
Maxl
-
Posts
156 -
Joined
-
Last visited
Content Type
Profiles
Forums
Gallery
Articles
Everything posted by Maxl
-
ROTJ reinforcement for Austria & the Empire
Maxl replied to Maxl's topic in Build Threads Requireing Maintenance
The inlay get an upgrade and adjustment: There's not much left of the inlay and no protection against motorcycle accidents or hammerstrikes It looks very comfortable... The originally construction was very fine, because you could pull out the inlay and wash if needed. I decided to retain this function and glued a stripe of velcro on the front of the inlay and the filling of the inlay. Now I also can pull it out and wash The helmet electronic is already ordered (thank you for all ukswrath!!!) and will maybe arrive at wednesday. I'm very very nervous -
ROTJ reinforcement for Austria & the Empire
Maxl replied to Maxl's topic in Build Threads Requireing Maintenance
A little bit more sanding and the helmet will feel comfortable to carry. here I glued the foam (which was on the helmet inlay fixed) after sanding: it actually looks great, ... ... but if you look closer, there should be sand off more approximately that much should be trimmed off: The electric for the helmet is nearly combined. I (hopefully) can order it tomorrow. There is so much to note I posed a bit with my "new" helmet (couldn't resist): incognito: sexy Duckface-Selfie message: Metal never dies :P -
ROTJ reinforcement for Austria & the Empire
Maxl replied to Maxl's topic in Build Threads Requireing Maintenance
Today I finally feel that I have brought on much. One step nearer till to finish the helmet. Here you can see the lining BEFORE processing: DURING processing (with saw (!!) and grater): And the last stand: Has to be processed again and more. For that I drawed the "ominous lines". The lining should be ready tomorrow. After that only electricity, ears and the remaining decals have to be mounted. If everything will fit, I only have to paint white the soles of the shoes and then ... hehe ... THEN the is finished I expect with "before Helloween", so keep on looking my threat -
ROTJ reinforcement for Austria & the Empire
Maxl replied to Maxl's topic in Build Threads Requireing Maintenance
Thanks for the tipps. Yes, I do not have screws/bolts in the ears like Frankenstein After much thinking and trying (repeat) I have finally developed a tactic to clamp the ears. A test on the left side of the helmet: Under the clamps and the magnets a piece of foam so they cannot "move". A wooden piece with magnets to push down the hollow. Here the results: I hope it will works, when I start gluing it. -
ROTJ reinforcement for Austria & the Empire
Maxl replied to Maxl's topic in Build Threads Requireing Maintenance
I use these clamps. But they are too strong for the ears! [/url]">http://http://s1098.photobucket.com/user/mar_v85/media/DSC_0145_zps7dfe2stk.jpg.html'> -
ROTJ reinforcement for Austria & the Empire
Maxl replied to Maxl's topic in Build Threads Requireing Maintenance
After a long, long work I finally finished the "right ear". I hope that I can glue it somehow But all anticipated here the operation: First roughly mark and cut: Then always cut cautious. It is really important to do not cut off too much!!! Do it again and again till it fits! (very easy ... ) That was a really really hard work for me. Not even the strapping has taken me so long. Now I have to glue it ... somehow ... I don't know HOW to clamp!!!!! Can anybody help me, please? -
ROTJ reinforcement for Austria & the Empire
Maxl replied to Maxl's topic in Build Threads Requireing Maintenance
Thank you! The left "ear" is ready now and fits very well. I hope that the right "ear" fits well too, cause I think that I cut too much off of it. Perhaps I can set it right. Does anyone have an idea how to glue the "ears"? Because when I clamp the "ears" the clamps would slip away -
ROTJ reinforcement for Austria & the Empire
Maxl replied to Maxl's topic in Build Threads Requireing Maintenance
After a long break it's time for going on assembling. The helmet is already glued, but first time the sides of the helmet have been released again. So I had to glue it again. Now it looks better Now it is time to cut the ears off .... pfuh .... this is realy hard work :blink: many times cutting and test fitting again and again ... I set a mark to know where to place the ear pieces: more pictures will follow ... till then ... cu! -
ROTJ reinforcement for Austria & the Empire
Maxl replied to Maxl's topic in Build Threads Requireing Maintenance
hm, ... maybe I have to search for another glue or silicon or whatever ( ) -
ROTJ reinforcement for Austria & the Empire
Maxl replied to Maxl's topic in Build Threads Requireing Maintenance
Does it works better than hot glue, or is that the same? -
ROTJ reinforcement for Austria & the Empire
Maxl replied to Maxl's topic in Build Threads Requireing Maintenance
I actually added the photos on post #169 -
ROTJ reinforcement for Austria & the Empire
Maxl replied to Maxl's topic in Build Threads Requireing Maintenance
You didn't use hot glue? -
ROTJ reinforcement for Austria & the Empire
Maxl replied to Maxl's topic in Build Threads Requireing Maintenance
Which glue did you use? -
ROTJ reinforcement for Austria & the Empire
Maxl replied to Maxl's topic in Build Threads Requireing Maintenance
After an eternity I continued assembling: The brow fits now: And after a few days I was finally able to come up with the tool I need to glue the helmet ... Actually the "missing tools" were only two black/orange clamps Front: left side (viewer's perspective): less till no gap between both pieces: Front (I put glue on the brow to fix it with the "inner" helmet piece): right side (viewer's perspective): A short view inside the helmet: Tomorrow I'll continue with the ears. PS.: photos will follow today. -
ROTJ reinforcement for Austria & the Empire
Maxl replied to Maxl's topic in Build Threads Requireing Maintenance
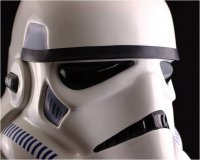
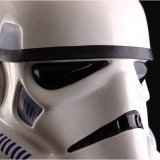
Thank you for the pictures, Paul. I already searched in google, but there are so many of the "original" helmets that I don't know which is the REAL original More trimming on the eyes? I must confess that I do not dare to trim more of the eyes. Does it look bad? (I forgot to post pictures of the trimming of the eyes, I think) -
ROTJ reinforcement for Austria & the Empire
Maxl replied to Maxl's topic in Build Threads Requireing Maintenance
Yes, I remembered, what you said about the CRL's I cannot see the movie accurate helmets, because the resolution is too bad. But I'll wait of the assessment and in the worst case I have to paint it again with mat black And the rest of the helmet? Does it look good to you? -
ROTJ reinforcement for Austria & the Empire
Maxl replied to Maxl's topic in Build Threads Requireing Maintenance
I painted the vocoder and the frown with gloss black. But in the CRL's is nothing described about gloss or mat or silk mat -
ROTJ reinforcement for Austria & the Empire
Maxl replied to Maxl's topic in Build Threads Requireing Maintenance
I have painted the aerators black on the inner side too: https://1drv.ms/f/s!Aopi4l91W0fEgQbIh6OKzoDcUNGS Today I did some work and fixed the aerators and painted the frown and the vocoder black (I hope it looks good, what do you think?) https://1drv.ms/f/s!Aopi4l91W0fEgQel-A5DngNHZuiO It will be not long and the Stormie becomes ready -
ROTJ reinforcement for Austria & the Empire
Maxl replied to Maxl's topic in Build Threads Requireing Maintenance
The aerators are ready painted https://rnhxna.dm2304.livefilestore.com/y3mkElSH8XjINuTN3touho4rLssXRtdAdCflHanbO78OqT9--HZWNoWHJMLFsQBRN5KpHImr1urmyvbJLnFPTcqFJgedFhyiKUMMvcDZQADdtsZtltmzYu22id6Fke0IDuXqPqr1b3J5og36nWSVAUjOzJJ1T5LJvlcT5r_8IrXEW8?width=1024&height=576&cropmode=none and I prefigured the vocoder: https://rnghsw.dm2304.livefilestore.com/y3mH9DgztUh23gi_z3GsxSnTUAZxcO88QP-VJ1uda1dUAfVIdAR02qvPqKGEOJthEvWMdEqbuXrwVvxWQW6GvyNP1qHOO1sN49urTAgR2BWlLAvnTQdVCmyiZ09i9QDj4Q36X_n2SwsMjx57Q6S0oXb6EVl1psj079VeyceaznZaek?width=576&height=1024&cropmode=none https://rni8jw.dm2304.livefilestore.com/y3mDcMUXMHhEYFoIj81RXzNp9Suv35rxT6VNDdH70wGmr4LAyPncvJjbjMhmM4YmUkqsPCYIXAQQm2lp_pDvN-6uFJhUmifhZu4NFazopYb-at5YnrbgxCDDQLDVLoom3khW83oKNG4C9_MhdjKMZQsKFetdXVx2HZriQefscPqySM?width=576&height=1024&cropmode=none I guess it looks good. Does anybody have suggestions? PLEASE let me know, because I don't want to do anything wrong! -
ROTJ reinforcement for Austria & the Empire
Maxl replied to Maxl's topic in Build Threads Requireing Maintenance
I cut out the teeth yet. Is the size of the teeth big enough, or shall I cut out a bit more? https://r02tba.dm2304.livefilestore.com/y3mSQKE1HzSwkpRGiOtac0olloNrOov0Hah2ADG7HeEB7LyDf2gCgHG9ZaPKHDA78Z3HuA8Wd0-66IMb28zlGQbjjfWUihkTzidDV2TdBVgQ_LJitnKFzhWobdz000EWqLLrM40bx0ZBl6t7Uy3nafKitoaApUZHIdrdH2NxmdUYfY?width=1024&height=576&cropmode=none With a small strip of sandpaper I have smoothed the cutting edges: https://r03cdg.dm2304.livefilestore.com/y3mTAbrOonFE4r-s6pYir9pACFSKnkoNJNH52mqt3D6k_4ZciJSqFNvYY5KD3MgtNxdTSLPwkFNxzhG8eInEUPkBuxf9yy7ZcTrfeYYy8Dk5UL_BY222oPu268DumtRrbhCynMYAOBWJU-P6K5qAeB21KRf9EU9X-cUX9qYn8gZMEQ?width=1024&height=576&cropmode=none and here the result: https://r00guw.dm2304.livefilestore.com/y3myvz-V3_w7PQCepHVB2ua1W1LNS0f3HNV1ZHkekOWtMAKH2L-FOW8ZQpZMrjphf8P615pPBLrD6hFDEgGom3NPVQ1m4IM4dL1U_TPuQhIYYmFfhDjOGxadBV4GHxyF86xY7Q730BU_hVYoEq8nCnCJzEugq2x4kRLegeBy3Ej-9o?width=1024&height=576&cropmode=none After that I drawed a line to have a contour for painting. Does it look good to you? https://rnjryq.dm2304.livefilestore.com/y3mFb2WYcKfs4jUdy7kpYqdghjDYOPc4RP3jQY3o24xUmfSWK2fF5XXhN_r82lTz383p15aKNSazgreI091DChQmrYrDl1H_yoU39rHLxc7HHoKpl3-7MBED0BNdFBReHL-6BC9VAjoLemu8LvDRt4D7vbq5mEhkJFH8I_mIpmvxLc?width=1024&height=576&cropmode=none PS.: sorry for the links instead of the pictures, but I have no more space on photobucket -
ROTJ reinforcement for Austria & the Empire
Maxl replied to Maxl's topic in Build Threads Requireing Maintenance
Aah, ..... ok .... thank you! The black line symbolized the black painted area, is that right? -
ROTJ reinforcement for Austria & the Empire
Maxl replied to Maxl's topic in Build Threads Requireing Maintenance
Can someone help me, please!? Is that right so, or shall I cut more or less off? The Ends will be rounded as in the CRL's specified (The ends of the frown are rounded, not tapered to points (not like ANH/ESB) and not squared ended like the ESB MKII): -
ROTJ reinforcement for Austria & the Empire
Maxl replied to Maxl's topic in Build Threads Requireing Maintenance
The second point in my list I posted a few days ago is also cleared. It looks better now I bought 3 different white-colors. mat silk 301 mat 05 gloss 04 gloss 04 fits best: and so it came that the rivets got white Shoulder stripes holster and belt ammo knee belt right thigh left shin sniper knee plate the drop boxes are also glued ready: So ...... the armor is already finished (except the boots; I'll paint the sole white last) Da ja nun die Rüstung soweit fertiggestellt ist (außer die Stiefel; die Sohlen möchte ich erst ganz zum Schluss weiß lackieren) and so it will be exciting - first test fitting: drawed the contours: then cutting (it feels like it was a long time ago ) second test fitting: left side should be trimmed more cutting again it looks better, but not perfect! What do you think? Is it ok so? Who can help me with the voice decoder, because of the assembling of the helmet? Is there anything to care about BEFORE gluing the helmet? -
ROTJ reinforcement for Austria & the Empire
Maxl replied to Maxl's topic in Build Threads Requireing Maintenance
Thank you and no problem. It annoyed me that the waistband is constantly hiked up. -
ROTJ reinforcement for Austria & the Empire
Maxl replied to Maxl's topic in Build Threads Requireing Maintenance
I made a new upgrade Because of riding up (I hope it's the correct word for it) of the trousers and the undershirt and getting wrinkles while putting on the arms and legs of the armor, I decided to do something that that would no longer happen. ( I'm shure that's not the right english, but I hope you understand ). here the waistband: other side: Here you can see the tautly stretched fabric of the pants - no wrinkles! I sewed the strapping on the outside to avoid friction points. I feel nothing of the strapping on my sole. I did the same on the sleeves. there is only one difference: I sewed it on the inside, because there is no opportunity of friction points. Unfortunately I don't have a black small strapping, but while wearing the gloves there is no opportunity to see anything of the strapping. and so it looks like when it's ready: Here the strapping of the shoulder bells: The holster is also fixed. It fits very well, I think! (to drill is perhaps a bit exaggerated, but I had no other tool ) rubber washer between: And that's how my Stormie-Armor looks like at the moment: holster I'll glue the drop boxes today. I think it is not necessary to assemble them openable
