-
Posts
466 -
Joined
-
Last visited
-
Days Won
2
Content Type
Profiles
Forums
Gallery
Articles
Media Demo
Posts posted by Raintrooper
-
-
TK-76216 reporting for duty!


-
What do I think of when I hear someone mention Austria?...

-
-
These are the tools I used most. Your list of tools will grow as you build (clamps, magnets, rivet tools, etc.), but I'd say these are the necessities to get you started.
1) 2 pairs of Lexan scissors - straight and curved (craft store or Amazon.com)
2) X-acto blade - aka hobby blade (art supply or variety store)
3) Box cutter blade - aka shop knife (hardward or variety store)4) Dremel with drill bits, cutting wheel, and sanding drum (hardware store)
5) 18" metal ruler (art/craft store)
6) Tons of sand paper! (rough and fine grit)
Good luck, and keep reading those build threads!
-
Thanks Greg! Still waiting on that email from the LMO.
 Sure hope it doesn't take the entire "up to 3 weeks"!!..
I definitely do not have the patience of a Jedi...


-
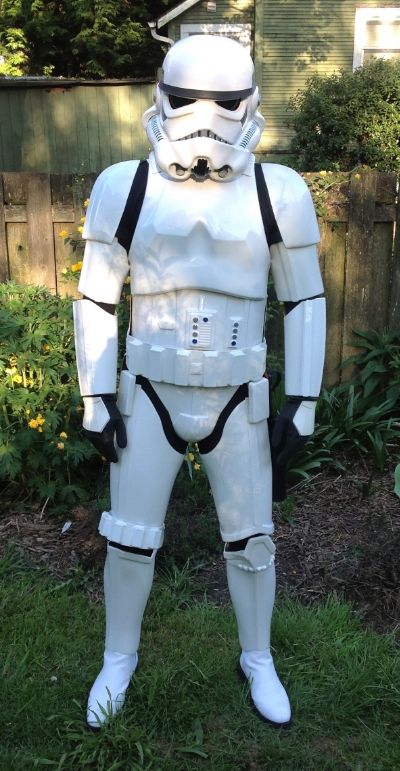
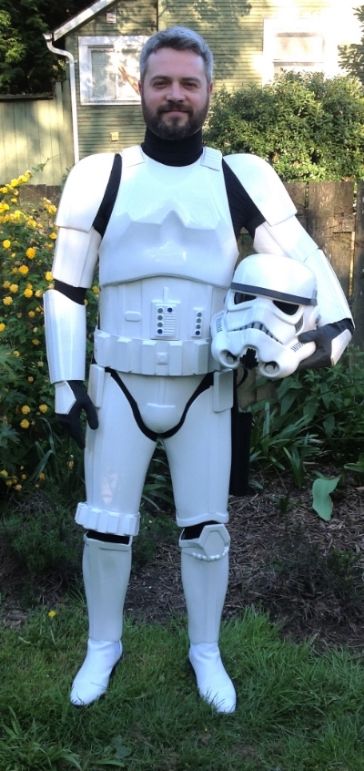
Cloud City Garrison Approved!
 Next up, Legion Approval!! Now, I'm off to check my email every five minutes for the next few days/weeks like a complete crazy person..
-
The shoulder elastic is there, it just might not be tight enough. Thank goodness for E6000..

-
Awesome. Thanks Germain! I might trim the thigh back strips a bit then.

-
Shoulders look a bit off to me.. Other than that great fit!!
Thanks Caveman! Yeah, the shoulders slipped back a little bit before the picture. Need to figure a way to prevent them from falling toward the back of my shoulders. Any easy fixes or is that just a common problem?
One word - Jealous!
Looking sharp man. Looking forward to seeing the side and back shots!
One thing I'm noticing - the tops of your finishing strips for your thighs. I believe they should be rounded off to follow the curve of the top of the thighs?
Ha! Thanks Ron. You'll get there soon! I'm not sure about the top of the thigh cover strips. I've seen them rounded and squared. I'll look more into it. Just from walking around the house, I can tell I'm going to need to sand a few places here and there.
-
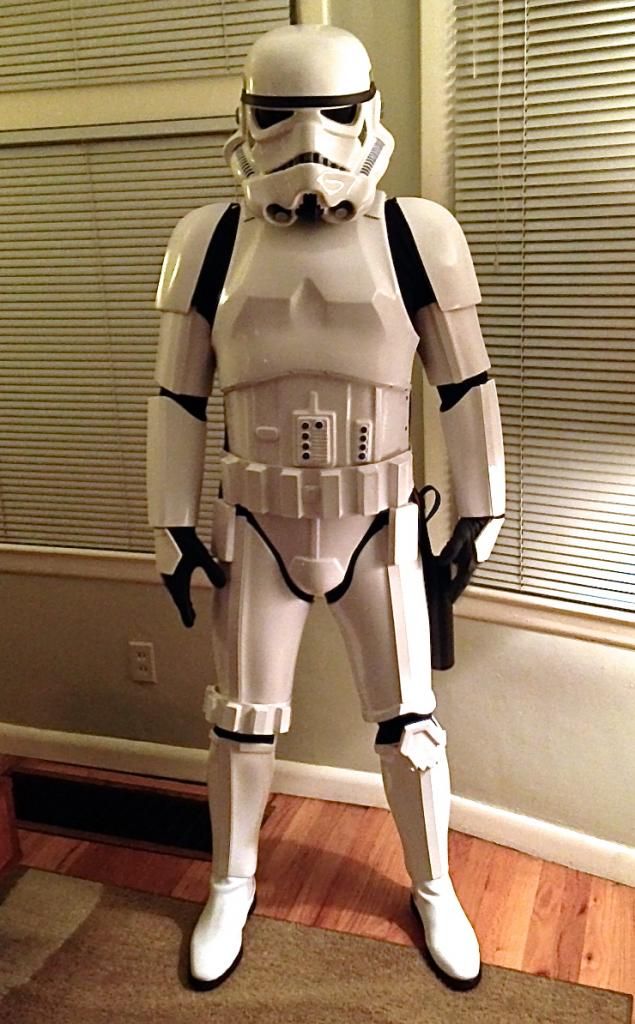
So here it is! My first full test fit! I still need to paint the rivets, and attach the forearms to the biceps with elastic. Not the best picture, but how does it look fit-wise? Many more detailed, well lit photos coming soon! First base approval pics, then EIB!!


-
The ammo pack is actually thin enough to bend without heat.
My ATA ammo pack definitely needed heat bending or else it may have cracked. The NE ammo pack and belt are thinner than ATA. Not sure about other makers and their ABS thickness.
-
I tried heat bending my thigh ammo-pack with a hair dryer, and it didn't really work. It doesn't put out nearly enough heat to soften the plastic. It only bent slightly after holding the hair dryer almost directly on the plastic for a good length of time. I don't know, maybe it's my wife's hair dryer
 . Boiling water finally worked for me. Definitely use those paint stir sticks so the plastic bends at the base of each box instead of the middle of the flat part. Getting your hands on a heat gun might be your best bet. But be careful, I hear they can turn ABS into a gooey mess pretty quick if you're not careful.
  Good luck!
-
 1
1
-
-
Congrats brother!!


-
Thanks Ron! I'm just a day or two away from approval pics! Gluing shoulder bridges down and doing the elastic hold-downs in the back, then painting all the screws and rivets white... THEN DONE!

-
That troop looks beyond fun! SO awesome!

-
I'd go with MTK if I were you... if you want to avoid the waitlist.
 Comparable price, comparable armor.. Good luck on your purchase!
 -
Over all the kit looks good and accurate! A few of the pieces look a lot like my ATA, which I believe came from CAP (?). Namely the biceps and forearms. The right arm pieces are straight at the join, and appear a bit larger than the left arm pieces, which have curves at the join. I've been helping a future garrison mate with his NE kit and that ab/cod piece doesn't look anything like his, especially at the sides.
I'm confused about the piece next to the thermal detonator plate (which looks broken or trimmed too short, btw..?). Is that used to connect the TD to the belt? -
Where did you find this armor? Do you know the maker?
-
Thanks guys! I'm in the home-stretch! I finished all the arm straps & snaps, now all that's left are the shoulder bridges and the thigh ammo pack. More photos coming soon!
How did you go? I had the same problem. After glueing the fronts, I forced mine closed, taped them nice and tight, then gave them a boiling water bath in the kitchen sink for 20 minutes or so. Worked out great.
I tried the boiling water method, but I don't think I left them in long enough.. I filled a 5 gallon bucket using big pots of boiling water, and tied the calves closed with webbing. They closed up a little, but not all the way. Also, I learned I was using the wrong velcro before, so I got the 'Industrial Strength' velcro and they now stay closed nicely!
I take it the boiling water did not affect the glue from the front cover strips and sniper plate?
No, boiling water won't melt, soften, or affect E6000 at all. I wondered the same thing at first, but no problems. Cover strips and sniper plate in tact!
-
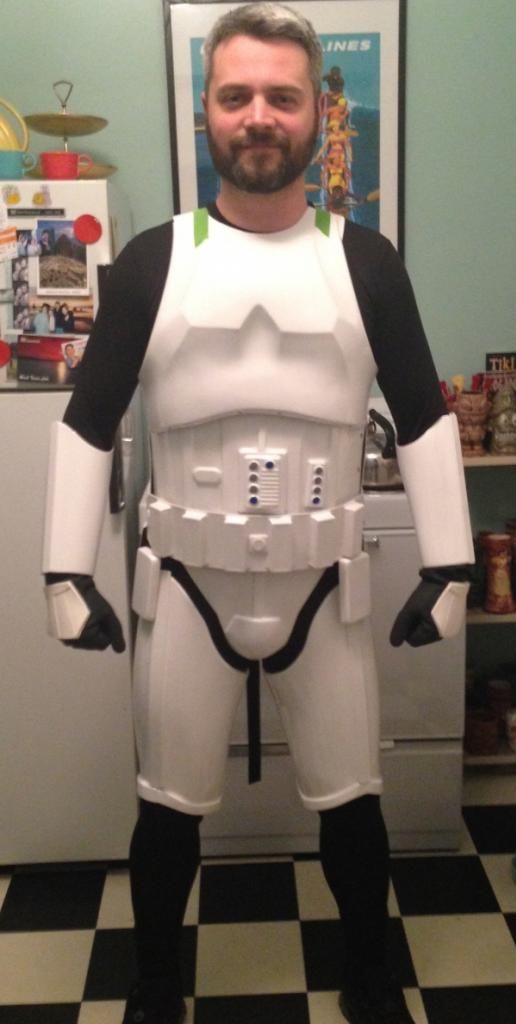
Torso and thigh fitting! Taped at the shoulders, now working on the white elastic at the shoulders. How's it looking so far? Is it common for the chin of the helmet to bump against the top of the chest quite a bit?
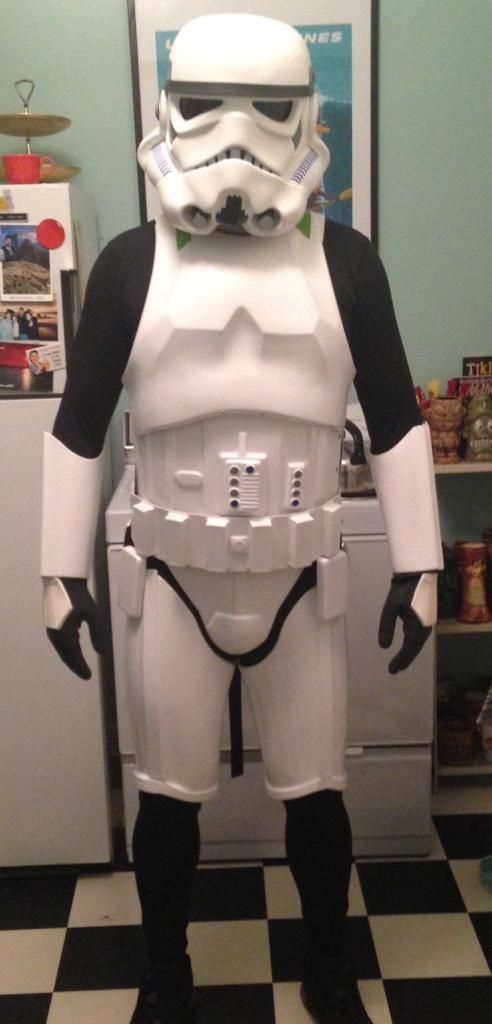
-
Looking great! I'm jealous of the backs of your thighs! HAHA! No raised ridges!
-
No problem! Amazing build!

-
HA!! Love this one! "...oopsie."
 There's a few other videos of this kid doing some hilarious stuff... Dad must work in the FX biz.
 -
Looks awesome!
 Good luck!


RainTrooper’s ATA Build
in Build Threads Requireing Maintenance
Posted
Thanks Steve! Yep, sure did. I was able to clean up the ab buttons a bit with a tookpick and a little thinner. EIB pics coming soon!