

Gep
-
Posts
81 -
Joined
-
Last visited
Content Type
Profiles
Forums
Gallery
Articles
Everything posted by Gep
-
Thanks for the tips thus far. I do not see how the pressure fit (no adhesive) method would work with the ATA supplied trim. It has a fair amount of overlap to the outside bottom of the bucket. On the curvy bits leading into the aerators, there is no way it would set flush with the ABS. I have 3 new methods in process today: Liquid Nails Perfect Glue LocTite Vinyl/fabric adhesive Scotch Extreme double-sided mounting tape The ABS is no problem to adhere to. It's the rubber with the ATA that is impervious to adhesives. I do not like CA, as it scars the ABS and ended up not holding the rubber in place. I also tried some 3M Black weatherstrip adhesive. I thought it would at least stick to the rubber. It pretty much did the same thing as E6000, except it was black.
-
I have an ATA bucket and am having fits trying to get the neck trim to stay stuck to the ABS. I'm using the trim that was supplied with the kit. I've tried the following to no avail: E-6000 Hot melt CA glue Goop Shoe Goo Anyone have a suggestion?
-
TK-7939 Requesting ANH Stunt EIB Status[261][AM]
Gep replied to Gep's topic in Request Expert Infantry Status
thx again everyone! Fitting the AM kit on a 5' 6" female is the next challenge for me. I think this project was good training for that. I see a lot of work with the hobby iron and return edges in my future. -
TK-7939 Requesting ANH Stunt EIB Status[261][AM]
Gep replied to Gep's topic in Request Expert Infantry Status
Thank you all for the compliments! Yeah Keith, I totally remember you. I was trying to get to the vendor area for an appearance we signed on for and you saved my butt with a hallway strap fix! Roger that on the shoulders. We tweaked them a lot on the picture setups. As large as they are, they tend to scoot around a bit. I will look into securing them better. Thank you for the quick approval! -
E11 - Hasbro Doopy Doo with a few extra mods done!
Gep replied to Gep's topic in Build Threads Requireing Maintenance
It NP.... I removed the plastic 'scope rail' with a dremel and sanded down the surface. After that, I just took some 1/2" wide aluminum stock and bent a 90 degree curve on one end. Drill a hole in that and mount it to the rail back on the Hasbro. I dremel'd a little slot up under the scope for the other end of the rail to mount. Plastic epoxy putty was used to hold that end in and fill in the gaps. Here is a pic of the original rail removed. You don't have to get the surface perfectly smooth, as the new rail will hide most imperfections. Here is a shot of how the aluminum is mounted. A Philips screw holds it in place in the back. It just sticks in the slot I formed on the other end. -
TK-7939 Requesting ANH Stunt EIB Status[261][AM]
Gep replied to Gep's topic in Request Expert Infantry Status
I keep showering, but that stink just stays, Mark. Thanks! -
Thanks Tim. Yeah, I removed the RT on the bottoms. I think I ultimately may need to trim about 1/2" of plastic from the bottom of the grieves. After wearing it and thinking about the feel, I realized the problem is that the front and back of the grieves come down just a shade too far and hit the curvature of my foot. This is creating 2 rub points and a lot of discomfort. I like your solution for keeping them lined up with the Velcro on the boot!
-
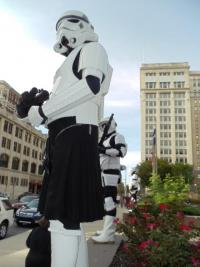
Name: Bryan Goeppner (Gep) ID: TK 7939 Garrison: Bloodfin Hight: 6' Weight: 160 lbs Armor: AM Helmet: ATA w/ Dave M decals and Trooperbay ear stripes Undersuit: Eastbay 2 Piece Neck seal: Trooperbay Boots: TK Boots Belt: White canvas, AM parts, TK0812 inner boxes Holster: Ebay - bmlt1138 Gloves: Hatch BNG190 Flight Hand plates: AM ANH Thermal detonator: AM with custom clips Blaster: Hasbro with Doopy mod and a lot of customization Electronics: Aker amp and dual Allelectronics squirrel fans Yes, I left a lot of plastic on the scrap pile to get this AM kit to fit my frame. I used Pandatrooper's AM build as a rough guide for this build. Hedji's WIP was also really helpful, as he ran into some of the same issues I did. Note that I'm NOT taking this to Centurion. You won't see the side rivets and extra snaps in the cod/butt. That said, I did do some extensive work on the back plate to scale it down a bit and add a new return edge. I also put a fair bit of extra work into the Doopy mod, adding the scope rail, lower cooling holes, bolt, spring, and improved LED/driver circuit. Inner drop boxes have also been added to the belt. I will be cutting the AM hand plates down about 25% and putting on a new return edge. I'm holding that off until I finish my wife's TX build. This was a fun build and I'm looking forward to repeating it for my wife. With scissors, heat gun and hobby iron, the AM kit is quite flexible. Here goes...... Bucket off and my best smirk. EDIT: I just noticed that I left out the foam bit on the back plate that pushes it out from my back to almost flush with top of the kidney plate. Forgot to hot melt that piece in. Hard to tell since this is a butt joint, but the Velcro closure is seamed on the inside of the calves. Took a ton of ABS off the button plate so it sits more flush with the AB plate. Canvas belt courtesy of my wife! Rivet covers installed on belt. 3x Hovi closeup EDIT: Added side pic of bucket showing screws and paint work Holster rivets. Chamfer put on belt edge. Used Pandatrooper's method for the clips. The TD is not going to fall off with this thing in place. Doopy/Hasbro. Scope rail, bolt spring, and bolt added as well. Charge cables and extra vent holes added here. Site and trigger milled out. Cadillac tail lamp replaces Hasbro stock and is REALLY bright with new drive circuit. So, here it is. Thanks for taking a look at this!
-
TK 7939 reporting for duty on the detachment! Requesting access. Thanks http://www.501st.com...hp?userID=13302
-
I might try this. I assume you stuck velcro directly to the boot to accomplish this?
-
So I've trooped my TK (AM) about 6 or 7 times. I started with new TK boots. They are showing some wear right where the grieves rub. I've dremel'd the grieves a bit this weekend and put some velcro on the edges to pad the contact point. Any other advice? Can the boots by dyed (i.e. Tandy) as more of this surface wears off? Is this pretty much normal? -------
-
I got some Testor's over the weekend so I'll try it too. I am not sure what the heck is causing all the air bubbles. That's the biggest problem now.
-
MxPxRobbie's ANH Stunt Helmet Build [ATA]
Gep replied to MxPxRobbie's topic in Build Threads Requireing Maintenance
Thanks for this thread. My cover strips are also off. The white is a 'cool' white with almost a bluish appearance under the right lighting. Did your replacements match better? -
That's a sensible answer based on what I'm seeing. Thanks!
-
On several posts on this forum, I've seen the following regarding ANH cover strips for the legs: Front/Back Thighs 23mm Front Shins 23mm Back Shins 25mm But I've also seen this mentioned: Front Thighs 20mm Back Thighs 23mm Front Shins 20mm Back Shins 25mm Which is it? I've read that the dimensions I listed first came right off a prop part, but I still see that 20mm floating around the threads.
-
Good thought on the contamination. I suspected ABS dust, but had not considered my paint might be hosed. I'll test it first on some scrap.
-
The point is moot. Stripping down paint for another try. Suspect 'unclean' brushes were culprit. They were used with water based acrylics before I grabbed them.
-
Thanks TM! That's where the disconnect is. The AM kit is flat on that inside piece on both sides and designed for an overlap joint as opposed to butt.
-
This is getting kind of confusing. Let's try a better picture on my part. Is my interpretation of things correct? My preference after having cut this forearm already is Pandatrooper's method. The curve of the outside of the forearm will be tough to force into a flat surface. I
-
I'm making progress, but am struggling with painting the bucket details. I'm using Humbrol gloss black and gloss gray. I seem to get a lot of brush strokes and bubbles, particularly in the teeth and vocoder. I know I can easily remove the paint and try again, but I'm not sure how much it matters at the end of the day. Is there a trick to getting Humbrol on without bubbling? I've used Testors before and don't remember it being this big of problem. I hate to say "that's good enough" if I can do something to improve it. Or is this one of those things that people just tolerate because it does not show up in pictures of the full costume?
-
Thank you TM and RT! The summary above is great for where there should be ridges and where there should not. The picture of my forearm does not show what I trimmed very well. The ridge is removed from both edges of the outside piece. Based on what you both said, I probably cut off the ridge incorrectly . I was under the impression that there were no ridges on either front or back of the forearms (ANH). I read a post in the thread in Hedji's build where it seemed like a couple people removed BOTH ridges on the forearms, as opposed to just one. After going back and watching ANH and pausing, it looks like there is indeed a ridge on the outer edge of the forearms. I removed it on both sides of the dimpled piece. If that's wrong, no biggie, as new forearms are en route, and I'm not out much money or time for the mistake. On the replacements, I'm just going to go the Pandatrooper route and cut the ridge to half the dimension of the cover strip and butt it to the inner piece. Since this is my first build, I probably should not worry about getting too cute with some of these mods. I My big concern is the black TX AM kit that I have not started. I want to get this one right before cutting that one. Is the below diagram correct for the forearm? I realize leaving the ridge on both sides is not super accurate, but I think that is what Pandatrooper did. I plan on leaving 8mm of ridge and using a 15mm cover strip on the new forearms.
-
Thanks Tom! I was hoping you'd weigh in on this I believe you might have been the one who posted this approach, so I figured you'd know. Yeah, I've got a lot of return edge stuff I'm working on today. I picked up a spare set of forearms in case this does not work, as they were pretty cheap. I'll continue down this road and see how the strips behave once the backers are in place.
-
I'm doing an AM build and loosely basing it on Pandatrooper's great tutorial. I'm a skinny guy so on the biceps, getting rid of the overlap completely worked very well and is, according to what I've read and seen, more ANH accurate. I'm very happy with the way they turned out. Howver, the forearms are giving me a little trouble. After reading these threads.. http://www.whitearmor.net/forum/index.php?showtopic=18629&hl=&fromsearch=1 http://www.whitearmor.net/forum/index.php?showtopic=16446&st=0 I decided to remove the overlap completely as mentioned by several in those discussions. It was said that the 2 pieces join better without the ridge but I'm not seeing it. It seems like the curvature of the outside of the forearm is going to make the cover strip very difficult to glue. It's my understanding that ANH/ESB TK's do not have the ridge on either the forearm or the bicep. Am I doing this right? I've taken a heat gun to the outer forearm to adjust the curves, but I'm still wondering if it will conform to the way I'm going to glue it with shims and strips. Is the spacing from the dimples to the cover strip too close doing it this way?? Just not sure how I feel about this after thinking it over. Props.... Mine.....
-
E11 - Hasbro Doopy Doo with a few extra mods done!
Gep replied to Gep's topic in Build Threads Requireing Maintenance
I will be there Thursday, Friday, and Saturday nights. Hopefully in my new TK, but definitely in my DZ at least once. -
E11 - Hasbro Doopy Doo with a few extra mods done!
Gep replied to Gep's topic in Build Threads Requireing Maintenance
Thanks! Trying to repeat the process for my wife's TX right now.