


Indyrebel
-
Posts
21 -
Joined
-
Last visited
About Indyrebel

Recent Profile Visitors
918 profile views

-
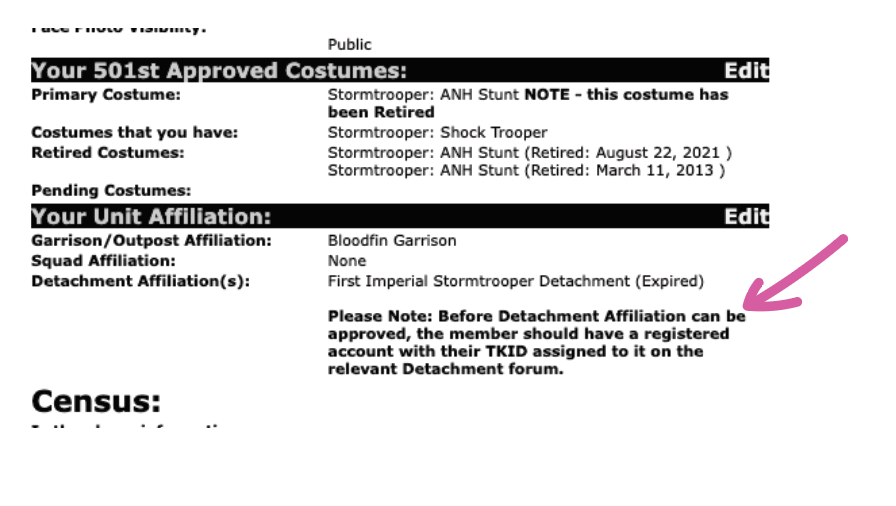
Hi, everyone. I converted my ANH Stunt to a Shocktrooper last year and have been approved. Do I need to update something here in the system, because it shows me as FISD expired on the Census? Can someone tell me what I need to do, or if that matters? See attached screenshot of my FISD status.
-
 Indyrebel changed their profile photo
 -
some of my submitted photos. I have to make one adjustment, move up the black elastic that's laying over my side armor (under the arm). I also need to tighten up the elastic on the shoulder bells a little more. Can't wait to start TROOPING!! [
-
I found this at Lowe's for only $24.97. It has wheels, handle and 2 slots in the lid to put pad locks. Everything fit nicely, I really like it!
-
okay I need some suggestions, my back side of the armor is running a bit long(now I see how the RT-Mod is made for taller troopers). I got the front fixed easily by moving up the cod piece. I was thinking of cutting off more plastic to shorten the length of the back or should I over lap some pieces?(let the butt plate over lap the kidney plate?) What should I do?
-
Okay, my FIRST fitting last night with all snaps and straps in place. I need to trim some armor me thinks??? pinching on butt and lower legs, should I trim the top part of the thighs or are we allowed to trim the butt plate? The velcro straps for the leg garters does not work well, it's hard to get the two sides even. I'll switch those out with snaps. I still need to add the gun holster plus waiting on my buttons from VaderDave.
-
LadyinWhite-Thanks! I was wondering about that, when the chest pieces hang on my shoulders the black is against my black under armor? It needs to be white only if if rides close to the white armor bridge, right?............sorry I'm still learning, this project has be hell for me!
-
I trimmed my thighs first but after the test fit tonight with all the snaps and elastic installed I think...I know I need to trim more. Question guys: How do I upload more pictures, it says the file size of 1 photo must be smaller than 9.27 kb ? that is a tiny file size, are we limited on how much we can upload or am I doing something wrong. I found photos in my profile settings, do I delete old files to upload new or will that delete them from older posts?
-
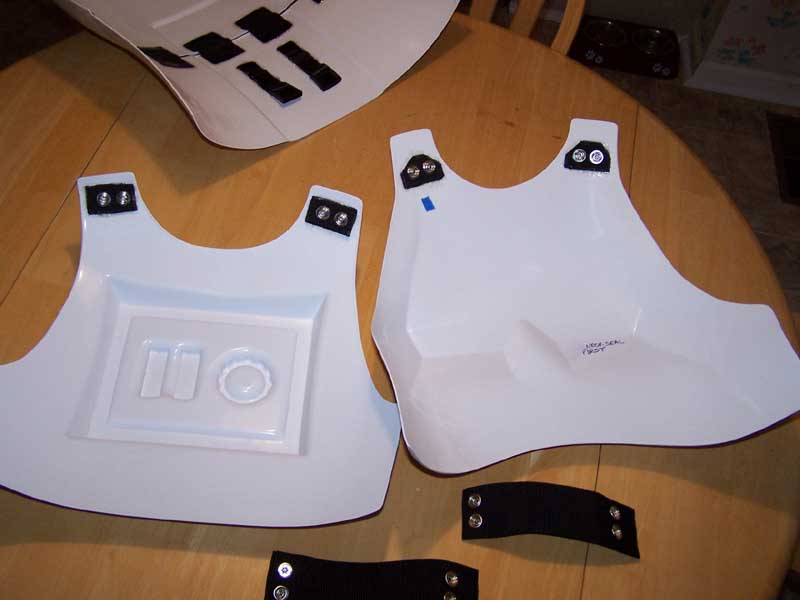
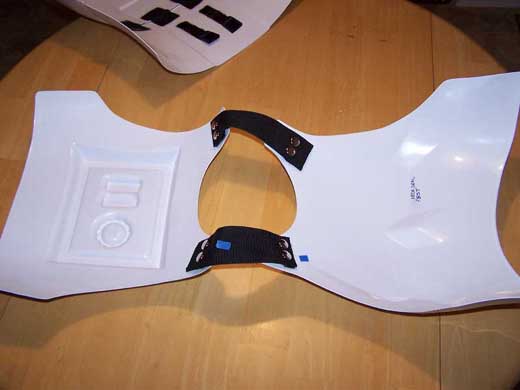
Glued snaps to the chest and back plates, used 2" nylon straps to help connect both sides. I'm planning on using velcro to hold down the plastic shoulder straps and I still need to add a couple more snaps in the center to connect my shoulder bells
-
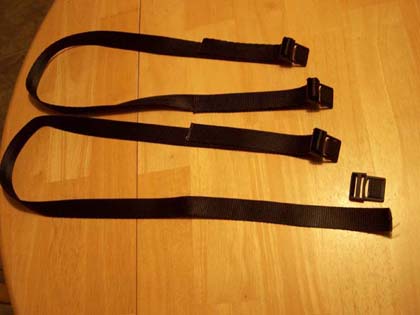
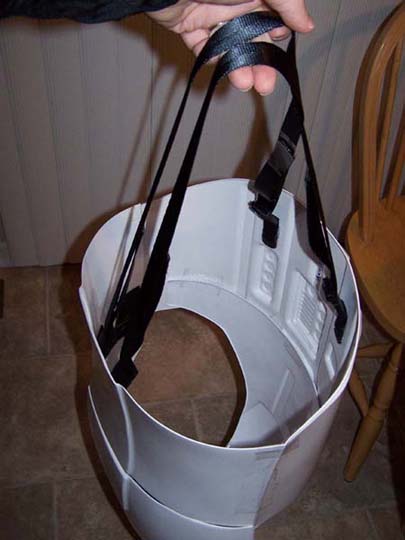
next was the long one inch suspenders with the attached male part of the buckle, this was nice because I could adjust it really quick. They click into the female buckles that are glued to the ab and kidney plates, I crossed the suspenders across my chest and later added a snap to keep them from sliding off my shoulders.

-
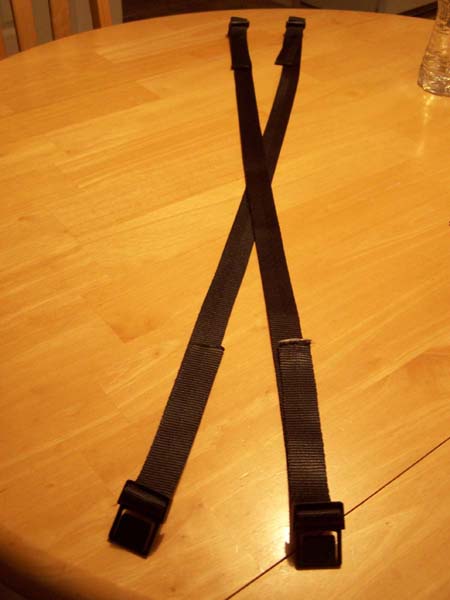
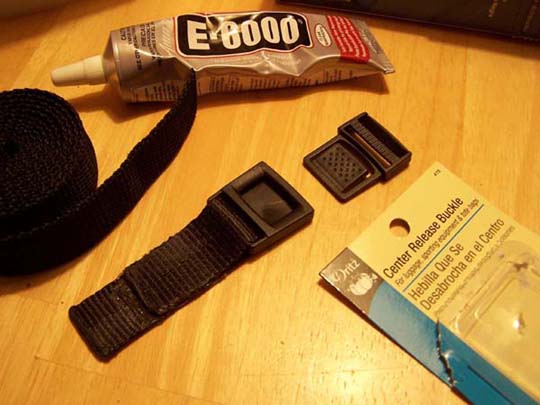
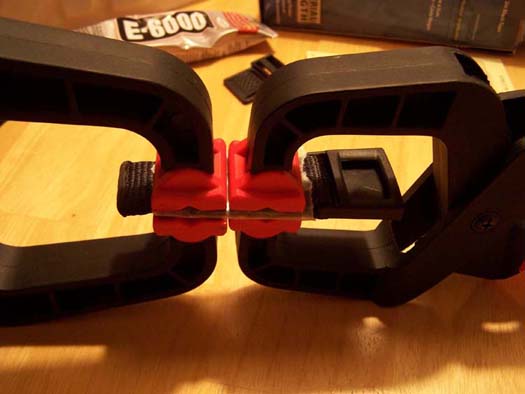
okay, next is the custom made suspenders I made using supplies from Joann's fabric store. one inch nylon strap and one inch Dritz center release buckle, you can see I used E6000 instead of sewing
-
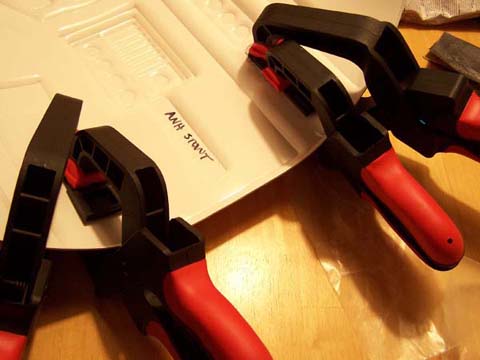
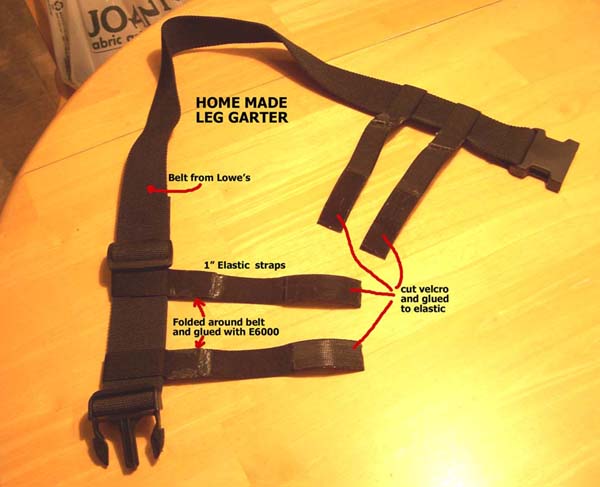
Hi everyone, NastyNoah suggested I start a build thread although I have been cruising along with the help of the tutorials from most of you. I got a lot of things done before I realized I should be taking pictures along the way, so it may seem some steps are missing. These pics are of my custom made leg garters and finished leg armor, I may need to trim a little more off the top because it still seems too close to the cod piece when I walk? I think I got the work belt at Lowe's, I decided to try the E6000 on elastic since I didn't have access to a sewing machine, I like the results. I had to use a lot extra because the elastic seemed to absorb a lot of it. I made loops on one end leaving enough room to get the belt through, used clamps to hold it in place for 24hrs. I then cut strips of Velcro and also glued them on the other end as you can see in the pic, so far it's been a strong bond...the real test will be a couple of troops in the hot summer heat/humidity. The pic of myself was only to show the test fit of the leg armor using my leg garters, the top half of armor was temporarily taped together with clear packing tape.....I look grumpy in this pic, must of been late
-
Darth Aloha's RT-MOD ANH Stunt Build[*RT]
Indyrebel replied to Darth Aloha's topic in Build Threads Requireing Maintenance
your very welcome, I may post some pics on here in the morning for you to check out. -
Darth Aloha's RT-MOD ANH Stunt Build[*RT]
Indyrebel replied to Darth Aloha's topic in Build Threads Requireing Maintenance
Hey Jason, I'm currently building my RT MOD and I used 1 inch by 2 inch nylon straps and I didn't worry about glue getting on the metal snaps and they work fine....so far I'm up to 20 snaps and I'm getting ready to add snaps for the front cod piece, maybe 4 snaps across. I decided to attach the butt and ab plates together with 4- 2inch by 4inch elastic straps held on with E6000, that way I'll get the flex I need and won't have t o worry about snaps popping. The glue is almost dry on that part so I will test it tonight or in the morning, if it works I may use that method on the front ab and cod piece. Rick Indianapolis -
Hey Ray, I am starting the same build, same RT-Mod From Rob in Canada. Looking at your pics, we may be the same height and weight. I will definitely use your post as a guide. I found this post because I was looking for a good way to paint those Molded AB buttons, looks like you may have installed buttons from VaderDave right over the top of the existing button mold? Thanks, Rick Indianapolis
-
Review of items I have for Stormtrooper suit
Indyrebel replied to TK-7186's topic in Getting Started - Read this First!
Hey Gerrit, do you still have stuff for sale? I'm a newbie in Indiana and I just placed my order for my RT-Mod suit from Canada.
