

Aphinity
-
Posts
26 -
Joined
-
Last visited
About Aphinity

Recent Profile Visitors
918 profile views

-
Hello! Just checking if there's a reason my approval hasn't come through yet. It's been over a week. I followed the directions to the letter, from what I can tell (but admittedly, with the crossed-off sections and screenshots, I'm worried I missed something without knowing it). Thanks for your efforts, everyone! We appreciate you!
-
Requesting detachment and TK/501st access, please! TKid: 10017 UserID: 14606 https://www.501st.com/member/10017/
-
Yup, ordered mine yesterday.
-
I bought an armour kit on the sale last night, so I guess I"ll find out how thin/incomplete/inaccurate it is, whenever they finally ship. Honestly, I'm just hoping it's fully approvable and all that. I can't see why it wouldn't be.. ? It will be interesting going from one of the thickest TK kits out there (RT Mod) to this. I am worried about the durability, but I guess I"ll just have to be careful.
-
It's ready! It has a number of items that need some tweaking and additional work (such as my white thigh garter and painting the ab plate), but I'm very happy with the build! My girlfriend and a friend stayed over until almost 3am last night (3rd night in a row of that for me) to help put the final straps and snap plates in, plus measuring and cutting the kidney and ab plate. No, I definitely didn't follow Rob's instructions. I went off of multiple sources, including builds here, but I have to admit, I could not BELIEVE how much I had to come up with myself. It's almost like these forums are for people to say, "here's what I've done, but don't worry about how I did it" for a lot of things. I have found details about every single little thing in the most random of places, but never all together, including the tutorial thread. I will post more photos here once I have more time to do so. I have too much going on! I will take additional pics as well. I cannot believe how many snaps and snap plates I installed. Just wait until you see the pics I can't wait to put it on for the FIRST TIME! I've never actually put it on fully.. just test fit each piece and set of pieces. I had to wait for the shoulder straps to dry overnight
-
Thanks Jesse! It's relatively comfy, although it doesn't exactly breathe very well. I suppose that's no different than any other neck seal though. I'm working hard to get it done in time for halloween! Thanks! I agree, Halloween would be a great first 'troop' to work out the bugs. I won't have a holster or blaster in time for halloween, so it won't be a complete troop even if I get the armour together. Still, I'm excited to be dawning white armour for the first time!
-
The NEWS id been waiting for RT-MOD!
Aphinity replied to TrooperJesse's topic in Hard Armor (General Discussion)
Here's a thread I started specifically because you asked for pics! Wow.. took a while to post all that info! http://www.whitearmor.net/forum/topic/21807-aphnitys-build-rt-mod/ Feel free to keep in touch on that topic, if you like. Good luck! -
The belt was purchased thanks to a very kind supplier here on this site (I'm sorry that I forgot whom.. I will look it up). It is a very nice piece and was very nice to work with! I chose to use snap plates to hold in the ammo belt onto the canvas. I used a soldering iron to melt holes through the canvas and plastic of the belt so I could directly clamp in some snaps, then I used ABS glue to secure snaps via snap plates to the moulded belt. I also used snaps for securing the drop boxes on each side, and I put in an additional snap that will be used to secure to the ab plate: I continued applying snap plates and snaps to areas that needed them, and I tried my best to follow all the EIB protocols where I can, although I know I missed a few and will have to revisit once complete: In case you're wondering, the 4 velcro pieces in the chest are to hold my amplified speaker box (a cheap kimafun unit from www.dx.com). Next up: joining the arms, bicep, and shoulders together via straps and snap plates snap plates & adjustable strapping for chest to ab plate trimming the ab plate and kidney plate to fit then applying snaps as required attaching the sniper knee and knee ammo belt attaching the shoulder thingies
-
Gluing the arm and leg pieces together was done using RT-Mod's built-in overlap setup, as opposed to the centurion style cover plate style of build. I did this for a few reasons: It's a huge time saver The overlap is very strong, well moulded, and in my opinion, looks cleaner It feels stronger than the cover plate method since it's one glued seam and piece instead of multiple I don't particularly care about Centurion status at this point I used E6000 for all exposed seams so the adhesive would not show up as much as the ABS cement I used on the snap plates. It takes much longer to cure and I left most joints to cure for overnight before removing clamps. I used rare earth magnets and hard drive magnets (also rare earth) to hold the pieces tightly closed. I started with masking tape to protect the outside from adhesive seepage, but I realized that this was a bigger problem than it was worth if the E6000 got over top of the masking tape and glued it as well as the armour piece! I did continue to use masking tape to hold the position of the armour so it did not slip outwards. My dog Jade, always the great assistant, was overseeing the operation: To hold the one side closed on the legs and the arms, I chose to use industrial velcro rather than snaps or other methods:
-
Next, I got to work on snap plates. Following multiple guides, including those from Pandatrooper, I decided to go the ABS plastic with flat snap route, adhered to the inner armour with ABS cement. I opted for ABS cement since it cures very quickly, and I was looking for the highest durability and strength when I didn't care as much about aesthetics. The yellow of the ABS glue is unsightly, but if used correctly, barely noticeable. I still used E6000 for all my exterior pieces so you cannot see the adhesive. Unlike some snaps that do not sit flat, I ensured to use Prym brand "Sport & Camping" snap plates (15mm) that have very nice, flat bottoms on half of the provided back sides. These, along with a heat gun, allowed me to ensure a good surface area was available for the glue to stick to. I marked, drilled, and scored/broke each snap plate out of some provided ABS that came with my RT-Mod kit: Holes were countersunk with a larger bit to allow the snap to sit flat. As you can see, it does not sit flat without this: The snap plates were then heated with a paint strip heat gun until the corners curved, and pressed to the intended location with leather gloves (actually, my trooping gloves) and held for about 20 to 30 seconds while the heat disipated. This created a very nice bond with the curve of the material without any need for clamps or pressure. I then sanded both the snap and the armour area to be glued to, applied ABS cement to both surfaces, and pressed the snap plate to the armour for about 60 seconds. In about 5 minutes, the cure had almost fully set, and could be test fitted with elastic pieces.
-
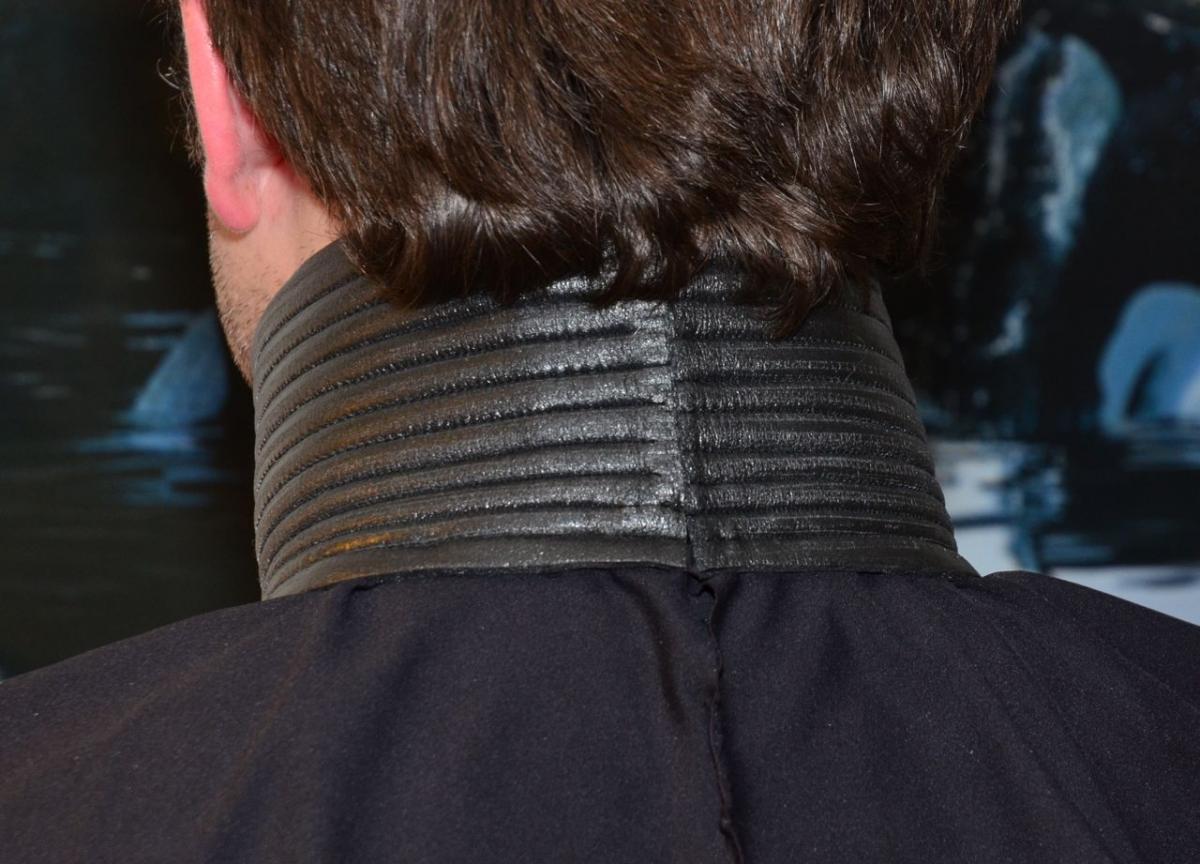
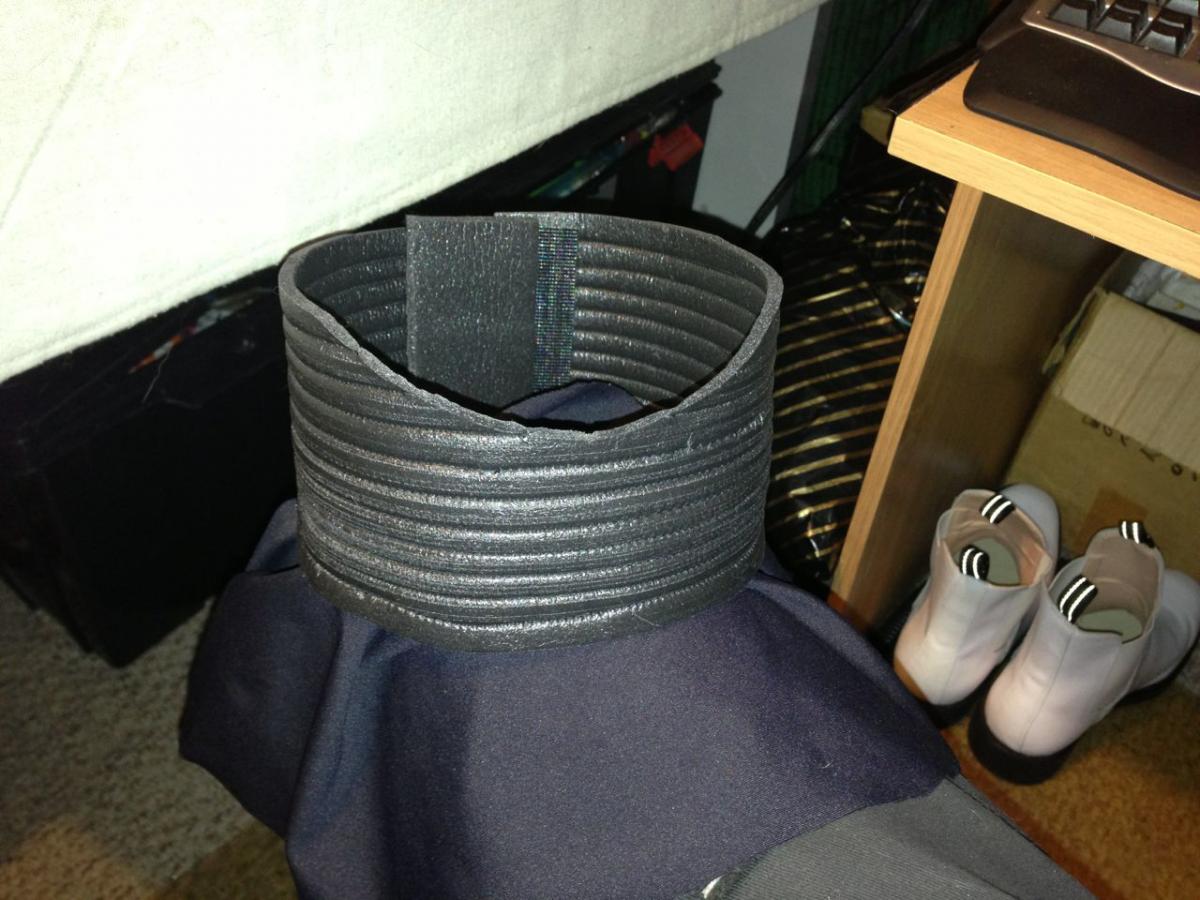
There have been a few questions asked and I thought I'd do some very brief photo documentation of my progress on my RT-Mod kit so far. It's been in my hands for months, and thanks to a trip to europe and a heck of a lot of stuff personally, I've had to delay building the kit until now. I'm trying to pound it out in time for Halloween and I think I'm on track for that date. First things first. I made myself a neck seal using some rubberized foam designed for model train sound dampening. I found it to be very close to the sheen of the ANH hero items without the high cost and build difficulty of leather or vinyl. I essentially took a sheet of it, sewed straight lines in it (10 to be precise) and ensured it fit my neck. I then sewed a basic bib, thanks to Pandatrooper's suggestion, made of stretchy polyester material. You can see in the image above there is a small piece of the same foam material with industrial velcro that bonds the two sides together. I did this to create the nice, flat look at the back, as you can see in the image below. I'm very happy with the feel and the look of this piece! It took me a few hours to complete (including a broken sewing machine), so I can't complain about the time. Not quite as nifty as some I've seen, but it should work fine for me.

-
The NEWS id been waiting for RT-MOD!
Aphinity replied to TrooperJesse's topic in Hard Armor (General Discussion)
Pics? I'll try to take some if I can! I'm fairly happy with the results so far, except for one arm piece which I heated just a tad too much. I'll have to contact Rob to get a replacement, if he's willing. In the mean time, it'll do. I have used ABS cement for the inside snap plates for durability, and used E6000 for any exterior and visible areas, plus areas that may need future disassembly. E6000 is essentially a specialized shoe goo silicone that holds very well, but is still removable with enough force. Plus, if you have excess that runs off, you can use your finger nail with a bit of effort and remove it. The ABS cement is cheap, easy to work with, and available anywhere, and holds INCREDIBLY strongly, but it is also yellow and rather ugly. Still, for areas you won't see it, it's probably the best choice if you want permanent adhesion. I'll snap a few photos as I lay things out tonight. My work area is cluttered like crazy right now.. -
The NEWS id been waiting for RT-MOD!
Aphinity replied to TrooperJesse's topic in Hard Armor (General Discussion)
Good luck with your build! I'm building my RT armour right now.. trying to get it done for Halloween. I'm close! Just need to finish the thigh pieces and build the snap plates and straps. -
This was EXACTLY what I was looking for! Thanks guys for making this thread! Pablo, I love your system, but I may choose to forgo the suspenders. I'm going to let the torso hang like was suggested by others, and use a hockey garder belt to hold the thighs up. I have my RT-Mod kit sitting in my hot little hands and itching to be finished. Hopefully I'll have it done in time for howloween, since it's such a great time of year for random trooping and costuming
