

Rolf
-
Posts
806 -
Joined
-
Last visited
Content Type
Profiles
Forums
Gallery
Articles
Media Demo
Posts posted by Rolf
-
-
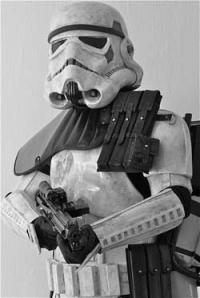
Hi Rolf , hope you and your little boy are keeping well , wont be long till you get your x2 RS kits cant wait to see your builds as i always do , yes mate iam going for the the look of the closes trooper in that awsome pic , with my RS Pvc kit , plus give it some tantive weathering

We are good together here, sadly my ex still try to destroy what i have whit my son.
I shall go to a court case this 7 of december coming, so send all your energy there bro to it will end up good.
The two RS full suit kits are all ready here in Denmark, i´m just waiting for mr. postman to come whit the gold at my front door.
-
-
What a beauty, i can´t wait to start up mine as well.
Keep up the good work
-
Sweet looking ANH Stormtrooper you got there.
Congrats and enjoy him

-
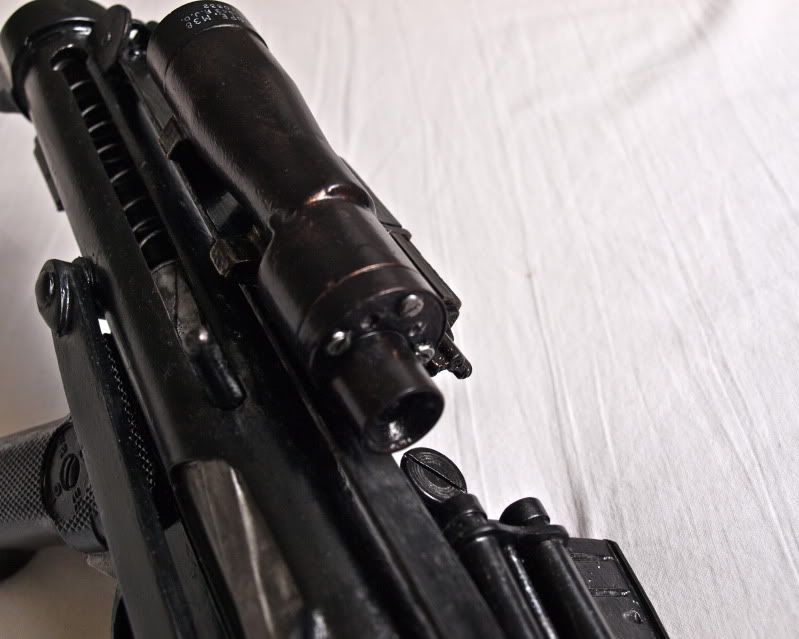
I layer my paints over the top of the black as well, then I paint again black over the scope
after the brass cures. makes for a transparent weathered look just like the real scopes/hengstlers.
you did a really fine job of weathering there rolf... perhaps it comes from all that sandy work?
Thanks bro
Yeah as a true dirty sandy, i love dirt, weathering, and beat up stuff looking real and used


-
I'm sure you're scrambling to answer all these questions... but I'll add mine to mix (oh btw multiquote reply is your friend)
So... wait... you painted the copper and silver weathering OVER the black. Sonofa... that's brilliant.
What sort of brush did you paint the humbrol satin black with?
I'm guessing it's the same in the US... just with an e... turpentine.
It's really a fine looking blaster and something to strive for someday.
Aloha,
-Eric
Yeah i just paint all over whit the semi black humbrol, and work it up when it was dry whit silver, bronze and gold mixed whit turpentine.
The brush was nothing fancy, just a 1$ brush, smooth a like, and in size as around a finger nail i guess
-
How did you do the white paintfill on the scope where the words are? Nice!
Also, what glass did you use in the scope for front and back? Thanks!
Great job btw.
Oh i forgot to answer this one.
I just paint the complete gun humbrol semi black.
After around a day drying, i took some toilet paper.
And a brush, and just paint the going down letters over whit white humbrol paint.
The humbrol paint dry so slow as we know, so i could easy just take the toilet paper, and go over the letters on the scope.
The white have then going down in the letters, and stay there.
So it only took a few seconds, and bang it was there
-
The weathering you've done on this look fantastic Rolf. What have you used for the copper undercoat on the sight? Have you just added the copper scratching or have you actually scratched the black back and been able to keep the copper?
Also a reply to August here.
I just paint the complete gun whit humbrol satin black # 85.
Then i add some humbrol silver on a piece of thick paper, and then i take some toilet paper and add some terpentin on it.
Then i just move the toilet paper whit the terpentin on into the paint, and then add it all over the gun, and more on the higher going out areas.
Same progress for the scope, but this time whit bronze, and the counter got both silver and gold there.
I add some paint tape, so the did not touch each others areas there
Terpentin, not sure its the same name for it in the US:
http://www.google.dk...l1393l0.8.1l9l0
The glass in both ends of the scope, are also just paint for now.
But high gloss humbrol paint # 21.
-
I have a real hengstler counter I could sell for this rolf?
PM if you're interested.
Copy that.
Thanks, i might need one
-
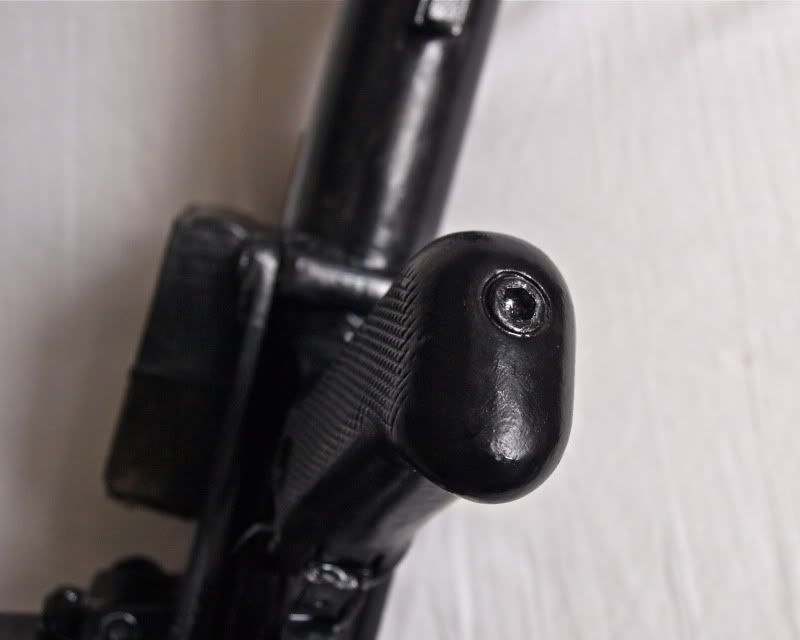
Nice job! I am digging it! What did you use for the rear bolt?
If you mean the rear bolt, as in the loading lock whit the grip in:
I used a posca:
http://www.google.dk...:0&tx=188&ty=36
Cut it up so it fit, and E6000 glue some hips plastic on it for the line lock detail look.
Then i took a small screw through it, and up it in the grip so it stay there solid.
-
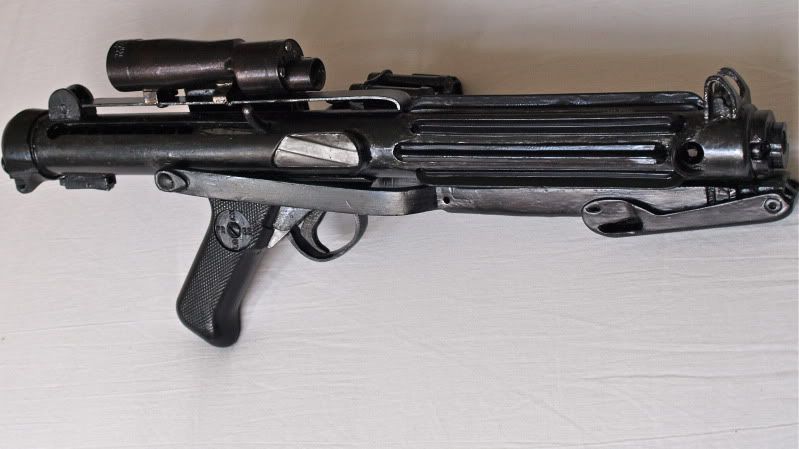
Thats one of the finest E-11s I've ever seen
Many thanks for the kind words, and back up Mathias, Daniel, Juan, Ken, Steve, Ricky, Julie
The DD E-11 kit is a super gun, to all most no money.
I guess one of the best choices out there right now :jawa:
-
this looks really great rolf! i can't wait to see what you'll do to that dlt-19
Thanks for the shoulder clap bro
I will start on it real soon, only one thing i´m not too happy whit.
Is i can see that the sight on the barrel are not there, and i think it was there on there last version.
I have try to send many mails to them, but whit no luck so far.


-
Really great work on your new rebell killer, Rolf....i like it
"2. Drill out a line on the back side counter, and add the numbers, and then add plastic glass over them like this"
....that is something, that i want to change as well
Thanks bro
Yeah to have the counter numbers add there on the back, would really rock!
-
These are sweet, i might need a set
-
Nice job! I am digging it! What did you use for the rear bolt?
I just used the DD bold from the kit, E6000 glue the spring/wire on it in side, and add it together whit the E-11 gun pipe.
-
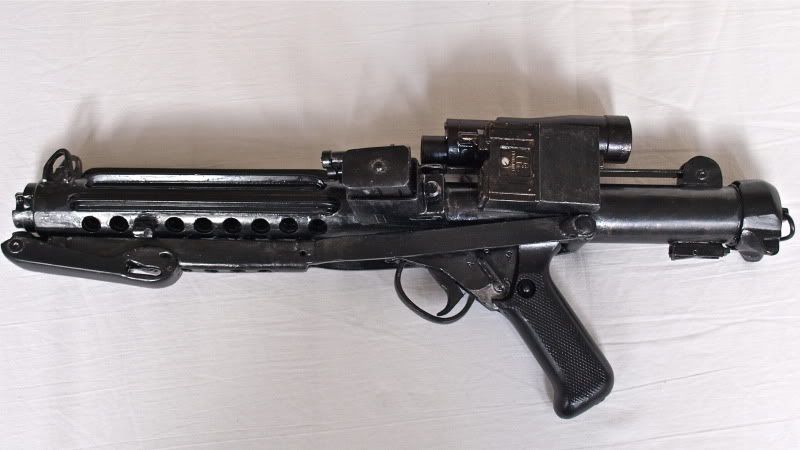
Done after a long time
This gun was no walk in the park, but top accurate and cheap as well.
So i´m very happy that i took my time on it, and for how it turn out.
Hope you like what you see
Here a pics of the kit:

And here all done:

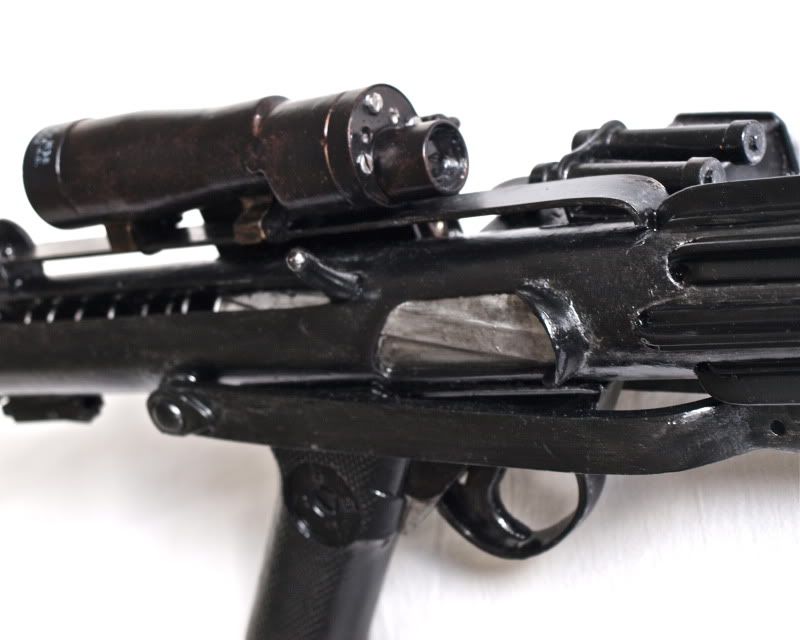
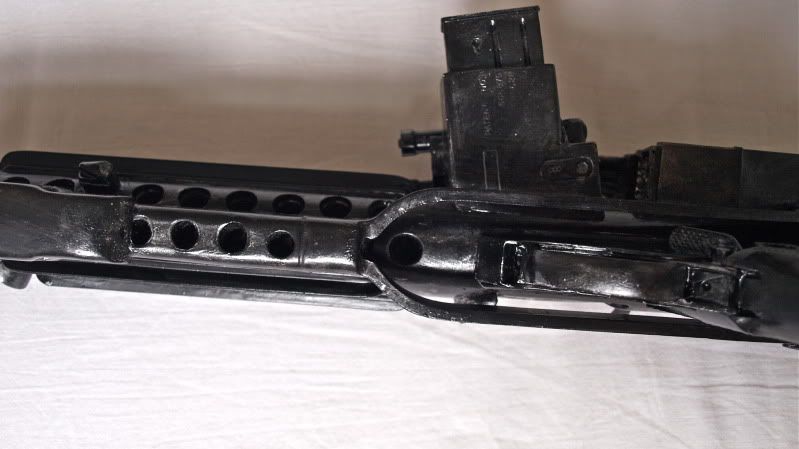
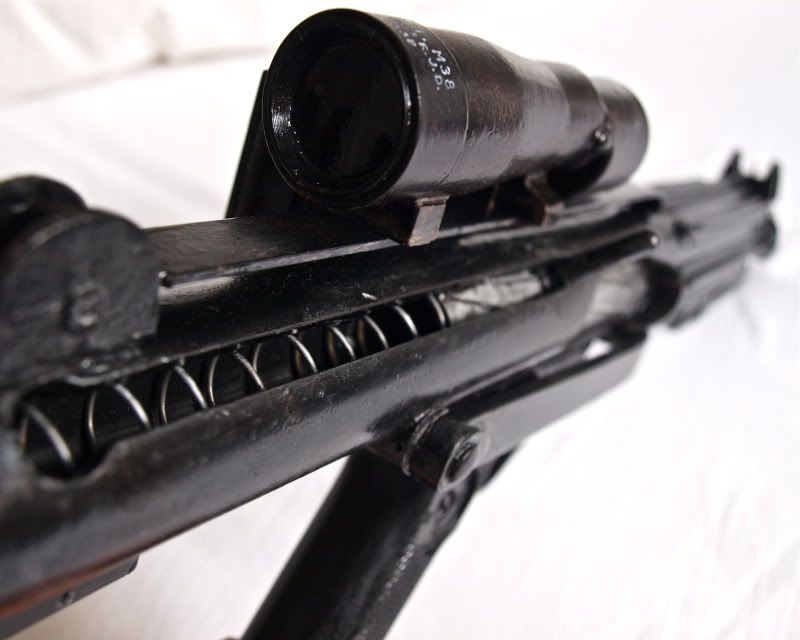
I got the small metal items to be add to the counter, but they kept falling off.
I will search for some new ones, and add them on later:

Two things i might do later is:
1. Drill some mm into the scope, and add plastic glass in both ends.
2. Drill out a line on the back side counter, and add the numbers, and then add plastic glass over them like this:

Over and out
-
Thanks for the fantastic link/pics bro, love it!!!
-
I´m very sad to read about your big loss in life bro.
Hang in there.
All the best from here.
Hugs
-
A+ from here, looking freaking nice and accurate.
I´m about to finish mine as well.
Took a lot longer time then i have ever dream off, but i´m getting there.
Congrats, and enjoy your piece of art
-
One of the best replica helmets i have seen

Congrats & enjoy

-
Made myself a TK-shirt today.. starting to feel it!
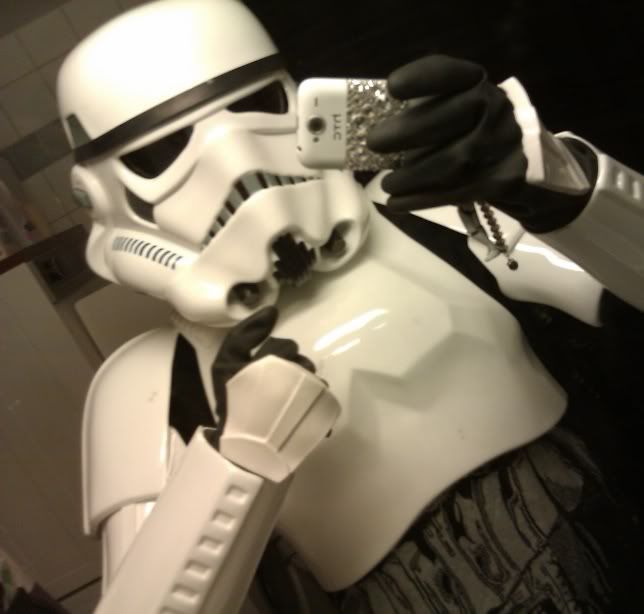
.. a bit narcissistic, but I'm in love <3
Looking good!!!, keep up the good work...
all most there
-
Looking beautiful bro, i can´t wait to get mine home and start up
-
Looks nice and accurate, good work.
Congrats and enjoy
-
Its a accurate beauty, i guess i need one when my son is a bit older as well here

My RS Props Armor Build
in Build Threads Requireing Maintenance
Posted
Monster cool bro.
I got two of them this morning...
MMmmuuhaaa
I will first build the sandy, and then the stormy, and deploy you guys here as well
(badly quick taken pic, i will make a topic asap)