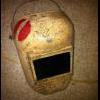
wiederk Posted May 7, 2016 Report Posted May 7, 2016 (edited) Hello all, my name is Kyle. Im somewhat new to this site. I just received my Caption Phasma bucket the other day from Shawn Thomsson. Its very nice, and I recommend getting one from him if your looking. Anyway, Im making this bucket for my wife. She is going to be doing something different for the armor, so she won't be trying for approval or anything, but we both want a nice bucket. She will also be making her own cape. Will post more on that once we get to that. I will be following the steps laid out by LadyInWhite for this build. I have not seen many step by step posts on how to do this helmet, so I thought I would share mine. First off here is what the bucket looks like fresh out of the box. First steps will be to cut out the eyes, and clean up the return edge on the bottom. Not sure how hard it will be to cut the eyes, with that support rod in there. Guessing it was put there to help with the molding. Then I will be cleaning up some of the holes and lines. Fill in some of the dents/little holes. Then some light sanding to smooth it all out. I'm thinking I will have to trim this down some to fit the inside. Will have to see once its cut out. Then some light clean up on this piece. Over all I have to say this is a clean piece that needs little work to be done on it. Edited March 6, 2021 by Sly11 Edited to restore images Sly11 2021 Quote
dejango[TK] Posted May 7, 2016 Report Posted May 7, 2016 That is so beautiful. Can you give me a link for the seller? Quote
wiederk Posted May 7, 2016 Author Report Posted May 7, 2016 That is so beautiful. Can you give me a link for the seller? Here is the link. He only seems to be on the RPF. http://www.therpf.com/showthread.php?t=246263&page=14 Quote
wiederk Posted May 8, 2016 Author Report Posted May 8, 2016 (edited) Spent half the day at different comic shops, and the rest doing some sanding. I think I have it where I want it. Had to use just a small amount of bondo to fill some tiny holes from the casting, and one small nick from the dermal. I did a test fit of the lens and it has some gaps on the bottom side. I think I will try to smooth the inside around the eyes a little more tomorrow, then will start to primer. Edited March 6, 2021 by Sly11 Edited to restore images Sly11 2021 1 Quote
Korriban Dan[TK] Posted May 9, 2016 Report Posted May 9, 2016 Looking forward to seeing your progress Quote
wiederk Posted May 9, 2016 Author Report Posted May 9, 2016 (edited) After two coats of white primer, I gave it a nice wet sanding. Once its good and dry, I will spray the first coat of gloss black. Im thinking about doing three coats of the gloss black, with some light wet sanding in-between them. The last coat, if we like it, will be the one that we polish. Edited March 6, 2021 by Sly11 Edited to restore images Sly11 2021 1 Quote
wiederk Posted May 14, 2016 Author Report Posted May 14, 2016 So the wife has started to buff the duck bill with the polish mentioned in LadyInWhites post, and the same method. She does not seem to have the patinance for it. Ha. But I was woundering if anyone has done this before? I can't say that I see it doing anything. If anything it looks almost more dull now. Thought I would stop and ask before doing more work that might not be right. 1 Quote
wiederk Posted May 14, 2016 Author Report Posted May 14, 2016 (edited) So here is the bucket and bill after three coats of gloss black. I did some light wet sanding in-between the coats. This is what they look like. We seem happy with the way they look. After drying for a little over two days, as stated above, we started to polish the bill. In Ingrid's post she said about using paper towels to wipe the polish in, and wipe the extra off with a terry cloth rag. After the wife got tired of it, I took over. Some black seems to be coming off onto the paper towel. So I tried using the cloth on a test piece. This seemed to just rub the paint off all together. This last picture shows the bill after about 50 min on polishing. I know things take time, but after seeing some of the paint come off, and not really seeing it get any more shiny, I thought I would stop and try to figure this out. I have a feeling I'm doing something wrong, or that maybe the paint is not really dry. I will give it a few more days before I try again, but am open to any ideas if anyone has done this method before. Edited March 6, 2021 by Sly11 Edited to restore images Sly11 2021 1 Quote
wiederk Posted May 25, 2016 Author Report Posted May 25, 2016 (edited) Might be giving this a try this weekend. Edited March 6, 2021 by Sly11 Edited to restore images Sly11 2021 1 Quote

Recommended Posts
Join the conversation
You can post now and register later. If you have an account, sign in now to post with your account.