CantBeatPie
-
Posts
28 -
Joined
-
Last visited
About CantBeatPie

-

ROM F/X running on Lithium batteries
CantBeatPie replied to sskunky's topic in Assembly, Mods, and Painting
Most electronics wouldn't be that sensitive to a couple extra volts (although maybe the romfx is). If you wanted to use all the batteries but to be on the safe side you can get tiny voltage regulator chips at Radio shack for a couple bucks. They're really small (half inch square) and the hookup is easy but you'd probably want to use a soldering iron. Of course that's the nerd/hard way to do it, if someone can go 14 hours even with one battery removed, then I like that idea! Simpler is better! At work we have been experimenting a little with Lithium-Polymer batteries. (Our president is a gadget nut). We replaced a battery on an RC airplane with a comparable Lithium-Polymer of the same physical size. It was 40% lighter and ran almost twice as long! I might look into LiPo for my helmet electronics simply for the cool nerd factor. -
Snaps and Straps Conversion
CantBeatPie replied to CantBeatPie's topic in Assembly, Mods, and Painting
Me too! I used 24 Gauge Tandy snaps. They come with a flaring tool & die in each pack which you can use to connect them or I think they make tools that do it too. Just be careful when hammering down as you can get off center and have this horrible off-center smashed up button-thing that has to be replaced! I chalk it up to learning. I got mine at Michaels. They had 24 and 20 gauge I think but the 24 guage are probably the best size. Michaels seem to be all over the US and Canada and of course you can order them online too if you're patience-which I'm not! I've seen/heard of people using two snaps but I haven't seen the need personally. Maybe they had cheesy snaps. The 24 gauge Tandy's are very heavy-duty. -
Snaps and Straps Conversion
CantBeatPie replied to CantBeatPie's topic in Assembly, Mods, and Painting
I had no idea! Cool, we all get closer to movie accurate AND a better fit! -
Snaps and Straps Conversion
CantBeatPie replied to CantBeatPie's topic in Assembly, Mods, and Painting
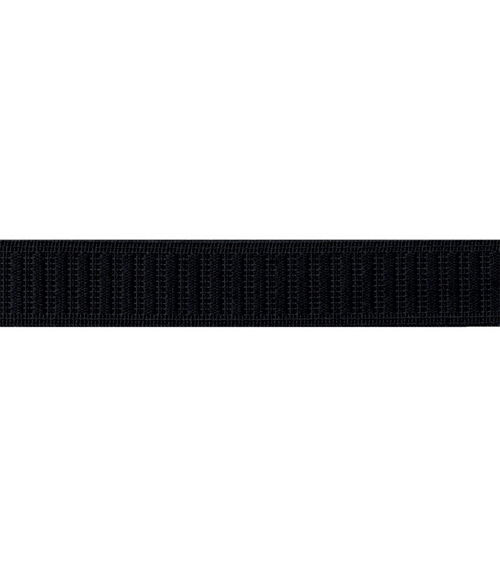
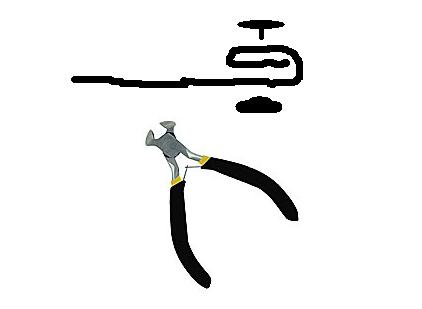
This is the stuff I used. I don't know about you guys but I go up and down in weight all the time and the elastic keeps the suit fitting snugly. ----- You can buy it by the yard for like .79c or in bulk. This awesome drawing shows how I wrapped the ends before putting the snaps through. At the point where I was to push the snap post through I'd briefly fold it in half then use nippers to cut a tiny hole in the elastic before pushing the post through. With one layer it would pop right off but with three it seems pretty secure. I'm sure I'll decide later there is a better way and redo the whole thing. Because that's what we all do ;-)
-
I just finished converting my TK from all Velcro to snaps and straps. Man what a difference! It fits like a glove now and doesn't crunch when I walk around. What amazed me most is that snaps and straps is cheaper than Velcro (The industrial strength anyway). Doing all that cementing is a little spooky but I figured out the sweet spot for clamping at about 30 minutes so as not to warp the shiny side plus I put soft cloths between the clamps and the shiny side of the armor before tightening. I used 24 gauge Tandy leather snaps that I got at Michaels and 1" black elastic straps that you can get cheap by the yard at Jo-Ann Fabric. I made 1.25" ABS squares (sometimes I used long thin ones and only clamped the two sides but most were square). I put slight bends into the plastic ahead of time so that when I clamped the corners all made good contact with the armor. I triple folded my straps everywhere I added a snap and the fold is barely wider than the snap. I usually shortened the straps by about 10-20% of the distance they needed to cover since they'll comfortably stretch about 80% longer than when no force is applied. I can't believe how much better everything fits and put-on time is about 4x faster now too. Anyone who is thinking of building a TK or other armored costume, I highly recommend you consider going snaps first. I'm sure all the veterans are reading this post saying "duh" right now. But I wanted to share my positive experience with everyone!
-
I didn't think I had particularly massive calfs but at 6'1" and 220 lbs everything fit BUT the calfs! So I shimmed like the link above says and it worked fine! I used a hair dryper to soften up the ABS (belt pieces from my FX kit since I made a canvas belt) and I bent the piece over 180 degrees and held it a minute or so while warm, then bent the bottom back a little for a gentle "S" curve. When I velcro'd it in place it had the right shape!
-
HOWTO: A guide to making a canvas belt
CantBeatPie replied to firebladejedi's topic in Tutorials, Tips and HOWTOs
I'm planning to sew mine tonight and I was planning to use 4 layers of canvas but seeing this thread has caused me to rethink. The elastic is thinner but probably as strong for supporting weight. Since my sewing skills were last tested in 7th grade in 1987 I got PLENTY of white duck cloth! This tutorial helps a bunch!