

F943
-
Posts
32 -
Joined
-
Last visited
Content Type
Profiles
Forums
Gallery
Articles
Everything posted by F943
-
Well because of the chest ridge I can manage only 3 and a bit lines. I've marked off for tape to glue on later. Hopefully this is ok, I also made sure to do your trick with the box between the back bit and chest to make sure it lines up fine. What is an acceptable return edge length for the chest piece on the bottom? And is the gap between the Ab and the chest ok or would I need t sand a bit on the sides to get it flatter somehow? Is the chest supposed to line up with the ridge at the bottom of the ab plate (red line) or is there enough wiggle room to make sure I get a nice fit with kidney plate and cut it around the blue line distance?
-
With the various greeblies (rivets and extra snaps) on the abdomen and on the posterior armour bits, is it advisable to glue some sort of support piece on the back of the armour where they are going to go or is it ok to just drill and attach directly onto the armour? Also I'm correct in assuming the 3 rivets on the abdomen and kidney plate are optional unless I want Centurian? I've run out of the rivets and the price of buying them online just seems absurdly high for what they are.
-
Thank you as always for your detailed responses.
-
Well it's that time of year again, time to make more of this suit. With regards to the chest straps, is this the general position it should be in and is there a general rule of thumb with the amount of ridges on the front? Wanted to check before I glued them on properly. Aside from this I have managed to acquire a completed RS made Detonator kit from my awesome CO which has helped me a lot, I was planning on making my own but the end caps were cut too short and trying to find replacements at a reasonable price were a struggle. One less job I need to do. Also I'm currently gluing in the last strips for the back of the legs.
-
With regards to strapping, most people seem to use buttons. I was thinking velcro because from what I've seen with the pop buttons or the straps in general is the elastic straps stretch and removing the pieces is a pain. With Velcro i can do minor adjustment for my initial fitting for later on down the road if the elastic is stretching and if the velcro wears out which i doubt will happen anytime soon it's easier to replace. Has anyone else done this you know?
-
Well i think I finally managed to get it to match the top sides and make it look ok when seeing it face on.
-
It's definitely tricky, i just had to remove the part because it came out all wonky. How am I supposed to follow the back ridge and keep it from being completely wonky at the same time?? It sort of tilts to one side more than the other.
-
Is there an easy way to fold the flaps on split rivets? I struggled so much to do it but managed in the end. I know i have to do it for the side of the amour at some point. Also where is the best place to buy some more without it costing an arm and aleg? So i adjusted the angle to match the back ridge but the bottom part sticks out from the shin. Is that normal? If I have it in the previous position it's flat. I haven't glued it in place yet.
-
Thank you. What about the left hand side that has a horizontal cut? Should I leave that as it is or cut it to match the side ridge?
-
I did some slight sanding to clean up the previous cuts and straighten out the lines. So is this what I should be going for overall? And with this side, cut straight down like the pencil line or leave as? Not sure if that would be too short or not? 8mm split rivets are used for connecting the two I take it? Then painted white.
-
Currently gluing the back cover strip on the last thigh and working on doing the sniper plate and ammo belt. With the ammo belt is it ok to cut where the pencil lines are and round off? Not sure if it's too much or not. With the sniper plate, what exactly do i need to trim and cut? The previous owner did some rough trimming. What's the general shape the side bits? Flat cut straight down and match the lengths to the shin corner? Also I take it I don't over trim the return edge?
-
Thanks everyone for the replies, very informative. I'll definitely fork out for a big enough crate to keep it all in.
-
I like the idea of using fibreglass but it's just too expensive. I suppose having a suitable trunk to carry the armour around would help also. I've seen some people squeezing their kit into a travel case.
-
Sorry if this is not the right place to post this or if this has been discussed before. I'm just wondering if other members do anything to stop cracks from appearing such as reinforcing certain areas prone to cracking with spare material left over from trimming. Would UV resin coated around the edges be enough do you think if layered up?
-
Been a while, farming just got busy and then couldn't get back into the groove of things afterwards until now. Finally finished the helmet and have more magnets ordered so I can finish the thigh pieces. Man they're such a pain to do.
-
Slowly getting there, finished the arms nearly, just waiting for the inner strips to properly dry and that's it, did a quick test fit and they're perfect. I've started on the legs and just glued the the Ab plates in place. I haven't built up the courage to paint the helmet and buttons yet, also Fallout 1 is stealing my time at the moment. I think I might just stick with a TK now....
-
Just a quick update, still gluing the arm pieces together, I'm taking it slowly and doing inside seams also for added strength. I also finally fixed both the eyes so the lenses will be closer now. Not exactly easy but worth it in the end. Just had to make a quick template then cut and glue in place. fill the gap with abs paste, sand and then paint using Mr Colour gloss white followed by Mr Colour thinner to give it that nice smooth texture. I don't really want to do anything like that again, it's a pain in the a very impolite person to do. As far as the decals go I think I might do hand painted after seeing Cableguy's youtube tutorials. I only just found out he passed away Also I probably might end up just doing a sandtrooper instead of converting it after. Please don't hate me oh shiny ones.
-
I had a go at removing the frown paint, hopefully it's ok. And just to confirm for the stripes that they are supposed to start from here? (That's glue on the pencil not snot, honest).
-
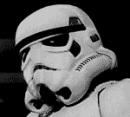
Hello all from Japanese Garrison!! I was very kindly given some MTK armour from a fellow Garrison member, he started trimming the kit but I think he decided to quit because it was all too much for him. After finally having some time I managed to get round to trimming and sanding the kit ready for gluing, I've never built a TK before so it's all new to me. I've only just noticed the magnet seems to have moved up since I last looked, it wasn't like that when I set it yesterday. As I haven't got many of them I'll be slowly gluing bits together, it will also stop me rushing the job. The Helmet was already assembled when I received it but I did some quick adjustments to lift the frown a bit as I might convert it to a Sandtrooper. Hopefully it's all fine. I'm also debating whether to hand paint the decals or just use stickers, both have their pros and cons I believe. I noticed for the eyes that they might have been over trimmed at the top part so there's a bit of a gap between the abs and lenses. Would this be an issue do you think? I was thinking of gluing some spare ABS in place and using abs paste to fill the gaps. Or forking out some money and just buying a new face plate. I mean from the front you can't really see it but I just wanted to check. Thanks in advance!
-
It's a lot more faded and flabbier now.
-
 TS 94349 requesting 501st Access http://www.501st.com/members/displaymemberdetails.php?userID=16756
 -
I was hoping for X-Wing vs Tie Fighter 2....
