


TOM R
-
Posts
67 -
Joined
-
Last visited
Content Type
Profiles
Forums
Gallery
Articles
Media Demo
Posts posted by TOM R
-
-
ahh I see i thought it meant you had to have the comm link mounted in the rear also my bad
 nice tk yours is how I thought it was supposed to be
 -
WELL I just want you all to know so far i have found this to be an awsome site full of nice people and tons of great insight and information so I went ahead and made the titanium donation to say thanks for keeping this site running
you guys (and gals) rock -
ok thanks langy
-
so is this a decent looking wearable moddable helmet? figured i would ask before spanding the $

-
I actualy found this screenshot in another thread this is one of the gaurds outside the melenium falcon notice on the left of his belt there is a com link it is sort of hard to see due to pic quality
-
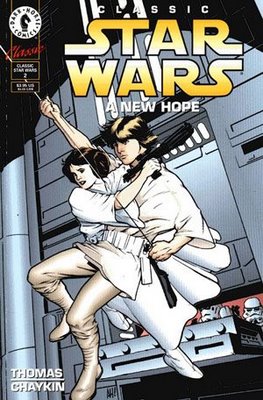
i have a question on the anh, i know i saw a pic here that showed luke wearing the tk belt and the com link was on the left side clipped above the drop pouch but the standard says ditch the td and mount the grapple and comlink there? I am new so this is probly a dumb question
I found this on someones site but cannot find the screenshot i saw this comic also depicts the com on the left front above the drop pouch if I find the other pic i will add it

-
pm sent thanks

-
anyone have a usa supplier for these items so i can build it? thanks
-
ok sorry i was looking for more like a link/resource for where these items can be procured since the links above aren't all good
-
ok sice this is a thread on where to get stuff, where can i get thermal detonator parts and helmets,don't say ebay i tried lol
-
there seems to be a whole lot of links to dead sites that no longer exist or sites that have changed to doing other things and have no reference to trooper things <_<
-
what are the differences in the anh,eps,rotj helmets and armor? is there a thread with pics to explain it?
once i have the boots on i am sure the shins/calf pieces will be up where they belong, what is wrong with the upper legs? need to be twised around or something? they may have slid down some as did the butt, i am sure once I put this on and off a few more times i will figure out all the little tricks
the helmet is not to bad in pics or from a few feet away but the closer you get the worse it looks 
i need to find a place that sells the detonator pannel so I can make that part also
-
since I do not know why i cannot up load these i have a link to photo bucket where you can view them

-
the contol pannel says images are larger than available space and every time i post now there is a message in the attachment area saying attachment space used 355.4k of 512k, what does this mean? in the manage attachment drop down menu it says 0 attachments

-
I clicked the browse button then upload, i think the pics are there just not showing and it won't let me add more, i don't like posting at places like photobucket since they eventualy kill the link or delete the pics then you have a thread like this with the pics missing
-
no idea why the pics did not show it says i uploaded 355.4k of attachments?
-
ok well I know the rubies armor is not up to the 501 standards but i got it cheap and only need it for costume parties and such,so here is a writeup for others that might want to do the same.
One thing i noticed is it looks like instead of left arm right arm specific pieces for the hand cover, bicep,forearm,and shoulders it looks like they give you 2 sets of rights <_< also the helmet is large thick and goofy looking like a cartoon so i will probly be replacing it, also they used black velcro on all the arm and leg seams so that should probly be ripped off and replaced with white to better hide the overlaps
*if you want to try to do this please read the entire post first so you don't remove or destroy something reused this is only a guide from what i did and some things may not work for you*
last nite i tried it on and it fit very poorly, couldn't move at all, loose in some area tight in others just looked sloppy i am 5'9" and about 180 lbs this is a standard size kit, so after reading some threads here watching some videos from here and suggestions from guys (thanks for the help
) I decided to have a go at making it at least fit better so it would look a little nicer, I started with cutting off all the elastic they had holding together the chest /abdomin * leave 2" on the abdomin *, back / butt *leave 2" on the lower back*, hand cover/ forearm/ bicep, since these straps just served no purpose. the hand covers already had velcro to hole em on the gloves so i just stuck em to the gloves easy fix.
the forearms i used a verticle horizontle belt sander and removed the lip around the inside at the elbo joint and also shaped that end better so it moves more freely, i then added 2, 1 1/2" wide strips of 1"thick high dsensity foam inside 1 for against the inside of my arm and 1 for the outside of my arm this works extreamly well to keep the forearm in place and is comfortable. *hot glue was used for the foam
the biceps, i took the biceps and put them on the positioned the shoulders over them where i thought they looked best and had a friend draw a line with pencil, i then took some of the elastic i cut off ealier and hot glued it inside the bicep and shoulder to hold em together, I glued em inside the ridge that runs up the center of both pieces, when hot gluing the elastic i found it best to have someone else add the glue while I held the piece in place then push the elastic on pressing hard the glue was hot but not enough to burn me, * a note the velcro on the shoulders was installed at the factory facing down not up i pulled it off and flipped it over hot glueing it back in place
the abdomen was next, since the belt is permenantly attached i added white industrial velcro on the belt strap that is directly against the lower back so the belt can be cinched tight and will hold the front and back together well, next i took some black suspenders and attached them to the leftover 2" of elastic i left in the abdomen and back pieces *the elastic was folded over to double it up for strength* i also added some white velcro loop to the inside of the belt on the sides in the gap between the font and back to hook the upper legs to since the factory velcro is in the wrong place
i may cut the lines on the cod/abdomen and the lowerback /butt later to make it so i can sit and bend
moving on to the upper legs i removed the lip inside around the knees since my knee caps kept catching on them and i also raised up the openings at the back of the knees so i can bend my knees back at a 90* angle (mostly for comfort) again I used the belt sander it worked great removing large amounts at first then slowly shaping
the lower legs i did nothing yet but i will probly remove the lips inside the openings at the knees and maybe add some 1" padding the padding they factory installed is not enough to do anything
i want to do some work on the helmet that was included but it just seems way to big oversized but fit my 6'6" buddie perfect so not sure what i want to do with that
the included body suit needs elastic sturrps sewn in for the feet and hands so the suit doesn't bunch while installing the armor, there was plenty left from what i cut off the armor, i still need to do some tweeking but i think it looks and fits much better than out of the box and it was only 2+/- hours of tweekin
i also need to buy or make the neck seal, detonater, holster and i plan to modd a hasbro blaster since it is liteweight, boots are stuck in transit for the holiday
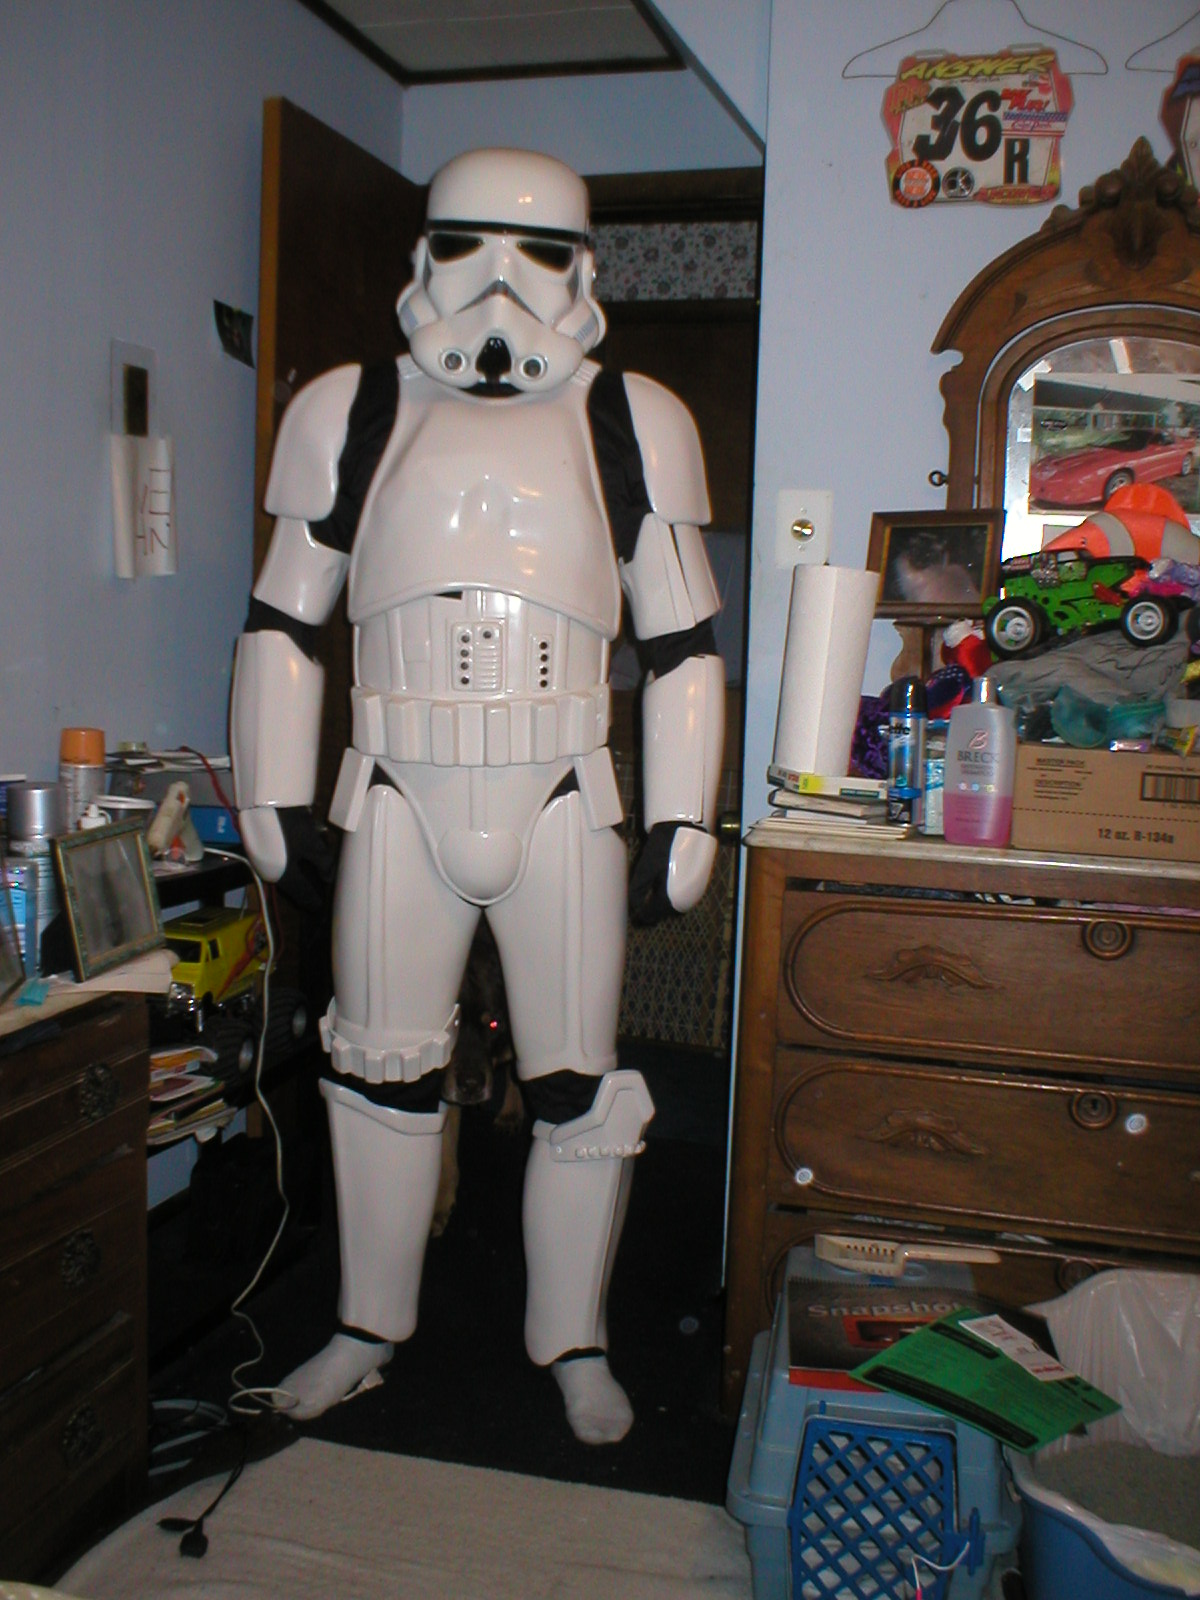
hope you all enjoy the pics, try not to be too criticle
sorry spelled supreme wrong in title and cannot fix it -
ok i will try the hot glue, i have some extra high density foam left from a set ow military truck cusions I had to redo and i think it will work well in the forearms to keep them in place, thanks guys
-
ok i saw use superglue (ca) and devcon plastic weld epoxy for plastics but what to use to hold elastic to plastic and foam padding to plastic? trying for a list to make a run to lowes have time today to work on this
-
-
ok what do you use on the armor for gluing on elastic and high density foam pieces? thought I saw a reference to some clear plastic weld? epoxy
-
what are you guys doing with the iron the pics in original link are not there anymore
-
well I know that i need to shorten the elastic bands that hold the abdomen to the chest to keep it overlapped like in the pic, i was looking through the elite pics and it looks like there should be more black visible around the groin?, also how do you get the biceps to stay in place? velcro?
is there a tutorial to make the detonator or oxygen tank tube that mounts on the butt piece? thanks
-
here is a pic of it thrown on to make sure it was all there, i am 5'9" + with average build and it is a standard size costume definitly needs trimming and fitting I can't move well in it at all boots were included but i don't have em on


fng questions
in Getting Started - Read this First!
Posted
thanks for the input guys, the helmet is being replaced with the mrce helmet I just ordered and I will probly do the fan and voice mods, I saw someone had voice mods that actualy used the areators as speakers does this work good seems like a good idea, the black strip on the abdomen is some velcro hanging out it just needs to be tucked in,my boots did arrive they look like the ca boots from what i see in pics, the armor came with a black 1 piece suit that has a zipper in the front(or back ), i have a holster on the way and a neck seal, and hasbro blaster upgrade kit (just need a blaster now) and i am probly getting the thermal det kit off a member here, i agree that i will need to put this on and where it alot to get the fitment correct and work out the bugs and the calf armour is big came with foam blocks in it from the factory there is a link to pics in my thread about modding the rubies tk costume, I am not quite sure about making things smaller diameter wise like the calves any additional comments and sudgestions are welcome since while i may not join a troop i would like it to fit function and look nice, thanks all