BATS2150
-
Posts
99 -
Joined
-
Last visited
Content Type
Profiles
Forums
Gallery
Articles
Everything posted by BATS2150
-
Here is the reglued front left thigh. Took off the cover strip and cut just about 1/4 inch on each side and reglued them. Now just waiting for the extension strips to come in to do the rear. Taking it slow and easy plus threw my back out so that's kind of hindering the process.
-
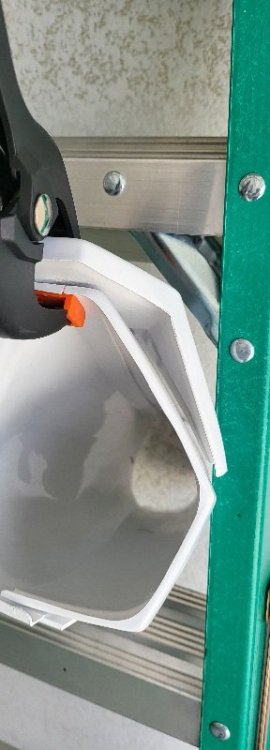
By the way, I you all having a problem taking apart glued areas, I used this orange little tool that I use to take off my plastic trim in the car. It makes it alot easier and won't hurt the plastic. Just thought I would share.
-
I also, after a test fit with the cardboard extension, the front had lots of room, so I removed the front cover strip and cut about a 1/4 inch on both sides of the front. It helped with the gap but will know more when I get the back done.
-
I have read a few threads about those who had trouble with the raised edges and problems getting approved by their respective GML's.
-
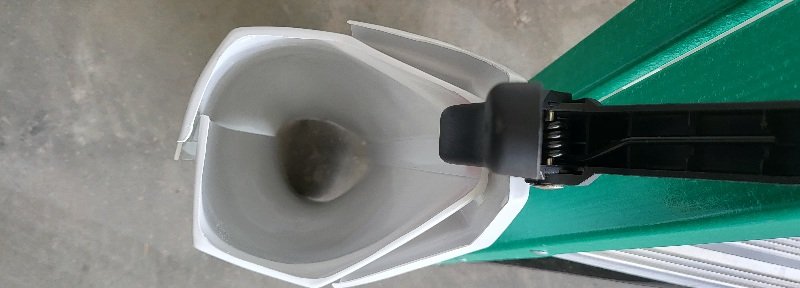
Ok, Well I need to open the Thigh in the rear because I need to widen the gap about 1 inch. As per the picture, excuse my color-coded drawing, I plan to use a 2-inch strip in the rear, fill the gap with putty, sand and paint and finally put the original cover strip in the rear. This should give me the space I need to get the thigh pieces to fit on my legs. Any input would be appreciated. Here is a look with the cardboard representing the 2-inch cover strip in the back. Thoughts anyone?
-
Yeah I used the same cover strip and moved it about 1/4 inch on both sides and will use a larger strip of abs and put it on the inside to give it some rigidity. I am doing one thigh first as a test run to see if that will do the trick but if not, I will have to model putty and fill in the gap and then sand and match.
-
Yeah being short and having big thighs really gets my goat. All that running in the Army. I pretty much got it just got to remove the rear cover strip and open n it about a quarter to half inch. Glad I have a bit of wiggle room.
-
I had to do some cutting on the top of the thighs because they bit into the leg when I walked on them. Your opinion is this look ok?
-
I had to do a little tweaking myself, mainly on return edges & mobility cuts because I am a little short for a Stormtrooper, forgive the Pun. I expected to do a little work here and there and I feel it will benefit me in the future when I decide to do a build myself. I also researched a lot about commissions and from the content, I am not the only one who had to do a little work. I am not trying to knock anyone here, but this is what I have experienced. Just be patient guys and take your time because like I said a while back in a reply to another thread, the reward will be worth it.
-
Yes, keep a good attitude and patience. To me personally, the modifications will come in handy when I decide to get a set of armor and build it myself. It gives you a sense of accomplishment of knowing that you built it with your own personal touches.
-
Ok, I don't know if it's the West Texas humidity today, but I had to redo the sniper plate. So here it is, the final, hopefully last time, the pictures. Any Feedback?
-
I think that the extra on the armor is there just in case the wearer has a few extra lbs, like me, being ex-military and kinda lost the figure. Lol!
-
By the looks of that armor, I could probably squeeze in there. Patience and doing little by little as to remove some of that slack will help. I follow simple but important rule of never take too much off because once it is gone, there is no putting it back. Keep up the good work and in the end, the rewards will be well worth the effort.
-
Ok, here is the end result of the reglueing of the new sniper knee. To me, it looks 100% better than the damaged on I tried to fit.
-
I got mine from Mark @ AP a few months ago and I had to do some return edge cutting on the thigh and shins, to include mobility cuts (There is a thread on this), since I am a short guy. Also, I had to do some adjustments on the sniper plate with a new one since I buggered the last one.
-
Ok, Let see in about a few hours. So Far Sniper Plate-1 Me- 0
-
Ok, had a little snafu with my last sniper plate that I over stressed it and it cracked severely. I had to order one and got it today and it is trimmed and ready for attachment. Here are a few pictures with it clamped on and just want to see if any of you have any recommendations or opinions.
-
I did a check of the rest of the Armor Kit that Mark from AP did for me and everything else doesn't seem to need any return edge grind/sanding. His shop did a fantastic job on my kit minus the Covid SNAFU. I found that using some car scratch remover does help with those minor scratches along with a little wax. Here are a few pics of the kit. I just got to wire up my bucket and shine it up also. Hopefully my sniper knee will cooperate this time, long story. The Dreaded Shiper Knee
-
Did a little this early morning. Waiting for the left shin to completely dry and reglued the Velcro on the shoulder straps and finished the elastic closures on the right shin armor. When I got the Armor from Mark @ AP, I had to do a little tweaking. The Velcro on the shoulder straps, the glue backing on the Velcro really does not do well in this El Paso heat so I kind of reinforced it a bit.
-
A problem I ran into is that the ends were about 2-3cm longer, so I trimmed them a bit. So now I am doing the twist tug and stretch phase. Fun times continue on the sniper knee. Now the wafting for the glue to cure and harden.
-
Yeah, I think it is going to take a little finesse and some warm water to maybe get the sniper knee fitted right.
-
Ok, I repositioned the sniper knee before the E6000 cures and becomes a pain in the butt to remove. It looks better. But still got to fix the Boo Boo!
-
One thing I am seeing on the sniper knee, I am slightly off center to the left. Would you suggest to sand down the high sopts and use ABS paste?
-
the fun part is trying to get the edges to meet and keeping the front centered at the same time.

-
I have seen on some pictures that the sniper knee seems to be flush. The pictures show how mine is and is there a way to achieve the look of it as part of the shin?