


BlueBoxFromSpace
-
Posts
31 -
Joined
-
Last visited
Content Type
Profiles
Forums
Gallery
Articles
Everything posted by BlueBoxFromSpace
-
BlueBoxFromSpace ATA ANH Stunt (first build)
BlueBoxFromSpace replied to BlueBoxFromSpace's topic in ANH Build Threads
I swear I tried to make the opening as round as I could. haha. Finally got to paint. I didn't use any templates, just taped off around the tube stripes and the traps on the back. I'm actually pretty pleased with how it turned out. I want to touch up the tube stripes a tiny bit, but other than that, if you guys think this good then I'm good with it. -
BlueBoxFromSpace ATA ANH Stunt (first build)
BlueBoxFromSpace replied to BlueBoxFromSpace's topic in ANH Build Threads
And it really was only a minute. I couldn't keep myself from continuing. I'm really excited to get this done. I got the ears on, the lens in, and the mic tips on. I want to take the dremel to the rim on the bottom a little bit before I fit the trim. Specifically on the seams by the ears Yeah? -
BlueBoxFromSpace ATA ANH Stunt (first build)
BlueBoxFromSpace replied to BlueBoxFromSpace's topic in ANH Build Threads
Well I hated that... Here's the result. I'm attaching them in a little bit. I need to walk away from this for a minute. -
BlueBoxFromSpace ATA ANH Stunt (first build)
BlueBoxFromSpace replied to BlueBoxFromSpace's topic in ANH Build Threads
Ears... Let's take our time. Use all the techniques we've learned thus far. We got this. It's time for the ears. I've been reading and re-reading build threads and tutorials about ears and I think I'm ready. On my ears the mold lines are pretty faint, which I like. I marked them out though as reference for the basic shape, and then I marked out my cut line. The mold lines are in red and my cut lines are in black. I'm not going to cut all the way to the cut lines but I'm going to get pretty close. -
BlueBoxFromSpace ATA ANH Stunt (first build)
BlueBoxFromSpace replied to BlueBoxFromSpace's topic in ANH Build Threads
Teeth I'm enjoying this a lot more than I thought I was going to. But I still have the ears and the painting left so... yeah. I'm going to be drilling and installing the screws to hold the face and cap together, when I get time to do so. I have everything held in place and I marked out where I'm drilling. -
BlueBoxFromSpace ATA ANH Stunt (first build)
BlueBoxFromSpace replied to BlueBoxFromSpace's topic in ANH Build Threads
That's a lot of good info, Glen. I already started cutting though, lol. And I got caught up in the thrill of the progress and here's where I'm at.. I got the face and cap trimmed and then I couldn't help but cut out the eyes and start the teeth. I wanted to post some progress before I finished filing the teeth. Not quite what you suggested... but it'll be fine right? and the other side: -
BlueBoxFromSpace ATA ANH Stunt (first build)
BlueBoxFromSpace replied to BlueBoxFromSpace's topic in ANH Build Threads
I had every intention of working on this last weekend... Until I was reminded of a wedding I had to attend. So there went those plans... But I have some time today and I'm definitely going to start this. I've been reading a lot of build threads and tutorials and walking through this in my head, and I think I'm feeling pretty confident going forward. Let's see how long that lasts. I'm just going to start by cutting off the excess on the cap and face. All the "seams" on these pieces are covered so I'm not super concerned about these being especially clean. They just need to maintain their specific shapes. Most of these cuts are pretty self-explanatory I feel, so I'm just going at it. All the forehead will be covered by the cap, so I'm just cutting off where it flares out. I'm getting rid of as much of the bottom as I can. The trim goes over the opening so that'll be covered. Cut out for the ears. Which is then covered by the ears. That being said the thing I might need to worry about is maybe cutting enough (or not cutting too much) to maintain the proper ear angle while still covering seams? I'm cutting the back of the cap right in the valley. Also covered by the trim. I don't know how much I want to cut on the sides of the face. This line is just a straight cut to remove a little bit of flare at the end of the tubes. There's an angled line, I'm not sure if it's the flashing, that runs up both sides. I didn't mark it but you can kind of see it here. That would be where the ear overlaps so I don't think it's important. I'm just going to trim my line for now. -
BlueBoxFromSpace ATA ANH Stunt (first build)
BlueBoxFromSpace replied to BlueBoxFromSpace's topic in ANH Build Threads
Haha. You almost had me there. And thanks for the support. Thanks. I may end up hitting you up for some stuff eventually. I had already ordered some rivets, though, so I'm good there for now. -
BlueBoxFromSpace ATA ANH Stunt (first build)
BlueBoxFromSpace replied to BlueBoxFromSpace's topic in ANH Build Threads
Thanks, Glen. Yeah I've been reading as many threads and posts as I can all day. These will definitely help. -
BlueBoxFromSpace ATA ANH Stunt (first build)
BlueBoxFromSpace replied to BlueBoxFromSpace's topic in ANH Build Threads
I'm going to start this tomorrow and I am terrified. -
BlueBoxFromSpace ATA ANH Stunt (first build)
BlueBoxFromSpace replied to BlueBoxFromSpace's topic in ANH Build Threads
Got my clips the other day. I was going to try and make them but there's a lot of amazing troopers out there who have them already made so I bought them instead. I decided to buy from Tony because he includes the screws and I have been struggling to find some of this hardware. I also bought rivets from Etsy because I just couldn't find the right ones anywhere else. Now the TD is complete. And with the Holster attached (also purchased on Etsy from DarmansProps), my belt is complete. I also attached the sniper plate to the shin The only thing left for the body is to attach the ammo pack to the thigh. Unfortunately the only rivets I have on hand at the time are 7mm and 9mm double cap rivets, so that's going to have to wait for a little bit. -
BlueBoxFromSpace ATA ANH Stunt (first build)
BlueBoxFromSpace replied to BlueBoxFromSpace's topic in ANH Build Threads
I trimmed the knee plate. I'm assuming, looking at some other photos, that the ends (where I have the tape) need chopped off. Then I think I should be good to glue provided you guys think the positioning is correct. The gap underneath seems weird to me but maybe it's supposed to be like that? -
BlueBoxFromSpace ATA ANH Stunt (first build)
BlueBoxFromSpace replied to BlueBoxFromSpace's topic in ANH Build Threads
Haven't had time to post lately... So here's an update dump. Here's where we're at with the belt. I still need the holster. I was originally going to try to make one but I think I'll just buy one instead. I also ended up switching out the snaps for Chicago screws. So much easier. I don't know why I didn't do that from the beginning. I think I was just resisting buying another type of fastener for some reason. I'm also going with velcro for now to hold it belt in place on the armor. I'll probably switch to snaps eventually though. I started the TD. After a lot of sanding to get the caps to fit, I painted it with just a grey primer for now. Is there a specific color and finish for the TD? The pics I've seen look like it has a slightly glossy finish. I also finally glued on the Ab button plate. You can also see here the velcro for the belt. I finally mustered the will to continue on with the shins. For me this was one of the most challenging parts of the ATA kit so far. The right shin wasn't bad but the left shin had some issues with the fitting. This is apparently a common thing with this kit. I think a lot of people solve this with either a hot water bath or heat gun to reshape it a little bit. I'm not comfortable with either of those techniques yet so I just made it work the best way I could. I decided to go with velcro for the closure method on them. I felt like that was the easiest in this case. It's a little hard to see here but this shows the difference in the ankle sizes. The one on the left is the right shin and vice versa. You can also see some Velcro on the inside of the ankle. I'm having the issue of my shins popping off of my boots and I'm trying out some ways of keeping them on. Speaking of the boots... I got some cheap black Chelsea boots on amazon and painted them white with some spray paint thats for painting car interiors (vinyl, fabric, and leather). And it immediately started cracking... lol. I like the way it looks though. I'm just not sure how long it's going to stay on. Hopefully long enough for me to get a proper pair of boots. Also you can see where I added some Velcro to keep the shins in place. So I think all I have left for the armor part is finishing the TD, getting a holster, putting the ammo belt on the thigh, and adding the sniper plate to the shin. As far as the sniper plate goes I marked out some guide lines for where to cut. Do these look good? And how much edge gets left underneath? (Don't mind the line there. ) I feel like I'm almost there and I'm getting excited. I'm just super nervous about moving on to the helmet... -
BlueBoxFromSpace ATA ANH Stunt (first build)
BlueBoxFromSpace replied to BlueBoxFromSpace's topic in ANH Build Threads
BRILLIANT! lol I don't know why I didn't think of that. I think I assumed the cap went there because of the look of the button cover. I don't know what I'd do without you guys. I switched them out and finished sanding the button covers. I'll post the pics when I get them glued on. I'm starting to work on the drop boxes but was wondering if there is a suggested depth for them. I saw one sizing of approximately 12mm for the inner and 15mm for the outer. Is this important? Thanks again for past and future help! Sent from my SM-G986U using Tapatalk -
BlueBoxFromSpace ATA ANH Stunt (first build)
BlueBoxFromSpace replied to BlueBoxFromSpace's topic in ANH Build Threads
Yeah, haha, like I said this was my first time sewing so I ended up going over the stitch like 3 times. I'm more than likely going to be making(or buying) a new belt at some point. I just want to finish this one in case there's anymore "gotchas" or other things I'd like look out for next time. That hole got away from me when I was drilling. I don't know what happened. On that note also... I had a few freak outs last week while I was working on the button covers. I realized that the snaps I was using here are massive. I don't know how I missed that when I put them in. These were snaps that I bought locally just to tide me over until I got others from online. I removed them no problem with some needle nose pliers but I'm wondering if while they're out I should patch that old hole that's off and try to drill a new one that's more on target? Or just leave it and correct it with the covers? Which brings me to my next freak out... When I had sanded down the cover and placed it over the snap (ultimately realizing how big those snaps were) I thought I might have sanded too much off of the covers. I stopped sanding them and went back to checking references but I haven't personally had much luck in finding good photos ( I think I'm just bad at looking at pictures or something. Every time someone posts an image and says "This is an example of this", I usually see the opposite of what point they're trying to make.) It feels like what I've done is okay but I'm just always so nervous about removing too much. also the smaller snaps that I have now (the ones I used for the rest of the build) kind of seem like they might be too big. Which adds to the worry that I've removed too much of the covers. It might not be clear but the normal sized snap is under that plate. It isn't actually attached though. It's just the one side of the snap sitting loose in the hole. -
BlueBoxFromSpace ATA ANH Stunt (first build)
BlueBoxFromSpace replied to BlueBoxFromSpace's topic in ANH Build Threads
I've started on the belt. I decided to make my own from scratch following Mark's guide here: HOWTO: A guide to making a canvas belt - Tutorials, Tips and HOWTOs - 1st Imperial Stormtrooper Detachment (whitearmor.net) This was actually my first time sewing... so yeah... Here's how it turned out. As with most of this project... it's a little rough, but I'm pleased overall. I have enough material to make another one but for now I'm sticking with this one. At least until I finish it. I'm considering running a bead of fabric glue along the edges to stop them from fraying. Thoughts on that? I put that snaps in the plastic section. Which I probably should have waited to do because, as you can see, I didn't cut the corners off yet. It shouldn't be too hard to get them off now but it would definitely been a lot easier before. Speaking of those corners... I noticed in the CRL it says: For Level 3, the corners of the plastic ammo belt shall be trimmed at a 45 degree angle that meets the outer edge of the cloth belt. I think I'm either going to have tiny corners or the cloth belt will extend slightly beyond the cuts. That might be something that gets fixed when I make another belt... -
BlueBoxFromSpace ATA ANH Stunt (first build)
BlueBoxFromSpace replied to BlueBoxFromSpace's topic in ANH Build Threads
I'm definitely going to try to shoot for the higher levels. I printed out the CRL and have been going through it while I'm working on the armor. I don't think it should be too too difficult for me to get that extra level of accuracy. It should at least be fun to attempt. -
BlueBoxFromSpace ATA ANH Stunt (first build)
BlueBoxFromSpace replied to BlueBoxFromSpace's topic in ANH Build Threads
I just want to take a minute here to express my appreciation. I started this build over a year ago, right before covid shut everything down. When I have the time to work on it, it's been a great project to help take my mind off all the craziness. I'm really thankful for the support and help everyone here has provided. This is a great community here and I'm really excited to become part of it. (hopefully very soon lol). Thanks again everyone. Sent from my SM-G986U using Tapatalk -
BlueBoxFromSpace ATA ANH Stunt (first build)
BlueBoxFromSpace replied to BlueBoxFromSpace's topic in ANH Build Threads
Yeah that wording still confuses me. I went with the 1/2" diameter circle for the template. I don't know if my buttons are just bigger than the ones used on screen but the 7/16" was way too small. Even after I removed the tape and cleaned up the paint a little bit it still seemed like the painted area was too small. Also it was still pretty messy. So I just went back over it by hand without a template and I think it looks pretty good. Not perfect but pretty good? -
BlueBoxFromSpace ATA ANH Stunt (first build)
BlueBoxFromSpace replied to BlueBoxFromSpace's topic in ANH Build Threads
I'm working on the ab buttons now. I had a little board with some 60 grit sand paper glued to it that I used to slowly shave down the plates to the size I needed. I'm making some templates now to do the painting. I was using a 1/2 inch circle but then I noticed the CRL mentions "buttons are approximately 7/16" (11mm) in diameter. " I'm assuming this is referring to the paint? -
BlueBoxFromSpace ATA ANH Stunt (first build)
BlueBoxFromSpace replied to BlueBoxFromSpace's topic in ANH Build Threads
I finished the garter belt. I found a cheap kit on Amazon for making straps and such. I just used it to make an adjustable belt. Then I had sewn loops out of 2 inch elastic and glues them directly to the inside of the thighs. -
BlueBoxFromSpace ATA ANH Stunt (first build)
BlueBoxFromSpace replied to BlueBoxFromSpace's topic in ANH Build Threads
Shoulder bridges complete -
BlueBoxFromSpace ATA ANH Stunt (first build)
BlueBoxFromSpace replied to BlueBoxFromSpace's topic in ANH Build Threads
Yeah I saw those fancy contraptions of yours. Lol. Very cool idea. I was thinking about using them. Although the issue might be that the straps on the sides might be a little too tight and the middle might be too loose. So I'm going to try that first as I don't yet have a heat gun. Sent from my SM-G986U using Tapatalk -
BlueBoxFromSpace ATA ANH Stunt (first build)
BlueBoxFromSpace replied to BlueBoxFromSpace's topic in ANH Build Threads
Haven't posted in a while. Been a little busy with things. I adjusted the shoulder straps. I decided to use velcro on the back side of the straps to make them adjustable until I find the position I like then I'll make a new snap strap that size. I might even double up on the elastic to make it a little more rigid. My shoulder bells seem to want to pull them down a bit. But here is where I'm at so far. The upper body strapping is done for the most part. I need to whip together a garter for my thigh straps next. And also probably finish the shoulder bridges.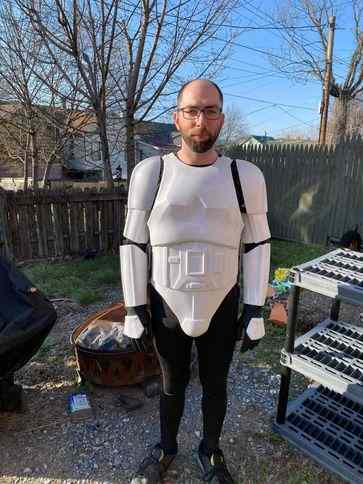
-
BlueBoxFromSpace ATA ANH Stunt (first build)
BlueBoxFromSpace replied to BlueBoxFromSpace's topic in ANH Build Threads
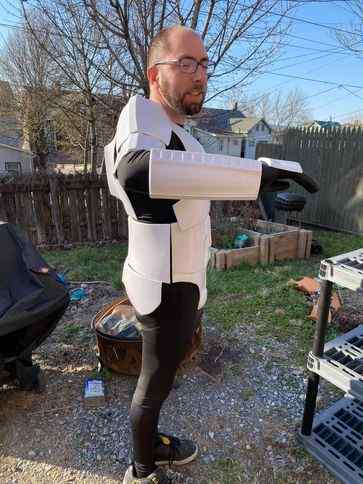
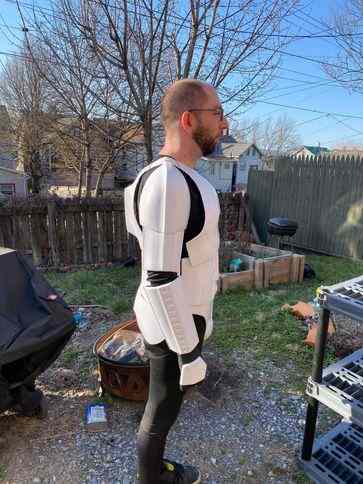
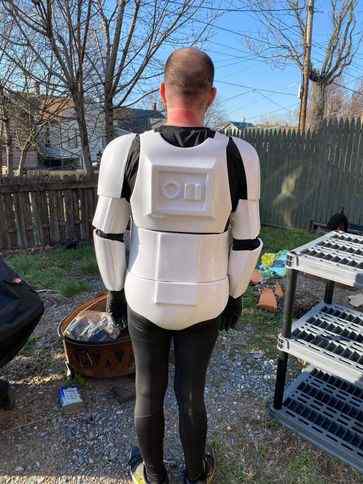
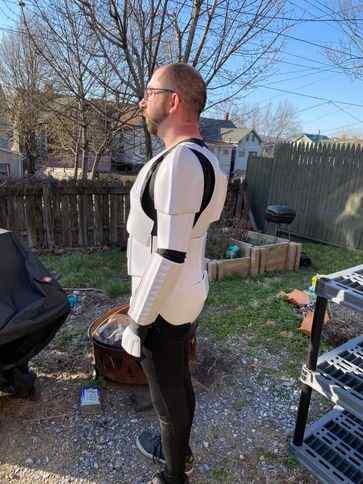
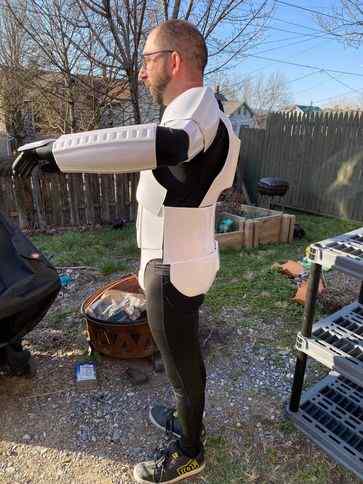
So this is my torso so far. I don't have a belt yet. I'm hoping that will close the gaps between the kidney and ab sections. After wearing this around the house for a couple days I feel like I might need lengthen the shoulder connections. The whole back feels like it might need to come down. However I'm not sure how low I can make the back plate. To me it doesn't feel like I can really lower it anymore. Where should the butt plate sit? My butt kind of peeks out of the bottom of it. Thanks in advance for the feedback. I can get different pics if that helps elaborate my questions.
