


SirFalconian
-
Posts
55 -
Joined
-
Last visited
Content Type
Profiles
Forums
Gallery
Articles
Media Demo
Posts posted by SirFalconian
-
-
T-Jay i did sir thank you
") and again TY for helping me along the great adventure.
and again TY for helping me along the great adventure.
-
Ok guys it's official TK37512 reporting as active.
Now just clean it up before my first troop.
-
 4
4
-
-
Ok so I have been on the forums for a bit working on my first build. But wanted to say hello.
https://www.whitearmor.net/forum/topic/47279-very-first-build-am-armor-anh-stunt-will-update/
You know first exciting day is big brown box. But today was just way to cool to know I have my TKID ... Will wait to post that later with a few more pics ...
Check out my build and if I can will post more about the adventure later.
-
1
-
-
TK37512 reporting in and requesting 501st Legion Status ...
https://www.501st.com/members/displaymemberdetails.php?userID=30921
-
Ok guys so today was first day in the whole gear ...got to get walking to drop some belly fat
And do some adjustments on the electronics In the helmet was a bit hard to get on.


Some strap photos ...


Application has been put In and GML notified tomorrow action pose and helmet off photo ...hope everyone is having a safe weekend.
-
2
-
-


Little clean up needed but new stripes are on
-
2
-
-
On 7/17/2019 at 5:20 PM, justjoseph63 said:
If I could make one small suggestion, it would be this:
After applying the decals and pressing them down firmly, hit the edges with a tiny bit of white paint first and let it dry for 10 minutes or so before applying the blue.. The reason for this is that if there are any tiny gaps where the decal is attached, the white will fill them and the edges of the blue will come out clean and crisp without bleed through.
Great idea down side I didn't see this untill after
but no worries only two small spots to clean up after work in the morning. thank you
-
17 hours ago, LightBox said:
Before reapplying the tubes, I recommend polishing the plastic a bit, as it may be dulled a bit from the mineral spirits. Quick question, what mineral spirits did you use? I made a similar mistake, and I'm having quite the trouble removing them. Best of luck!
Gemini Masterpiece odorless mineral spirits. Plain paper towel let it sit for only 3-5 seconds ...then with decent pressure and finger tips rub hard
took me under 3 min to clean it all off ...now this was directly on ABS no primer and only sat for about a month. Looking over the area very small micro scratches but after new paint is on and a good polish will never see it -
1
-
-
thank you both will be painting after work. Again glad this got caught early. With all the other small issues I have had this one was easy. If I wanted just to be in my armor I would have already finished but as my first build I want to get as much right as I can.
-
4 hours ago, Sirfalconian said:
No worries and after looking at the CRL I see the line of text that vaguely refers to it ...just didn't catch it or understand ...but I can see it now thank you for the template reference think I had a second set.
Ok hope this helps someone in the future ...odorless mineral spirits will safely remove a few week old paint job that used Humbrol Enamel ...coat the paint in it with a brush and then just a few seconds later used plain white paper towel ...putting just enough pressure to remove the paint ....elbow grease ...but soon the paint will flake off into dust ...here are the photos


Now to.make make sure my eyes got it right ...next two photos are templates in place on the correct sides ...will get them in place and paint after I get the green light that I got it correct ...


Talk about not to post stuff when at work ...had to figure out how I was going to do this all day ...again TY for catching this.
-
1
-
-
2 minutes ago, gmrhodes13 said:
Easier to see the difference on the template image.
Not a must for basic approval but for higher levels it may be requested.
No worries and after looking at the CRL I see the line of text that vaguely refers to it ...just didn't catch it or understand ...but I can see it now thank you for the template reference think I had a second set.
-
1
-
-
3 minutes ago, gmrhodes13 said:
Nice work, tube stripes should be flipped though, greater fall from top to bottom back /////// front

Well that's going to be a mess and wish I had caught that but with my new found need for glasses I still can barely see the difference between the photos

-
Ok so it's been a few weeks ...life always gets in the way when you have kids. So in the middle of building the armor I stopped to put time into my DroopyDoo kit and all the extras I got for it. Scope was from Bulldog Props and added some parts from T-Jays kit ...then decided to add few upgrades from StarwarsCostumeProps on Etsy ...in the end I also decided to get a power cylinder from Shapeways. Here are the photos ...may make a build thread about the adventure.

Lots of work before this but was just allot of Dremel and glue work.

First little bit of paint.

White crayon does wonders.


Now that that was done I spent more time. On the TK build ....again toons of photos but here is a sneak of the almost done...have a few more straps to do and just finished hand painting my helmet last night ...

So I hope to be posting the finial product in the week or so.


-
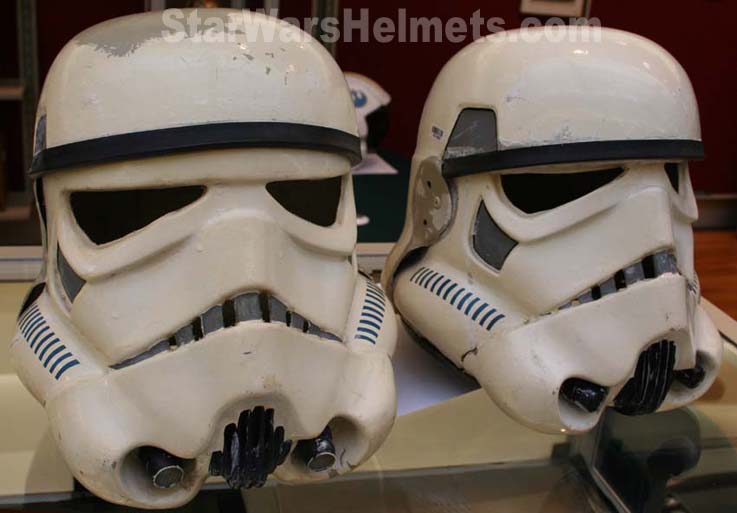
TY wook1138. All great tips here is a sneak peek of helmet now. The exact point you brought up has been in my notes and I'm still working on it but I'm happy where it sits now. Well at least I think it's a happy place between to low and to high.

I haven't quite finished still need to paint a few outlines and the white over screws.
-
2
-
-
Ok so I started this build last month and took a break to work on my E-11 let me.say first I have talked to some amazing people over the past few weeks and love how it's been going.
So I will be adding over the next few days all the photos I took along the way . I have been sharing on the AM build group on FB and with members of the FB academy for my local group. Again amazing people still don't know why it took me this long In life to jump in.
Now I have built Armor for fantasy RPGs and some cosplay before so getting out old tolls from the 90s is warming to my soul.
Brown box day April 20 YAY ...

Now next was getting few more tools ...

Then we'll got to start somewhere after watching all the videos that a brain can handle. So we cut teeth.

And we'll the saga keeps getting better ...next a few helmet photos of progression as I built


And not 100% done yet make a few additional changes and started to paint

Ok more toys to add to the helmet ...how much can we fit??

Now we love on to a few other orders that came in along the way Boots ... DroopyDoo kit (this starts a obsession and will be another part to this post ;)....
Anyway this is to keep record off very first build started April 20 2019 and can't wait ...I leave you with my first Thermal Detonator straps .... Oh and a hello to everyone ...


-
2
-
Not 100% new here but hello fr KY
in New Member Introductions Archive
Posted
thank you sir. Your electronics in my helmet are amazing little snug. But I'm so happy with it all.