


Slayer6769
-
Posts
230 -
Joined
-
Last visited
-
Days Won
1
Content Type
Profiles
Forums
Gallery
Articles
Media Demo
Posts posted by Slayer6769
-
-
Welcome!!
-
TI-13793 Ohio Garrison, please enable me for 501st status<br><br><br>
<a data-ipb='nomediaparse' href='http://www.501st.com/members/displaymemberdetails.php?userID=25079'>http://www.501st.com/members/displaymemberdetails.php?userID=25079</a><br>
Thanks! Ron
-
I got to be honest, I certainly feel a whole lot better after having lost weight. I have found that I have more energy than I've had in a long time. And to make things even better, my family doctor has taken me off of high blood pressure and cholesterol medications. So needless to say I'm pretty stoked about that!Redoing your armor for a good cause!
Sent from my iPhone using Tapatalk
-
I wholeheartedly concur!They do say that drinking and driving don't mix but I bellieve the unabridged list is much more extensive.
-
I have been overwhelmed last several weeks with work, home projects, getting my boat ready for spring and my honey bees. I only have a few more home spring time projects to finish and my boat is ready to go. My honey bees are doing well so far and I think I'm close to a point that I can take a more hands off approach to them. So hopefully I will soon be able to start working on my armor again soon. <br>
For those if you who don't know, I basically had to start all over again with my armor. To make a long story short, I dropped a bunch of weight and the work I had done before was for not. Everything was WAY too big for me. So I had to take everything apart (E6000 made things easier to disassemble) and trim everything. Plus I'm having to cut off some of my return edges and form new ones. Very time consuming to say the least. <br>
I haven't been able to get online here much lately because of how busy I've been. Hopefully everyone is doing well and enjoying the new spring weather!
-
 1
1
-
-
Oddly enough when I read the title of this thread, I thought it would be going a different direction. Let me explain if I may. <br>
I found out the hard way of drinking Tennessee liquor and building armor. It's just like drinking and driving, they don't mix. I was not drunk, but feeling pretty good. Later I found out I had made some mistakes building my armor. Lesson learned and note to self. Absolutely do not drink alcohol and build armor together. While my mistakes were fixable, the results could be catastrophic. Don't do it!!
-
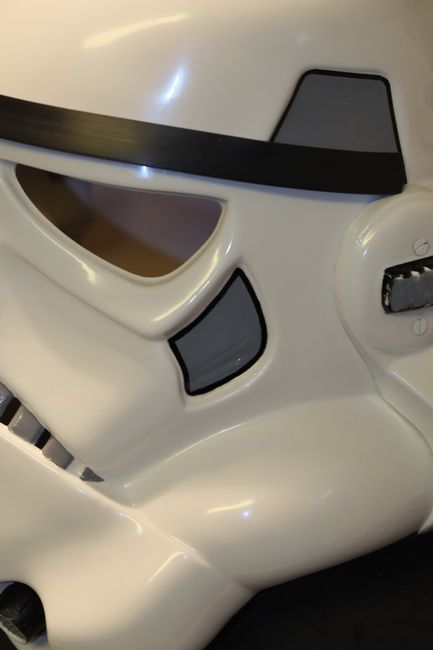
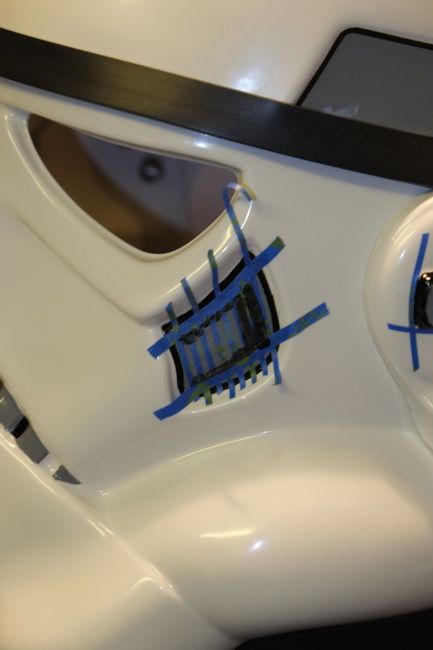
Very nice job, looks awesome!I did the gray background and the black outline freehand on the traps and the tears and then masked the lines with painter's tape. There are a few tricks to using tape this way. I always smooth it down well with a fingernail. Some people like to lightly paint the area with the background color to seal the edges and prevent bleed but I find that a carefully adhered tape job is usually sufficient. Then paint your black lines and carefully remove the tape before it is completely dry. You may need a little touch up with gray but if you're careful, it will be very little.
Here was my go:

-
1
-
-
Snap settings pliers are garbage. And most won't work for heavy duty metal snaps like the ones you should be using on your armor kit. I bought a pro snap setter for $50 approx at kamsnaps.com. It's just as good as the one Tandy sells but WAY cheaper. And it was definitely worth buying. Hammering 100 snaps is a nightmare.
I've seen these before, but I was under the impression that it was only for plastic snaps.
Sent from my iPhone using Tapatalk
-
I would probably repair the crack first. If the backing strip isn't working, maybe use some Loctite epoxy putty. It won't be flexible there anymore, but it won't crack either.
-
I haven't seen his armor in person, but I have talked with him a great deal. I even asked him for a sample of the ABS he uses for a color match comparison and he sent me a sample and refused to allow me to reimburse him for shipping costs.I realize this is an old post, but I couldn't agree more TK41576!! I'm also in the process of researching this armor and some constructive criticism would be much more helpful then the armor bashing.
I don't really agree with some of the armor bashing that's gone on here and won't participate in any of the drama. I honestly wouldn't have a problem buying armor from him.
Take this for what it's worth.
And if anyone disagrees with me, that's fine. I'm entitled to my opinion and you yours. I won't take part in any bashing, drama or arguments on this or any other matter.
-
I'm not a fan of Humbrol really. I'm a Testors guy. I do feel that Humbrol is thinner than Testors and I don't think it covers as well. I can also get smoother results with Testors.
-
Best way I've found is to either the eat gmrhodes13 suggested or I have a pair of wire strippers that have holes for specific size screws. You thread the screws in to the desired length and squeeze the strippers and it cuts the screw flush. Thread the screw out and your finished.
-
I have a multi piece ABS helmet and a one piece fiberglass and resin helmet. There are pros and cons to each. I do however prefer the resin helmet. Every TI helmet I've seen varied in size from maker to maker. So which is more screen accurate? I've no idea I'm afraid. It basically boils down to personal preference really. Some people like the big helmets and others don't. WTF makes really nice TI kits. Targ over at JRS probably makes the nicest TI armor I've seen. You can get his in either kit or what he calls "the full monty" that's ready to wear out of the box. I got my ABS armor and helmet kit from another maker over at JRS. It's not quite as nice as Targ's or Walt's kits but I'm happy with it and the price was right, not to mention no real wait time.
-
I really like his kits. IMO there are none better. They do however require alot of prep work, but the end product is awesome I think. He is a member here by the way. <br>
Having said that, I would recommend getting a Hyperfirm to troop with. They don't get much more durable than a Hyperfirm. You would probably have to purposely do something to break a Hyperfirm.
-
1
-
-
You could maybe take the parts you have and shim them to a larger size.
-
No I only had to trim away one dimple on mine. But that's what my GML said.
-
I assume your referring to the square dimples. I needed to do the same thing on my AM 2.0 kit and my GML said it was ok. He said they have to fit your arm and you be able to move.
-
Anovos does not offer replacement parts, but you do have some options. First I would suggest posting pics of your thighs and explaining what you did incorrectly. Most likely they can be repaired. I've found ABS very easily repaired myself. <br>
If they can't be repaired and I doubt that's the case, I would contact Walt and order a replacement set from him. <br>
But before you do anything, please post pics.
-
1
-
-
Yes but your only talking about maybe 1/16" at most. That wouldn't even be noticable if you repaired it like I was talking about. If your not comfortable with fixing it yourself, ship it to me and I will repair it for you if you want. Just pay for return shipping back to you when I'm finished.I thought about doing the repair but I am very OCD and that side wouldn't be the same width as the other side haha. Stupid but it kept me from fixing it. Which belt do you have? My kit came with two, the one in the picture and then the other has the countersunk squares which isn't centurion approved.
Yes, the belt with the countersunk squares is the one I was talking about. Really though, I think you could make it centurion approved if you cut cover squares like you did for this belt and put over the countersunk squares on the belt. I think that would work like that instead of using the vac formed squares that came with the kit. You would never know it was like that, unless you looked at it from the back.You would have it attached to your canvas belt and couldn't see the back anyways.
-
I think it can be fixed honestly. I have found ABS to be very repairable and user friendly. I would sand the two broken edges to about a 45 degree angle or so, put them together with a very slight gap between them, glue a piece on the back to join the two broken pieces, them fill the gap with ABS paste, sand smooth and polish with Novus. I think it would be a good repair. <br>
But if your not interested in doing that or whatever, I have the extra AM 2.0 belt I'd be willing to part with. It's the one that has the dimples.
-
If your in the CONUS, like $25 shipped.
-
1
-
-
If your looking for TD clips, I'm going to part with a couple pairs of them that I have.Hey, guys. Found this site: http://www.tk1336.com/stormtrooperaccessories.html. It appears they sell canvas belts, thermal detonator clips, and latex hand guards. I haven't heard anything about them though, what do you guys think? Thanks!
-
1
-
-
Joseph is correct, Novus is absolutely awesome stuff. I've been amazed at what this stuff will do.
-
That's the same one I got and it's great! With it's size thought I could see it maybe not working so well with people who have small cars. But I have a four door Chevy Silverado and I can either put it in the truck bed or fold up the back seats and put it in the back cab.I use one by the brand Husky. It's huge but it's HECKA awesome. And it's got a handlebar that pulls out to use with the wheels. AND it has a nice little toolbox thing at the top that's removable. I usually put extra things like my neck seal and extra material in case of wardrobe malfunctions. It's great!

Sent from my iPhone using Tapatalk
-
1
-


Greetings from MA
in New Member Introductions Archive
Posted
Welcome!! Looks are a reason some people paint the inside of their buckets, but it's also functional in that it helps darken the inside of the helmet from outside viewers.