

jamesmillerio
-
Posts
24 -
Joined
-
Last visited
Content Type
Profiles
Forums
Gallery
Articles
Everything posted by jamesmillerio
-
James's Rogue One TK Build
jamesmillerio replied to jamesmillerio's topic in Rogue One Build Threads
Well that’s an embarrassing miscommunication, haha. Still, another easy fix and thank goodness E6000 is removable. -
James's Rogue One TK Build
jamesmillerio replied to jamesmillerio's topic in Rogue One Build Threads
Between holiday festivities, I was able to get quite a bit done. I made most of the changes mentioned in my previous post. Those where: - Adjusting height of chest, moving it up in the front. - Adding 2" nylon strapping to ammo boxes. - Gluing calves together (more on this later) - Adjusting bicep and shoulder distance - Adjusting belt and thermal detonator. - Adjusting side black wings (more still to go) Regarding gluing the back of the calves together, I think I'm going to have to find another solution there. It's almost impossible to get my boots on after having the calve armor on. The CRL says: "Greaves are loosely held closed in the back with elastic, shock cord (bungee cord) or white Velcro and are designed to remain flexible." I'm going to see what I can do to make them remain flexible and open in the back, otherwise I may have to find another solution. Velcro was working fine, maybe just some thinner velcro so its less apparent. I adjusted the black side wings some but they still need a bit more work. I really don't like the shape of the side wings I was provided when I bought the kit. I may take TerribleBen's approach and seek something else out. I also moved the strapping for the thighs further onto the side. They still need an adjustment there honestly as they are so close to the cod piece even after dropping them slightly. Something else I noticed in the pictures is the chest armor looks slightly tilted. Not sure why that was but I’ll look into it. Circling back, I think all of these small changes lead to some big improvements. I still have a few things to tackle such as those side wings, some belt changes, a missing thigh cover strip, paint, etc. I'm pretty happy with this round. Let me know if you notice anything else that looks odd. -
James's Rogue One TK Build
jamesmillerio replied to jamesmillerio's topic in Rogue One Build Threads
Sorry, the lower black strip between your chest and back armor. -
James's Rogue One TK Build
jamesmillerio replied to jamesmillerio's topic in Rogue One Build Threads
Oh nice, that helps actually @TerribleBen. If I can ask, how did you attach your side wings and were they also ABS or something else? They look so uniform and well placed. -
James's Rogue One TK Build
jamesmillerio replied to jamesmillerio's topic in Rogue One Build Threads
@gmrhodes13 You mentioned the belt closure; in one of the pictures above it looks like it doesn't overlap at all (and only slightly in other pictures) but the CRL calls for the rear belt to overlap the front. I'm not sure how literal to be about that, just curious your opinion. -
James's Rogue One TK Build
jamesmillerio replied to jamesmillerio's topic in Rogue One Build Threads
Oh interesting! I was under the impression the shins were open in the back and velcro'd shut. That's an easy fix. The blue you saw on the belt is actually painters tape I forgot to remove after prepping for paint, hah! Nice catch. I'll swap out the straps for 2" ones once I paint it. -
James's Rogue One TK Build
jamesmillerio replied to jamesmillerio's topic in Rogue One Build Threads
Looking back at the pictures, one of the side black wings looks strange. I think I need to adjust how they attach to bring them in more and prevent them from overlapping the chest armor. -
James's Rogue One TK Build
jamesmillerio replied to jamesmillerio's topic in Rogue One Build Threads
I've had a lot of home projects that have kept me from working on my armor but I'm back in business now and making great progress. I put the armor on today after all of the adjustments I'd made. Here is a summary of adjustments since my last post: - Adjusted how and where the chest attaches to the abdomen in order to pull it into the right place. - Changed where the side black pieces attach to the chest. - Changed where my thighs attach. They used to hang off of a belt, now they are attached to the bottom of the abdomen. This feels much more secure and doesn't feel like it's drooping like it did with the belt. - Brought the butt up higher to align with the belt. I had my wife take some pictures while I had it on to figure out what needs further adjustment. Here is the list of things I know are wrong as well as things that need minor adjustments. - I did a lot of sanding so it needs paint bad. - I'm missing a cover strip on my thigh. I'll be printing one of those. - My back plate was misaligned. I just need a helper for that, it stayed in place fine. - I think my thighs need to drop an inch or two. They are being pulled up into the cod piece. Just need new straps here. - Need to fix my belt. It keeps detaching in the front. Over all though, I think I'm pretty close. I'm getting really excited to cross the finish line. Going to make some adjustments tonight and hopefully take some more pictures tomorrow. -
James's Rogue One TK Build
jamesmillerio replied to jamesmillerio's topic in Rogue One Build Threads
It's update time again. I usually take the week of my birthday off and next week is no exception. I'll be spending my time (mostly) sleeping and working on the fitment details of the armor to hopefully get it into a good shape for paint by the end of the week. My biggest issue right now, as pointed out by [mention]gmrhodes13 [/mention], is the gap between my chest plate and my abdomen. It's really pretty cavernous... I could probably hide an Ewok back there if I tried. But I digress... One of the issues I have is the black extension pieces on the sides for this kit have a pretty sharp almost 45° turn inwards, which is pushing the chest armor out on the sides. You can see that in the following pictures: I've never quite known why they were molded like that when all the other kits and gallery images I've seen has them basically flat against their sides and it acts strictly as a black connection piece between the chest and back armor. With that in mind, I took my heat gun to them and flattened them out and I think it's helping already. It's not perfect, but it's no longer adding more of a protrusion. After that what I think is happening now is the top center of my abdomen armor is pushing the bottom of my chest armor out some. I trimmed a little gap out of there, but I think I may have to trim a lot more. For obvious reasons I'm somewhat hesitant to do that for fear of cutting too much off, but I'm not sure there's a better option but I'm open to suggestions. Hopefully I’ll have a productive week coming up! -
James's Rogue One TK Build
jamesmillerio replied to jamesmillerio's topic in Rogue One Build Threads
Did I mention I have short legs? Haha. Sent from my iPhone using Tapatalk -
James's Rogue One TK Build
jamesmillerio replied to jamesmillerio's topic in Rogue One Build Threads
Actually, I just remembered I have a couple pictures from that time. None straight on, but you can see how high the abs were. The sweet spot must be in the middle somewhere. It does seem like that improved the rear gap between the butt and thigh though. Love the lollipop picture with my daughter also. Sent from my iPhone using Tapatalk -
James's Rogue One TK Build
jamesmillerio replied to jamesmillerio's topic in Rogue One Build Threads
Thanks! Not sure how I didn’t notice the huge gap on the chest wings. I’ve refrained from trimming my ab armor around the top but I have seen some troopers cut some out of the middle in the top so it’s not pushing out at the center point. I’ll try raising the armor before I do that though since that may bring everything flush. I usually criss-cross my suspenders for the ab armor but it seemed a little high the other day but maybe I was mistaken. I’ll give it another shot. Thanks again! Sent from my iPhone using Tapatalk -
James's Rogue One TK Build
jamesmillerio replied to jamesmillerio's topic in Rogue One Build Threads
Just got done wearing my armor for Halloween and I think things are improving. I may still need to shim one of the thighs but aside from aligning things and touching up paint I’m fairly happy. Open to critiques for sure. Sent from my iPhone using Tapatalk -
James's Rogue One TK Build
jamesmillerio replied to jamesmillerio's topic in Rogue One Build Threads
Oh that’s awesome, I’ll check that out. I tried just tightening things a lot more and it worked out better but having actual support is probably the way to go. Sent from my iPhone using Tapatalk -
James's Rogue One TK Build
jamesmillerio replied to jamesmillerio's topic in Rogue One Build Threads
I got a chance to wear my armor the other day to test everything out. I was able to take some great pictures but did find an issue I'm having problems solving... But first, here are the pictures: It felt awesome to finally get to wear the whole thing and I was really happy with how well its coming along and how great the pictures turned out. The one issue I'm having is with my thigh armor. As you can probably tell from the images, its hanging pretty low from my belt. Admittedly, the belt is slipping some so I need to maybe add some velcro to it to keep it snug, but even with it snug I can't get the thigh armor to go much higher. After having my wife look at how it fits in the back, in her words, "there's just too much you in there." Other than looking wrong, it also causes the sniper knee plate and ammo belt to catch on the thigh/shin and it makes walking difficult. It is also damaging the paint on each of the parts unfortunately... Also, because the thigh armor is so low, it causes the drop boxes to catch on the top of the thighs since they should be floating above them. All of that being said, my thighs and calves are fairly large from being a bigger guy (mostly) but also years of playing drums. I'm not sure if trimming them along the inside contour would give me some more room to move up more, or if I need to make some kind of shim for where they close in the back. Otherwise, I think I'm doing pretty well and I'm pretty close to submitting for approval. If you notice anything else, definitely let me know. Any advice would be greatly appreciated! -
James's Rogue One TK Build
jamesmillerio replied to jamesmillerio's topic in Rogue One Build Threads
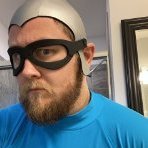
I've been doing a lot of work on the helmet and associated electronics over the past few months. I wound up buying the typical hearing and voice assist as well as an iComm. I like them, but getting them in my helmet felt a bit bulky to me. Since I've been doing some light electronics work on the side, I figured I'd see if I could piece together a simplified amplifier system. The following images are what I came up with using some simple amp breakouts and designing a PCB for them to mount to. This was from my first run of PCBs that I ordered to test out the design. There were a few things wrong with them, including the 3.5mm jacks being the wrong layout, but it mostly works. This combines voice assist, hearing assist, and fan control into one roughly 3"x3" PCB. I have some revisions I plan to make, which includes realigning the modules on the PCB so that it's longer than it is square such that it can fit in the helmet hump along the neck better. I also want to do away with the JST connectors and have them just connect to pads along the side of the PCB so that it's as flat as absolutely possible. In the meantime, I went ahead and molded the hearing assist mics into the ears of the helmet. I took some black ABS 3d printing filament I had and created some ABS paste so that the holes in the ears to accommodate the mics are basically invisible. Need to do some ear cleanup around that area, but I'm probably going to wind up repainting my helmet anyways so no big deal there. Anyways, I'm pretty excited about the electronics in the helmet. I also have some wireless Qi chargers that I plan to embed in the padding such that I can set the helmet on a stand and have it charge without having to plug anything in. You can see the beginning stages of that circuit below also. -
James's Rogue One TK Build
jamesmillerio replied to jamesmillerio's topic in Rogue One Build Threads
It's been a while and I've done quite a lot so an update is in order. My goal was to mostly finish, approvable softgoods aside, by Halloween. I believe I'm mostly there, the only thing left being paint and any final touches to fit and finish. I've been working on a ton of different projects, armor related and not, which have taken up a lot of my time. Here's a family picture of everything laid out. It has all been trimmed and sanded at this point. Ignore the state of the abdomen, I primed it to see where the imperfections were so it looks a little rough right now but is mostly ready for paint. Giving the upper body a try on before adjusting the shoulders and straps. One of the threads that was left unresolved in the older posts was the matter of the abdomen side stripe angles. I wound up cutting the abdomen up and reforming it. The angle I believe is much closer now to the original angle, or at least god I hope so... It was not a trivial thing to do. The way I approached it was to 3D print some ABS shims that I used to rejoin the armor together where I needed it to and then adjusted the angle of the stripes. I warn you, the images of the abdomen are pretty rough right now since I primed them a couple times in order to see where my imperfections were for sanding. They'll look a lot better once they get a few coats of paint on them. The last piece of trimming I need to do is to trim the sides on the top of the abdomen down some where the stripes end. Right now they just kind of stop and it looks pretty bad. I need to trim a scallop out of them and then they should look a lot better. I think I for sure bit off more than I could chew with cutting up the abdomen, but hopefully it'll pay off once I get some paint and the final trim on it. The trimming and rejoining did deform the abdomen a little bit near the seams since it added some rigidity where there wasn't any before, but when its being worn it looks a lot better and isn't noticeable. I did get a chance to try on the armor on July 4th. I walked around our neighborhood in it to see how things felt with how they were trimmed. Everything felt fine, save for the fitment of the helmet. I have some padding that I'm going to tweak to get things feeling more comfortable. I have some more updates about the helmet below that I'm pretty excited about. In the meantime, here are some pictures from July 4th when I got to walk around. -
James's Rogue One TK Build
jamesmillerio replied to jamesmillerio's topic in Rogue One Build Threads
It is pretty glossy, but when I first got the armor it already had some scrapes on the breastplate so my plan had always been to paint it anyways. -
James's Rogue One TK Build
jamesmillerio replied to jamesmillerio's topic in Rogue One Build Threads
That's not a bad idea either, I like that approach. I could probably just 3d print the shims since I have some white and black filament laying around. Speaking of 3d printing, I needed to make a bracket for the thermal detonator on the belt since the kit doesn't come with one. After looking around at source images, it looked pretty simple. It's essentially just a block with a cylinder indent cut out of it that the detonator sits in. The CRL says the mount needs all four sides to be self contained and to not have any clips or screws visible. I purchased some neodymium magnets for clamping snap plates while they cure and decided to embed one of those in the bracket and one in the thermal detonator so that it's attached pretty snug but can also be removed easily. This is what I came up with: [Link if the embed doesn't work] I'm pretty happy with how it came out. I realize it might be entirely possible that I need to make it permanently affixed in the future less it get ripped off somehow, but I'll deal with that when the time comes. It might actually be better to have it come off easier rather than get ripped off the belt (or the belt get ripped off) if it gets caught on something. -
James's Rogue One TK Build
jamesmillerio replied to jamesmillerio's topic in Rogue One Build Threads
I do actually. Here it is: Looks like it’s in the neighborhood of 85°. Not sure at what point I’m nitpicking but I think I want to make it more accurate. I’m working on fitting the upper body right now so that gives me some time to consider my options. Thanks for all the suggestions! -
James's Rogue One TK Build
jamesmillerio replied to jamesmillerio's topic in Rogue One Build Threads
Holy crap, that's awesome! That must have taken a lot of time. Thank you so much! I'll almost definitely wind up doing what you suggested. Luckily, the kidneys were molded as a half torso and the back where the trauma plate gets mounted has it's own almost half torso piece of ABS. I think between the two, I should have enough plastic to make those cuts and join everything back up as needed. Even if it's approvable, why go through all of this effort and miss the mark on that detail by that much... Thanks again! That definitely gives me some direction and some confidence that I'm on the right path. -
James's Rogue One TK Build
jamesmillerio replied to jamesmillerio's topic in Rogue One Build Threads
Honestly, I'm really not sure. I've been going back and forth over that same CRL image and the reference images and haven't been 100% on any decision I've made in that area to be frank. The most unobstructed image I've found in the gallery is this one: It looks like the stripe is directly next to the raised strip, but in the CRL image it looks like there's some distance there but as you said, it's kind of hard to make out where it ends... The side of my armor looks like this right now, though I haven't trimmed or really done anything with it since I joined the two so it doesn't look great right now: I'm not sure exactly what to do because that diagonal raised strip doesn't look like the same angle as the CRL image or the gallery image... I'm half tempted to chop it off and use the kidney edge to create my own edge (on top of the ab armor) and then paint a black stripe on it further to the right at that 70° angle. I don't know, I'm torn. I'm open to any and all opinions before I make a rash decision and chop that strip off... -
James's Rogue One TK Build
jamesmillerio replied to jamesmillerio's topic in Rogue One Build Threads
Thanks for all of the kind words everyone! It's definitely time for another update. I've gotten a ton done, even though maybe it doesn't seem like it from the pictures. Made a lot of mistakes, fixed them, moved on, the usual. I've been focusing on the upper body, abdomen, and the helmet when I have any down time for more sanding. Looking around at other threads and reference images, I originally decided to attach the kidneys to the abdomen using snaps. This was a bad idea and looked terrible when attached due to the huge gaps between the two. This is how they were originally attached: After a test fit and realizing how terrible it looked, I was very thankful I took everyone's advice and used E6000 instead of CA glue everywhere... My main goal with the abdomen (besides accuracy) was to make sure it was adjustable. However, I was trying to make it adjustable in too many places. I eventually settled on just making the back where it connects adjustable, which means I could just glue the abdomen and kidney's together so that it's just a plastic seam that will be hidden mostly. I decided to make the seam the outside edge of the black line that has to run down the kidneys so that it would just look like part of the armor after I trim it. This is how it turned out, pre-trim and fitting. From this angle it looks like there is a lot of excess near the top and that's because, well, there is. I'm going to have to trim that down anyways though so it'll eventually be flush. Here is a side profile of it. You can see I tried to make the edge of the seam where the black stripe should be so it'll blend in. I also started doing some rough strapping and fitting with the help of my wife. These are some of the preliminary straps I've added to the chest and back. I'm going with the double snap system I've seen a lot of people use. I may add some straps across my shoulders also to keep things in place, but we'll see. Keeping it simple right now until I see how things wind up. This is the chest, back, and abdomen attached before I put on the kidneys. The abdomen may need to come up some, but it's sitting basically right at my waistline so we'll see once everything is in place. Since that picture, I've also done a lot of prep work on the helmet. It was resin cast, so there were a lot of imperfections. The main problem was the seam where the two halves of the mold go together, which went straight down the face of the helmet and across the vocoder, which isn't the easiest thing to sand and finish. I'm still working on getting everything baby smooth but this is where I stand right now. Still a lot of work to go, but I'm getting there. I've also been working on the forearms and biceps. I made a mistake at first with my choice of cover strips, which I had to eventually remove once I realized the ones I put on were most likely for the legs. This is how they looked initially before I removed them. I was pretty unhappy with how these looked due to how I had to round the edge at the top and how square they were at the front. It looked... bad. I removed them though and I currently have cover strips curing that look a lot better, though you can't really tell from this image. I'm not sure I used enough clamps on these... I also trimmed and have put the first cover strips on the biceps. Lastly, I made some progress with the thermal detonator. I have the paint drying now, but this is how it looked prior to paint. I still need to fill in the oval greeblie on the right, but otherwise I'm pretty happy with where it is. Also, these helmets are creepy without lenses... Making good progress and learning a lot though. Now I just need to get some of my soft goods in line while I work. More to come! -
Hello everyone! I'd been interested in joining the 501st for quite some time and finally pulled the trigger in January of this year with a set of 850 Armorworks Rogue One armor. I had seen one of your Boys in Blue White a year prior at the movie theatre when The Rise of Skywalker was released. After getting a picture and mentioning that I was interested in joining, @wingnut65 gave me his trading card. That card was on my refrigerator for the year as other home projects during Covid were getting done. And then, as I mentioned, in January of this year I finally put my money where my vocoder was. The armor arrived a couple weeks ago and I've already done some rough cutting work (and already made a couple requisite mistakes...) as I wait for some of my initial softgoods to arrive so I can get a better fit before cleaning everything up. But who are we kidding, enough talk. You all want pictures. This was the day the armor arrived, in all of its uncut glory. Since then, I've been slowly trimming the armor with lexan scissors and a Dremel, being careful to leave enough excess material. You know, except for that one time I trimmed all the excess off of one side of a thigh piece... But I digress. Here is where I stand now: A lot of the excess ABS has been trimmed and I cut the eyes and teeth out of the helmet so I could actually see what its like on my massive head. The helmet has a lot of work to go. In addition to all of that, over the past year I got into 3d printing. My first big project was to print my blaster using Blaster Master's plans. It's not exactly Rogue One accurate since it needs the added tactical flashlight, but it was 95% of the way there. I got lucky and happened across Droid Division's plans for the tactical flashlight. These are awesome plans that allow you to insert a smaller flashlight into the printed one so that it's both accurate and functional. I believe there's still some work to make it Rogue One accurate, but I'm mostly there. That's it for now. I have some preliminary softgoods and strapping showing up this weekend that I can use to start getting things fitted correctly and then any final trims before embarking on paint and detailing. Oh, and before I forget, if you've ever wondered what an expecting stormtrooper looks like, well now you know. More to come!
