

RickyBoyBlue
-
Posts
164 -
Joined
-
Last visited
Content Type
Profiles
Forums
Gallery
Articles
Media Demo
Posts posted by RickyBoyBlue
-
-
Congrats AJ! Go get that Centurion certification, brother!
-
 1
1
-
-
Whatttt????? Thank you!!!!! A wonderful way to start the day. EIB approval early in the morning!
Thank you Tony and Andrew for your time. And please do know that improvements are already well under way.
It was truly a fun but tedious process. Words escape me right now, so may I just share some pictures to illustrate how happy and grateful I am right now...

-
2
-
-
Good luck brother!
-
1
-
-
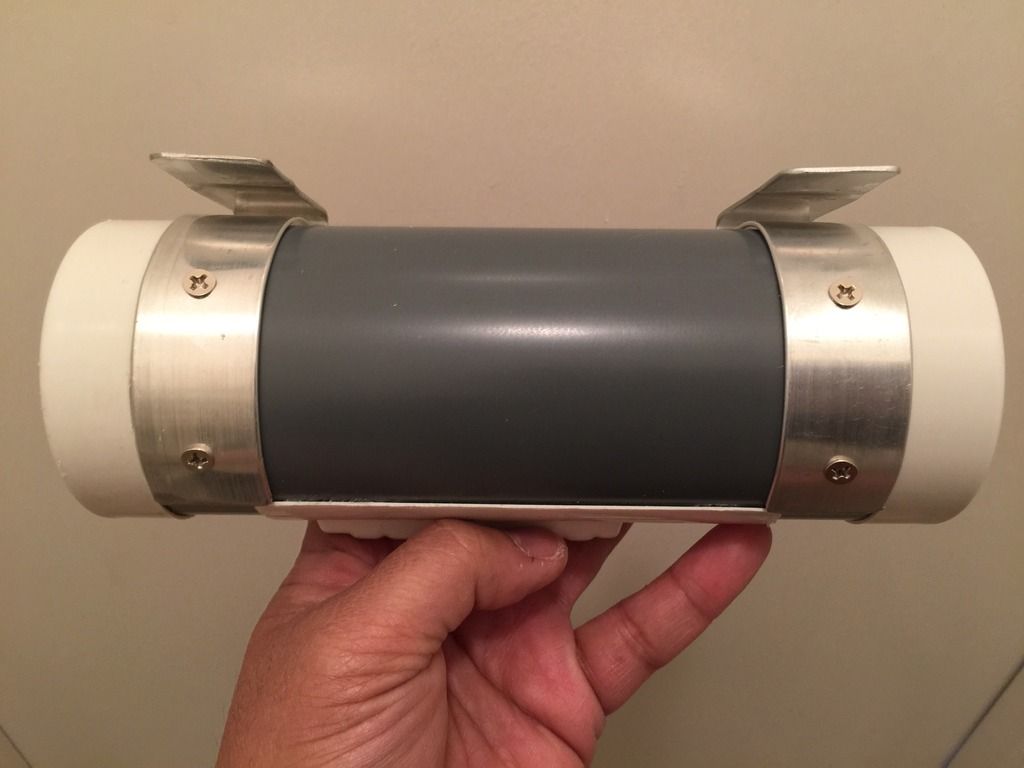
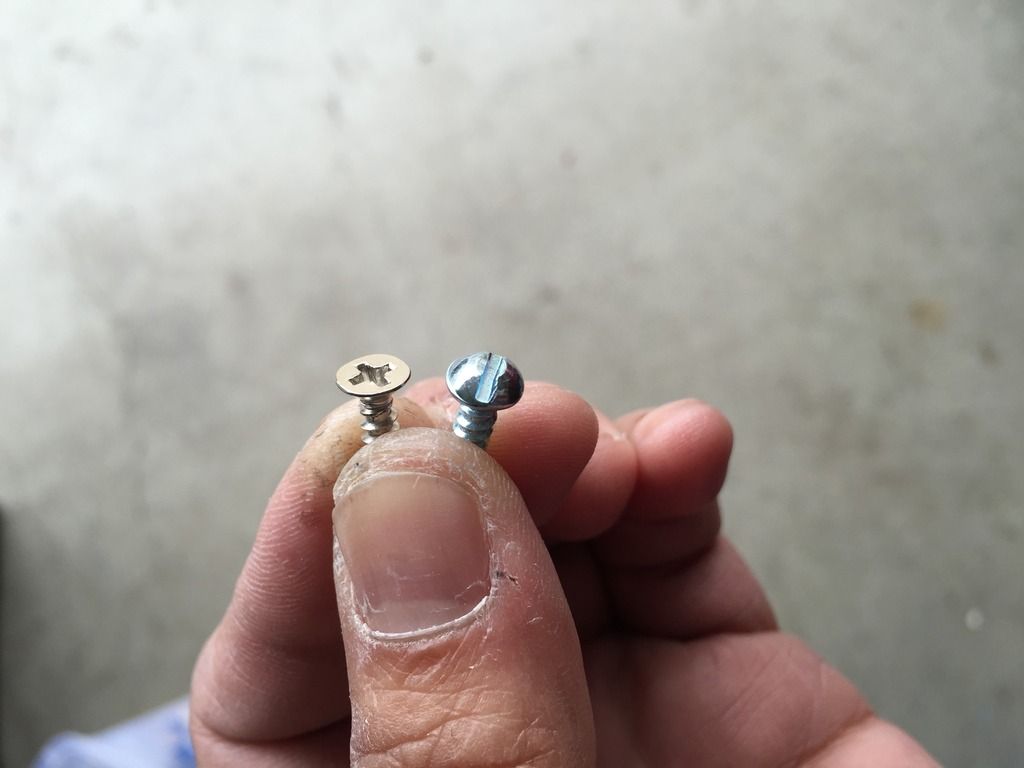
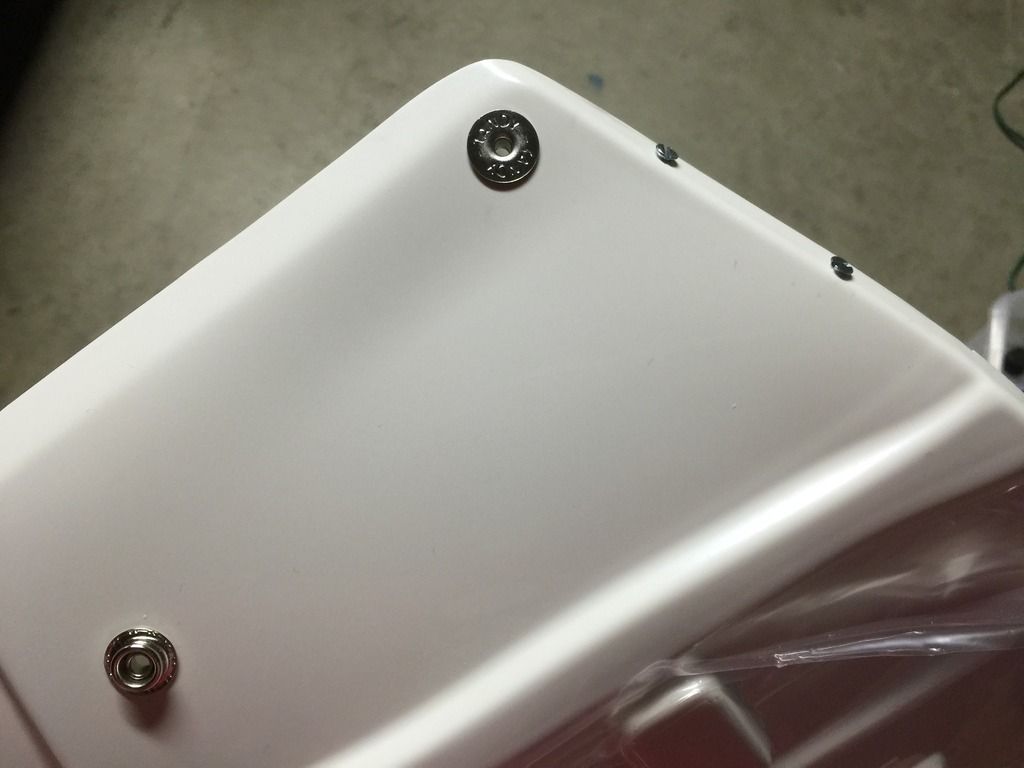
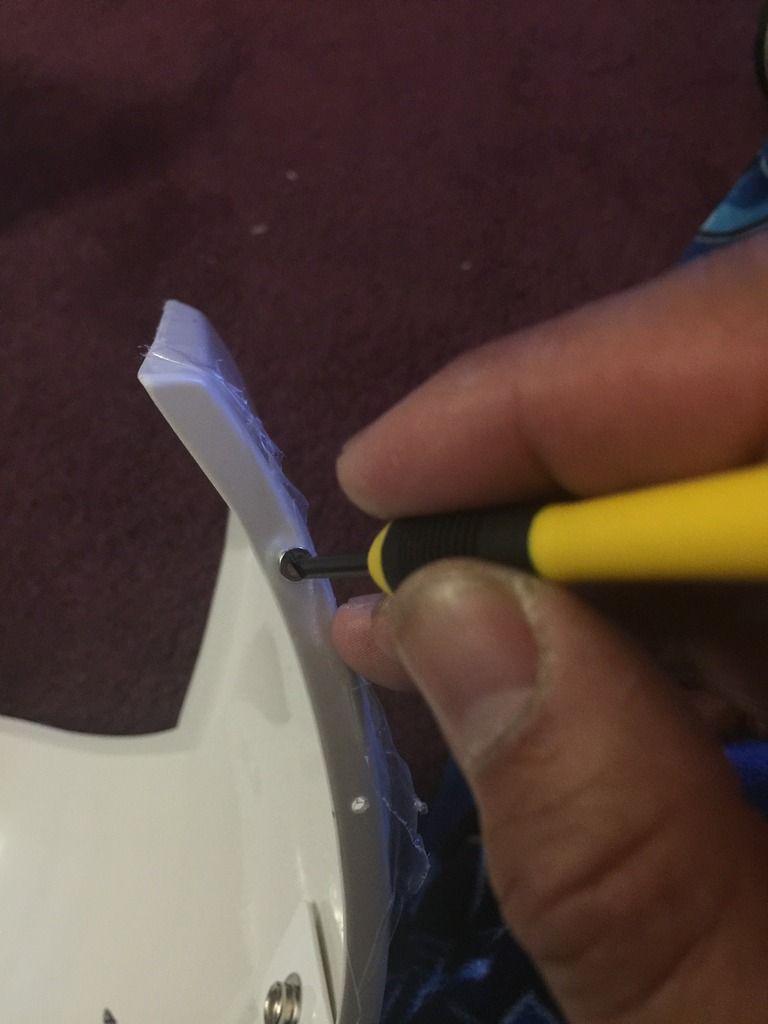
I installed my #6-32 screws yesterday after painting them white, and they look excellent. Thanks for the info and doing the trial and error of finding the right ones!
I ended up getting the 6/32s as well. Looked nice!
-
Cool looking armor with matching awesome backdrop.
Good luck, brother!
-
1
-
-
Great write up. Thanks for posting. Very encouraging to read the journey of a fellow newbie...well, now you're on the other side of the line, so congrats! I'll catch up, eventually!
Thanks for the note, Robert. Appreciate it. What stage are you in right now? Feel free to reach out to me or any of the nice folks around here for any suggestions or even a bit of encouragement when you hit some low moments in your journey.
With so much help available at your disposal, you'd soon realize that this "side of the line" is not that hard to reach, you'd realize it is not that far after all.
Good luck!
-
1
-
-
Congratulations to the team who worked on this! Beautiful!<br><br>
Congratulations Omar!!! On to the next level!
-
1
-
-
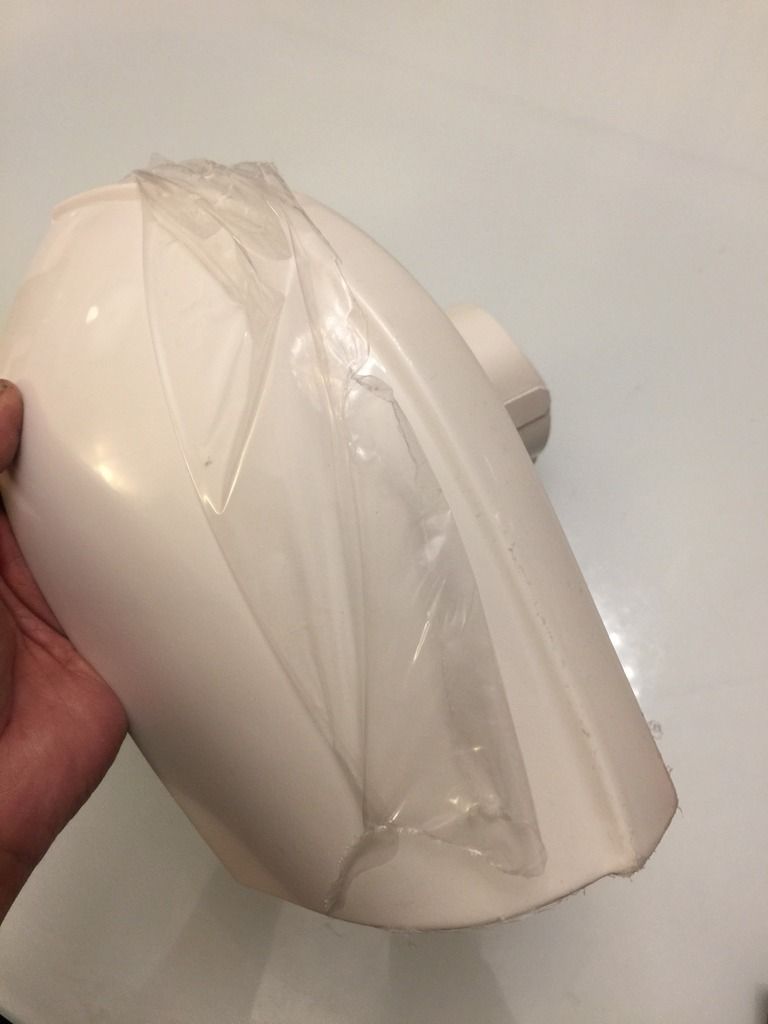
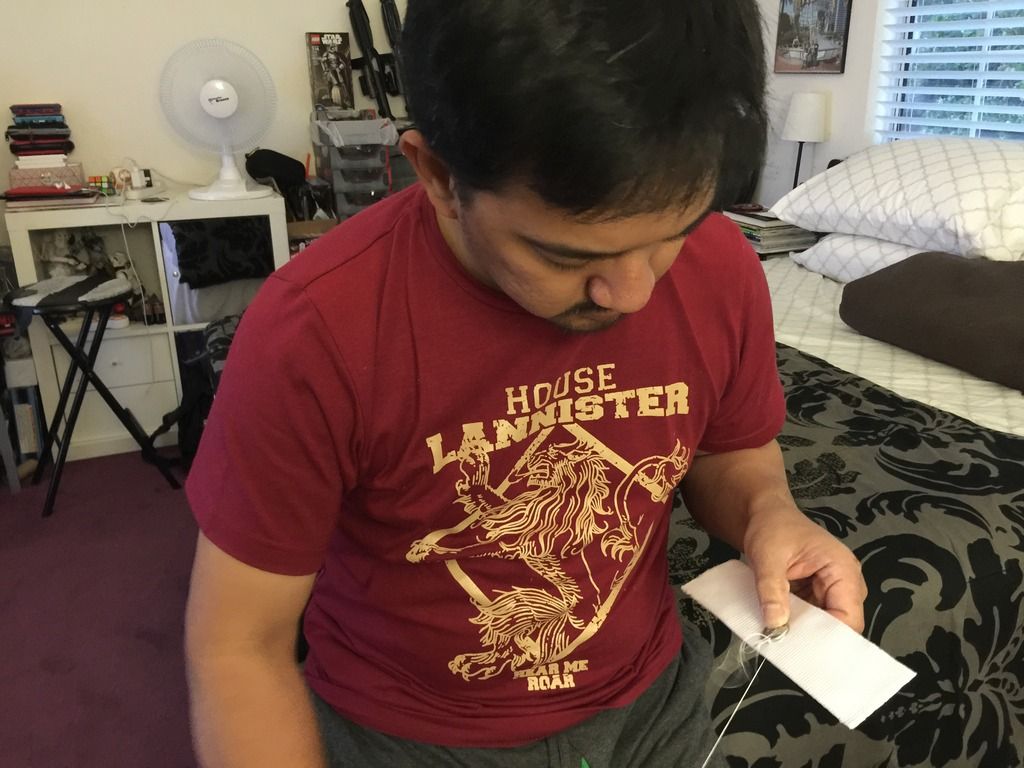
Dear Messrs. Tony and Sly:
Please know that immediately after my photo session was done, and after I took off my armor, I realized I left off painting the thigh ammo pack rivets.
Realizing this, I did so and took pictures at the same time the photo session happened.


For your kind consideration.
Thanks.
-
2
-
-
Congrats! Very nice. I hope to do the same later this year. I'm sufficiently intimidated by the process already.
Hey David, as any newbie who started on this thing, I guess intimidation is really part of the beginning process. Embrace it as most of us did. I know I did.
Take confidence in the fact that a lot of kind people are in this board who are ever so willing to lend any would-be-Trooper a hand.
That got me through everything.
Good luck on your build, and don't be a stranger bud!
-
1
-
-
Looking forward to it, sir!Nice build brother, we will be with you as soon as we can.
Sent from my iPad using Tapatalk
-
Good luck with your build, Ahmad. Have fun on this wonderful journey!
-
I'd follow Terry's advice above, except that I'd personally start with trimming the tops of the thighs for a better fit, and look at the half moon cuts in the back afterwards, should you still need just a little bit more room for mobility.<br><br>
There are multiple ways to gain mobility, ultimately it will come down to fit when wearing the armor, and personal preference.
Hi Kevin,
If it's any consolation, I'm significantly shorter than you are. Waaayyy shorter.
And in my application photos, I didn't have to mod the back of my thighs and leg parts. I agree with Tim, start with trimming the tops first to conform to the length (and width) of your thighs.
I have a friend who got a bit concerned with mobility, he cut the back so much that he was not approved by his garrison. Good thing he knew someone who decided to sell his Anovos kit.
Those are the only adjustments I had to make up to this point...
As for mobility, movement is not at all dramatically restricted. I can walk fine (though I would need to break this in eventually for longer walks and trips up and down the stairs).
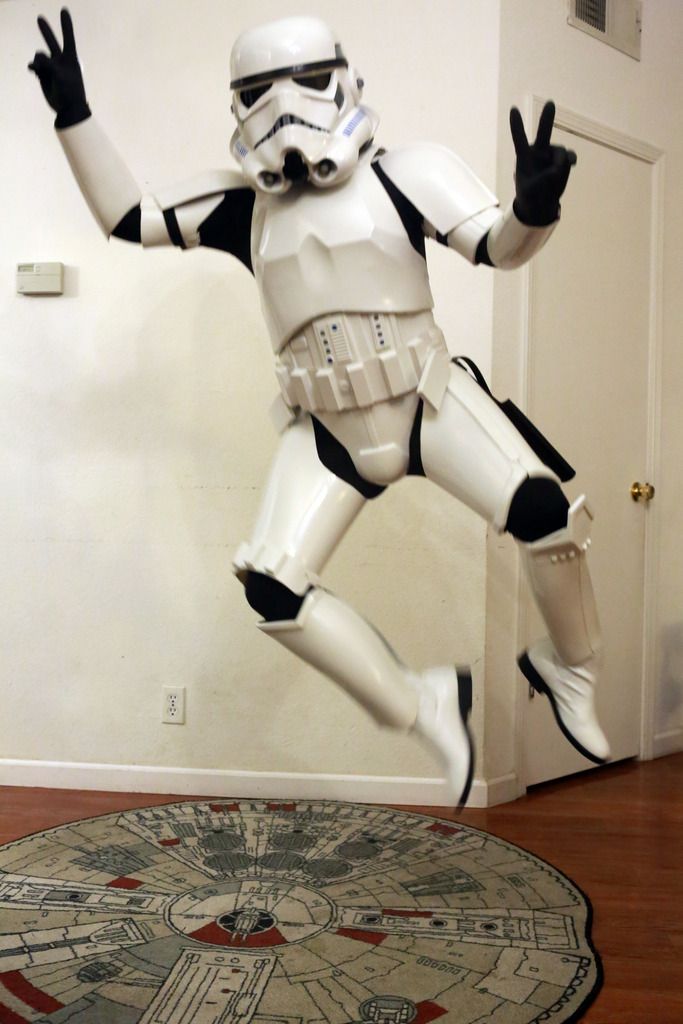
If you need some proof
Here's a demonstration in mobility...

-
Like a (would-be) Trooper on a crazy, unstoppable mission...
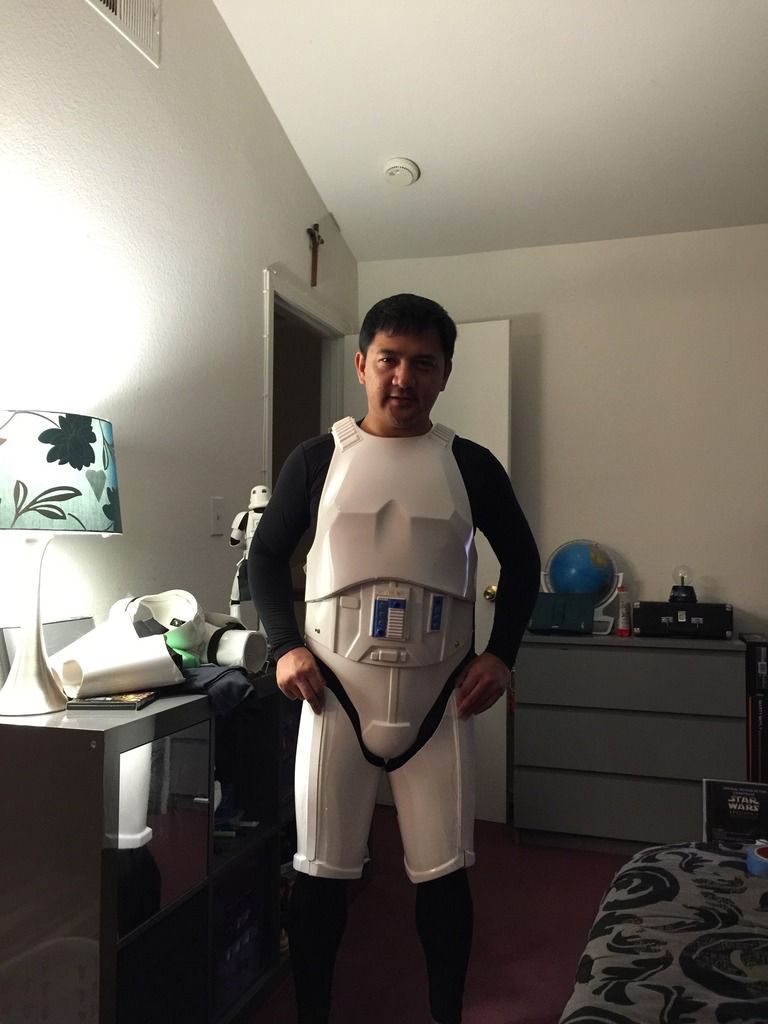
03.31.16: Did a late-night pictorial (again, thanks to the wife) and submitted the application at about 2am.
By April 1st I got the confirmation receipt from the Golden Gate Garrison and by the day's end, received my approval.
On April 2, the Legion confirmed my TK-ID.
This is certainly one of my sweetest experiences of achieving something. For sure this build is not done as a lot of improvements have yet to be implemented.
But imagine this... A SMALL TROOPER MAKING IT TO THE BIG LEAGUES OF THE 501st LEGION!
I'm sending positive vibes to my TK contemporaries who were in the same journey and to those who have yet to complete theirs.
TK-74259 (TK-RICKY) will always be here in case I have something to share with you.
Cheers my brothers and sisters in armor!!!
-
2
-
-
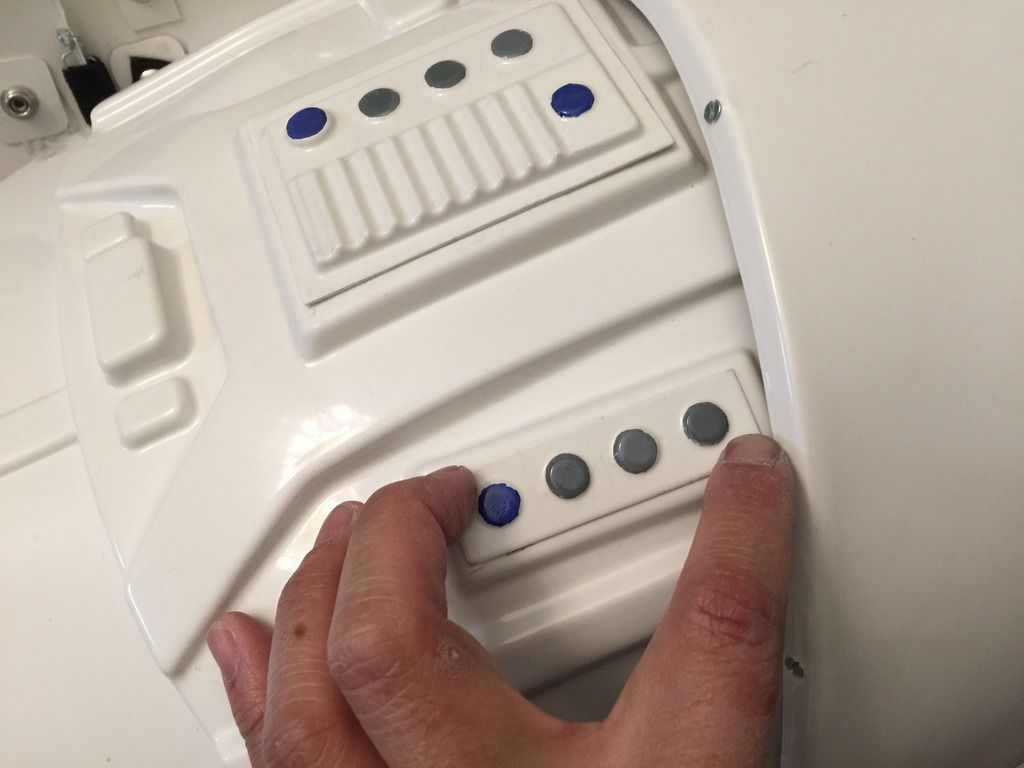
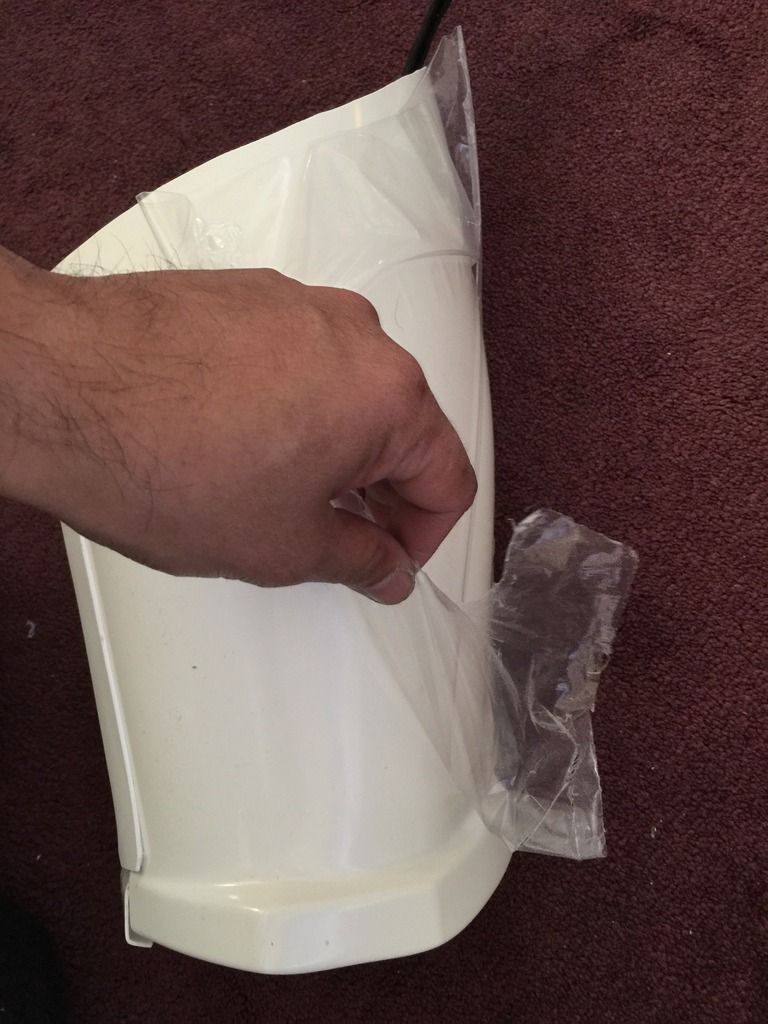
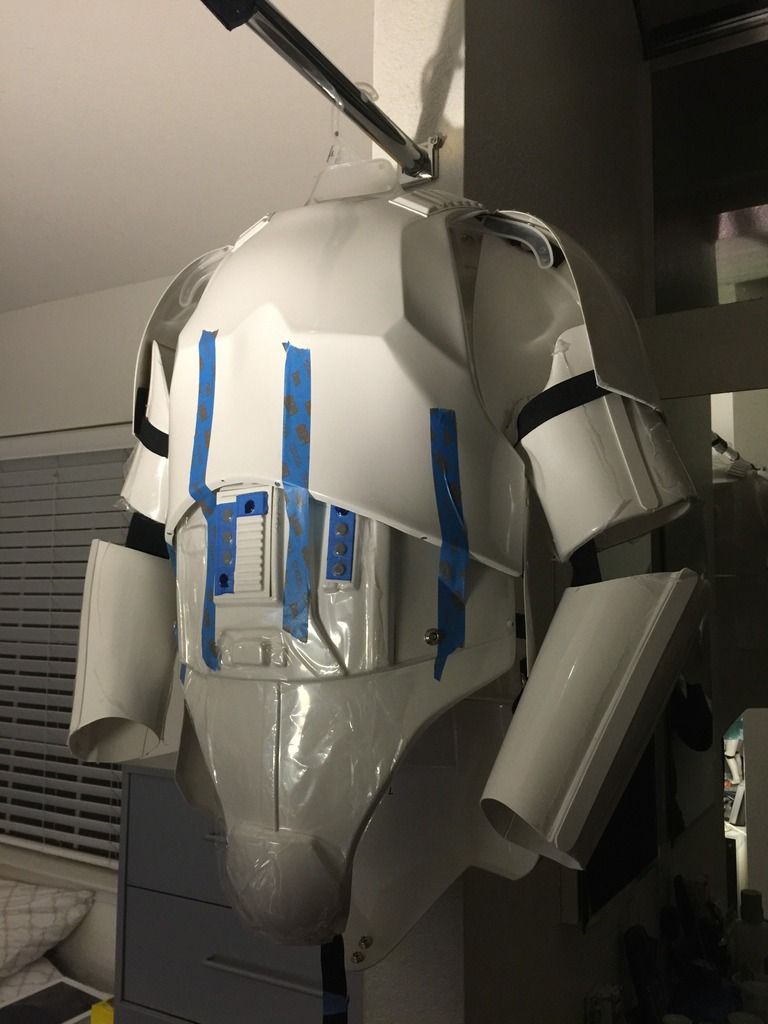
FINAL TOUCHES:
03.31.16 -- Two more things left to do before the submission: Install the ab buttons, remove the remaining plastic cover, and do a bit of polishing.
-
1
-
-
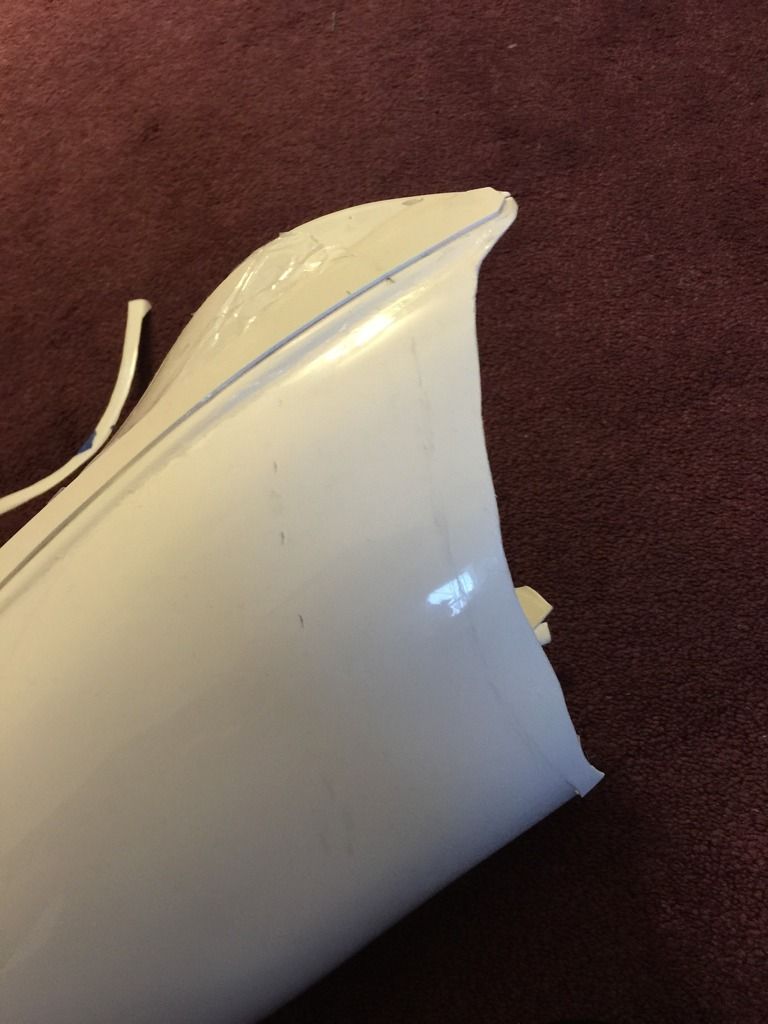
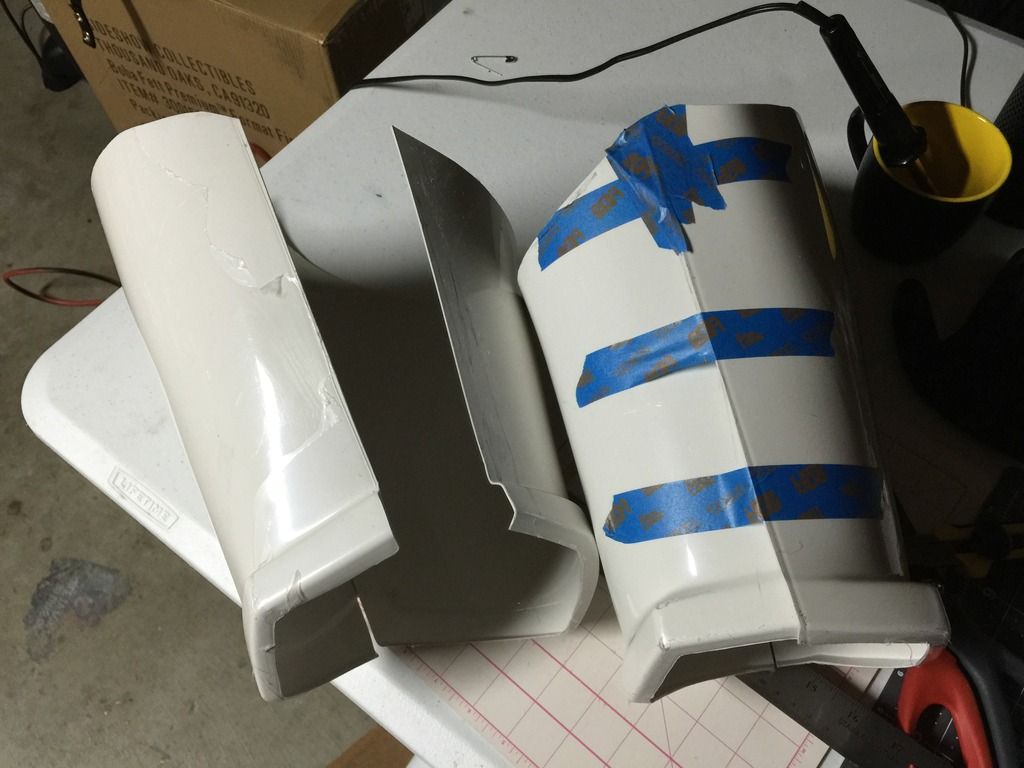
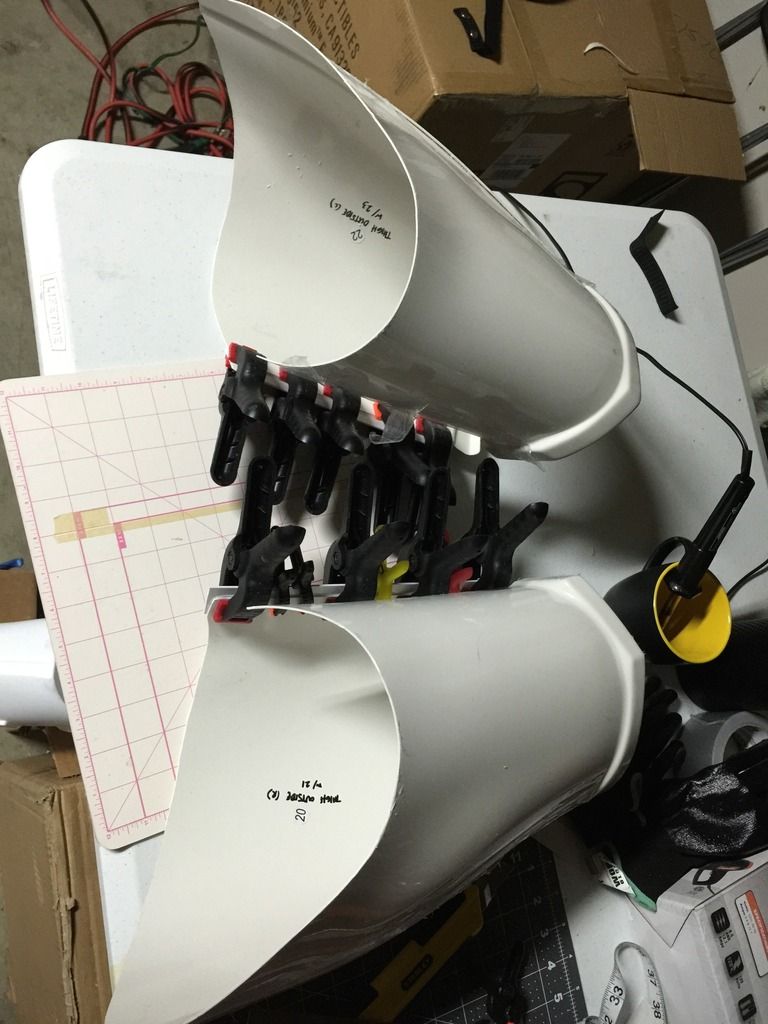
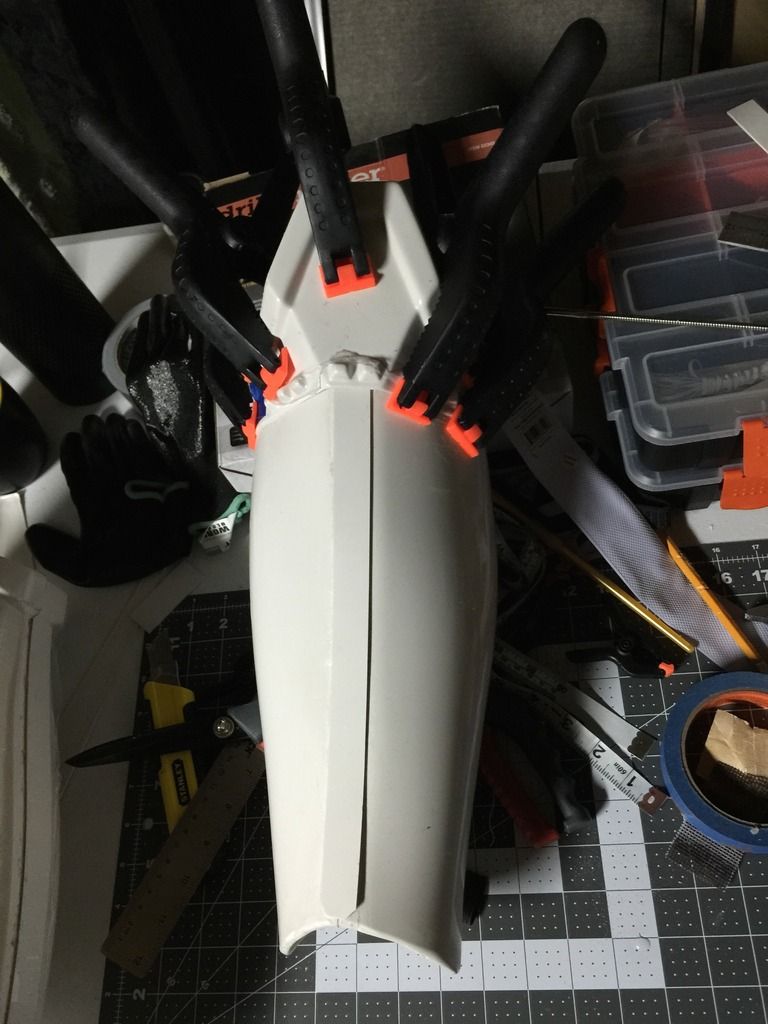
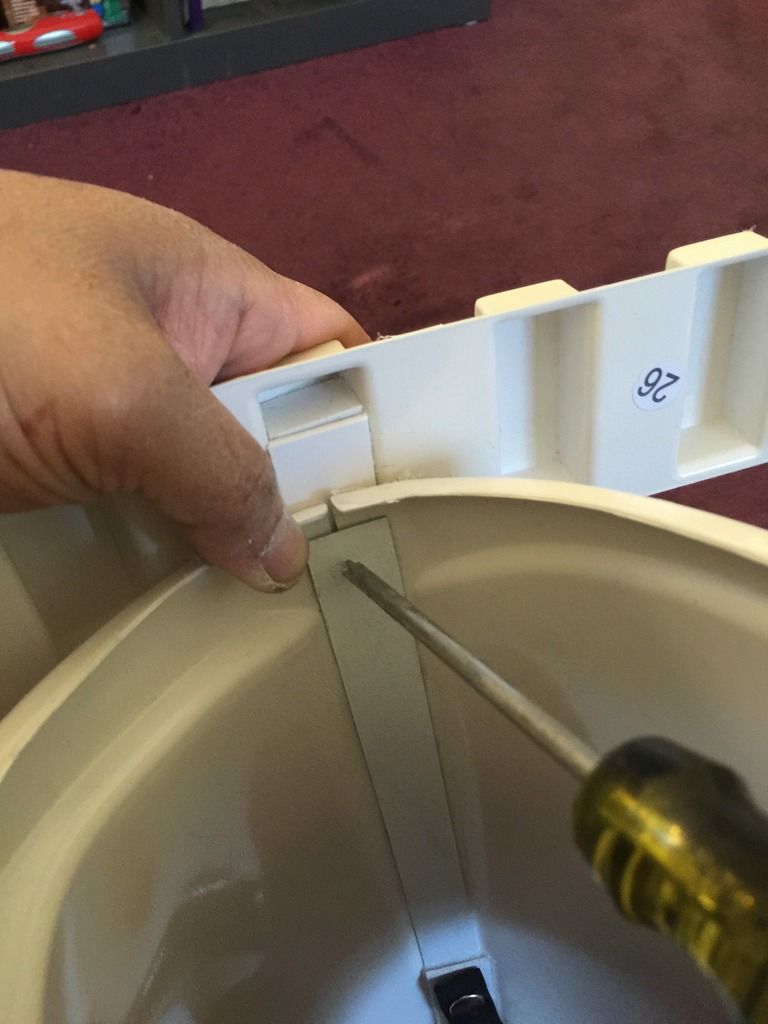
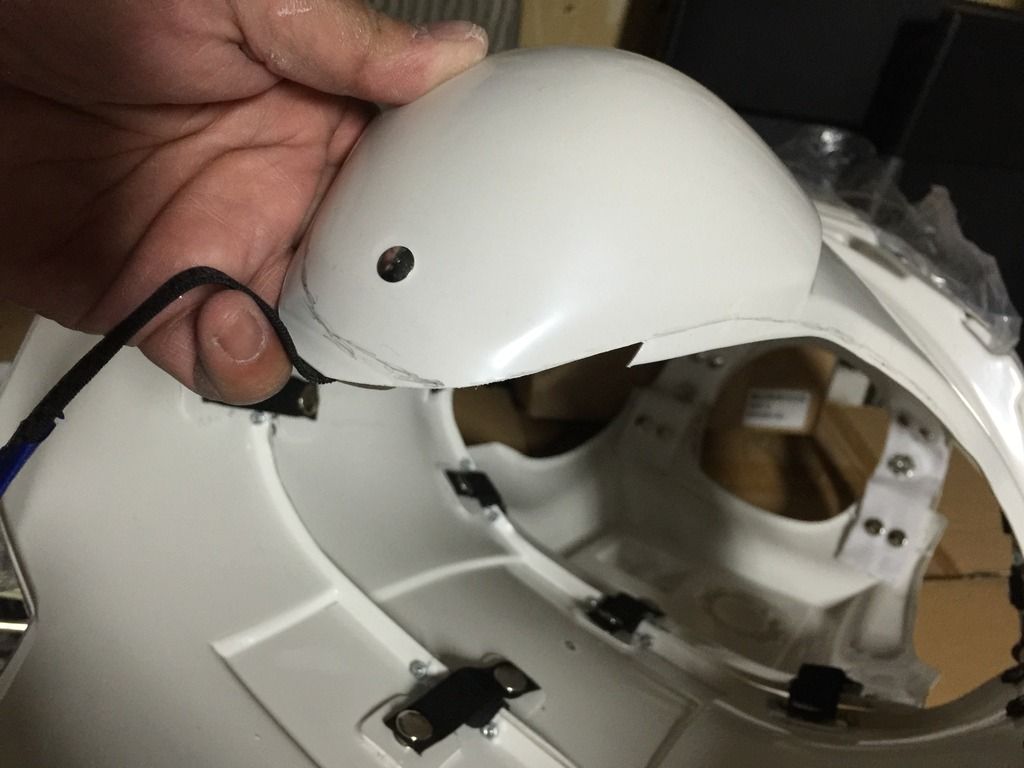
LATE NIGHT EMERGENCY SURGERY AT WALTER'S WORKSHOP...
03.30.16: Haribon72, sensing my frustrations with the shins, offered a bit of his work-week late-evening time.
At this point, I stepped aside and allowed the master-builder improve the mistakes I've done to the shins and allowed him to proceed with the fix.
This was a 3-hour emergency surgery that lasted til about almost 1am...
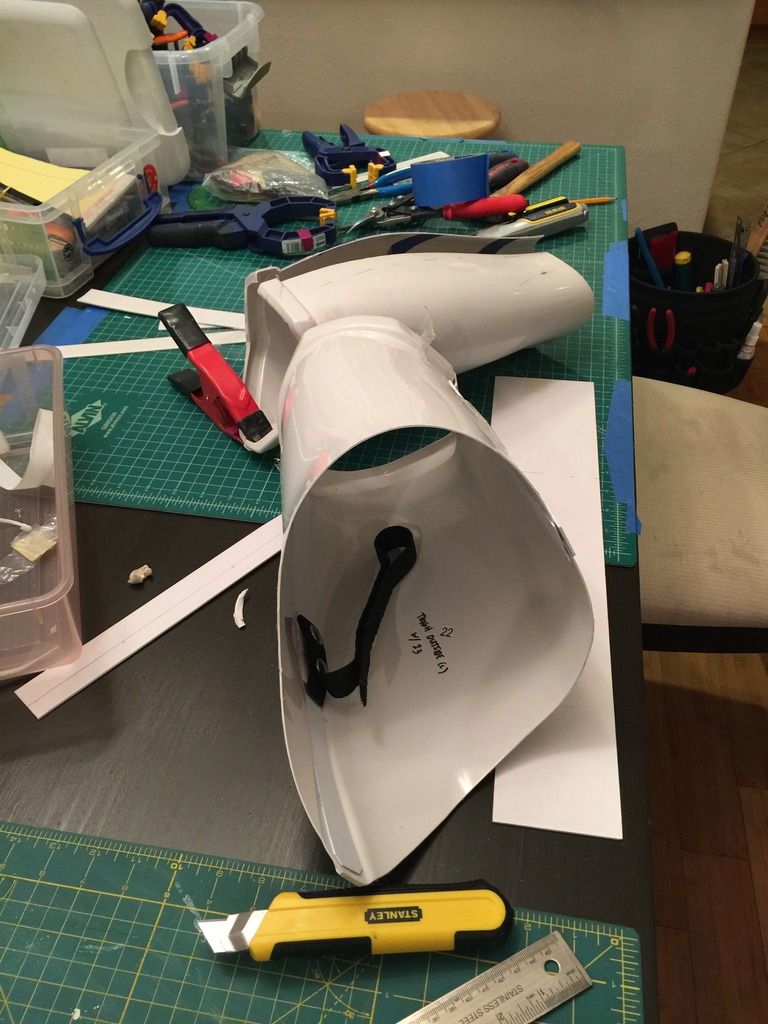
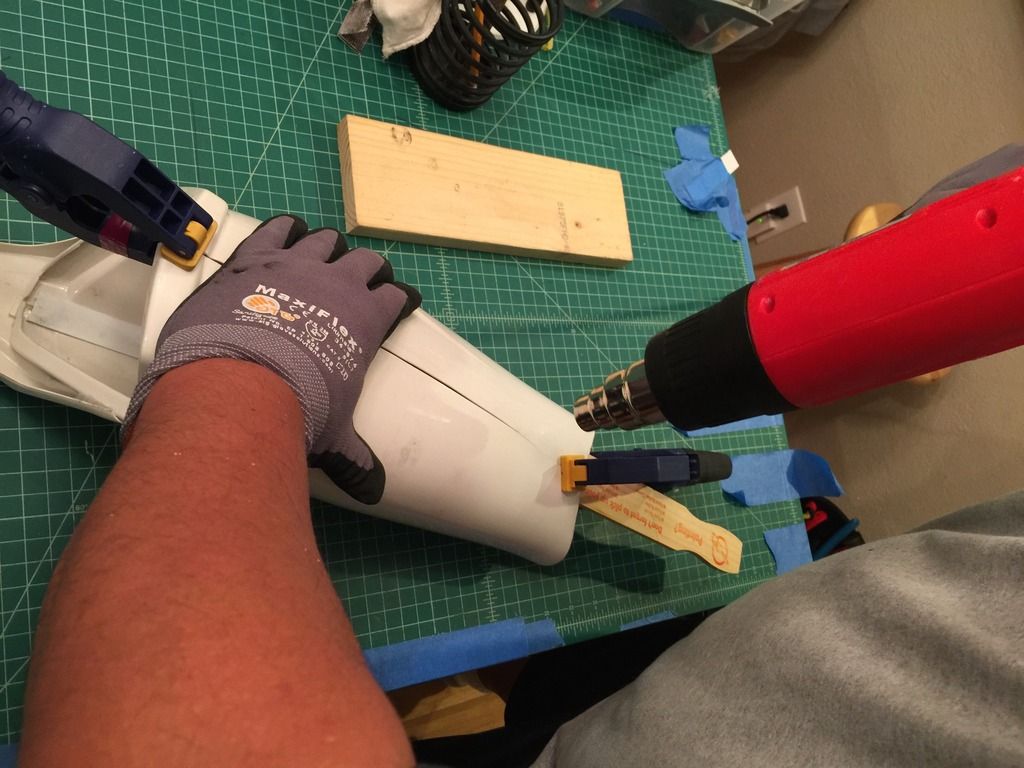
He even spotted some crooked ABS strip install. Eventually corrected it!

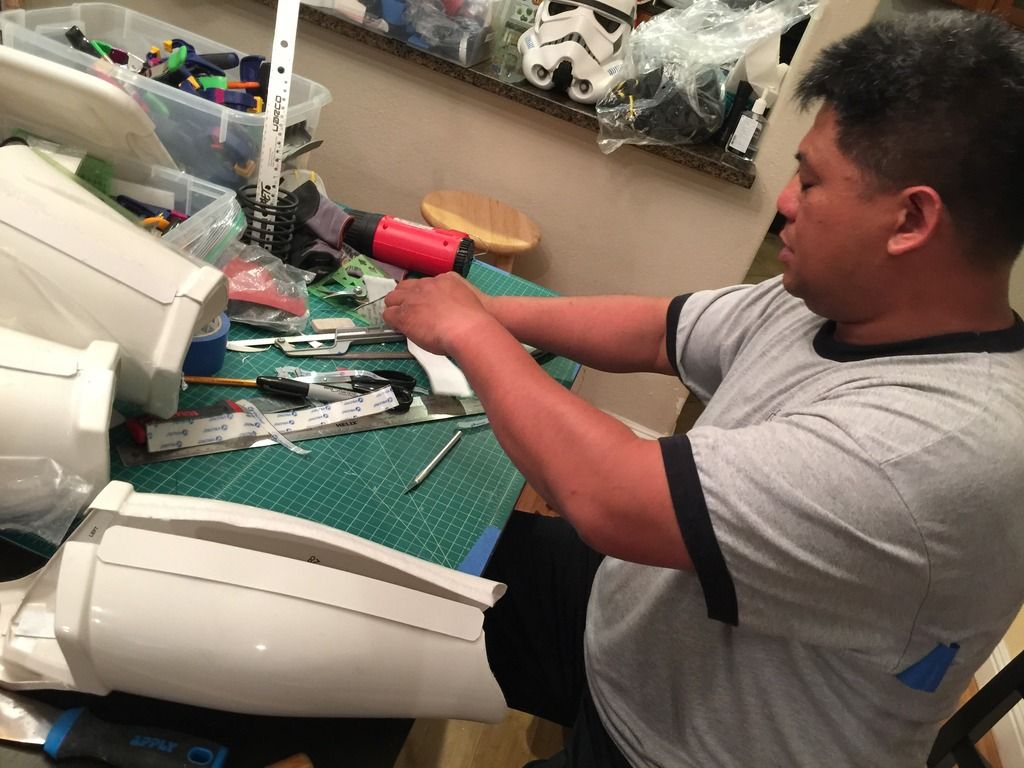

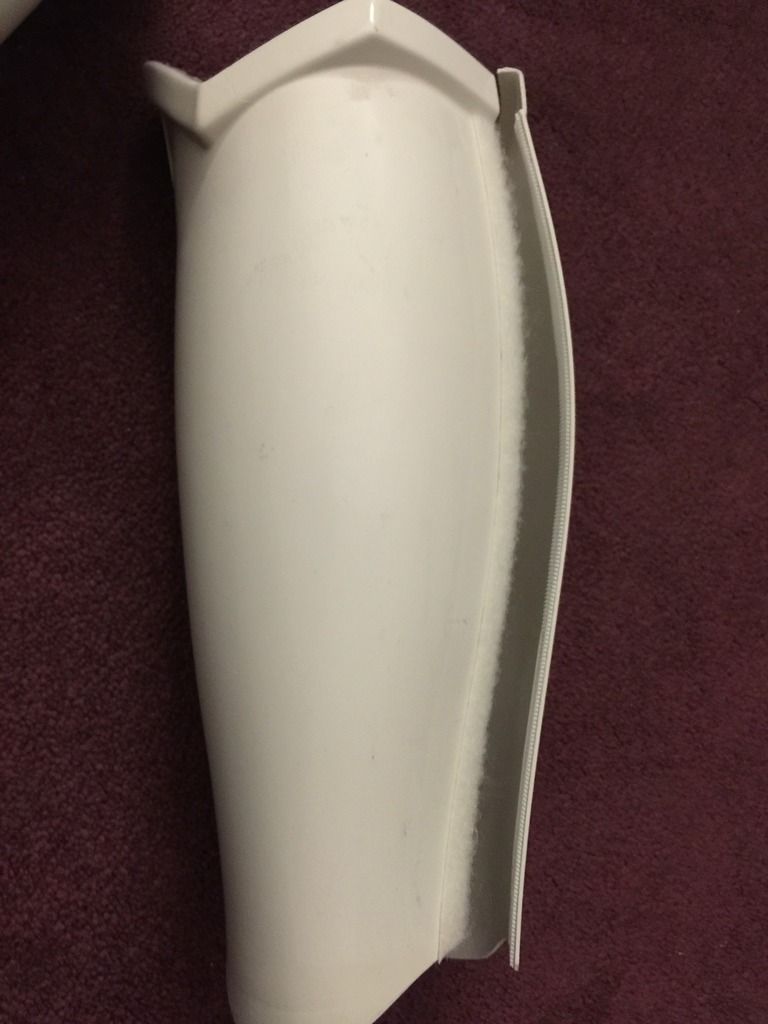
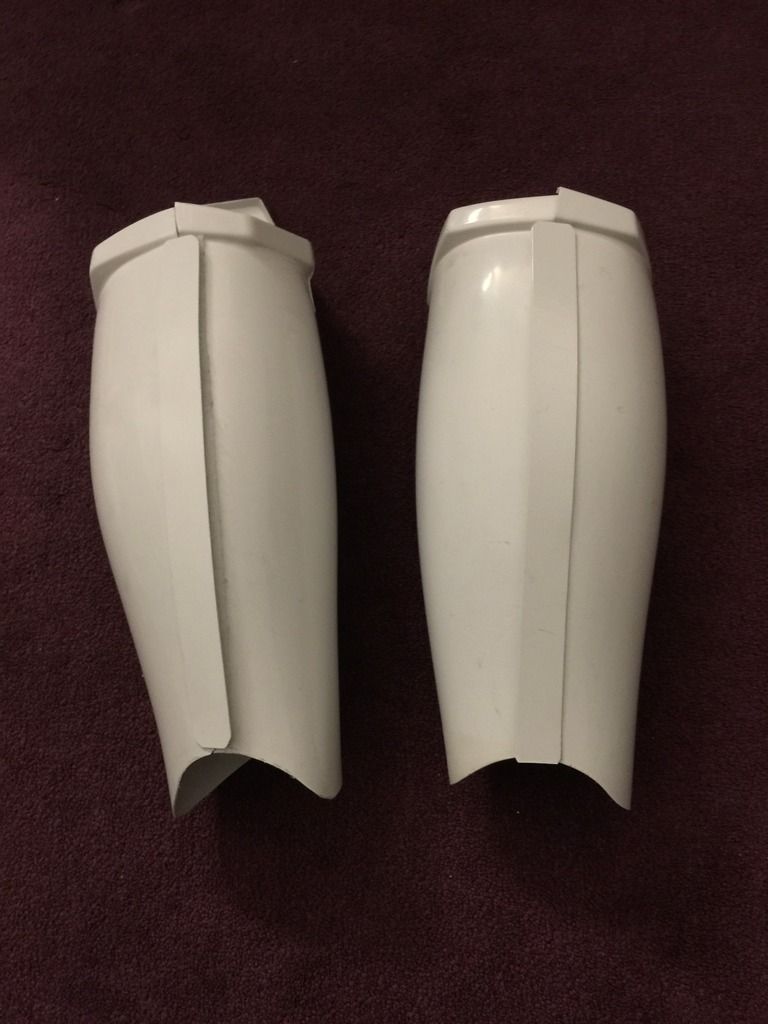
At home, about almost 2am. Shins turned out as best as it could be. Beautiful!
At that point, the build was practically done!!!
-
1
-
-
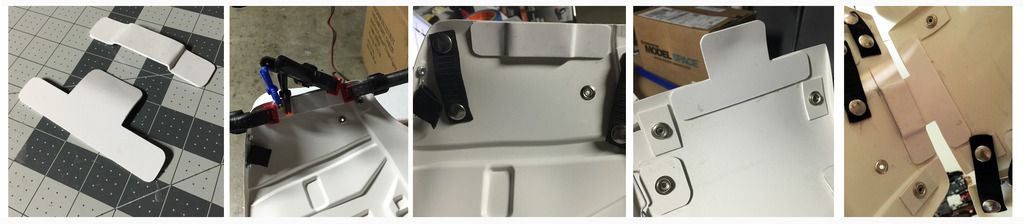
THE HOME STRETCH - Weak knees? Weakness!
It's the thighs and the knees that scare me the most in this build. For some reasons, I'm perplexed with properly measuring them and simply messing it beyond repair.
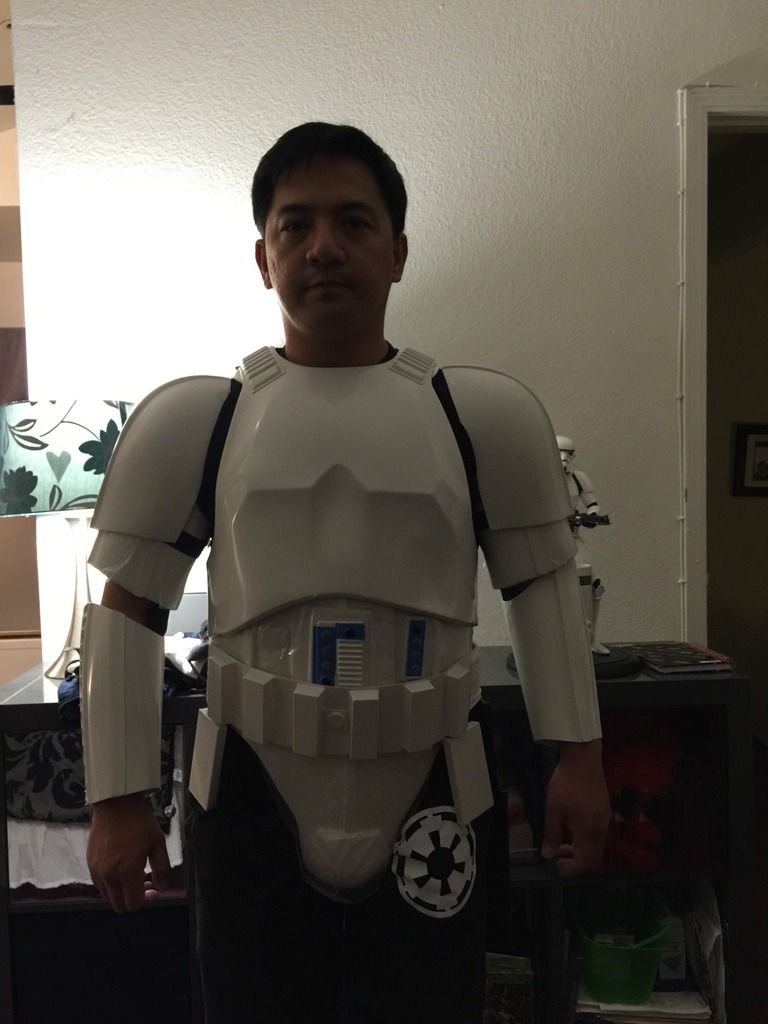
03.25.16: Summoned up all my strength and courage. With a whole lot of help from the wife, got the thighs to work...
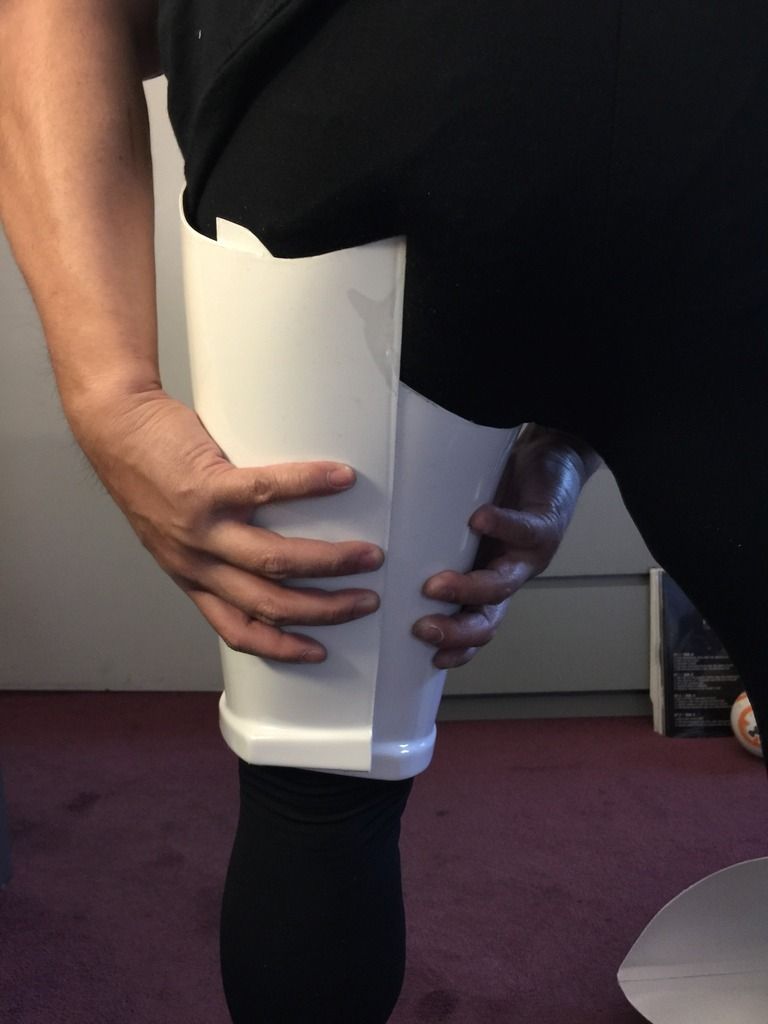
I committed the sniper knee to the "proper leg" (harkens back to the "shinanigans" issue of the shin-gate)
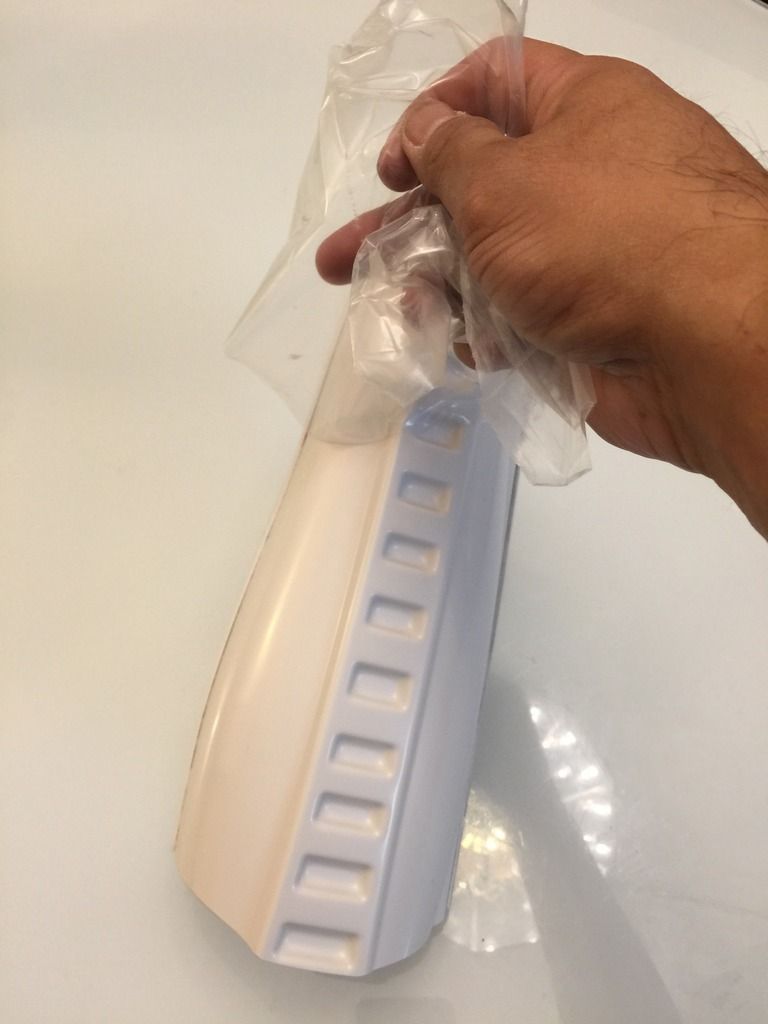
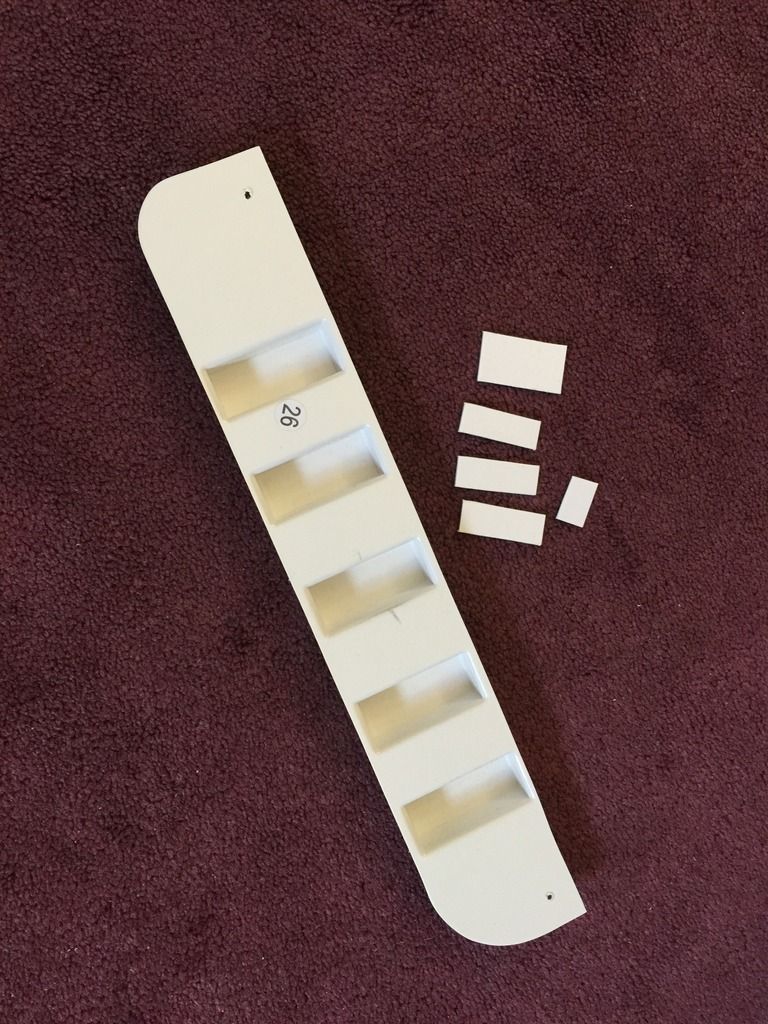
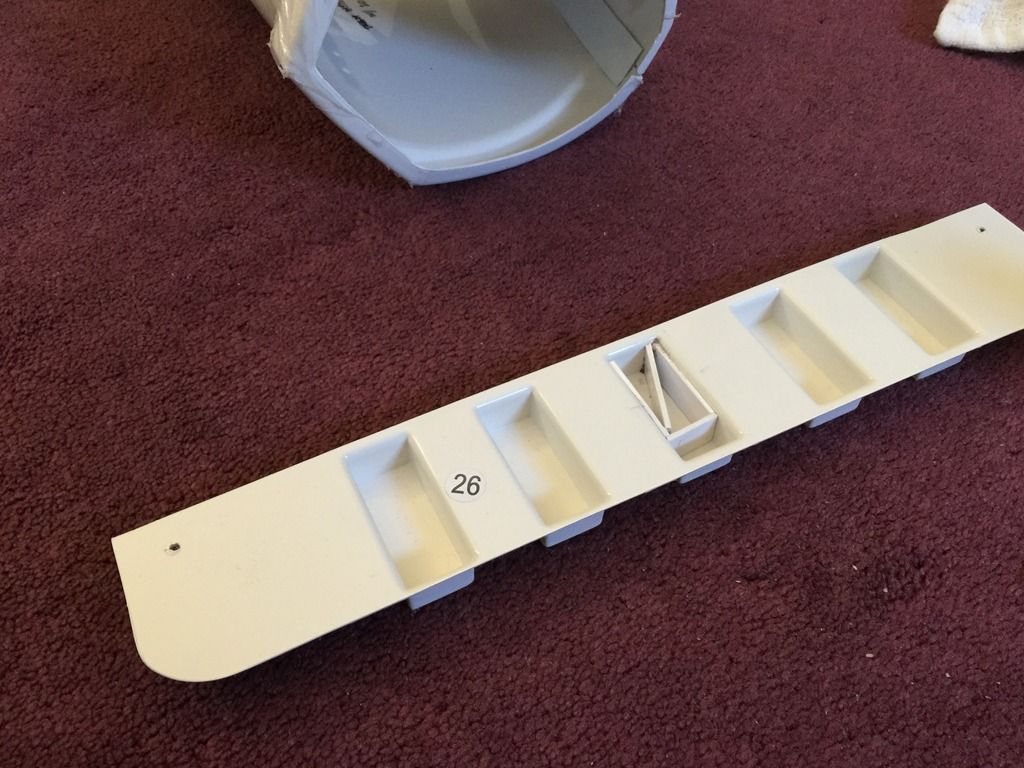
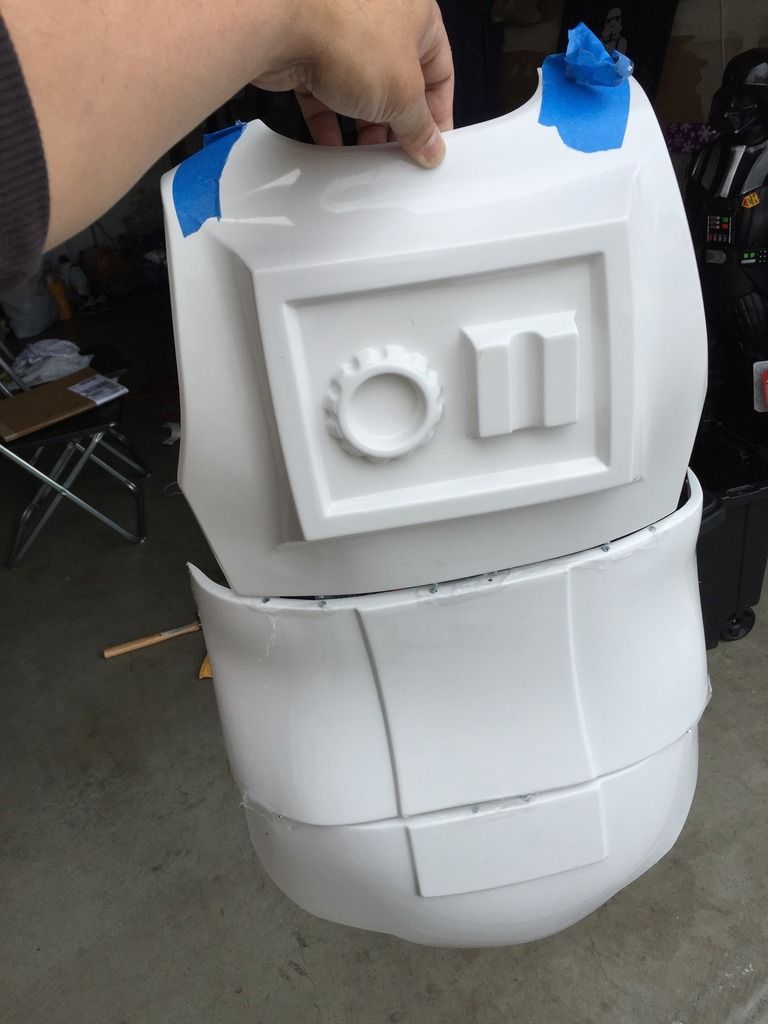
03.29.16: And installed "Walter's Pill Box" for the thigh ammo pack
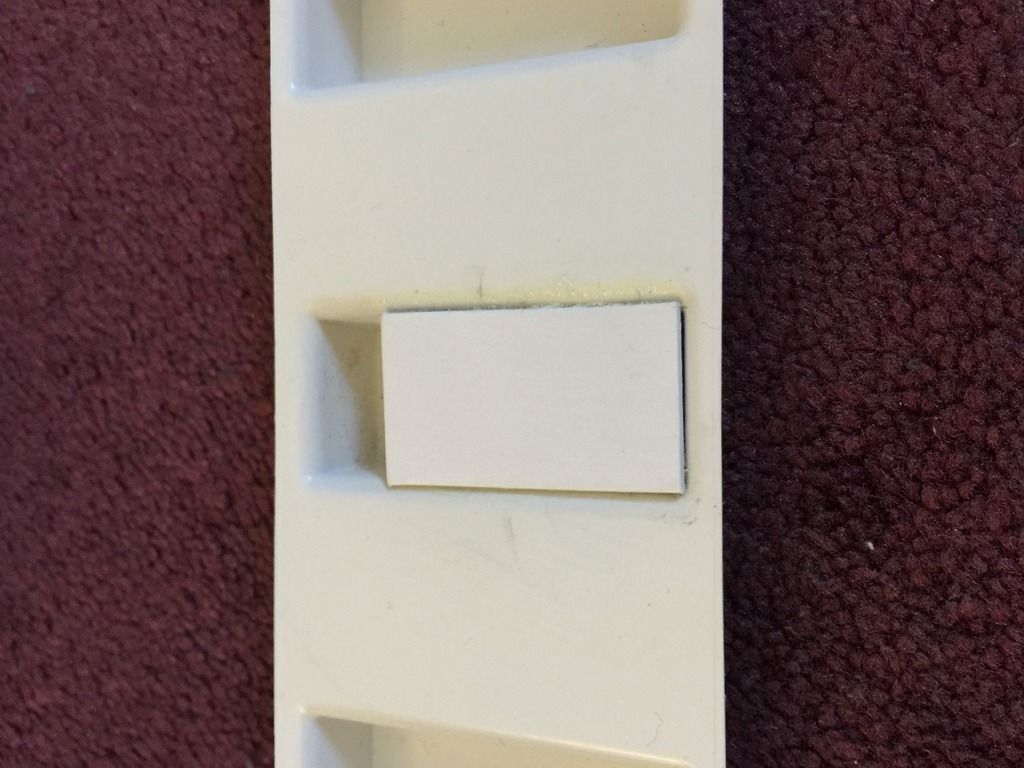
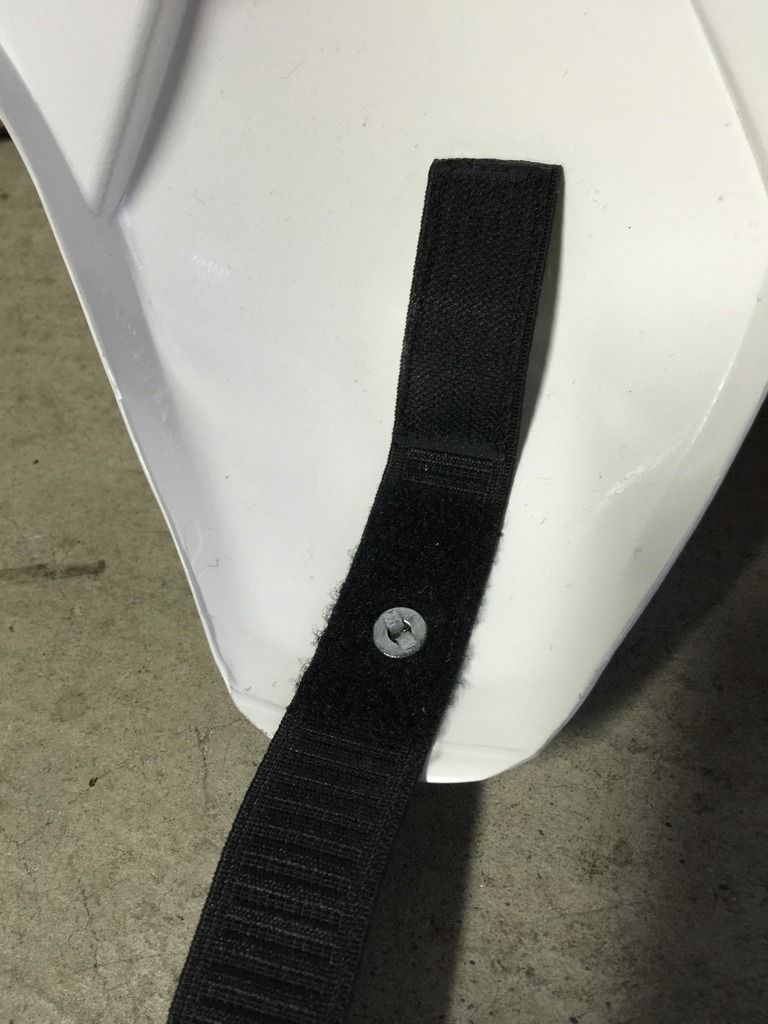
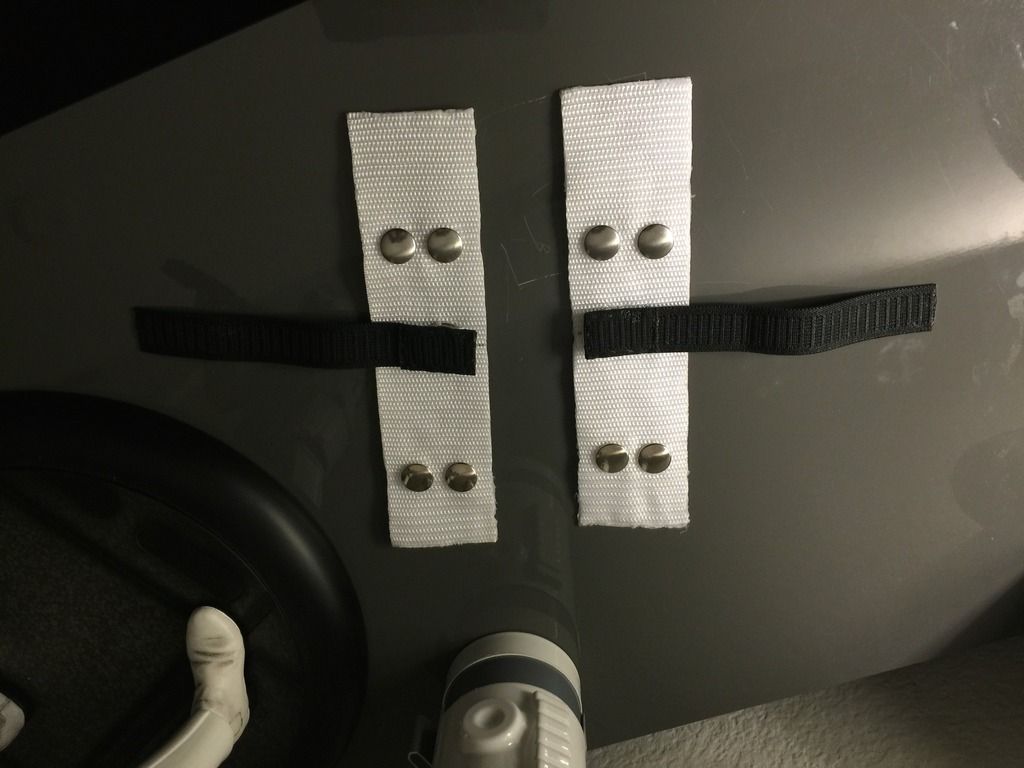
But as I confidently proceeded with my shins, and installed velcro-closure inside (on the left leg), I realized I did it right over left when it should have been left over right
(so the opening of the closure faces inwards, not outward where everybody can see it).
And I used CA glue! At this point, I practically hated my shin parts...
-
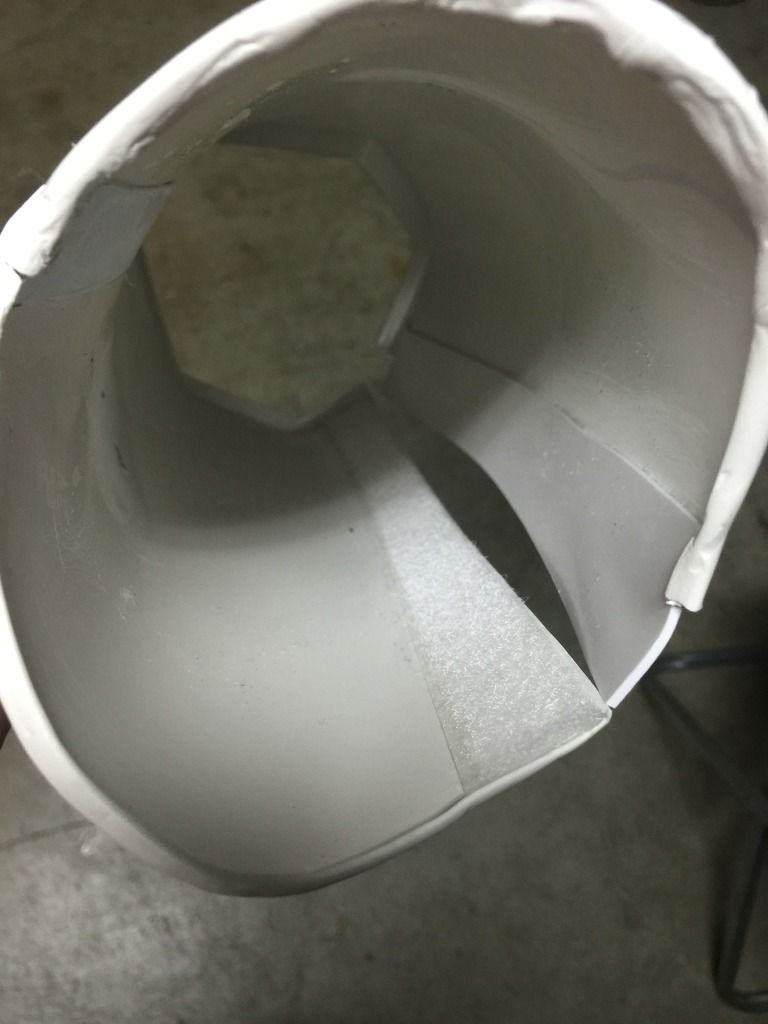
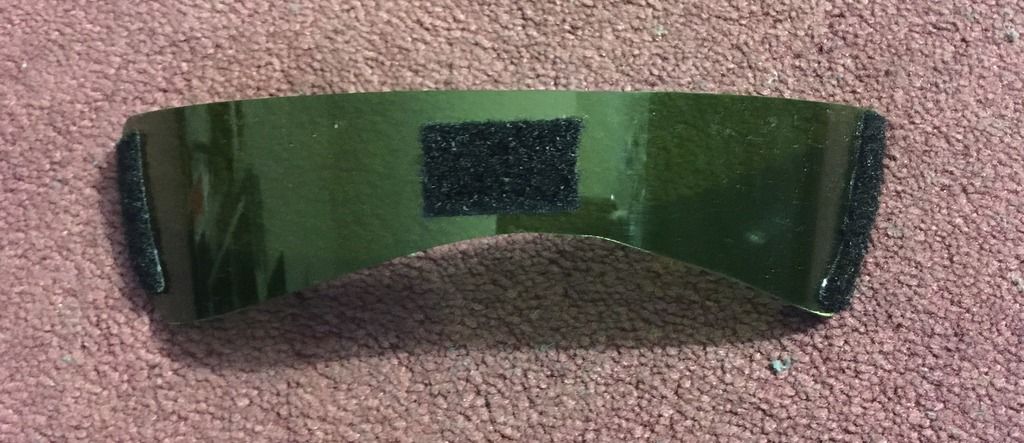
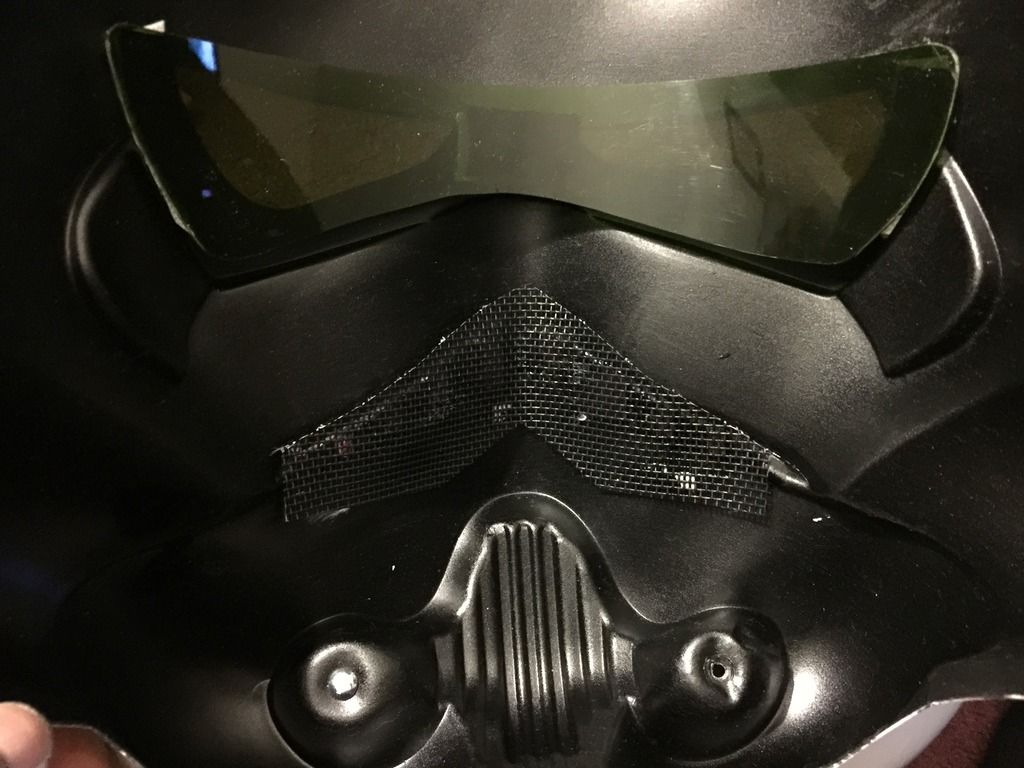
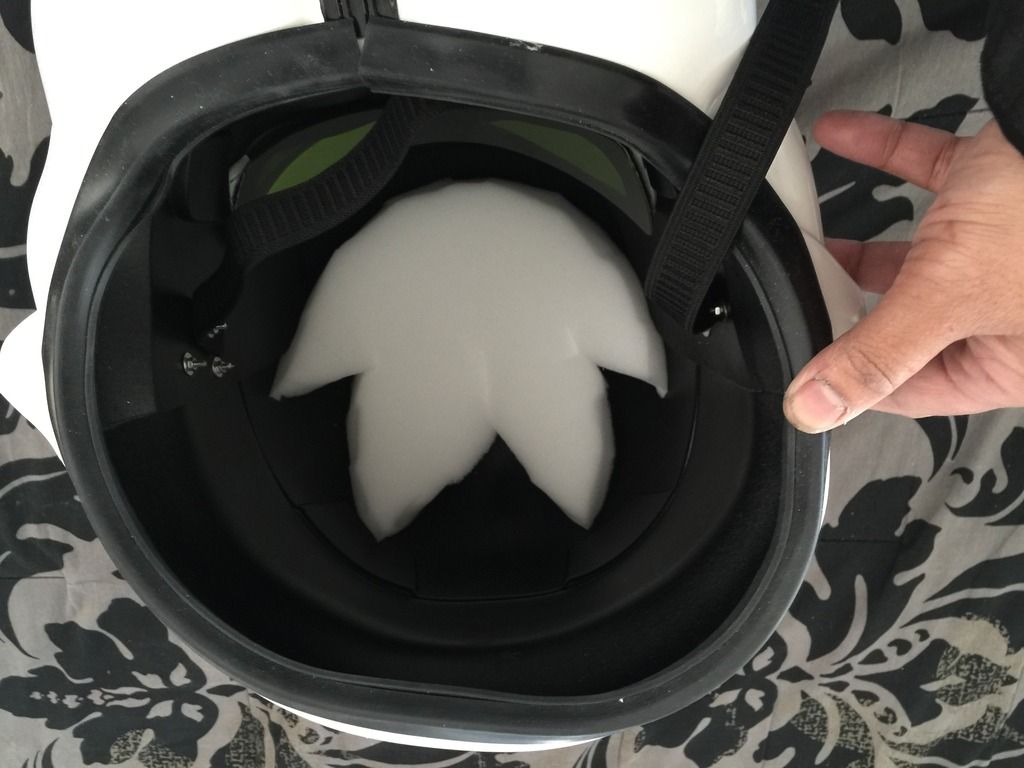
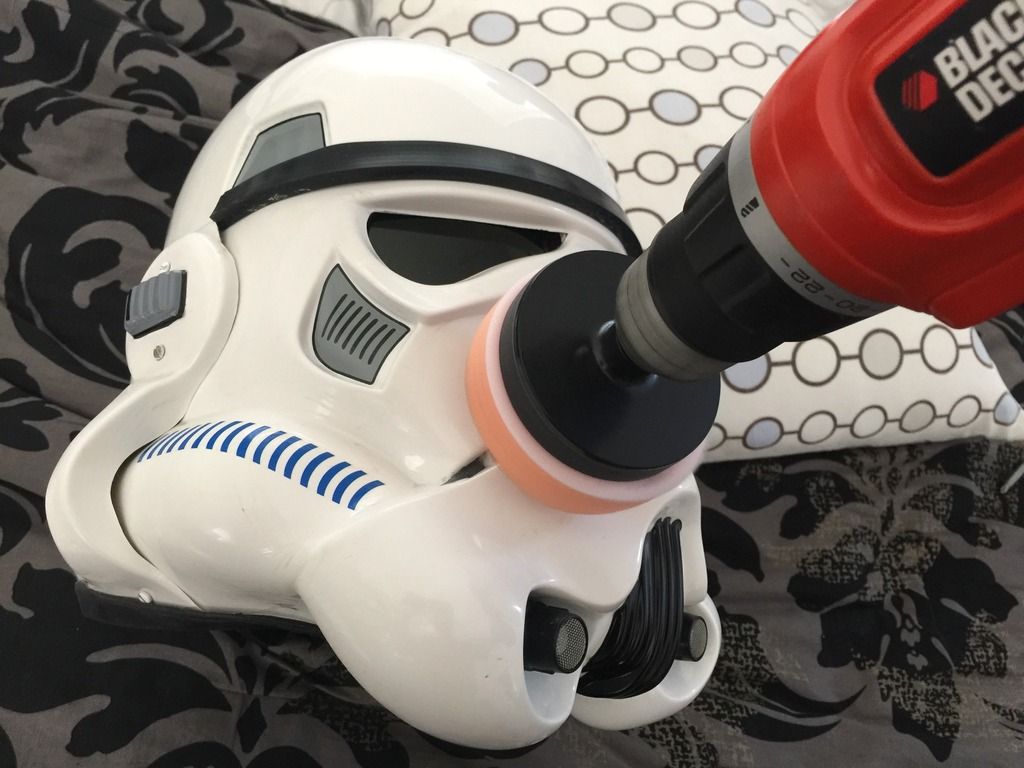
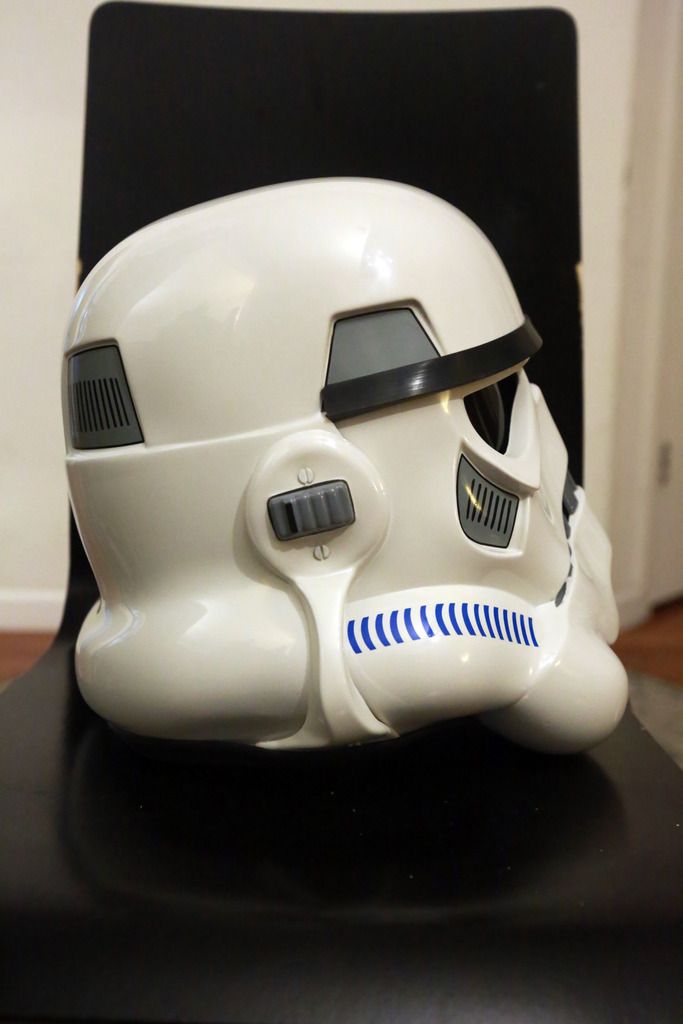
MARCH part 5 -- A Bucketful of Improvements
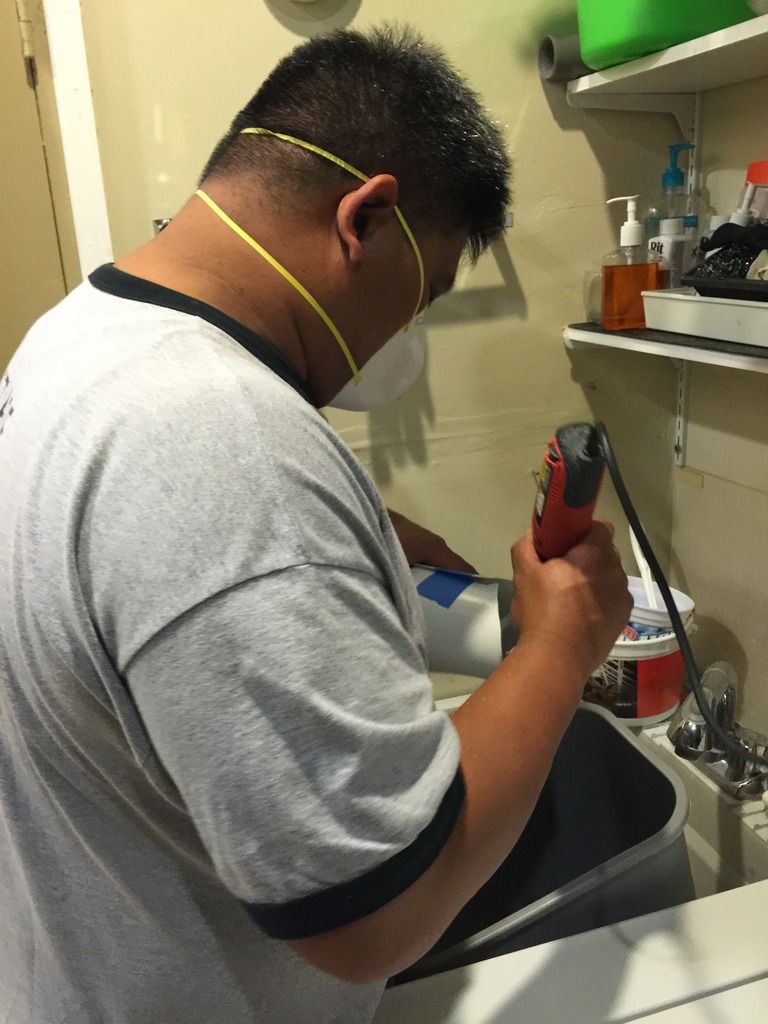
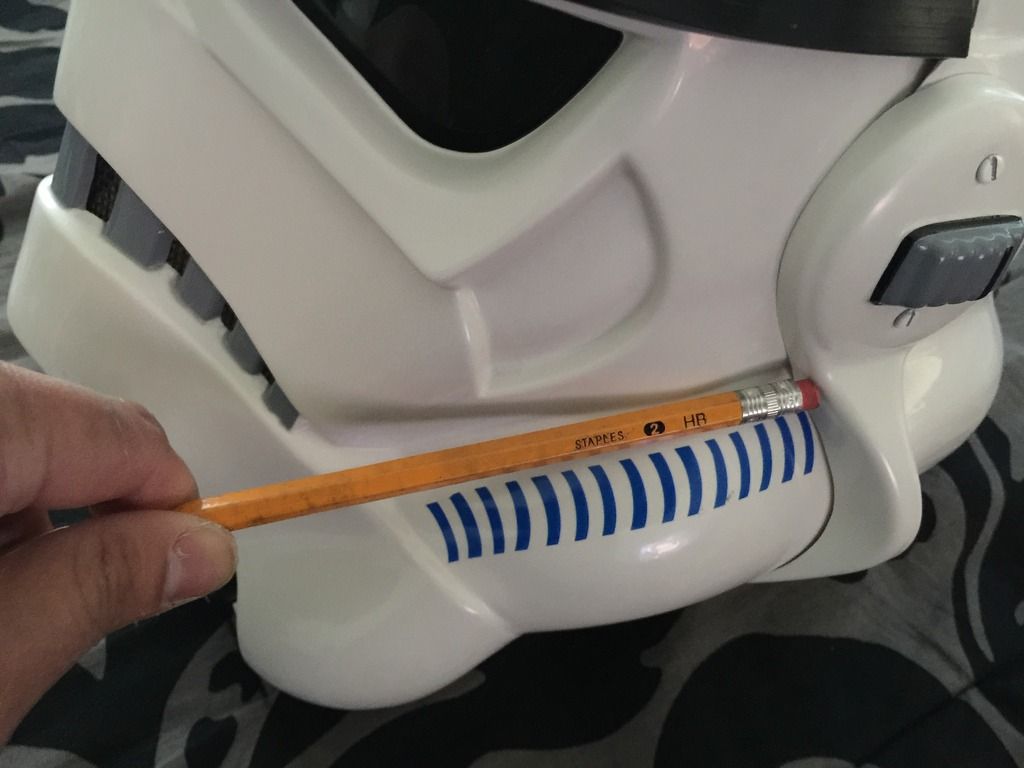
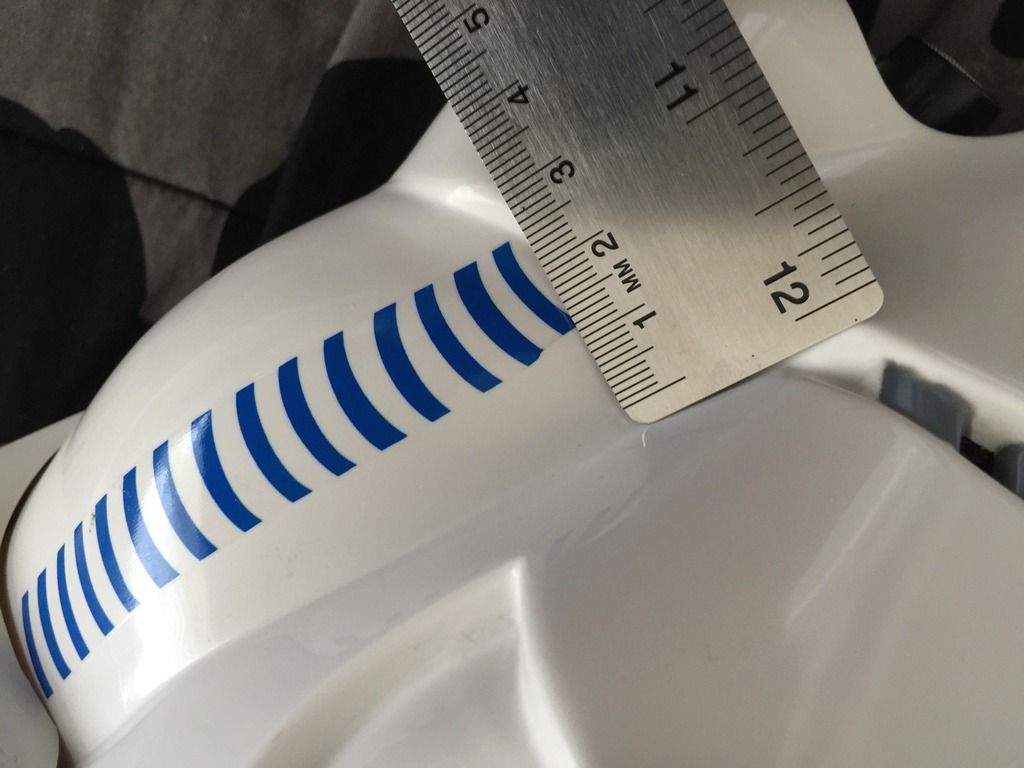
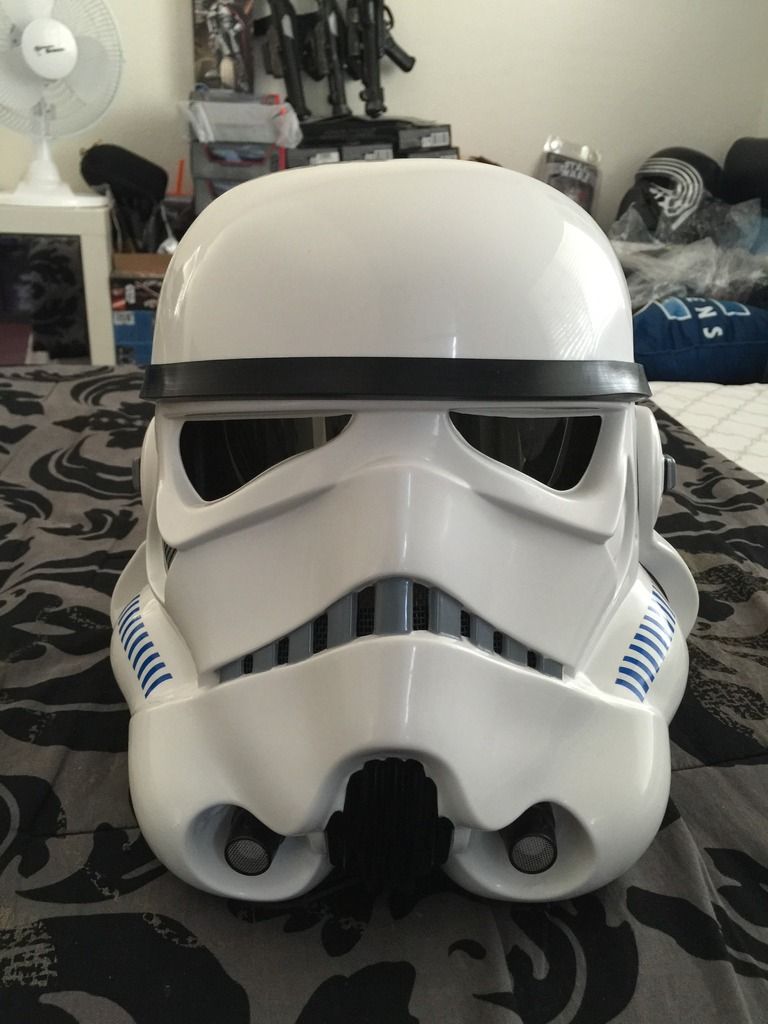
03.26.16 - 03.27.16 Shedding no tear for Anovos: Rather than waiting for Anovos' reply on how they will resolve my tearless bucket, I just went ahead and purchased decals from Trooperbay. Worked well, I think...
Now, let's clean those frown oversprays. Cleaned with alcohol, paint touch-up using Humbrol #40
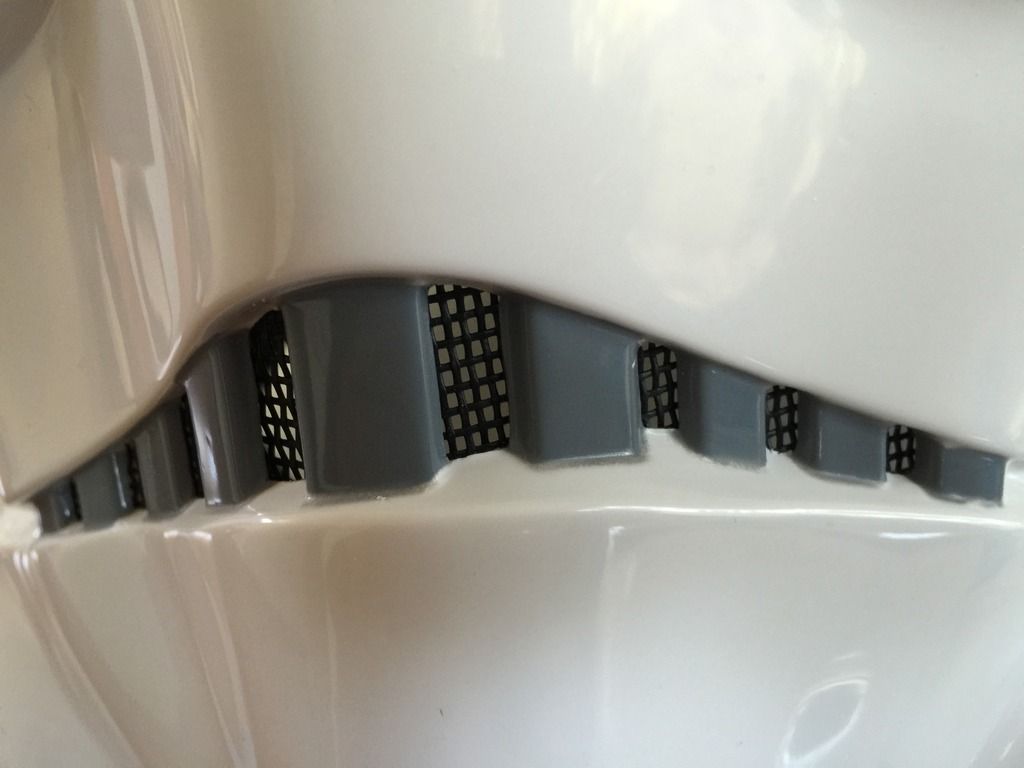

Applied textured paint inside the bucket.
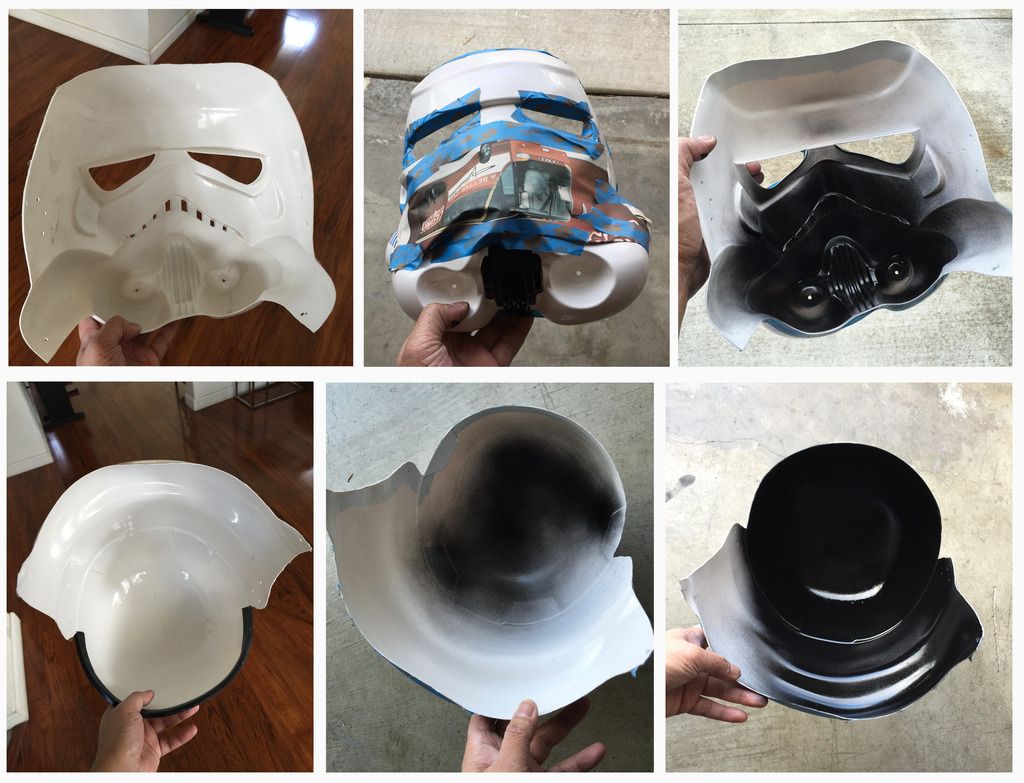
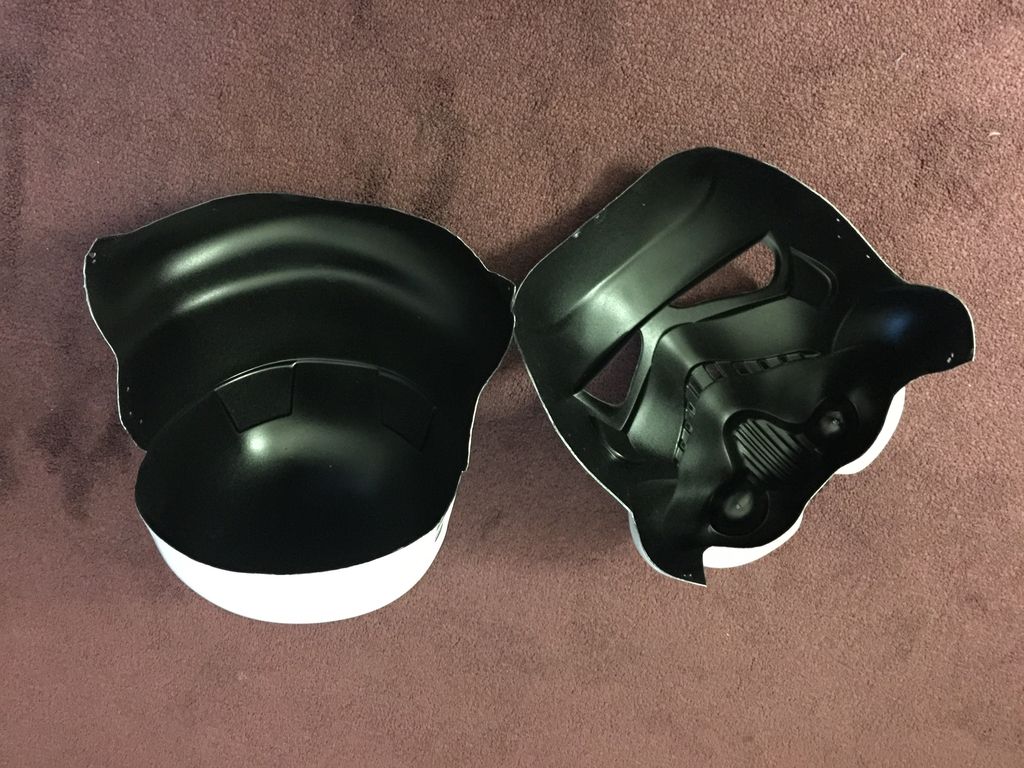
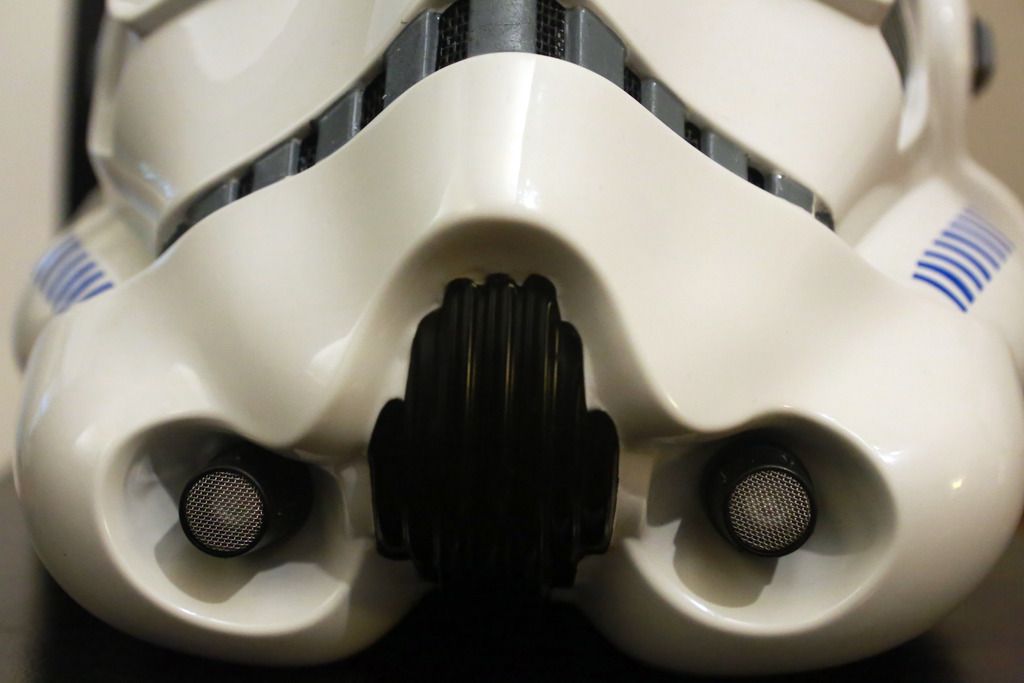
Fixed the visors a bit, the frown mesh, installed old school foam padding...
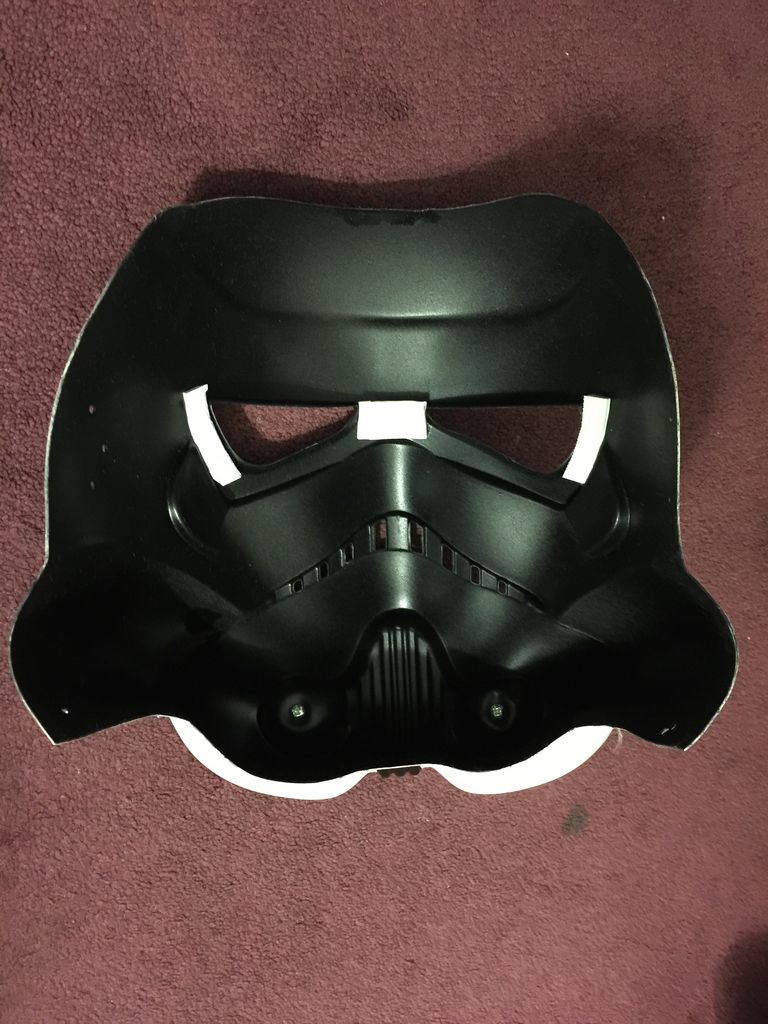
A little bit of polishing, and it's pretty done.
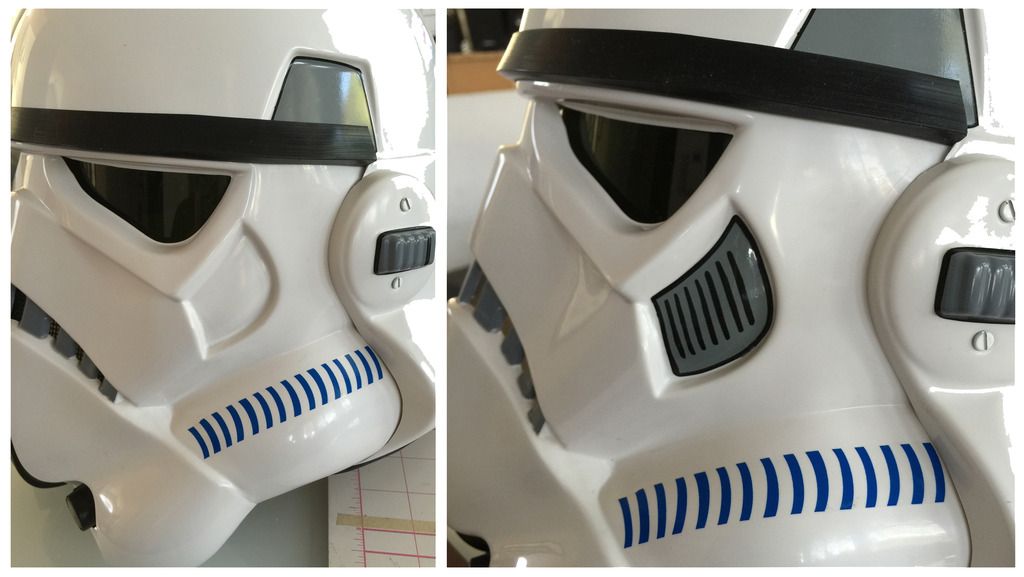
POST-APPROVAL IMPROVEMENTS:
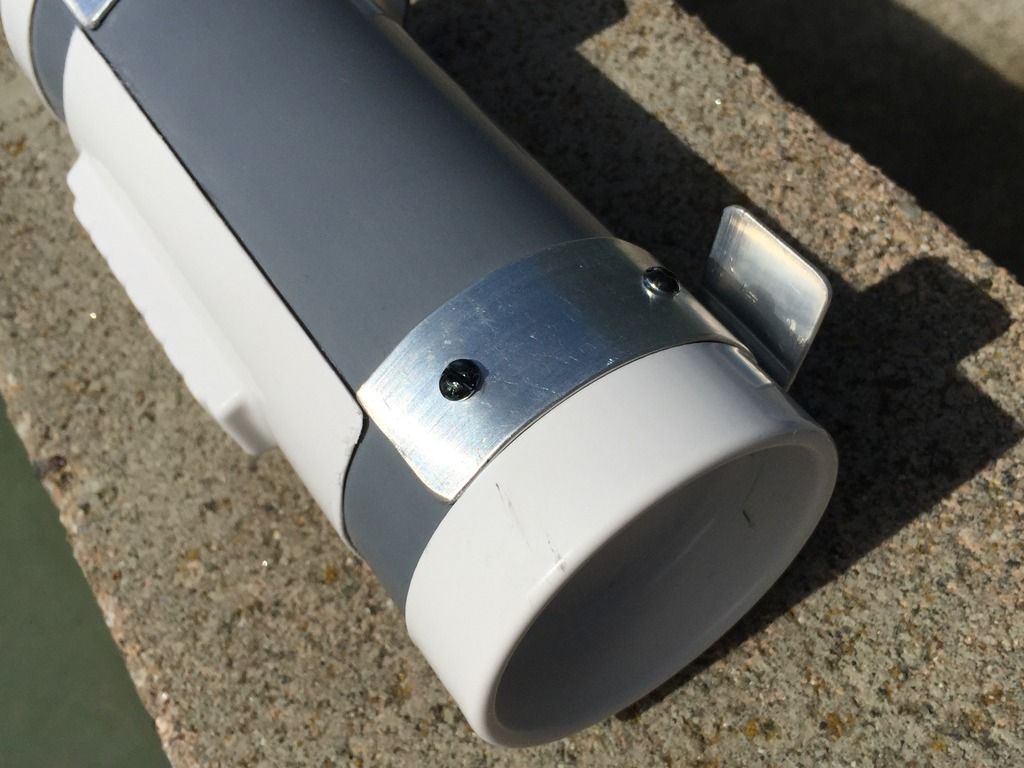
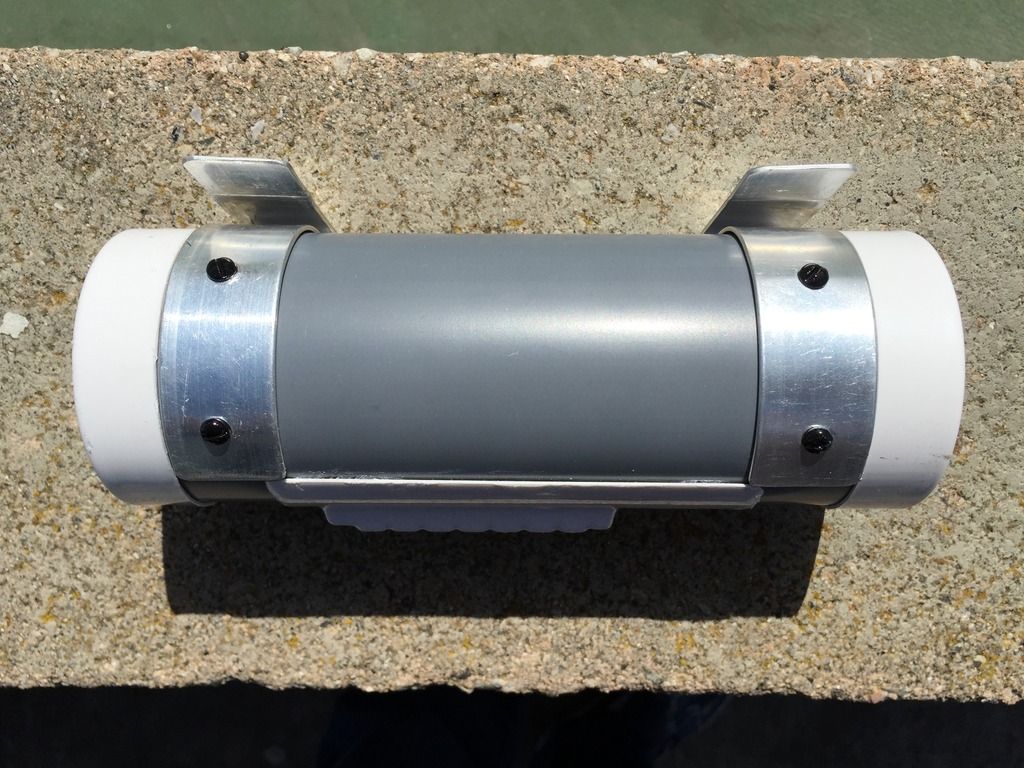
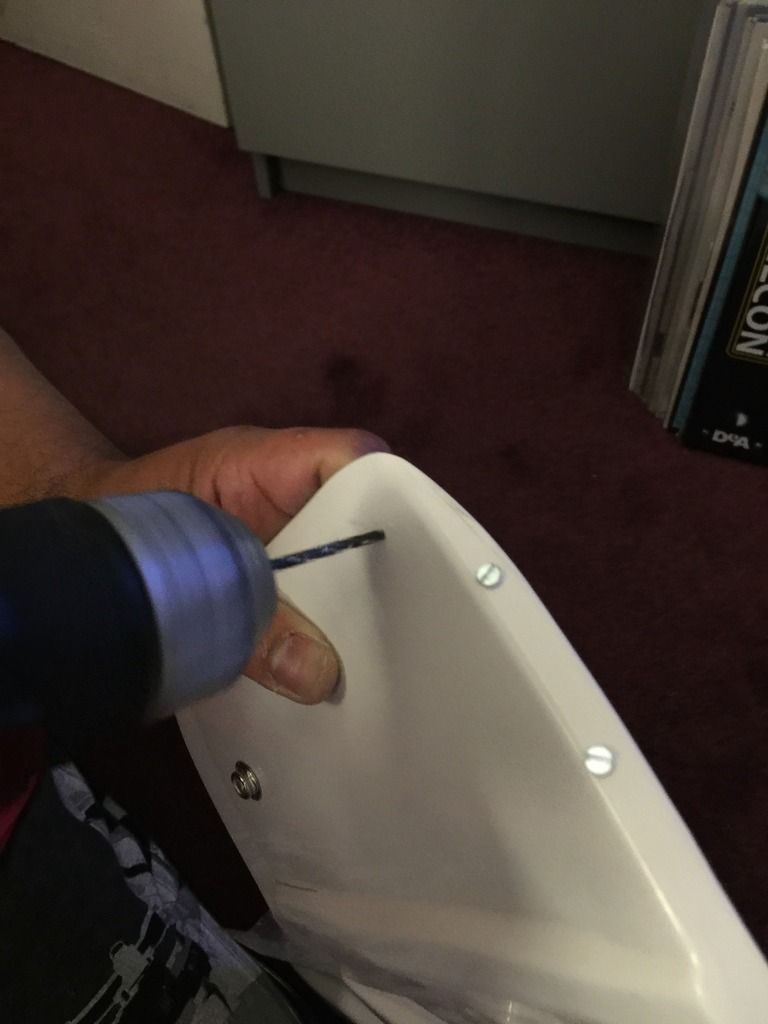
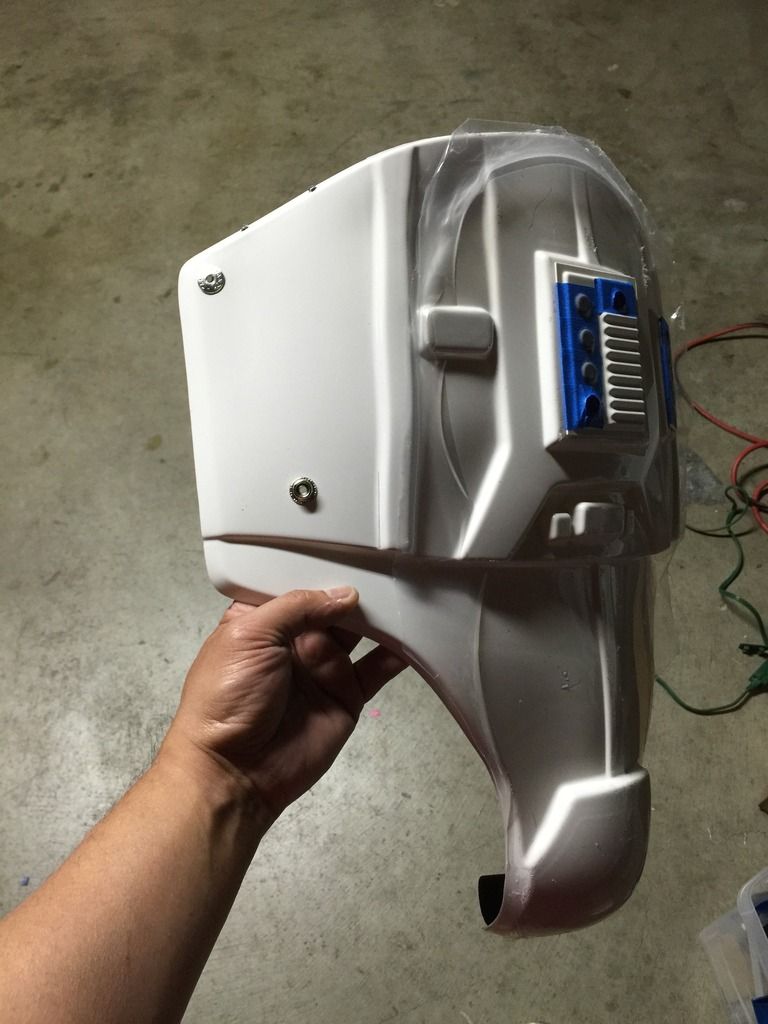
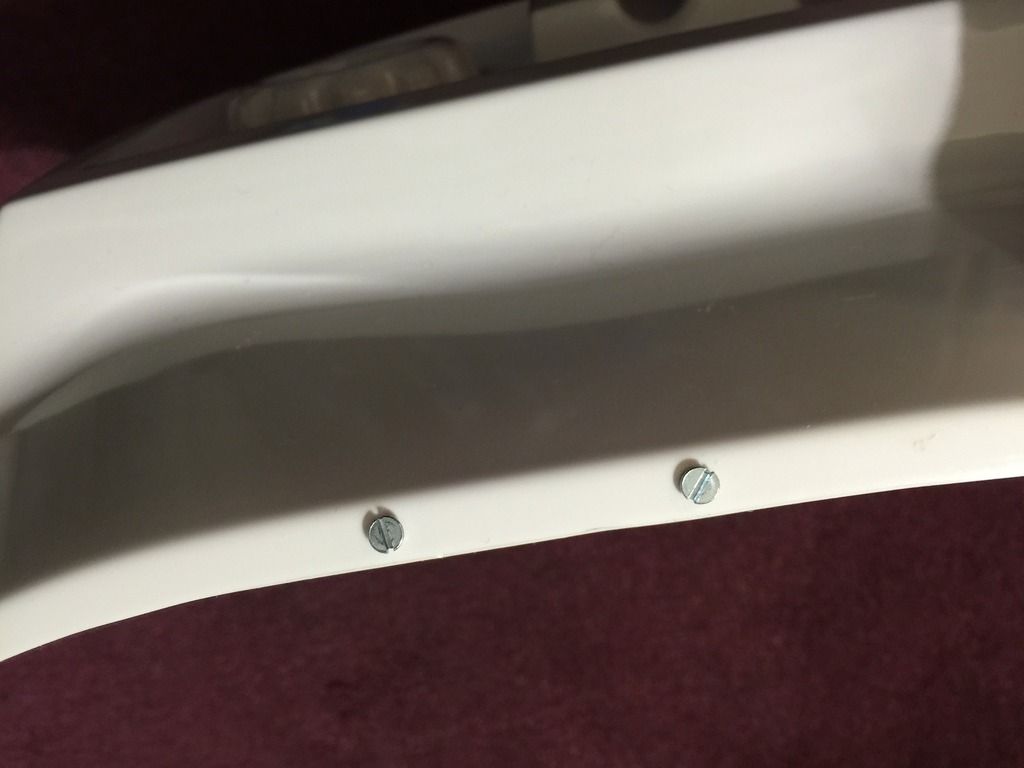
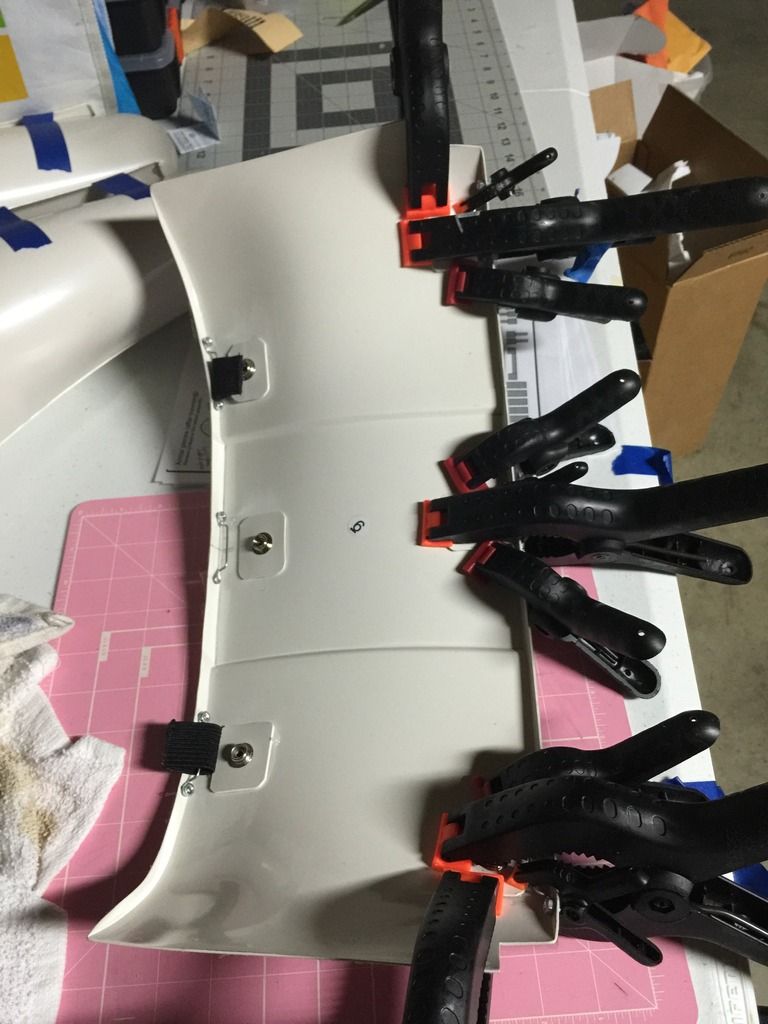
04.02.16 -- A friend gave me some 6/32 screws for the bucket ears.
04.06.16 - With replacement screws installed.
-
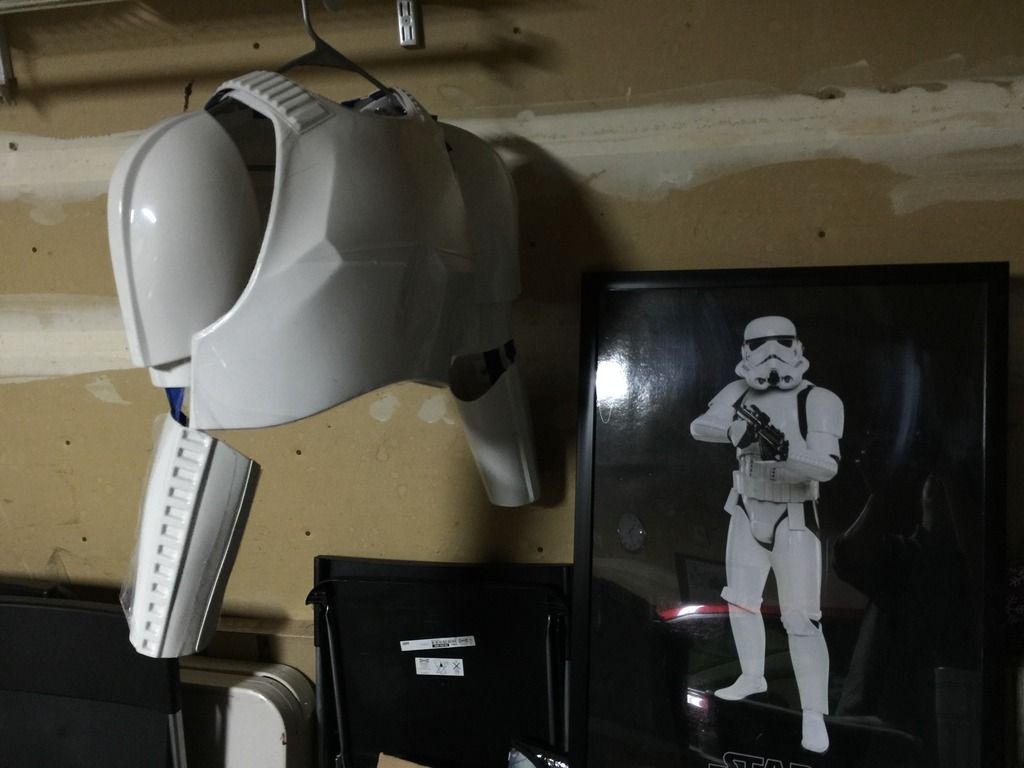
MARCH PART 4 More details. More details.
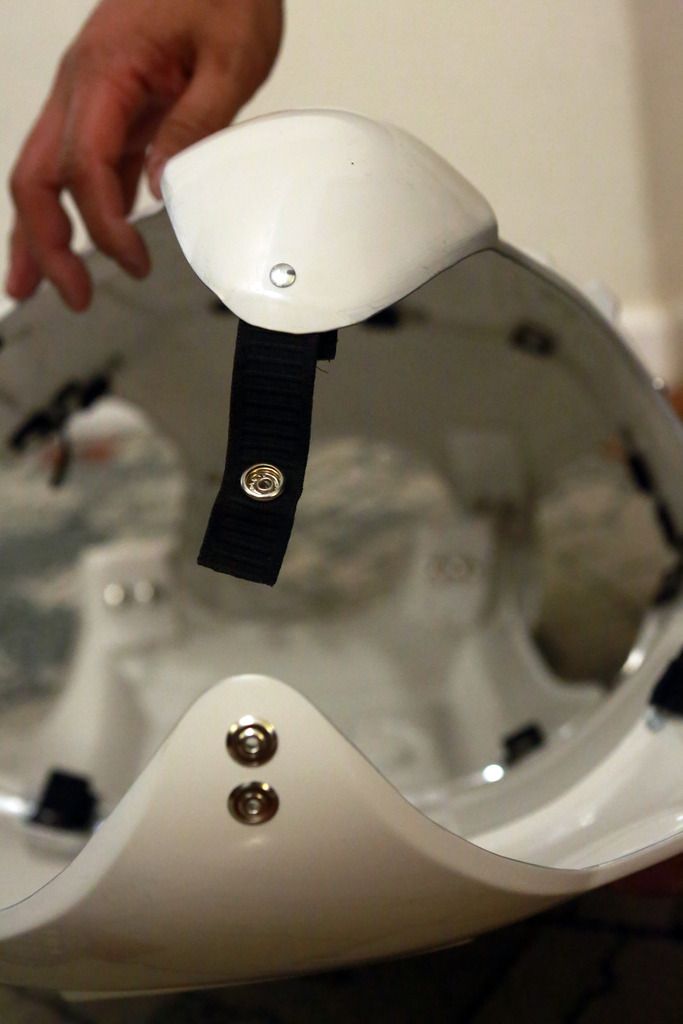
03.21.16 I loosely followed Haribon72's creation of clip. I really needed this one as I've had issues with my biceps and how it fits.
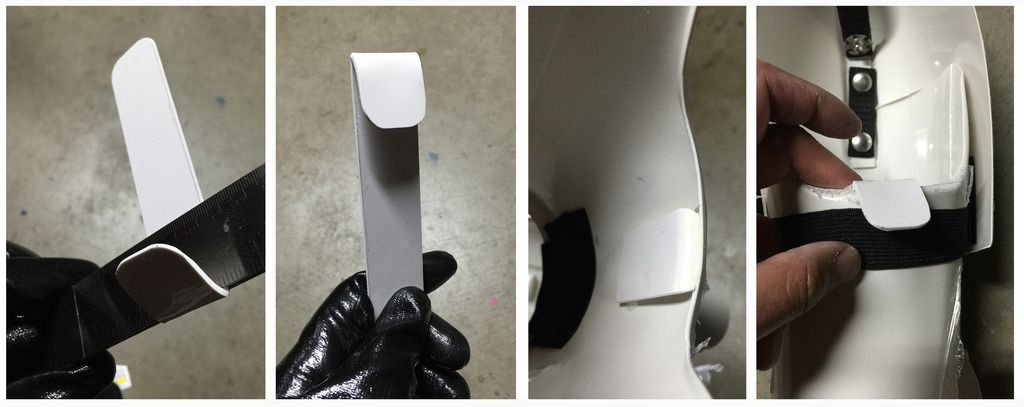
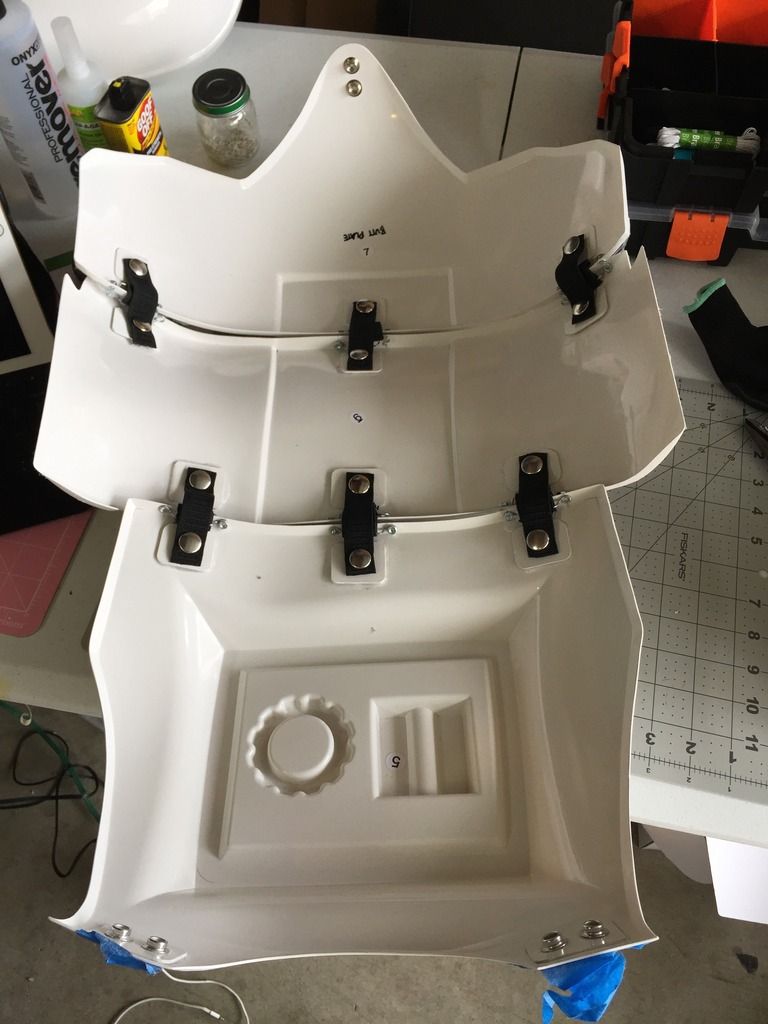
03.24.16 Another Haribon72 lead that I followed. Fabricated "Walter's Holder" which effectively keeps the right kidney and ab from moving up and down. They're really kept in place!
Strapping them all together...

-
Looking forward to meeting you too, Garrett. Just holler if you need help with your build. Good luck!Howdy! I'm working on my first TK now as well here in San Francisco.
It's awesome to see all the new recruits from the Bay Area. Looking forward to meeting you once this armor is complete!
Sent from my iPhone using Tapatalk
-
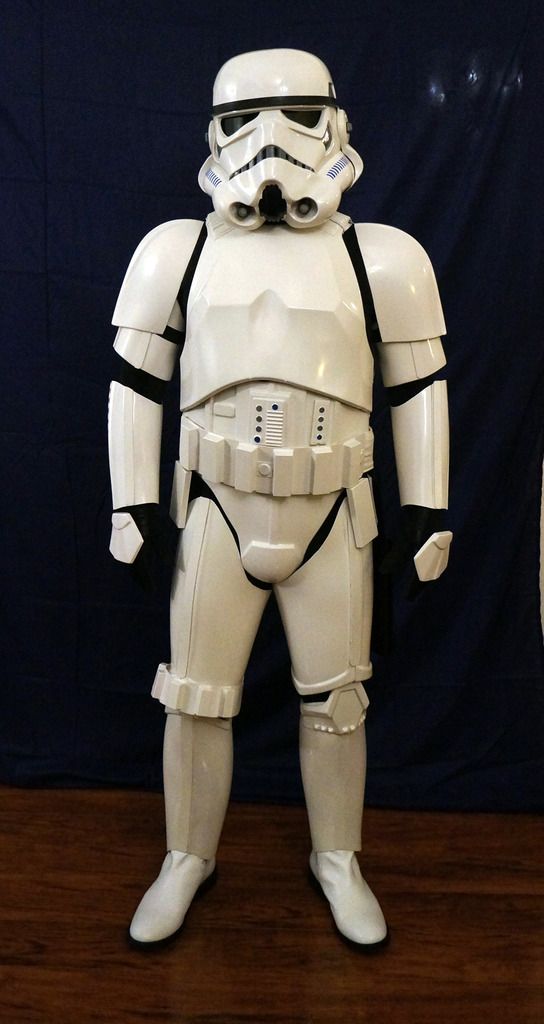
NAME: Ricky Resurreccion
LEGION ID#: 74259
FISD FORUM NAME: RickyBoyBlue
GARRISON: Golden Gate Garrison
501st LEGION PROFILE: http://www.501st.com/members/displaymemberdetails.php?userID=21051
ARMOR: Anovos
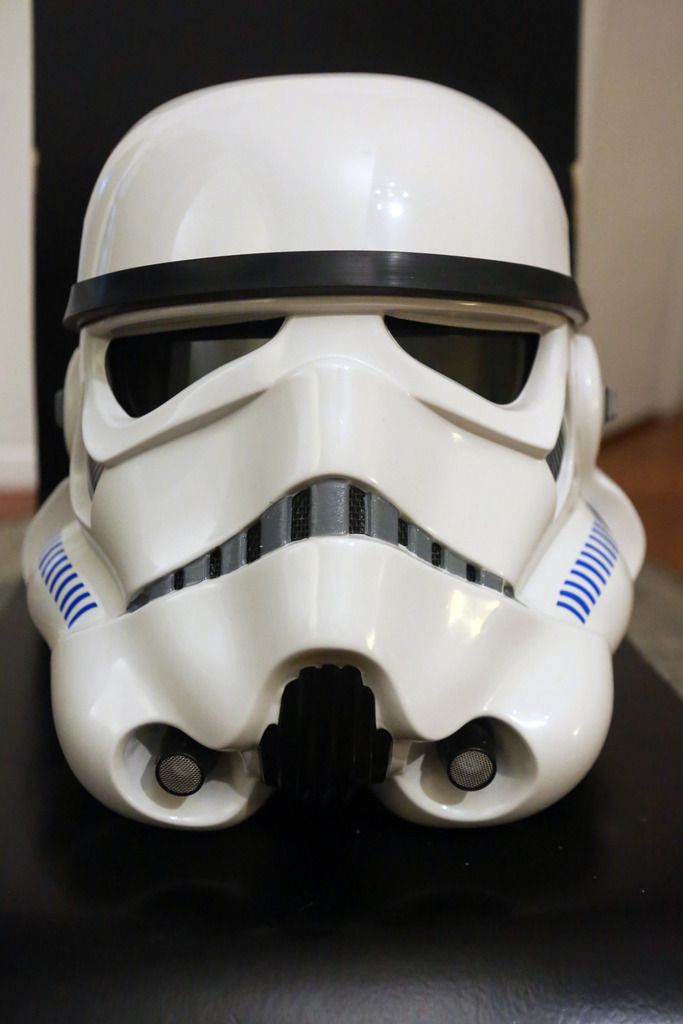
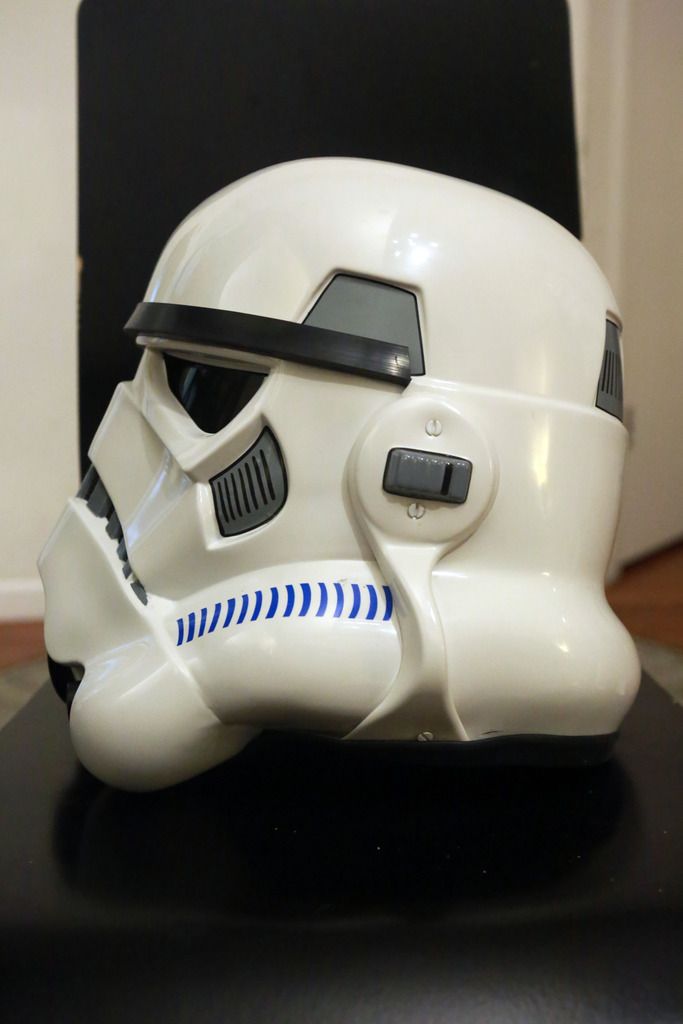
HELMET: Anovos
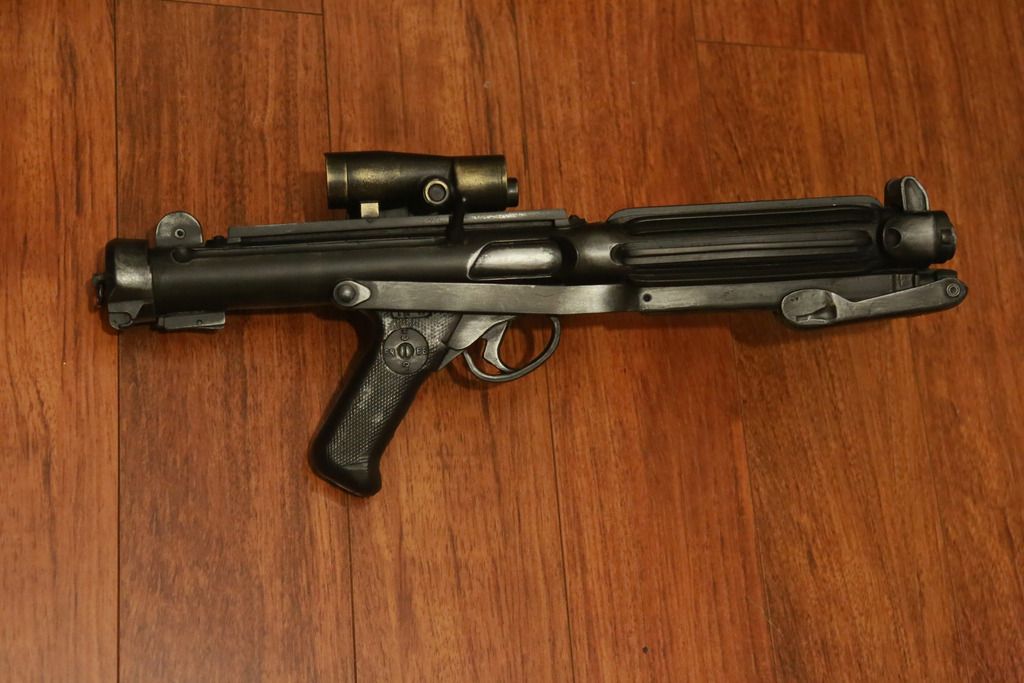
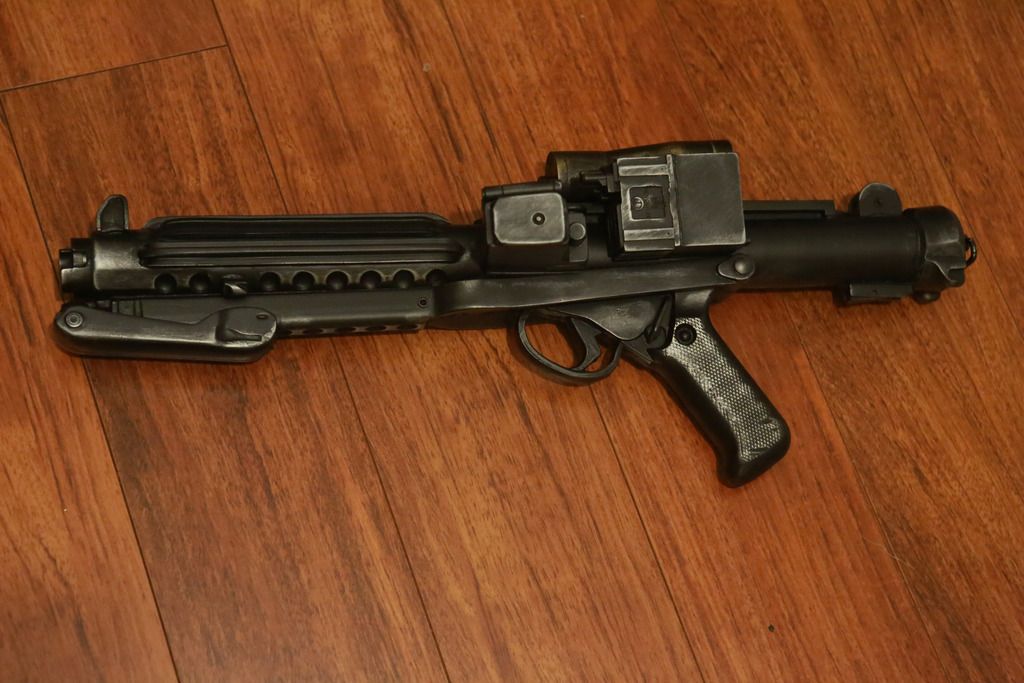
BLASTER: E-11 by Hyperfirm / D-Ring by Trooperbay
HEIGHT: 5'4"
WEIGHT: 154 lbs.
BOOTS: TKBoots
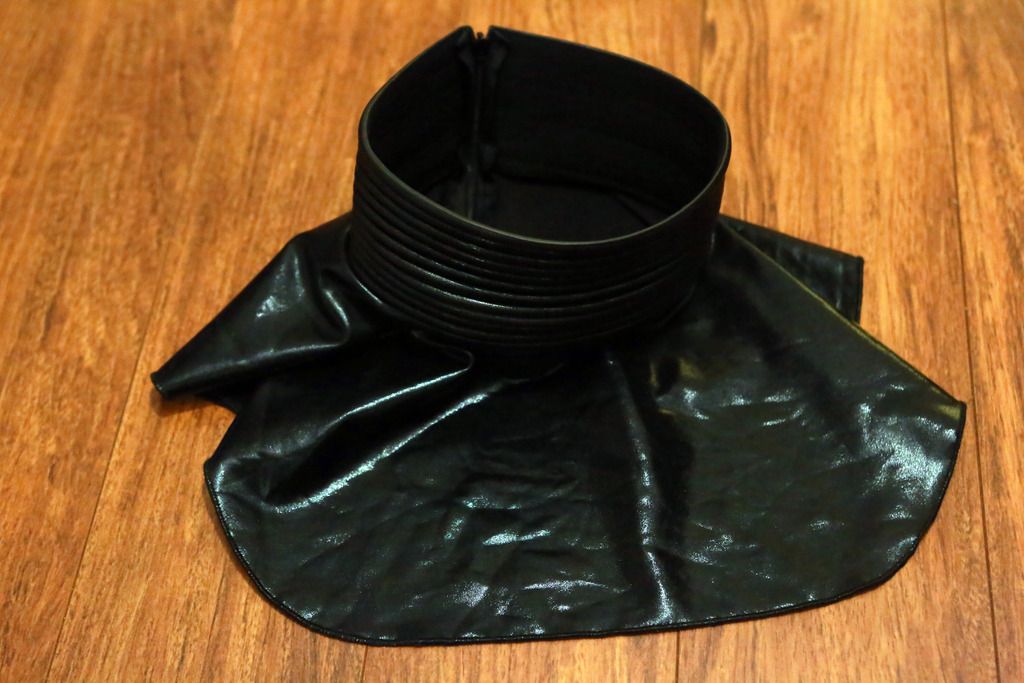
NECKSEAL: Anovos
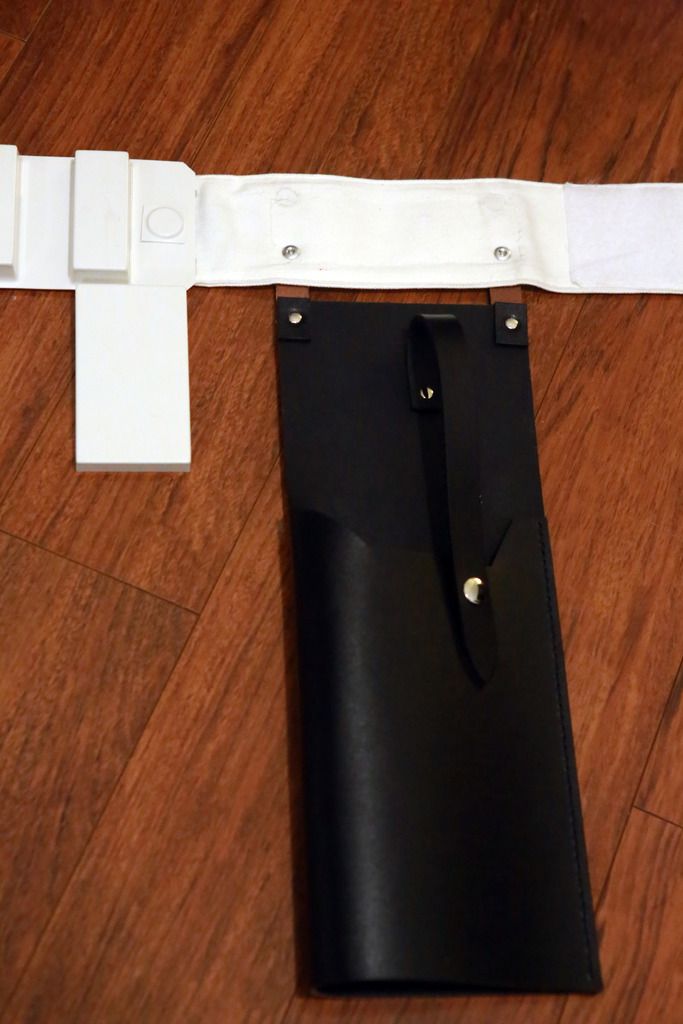
HOLSTER: Anovos
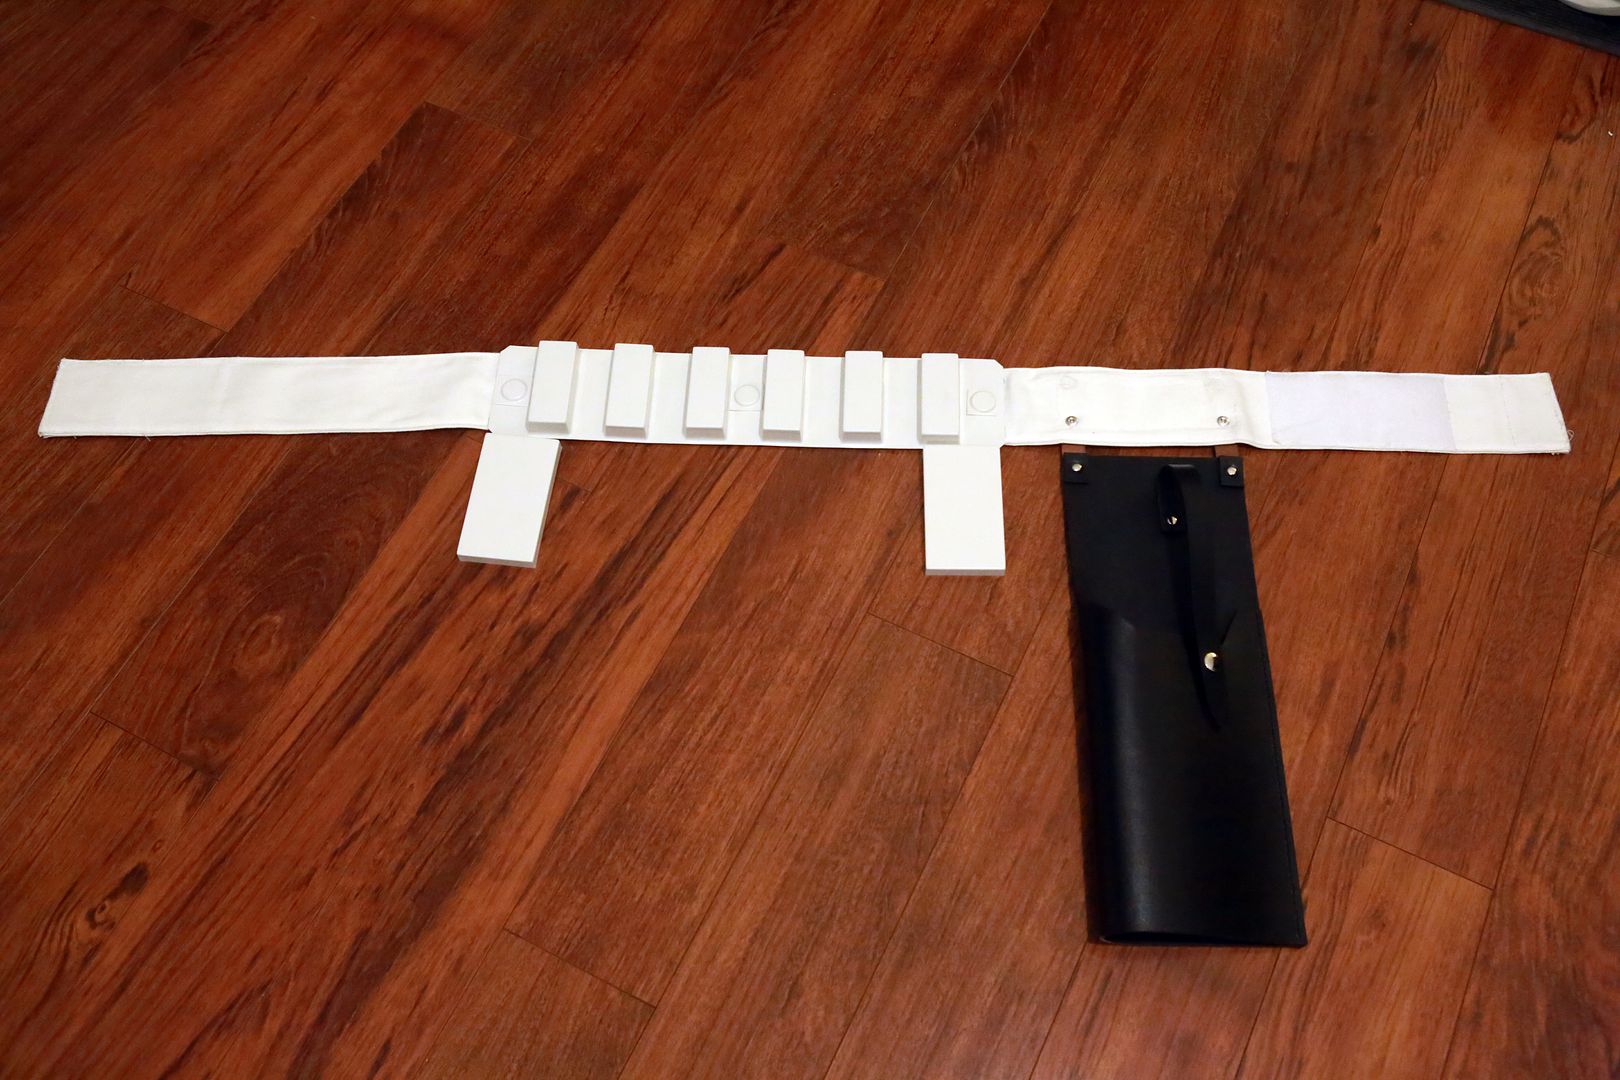
CANVAS BELT: Modified Anovos
GLOVE TYPE: Latex by Anovos
HANDPLATES: Trooperbay
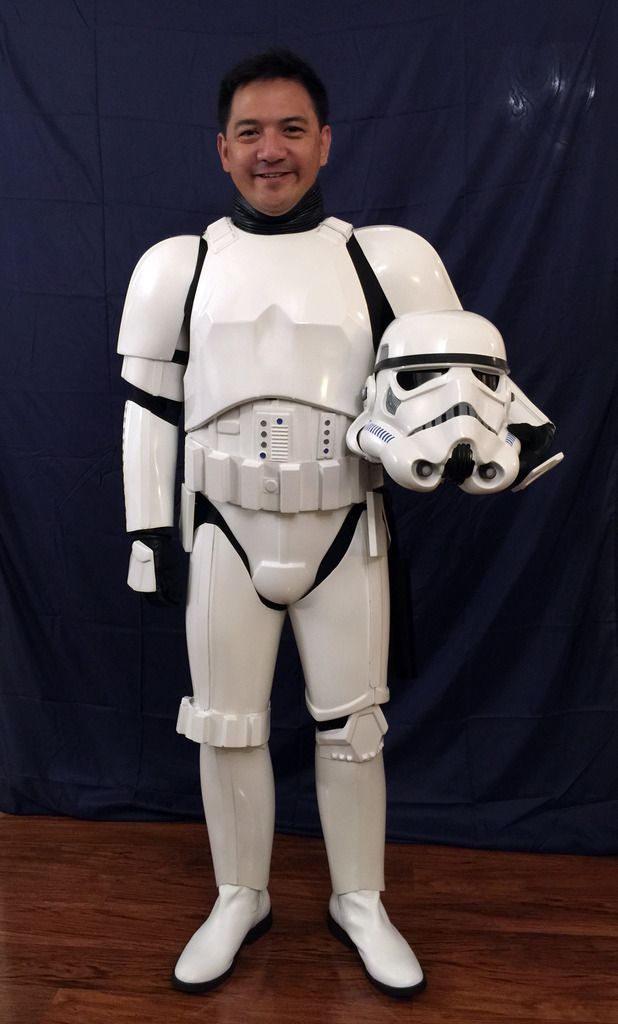
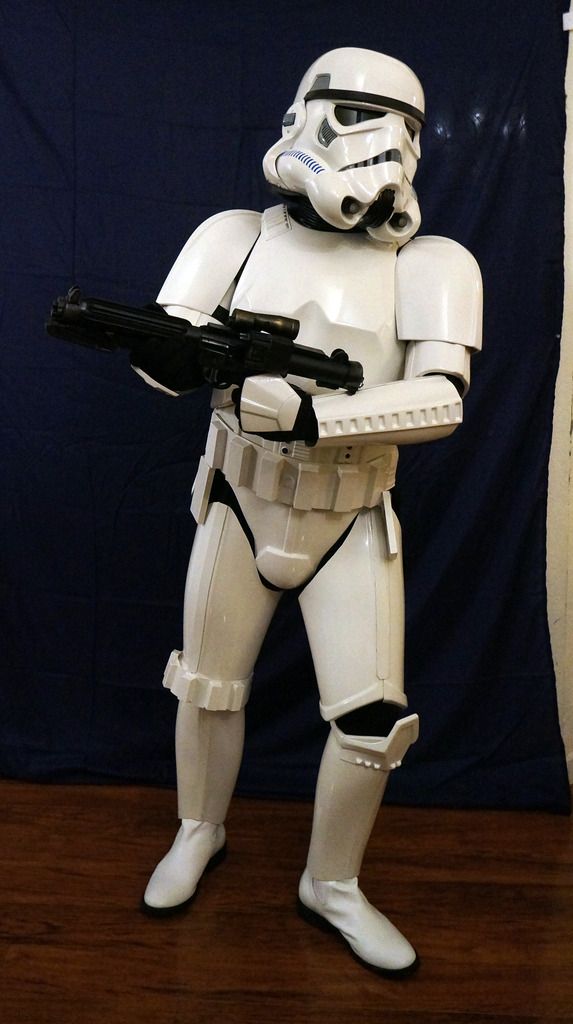
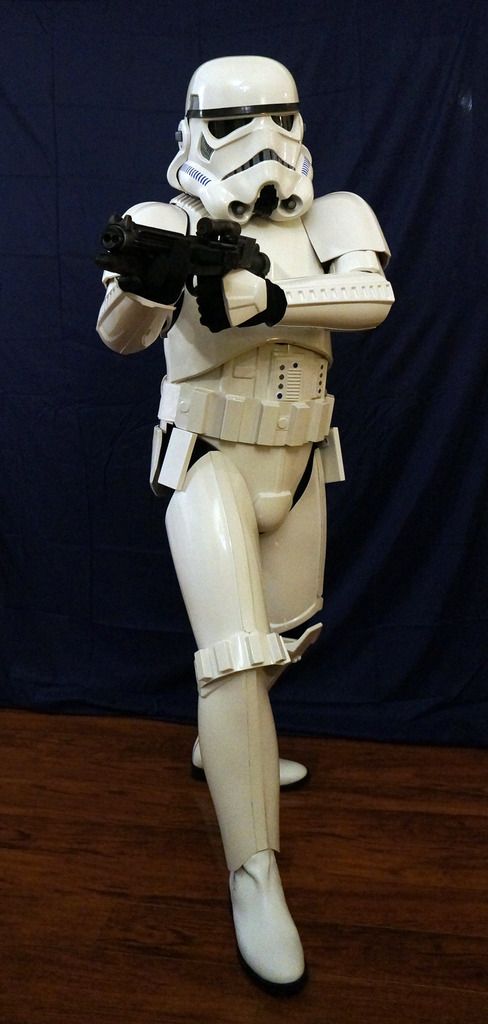
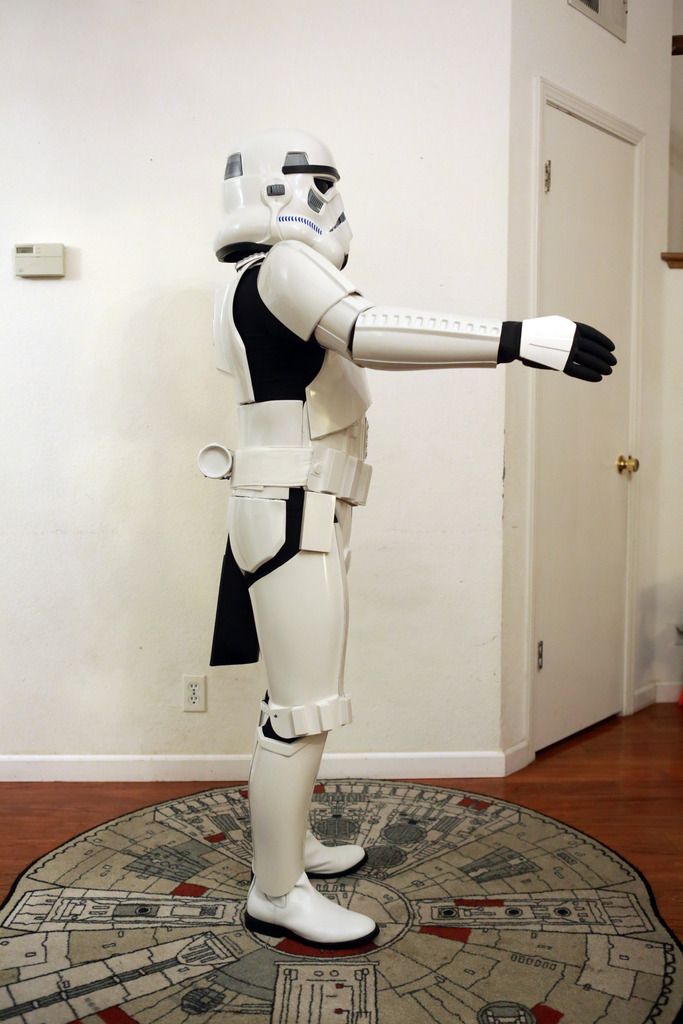
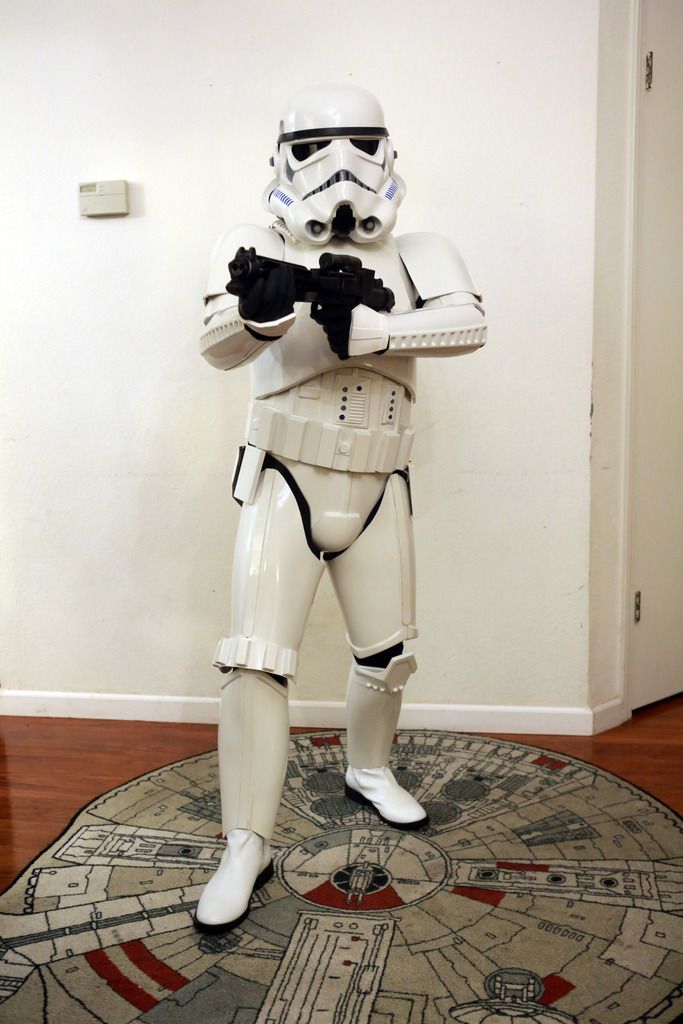
FRONT:
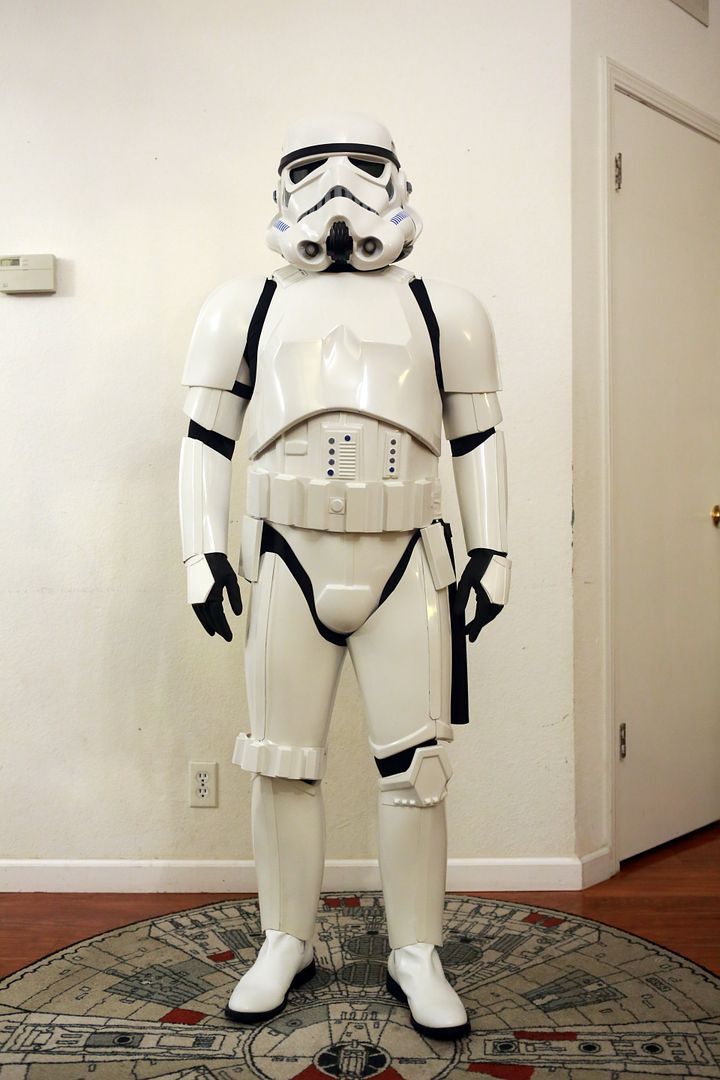
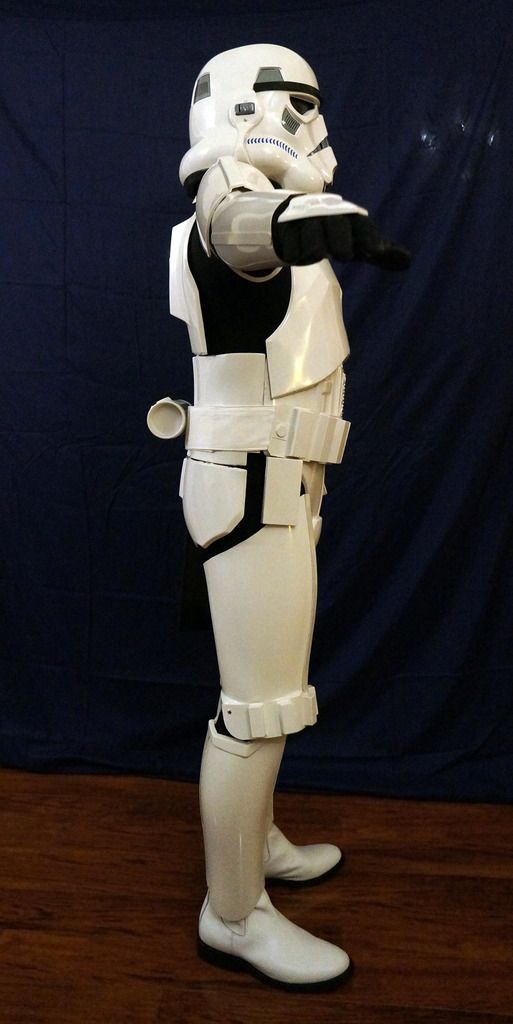
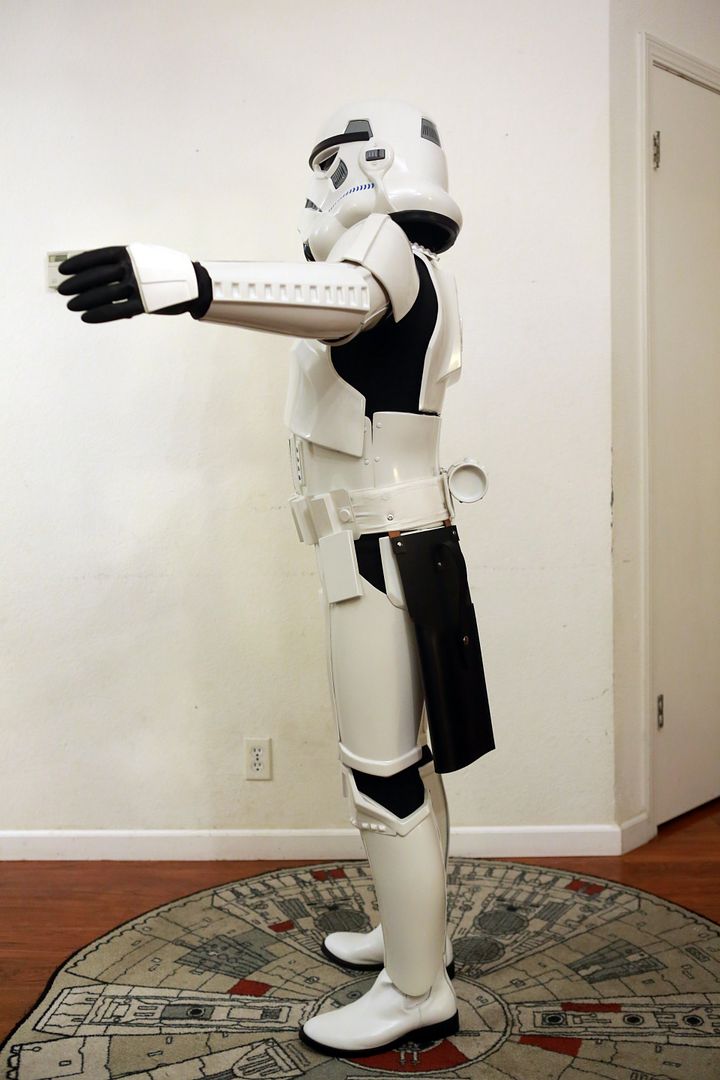
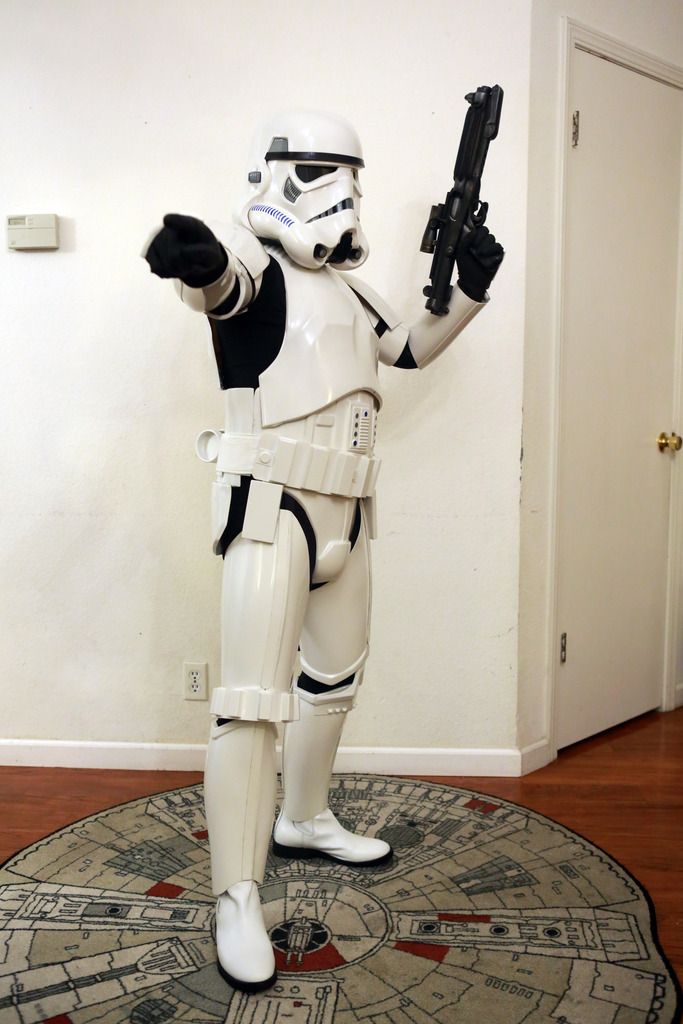
RIGHT (ARM RAISED):
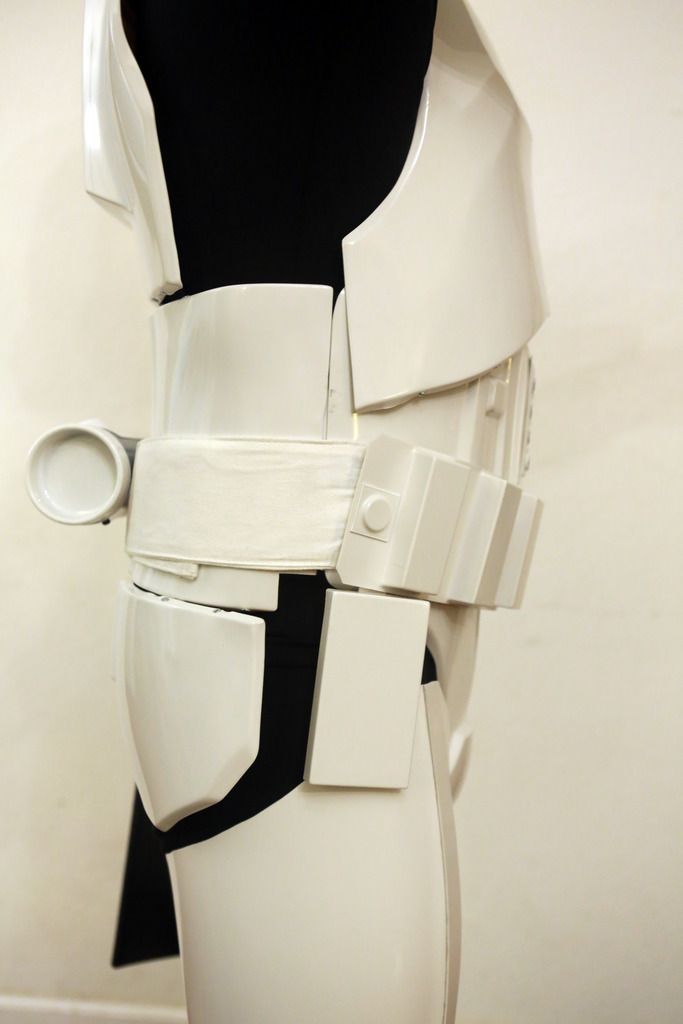
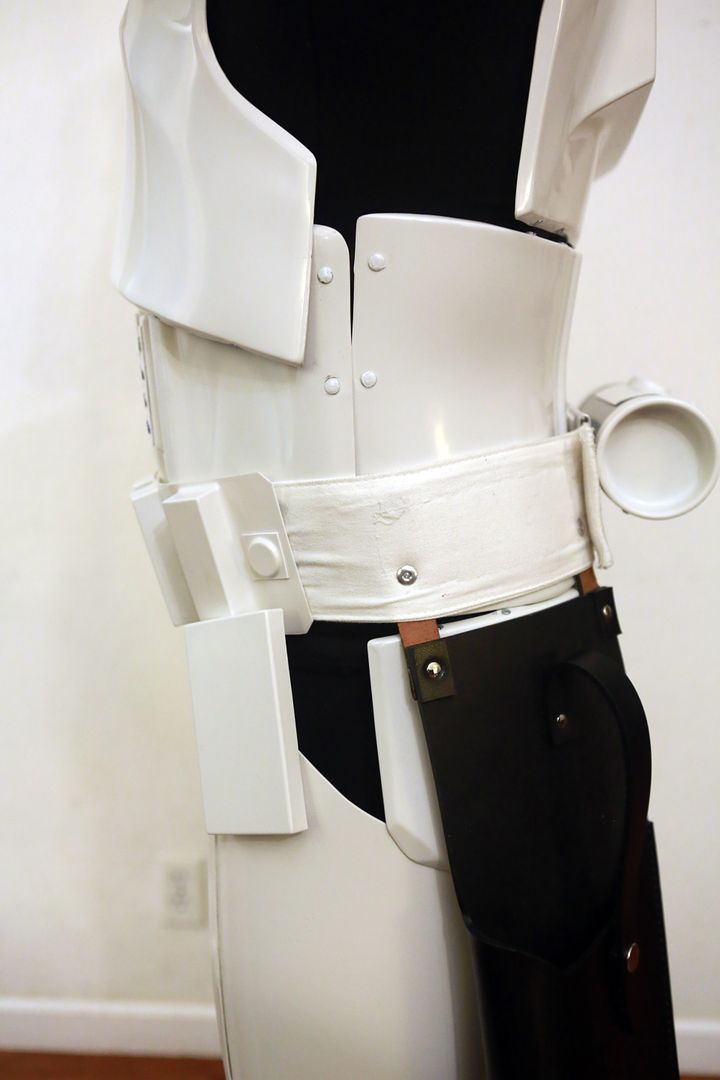
RIGHT SIDE DETAILS:
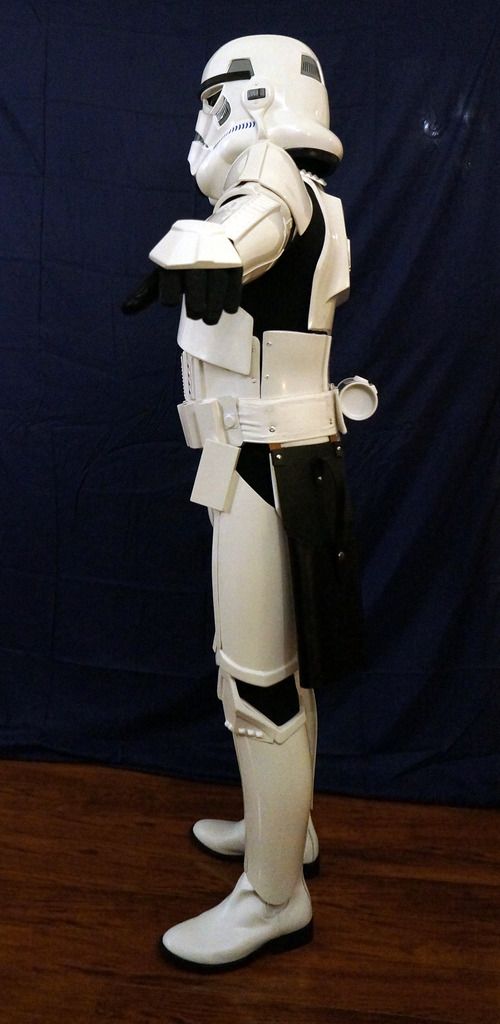
LEFT (ARM RAISED):
LEFT SIDE DETAILS:
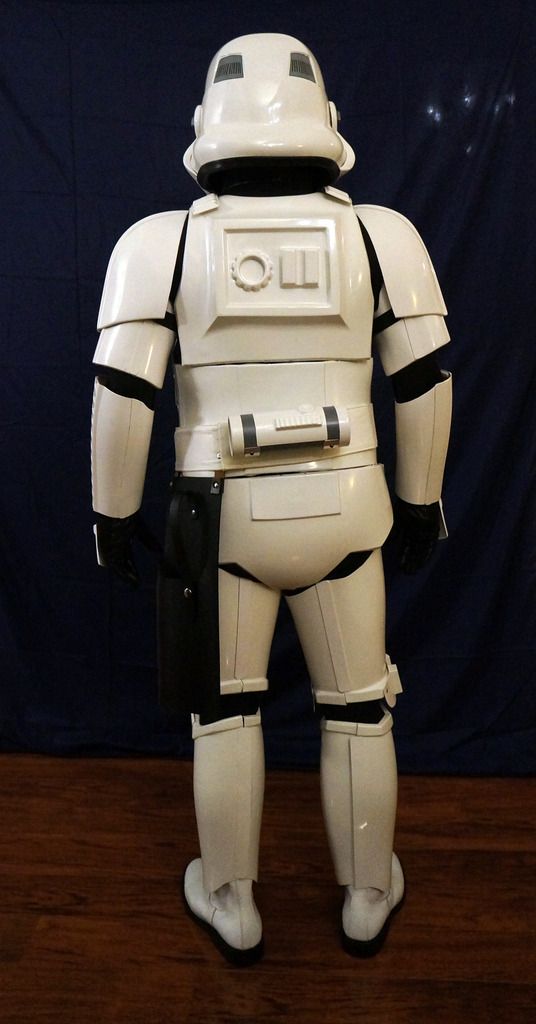
BACK:
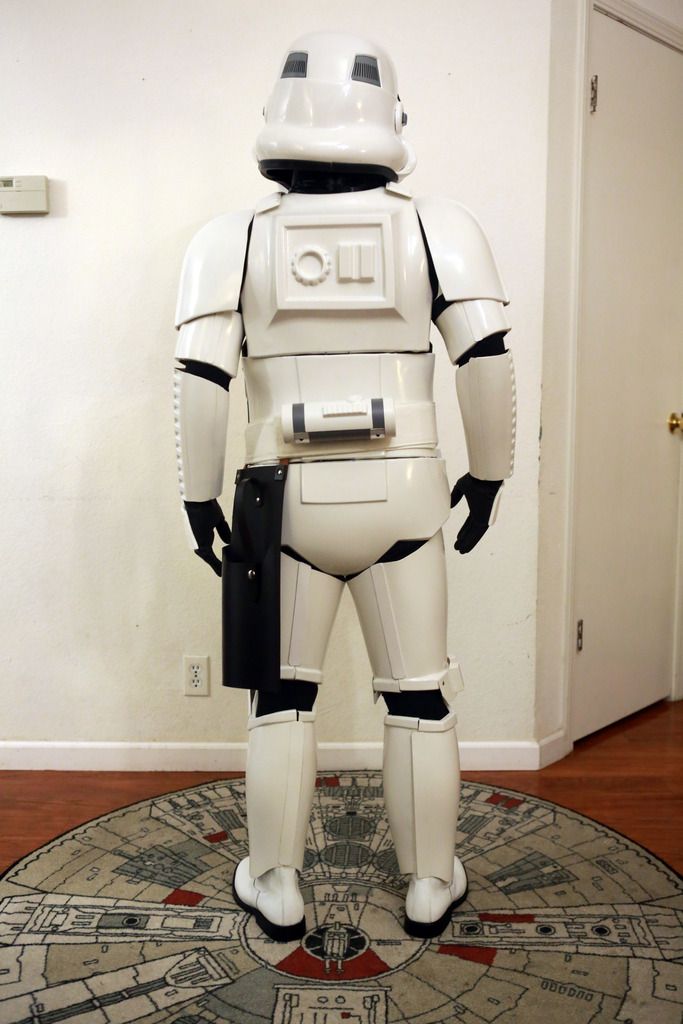
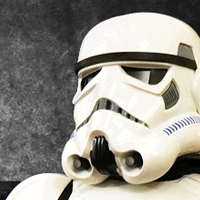
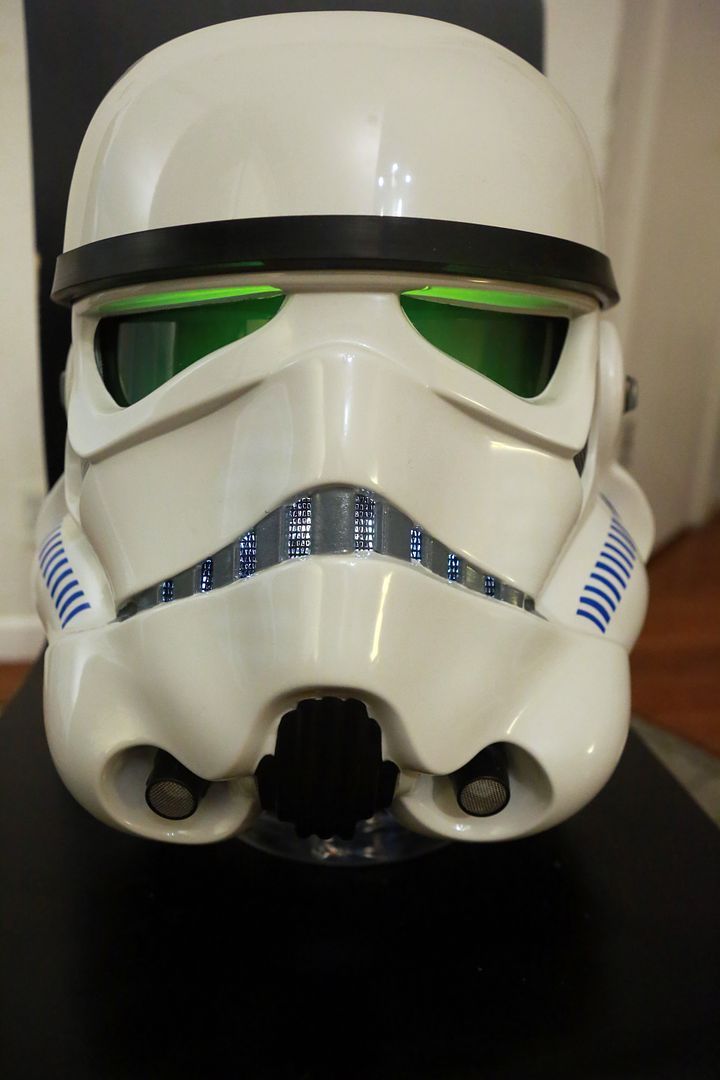
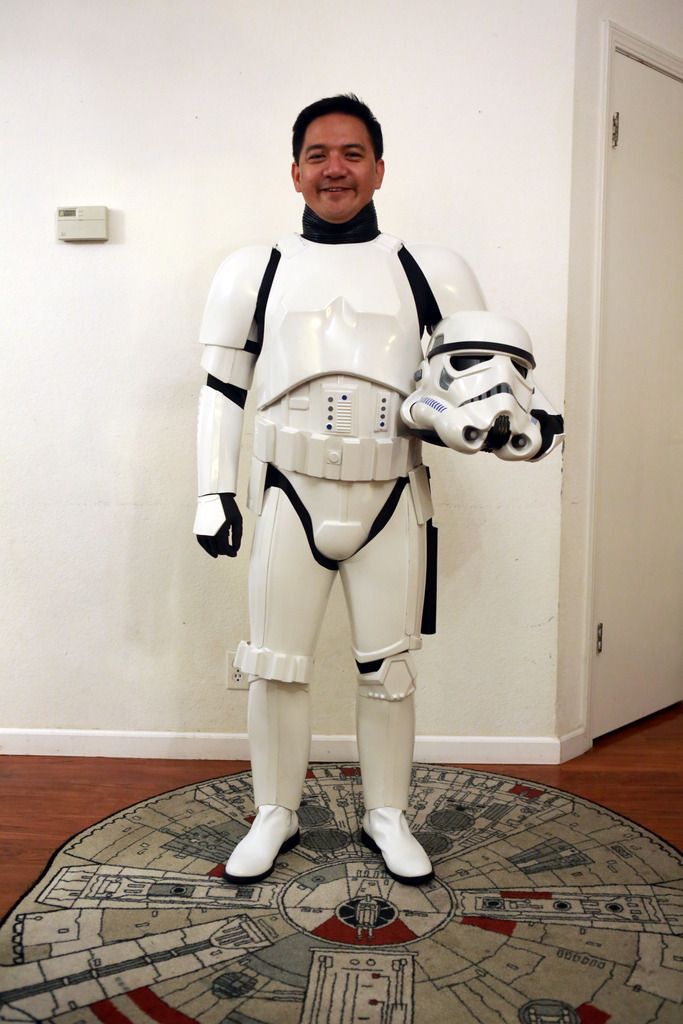
HELMET SHOTS:

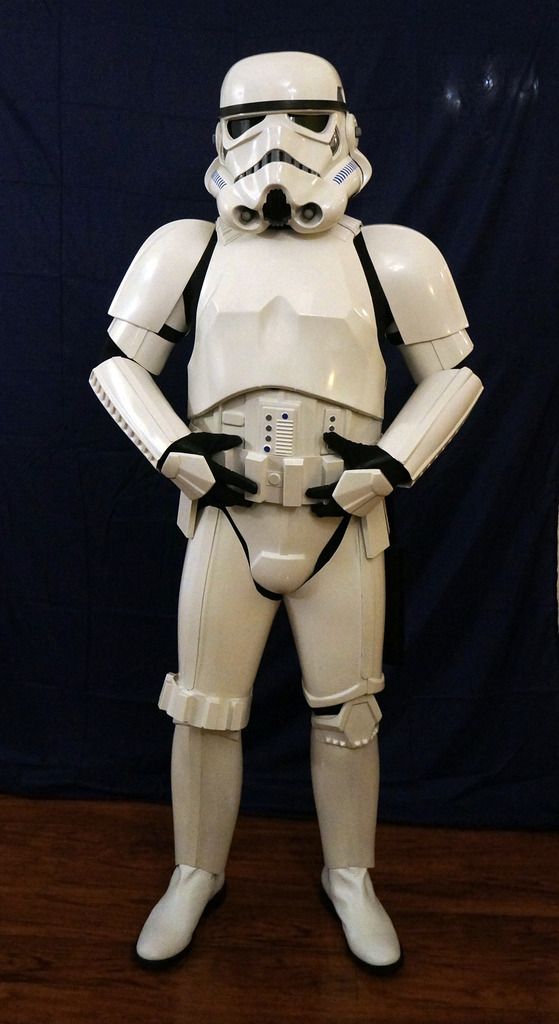
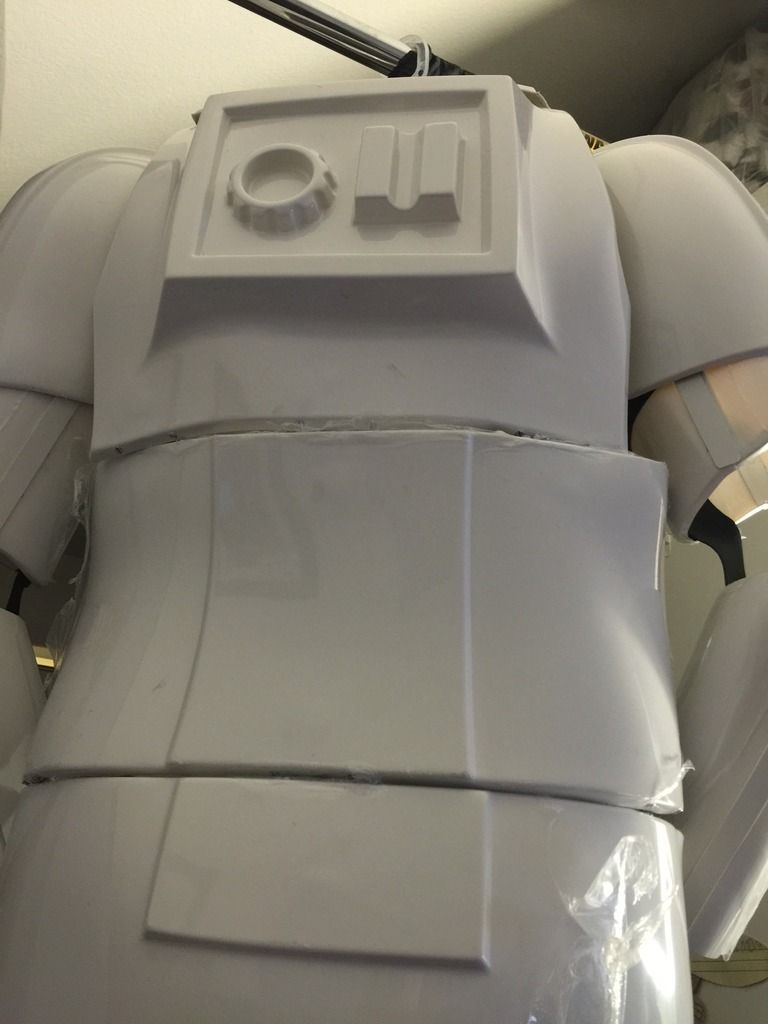
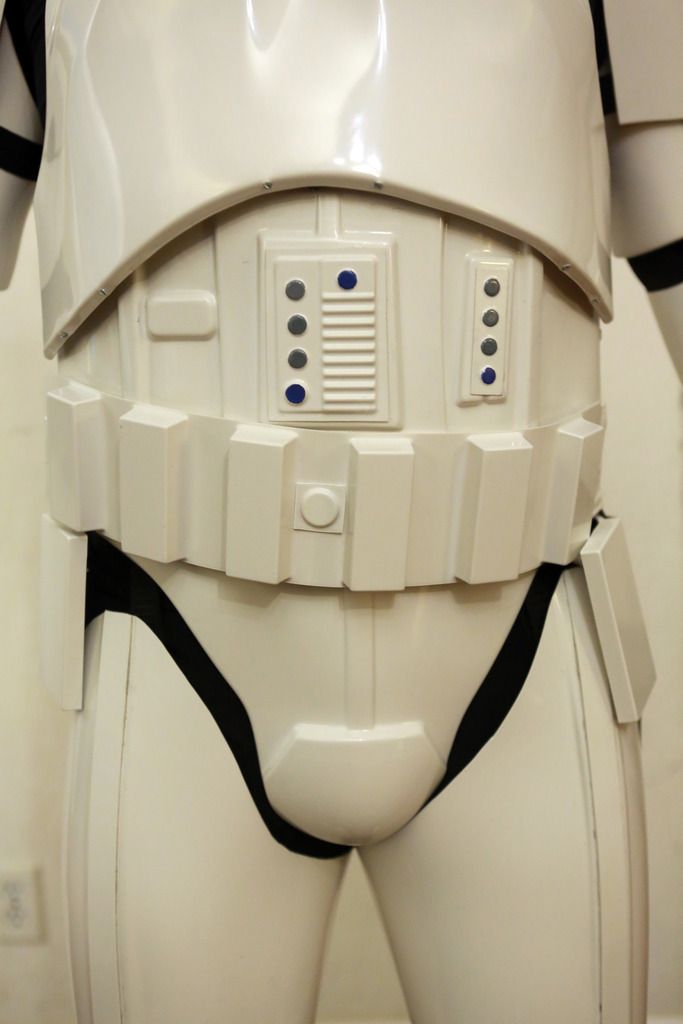
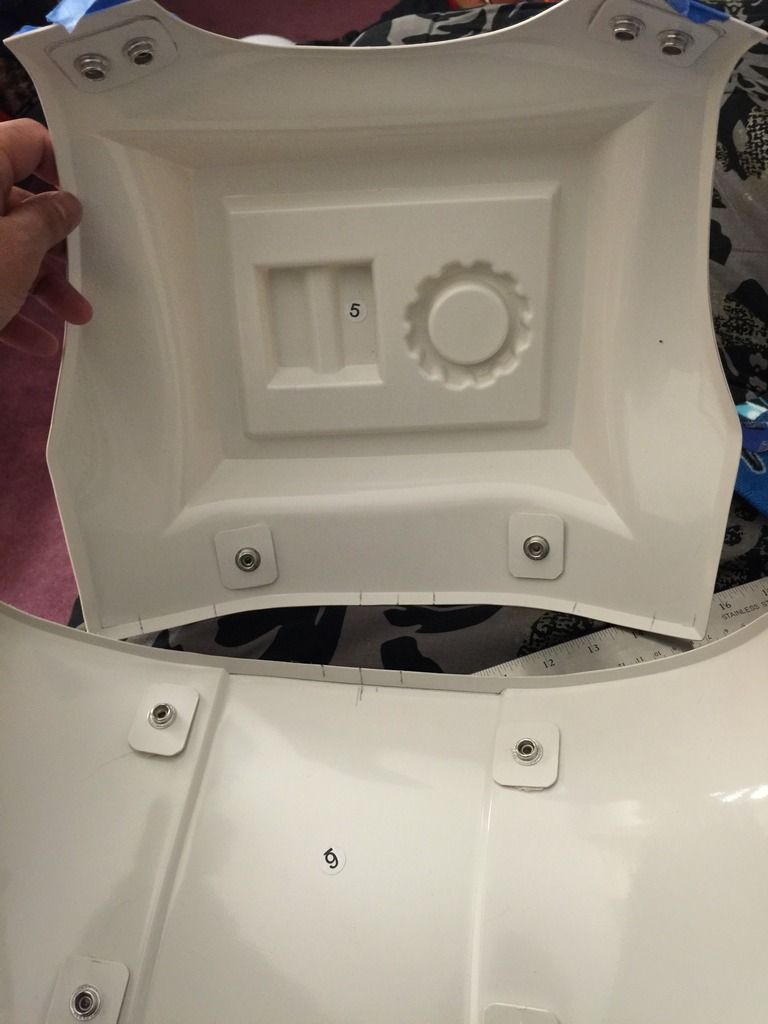
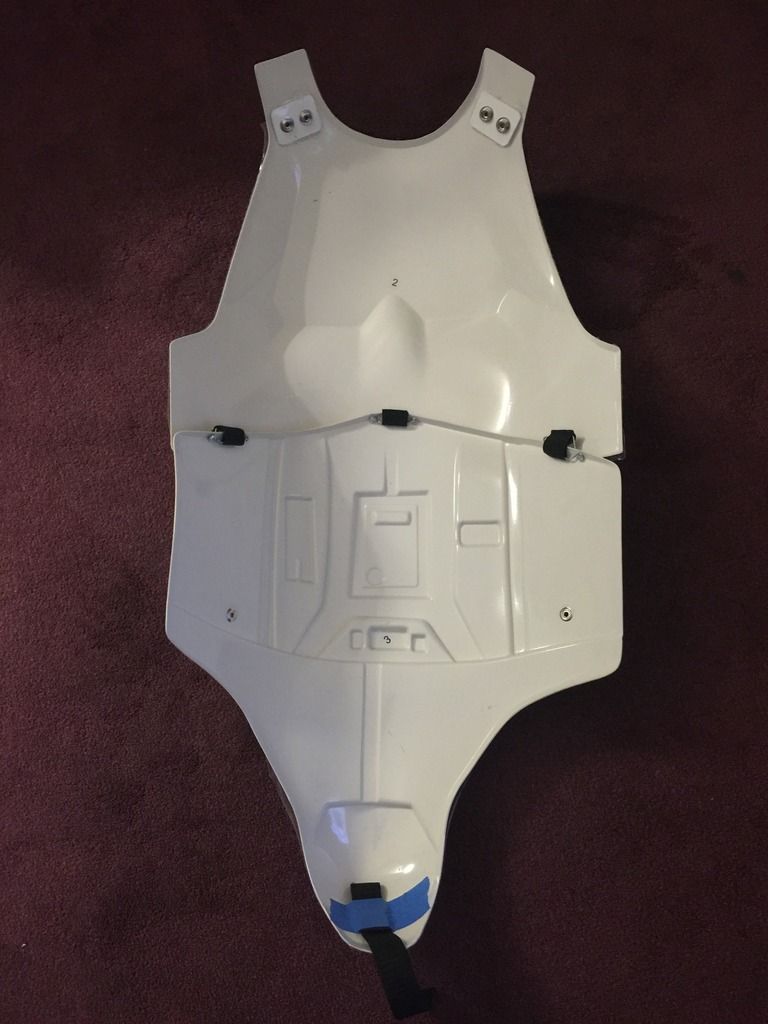
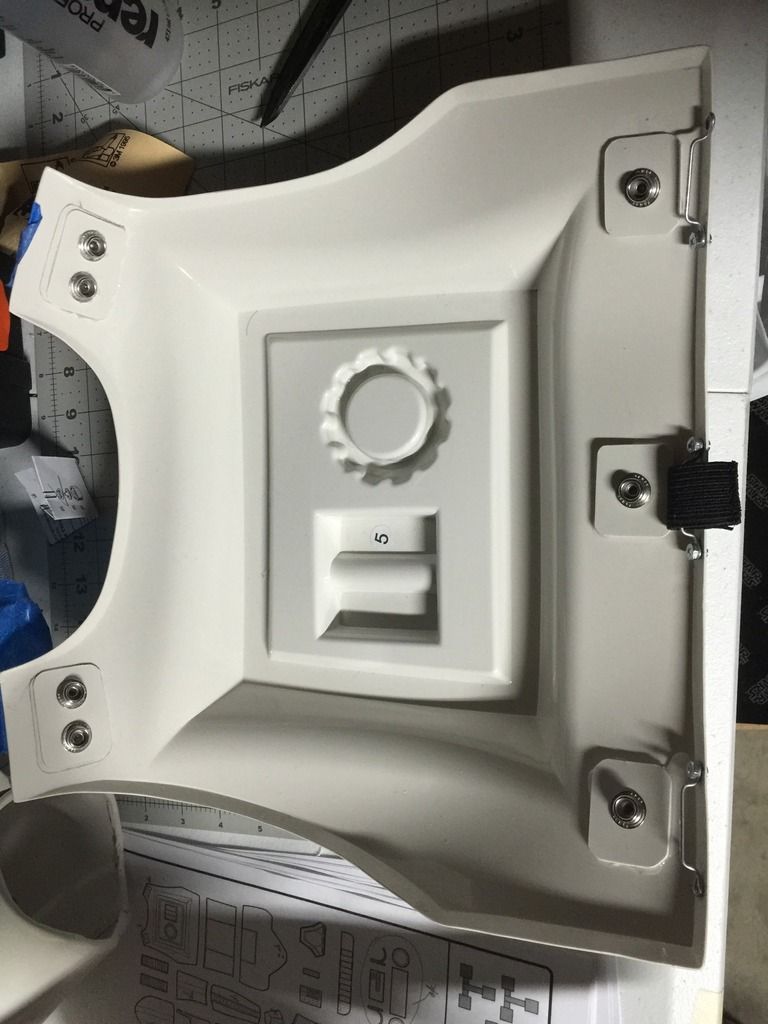
ABDOMEN DETAILS:
COD:
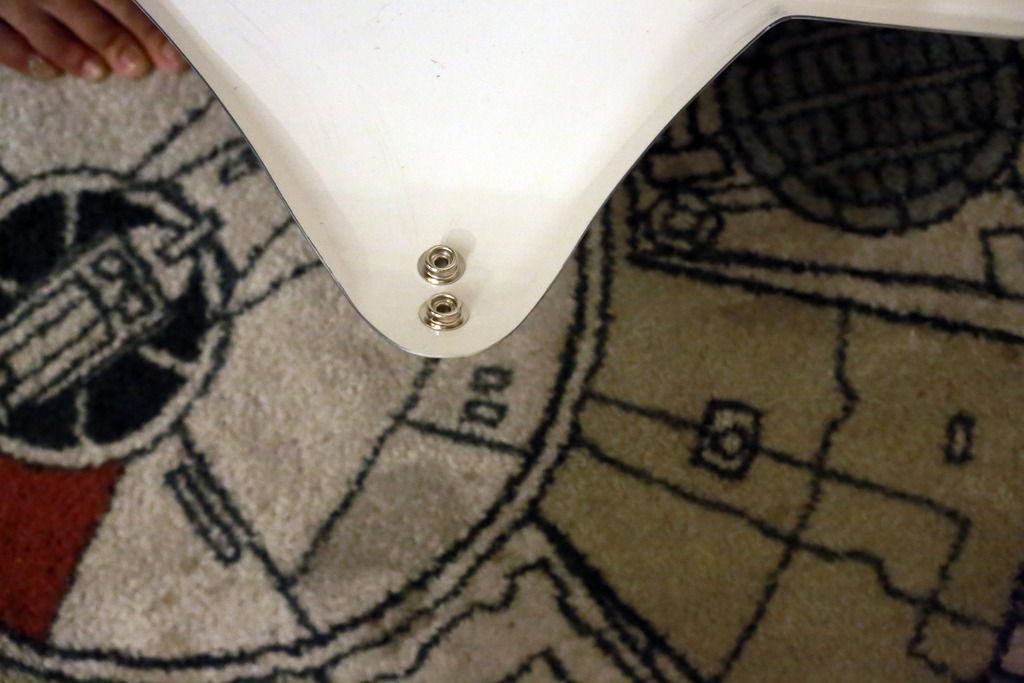
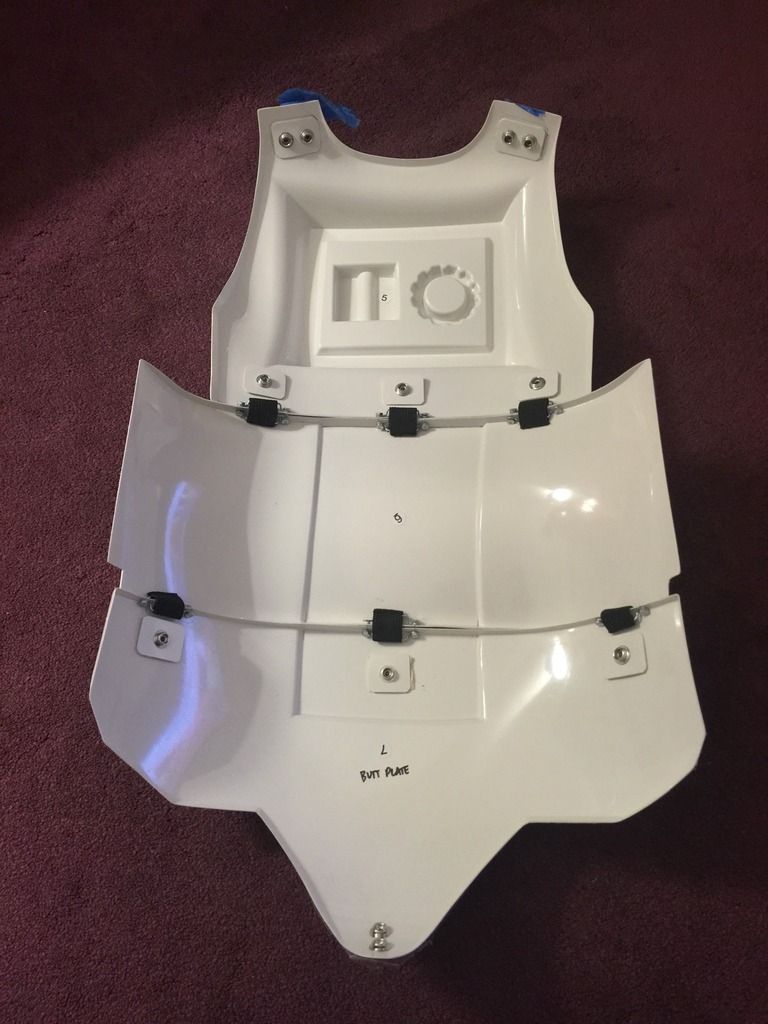
BUTTPLATE:
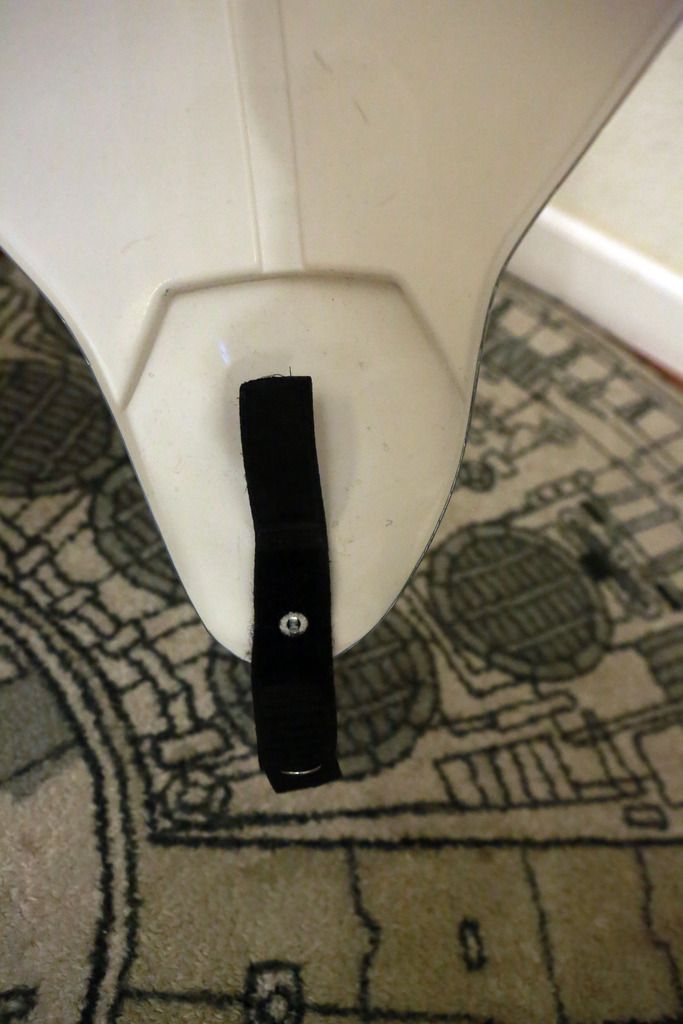
COD-BUTTPLATE ATTACHMENT:
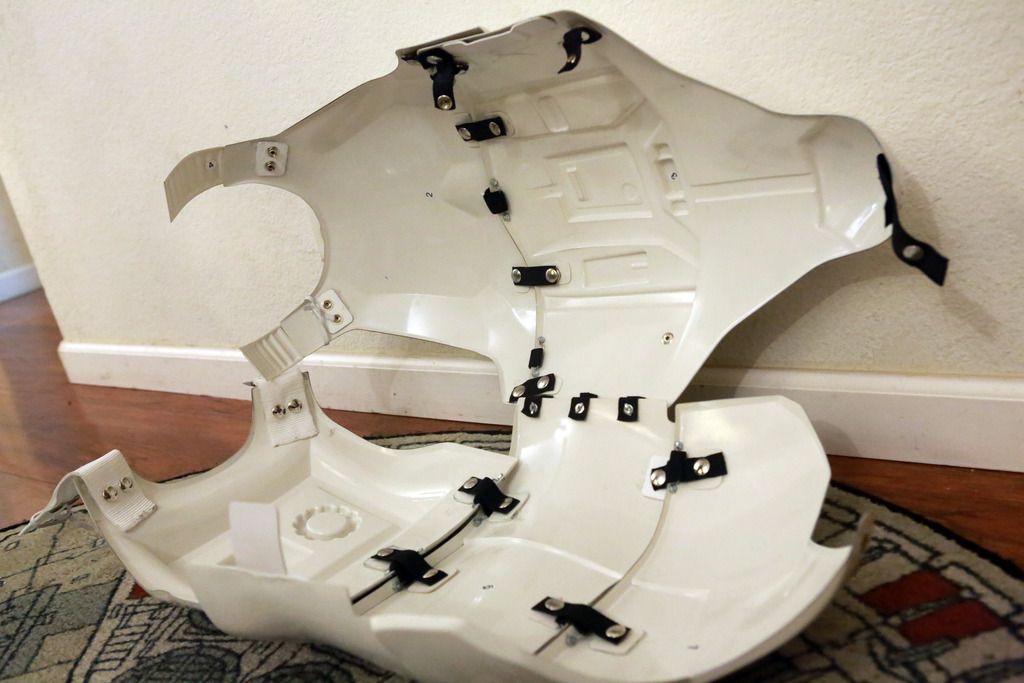
INTERIOR STRAPPING:
BELT / HOLSTER:
NECK SEAL:
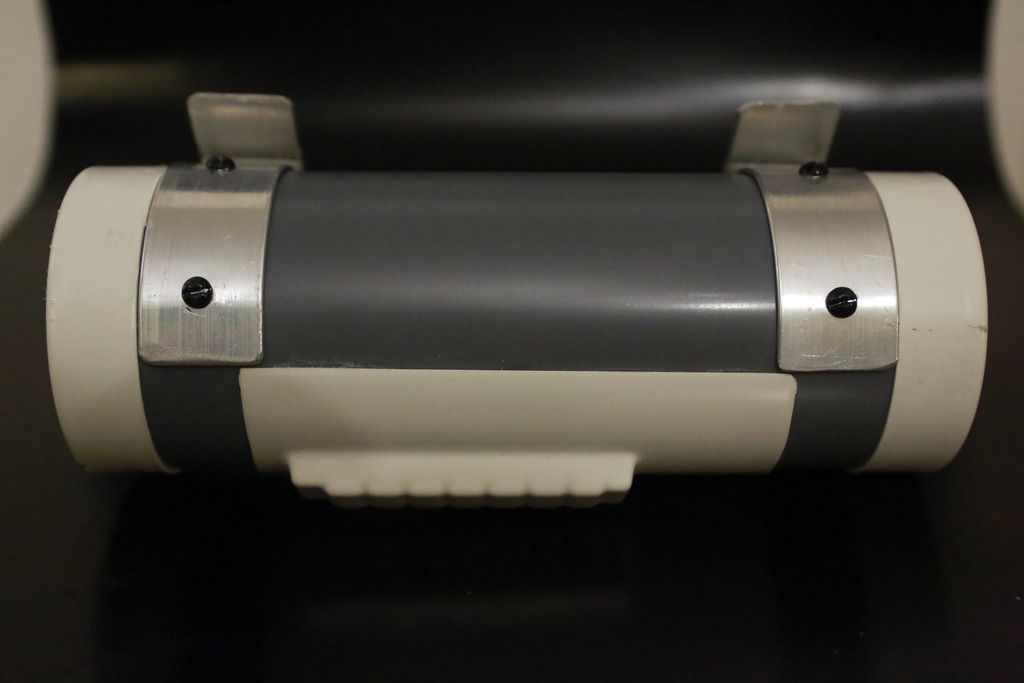
THERMAL DETONATOR:
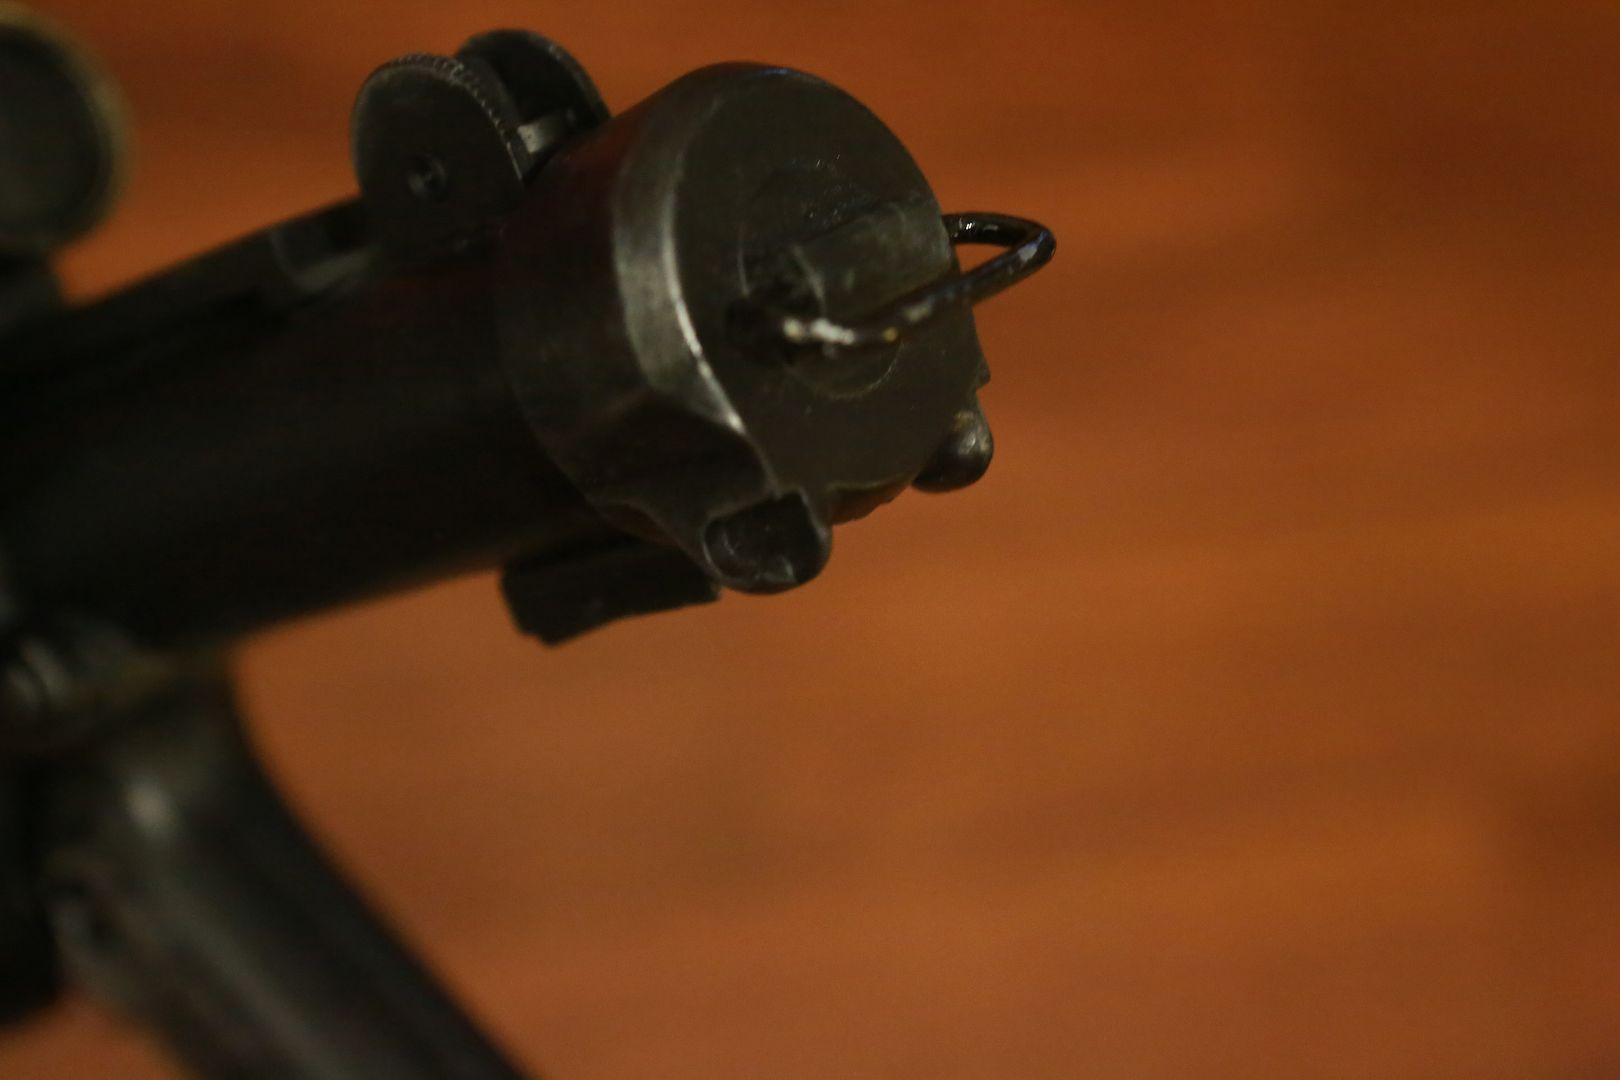
BLASTER:
ACTION SHOTS:
For your kind consideration, thank you for your time.
Cheers!
TK-74259
TK-(RICKY)
-
2
-
-
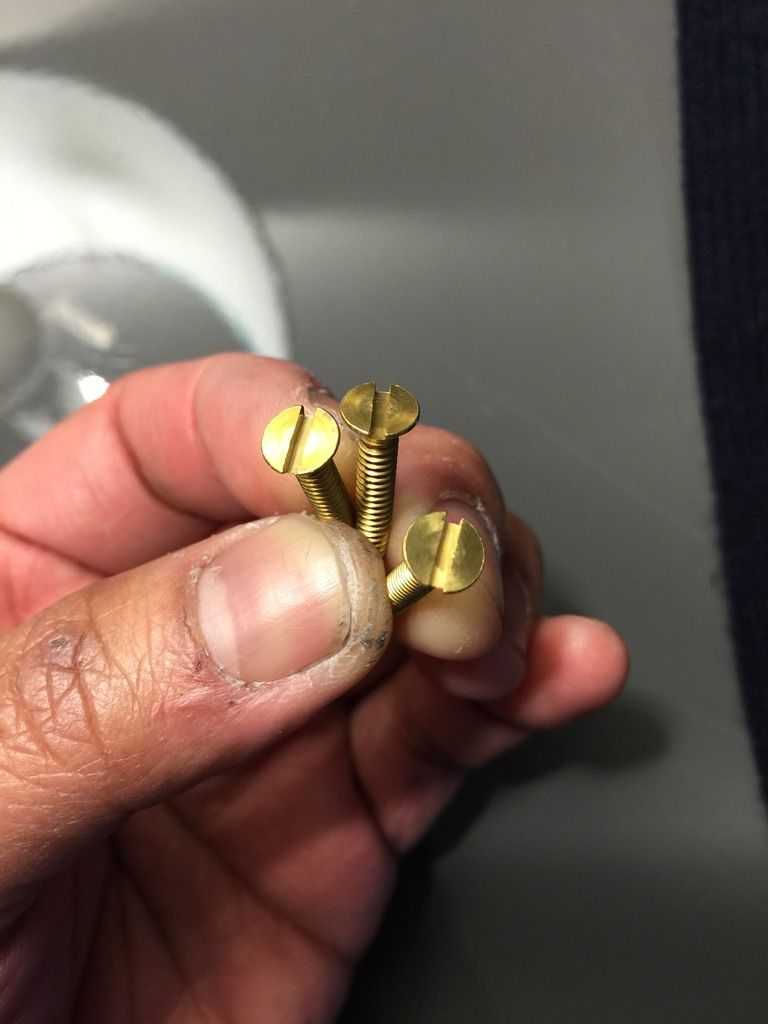
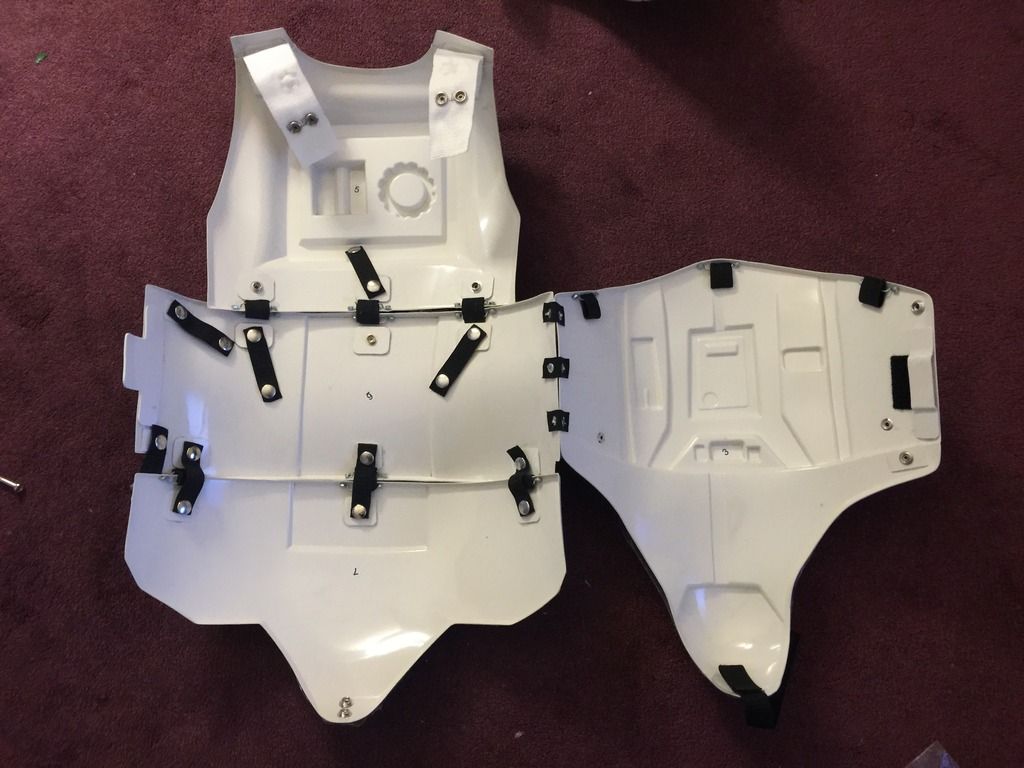
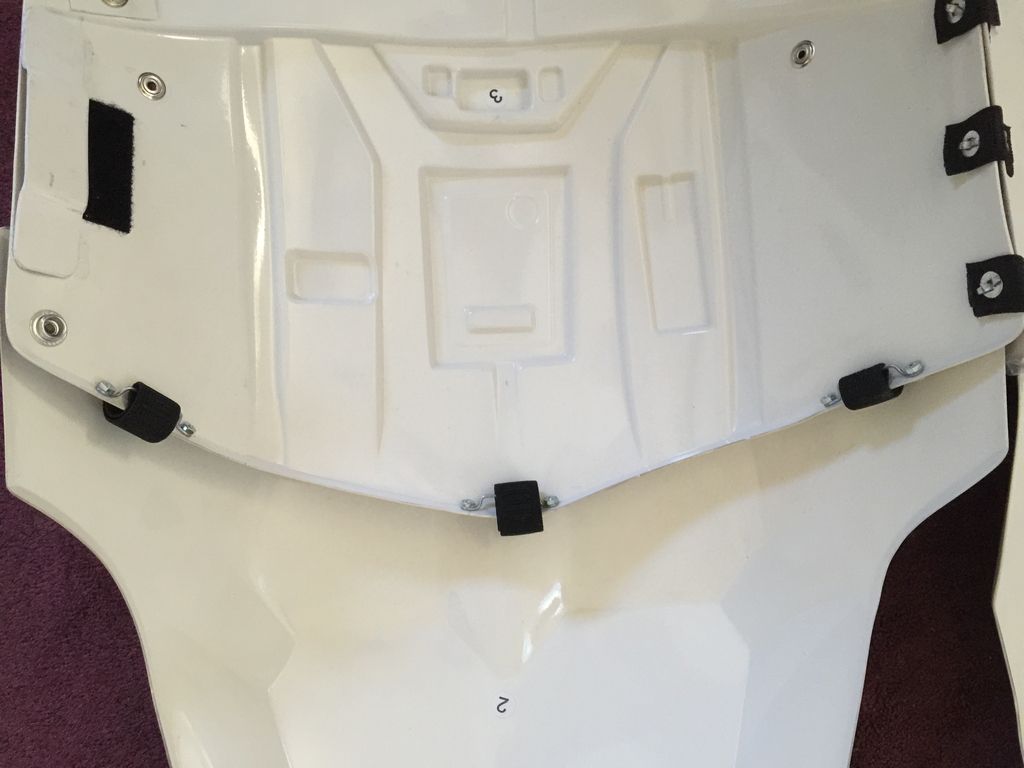
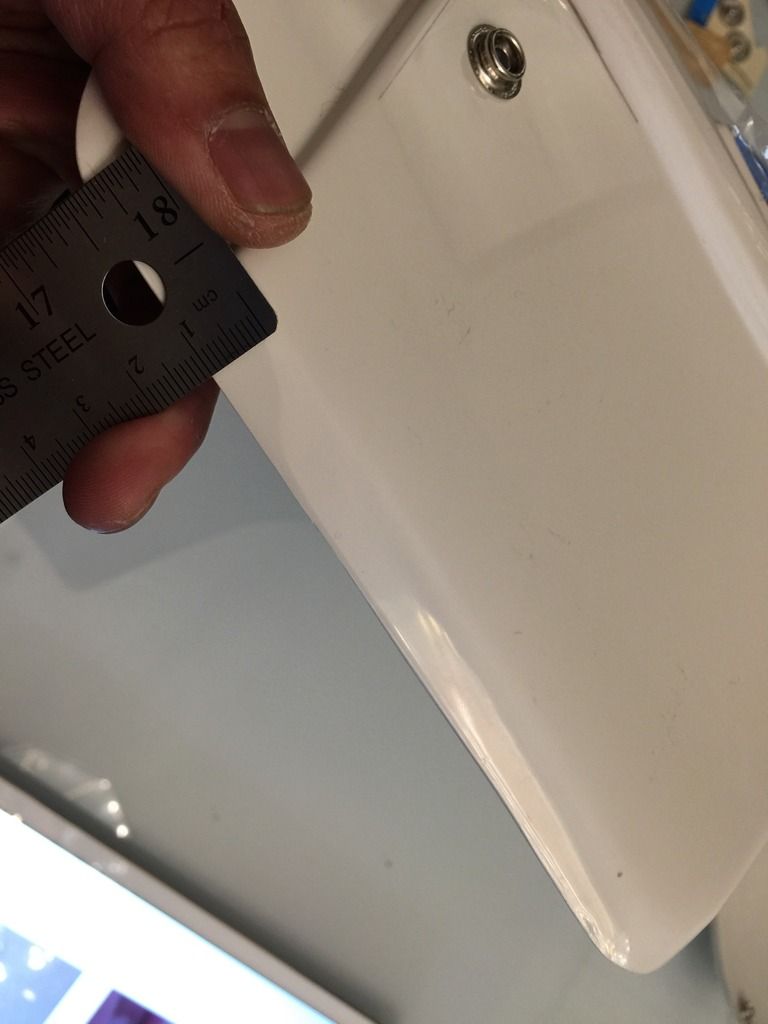
MARCH Part 3, it's all about the details...
03.06.16
Saying goodbye to the stock Anovos TD screws
03.08.16
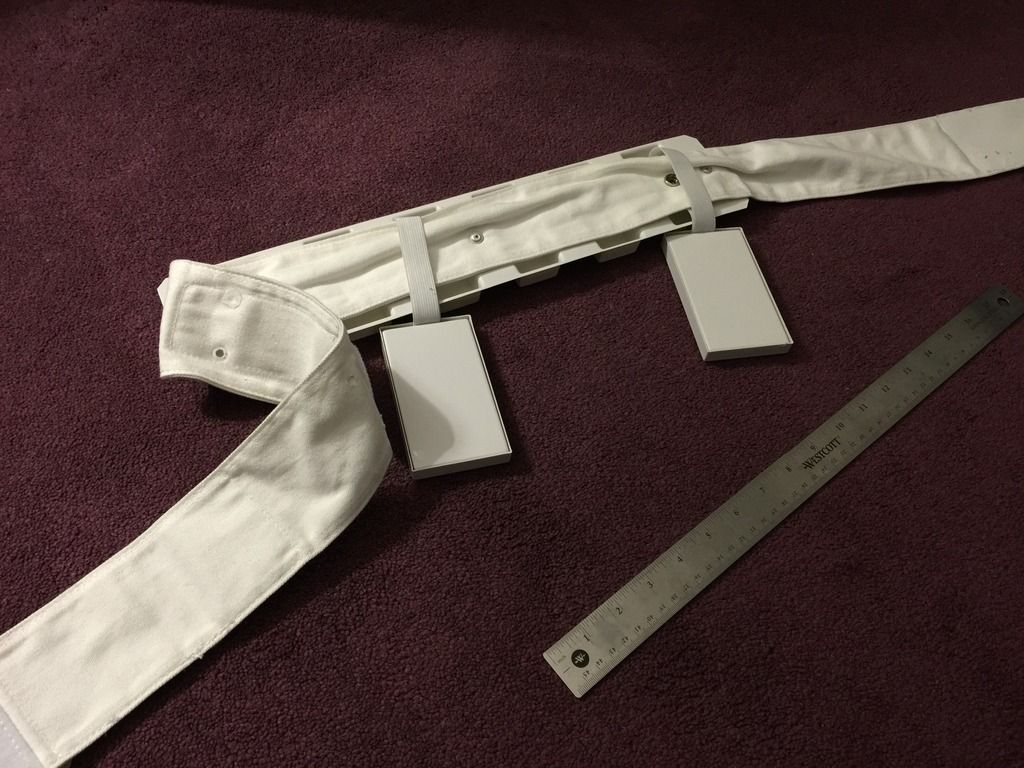
03.13.16 -- Prepping the shoulder strap

03.14.16
03.17.16

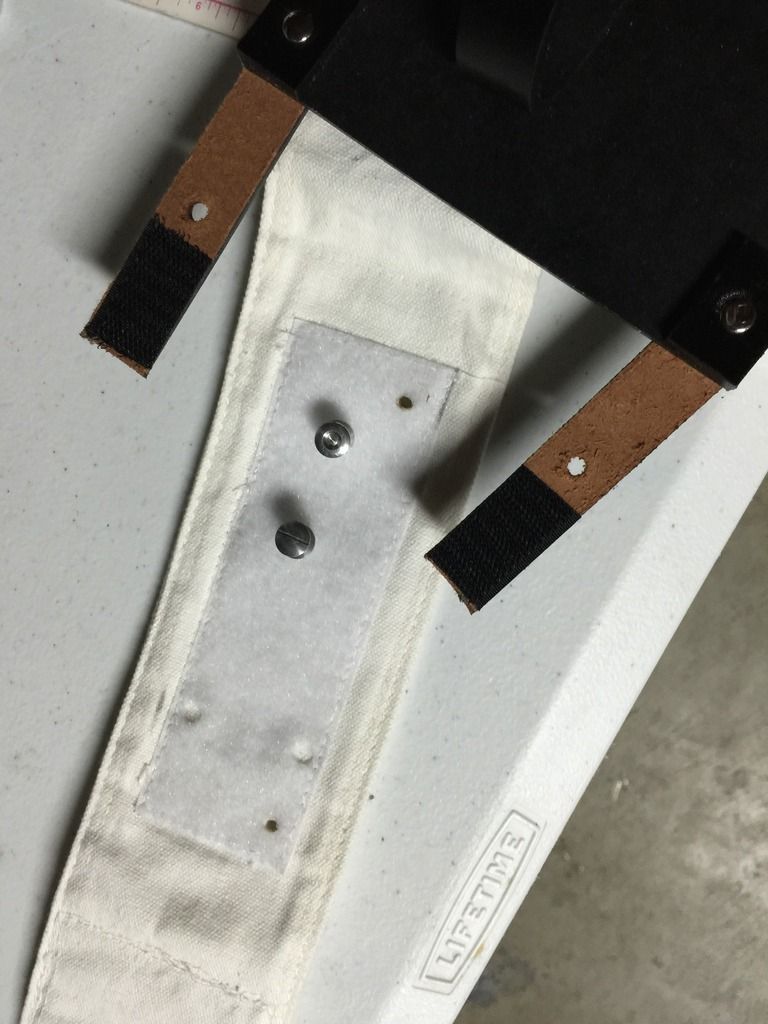
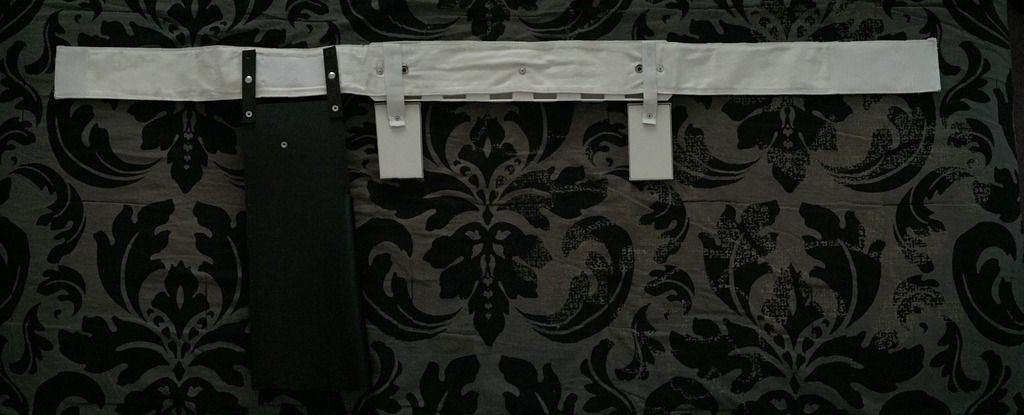
03.18.16 Belt support

-
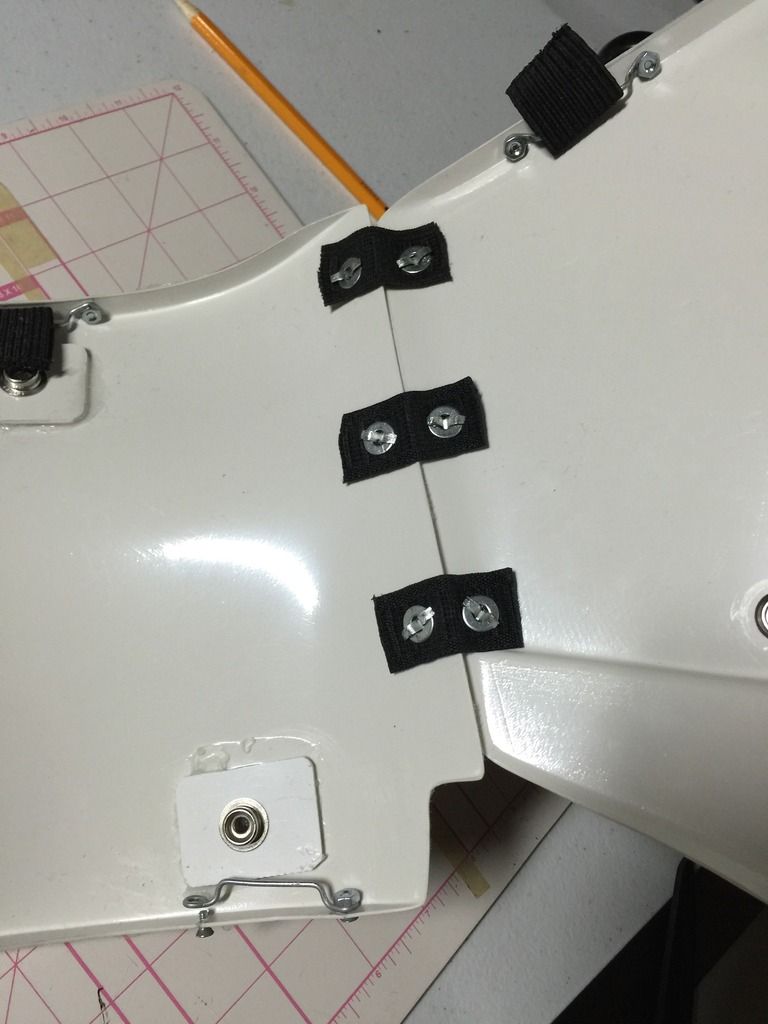
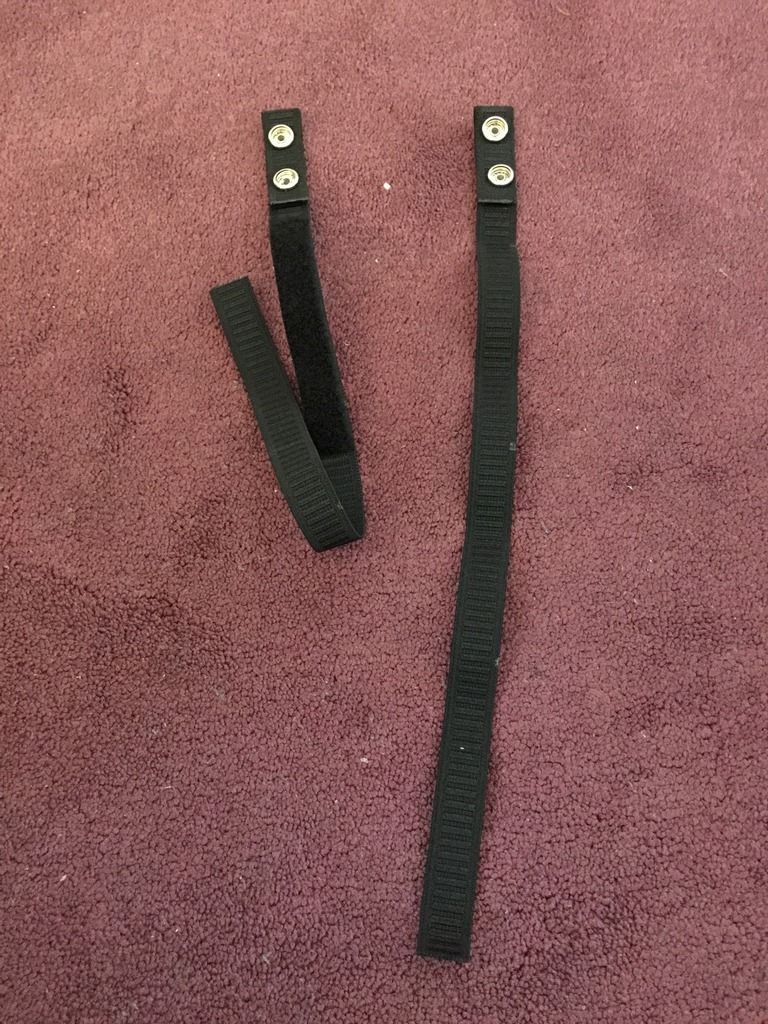
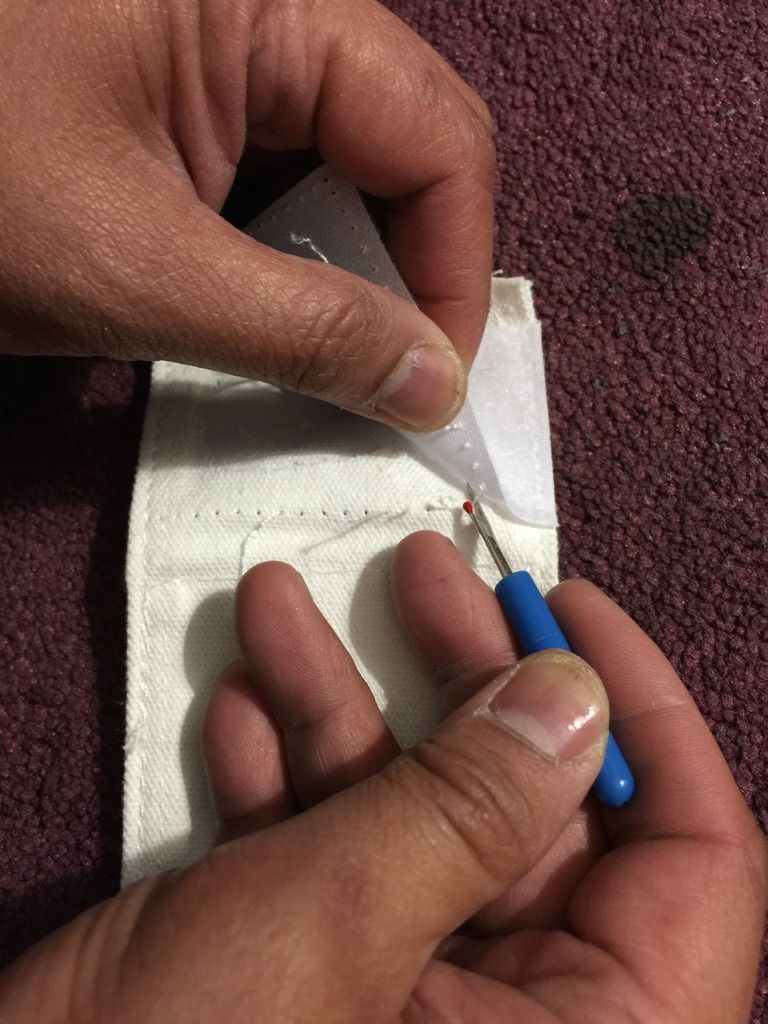
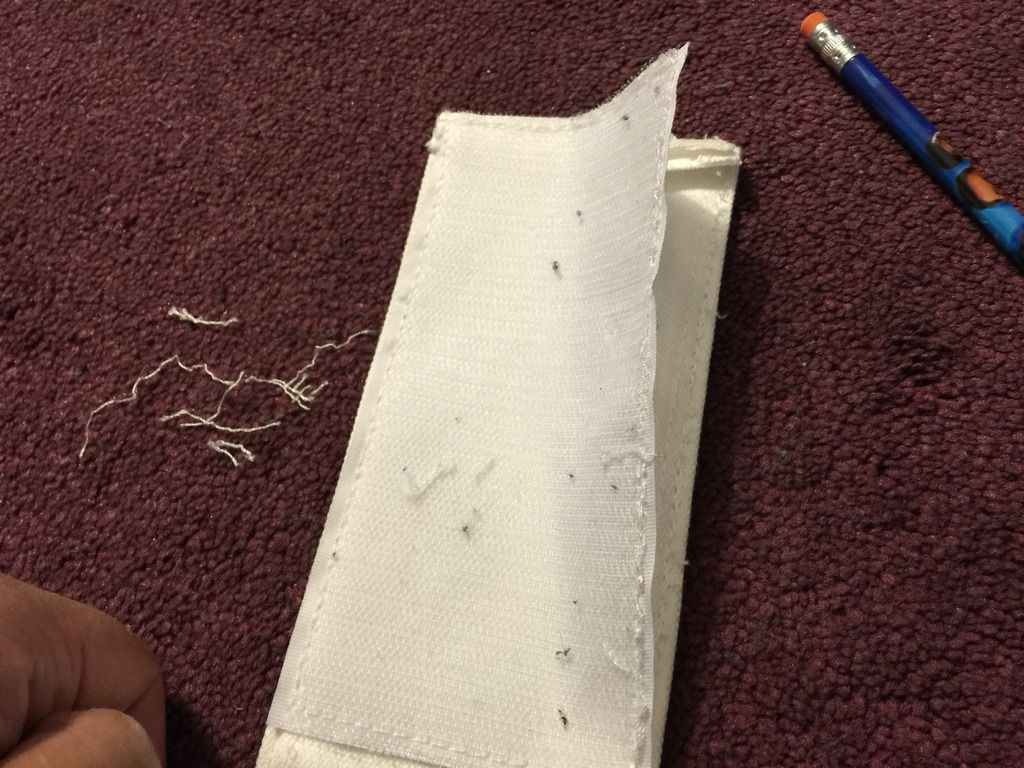
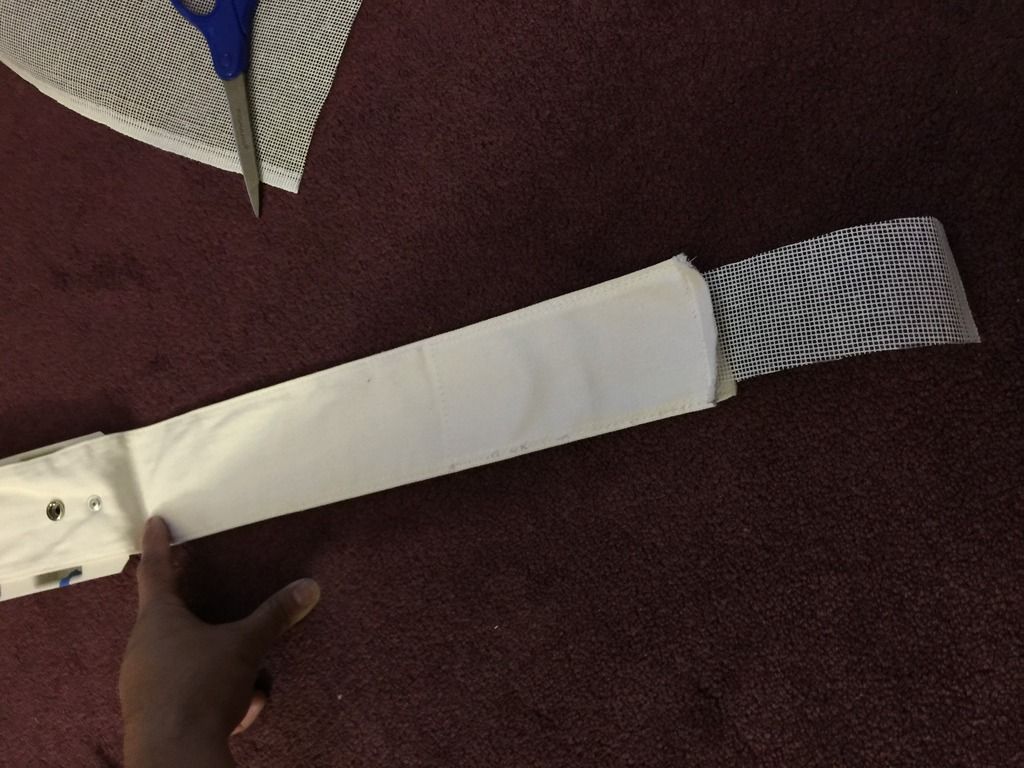
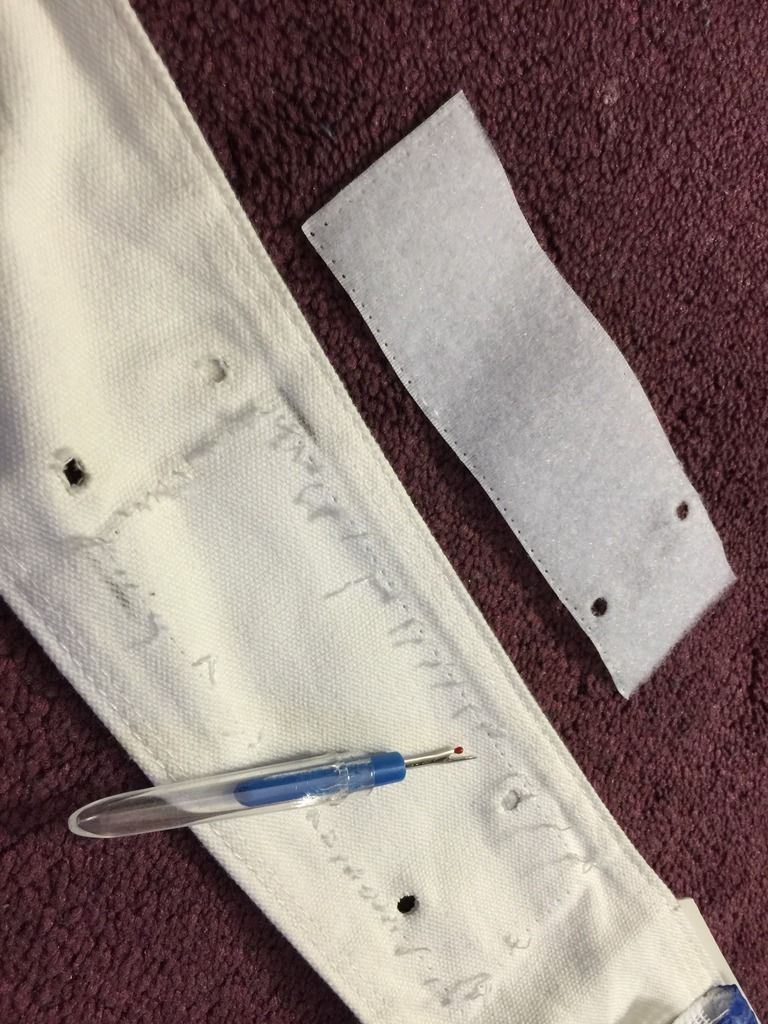
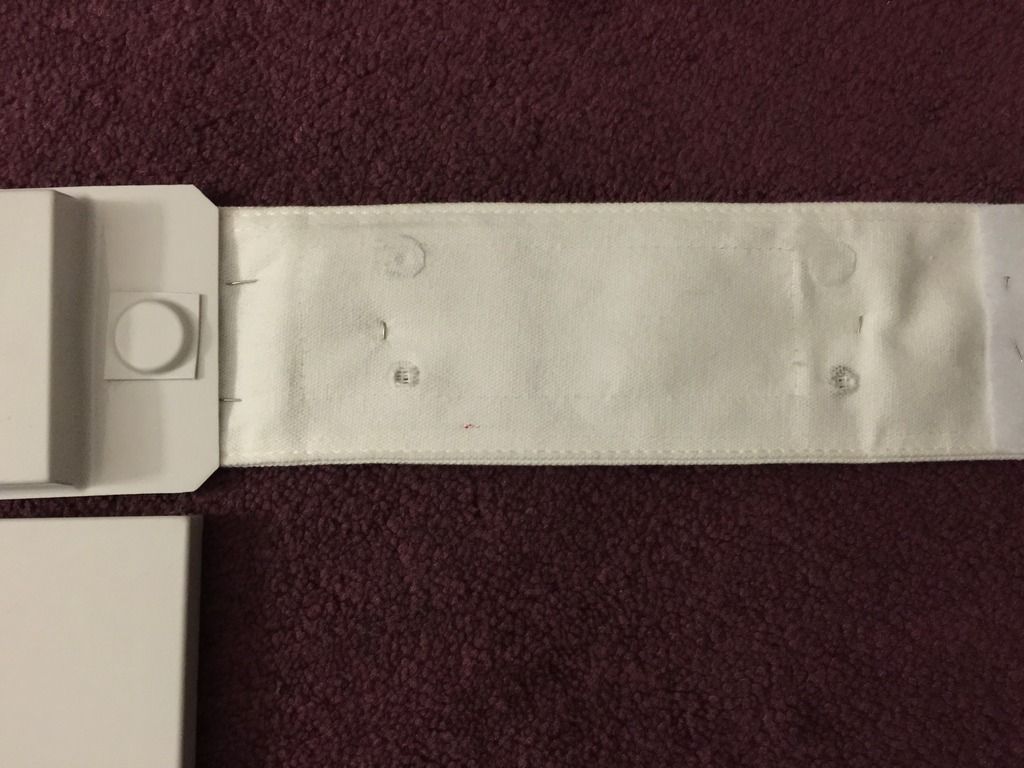
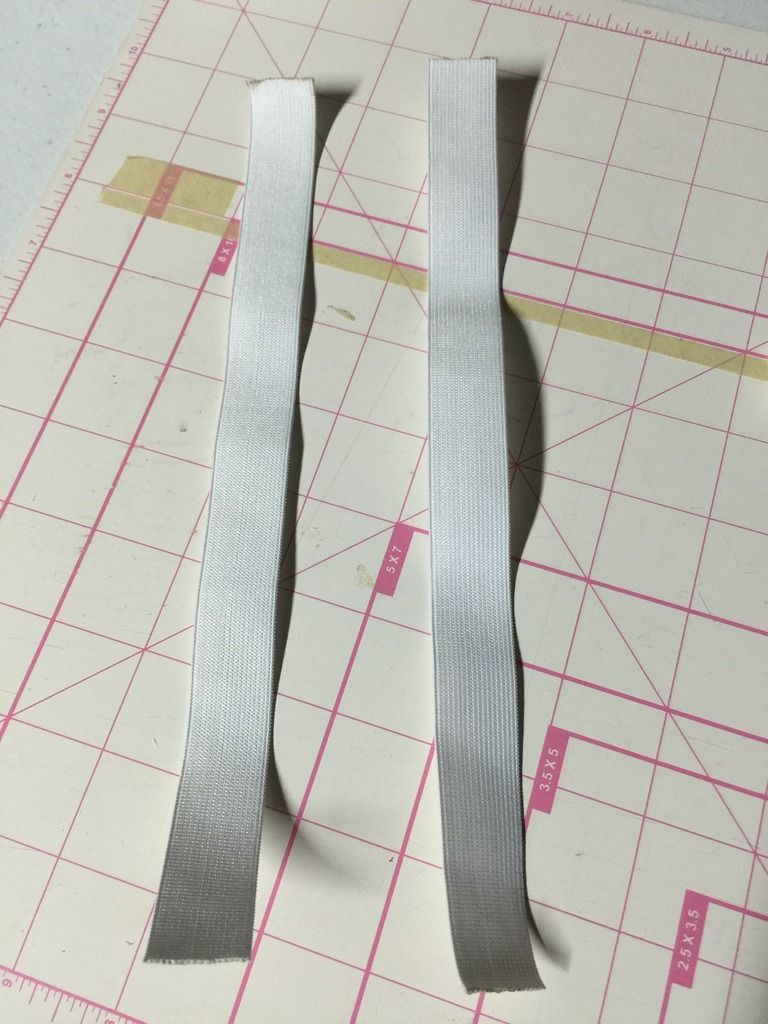
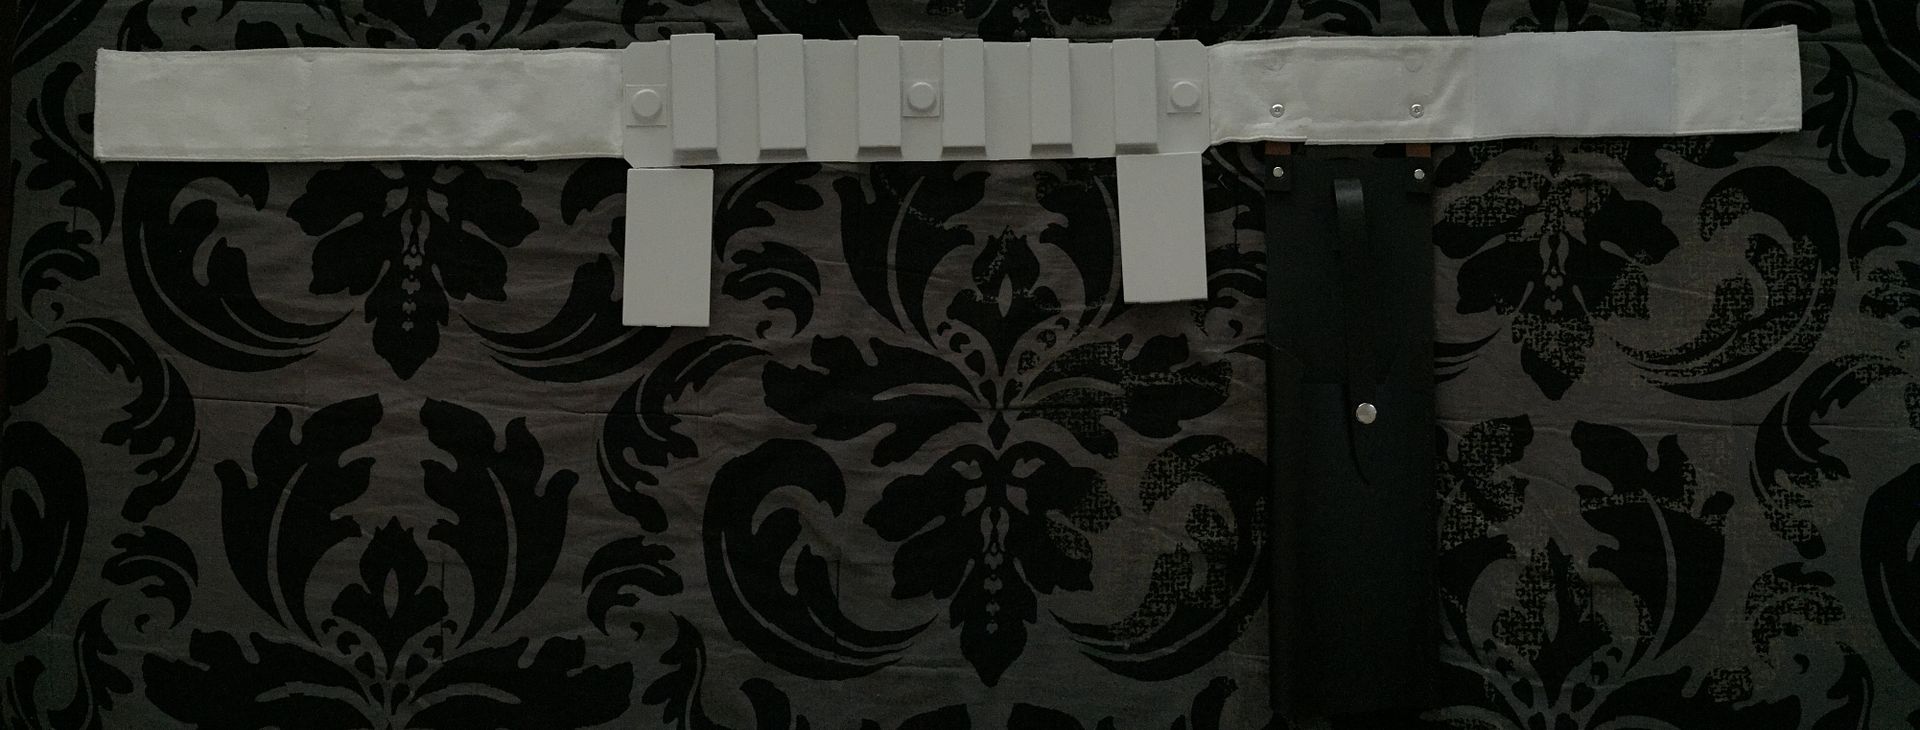
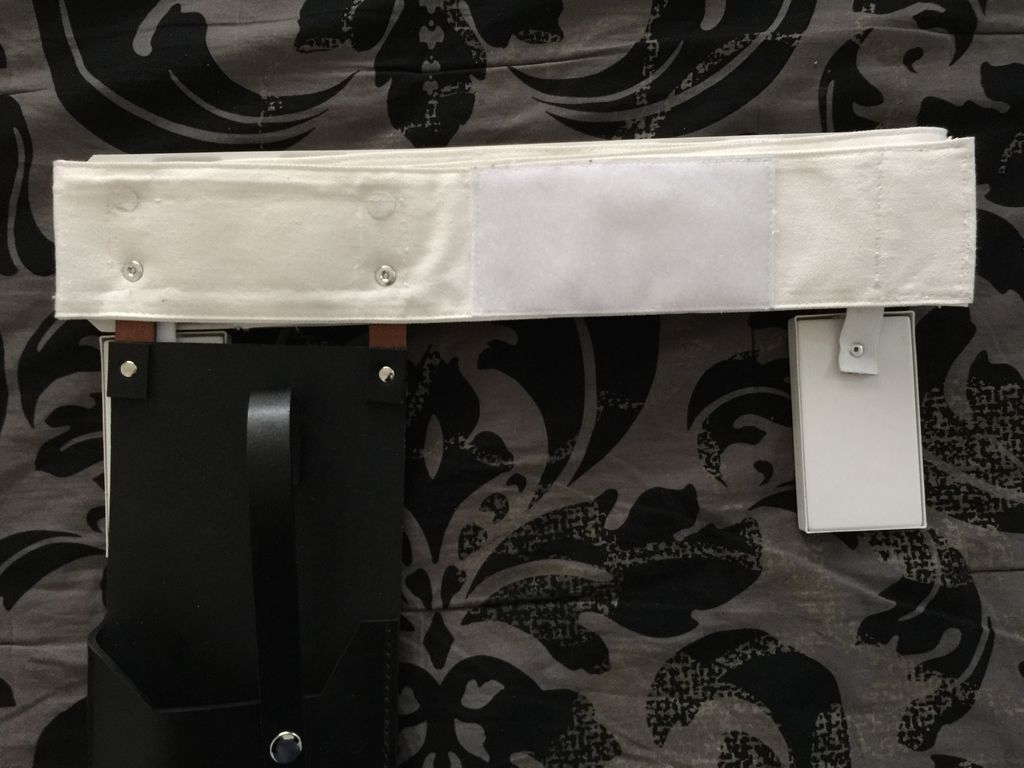
MARCH Part 2, Belt of Contention
Not wanting to continue with a flimsy belt, but not enough courage (yet) to do a major overhaul using a TKittel Belt, I decided to do something about this belt.
It may not be the best solution (I did it on gut instinct, with no research), but it kinda worked.
in the end, I lost a good amount of slack and gained a bit of rigidity.
03.05.16
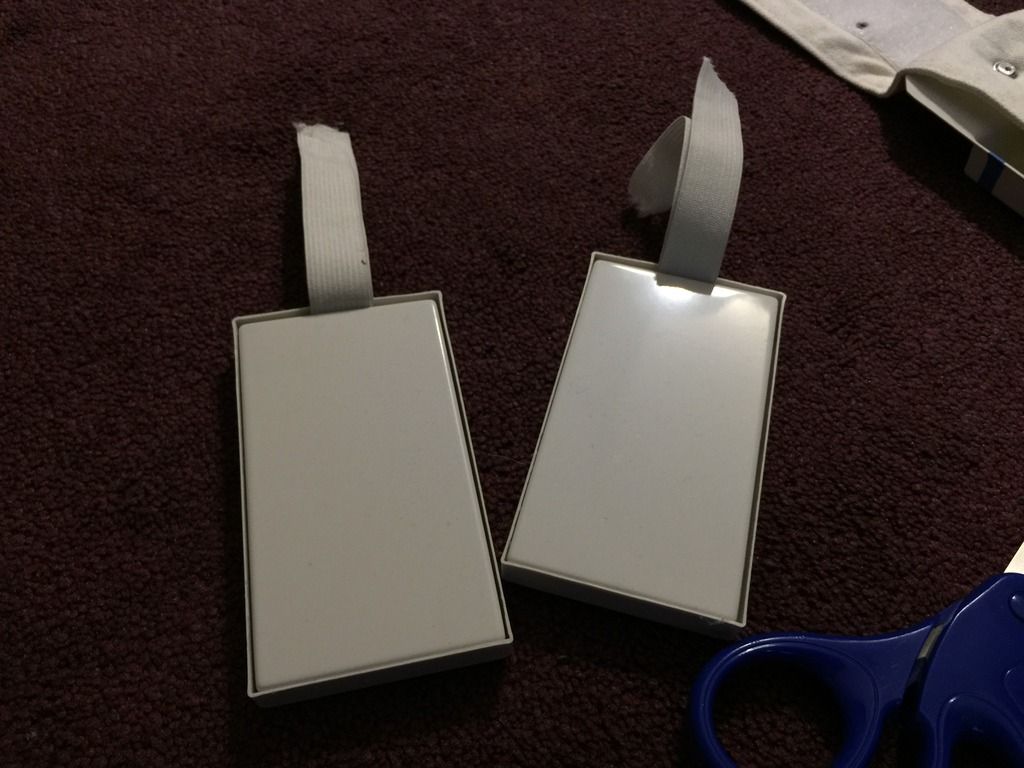
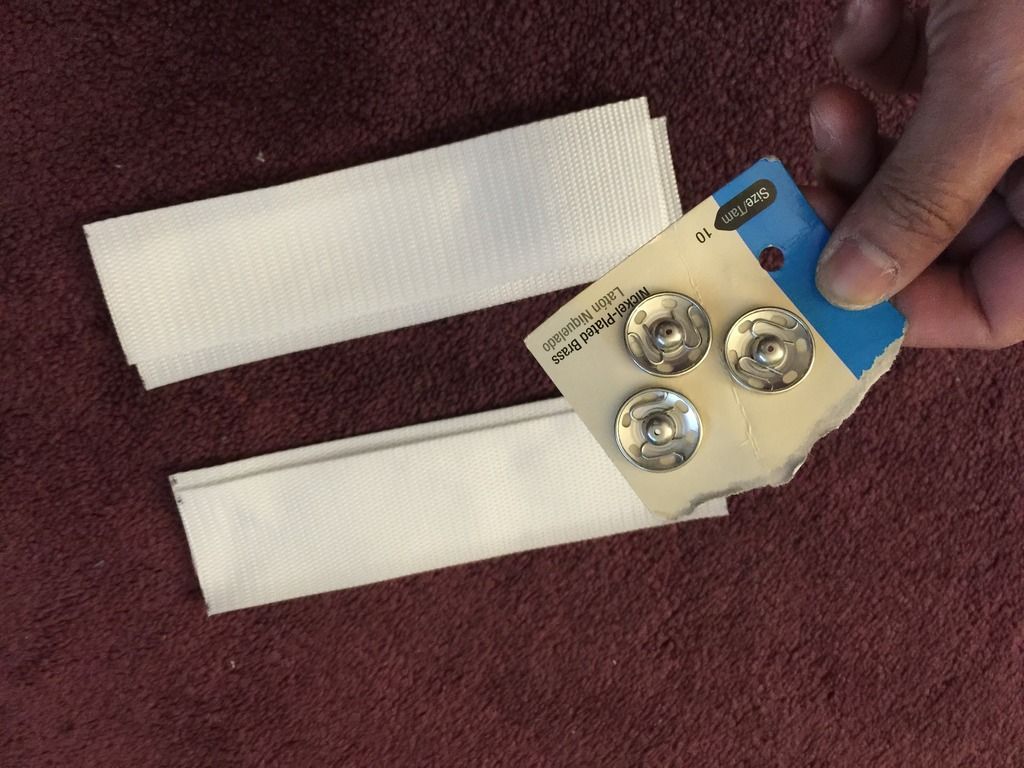
Saw this at Michael's and thought "what the heck!"
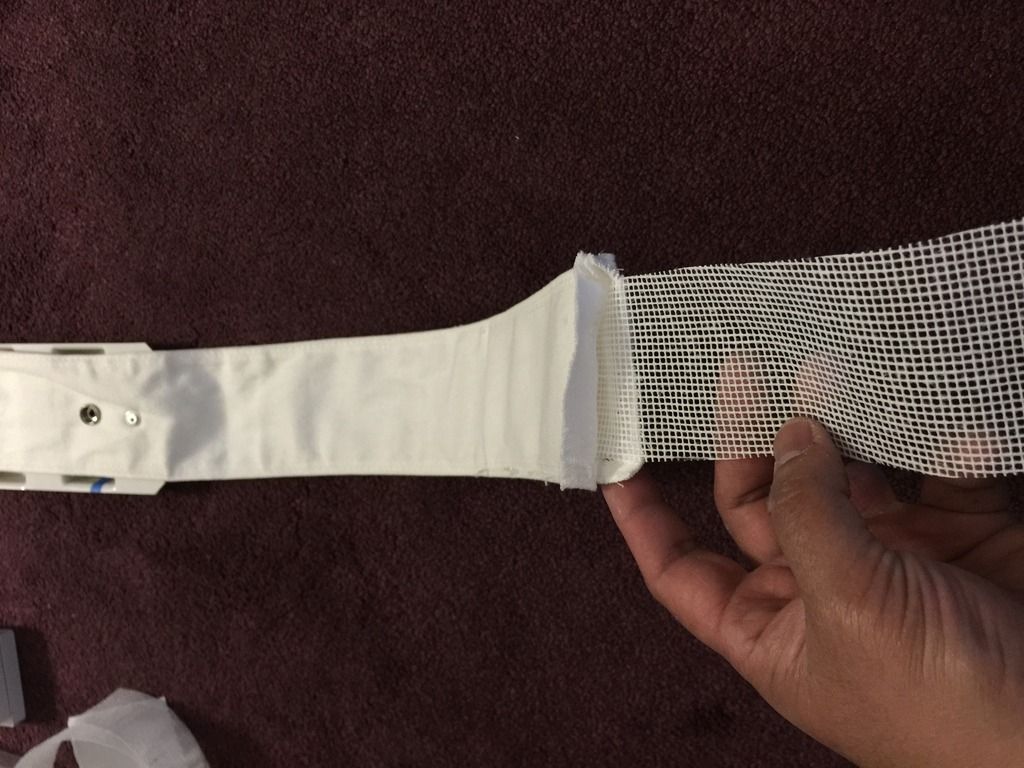
I eventually ended up inserting two of the material...
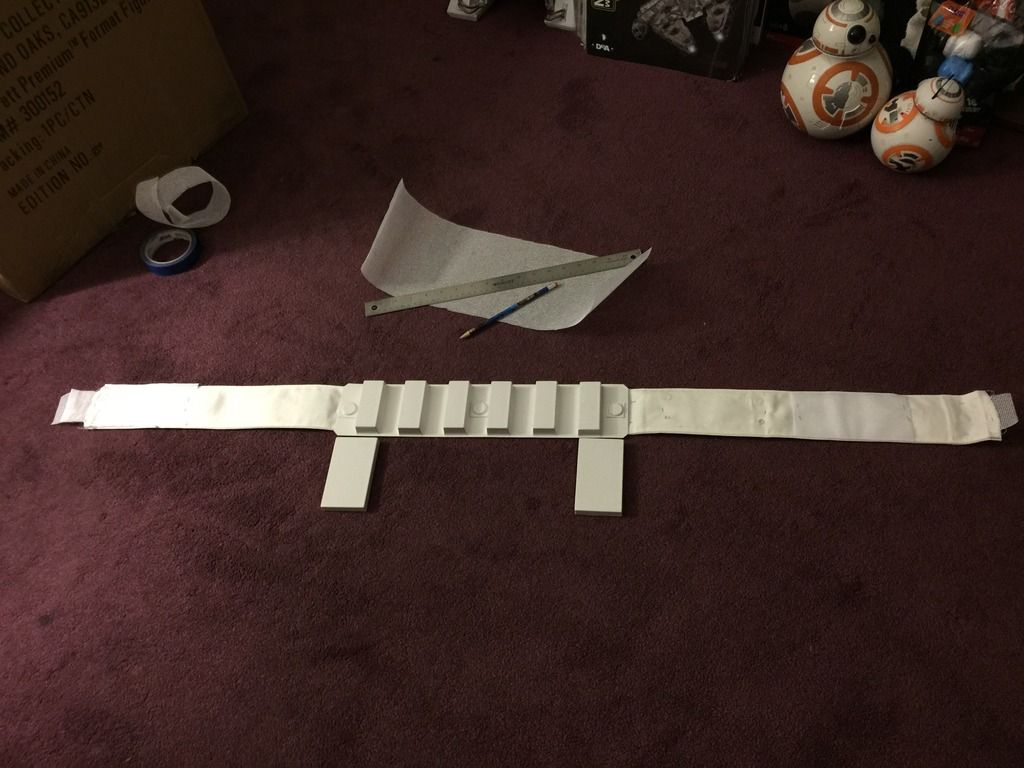
03.09.16
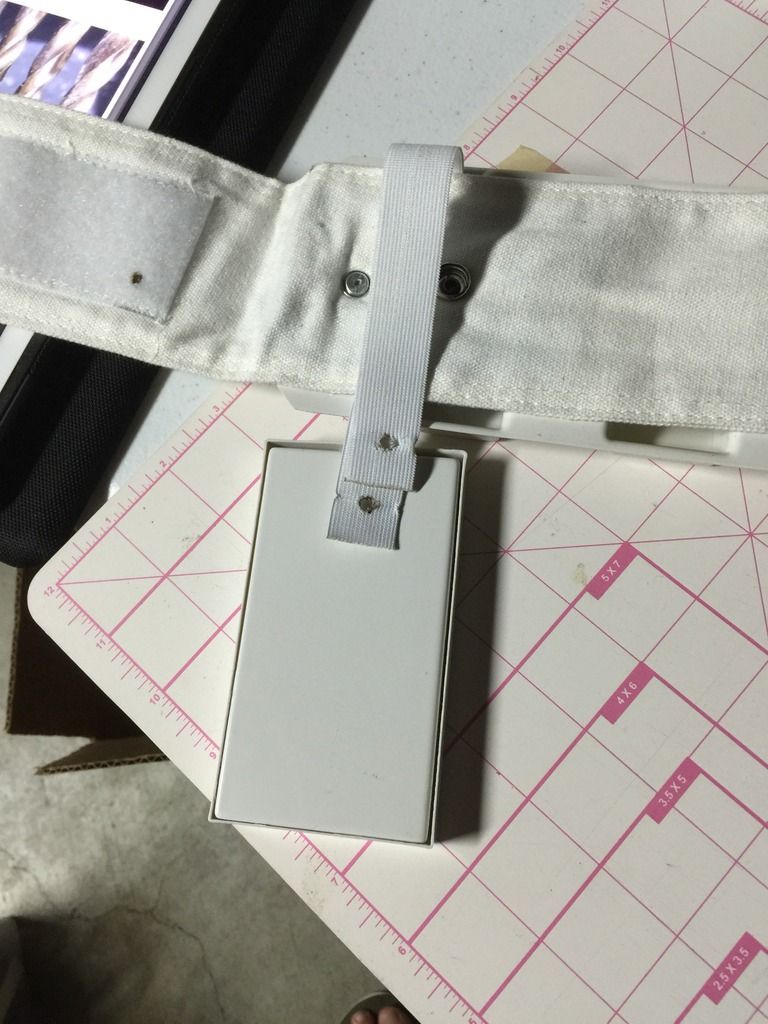
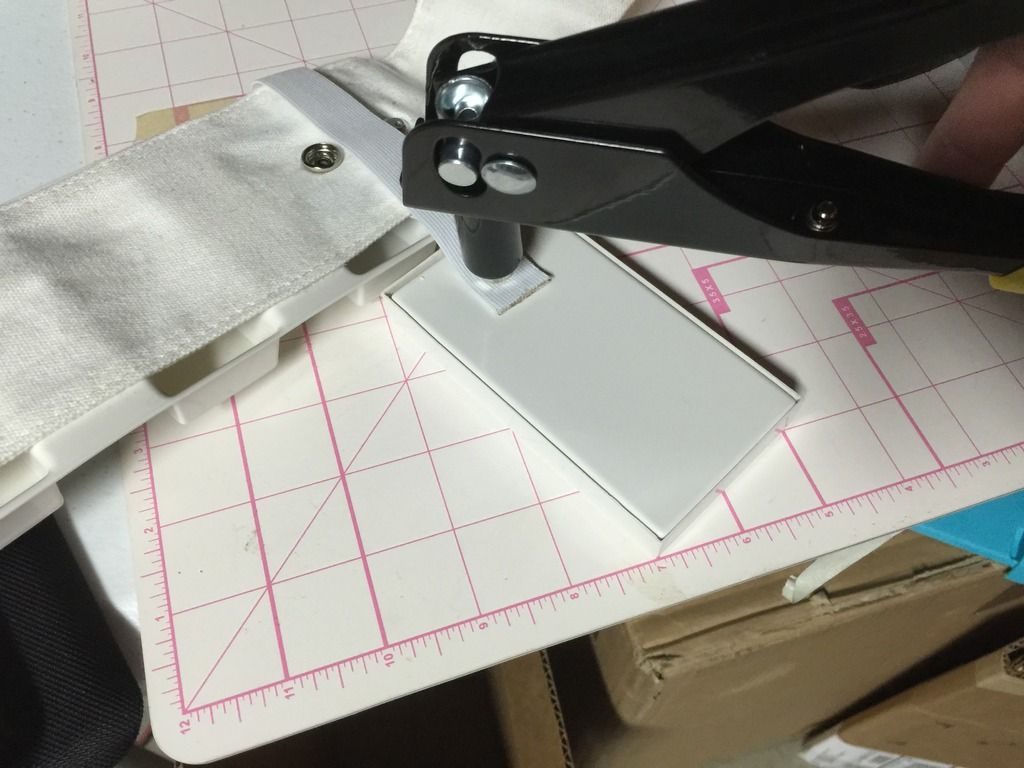

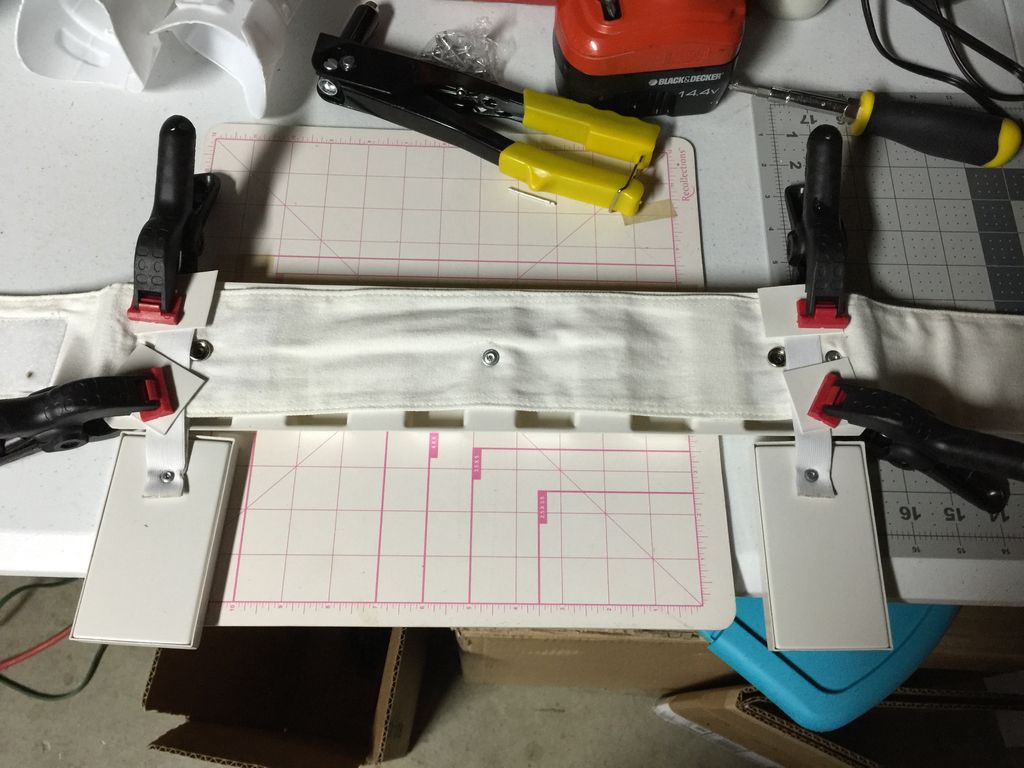
03.10.16
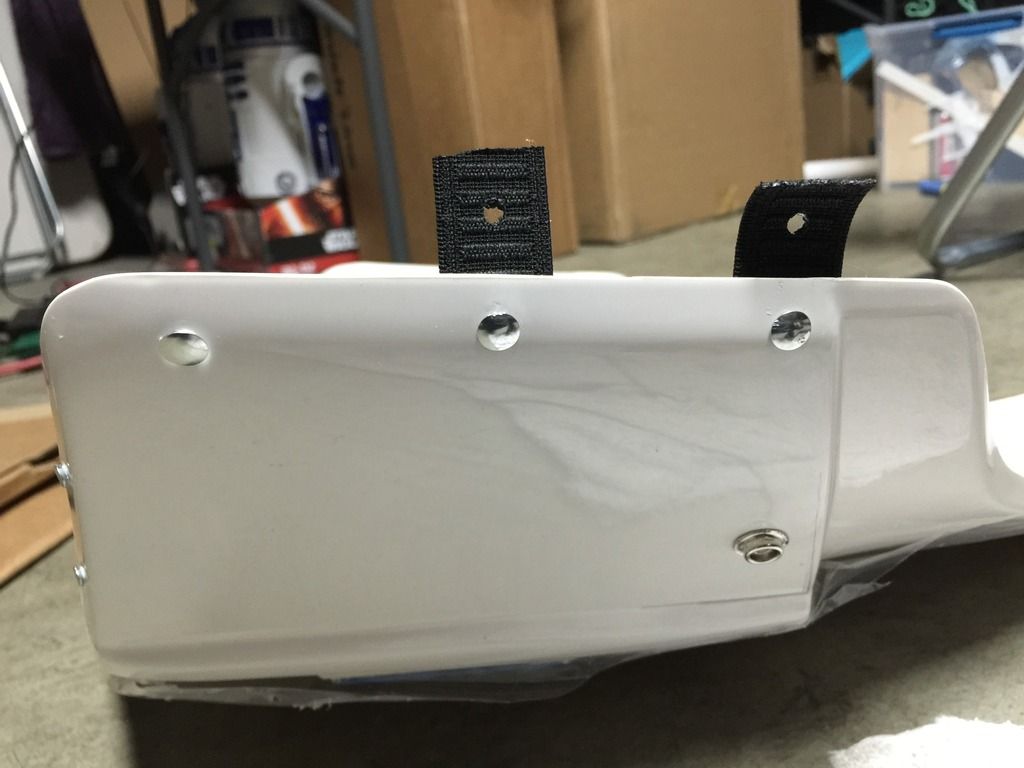
I installed some velcro on the upper holster strap to (hopefully) help the Chicago screws carry the load.
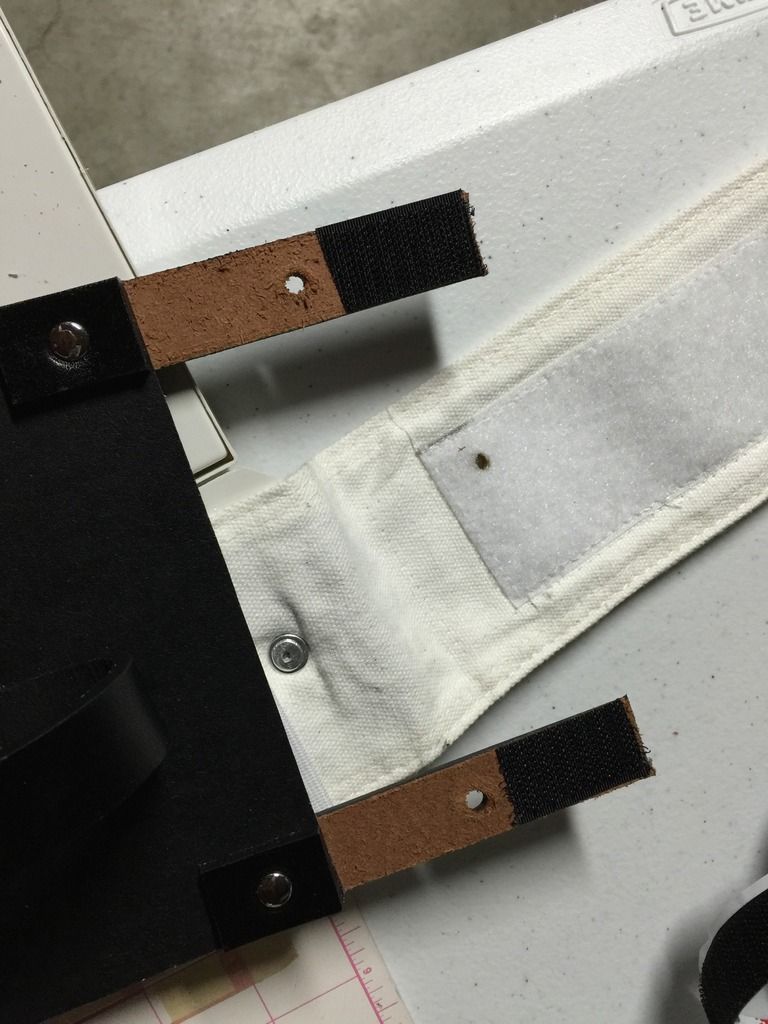
Notice that I also moved the soft side of the velcro to make sure it is in line with both ends of the holster starps.
-
1
-
-
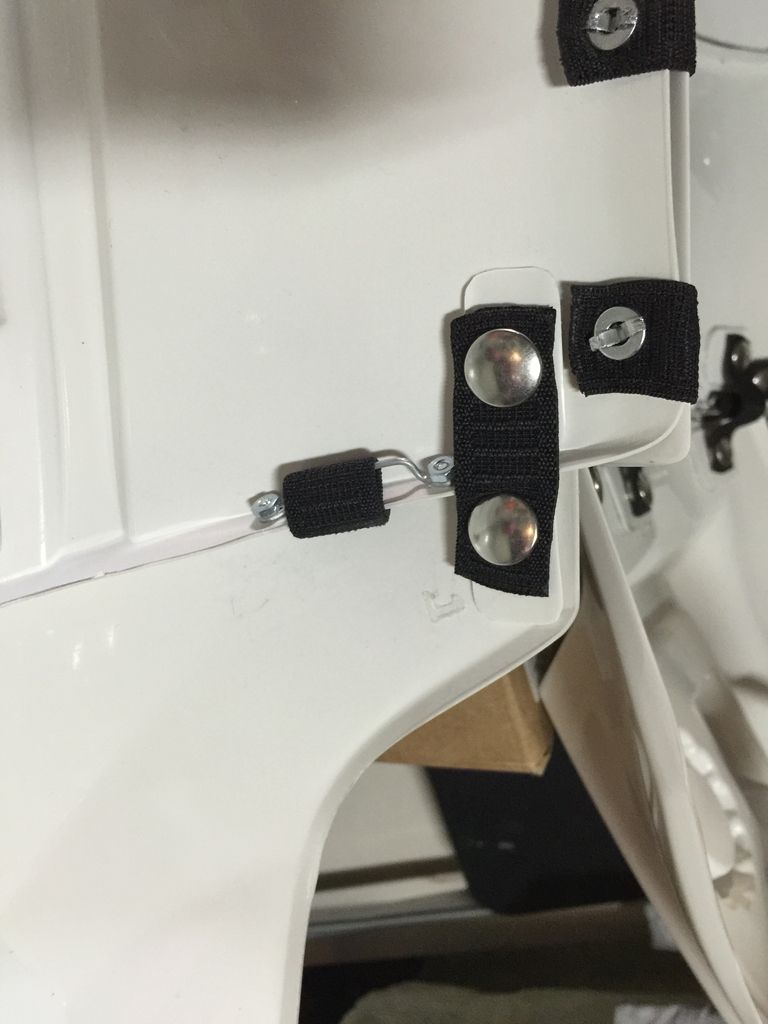
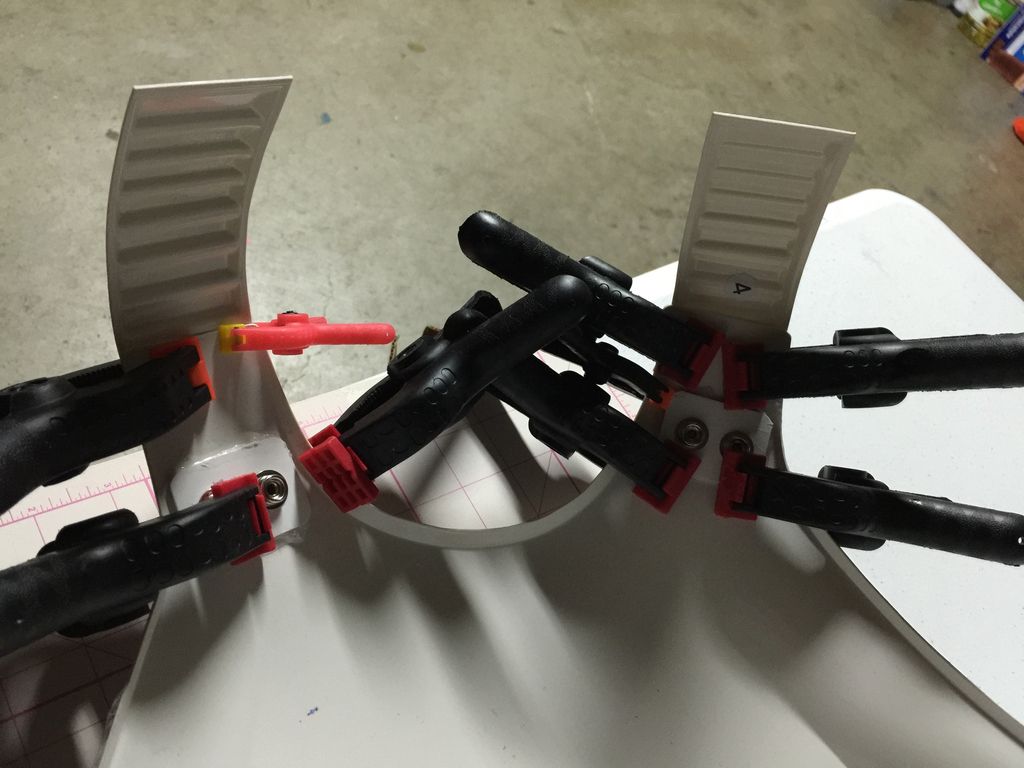
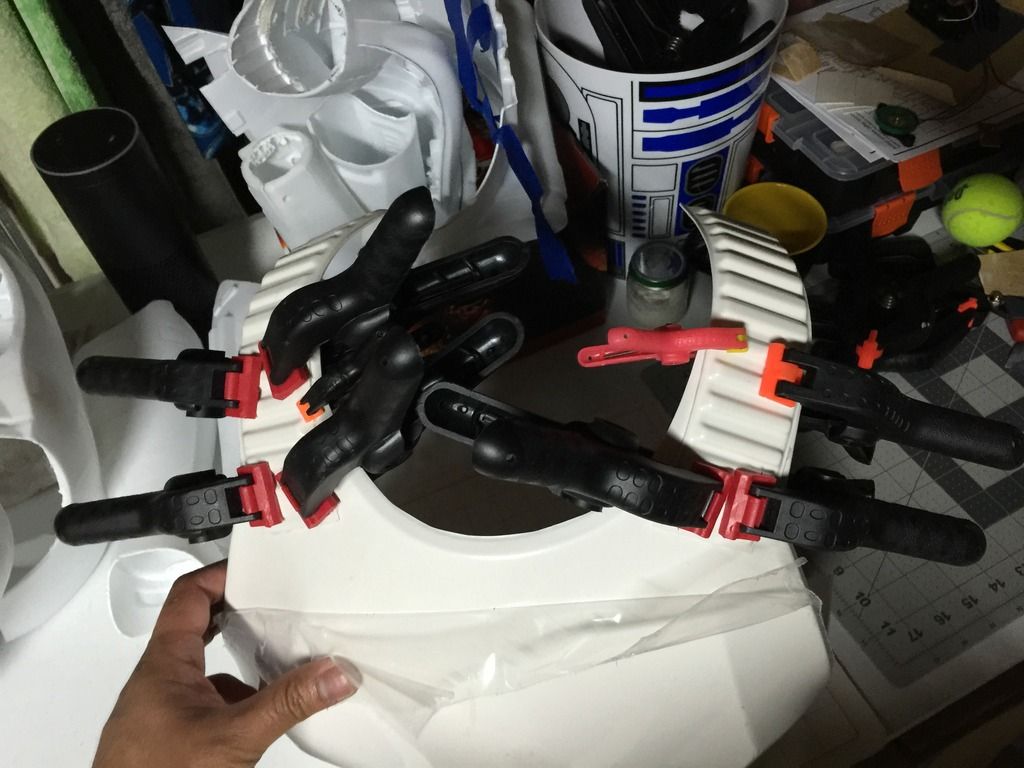
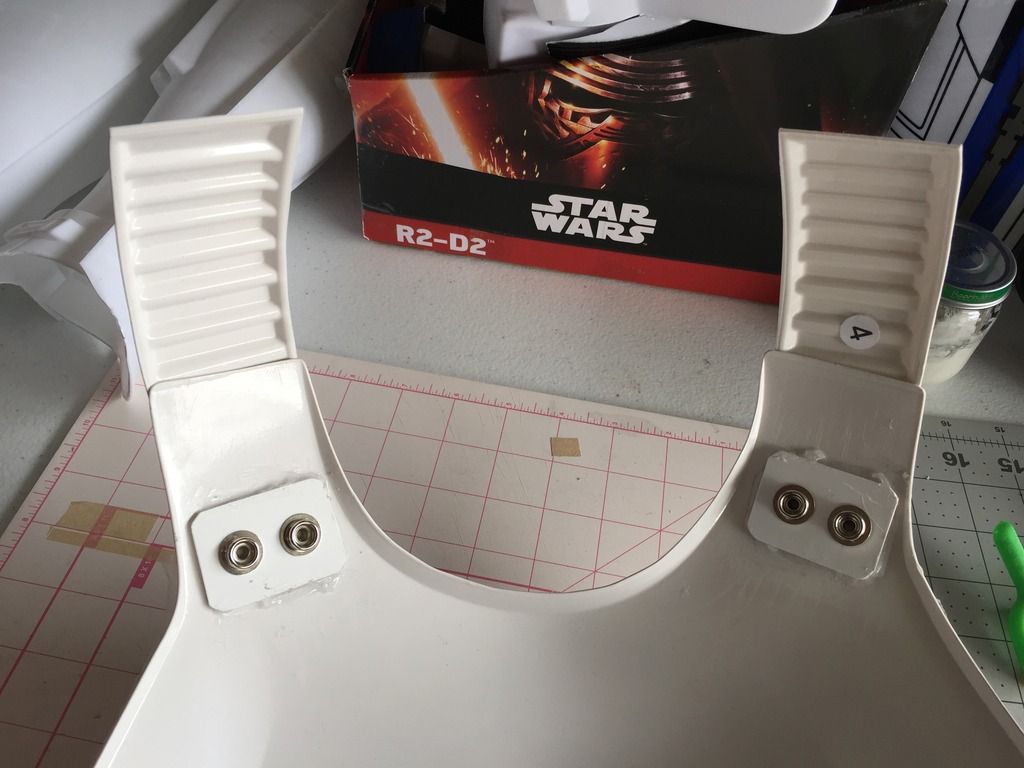
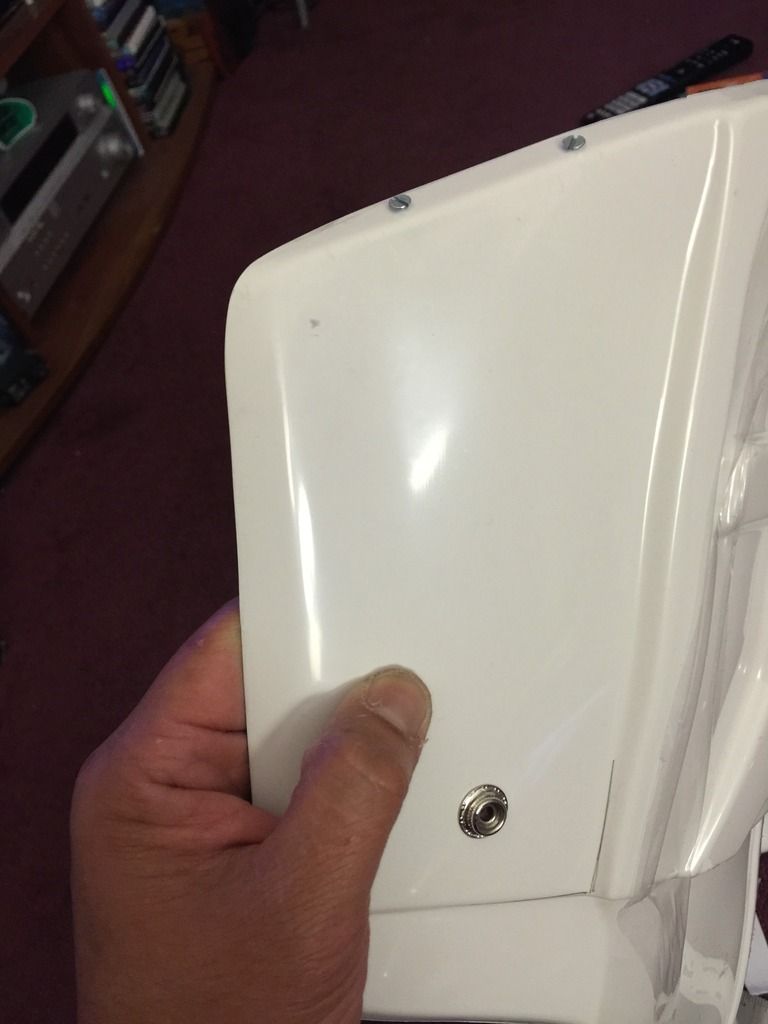
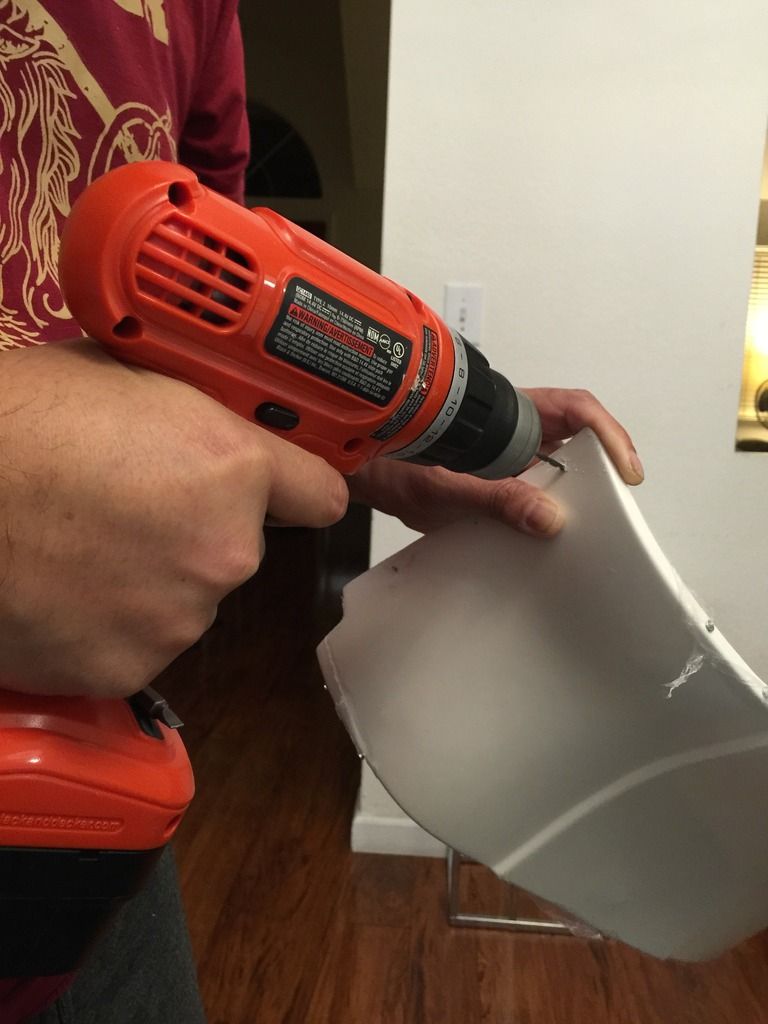
MARCH Part 1, Now let's talk Starpping -- Snaps or Brackets?
Let's do both!
03.01.16
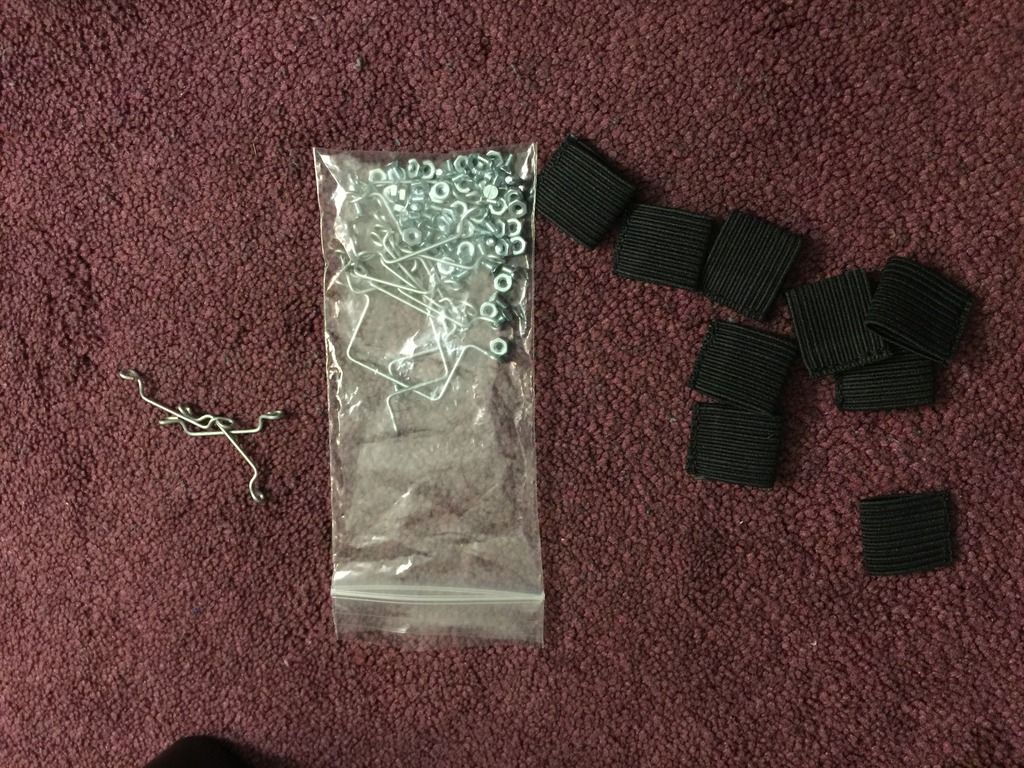
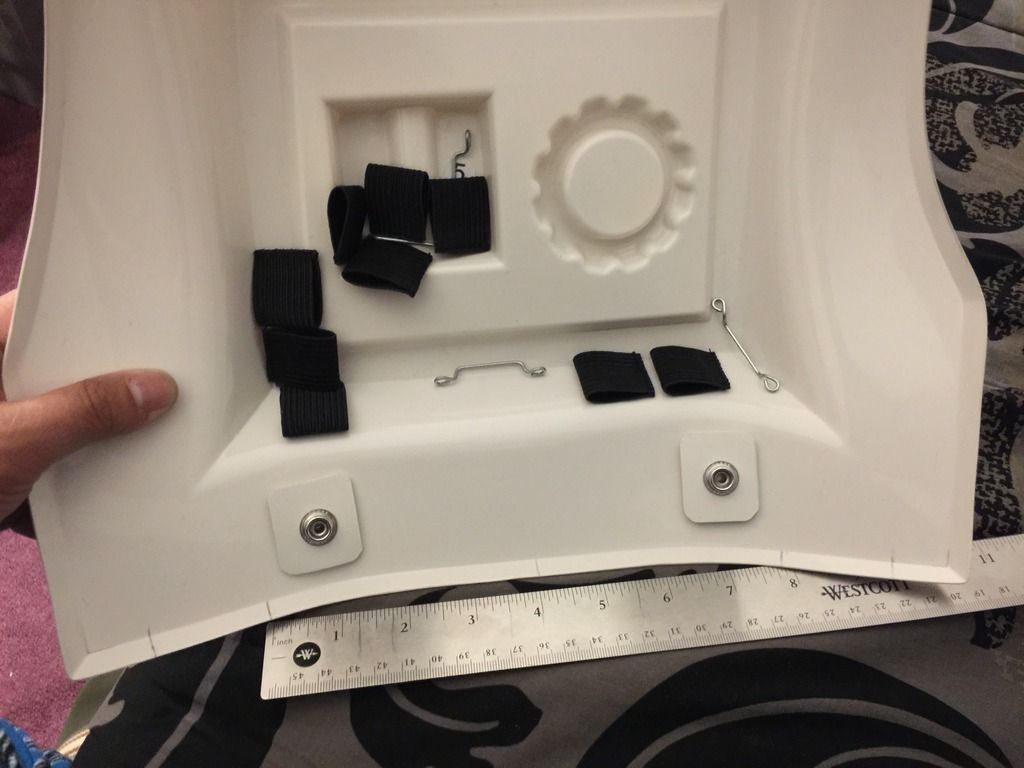
03.04.16
All gone!
-
I need to get a haircut before our armor sessions.

You better, Walter. I take a lot of selfies and/or stolen moments pictures.
-
1
-
TK-74259 Requesting ANH Stunt EIB Status (Anovos)[564]
in Request Expert Infantry Status
Posted
Thanks Walter. Your support and encouragements make this new experience of mine bearable and so much fun.
Your drive to achieve higher standards is infectious and inspiring.
On to the next level, I guess!