Mr. Accident
-
Posts
27 -
Joined
-
Last visited
About Mr. Accident

-

ANHv2 Build Thread[*FX]
Mr. Accident replied to Mr. Accident's topic in Build Threads Requireing Maintenance
Wow, looks great! I originally painted mine in the hero style (after filling in the outer teeth and lower screw holes with Bondo), but now I'm thinking I like the stunt style better. Definitely something I'll be doing when I get around to repainting mine, probably in a few months. -
ANHv2 Build Thread[*FX]
Mr. Accident replied to Mr. Accident's topic in Build Threads Requireing Maintenance
Holy crap, that's a nice paint job! Way shinier than mine, heheh. Looking very good so far; in fact, you're making me kinda jealous! I may just have to get mine repainted at the local auto body shop some time down the road... (One thing I've learned here is that getting an even, shiny coat with spray paint is not as easy as it looks!) -
ANHv2 Build Thread[*FX]
Mr. Accident replied to Mr. Accident's topic in Build Threads Requireing Maintenance
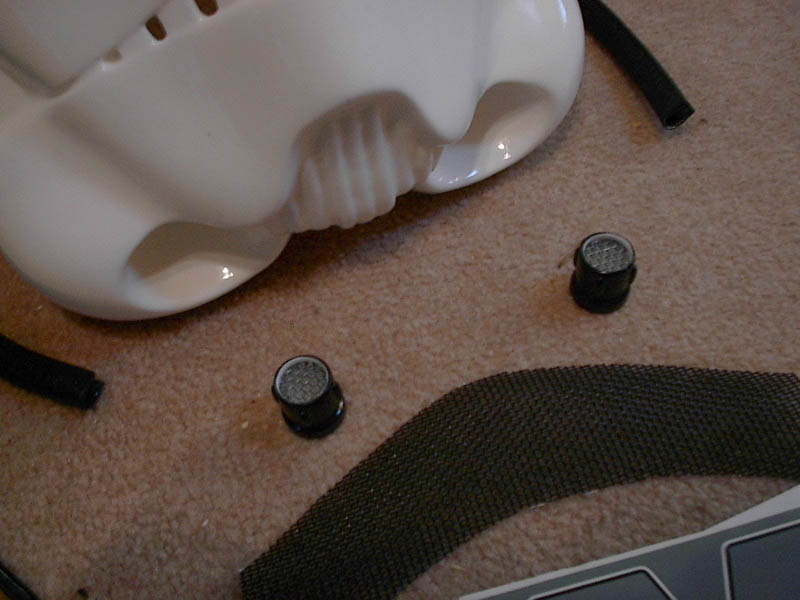
Thread revival again! Sorry it took so long to post these, but such as it is, here's the inside of my bucket: One more nice shot of the helmet: I'm not done with the inside yet; I still need to add an amplifier and speakers; it's kind of annoying when nobody can hear what I'm saying. -
I second (third? fourth?) that. I would love to see this come to life. I find Ralph McQuarrie's art so amazingly inspiring, and really emblematic of the "Star Wars" magic that captured me as a kid. Good luck, and I'll be eager to see any progress!
-
So far I've put around $1400 into my kit. I'll go ahead and jump on the bandwagon and give a breakdown: $850 - FX armor kit, bodysuit, neckseal, gloves, CA boots, and orange pauldron, including shipping (yeah, paid a bit too much... but it was at least convenient getting everything at once.) $120 - various snaps, straps, rivets, velcro, elastic and glue for assembly $20 - canvas and accessories for belt construction $100 - E-11 blaster $280 - Totally awesome ANHv2 helmet, including shipping and $40 trimming fee $20 - RustOleum spray paint, Bondo putty, and sandpaper for outside of helmet $40 - small brushless fans, switches, wire and wire tubing for inside of helmet Definitely you can surprise yourself with how much extra you spend just on those "little essentials" needed to finish your armor. It definitely pays to have the right tools and supplies on hand, though, so don't skimp too much. EDIT: "TD" is the costume designation prefix for sandtroopers, i.e., TD-1296 as opposed to TK-1296. I assume the 'D' stands for 'desert'.
-
ANHv2 Build Thread[*FX]
Mr. Accident replied to Mr. Accident's topic in Build Threads Requireing Maintenance
Thanks for the compliments, Rob! I agree, it's a very nice blaster. ...Wait a sec, didn't I just buy that blaster from you? -
ANHv2 Build Thread[*FX]
Mr. Accident replied to Mr. Accident's topic in Build Threads Requireing Maintenance
Time to revive this thread! I've pretty much completely finished my armor, but I don't have any fresh new pictures since I don't happen to have a camera handy at the moment. However, I was at the Emerald City Comicon yesterday, trooping "unofficially" with Garrison Titan, where a whole crapload of pictures were taken. Here's a pretty good one showing me in my armor with my shiny finished ANHv2 helmet: Never mind that the rebel seems to have gotten the drop on me... I had plenty of backup! I went ahead and used the flat lens that comes with the kit, since the visibility is vastly better. Also, I think the bubble lenses were making my helmet look just a little bit "bug-eyed". I'll try to get some more pictures soon, including interior shots so you can see how I've set everything up on the inside. -
ANHv2 Build Thread[*FX]
Mr. Accident replied to Mr. Accident's topic in Build Threads Requireing Maintenance
Thanks for the tips, Kevin! In fact, I bought a package of those sanding sponges at Wal-Mart a couple weeks ago, thinking they might just come in handy. I'll try the color sanding; I put a lot of coats of paint on this thing, so it shouldn't be too hard to avoid oversanding. RBJ: I might just use the bubble lenses from my FX helmet; I tested them out and they actually fit pretty nicely. EDIT: a few more pictures, with tube stripes and in better light this time: And, a few with the brow liner, aerators, and the bubble lenses from my FX scotch-taped on: () -
ANHv2 Build Thread[*FX]
Mr. Accident replied to Mr. Accident's topic in Build Threads Requireing Maintenance
What did you use to paint the interior, RBJ? I'd like to do something like that with mine, but I'm hesitant to do so because it would probably smell like paint for weeks if I sprayed the inside... Anyway, the painting on mine is almost completely done! I need to touch up the paint on the frown and ears - it's just a little bit rough if you look at it up close. A word of advice: be very careful about using masking tape when painting the details. I was applying Rustoleum spray paint with a brush (after spraying some in a paper cup), and it had a nasty habit of seeping up under the tape. Fortunately it could be wiped off of the existing Rustoleum coat pretty easily within a few minutes of applying it. That leads me to another lesson I learned: definitely wait a good 3-4 days after spray painting the helmet before using spray paint to apply the details! I tried painting the chin about 24 hours after the base coat, and the result was that the black paint began dissolving the white paint, yielding unsightly cracks. I had to sand that area down and repaint it... Anyway, here are some more pics: Note the filled in outer teeth - I'm going for the 'Hero' style, like Kevin's Hero conversion ANHv1 helmet here. These pics came out a little dark; I'll definitely get some photos in better light once I finish! Incidentally, I think it still needs a little polishing in some areas - the paint didn't always come out smoothly. RBJ, I'll be interested to see how that automotive painting works out! -
ANHv2 Build Thread[*FX]
Mr. Accident replied to Mr. Accident's topic in Build Threads Requireing Maintenance
Alright, great to see another one join the proud ANHv2-owning ranks! For the record, I've filled in the smaller teeth and lower screw holes on mine and given it a repaint with some gloss white; I'm in the thick of final exams right now, but I'll be sure to post some more pictures this weekend as I finally get started on finishing the details. -
ANHv2 Build Thread[*FX]
Mr. Accident replied to Mr. Accident's topic in Build Threads Requireing Maintenance
Hm, thanks for the tip. I think this weekend I'll pick up some of the Krylon H20 and some RustOleum gloss white and do a bit of experimenting. Oh, one other thing I should mention about this helmet: the acoustics. There is a lot more echo and reverb inside this helmet than there is inside the ABS FX helmet. I'm guessing that this has to do with the acoustic properties of urethane, but in any case, I am planning on doing something to coat or pad the inside of the helmet to deaden the echoes. This, as far as I'm concerned, is the only downside to the otherwise perfect ANHv2. -
ANHv2 Build Thread[*FX]
Mr. Accident replied to Mr. Accident's topic in Build Threads Requireing Maintenance
I went ahead and paid the extra $40 to have Kevin cut it out for me - I'm still not very experienced with plastic cutting, and I didn't want to risk this beautiful helmet in my clumsy dremel/file/xacto/chainsaw wielding hands. (Especially since the helmet is urethane, which is much less flexible than ABS.) As for the paint, Kevin personally recommended me to Krylon Fusion gloss white spray paint. That's what I used, and although it does not actually seem to be very "glossy" at all (hence the need for further polish), it's a pretty good match for the color of my FX armor. Additionally, his advice is to wait for the paint to dry completely before applying the decals, which I guess takes almost a week to be safe. He also recommended RustOleum "Gloss Protective Enamel" #7786 Smoke Gray and #7779 Gloss Black for the other details (also spray paints, though he recommended spraying a small quantity into a paper cup and applying with a small brush). These paints come out really shiny, so maybe RustOleum's GPE gloss white would as well? I haven't tried it yet, so I'm not sure if it's as good a color match as the Krylon, but it might be worth a shot. -
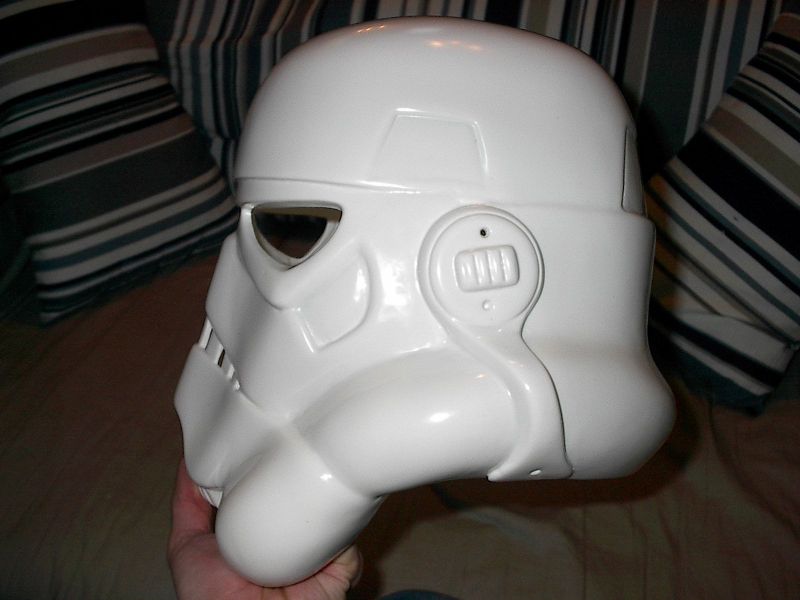
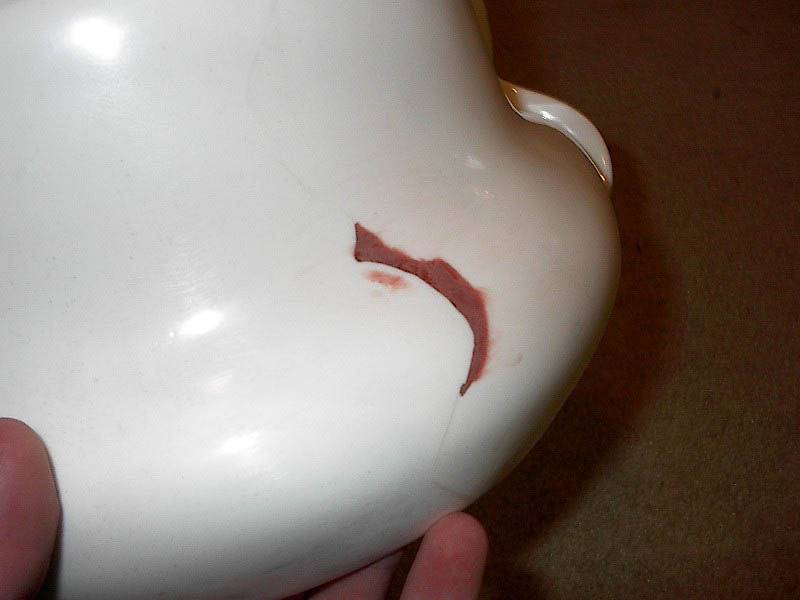
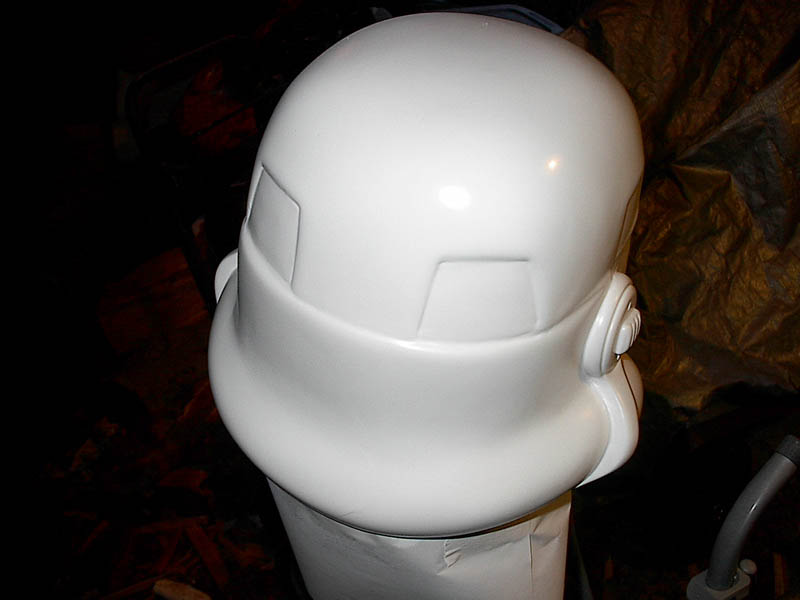
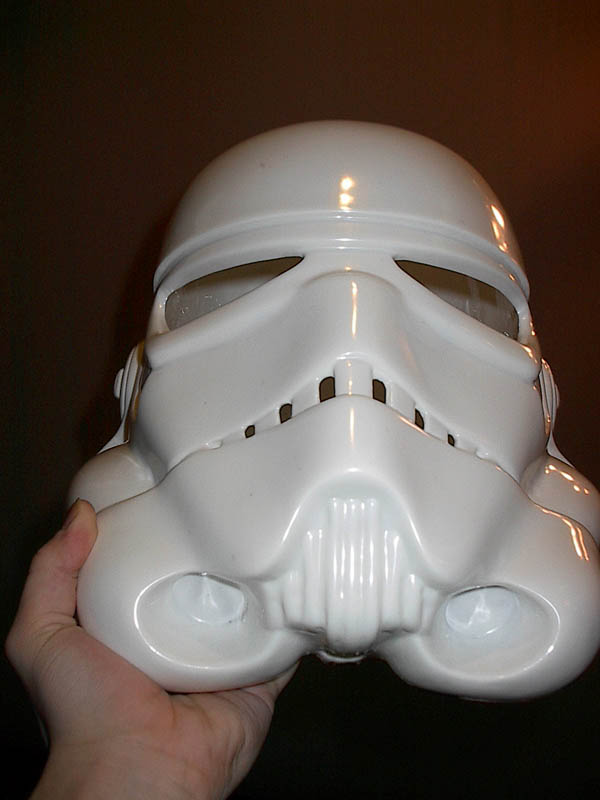
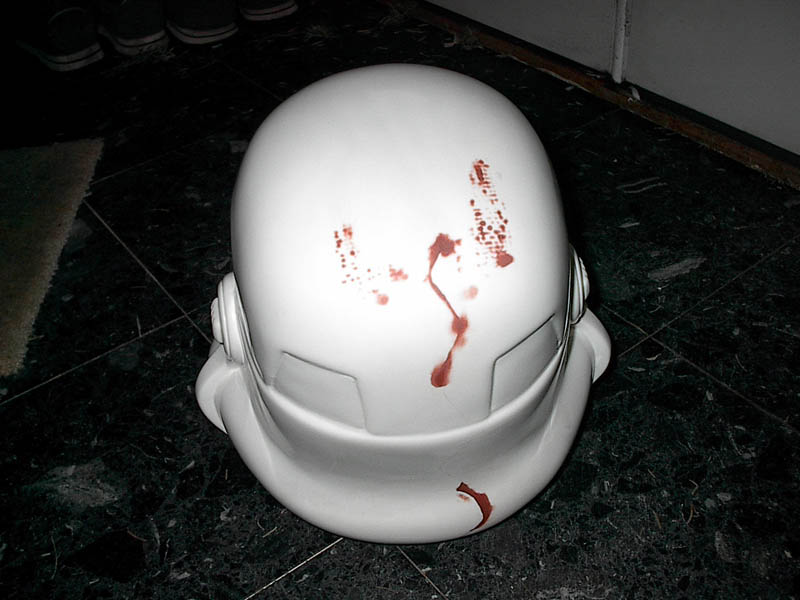
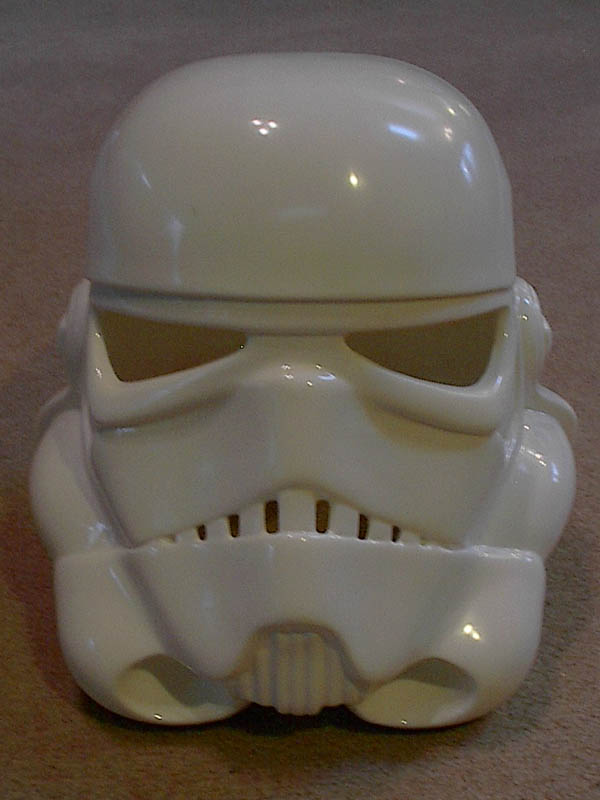
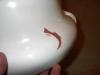
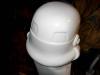
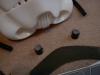
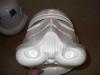
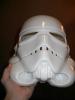
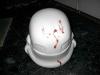
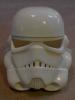
I just received my ANH2 last weekend. It looks great, and while considerably smaller than the FX helmet, it's just a little larger than film-accurate helmets, which is great for me since I need room for glasses. A few shots of the raw ANH2: Now, on the back of the helmet there are some marks from from molding process, which need to be filled in with Bondo or a similar putty before the helmet can be painted. The plastic is a faintly off-white color, so even aside from the dark red Bondo, painting is a definite necessity. Here are a few in-progress shots: The last image shows the back of the helmet after painting (still needs some polish to give it that shine). All in all, it's a really beautiful helmet I'd recommend to anybody. It really gives you the "feel" of the screen-accurate helmets, while being perfectly symmetrical - more like the Empire might've built them, one might say. EDIT: Here are a few comparison shots with my very unfinished FX helmet: (This is before painting, so you can see the difference between the white ABS and the faintly yellower urethane.)
-
First-time builder - Advice?
Mr. Accident replied to Mr. Accident's topic in Build Threads Requireing Maintenance
Definitely will do. Just waiting for my registration request to be approved. Heheh, well, as promised, here's a small batch of photos. Here's an early shot of me just wearing the upper armor, mocked up with drafting tape. I just couldn't wait to put on the armor once I had it out of the box. Here it's looking a lot closer, but still needs a lot of work. You'll notice I'm missing the right knee piece, the drop boxes and one ab button, and I'm just holding the belt in place there. Here are the shoulder and bicep pieces, with snaps installed. The strap on the left is some non-stretchy nylon or polyester material, and the one on the right is a new one I'm making with elastic. The stretchy stuff really is better. Also, the one on the left was made a bit too short. Here's the completed upper armor "shirt": This part here is pretty incomplete. The suspenders are just the standard stretchy stuff that comes with the kit, attached with velcro - surprisingly, that seems to be working very well, but the rest of it needs to be more hold-togetherable. Specifically I still need to hold the back / ab armor together, and the crotch piece could use a lot more support than just those two flimsy straps. The inside of the left shin piece; the knee plate is only temporarily held on with industrial velcro. My solution for getting the pieces to fit my calves was to run a single strip of ABS along the back with velcro on the inside, so from the back it basically looks like a more pronounced ridge. A bit of a primitive weapon here, and definitely not standard Imperial issue, but it's better than nothing -- hopefully it will be sufficient to hold off the Rebel scum until I get my E-11! (Also still haven't put in that last ab button... I'll probably want to get/paint some that are color-accurate anyway...) Here's the helmet in a state of semi-assembly. I just slapped the frown decal on there temporarily (and kinda sloppily, too) because I haven't got around to cutting / painting the frown yet. This is a good picture of the ABS piece I'm using to hold the parts of the helmet together a bit more securely, making ear fitting easier: This last picture's an extra: just wanted to show you guys how much snow we got last November: I was at my parents' house for Thanksgiving, and I wound up getting snowed in. A quiet weekend with the family quickly turned into a weeklong adventure of shoveling and firewood-cutting. We wound up having to shovel two feet of snow off of the entire quarter-mile length of their driveway, just so I could drive back to Seattle. I'll add more pictures as I near completion. Hopefully that should be relatively soon. Depends on how much my school schedule murders me this quarter. Hmm, that reminds me, I have a load of discrete math and computational theory homework I should be doing... -
First-time builder - Advice?
Mr. Accident replied to Mr. Accident's topic in Build Threads Requireing Maintenance
4935, please forgive me if I'm not immediately enthusiastic to try E6000 bungee! I'm sure it's great fun. Well, sorry about leaving this thread for so long, but I return at last! I've been steadily working on my armor on and off for the last couple of months (mostly on weekends, which is why it's taking so long). So far I'm quite happy with the results -- I decided to go ahead and use the ABS cement to put everything together, and that has worked pretty well with only one minor incident (detailed below). I picked up the requisite several yards of elastic strapping, a pair of snaps pliers, and a whole boatload of snaps, and thus far I have the body part of the armor nearly done - I still need to add thigh supports, the drop boxes, and the belt (I'm thinking of going the canvas or maybe leather route), and finish tightening everything up so it fits really nicely. At the fabric store they also had this nice white elastic that I'm thinking of using with some snaps to connect the ab and back plates. TomaXamoT, sadly I know firsthand that this is possible! One of the first things I glued was the shoulder bridges to the chest and back pieces, and I'm afraid I was a little overenthusiastic with the ABS cement - it melted through a bit, and some small wrinkles developed on the upper surface. Fortunately, you'd hardly notice them unless you looked up close, but it was a valuable lesson. I've been much more careful since. I just recently started putting the helmet together, and that's also going pretty well so far. The toughest part seems to be getting those darned ears to fit on nicely! To help with that I cut a couple small pieces of ABS and drilled holes in them to line up with the holes in the helmet, put them on the outside, and inserted the screws through that from the inside. I got a few extra nuts to hold these in place, and then I put the ears on over the whole assembly. It seems to be a bit more stable that way, and giving the ears a snug fit is a little easier. Also, I tried installing the hard-hat liner, but after all my careful markings and thumb measurements, it wound up an inch too low and with no room for my glasses. So I tossed it and I'm going with the foam. Actually, I've already ordered one of the gorgeous A.N.H.2 helmets from Kevin at www.imperialsurplus.com, but I'm still going to put a lot of effort into my FX helmet because really, who can be happy with just one bucket? And to 2802 and 8020, I've finally gotten around to sending in a request to join the Garrison Titan forums. I know I was going to do that a long time ago, but then we had that nasty windstorm and the four days of no electricity that followed, and right after that it was a mad dash to finish up my much-delayed Christmas shopping, and right after that my winter quarter classes hit me like a ton of bricks, and so on... And don't worry guys, I'll post some in-progress pics shortly. :-)