Order-66
-
Posts
142 -
Joined
-
Last visited
Content Type
Profiles
Forums
Gallery
Articles
Everything posted by Order-66
-
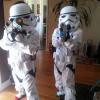 Pictures... imperial march playing...
 -
End cap clip Using the adjusting part of the trusty safety goggles I cut out a piece to make the end cap clip. It looks like I am just missing the imprint of the knurling pattern on the guard. I will add that and call it done! (For now...)
-
Added a selector switch. I picked up a plastic washer from the local hardware store, dremeled a slit, inserted a piece of plastic I cut to resemble the switch. Superglued them together and you have a selector switch for pennies.
-
Thanks for your inspiring build Richard.
-
Added a bayonet lug. I am not sure the name of this, but I think it is a ‘nail cable clip’. It is used to attach your coax cable wire to a wall or baseboard. I cut off the hook part and it makes a nice bayonet lug once painted. I did drill a wire to the flat side and drilled a hole in the blaster, then glued. I wanted to give the bayonet lug a little more security then just the glue.
-
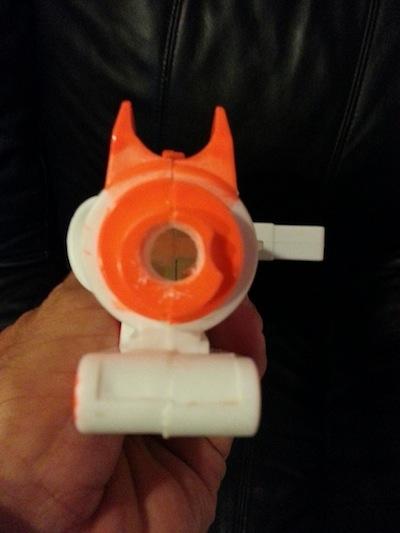
Added a lens on scope. Using the now cut safety goggles, you can trace out the lens size for the scope. The cap from a plastic bottled water gave me the same circumference as my scope. I traced it out, cut it using the dremel and then used the dremel sander to get it a close to a circle as possible. *Update. I found a small flashlight at the local dollar store. I cut off the end with the glass and housing. I had the sand the inner threads and some of its thickness down. I had to sand the scope end on the blaster and then piece it together. I fit nicely but there is a gap between the end of the housing and the grove of the scope that look a bit odd. I glued an o-ring to fill the gap. For the front of the scope I found a pair of children’s binoculars at the dollar store. I used the small lens with an o-ring and glued them to the front. It is nice but I will be on the look out for a better look.
-
Sight pin and block I made a sight pin and block to make a nicer front sight. I used the arm of a pair of safety goggles. Cut part of the arm which gave me a nice little block just perfect to fit in the front sight. Using one of the bookshelf supports, I shaved it down, cut a slight angle on the tip for the front sight pin. I drilled into the block and glued the pin into the block. I did use superglue for this.
-
14. Back to the garage. I sanded the T-tracks nice and low. I was looking at the FISD E-11 Blaster Reference thread and decided go even further…
-
13. The End… so I thought At first, I was happy with the results, but notice that it did not look like the ‘real thing’. It still had a SW Rebels look due to the cartoon T-tracks. Also, the black caulking was looking messy. Sooo…
-
12. Orange Safety Tip I used Zaphod’s orange tip idea by placing an orange earplug in the front barrel. These are the earplugs that are soft foam that you smush with your fingers before inserting in your ear and it will slowly expand to shape.
-
11. Decals / Counter Window I used the decals from Astyanax (scope) and SIMpixels (counter numbers). I used the plastic casing from a disposable razor for the counter window. I just needed to cut it in half horizontally, trim and glue.
-
10. Bolt I masked it off. Laid down the paint. Once dry, I drew in the stripe by masking off a stripe, score a stripe top and bottom lines with a razor blade, gently took 220 sand paper to the stripe leaving the masking tape on sides to ensure I did not sand the out sides. I then used the fine sharpe to accent the top and bottom line. Working on the angle…
-
9. Paint I did The body of the blaster, hammered black. Counter and T-Tracks satin black Handle gloss black
-
Thank you Joseph.
-
8. Power Cells These were pretty simple. I took a smooth wooden dowel, cut them to size. Placed finishing caps on the ends. Drilled screws with a nut into the ends, cut off the screw head and voila. I used a plastic square from the packaging form my children’s toys, cutting it and using it’s right angle to make the cell base housing. I used smaller dowels for the resistors. Primed and painted.
-
7. Front Muzzle / Front Sight / Front Sight Guard I noticed on the muzzle that there are two circles where the hex bolts are suppose to be attached. I drilled them out with a small drill bit and gradually went bigger until it was the correct size of my bolts. One side is easy but the other requires more finesse because the blaster is a bit uneven due to the design of the muzzle. I inserted two hex bolts (m5 bolts). Front Sight I used the bookshelf supports and shaved it down, drilled a hole in the blaster, E6000ed it. Since I am in the front I drilled out the sides on the front sight guard. I had to be carful here because the plastic will snap. I drilled little holes all over the area I wanted to remove and then used the dremel sander to file away the unwanted plastic.
-
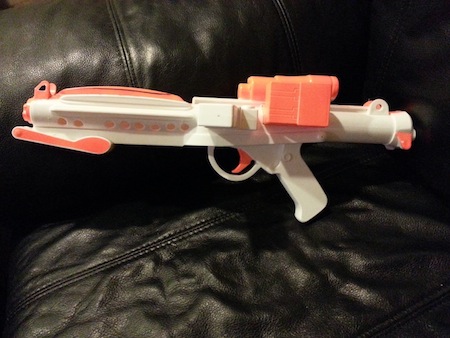
opperation photobucket complete... I think.
-
Thanks. I will work on the bolt stripe. Currently trying to use the photo bucket to get these pictures squared away. thx again.
-
I am having issues posting pictures on the thread. My upload sizes keep getting smaller and smaller with each picture I post. Also, when I am creating the post, it shows my pictures and when I do a preview post, I see them. Once I add the reply the thread only gives the jpg name. I will look into this, but has anyone had this same issues?
-
6. Rear site / Housing There is just a little nub on the scope rail. Just file this off and I used a bookshelf support for the site. It just needs to be trimmed/sanded and needs to have a hole drilled in the middle. I also cut notches on the rear site housing.

-
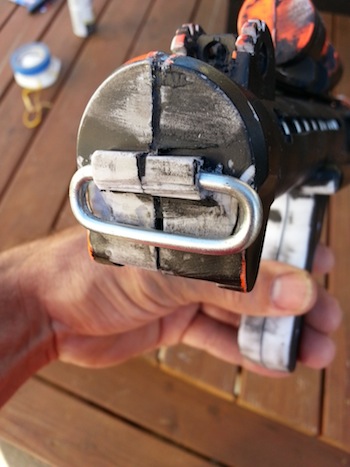
5. D-ring On this particular blaster there is a molded D-ring. I chose to cut it off and install a metal D-ring.
-
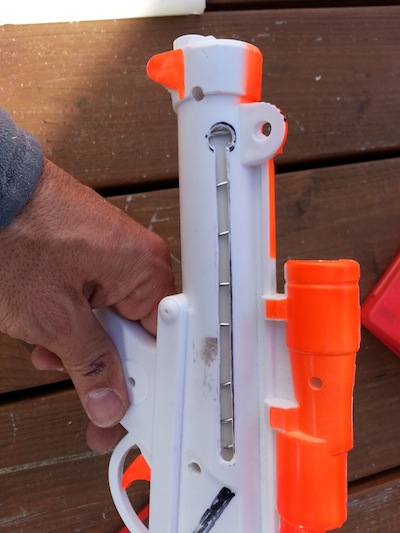
4. Scope Rail To cut out the plastic underneath the scope rail, drill a hole in each end and then use the cut-off wheel. It looks nicer with this plastic removed. (Inspired by Hupspring)
-
3. Close up blaster I glued the seams with E6000 and closed up the blaster. Screw holes need some E6000 as well. I used black caulking to fill the screw holes and gaps. *Caulking was not the best idea. It shrinks when dried. I recommend a plastic epoxy or bondo. After drying, I sanded the blaster and the logo. Sorry no file of the charging handle sequence, but here is one before the handle was installed. This is pre caulking.

-
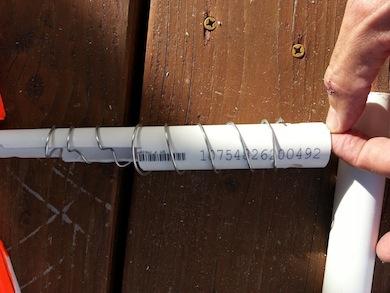
2. Separating the blaster / Inner Barrel and Spring / Charging Handle Taking out screws, normally elementary task… Except half of mine were stripped and just continued to spin. I was able to pry open the area around the trigger guard but the area around the scope was glued. I used a razor blade to cut through. I just scored, and scored it until it finally cut through. The dremel cut-off wheel will leave a big gap. (I don’t recommend using it on separating the blaster) The counter was factory glued and did not have the two screws I saw in other builds. I followed Astyanax, & Hupspring build and placed a ¾ PVC pipe in the barrel. Drilling holes in PVC to accommodate the screw connections. I decided I wanted to have the recoil spring and charging handle. I drilled a hole near the end cap and one near the bolt. I drew a line from drill hole to drill hole. Then, with the dremel on a low speed I slowly scored the line from one hole to the next. I cut the opening with the dremel cut-off wheel. Again, slowly. (The hole closest to the end cap is to be bigger than the cut line). I wrapped a PVC pipe with wire. Because of the counter box, the PVC has to be split otherwise the blaster will not close up. I also had to bend the wire into the split PVC in order for the two halves to close. (black primer on PVC) For Charging Handle I used the hook end of a plastic hanger (No wire hangers Mommie Dearest!). Cut and trimmed a base. I drilled a hole in the bottom, inserted a small wire post, drilled a post hole in the PVC that the wire is wrapped around, and glued. (Charging handle pic to follow later)
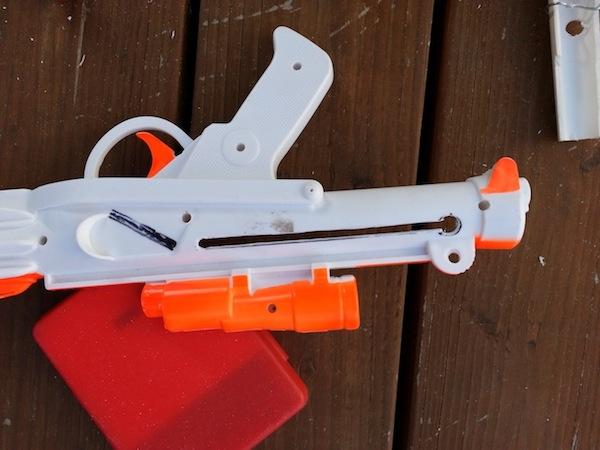
-
1. Drilling I drilled out the muzzle, rear site holes, folding stock rivets, and then the barrel holes. The templates for the barrel holes are already on the blaster. I used a regular drill with a small drill bit and progressed in size. I didn’t want to break the blaster so soon. The Dremel sander helps. The plastic melts easily, but can be peeled off with little effort.