


Ruthar
-
Posts
282 -
Joined
-
Last visited
Content Type
Profiles
Forums
Gallery
Articles
Media Demo
Posts posted by Ruthar
-
-
Gaskets, Boots, and Pauldron
Not much to update with just yet, but I did get some more pieces as I still wait on the armour to arrive. Here are Theresa's amazing gaskets - thanks so much, they are lovely!
Untitled by Taylor Goodson, on Flickr
My Imperial Boots TFA TK Boots came in as well. The package was really battered, but the boots seemed to have managed without much issue.

Untitled by Taylor Goodson, on Flickr
Finally, the pauldron from Trooperbay arrived a little while ago as well. It will need some painting and a few other small mods for assembly (magnets, primarily), but it's a nice and light piece that should be a nice addition to the armour.
Untitled by Taylor Goodson, on Flickr
Now the wait continues once again!
-
-
Hi, Kaleb:
Here are the links to the appropriate CRL's:
Hope that helps!
-
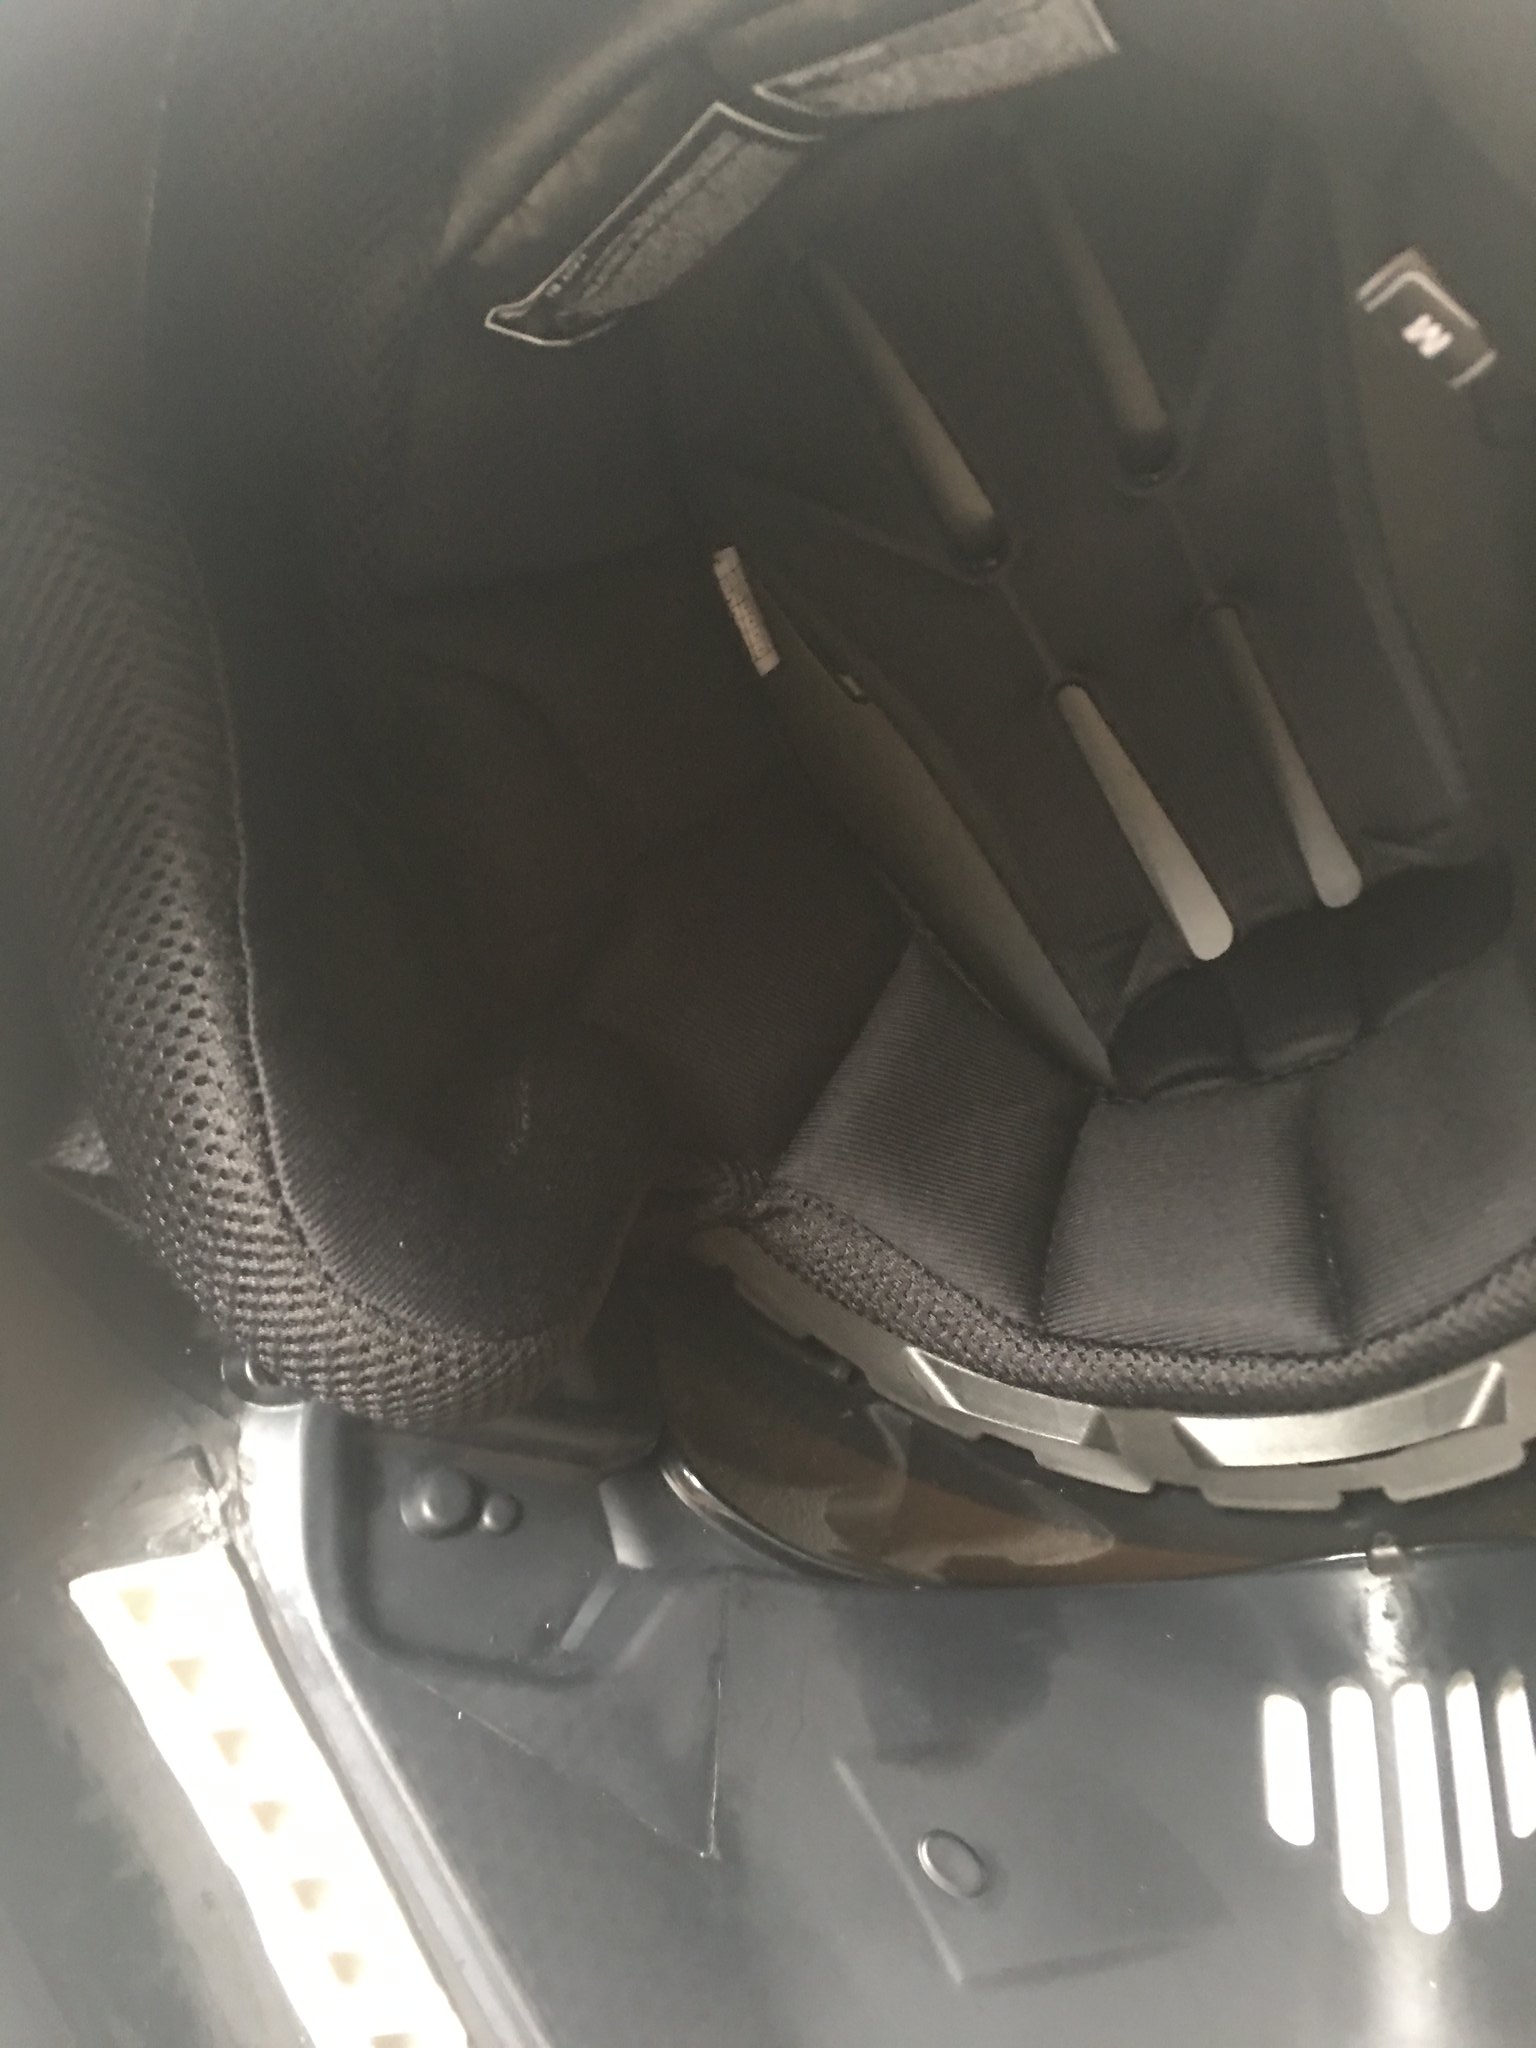
Additional Helmet Detail
While I'm still waiting for the actual armour to come in, I toyed around a bit more with the helmet. A new liner that is far more comfortable than the hard hat liner that came with the helmet is now in, the fans are ready to go, and the interior is now tidied up. Here's what I fiddled around with today.
I picked up a handful of these motorcycle helmet replacement liners a few weeks ago for some other helmets I was working on. They are amazingly comfortable, so I decided to use this instead of the liner that came with the Anovos lid.
Untitled by Taylor Goodson, on Flickr
It fits in quite nicely - I use a trio of industrial velcro strips to hold it in against the helmet.
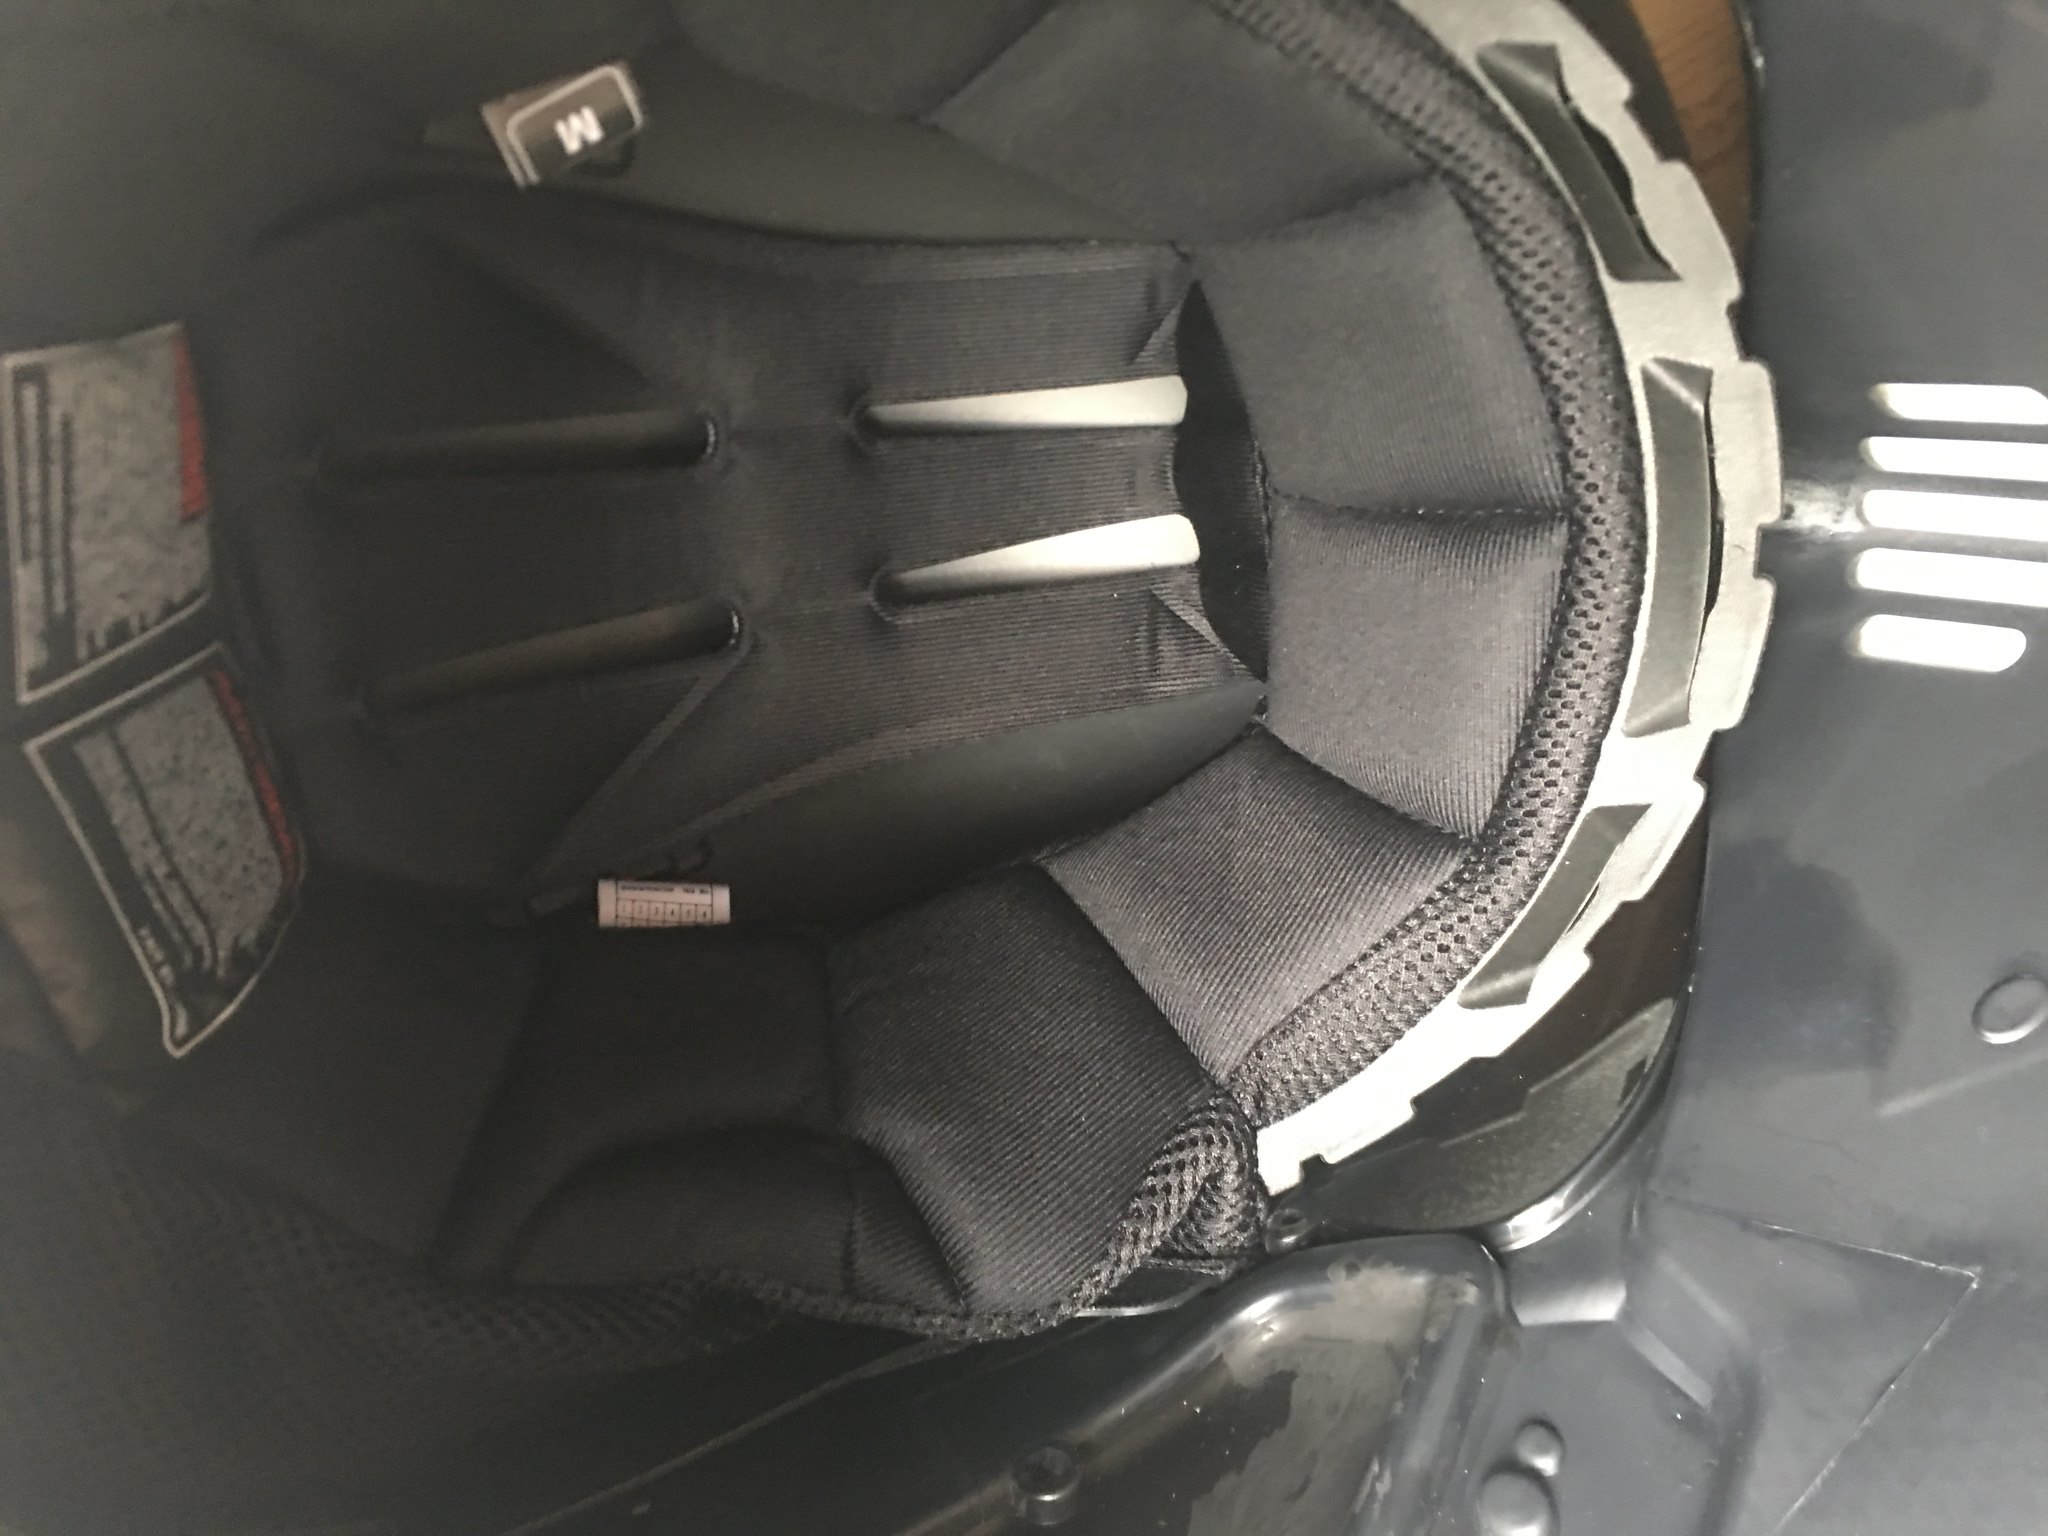
Untitled by Taylor Goodson, on Flickr
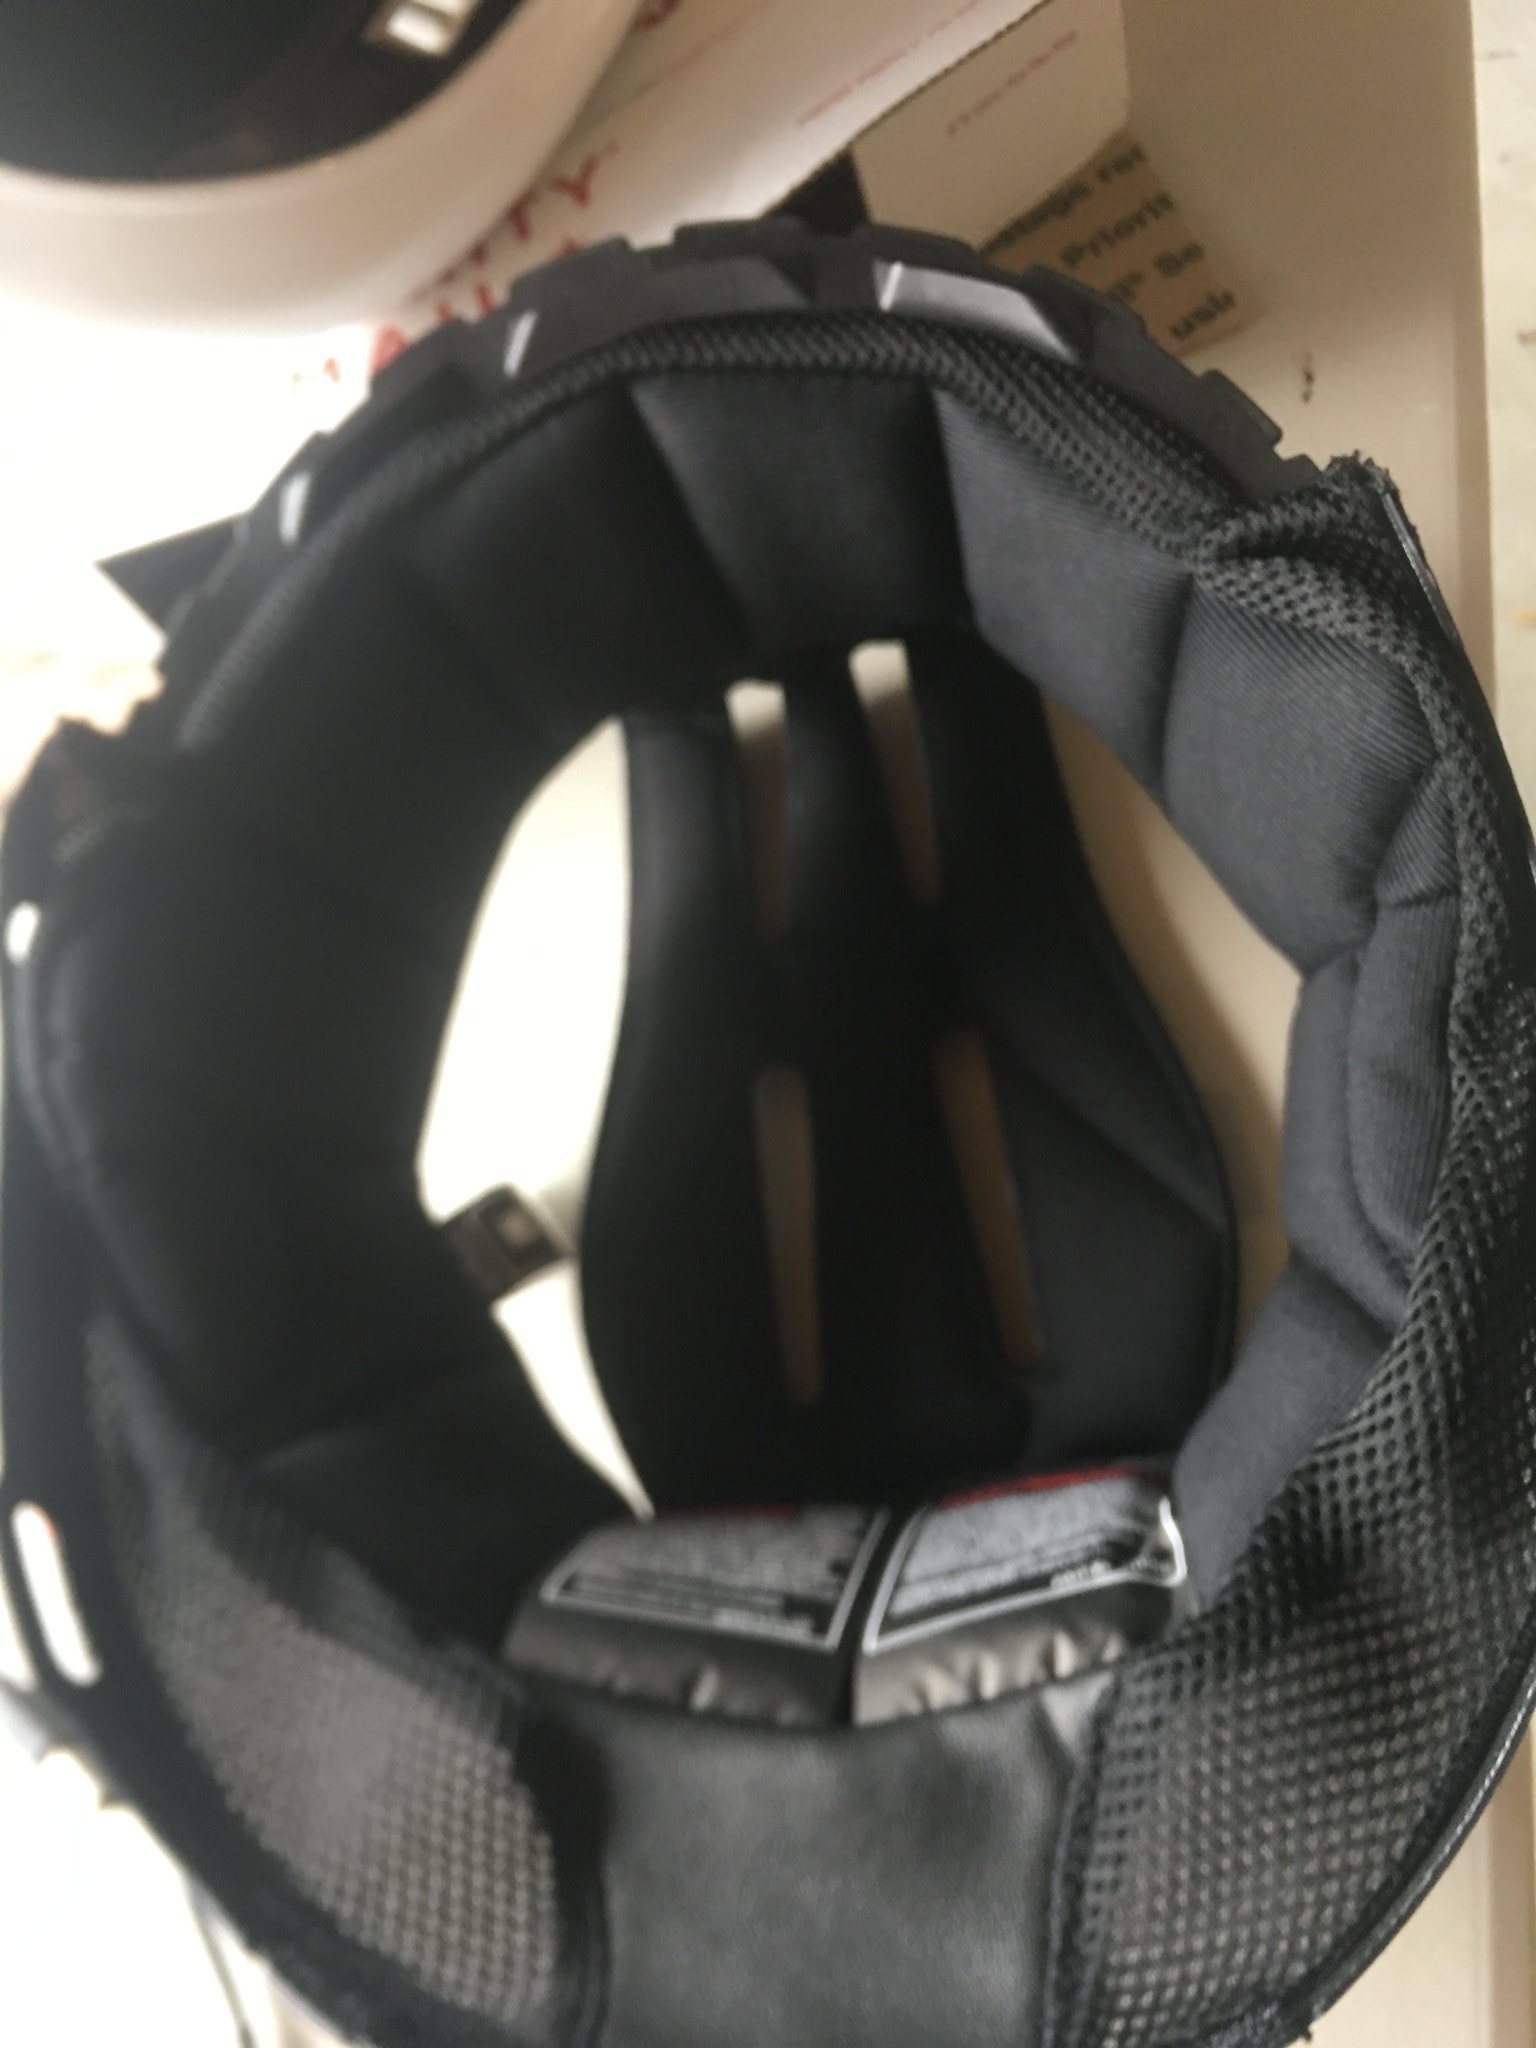
The liners also come with a pair of earcaps, so I installed those as well to get a more snug fit around my head (I've got a relatively small noggin).
Untitled by Taylor Goodson, on Flickr
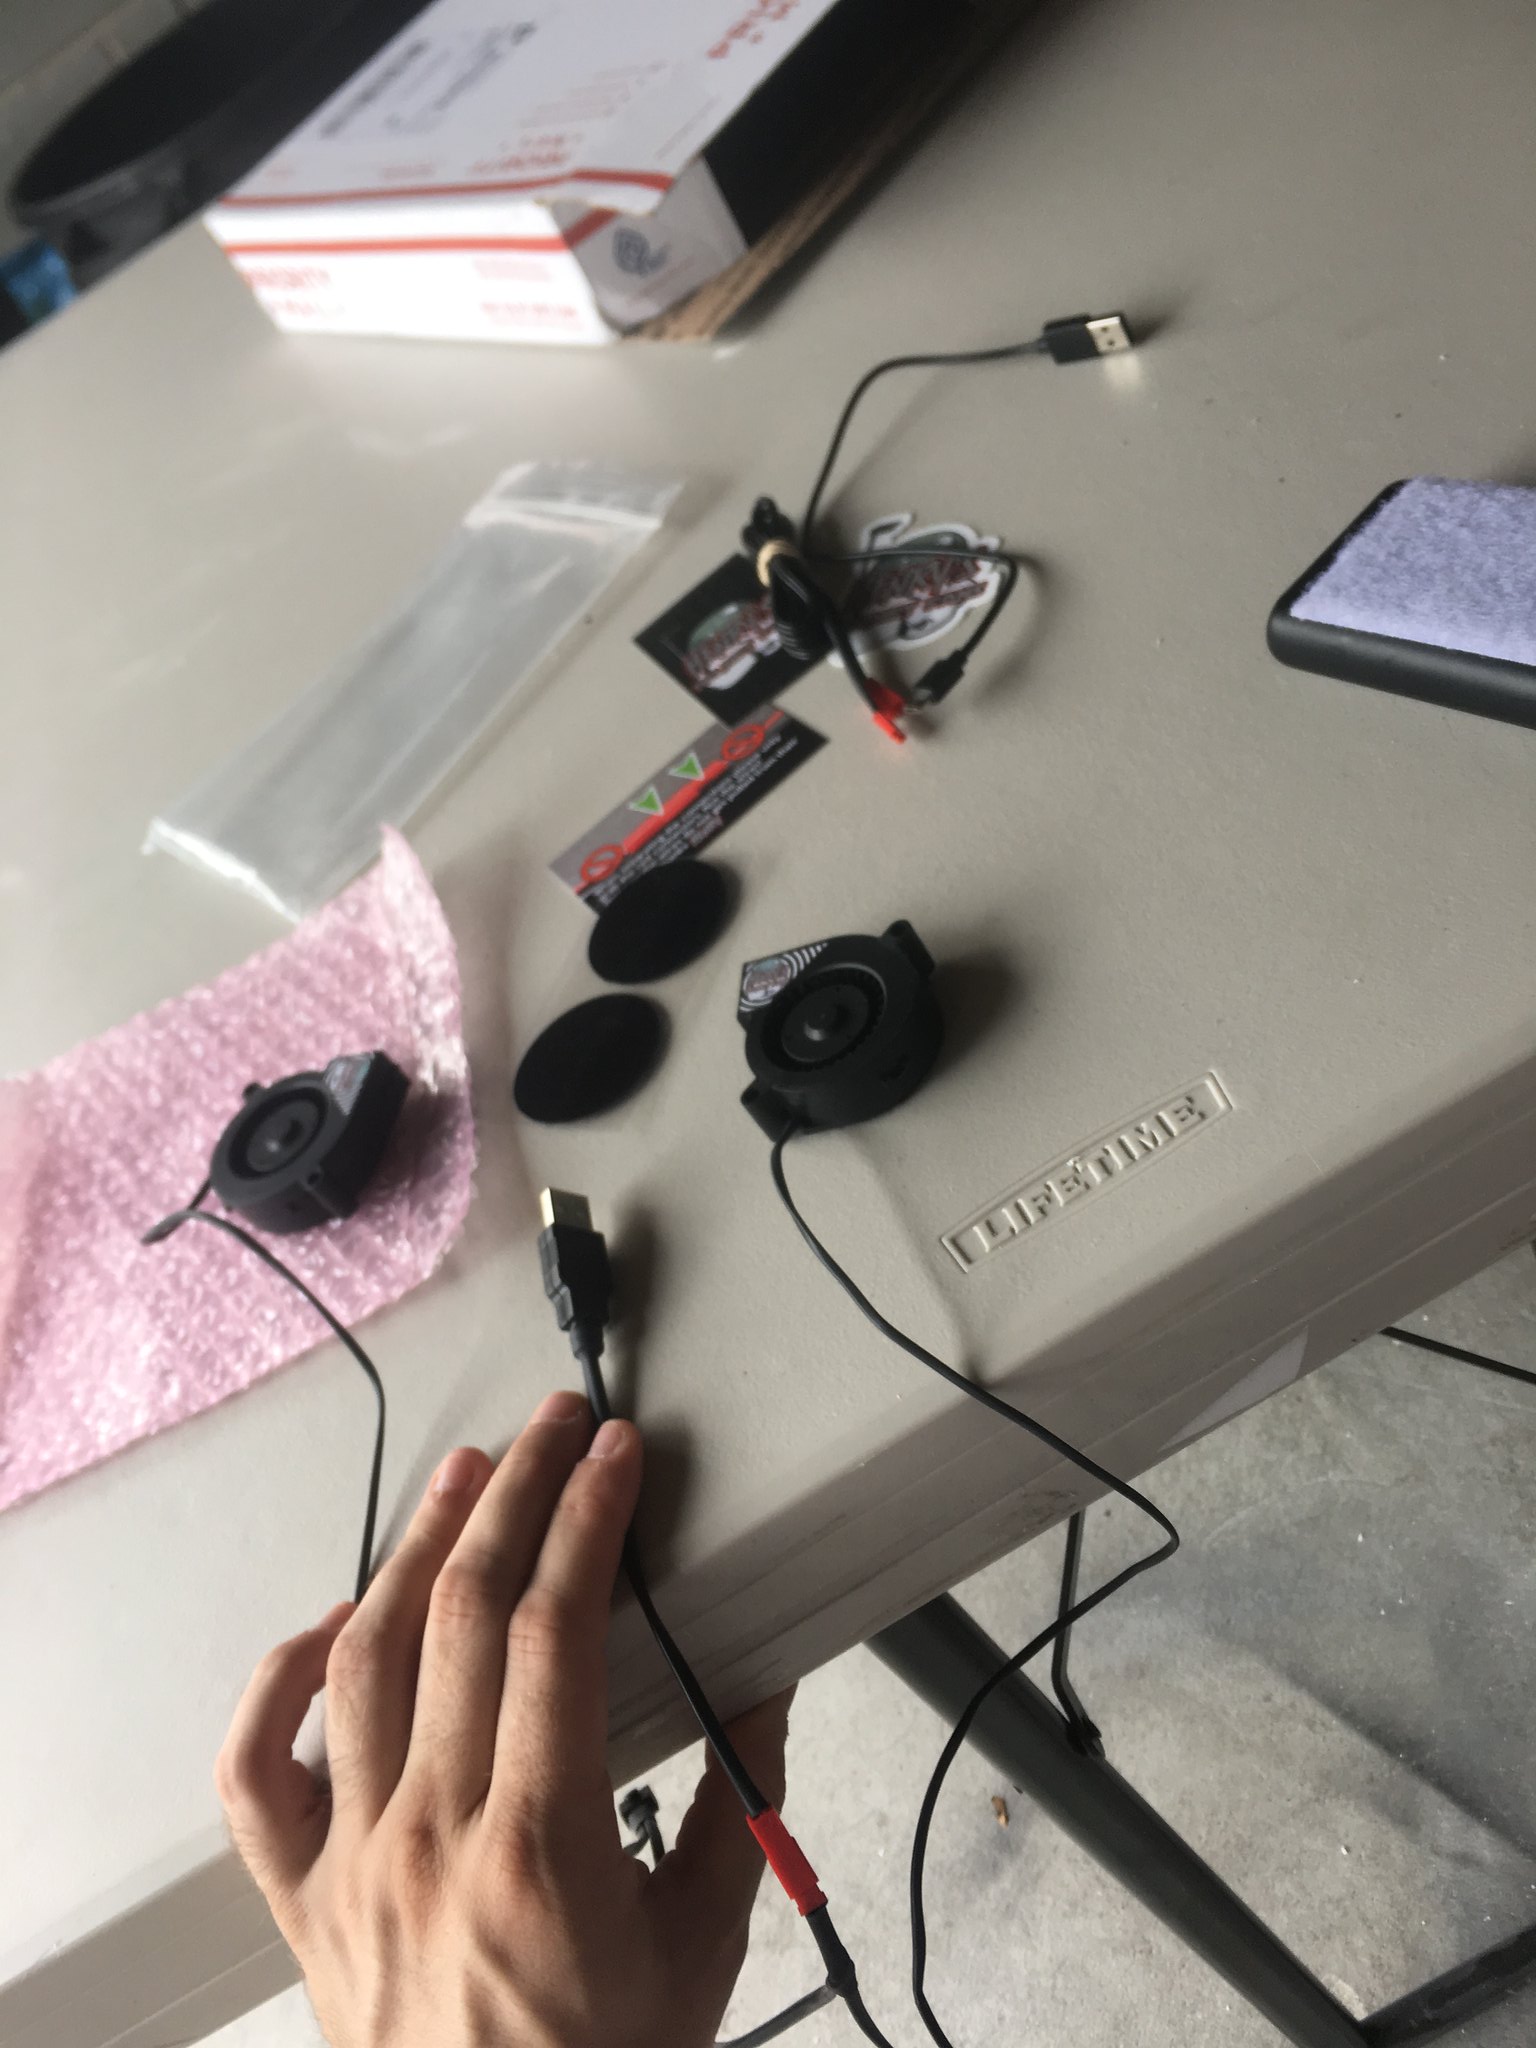
I also picked up another set of Henry's Helmet Fans (I used them in my AT-ACT Driver bucket with much success). I had no idea they were now available via TrooperBay, so I snagged a set while shopping over there.
Untitled by Taylor Goodson, on Flickr
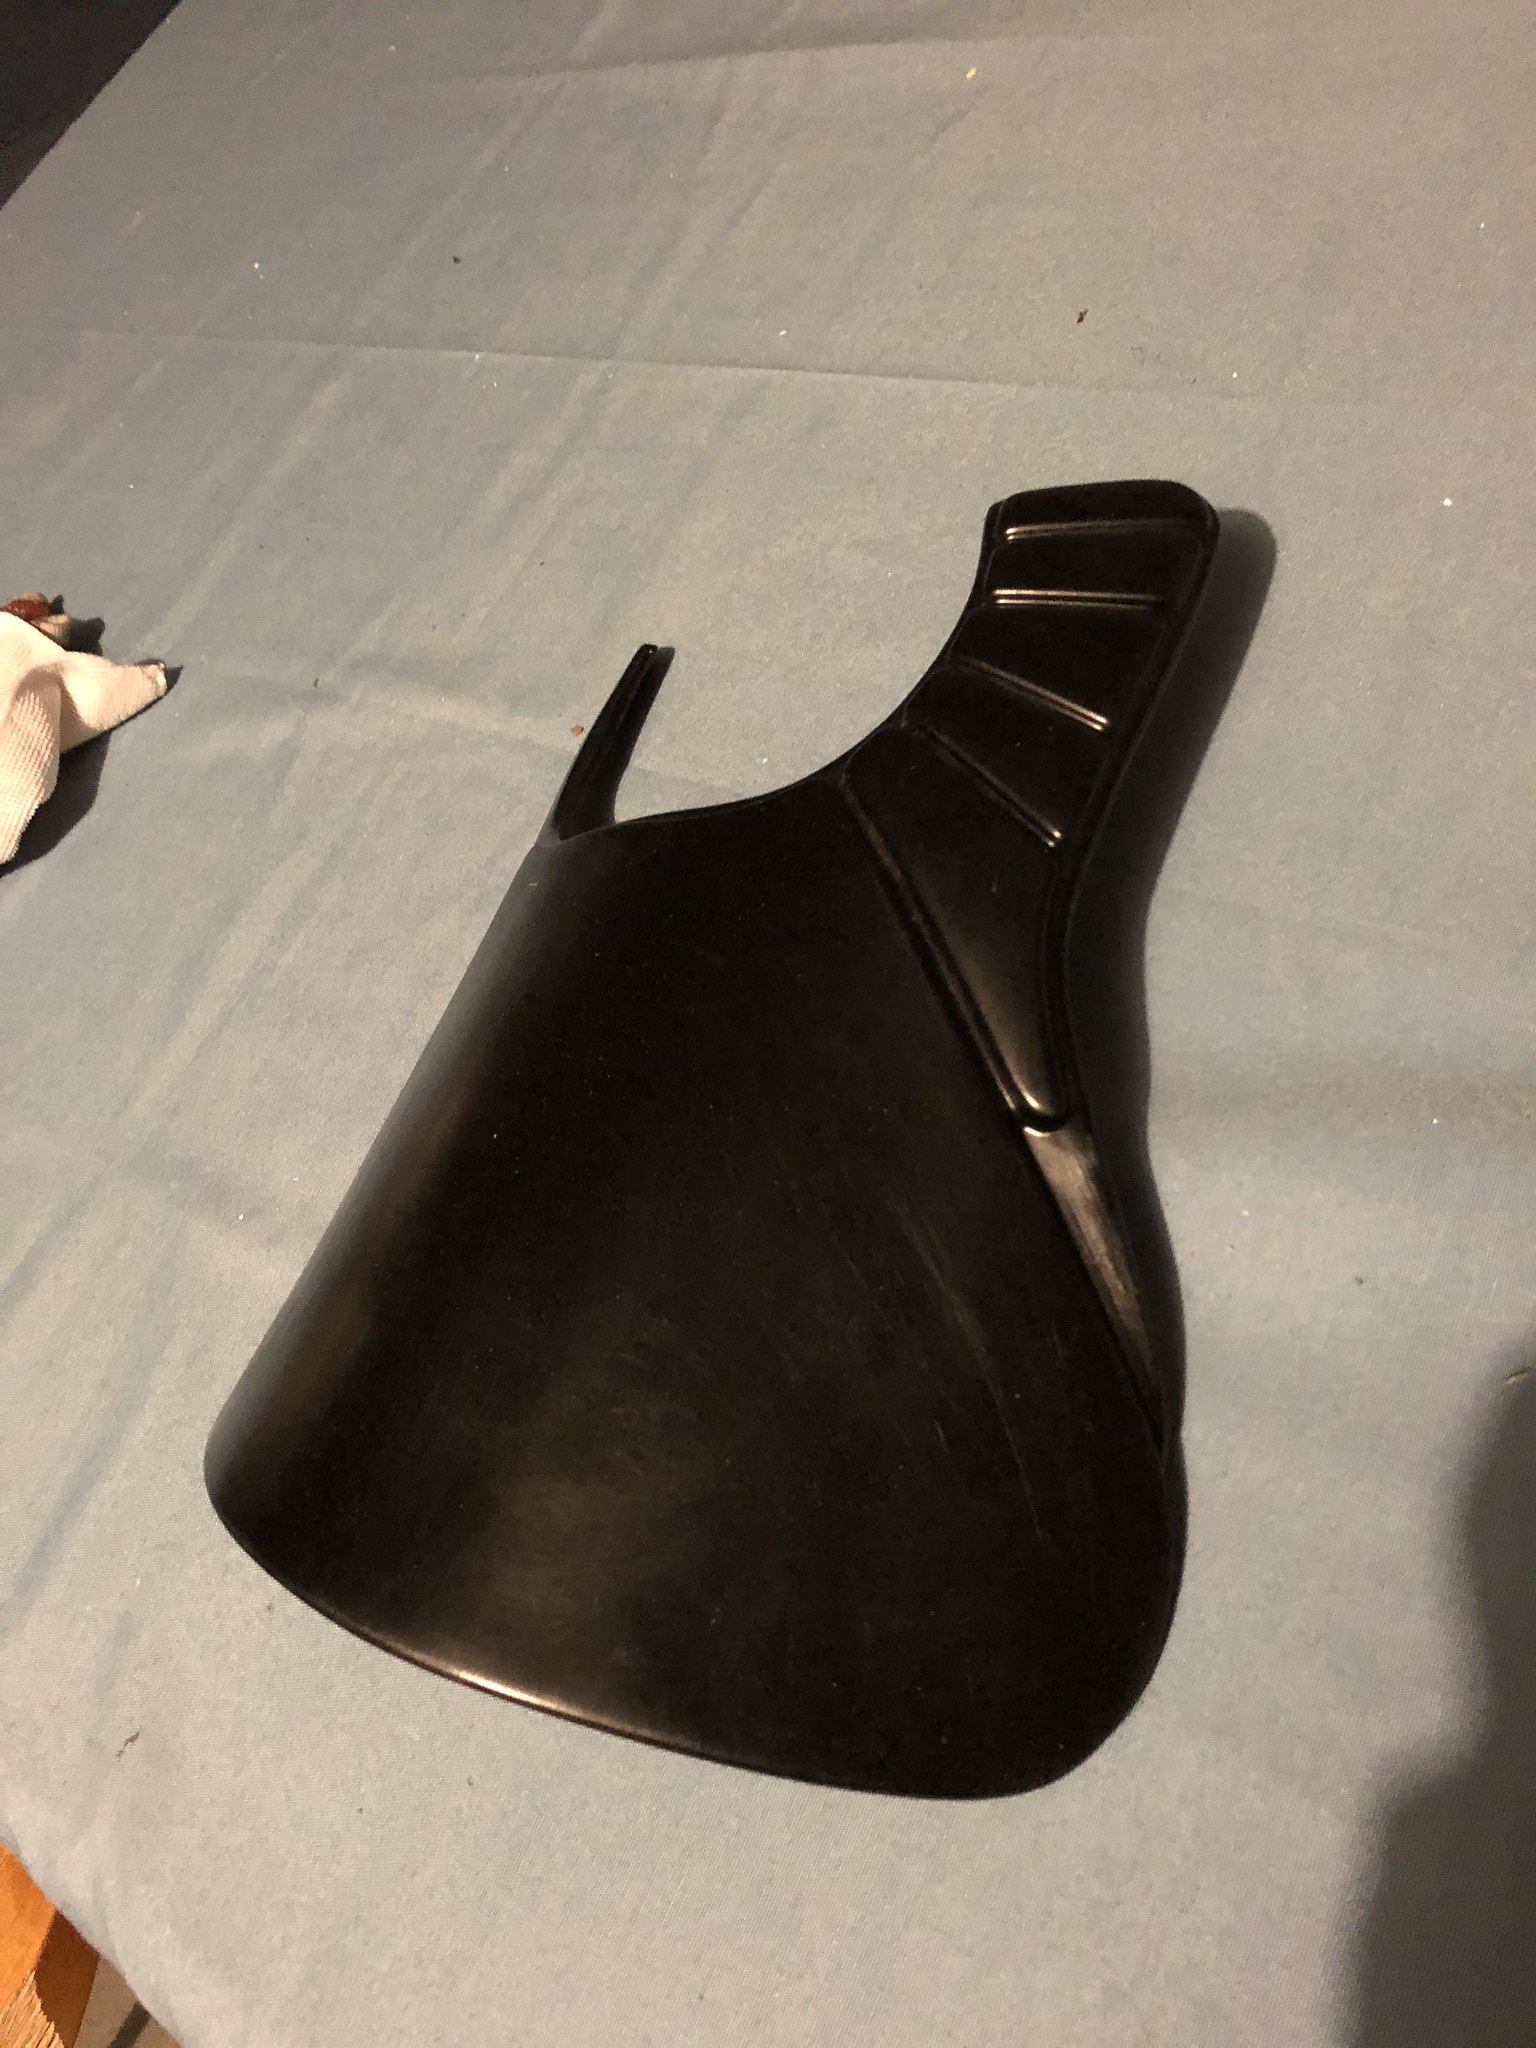
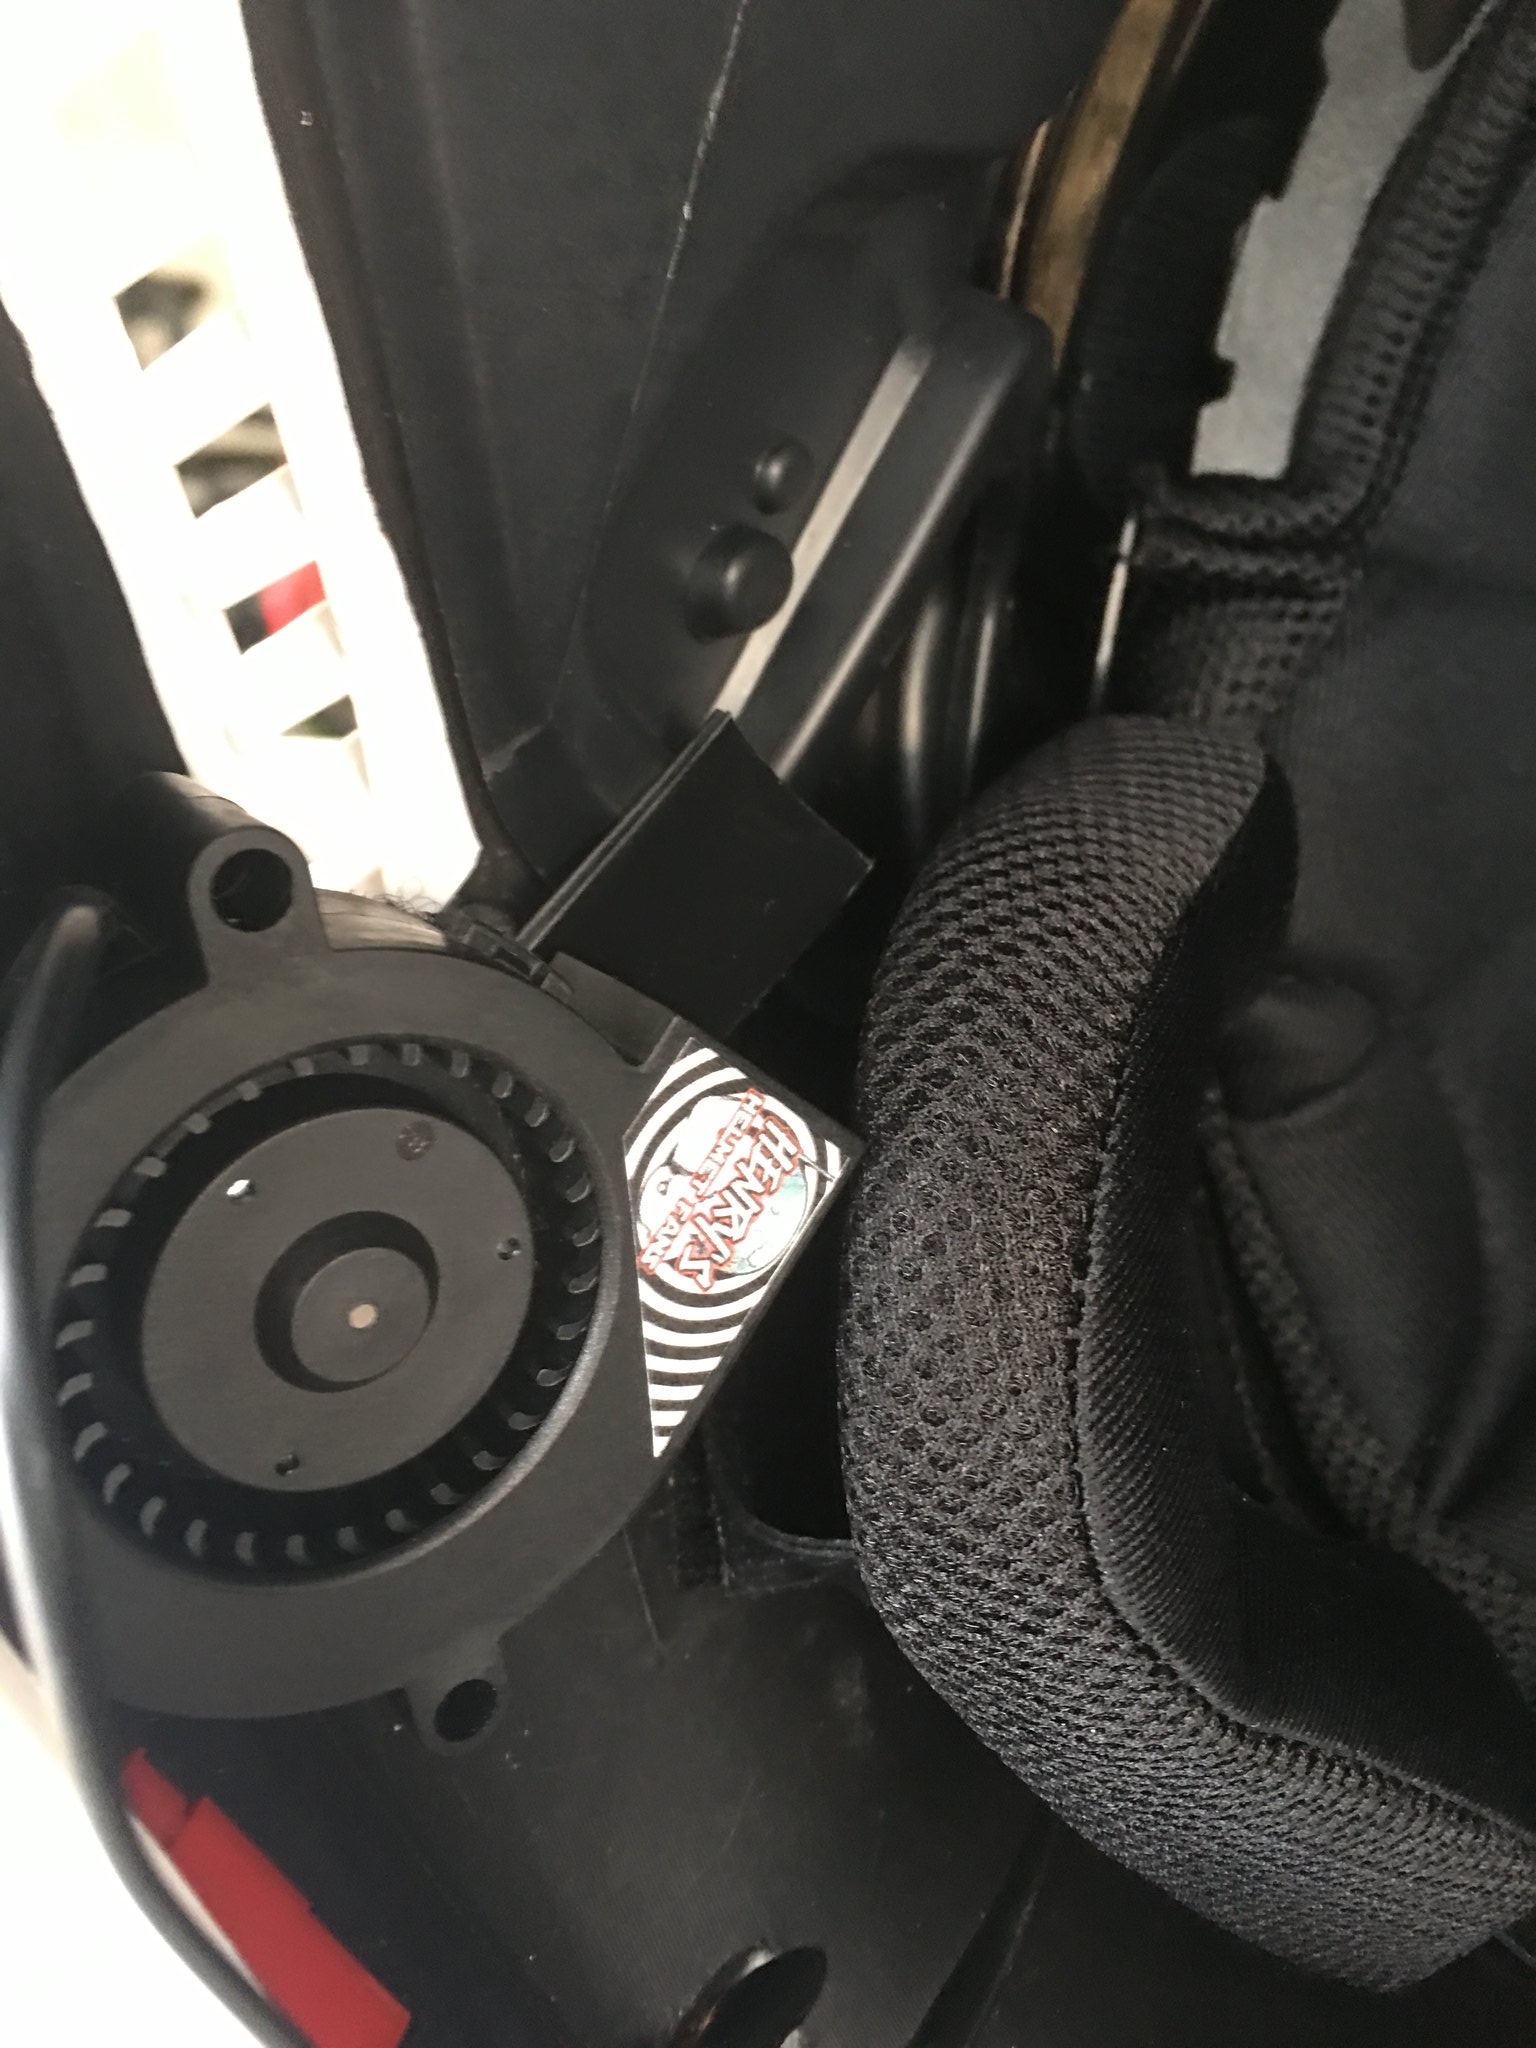
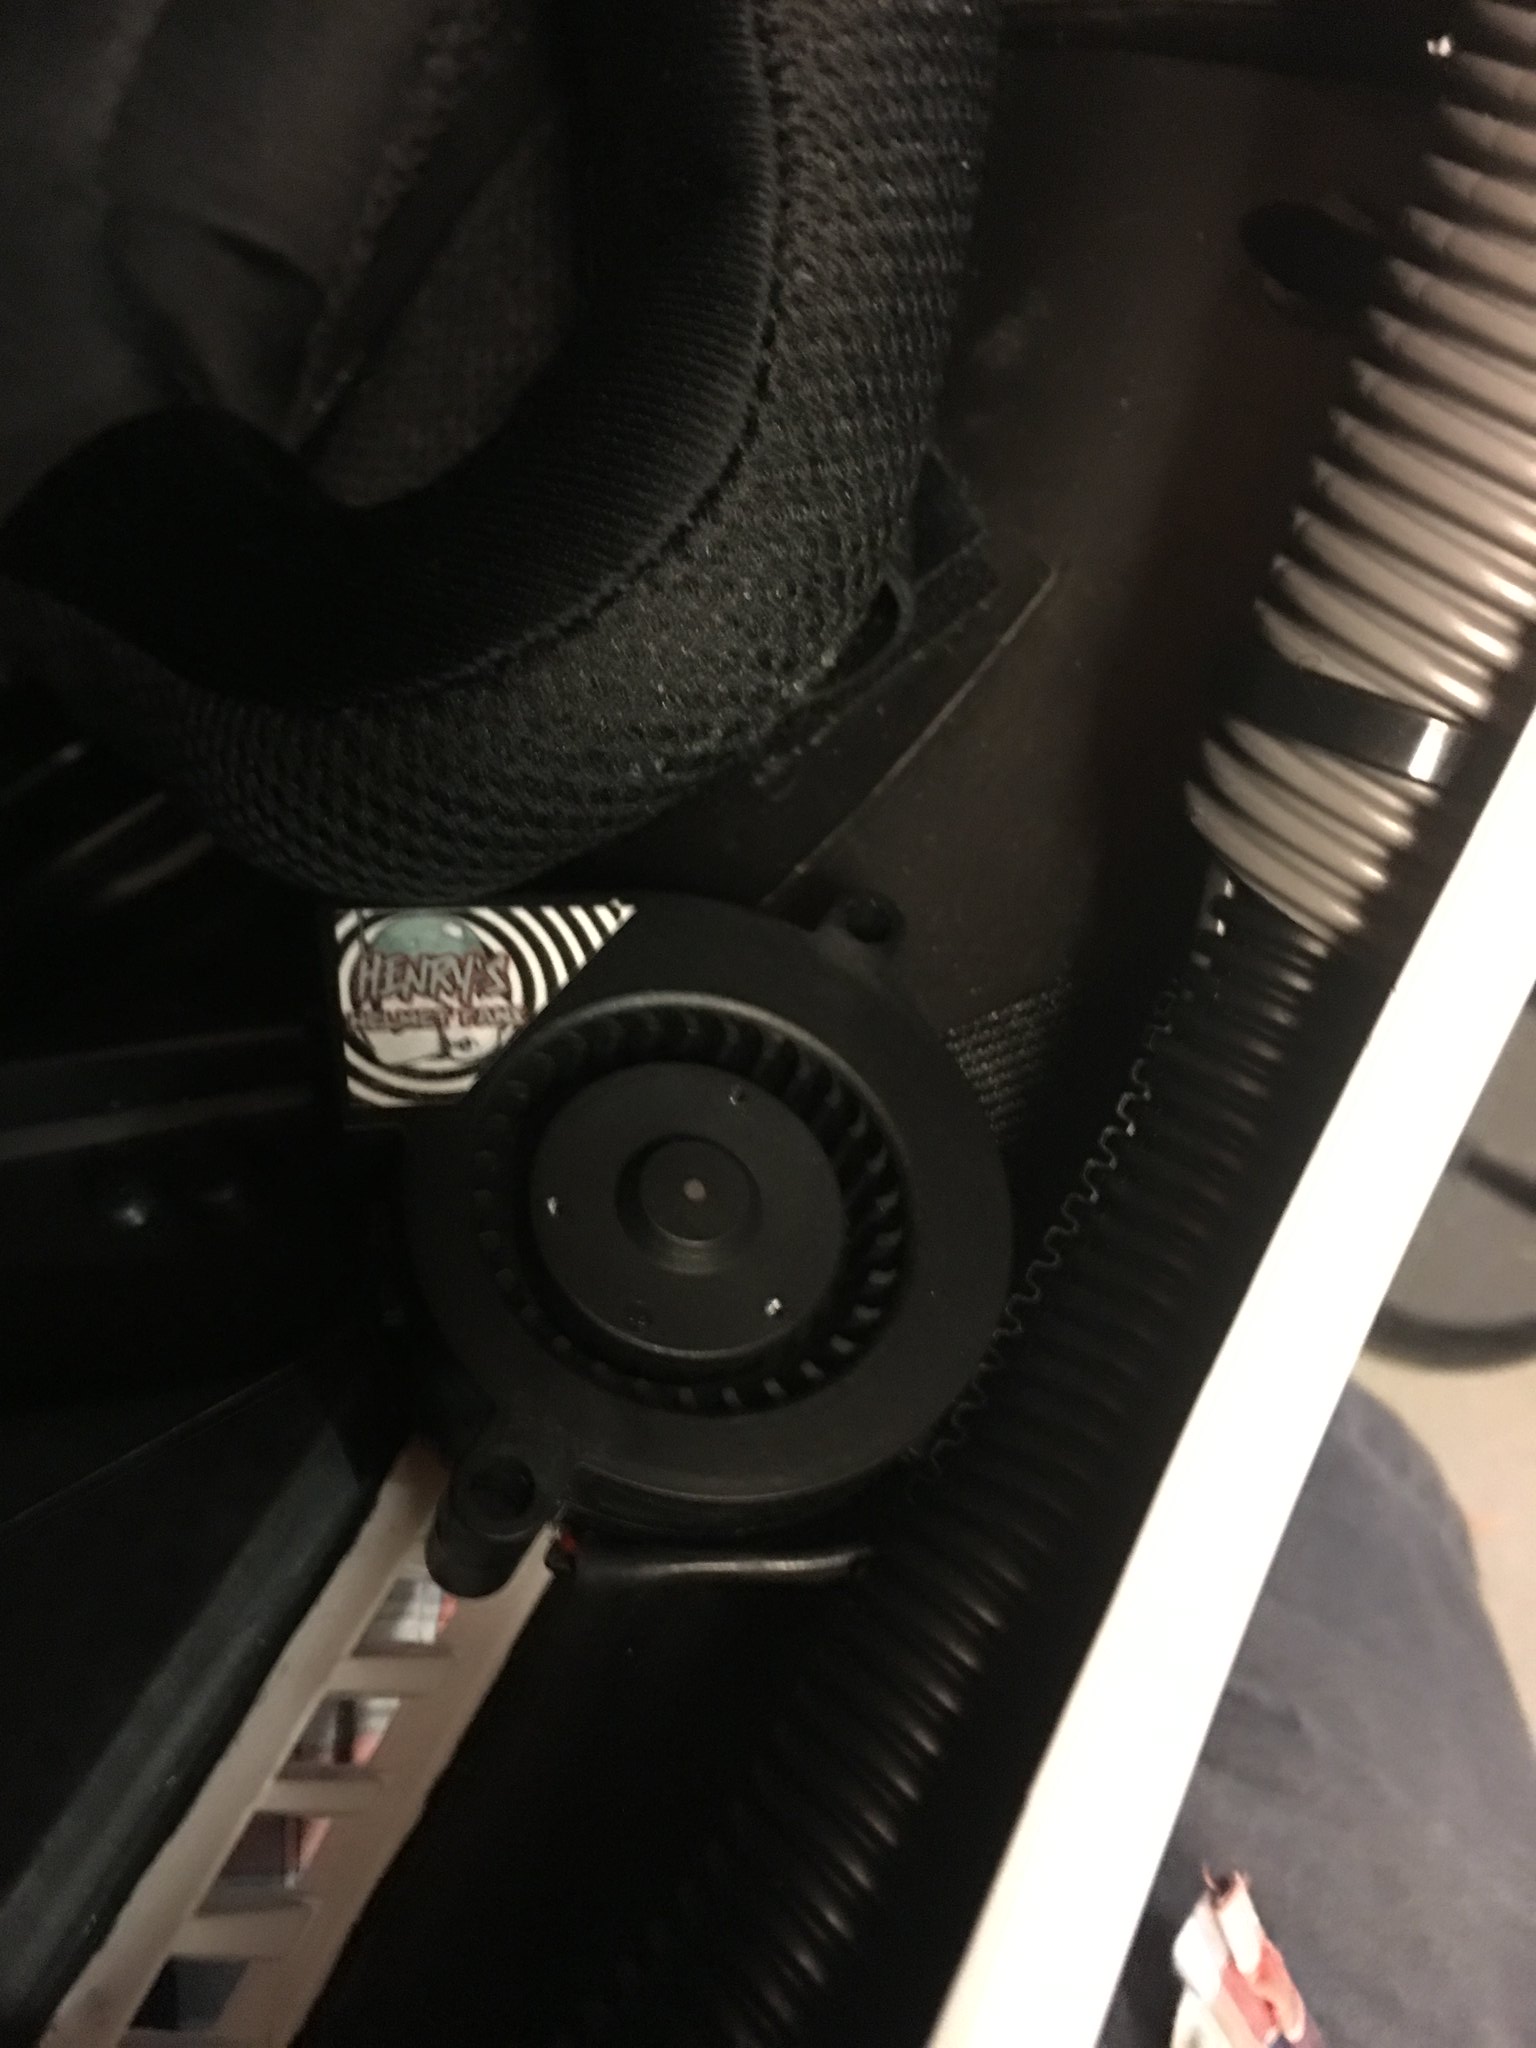
I installed the pair of fans right next to the cheek cutouts with the air directed right toward the lenses to keep them nice and fog free. Because of the angle of the area, the fan would sit blowing air right into the raised plastic portion of the face. I made a little ABS ramp to angle the air flow over that plastic and up to the lenses.
Untitled by Taylor Goodson, on Flickr
The Henry kits don't come with anything fancy for cable management such as brackets or the like, so I used a bit of plastic conduit to hide my cables. Once everything was in place, I used a bit more industrial velcro to hold down the conduit within the deep rim of the bucket.
Untitled by Taylor Goodson, on Flickr
Finally, I installed a few velcro strips to hold in my Aker USB power bank to power the fans.
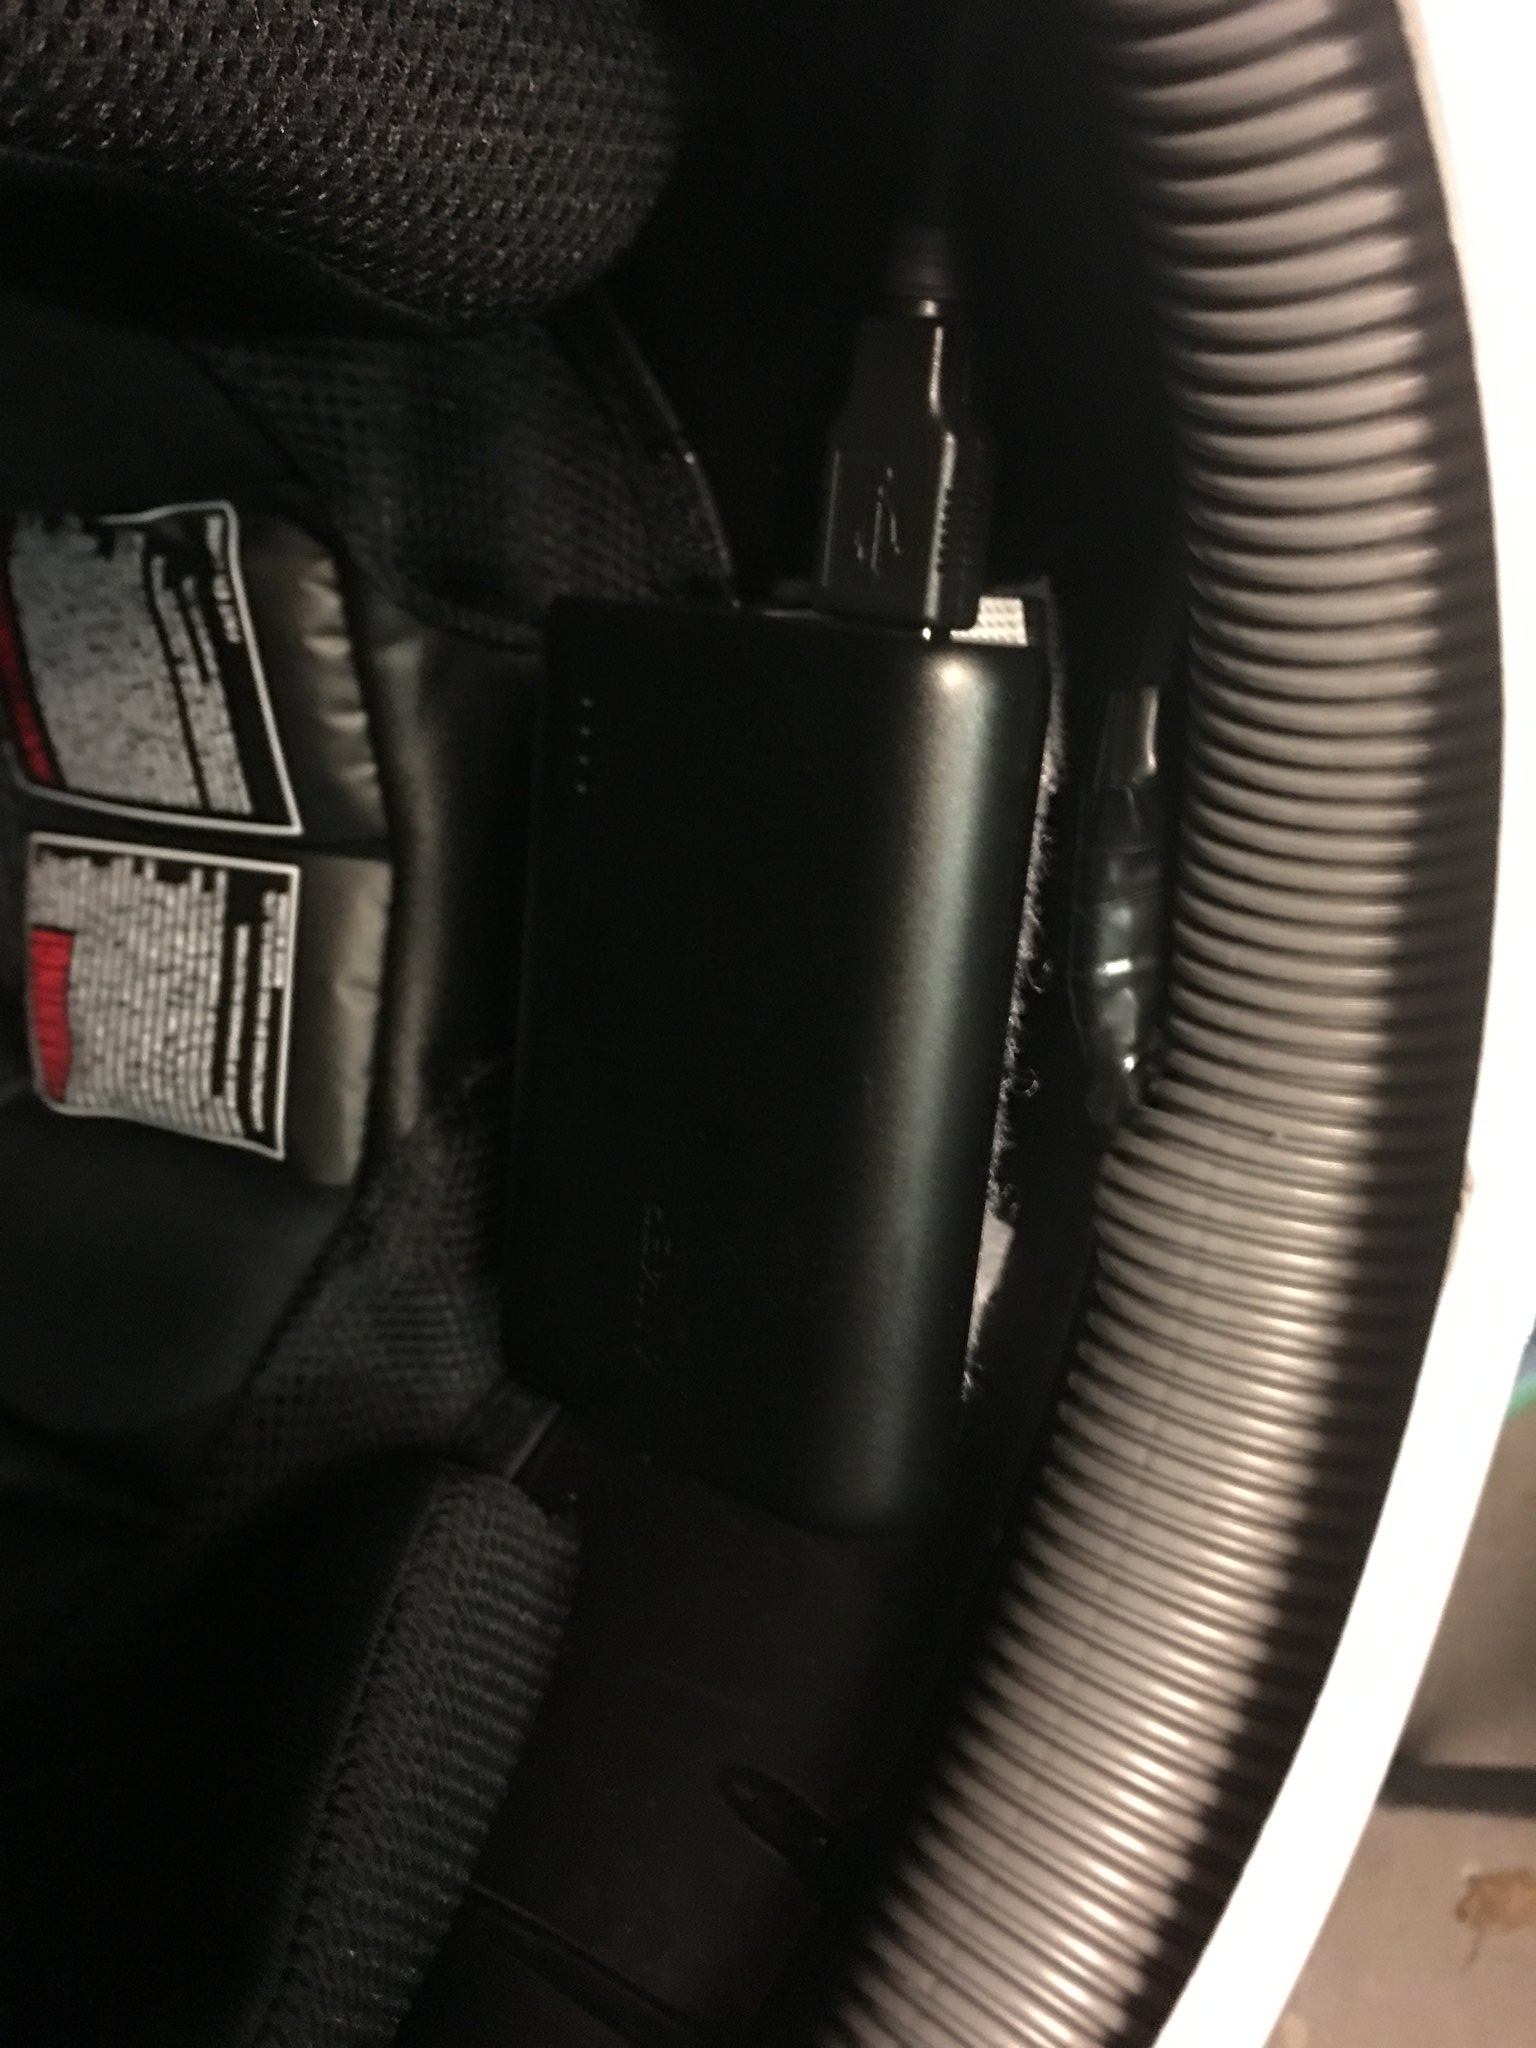
Untitled by Taylor Goodson, on Flickr
Here's the new interior look to the bucket.
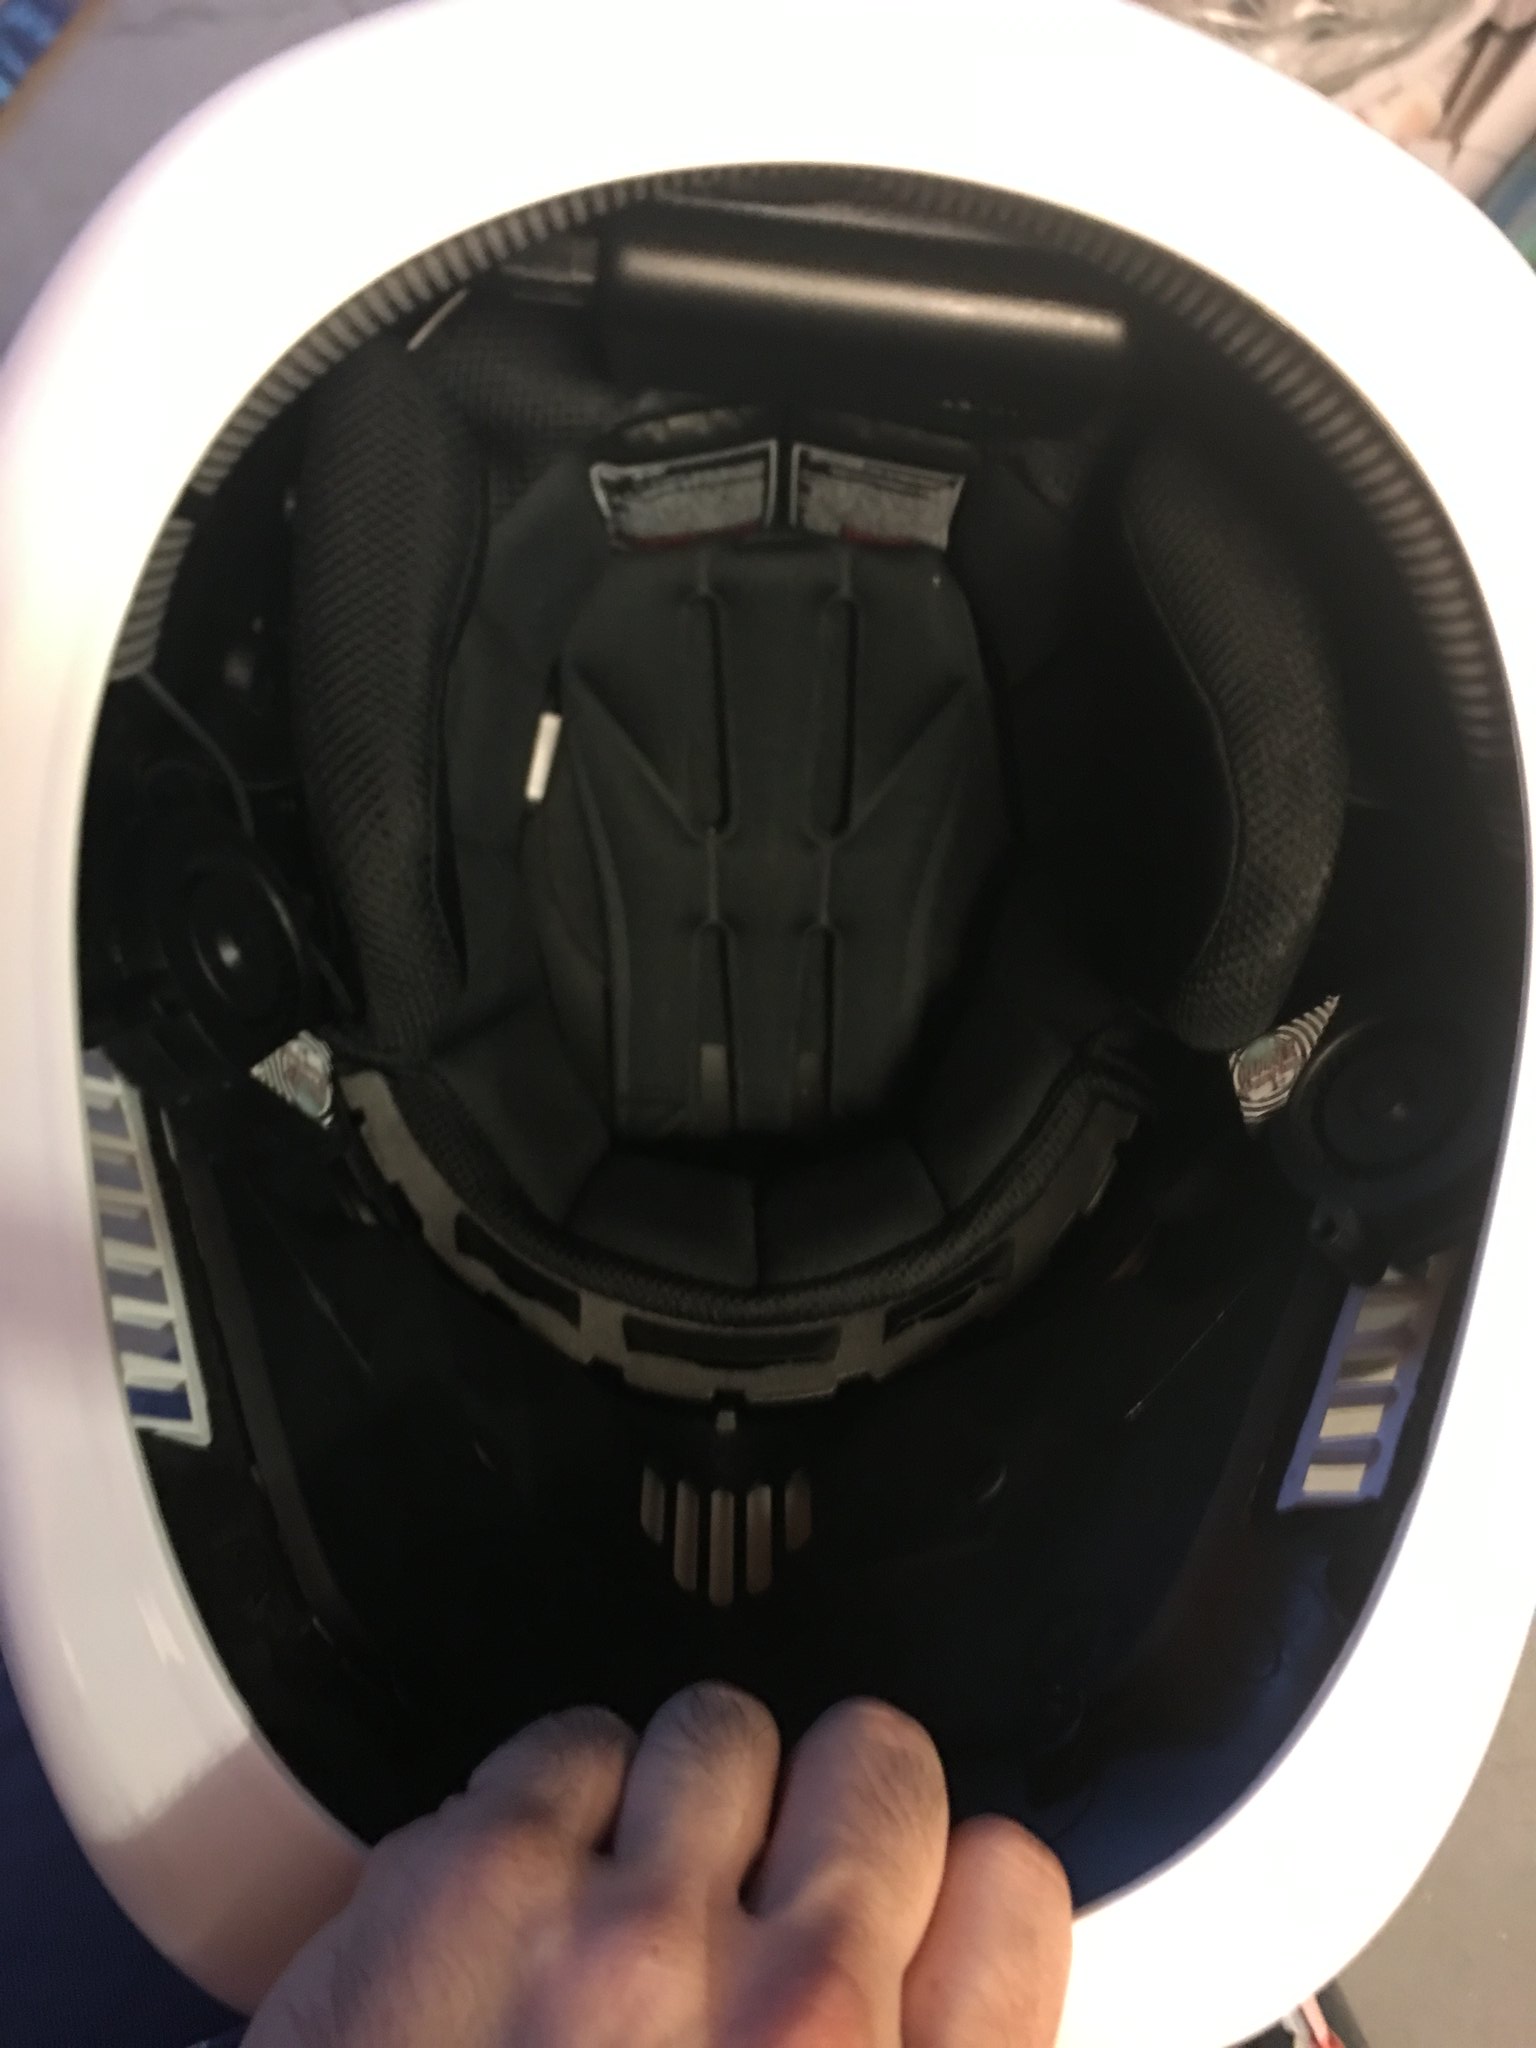
Untitled by Taylor Goodson, on Flickr
The fans run right up to the lenses and over my face, so that will be nice to keep things a bit cooler. The liner with the ear cups is incredibly comfortable in comparison to the helmet liner, so I'm quite pleased with that. After these little updates, I'm more excited than ever to get to building this thing!
-
 1
1
-
-
Thanks, guys!
") Definitely can't wait to be diving in to this one. Chatted with KB Props who said the armour should be pulled by Friday, so hopefully that beautiful box will be here before I know it!
Definitely can't wait to be diving in to this one. Chatted with KB Props who said the armour should be pulled by Friday, so hopefully that beautiful box will be here before I know it!
-
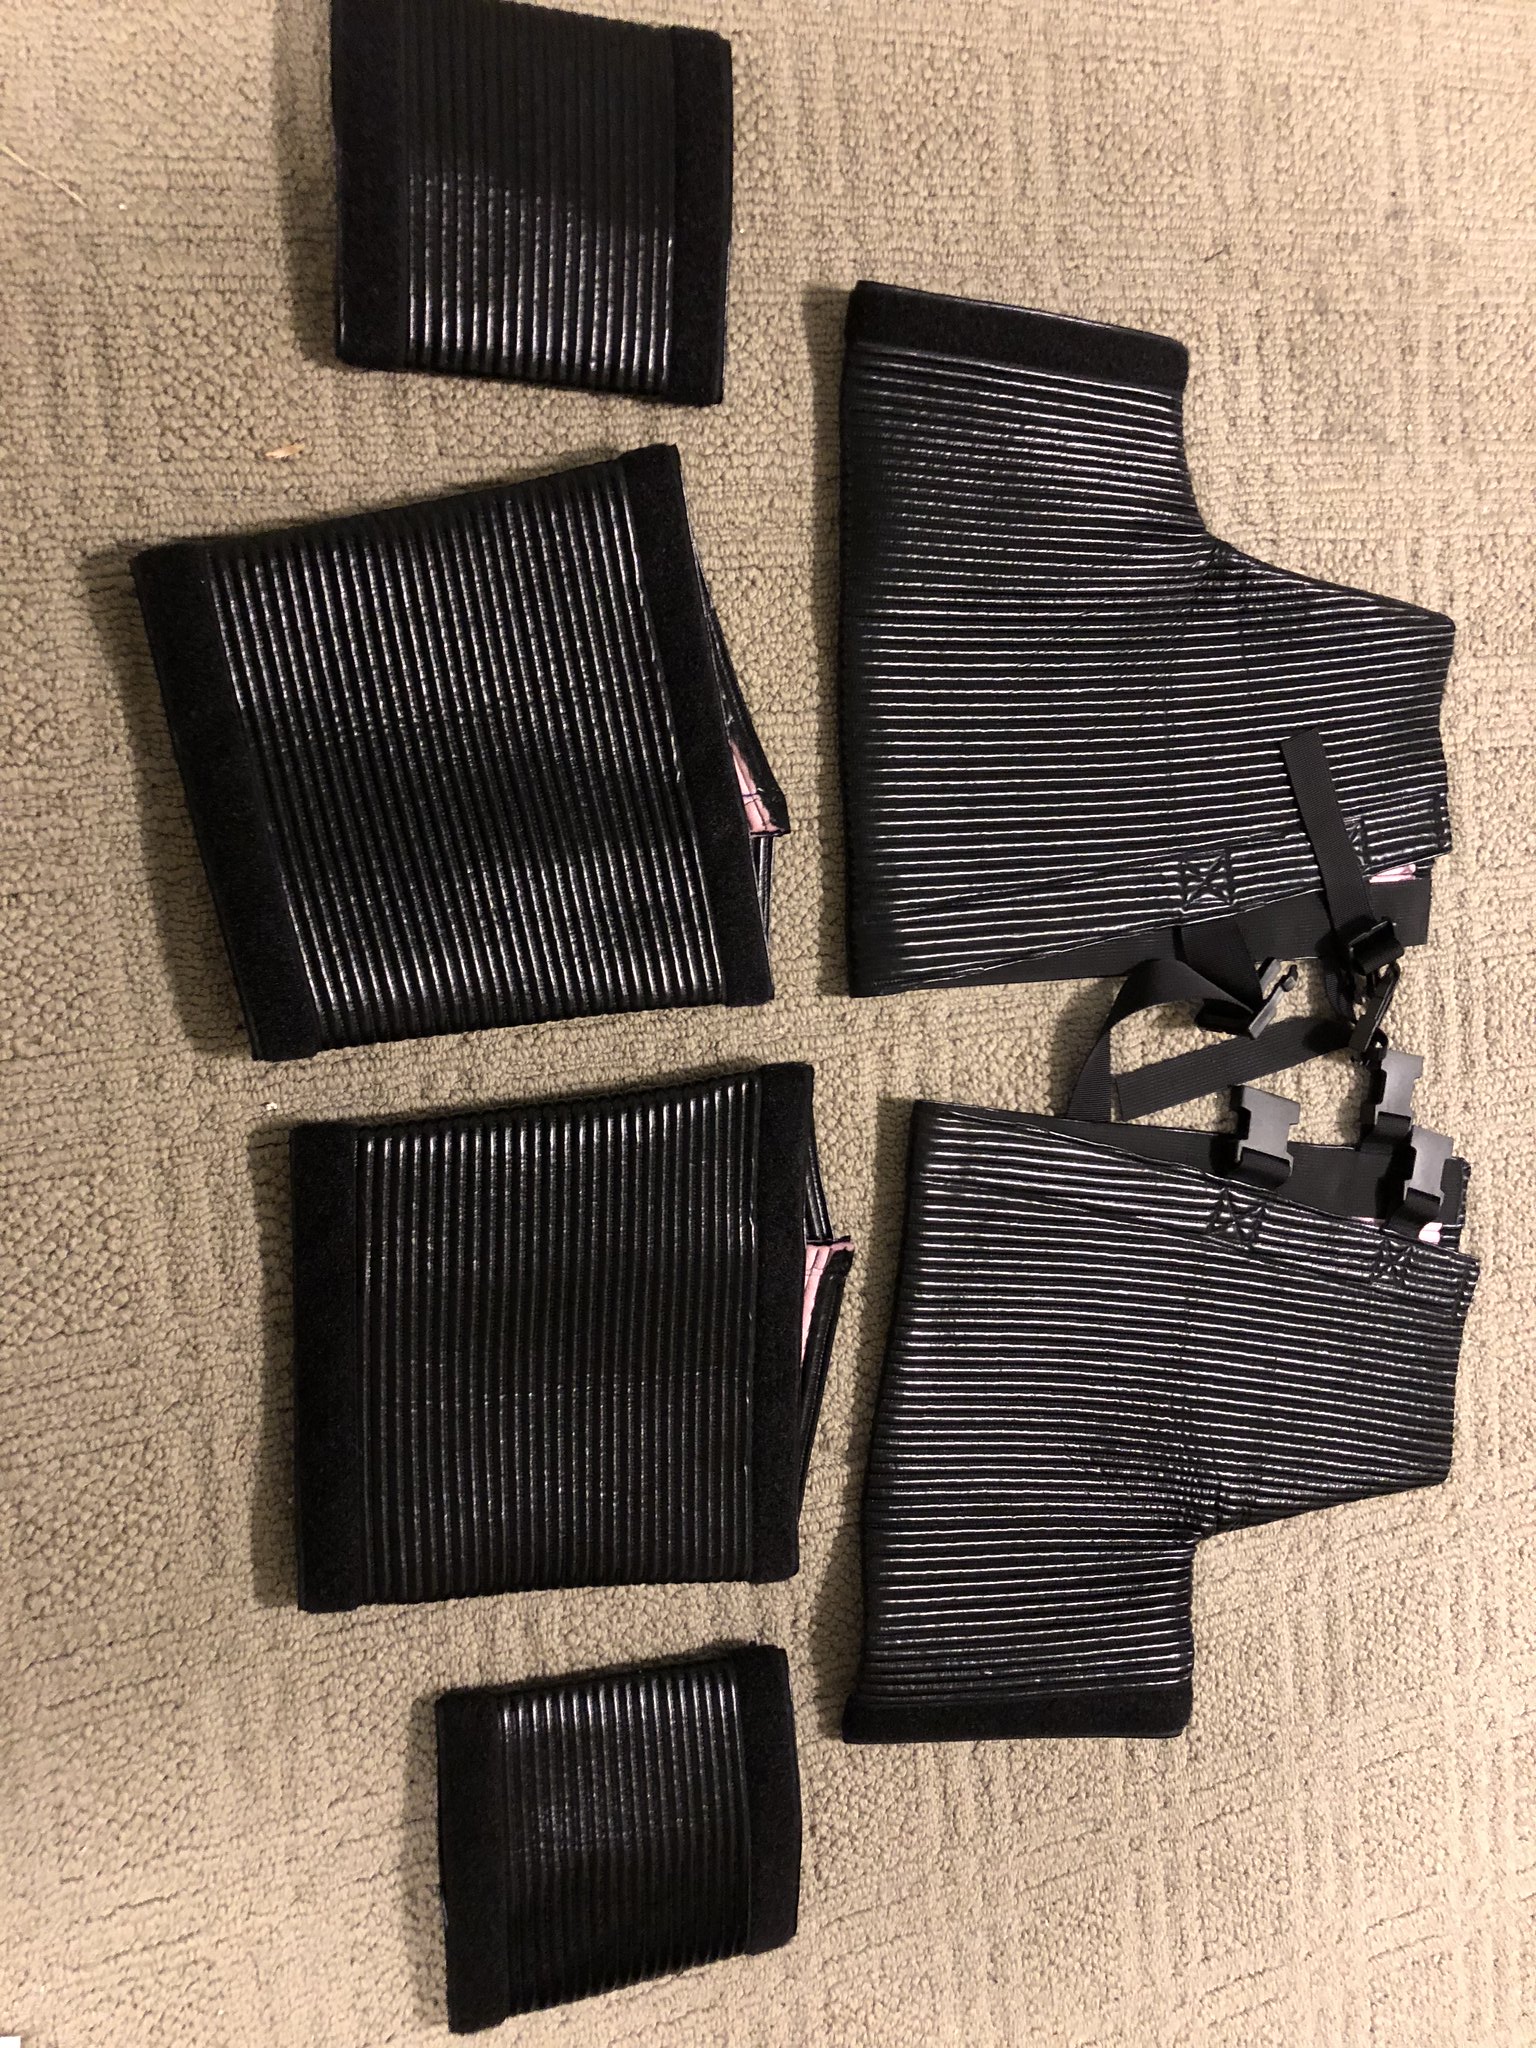
Soft Goods: Undersuit, Gloves, and Neck Seal
I got a package from England this afternoon from Stormtrooper Undersuit of all the First Order soft pieces I ordered from them. They came nicely packaged and sealed up:
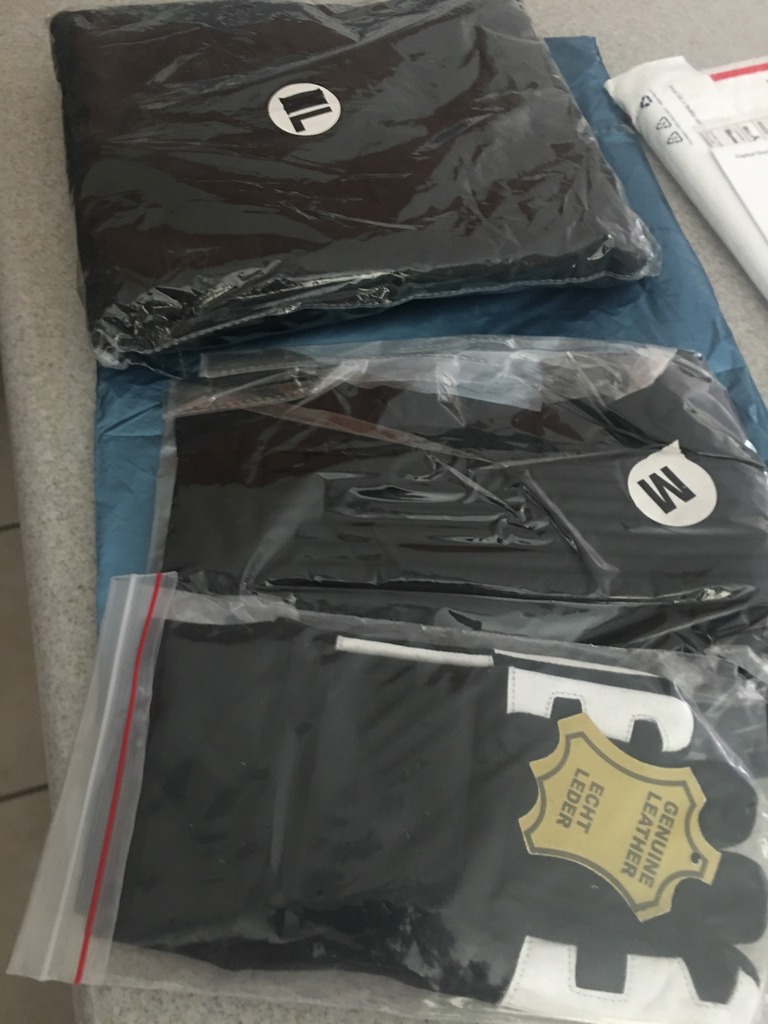
FCDCA413-1F5C-49FA-BB6D-3E33D079FBD5 by Taylor Goodson, on Flickr
1) The Undersuit - based on the measurements on their site, I went for a Large even though I normally sport a Medium and I'm glad I did. It's a really form-fitting suit and even the large is quite hugging. They have a guide on their site to get one that best suits your measurements, so that was easy to figure out. The latex fabric on the waist and thighs is interesting, but the rest is very similar to standard TK undergarments.
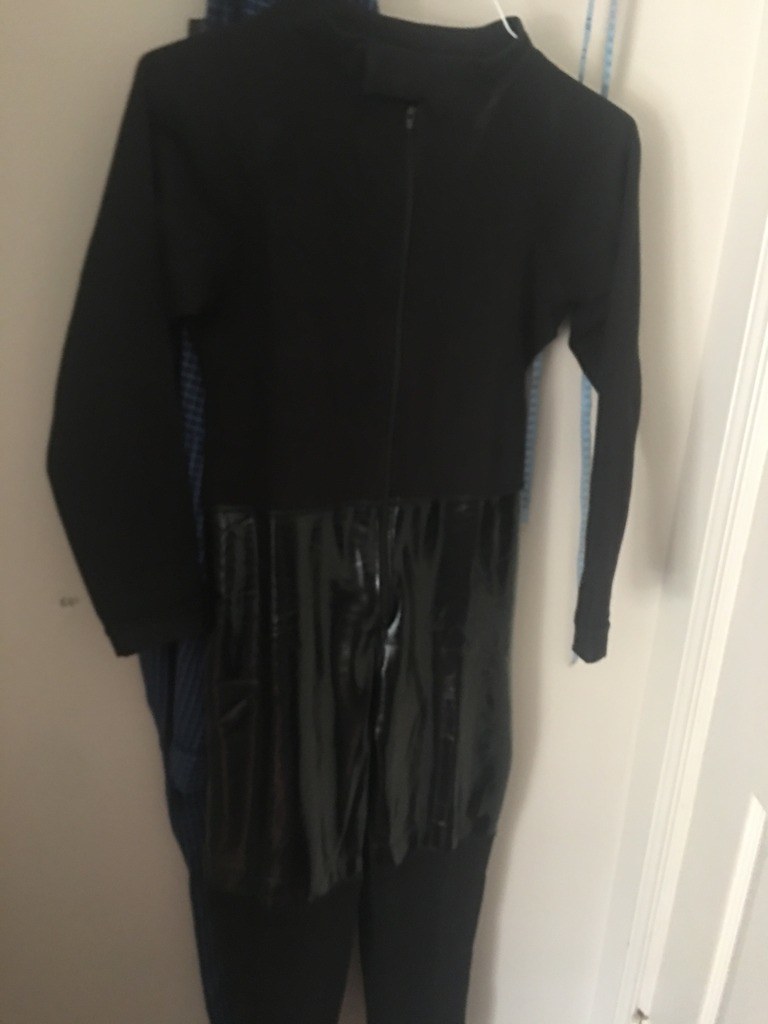
A9CD1050-069C-4110-AEF6-987047DA10D3 by Taylor Goodson, on Flickr
2) The gloves are great - made with real leather and quite comfortable. They've got enough extra material down at the bottom of the wrist to tuck beneath the undersuit for a seamless look. Only downside is that they are only one size, so they might not work for everyone.
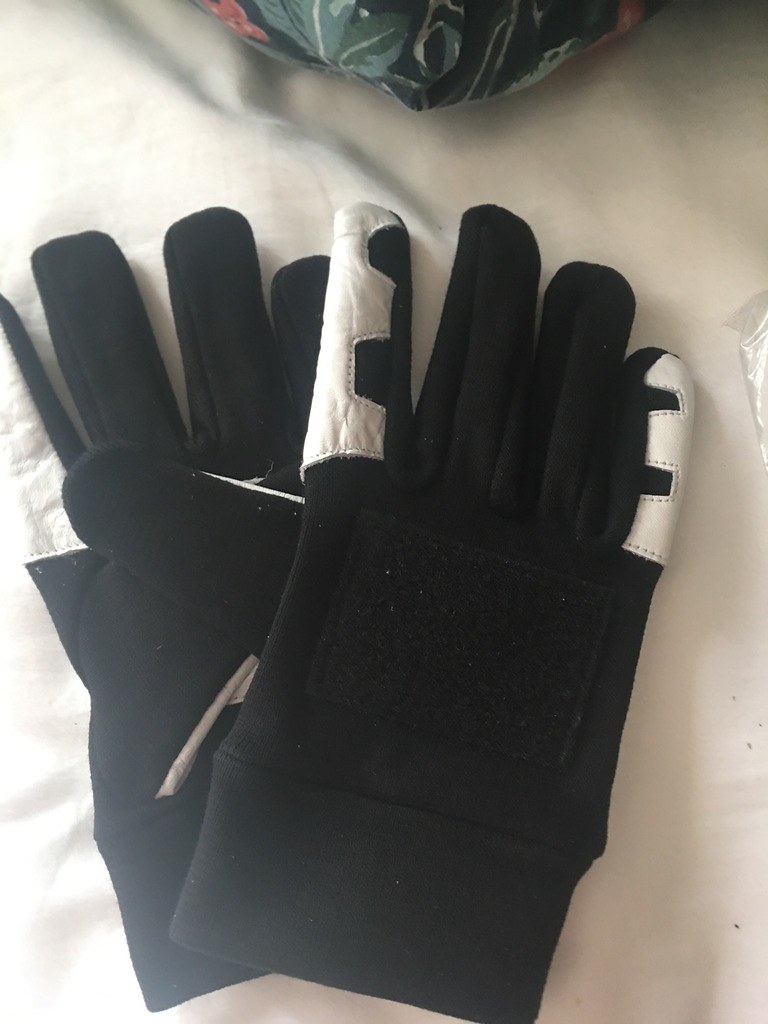
930A5E22-D670-406A-A361-E9BC387AECEC by Taylor Goodson, on Flickr
3) The neckseal - it's quite comfortable and has a very easy magnetic closure. There's a nice size bib as well to make sure all your skin stays hidden.
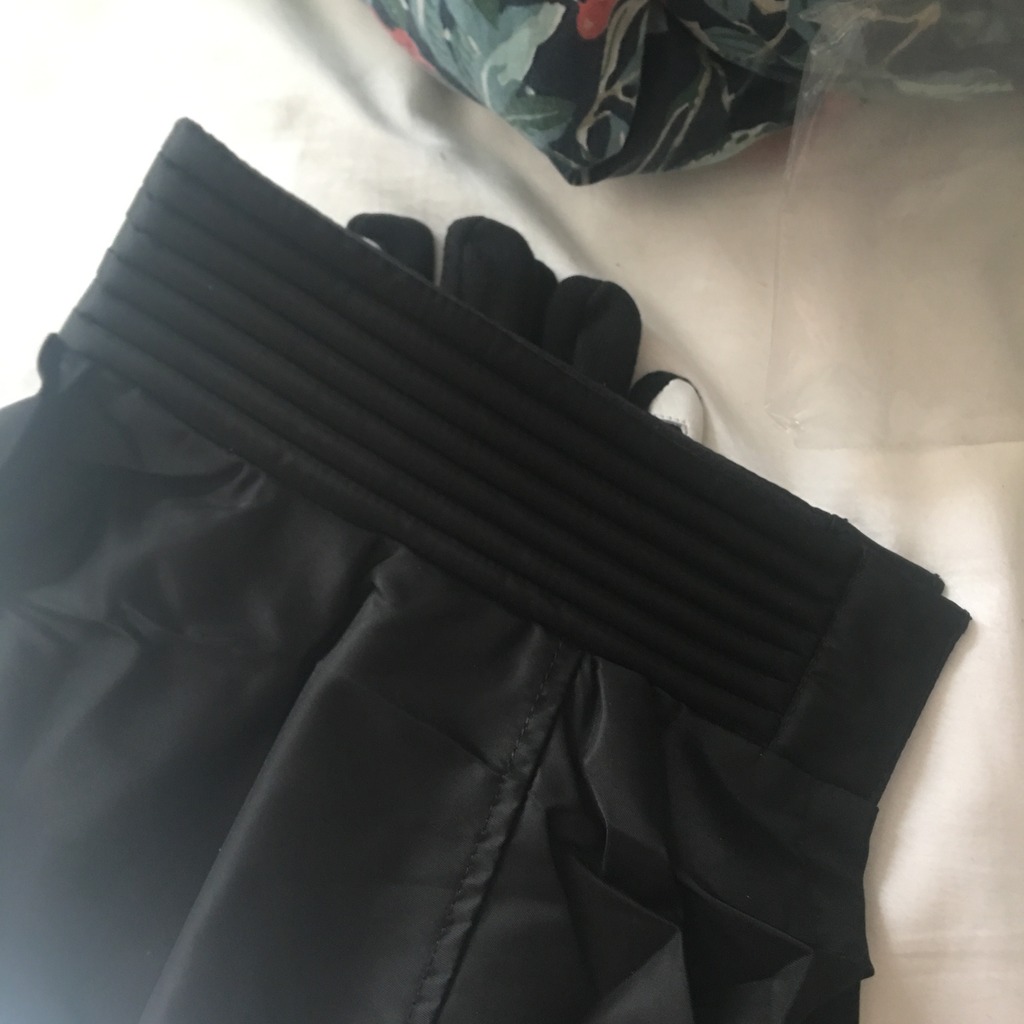
6DB50537-03E4-464F-B638-3B779C5719E7 by Taylor Goodson, on Flickr -
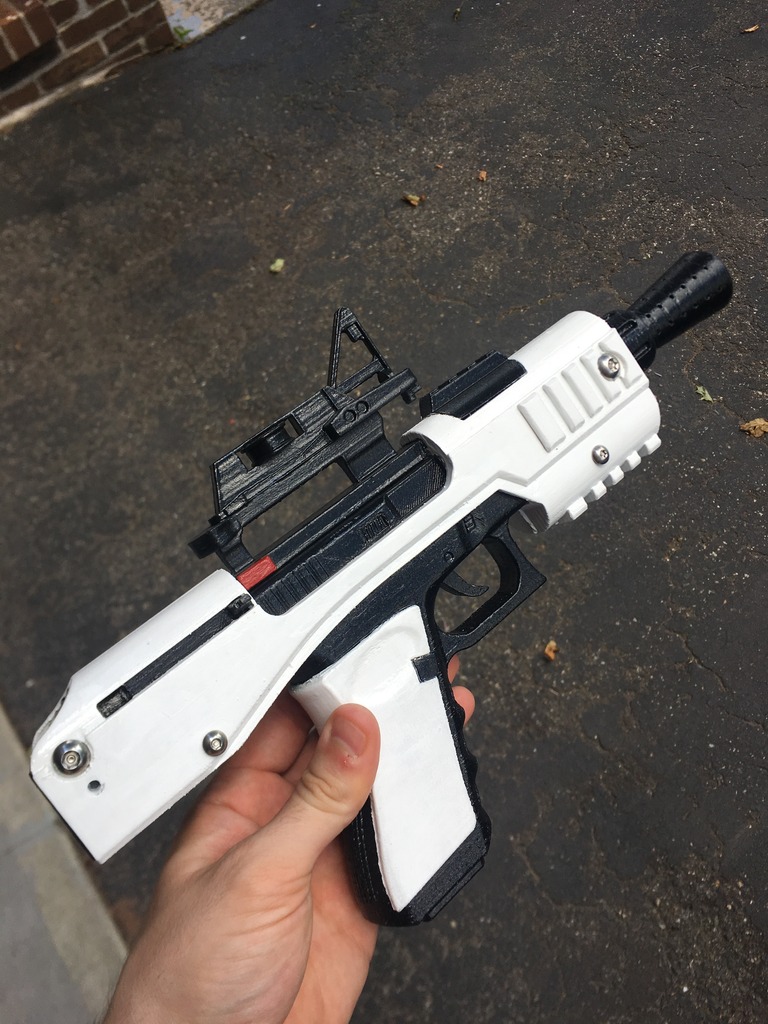
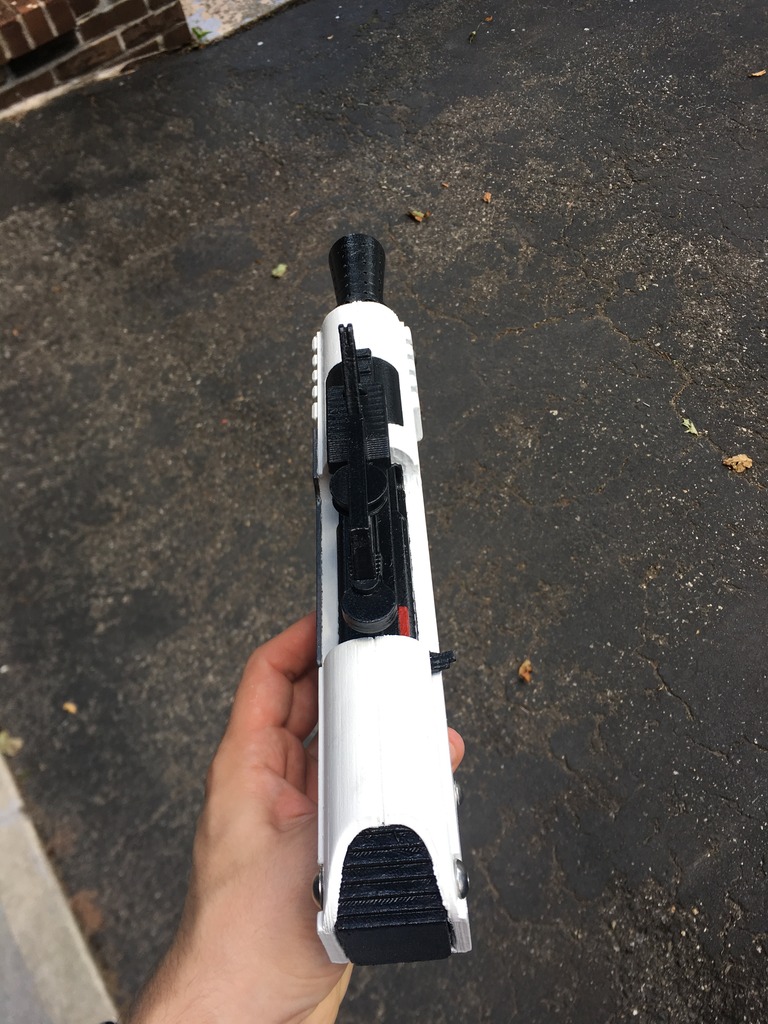
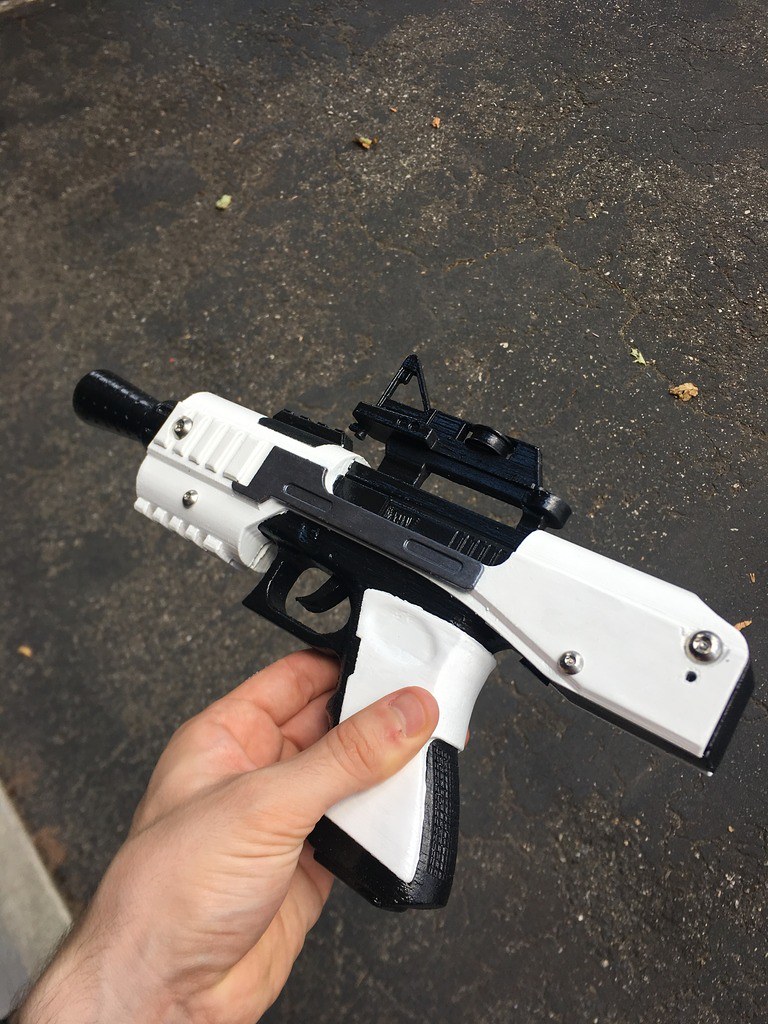
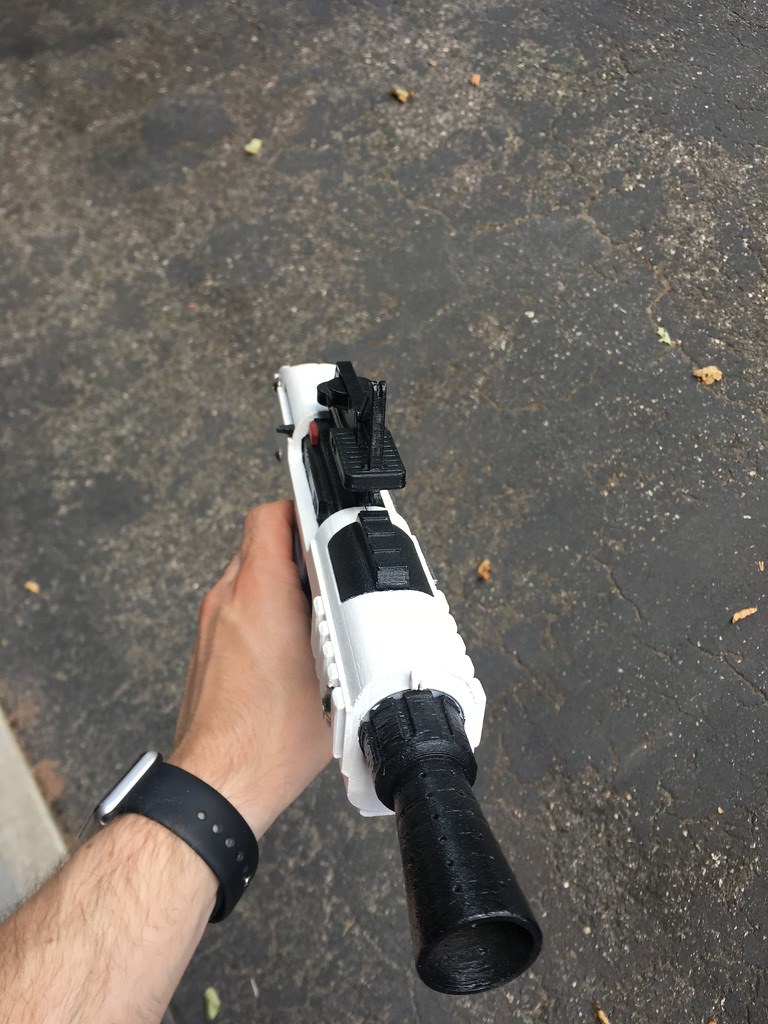
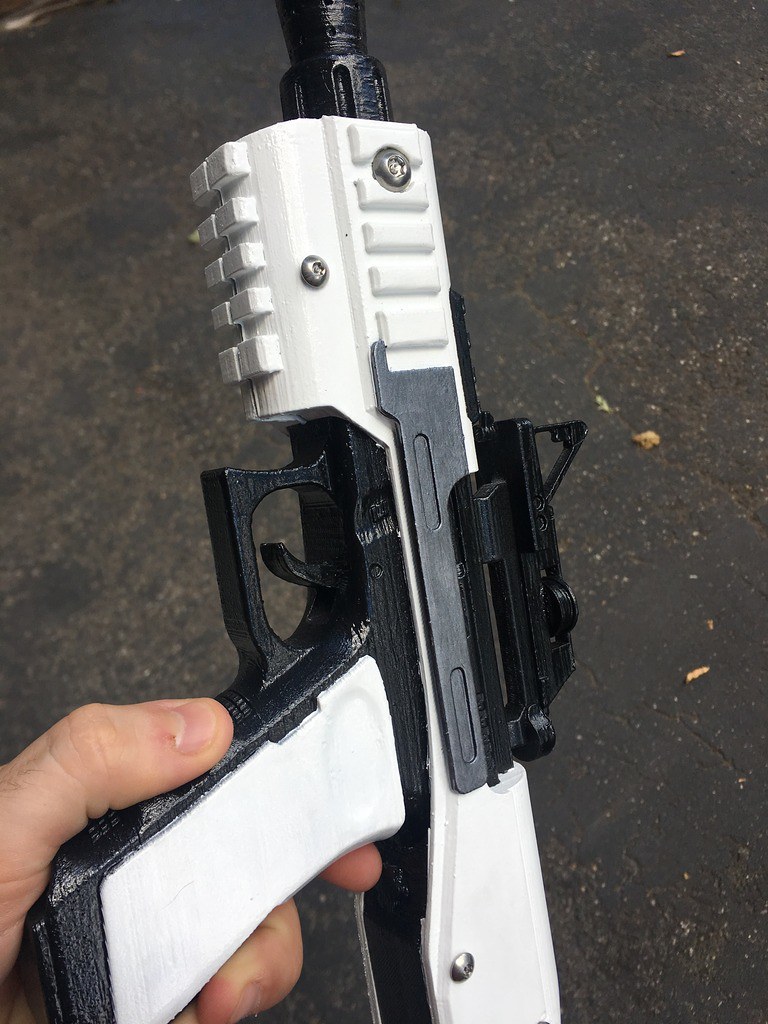
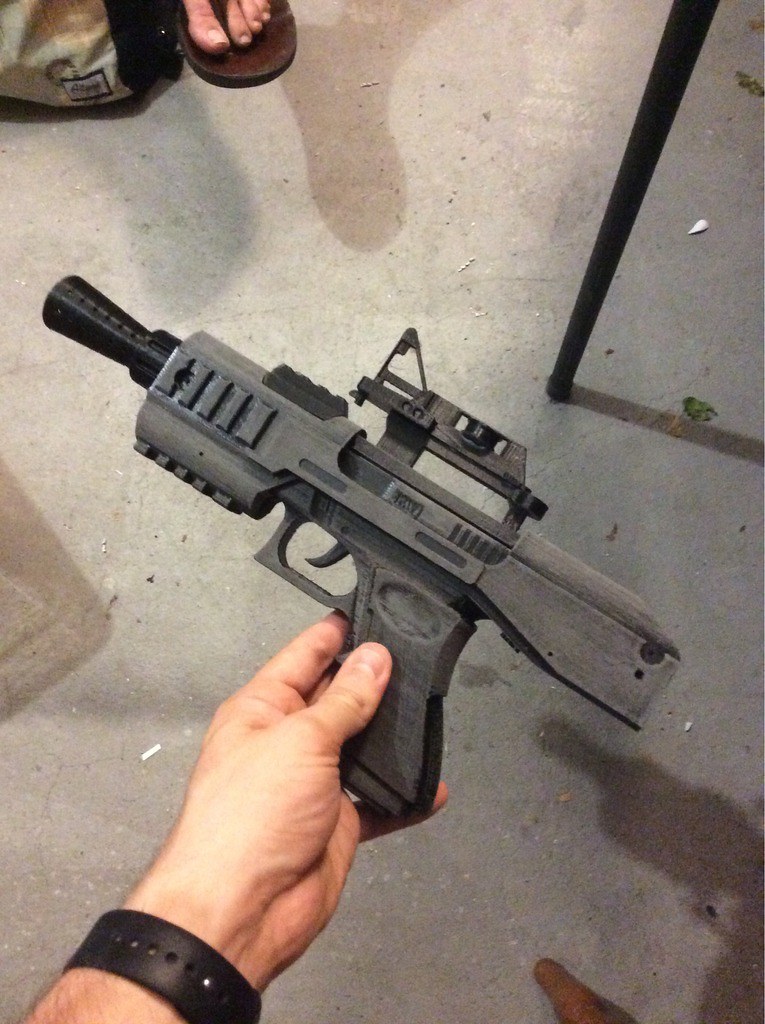
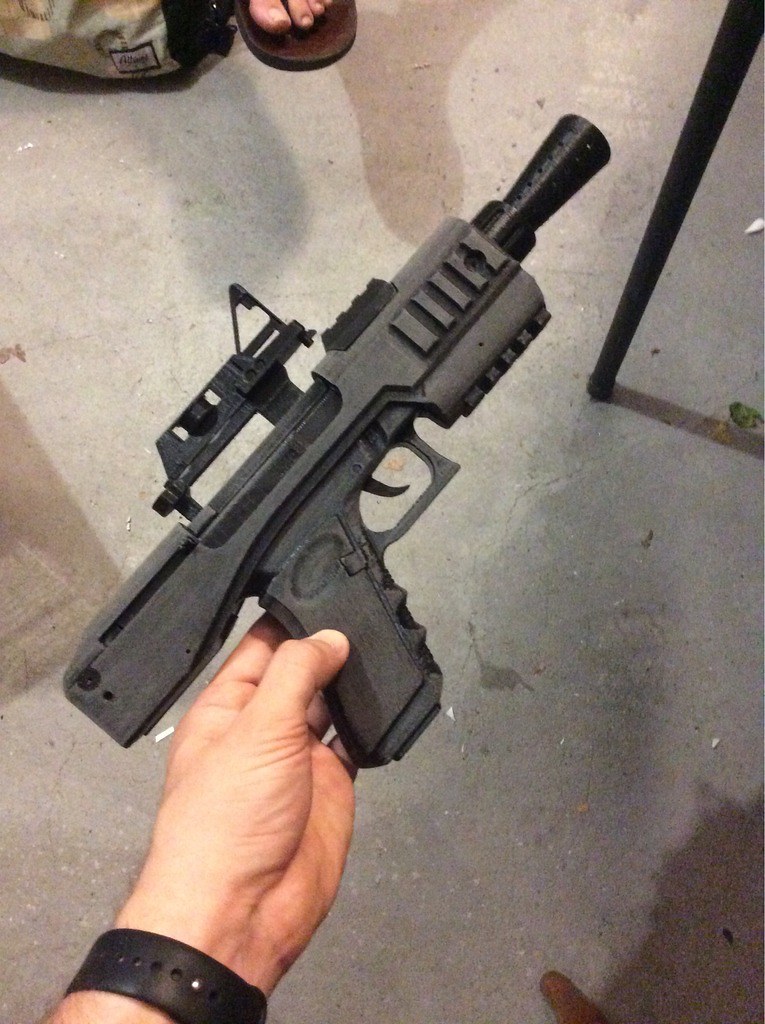
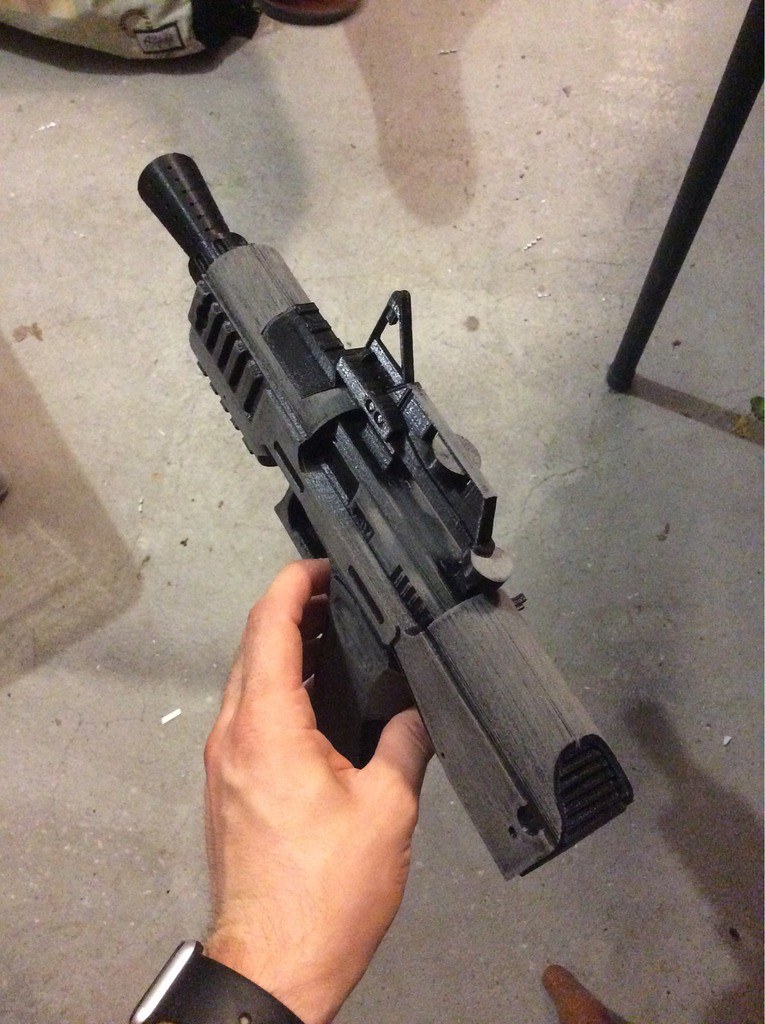
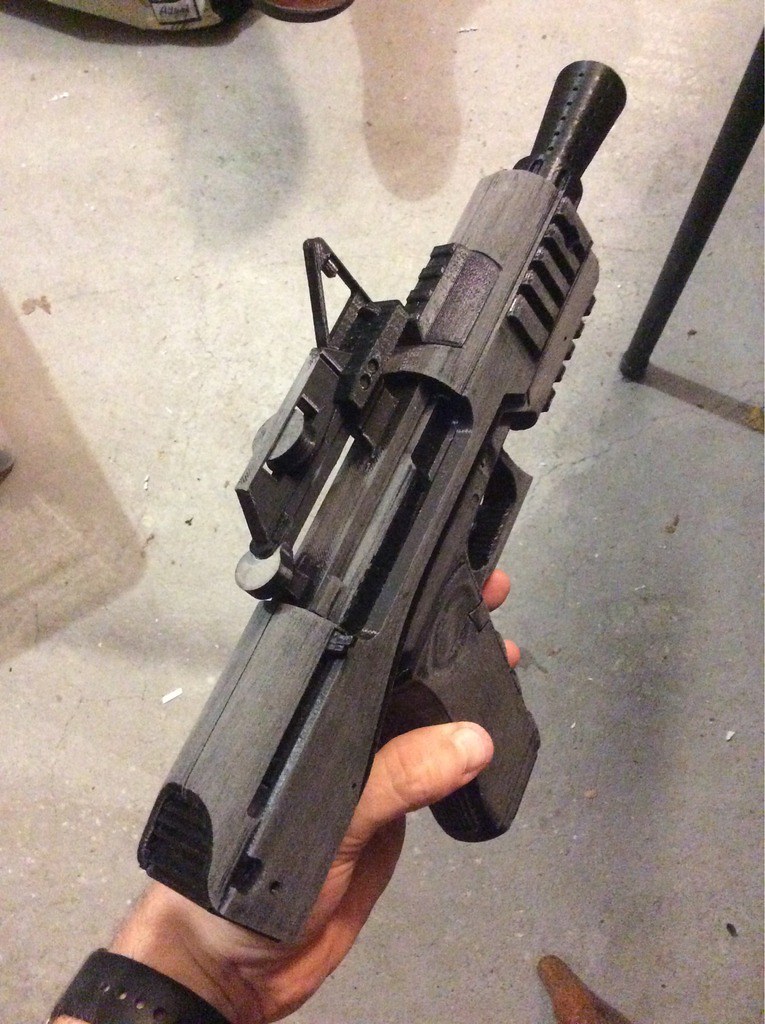
SE-44c Blaster Pistol - Final
Once the clear coat is dry and the screws are reinstalled, the blaster is all finished (well, as finished as it can be for now - eventually we will need to install additional hardware for mounting it to the thigh holster). Here are some shots of the finished piece:
47C3874E-1484-4B35-8119-8B53E78C85D2 by Taylor Goodson, on Flickr
0401ECCF-04FB-4135-99FD-5EC306E79699 by Taylor Goodson, on Flickr
8E0E3204-8FDA-40D2-82D6-EB398830A91C by Taylor Goodson, on Flickr
61DBEFF7-B992-4DA5-9AFE-584598CBD176 by Taylor Goodson, on Flickr
75192446-CDD1-4B6A-9D98-7EE6C5A42BF2 by Taylor Goodson, on Flickr -
SE-44c Blaster Pistol - Painting
Now that the weather is pretty fantastic for painting, it's time to get this blaster finished up.
1) First up was priming. I switched to Valspar spray paints from Lowe's this time for this small project (as opposed to the usual Rustoleum from Home Depot that I normally tend to use) just to try something new. The primer is a light grey colour.
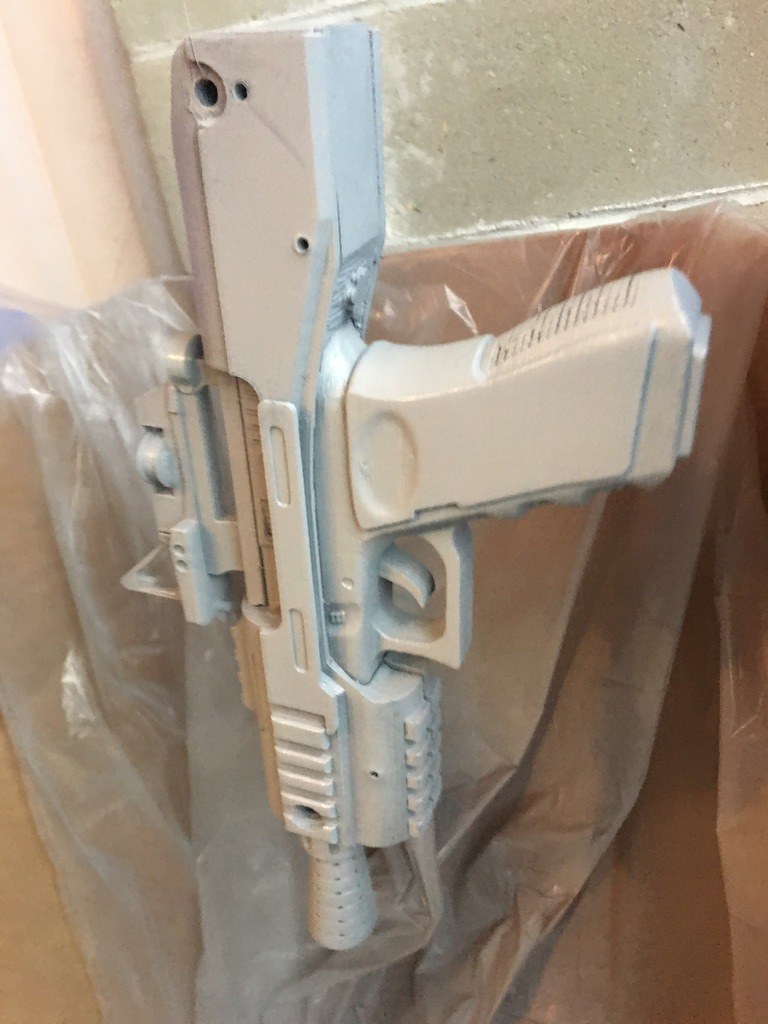
2B7612EA-F434-419E-8F6C-3E23D4EB5264 by Taylor Goodson, on Flickr
2) Then, I coated the blaster with Valspar gloss white.

DFA6C4BC-1C20-44E0-B67C-47492B5AD92B by Taylor Goodson, on Flickr
3) Spray painting was going to prove too difficult to get all the hard-to-reach areas, so for all the black (and the teeny tiny little red square), I enlisted aid from a friend of mine who's quite good at painting small details (as my talents in that field are somewhat lacking). Here are some shots of that in-progress.
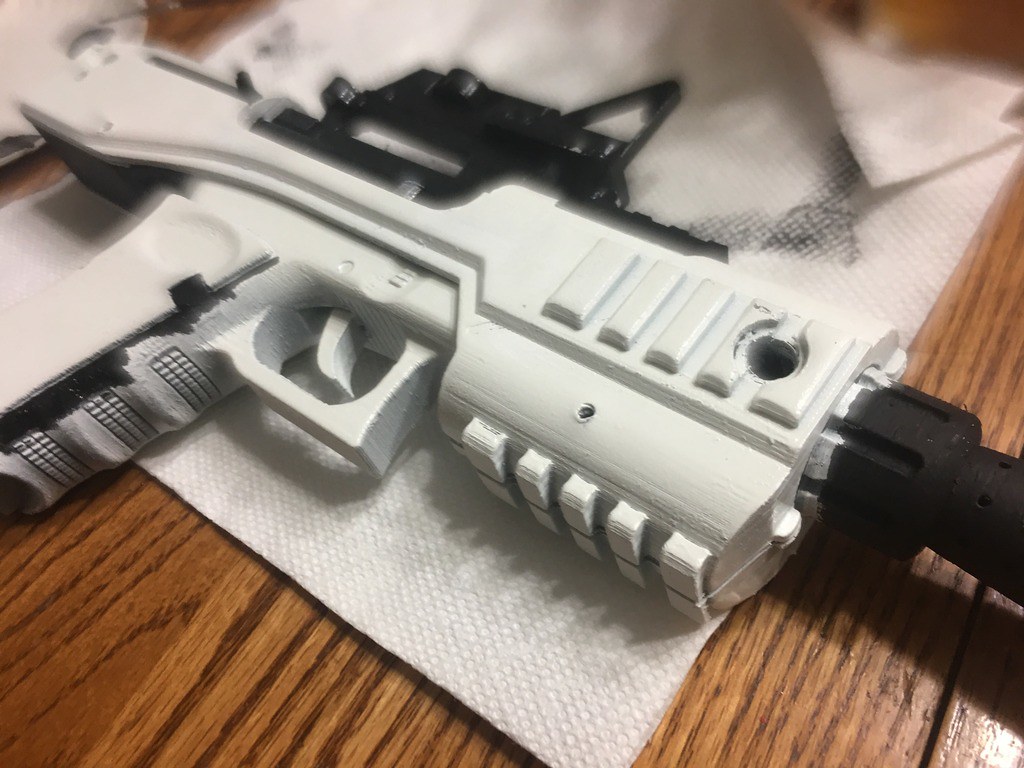
9419CE32-5D9B-4D55-9F62-4DADF1A120B5 by Taylor Goodson, on Flickr
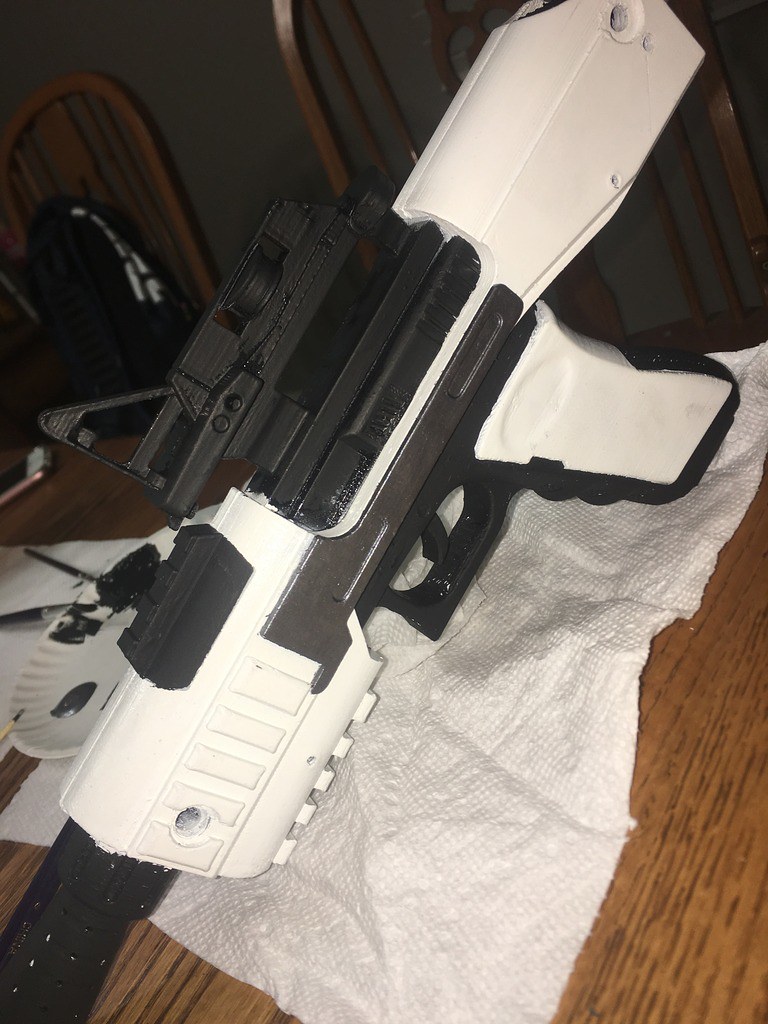
38DD03FC-46CC-49B4-8E8E-FB2F34CBC4DF by Taylor Goodson, on Flickr
4) We just used cheap acrylic paint for all the detail painting on the blaster, but, because it's basically a matte finish, it needed a top coat. I gave the blaster a handful of days to complete dry and cure before hitting it with Rustoleum Gloss Clear Coat.
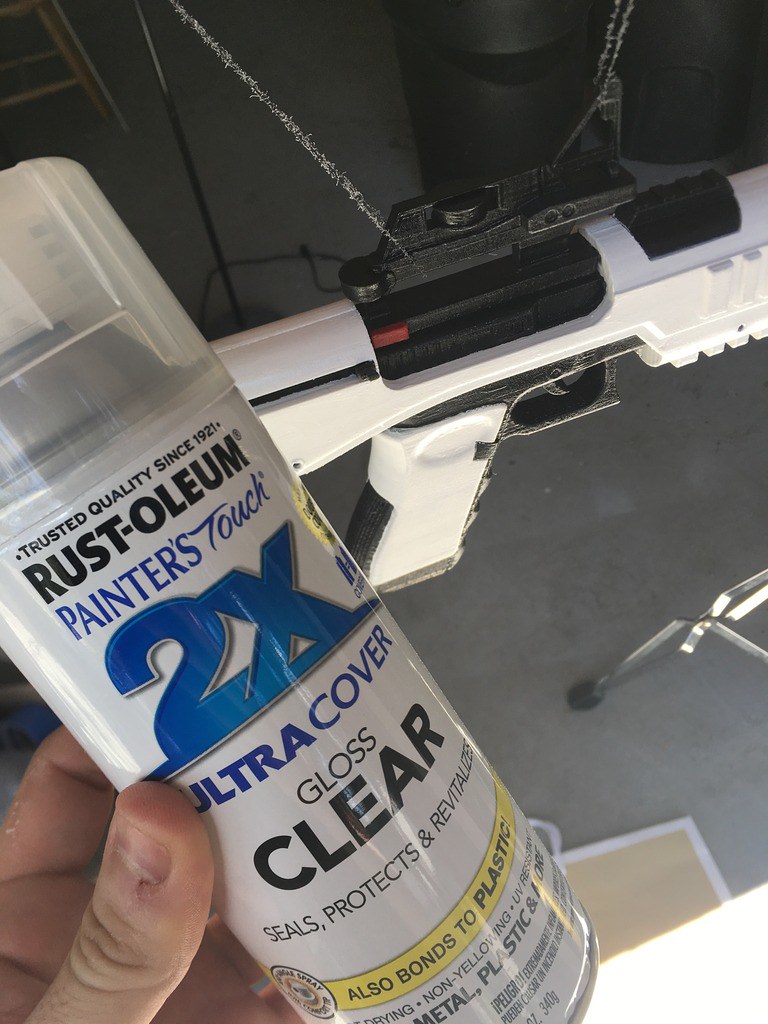
16AC26B9-4113-4492-BE9C-7627B441DF08 by Taylor Goodson, on Flickr
5) Two coats of that was enough - then set it aside to dry before reinstalling the screws.-
1
-
-
SE-44c Blaster Pistol - Assembly Part II
Before painting, there was one component I wanted to add that I neglected earlier - the screen-accurate screws. The 3D-printed model had guide holes already in the model, so it was just a matter of finding the right screws and drilling out the holes enough for installation.
1) First, here's a reference shot of the screen-used blaster via the Visual Guide. If you zoom in nice and close, you can see that the blaster uses two different sizes of torx security screws.

2) I took a trip to Lowe's and found the following - small sets of torx security screws, one with a larger head and the other with a smaller. You will need four of each type (2-per side) which came out to two packets of each type.
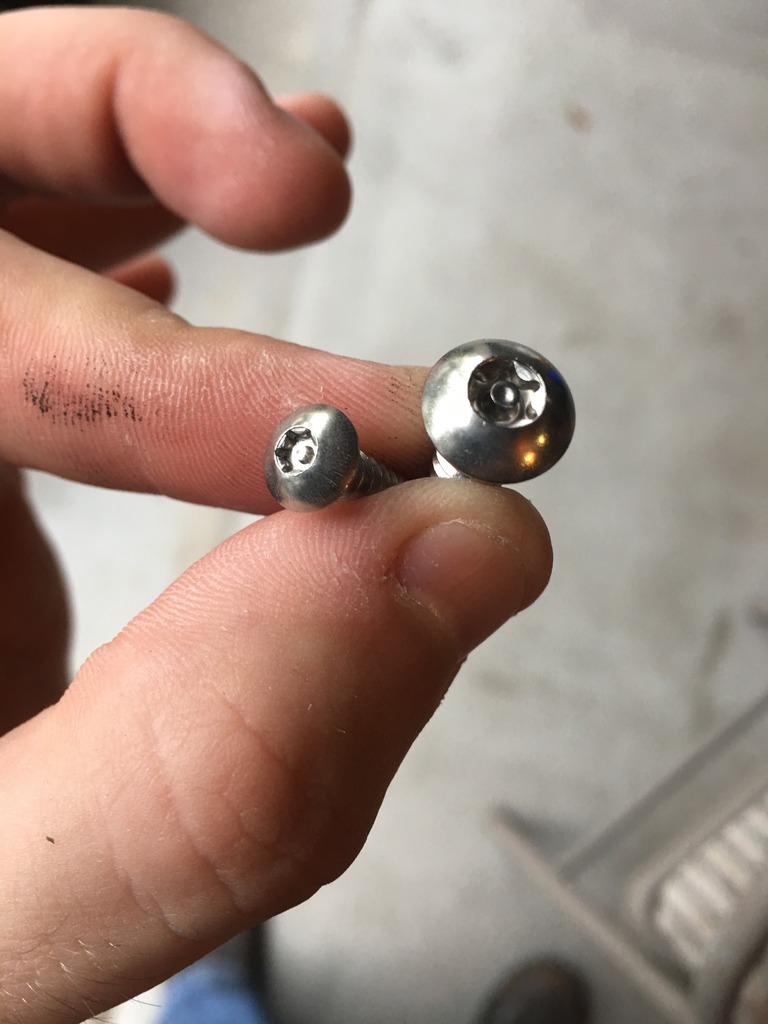
B8EA0F26-9D8C-4C1D-8F28-171B9521940C by Taylor Goodson, on Flickr
3) In order to get these to fit within the pre-drilled areas, I had to use the Dremel to widen the areas for the larger screws as well as an electric drill to widen the guide holes a bit to help keep the model from cracking as the screw was threaded.
A60F1F63-9114-499F-B867-F4C0088AE2A8 by Taylor Goodson, on Flickr
4) I removed the screws before painting (you will need a security screw bit set for these, too) to keep them from getting covered and remaining nice and silver. -
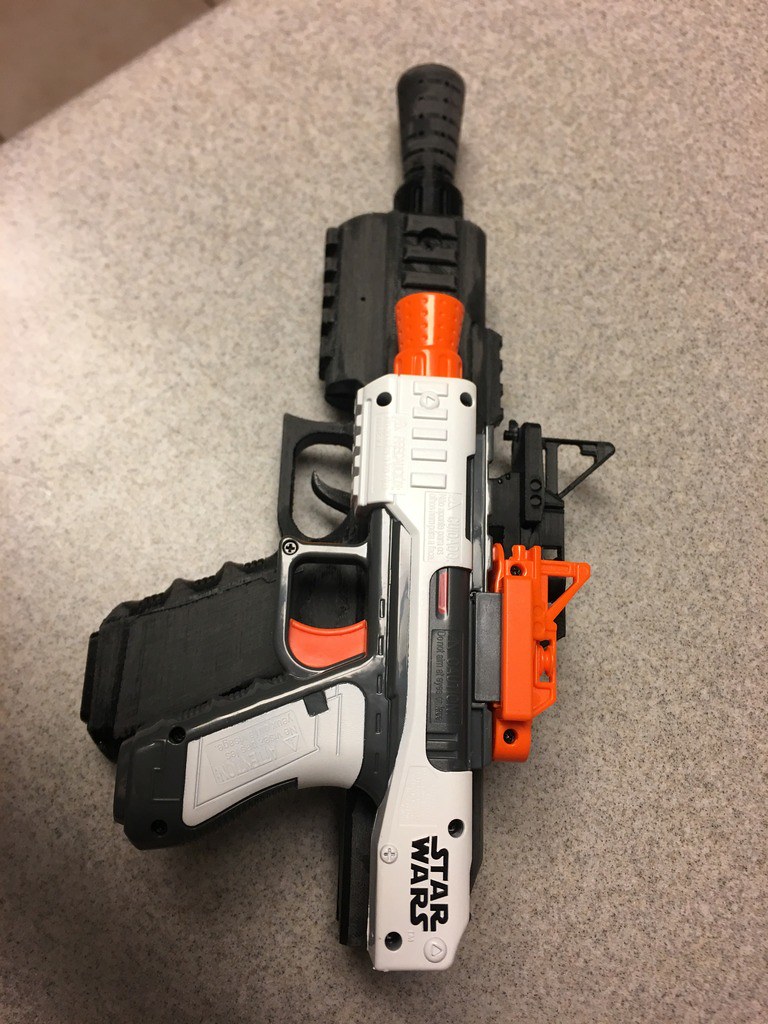
Just as a point of reference, here is the Nerf blaster toy in comparison to the actual blaster size (hence why I decided not to try to use it for anything):
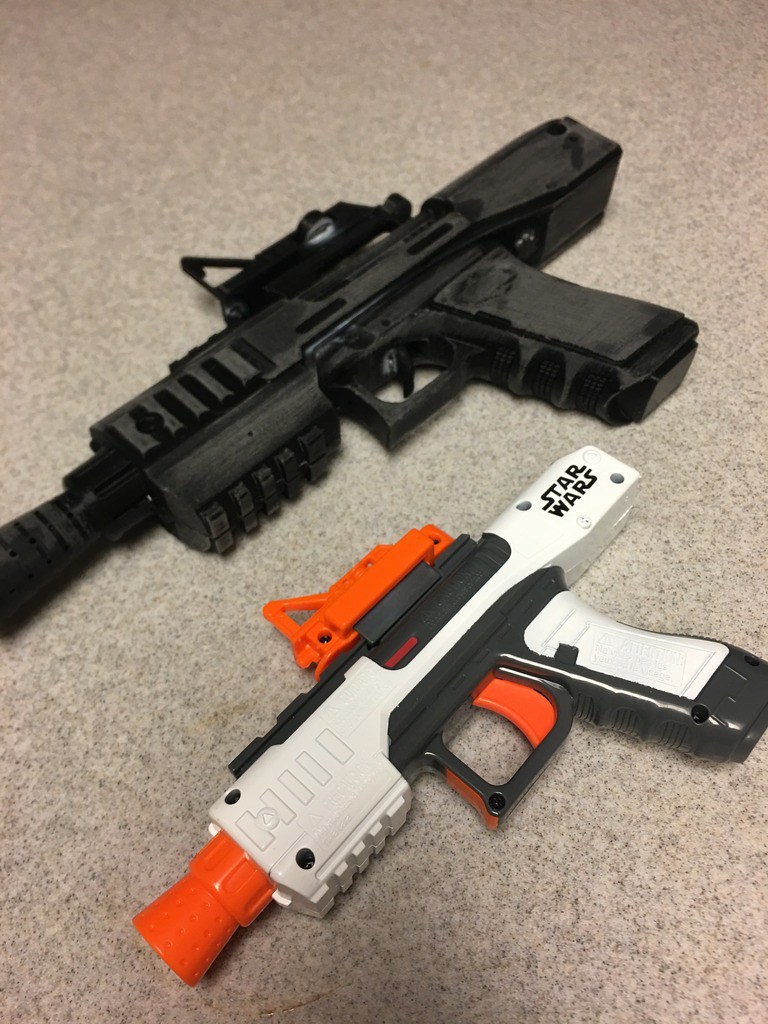
3E6BCD90-F440-4D64-B264-A5CA36D330F1 by Taylor Goodson, on Flickr
209BB075-64E8-4A7B-919B-3F20C7064060 by Taylor Goodson, on Flickr -
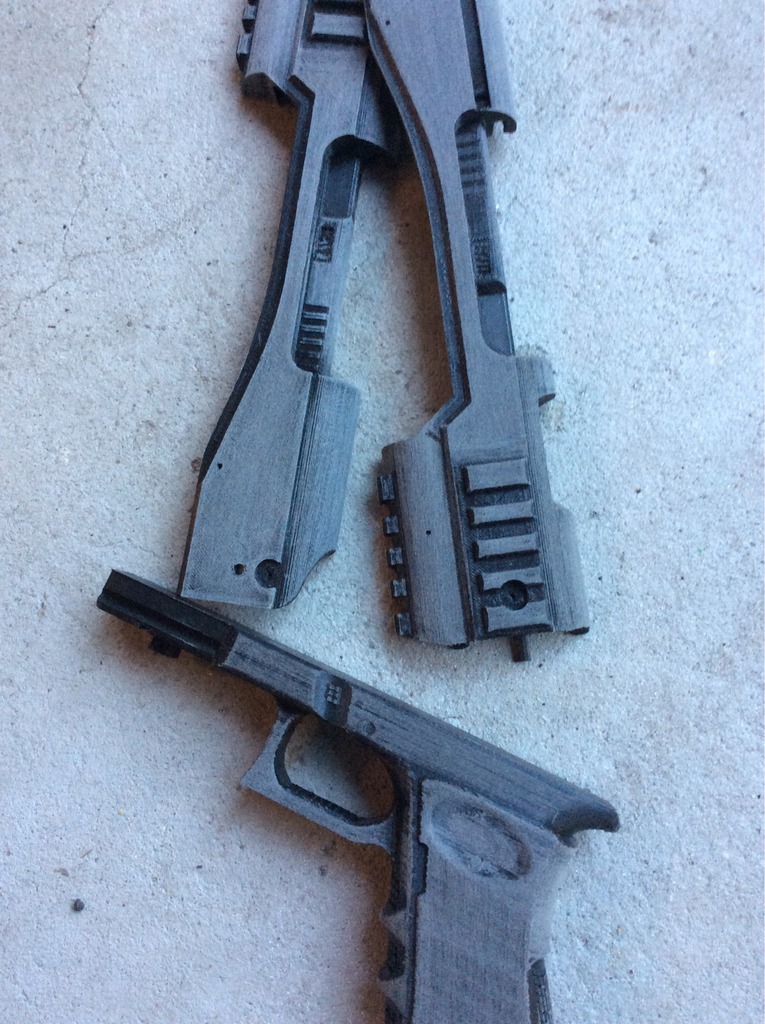
SE-44c Blaster Pistol - Assembly Part I
While I'm still waiting for the armour, I started on the pistol. Originally I had picked up one of the cheap Nerf toy versions and considered doing a conversion, but the sizing was too off to make it worth my time. Fortunately, I stumbled on a 3D-printed kit on the Legion boards not a few days later though I'm not sure who's files they are. There's also a great write-up/reference here that has lots of great info.
1) Here's the raw kit.
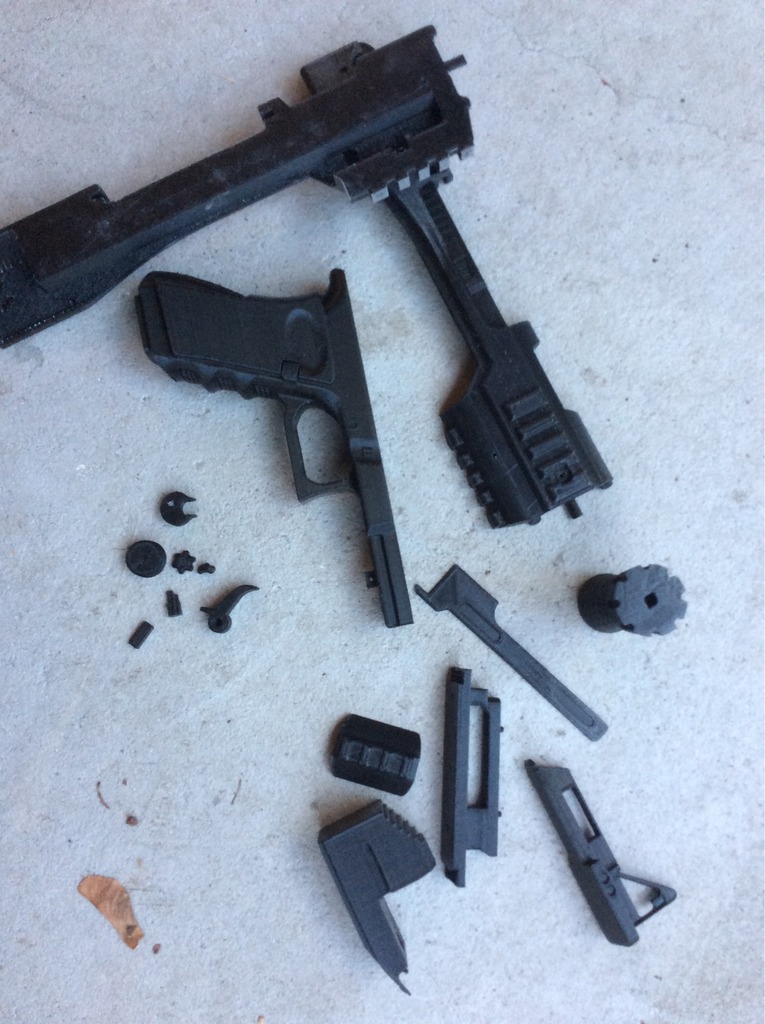
789C1E8B-A0DF-4BDA-A962-B73590D67722 by Taylor Goodson, on Flickr
2) Next up was sanding down the large surfaces. The print quality was actually quite high, but I wanted to get a good smooth surface on the larger areas before painting. I hit it with 80 grit first then followed that with 220 grit.
AC7C9B3F-C49F-4FEE-9BF5-27976C07417B by Taylor Goodson, on Flickr
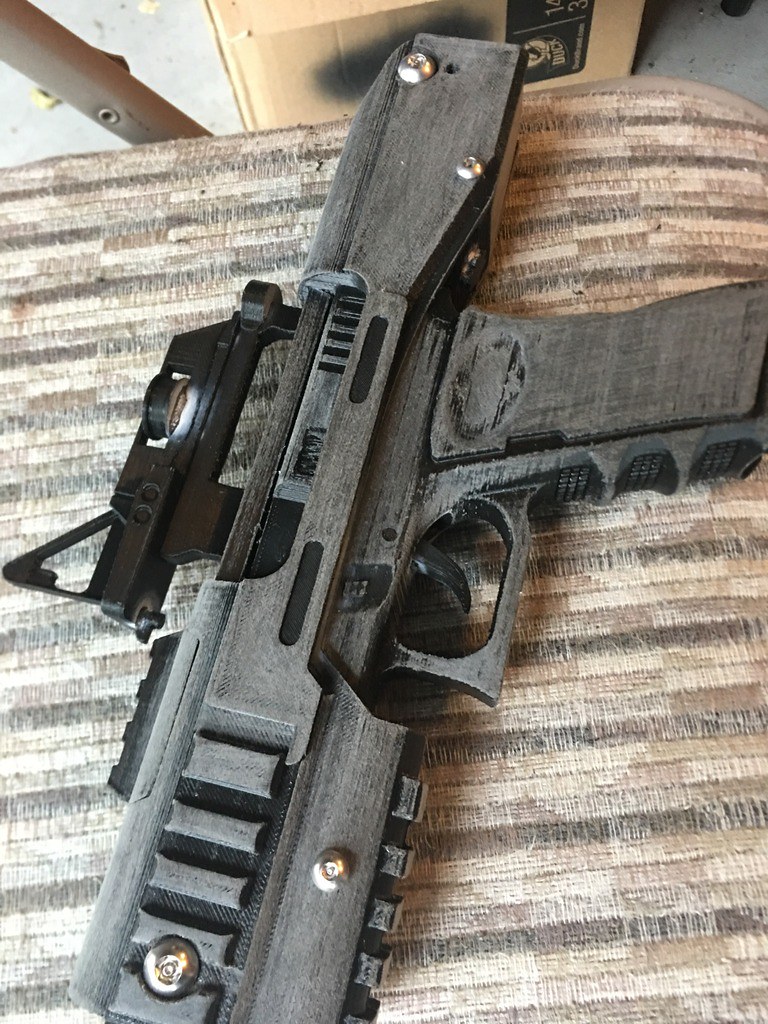
3) Then was assembly. It took a long while to identify all the really tiny pieces that were included with the kit, but eventually I was able to find everything via blaster references. This particular print puzzled together relatively easily, but I did have to drill and sand a couple attachment points to get it to nest correctly. I just used gel control super glue (my glue of choice these days) to assemble everything. Here's what we have:
E93720BC-E866-4E7D-80A5-DCDCA0BC0BA0 by Taylor Goodson, on Flickr
13F32FC4-FC1B-41AB-B11A-9757549485E0 by Taylor Goodson, on Flickr
7A293703-AFA7-4985-90DD-0D46EDE08B4B by Taylor Goodson, on Flickr
F3FE5179-26F7-4B16-805D-3953F769B35C by Taylor Goodson, on Flickr
Next is a little more sanding and paint prep followed by priming, painting, and then detail painting. -
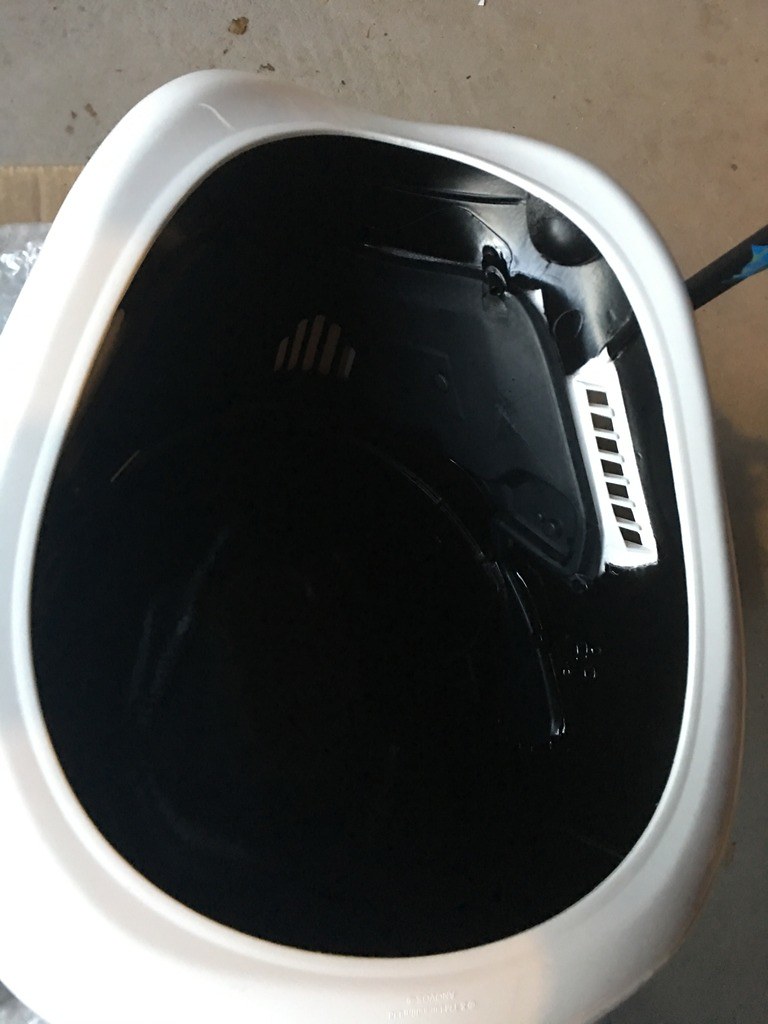
Helmet Interior Upgrade
The Anovos Standard Line helmet, as you can see above, comes with a pre-installed hard hat liner but is otherwise unfinished. To get a nice, clean look, I used Plasti-dip and acrylic black paint as I've done with most other helmets.
1) Remove the hard hat liner. It's held in with a pair of screws - once you remove those you can simply pull the liner off the tabs.
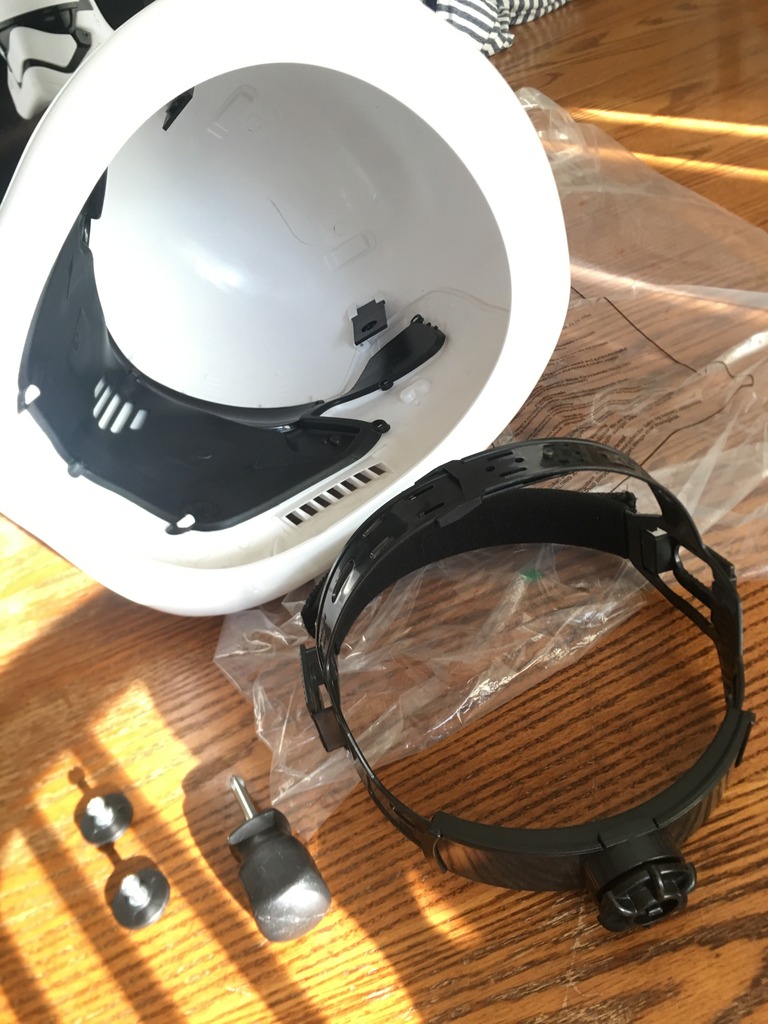
60150F4D-0D5B-48CC-8312-8472AE64AB61 by Taylor Goodson, on Flickr
2) Cover the areas we don't want touched with the Plasti-dip with painter's tape. The tabs, lenses, and black plastic interior pieces were all covered as well as the bottom lip to protect from spraying the dip.
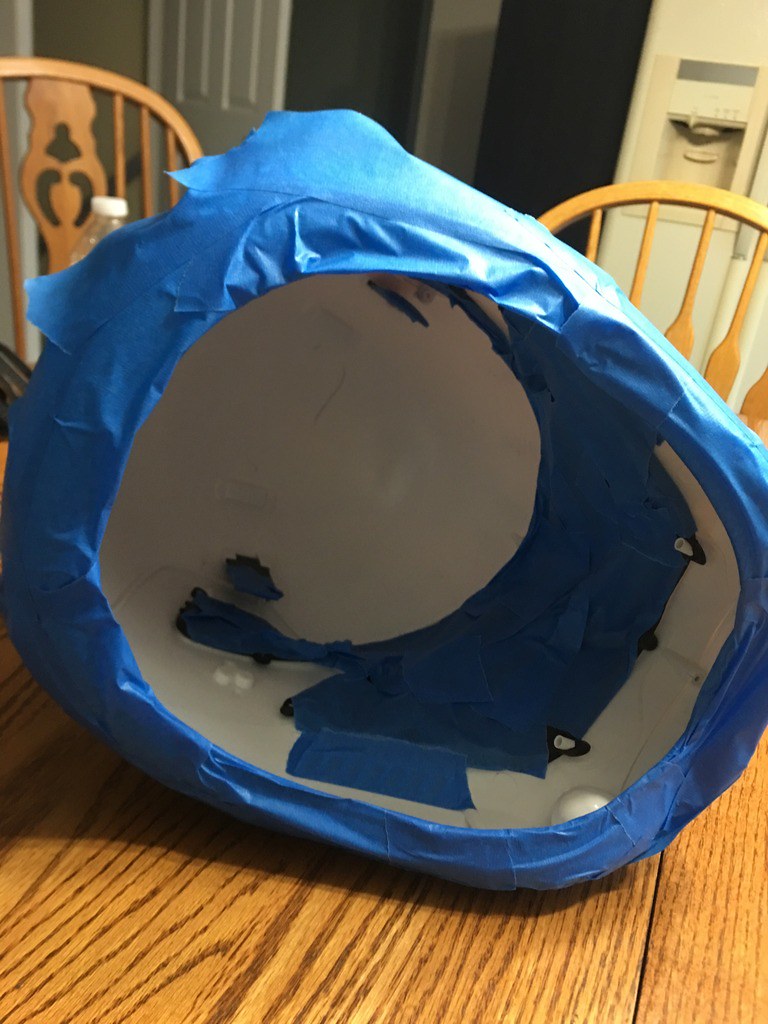
BA32FC57-ACDD-4537-9470-4F5DC63D6E40 by Taylor Goodson, on Flickr
3) Spray the interior. I do a couple light coats followed with a heavy coat to finish it off.
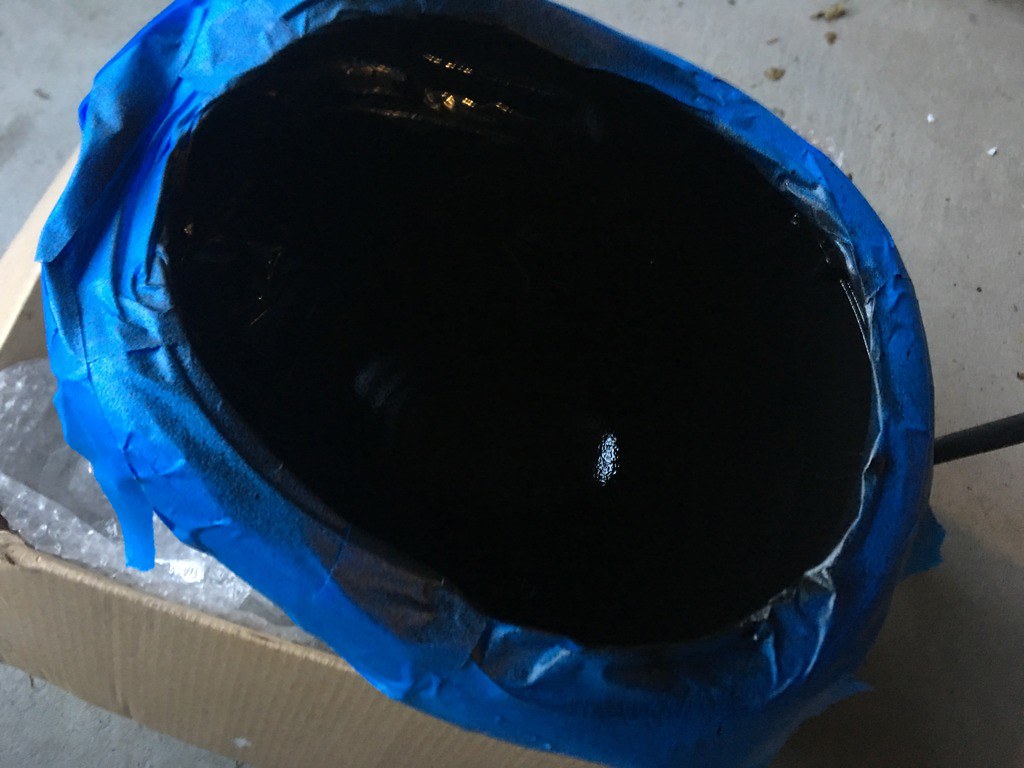
CB2A6C97-B2C5-4DE8-83A2-B7C94B89DBBC by Taylor Goodson, on Flickr
4) Before the Plasti-dip dries, carefully remove the painter's tape. If you wait too long, the plastic dip can harden over the tape and pull up with it.
CD9B58A4-37B3-4F2A-953B-982C40EE643F by Taylor Goodson, on Flickr
5) Clean up hard to reach areas and taped-off edges with black paint. You could also follow-up with the brush-on Plasti-dip, but I find just a touch of black paint to be easy and effective. Here's a shot of the chin vent detail that was taped off before being touched up.
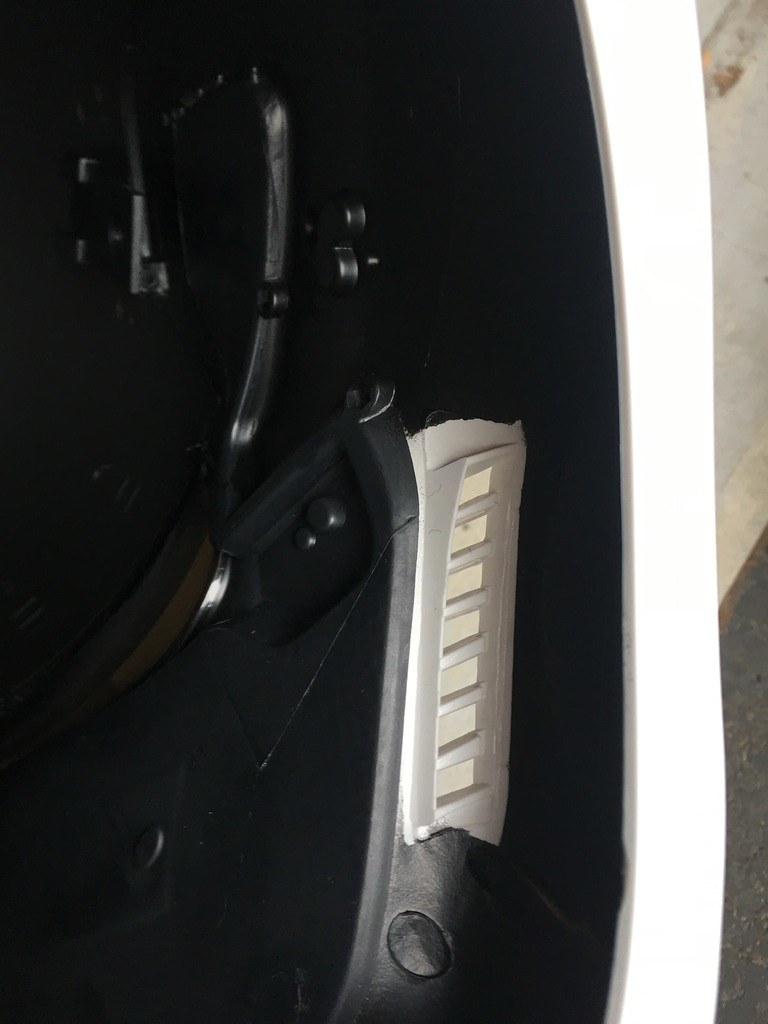
92D71121-39F0-45E2-8D72-B48F7E86B5AB by Taylor Goodson, on Flickr
And here's what it looks like after:
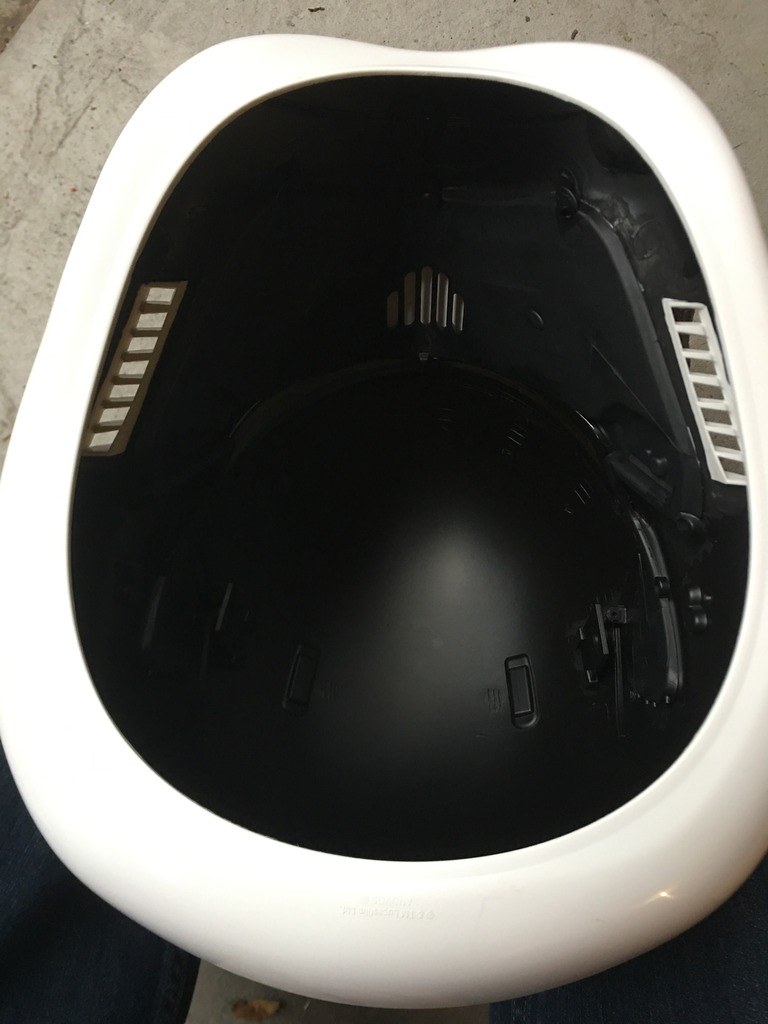
5A1F89E4-399E-49DC-B614-A187D87595FB by Taylor Goodson, on Flickr
6) Finally, re-install the helmet liner (if you choose to use that over padding).
C705B5B6-D374-4C4F-9740-33A0F5DFD542 by Taylor Goodson, on Flickr
Now it's ready to go!-
3
-
-
Anovos Standard Line Helmet
I need to start this particular post with my personal thoughts on Anovos. I am shocked at their inability to project and hit targeted release dates. As someone who works in an industry in which timing is everything, I cannot fathom why Anovos seems to be unable to produce material in the time frame that they themselves designate. I know there is much more to be said due to the experience of others (such as customer service woes, shipping issues, et al), but my biggest problem with them is that they cannot seem to get a firm grasp on how to meet a deadline.
That all being said, I can't take away from the product. A good bit of it (not all) is actually pretty good - the helmets in particular. The Shoretrooper and Tank Driver helmets released earlier this year are quite nice and easily some of the most accurate out there. The quality of their ABS armour plastic, not so much (it's pretty thin), but the pulls are good and the detail is there. The First Order TK helmet isn't bad, either - certainly the premiere line helmets are some of the best, though the standard line isn't too far behind in my opinion.
I picked this particular helmet up from one of my Garrison mates who had bought it while back, and that is most likely the only way I would purchase one of Anovos's offerings - second-hand - unless they could somehow guarantee their shipping deadlines. I don't want this to devolve into a bashing of Anovos, but I just wanted to be clear with my position before continuing on.
With all that being said, here's the helmet itself!
The box:
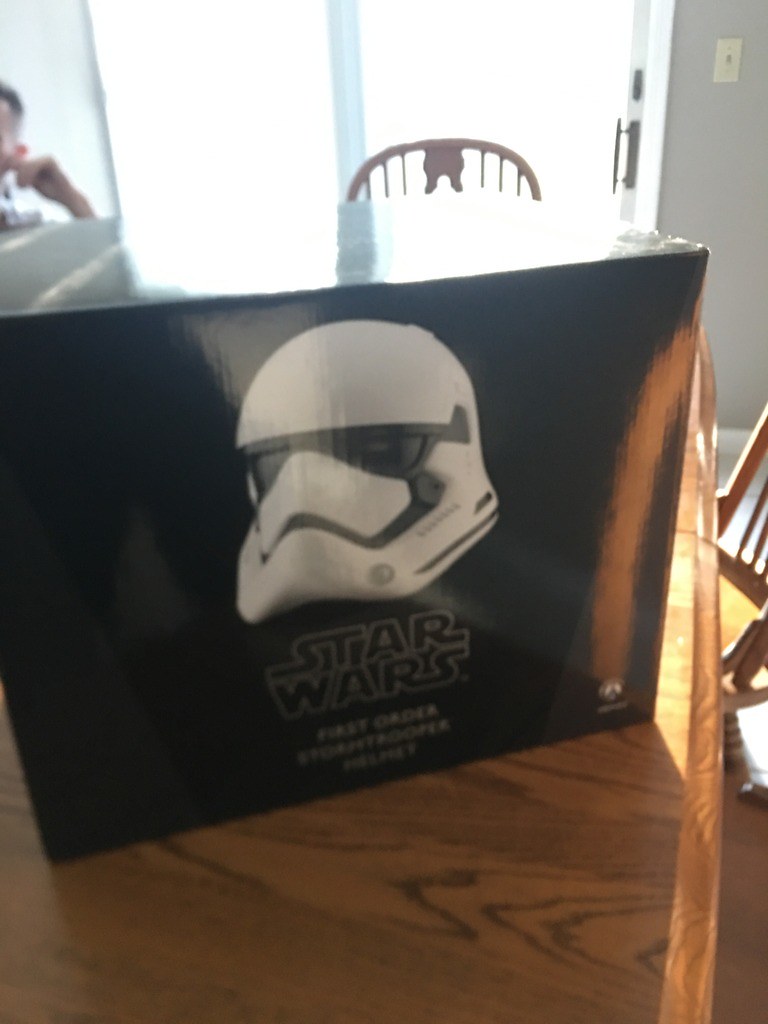
C767F328-03CE-4E9F-B052-D956BF7EC59D by Taylor Goodson, on Flickr
Front:
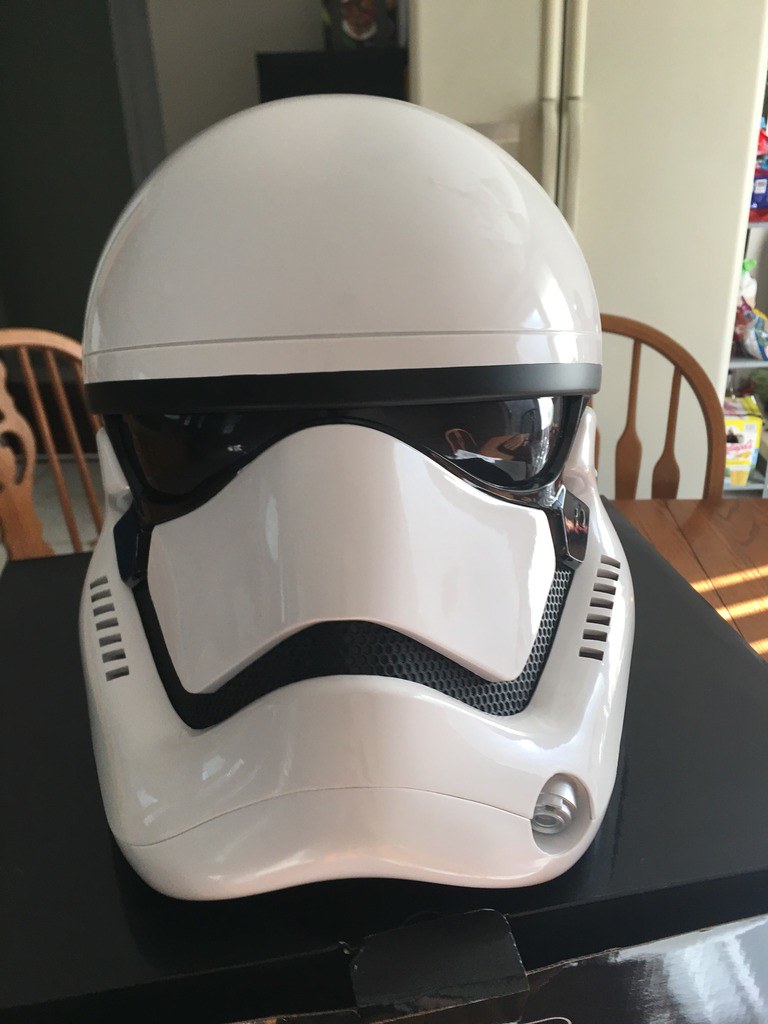
BC19499C-60D7-46B2-AB6E-F1B0DBBA5A4F by Taylor Goodson, on Flickr
Back:
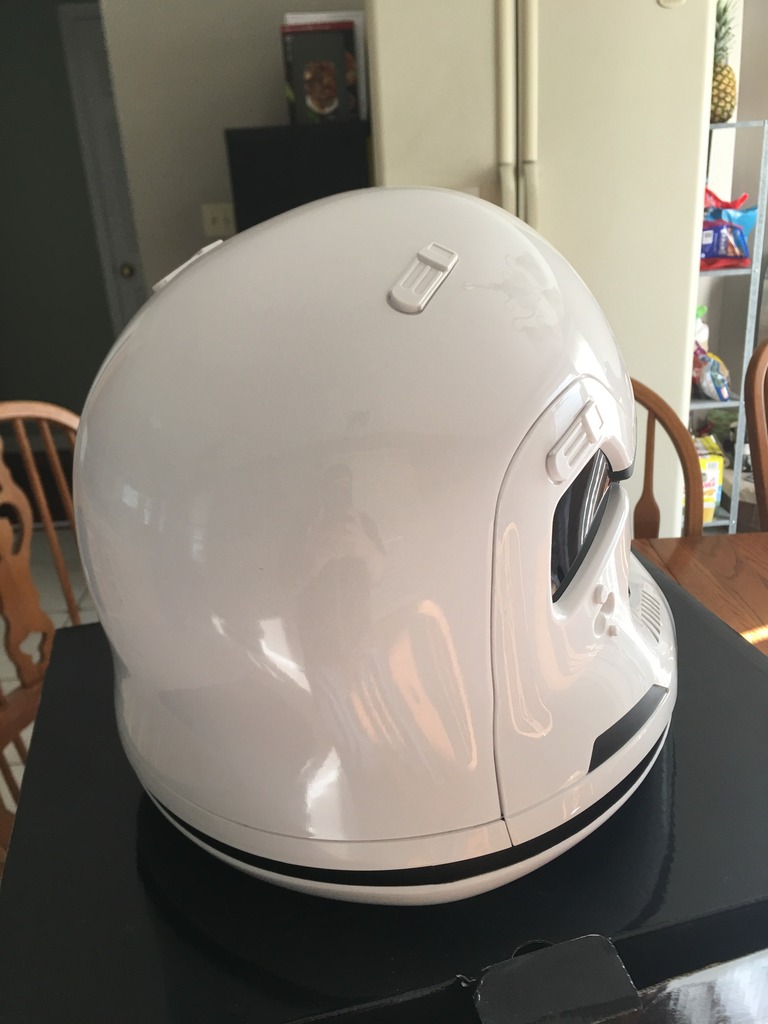
D8ECD5C4-BEB2-462E-8AB8-4C6325C28EA9 by Taylor Goodson, on Flickr
Side:
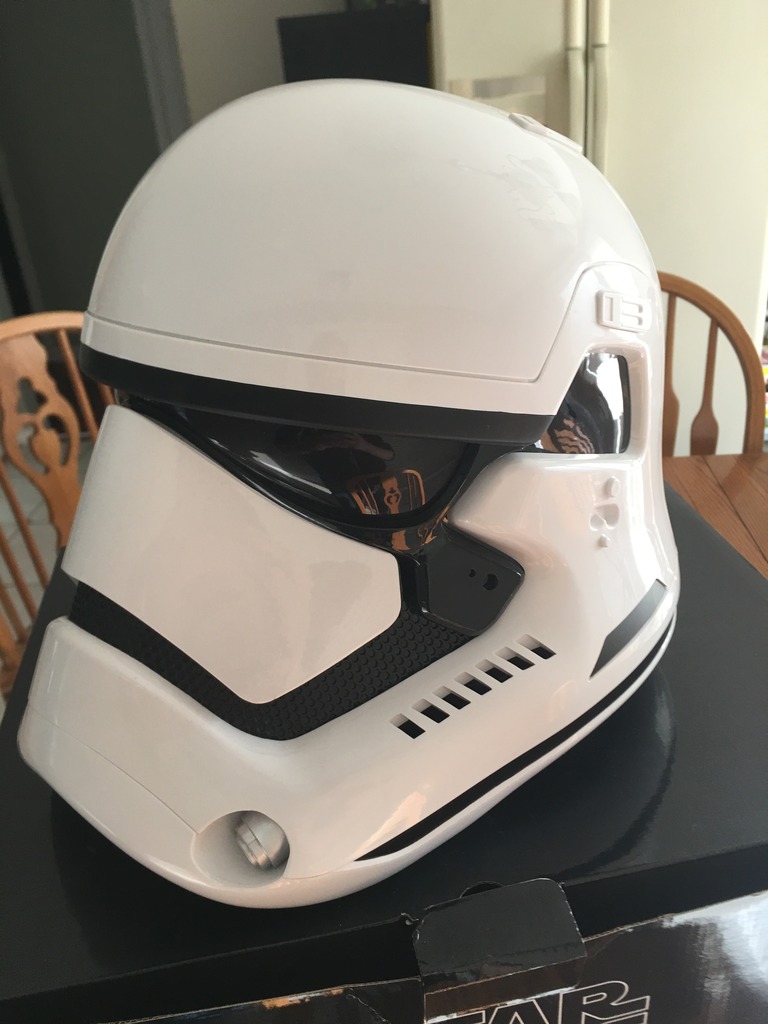
39DB71E9-4EEB-4CCF-9F04-F084390B4818 by Taylor Goodson, on Flickr
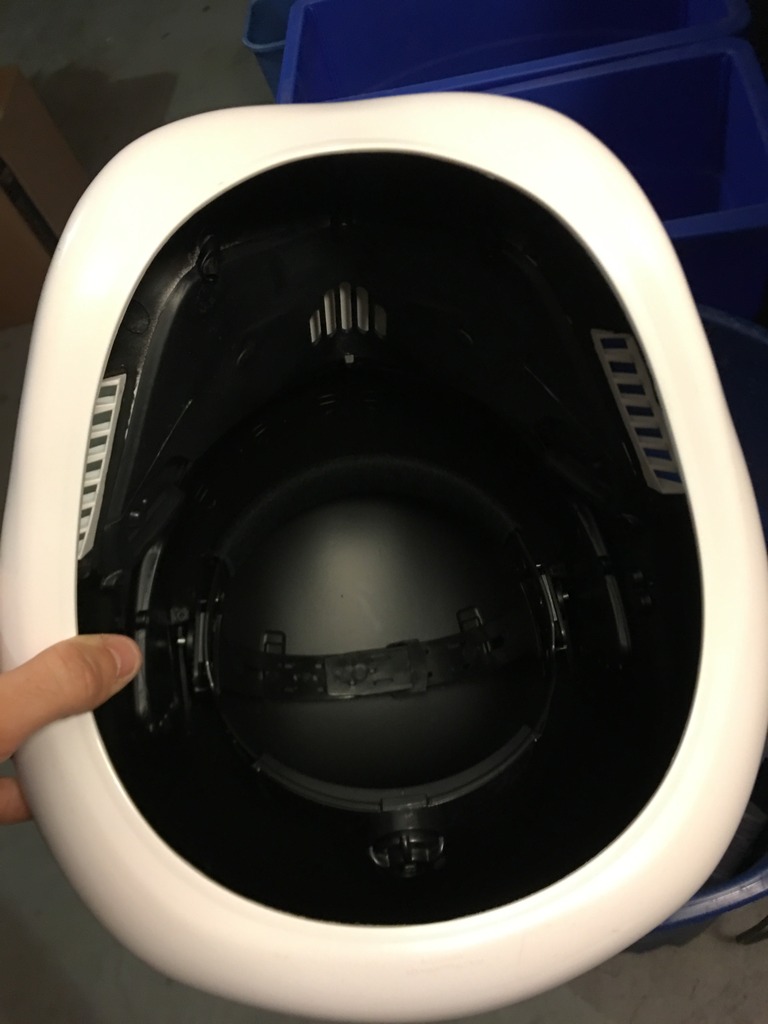
Interior:
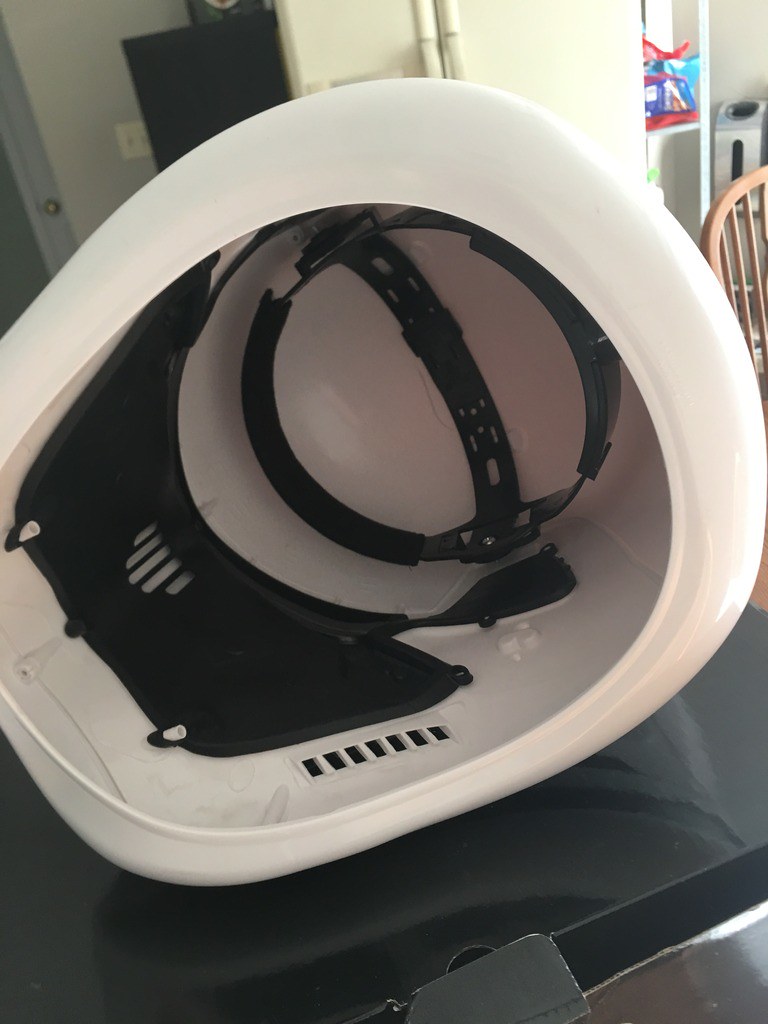
3C9B13A4-7B8E-48D7-8283-6B61F8F971E1 by Taylor Goodson, on Flickr
Obligatory selfie:
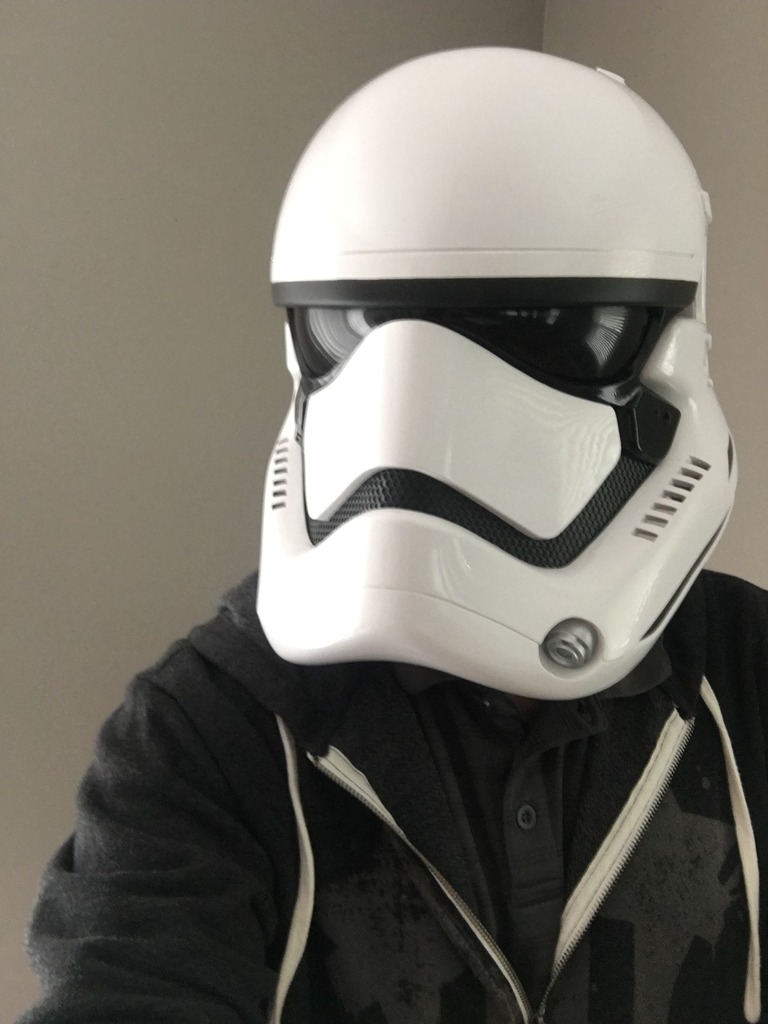
BEFC6480-FC9B-4A29-866A-40EF99BB83E4 by Taylor Goodson, on Flickr
Some thoughts on the helmet itself:
It's pretty light but still quite durable, not dissimilar than most of our standard TK buckets. There are a few seams here and there that you can see through if you really look for them (notably near the aerator in the left front and a pair of joined points along the bottom back edge), but nothing that isn't easily reworked. The helmet liner that comes pre-installed is decent and easily adjustable with a knob at the rear, and it's also easily removed with a pair of screws (the same screw allows for adjusting the helmet liner front to back as well).
It's a fairly large bucket - with the helmet line pushed back I have ample room between my nose and the front of the helmet, perfect for adding fans and other electronics down the road. The lenses are curved, so they do distort your vision a bit similarly to the TIE Pilot bubble lenses (though less extreme), so that would definitely go in the con section as well.
Overall, I'm happy with it - it's no more or less comfortable than your standard TK bucket if said bucket was 15% larger. Now, time to dive into some improvements!-
1
-
-
Parts List
1) Helmet - Anovos Standard Line Helmet
2) Armour Kit - KB Props First Order TK Kit
3) Undersuit - Stormtrooper Undersuit First Order Bodysuit*
4) Neck Seal - Stormtrooper Undersuit First Order Neck Seal*
5) Gloves - Stormtrooper Undersuit First Order Gloves*
6) Pouches - Trooperbay
7) Belt - Belts of the First Order
8) Gaskets - Geeky Pink's Phantastic Gaskets
9) Boots - Imperial Boots T7's
10) Blaster (optional) - 3D printed kit (original file source unknown)
11) Pauldron (optional) - Trooperbay
*the trio of items from Stormtrooper Undersuit are available as a bundle, too. -
Reference Material and Resources
501st CRL: Stormtrooper - First Order
501st Detachment Website: First Imperial Stormtrooper Detachment
General Hux's Speech from TFA: YouTube (for reference and First Order pride!)
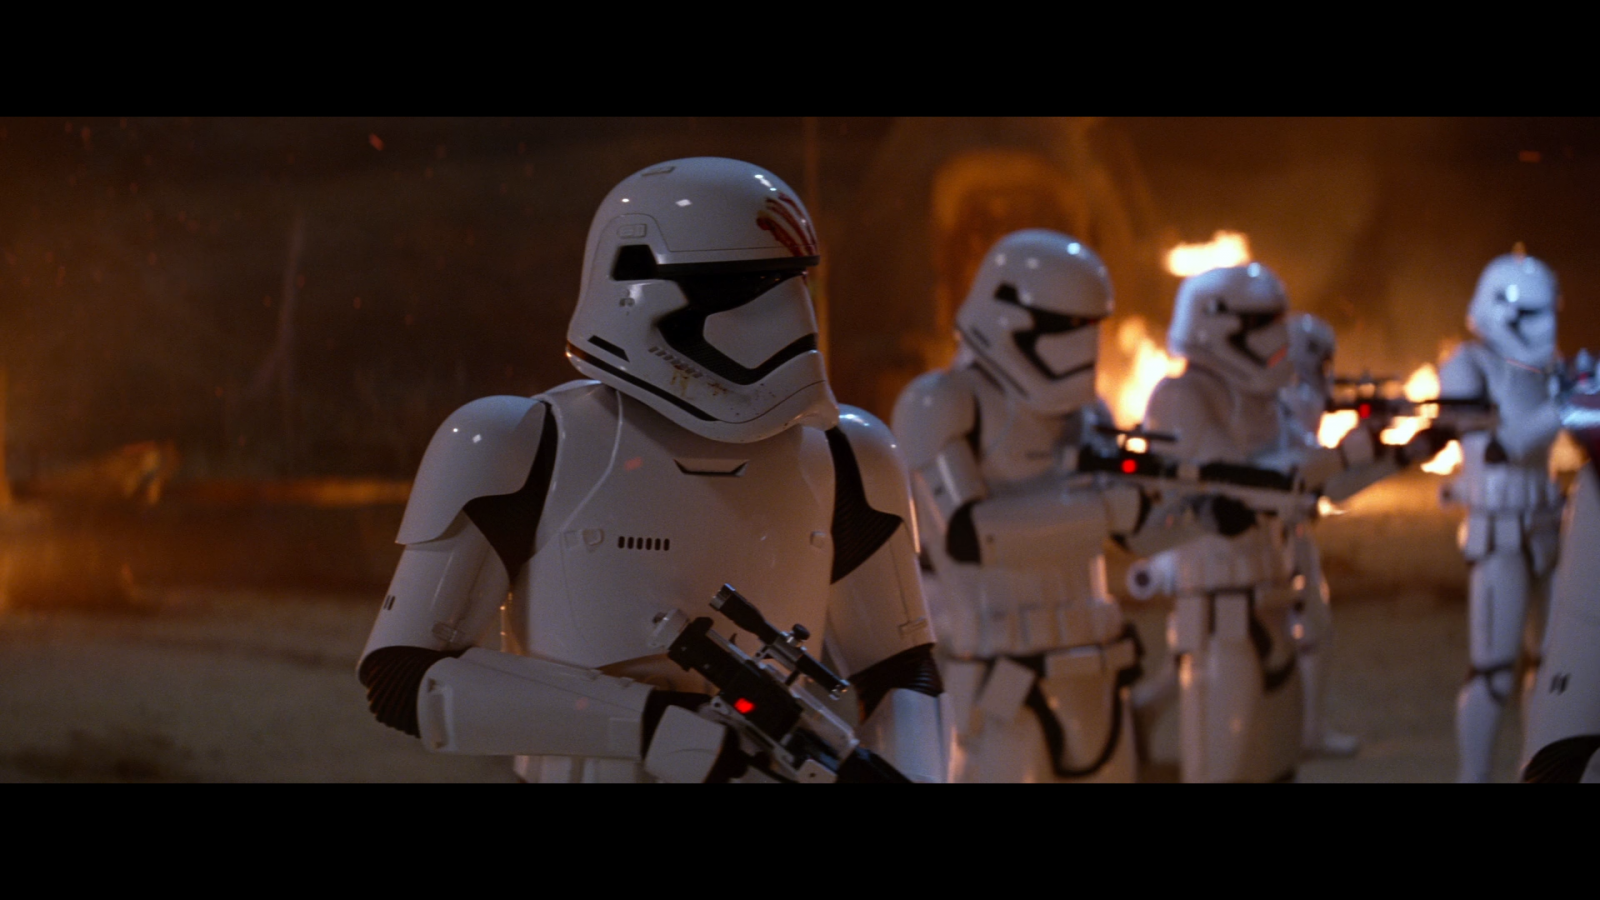
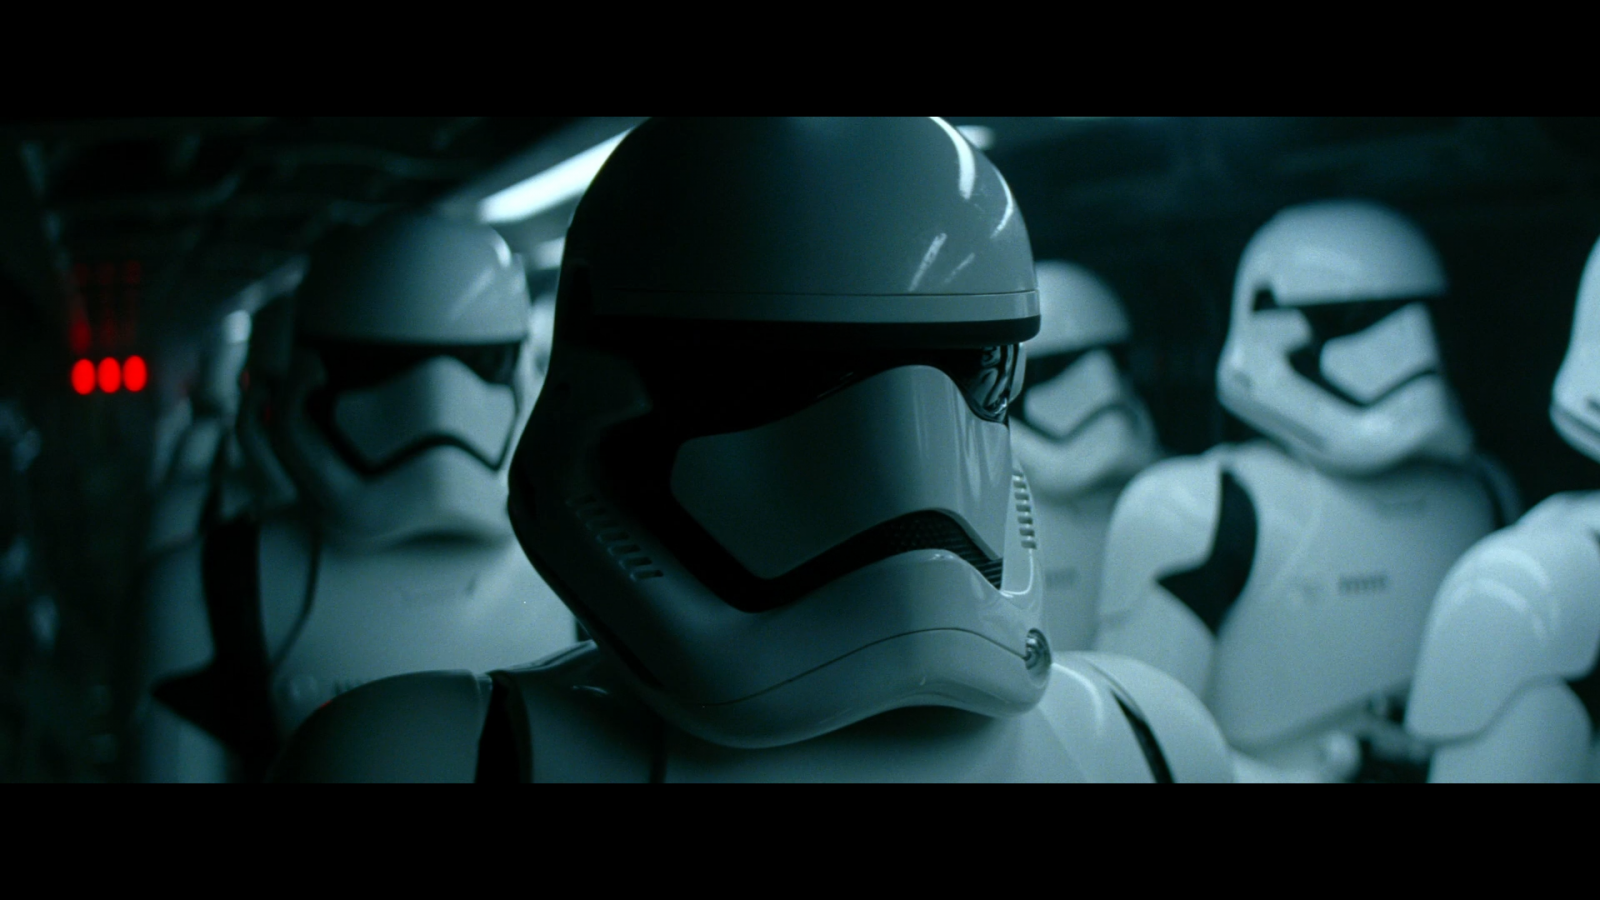
Reference Shots from The Force Awakens: (taken from this fantastic page on the FISD site)
-
First Order Stormtrooper Build

Hello, FISD! I'm Taylor, a member of the Northeast Remnant here on the East Coast. When I was working on my first costume in the Fall of 2015, I spent a great deal of time here on these forums because of the helpful advice and great community. However, being that my first ensemble was a Sandtrooper and subsequent costumes haven't been TK's, I've never been a part of this Detachment directly. Well, it's time to change that up! In order to prepare for the upcoming release of Episode 8, I've decided on doing my first TK. First Order costumes seem to still be a bit less popular, so why not bolster the ranks!
This thread will serve as a guide and a source for my own organization. It will be a lot of learning and discovery for myself along the way as the FO troopers are certainly no easy task, but I expect it to be a whole lot of fun.
")
So let's dive on in!
Contents
2) Parts List
2) Anovos Standard Line Helmet
3) SE-44c Blaster Pistol
- Assembly (part 1, part 2)
- Painting
- Final shots
4) Soft Goods
6) Trimming
7) Assembly
- Part I: Arm Components
- Part II: Leg Components
- Part III: Torso Components
- Part IV: Thermal Detonator
- Part V: Additional Details
8) Preliminary Test Fit
9) Additional Details
- Abdomen/kidney magnetic closure
- Seam filling
- Greeblies: clips, forearm rails, and chest tabs
- Abdomen and posterior strapping cut-outs
- Thermal detonator panel clips
- Yoke sizing
- Shoulder brackets
- First Order TK Belt
- Handplates (and a quick note on fitment)
10) Painting
11) Final Details
12) Strapping
- Handplates
- Shins and spats
- Thighs and suspension belt
- Abdomen and shoulder bells
- Cod and posterior
- Gaskets and knee plates
- Chest-back-yoke connection
- Abdomen to belt snaps
14) Final Tweaks
-
2
-
A beautiful kit, even better in person - good luck, Sebastian!
-
1
-
-
Thank you both. I will try your suggestions on the sniper plate, and the posterior plate! How do I find out who my garrison GML is?
You can find all the garrison contact information on the main Legion website 501st.com. Here is a link to the list of garrisons and their leadership contacts - http://501st.com/members/displayUnits.php#garrisons
-
So great trooping with you this weekend - best of luck with your submission!
-
1
-
-
Excellent work, it's coming along great!
-
1
-
-
I'm 5'7" and didnt find it necessary to cut out the backs of either shins or thighs. Getting up and down stairs certainly isn't the easiest thing, but it's definitely doable (just not the fastest thing). I found that trimming the tops of the thighs was better to get them to sit right, but my decision to not cut out the backs stemmed from the fact that the sandtroopers seem to lack those back cut features. Either way, see how it all fits together and move around before making any cuts just as those before me have mentioned - you might find that it's easier to move than you think!
-
Do you have a link to where you got that padding? That looks incredibly comfortable! Great idea with the USB power bank - certainly going to have to test that out as well, thanks for sharing!
-
1
-
-
Trooperbay is always great for small parts and things like that. This should help! https://trooperbay.com/mike-tips
-
HWT maybe? Got the TK sniper knee and buttons.
Very true, and dropboxes as well so more likely a HWT indeed!
Ruthar's First Order Stormtrooper Build
in TFA Build Threads
Posted
Thanks, Darren! Yeah I will definitely play around with that, thanks for the tip! The piece as it is seems a little on the flimsy side, so I'll definitely be beefing it up some. Nice touch with the leather!