

Darkpain714
-
Posts
67 -
Joined
-
Last visited
Content Type
Profiles
Forums
Gallery
Articles
Media Demo
Posts posted by Darkpain714
-
-
So far I'm pretty happy with the amount of vocal modification. There is a customizable eq that is set by default to emphasize the mid range and add a bit of compression. Does that "tin can" sound we've associated with the classic TKs. There will be more effects added in the next release or two of the main package that could be fun for other characters. You'd be hard pressed to find anything currently on the market that is as small and versatile as this.Very awesome project you have here. Kind of hard to tell from your video on page 1 but does this change the sound of your voice or just add the radio static sound? I am looking at an alternative to my iCOMM as it takes up a lot of space in my helmet but not ready to throw down a lot of money on a ROMFX card.
Sent from my SM-G930V using Tapatalk
-
Pleasure trooping with you this weekend!
I see what you were saying about those handguards. Keep at it!
Look forward to trooping with you again sometime, either TK or ID.

Pretty great weekend trooping. I'm sure it will happen again!
New casting attempt tonight. I'll run it in thinner layers this time.
Got my EIB last night too! So big push now to get those finished. As part of that I took your advice and ordered my hovi-speakers from Tony... I mean, I had to replace the Anovos mesh tips anyways right? lol
-
 1
1
-
-
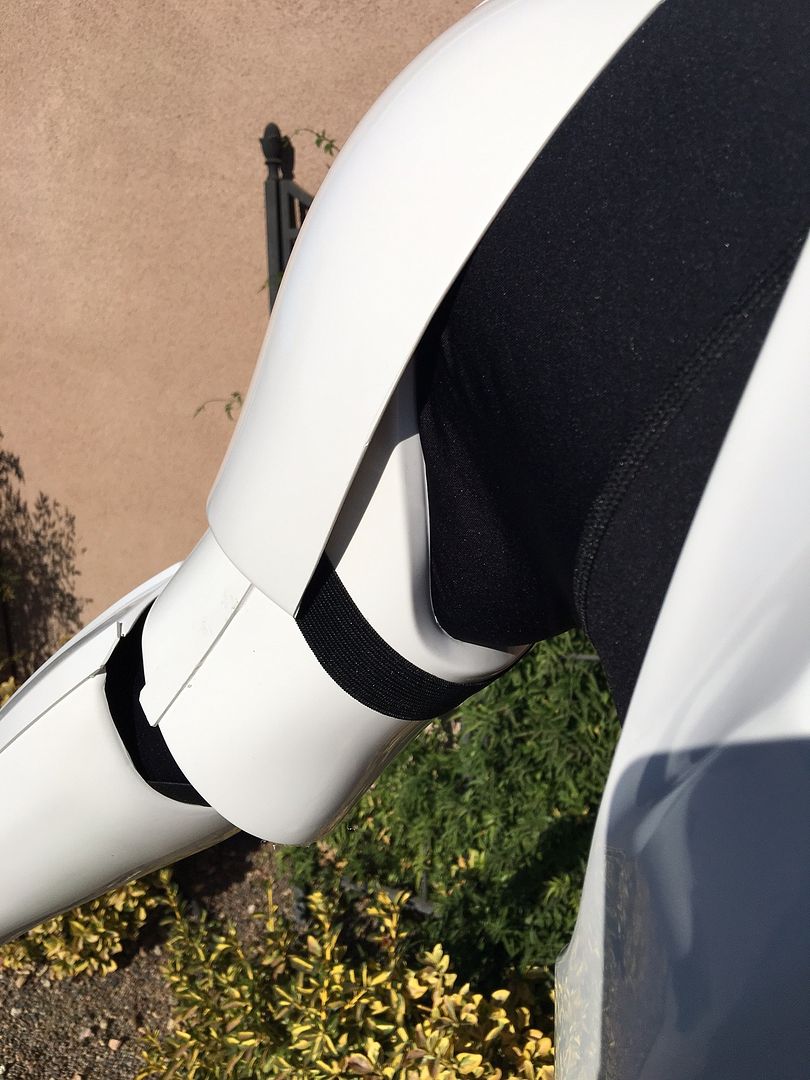
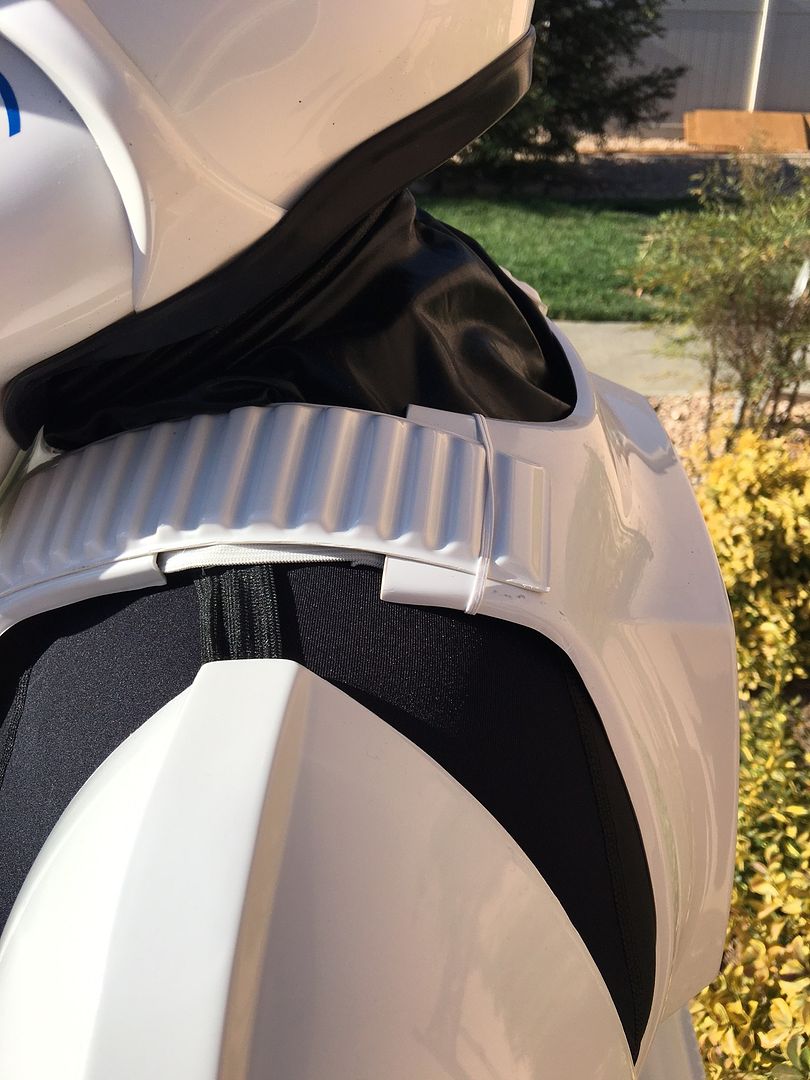
A HUGE THANK YOU for the detailed feedback! Most of the fixes I was expecting: the bucket tweaks, the blaster rear sights, the back strapping, shoulder bells. But a couple were new to me! Blaster charging lever could be a showstopper.
The button paint went round and round on various forums and discussion groups with some saying they were fine and others saying they needed touched up. I'm very thankful to put that debate to rest finally! I will touch up the gray for sure.
A couple of items not mentioned, but I know are required: the latex handguards and the side shim seam removal that I'm actively working on. I hope to get this all done by the end of the holiday weekend.
Thanks again so much! See you in the next round!
-
1
-
-
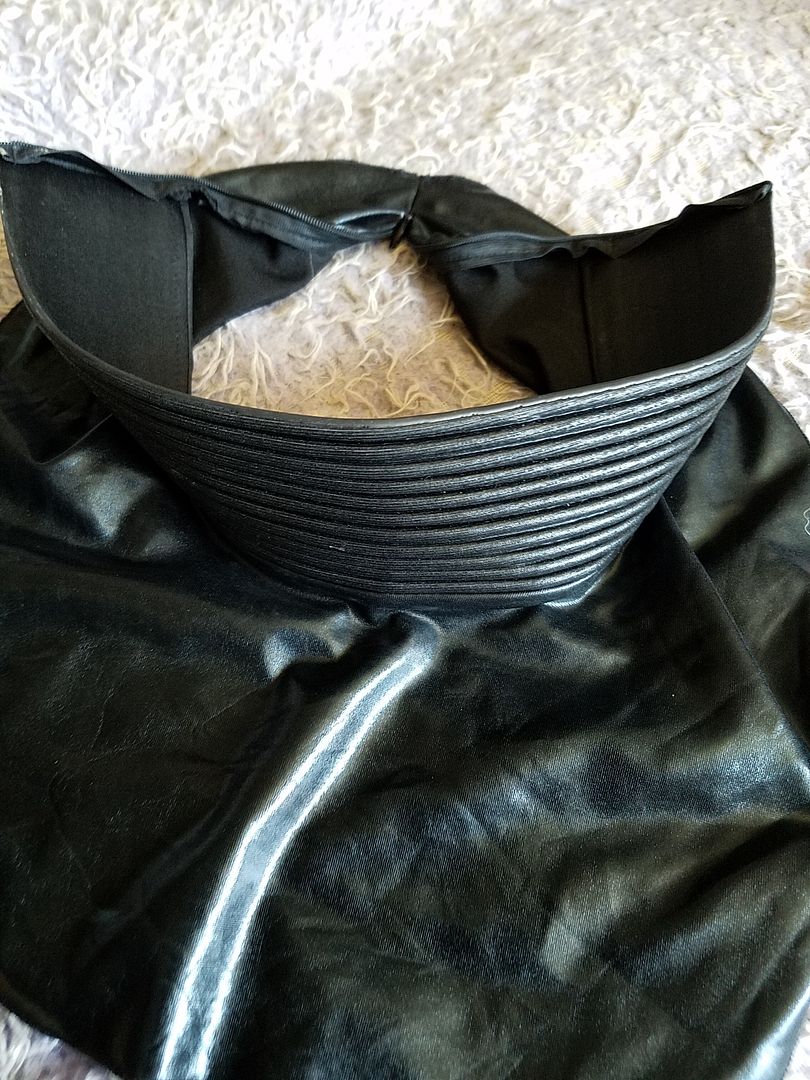
First troop in the bag. Great weekend at Comic Con Palm Springs. Home and already back to work. My first attempt at making my own latex hand guards was a failure, but only slightly. Poured too thick and quickly. Next time I'll brush it in slowly and in layers.
My first results:

Sent from my SM-G930V using Tapatalk
-
I may bring it out for a bit on Sun. Looks like we got plenty of TKs already though.
Sent from my SM-G930V using Tapatalk
-
Doublepost. Sorry
-
Looking good, Brian! Did you get approved yet?
Basic approved yes. My EIB app is submitted and pending review. Started ABS pasting the seams away. Looking pretty good, but still have a lot more sanding to do.
silverdollar22, on 26 Aug 2016 - 4:31 PM, said:

Looks really good!! Nice stand also. May I ask where you got it from?<br><br><br>
Thanks,<br>
Eric
Thanks! The stand I made using a Masters Replicas Darth Vader lightsaber stand and some scrap plastic I had laying around.
-
Added a bit of weathering finally.


Sent from my SM-G930V using Tapatalk
-
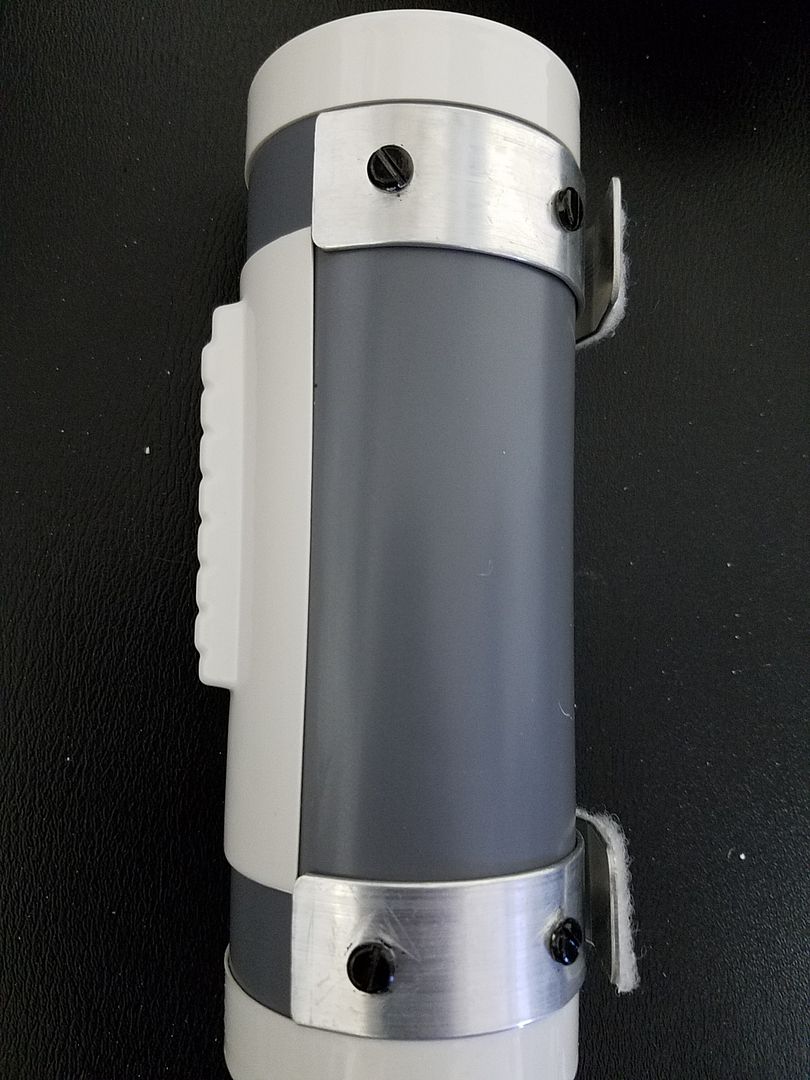
V2 Case Update
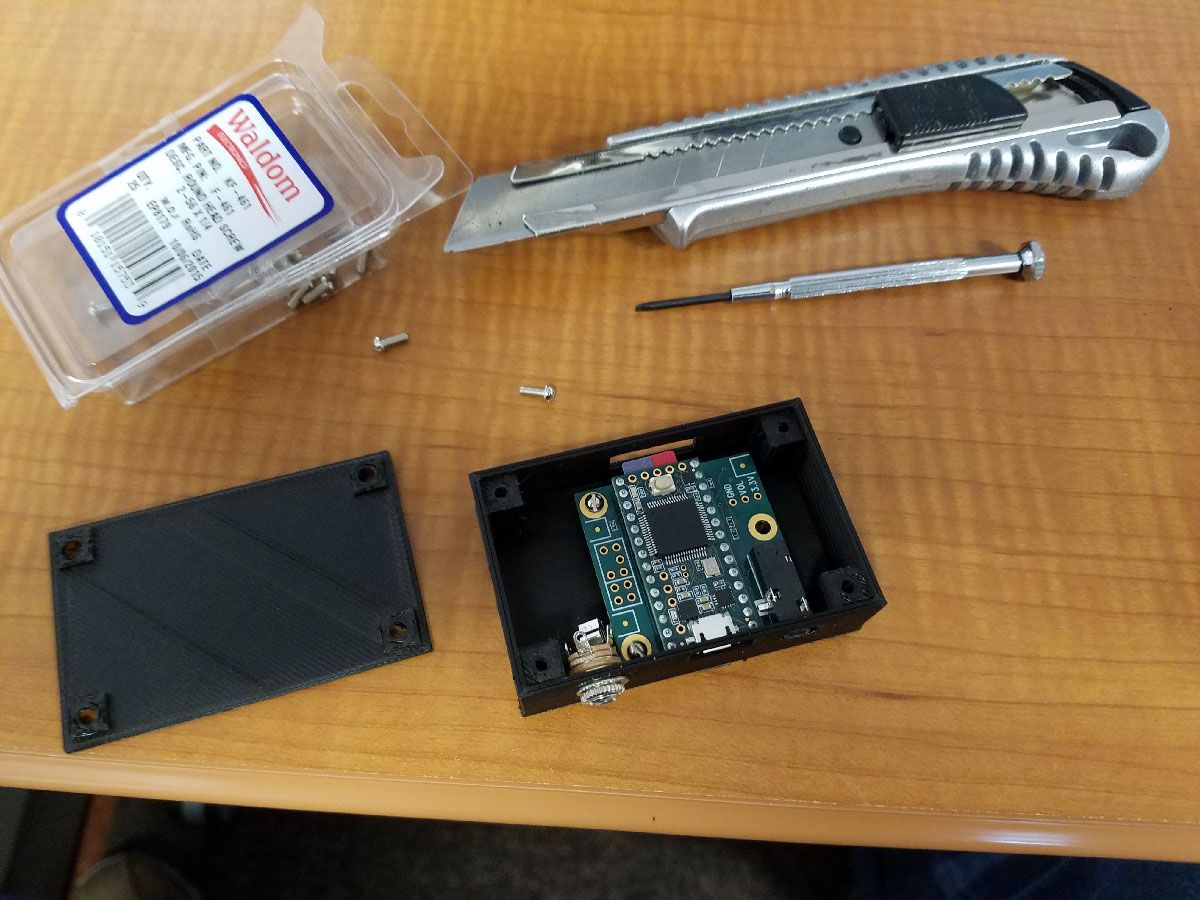
Looks like you can access the SD card. That is awesome. I really need to get one of those newfangled printer thingies.
-
FWIW I posed this question on the Teensy forum and Paul (the developer) said he has a phase vocoder on the to-do list for the upcoming Teensy 3.6. Hopefully it makes it in that release. It will allow you to shift the pitch of the inputs (microphone) up or down, which will be really cool.
Also, I just updated the code a tad after digging around in the Teensy docs. There is an onboard equalizer (both 5-band graphic and 7-band parametric.) I added the 5-band and set the bands to push up the mids for more of a "tin-can" sound. Add this code after the input select code in the setup function:
// Activate the onboard pre-processor
audioShield.audioPreProcessorEnable();
// Turn on the 5-band graphic equalizer (there is also a 7-band parametric...see the Teensy docs)
audioShield.eqSelect(3);
// Bands (from left to right) are: Low, Low-Mid, Mid, High-Mid, High.
// Valid values are -1 (-11.75dB) to 1 (+12dB)
// The settings below pull down the lows and highs and push up the mids for
// more of a "tin-can" sound.
audioShield.eqBands(-1.0, 0, 1, 0, -1.0);
You might be able to tweak this or use the 7-band to get closer to the sound you are looking for. The settings above work really well with my voice, at least.
I'm very happy with this addition. This is quite excellent. My family was complaining I sounded too "high pitch". I assume it's from my cheap little amp. But these settings with a bit of tweaking fixed that AND I got the tin can effect.
Mando can wait till 3.6. *crosses fingers for vocorder*
-
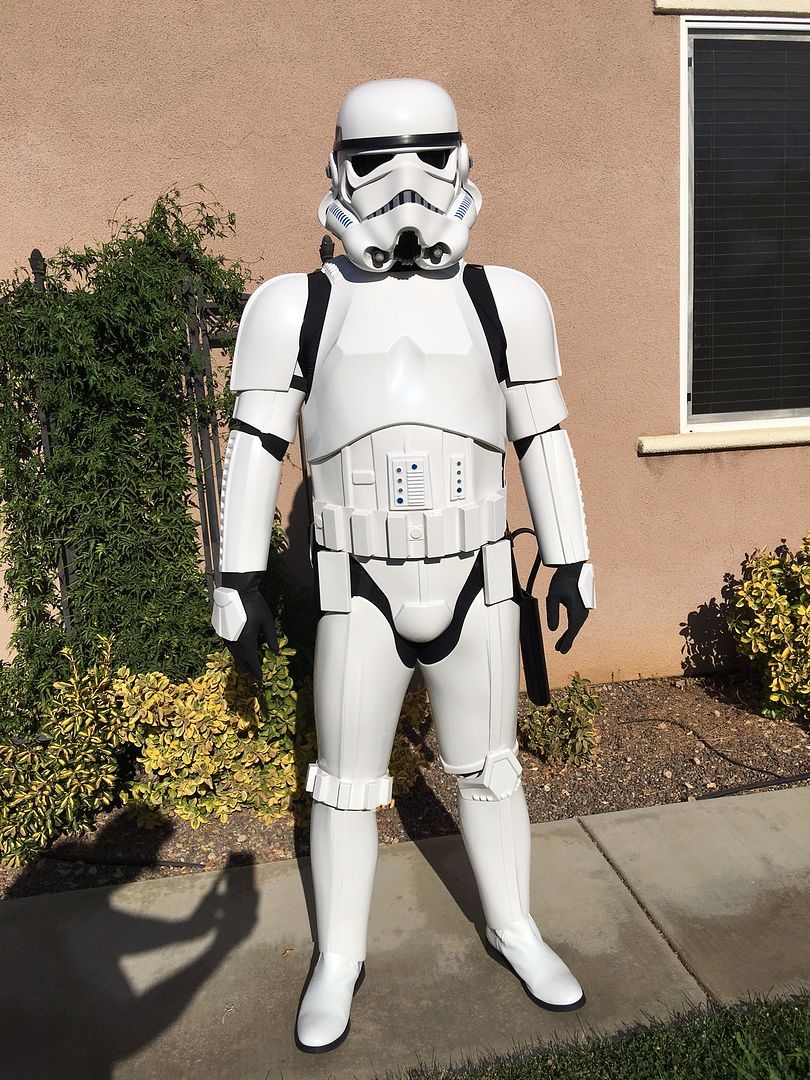
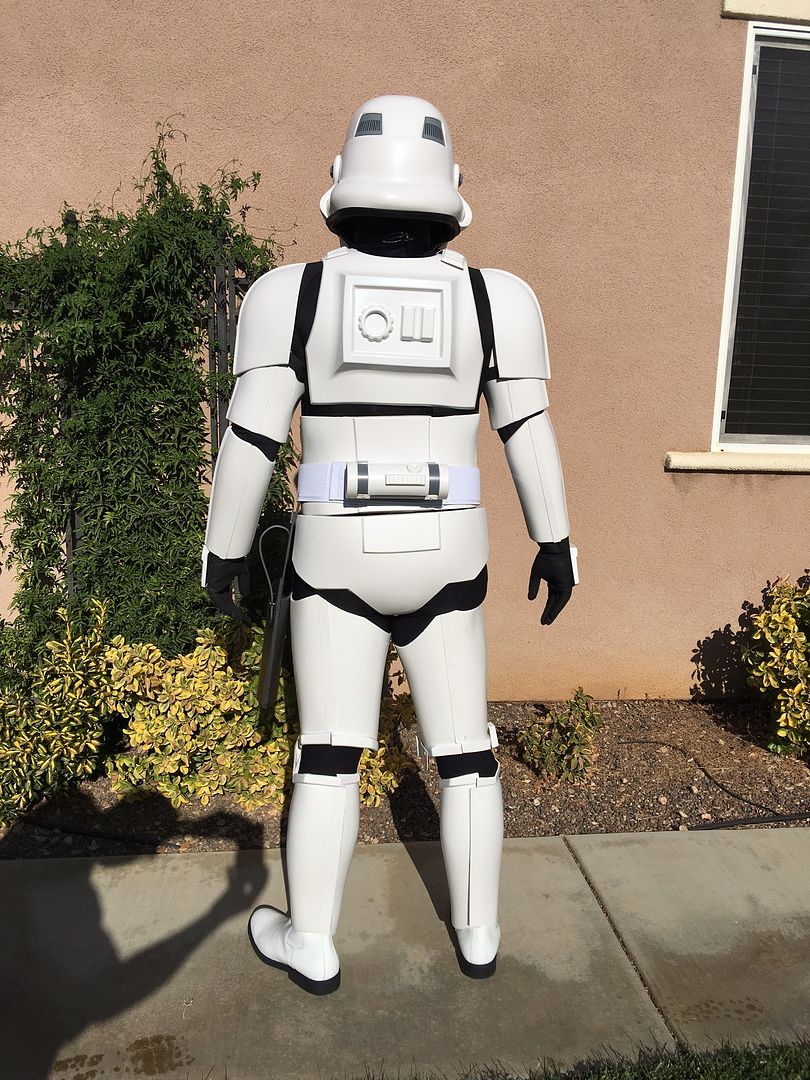
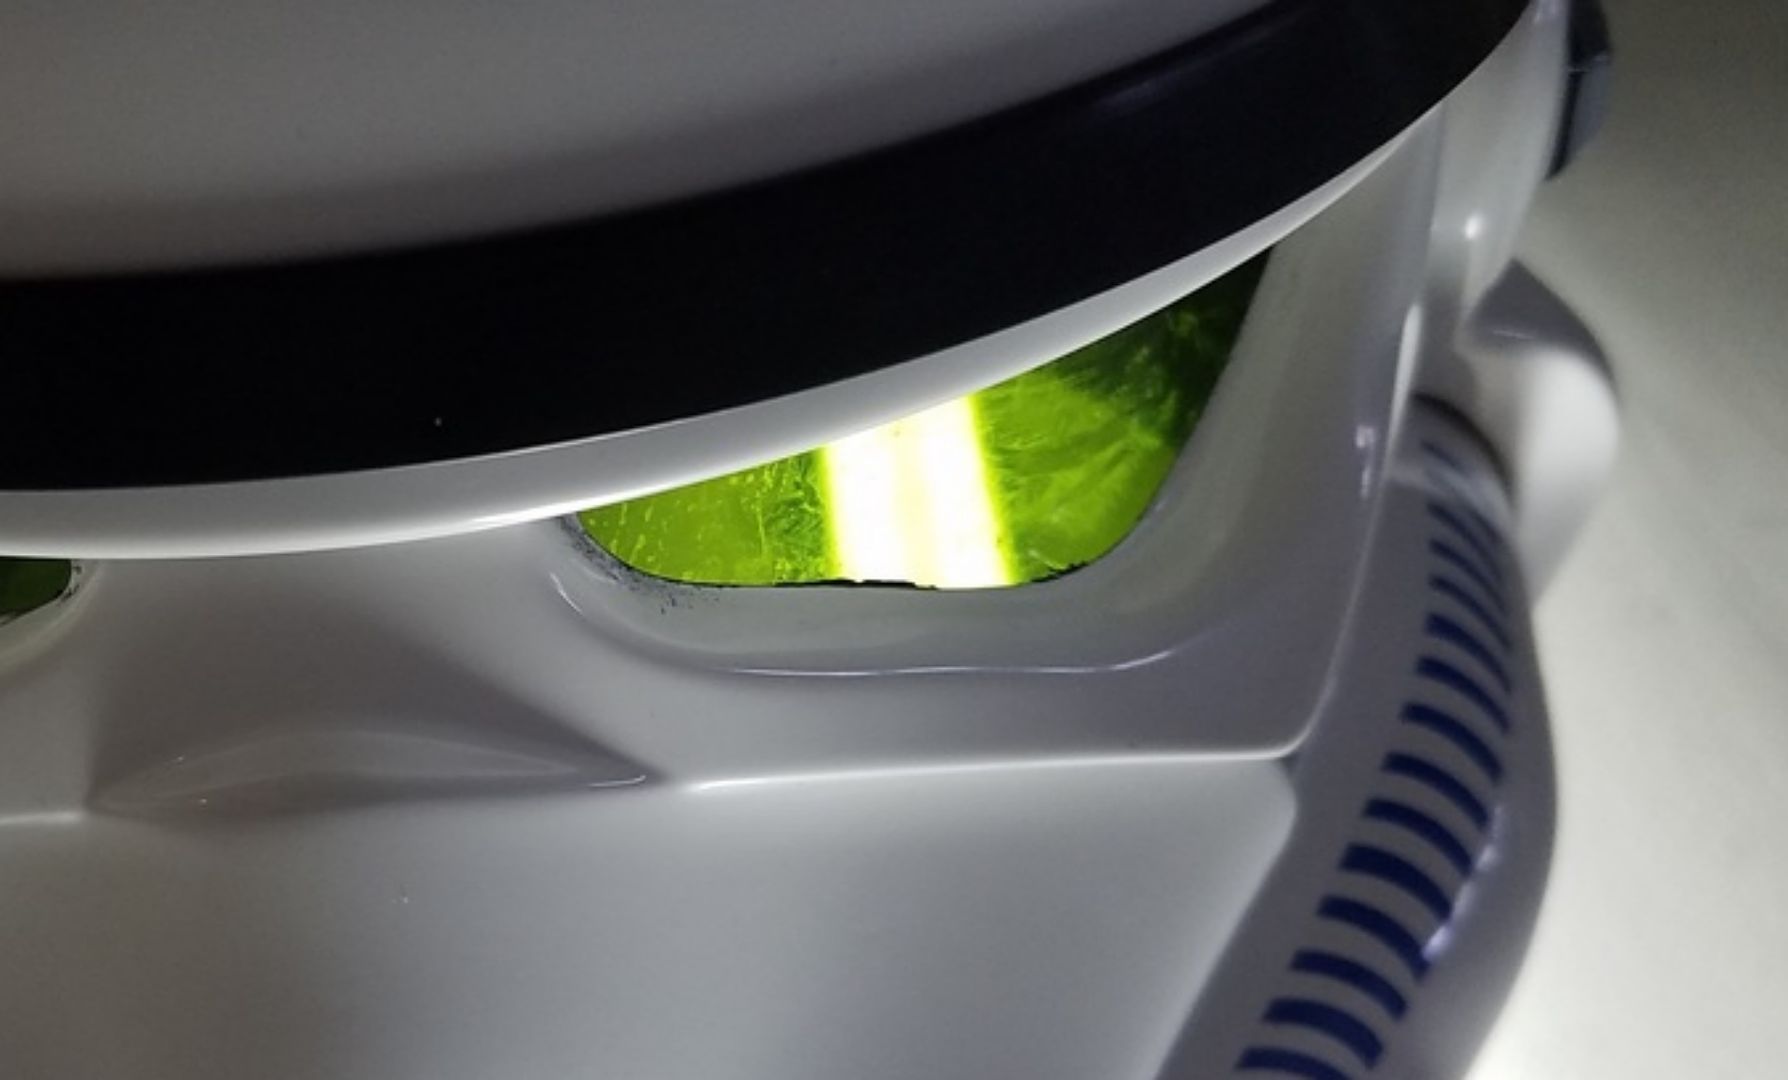
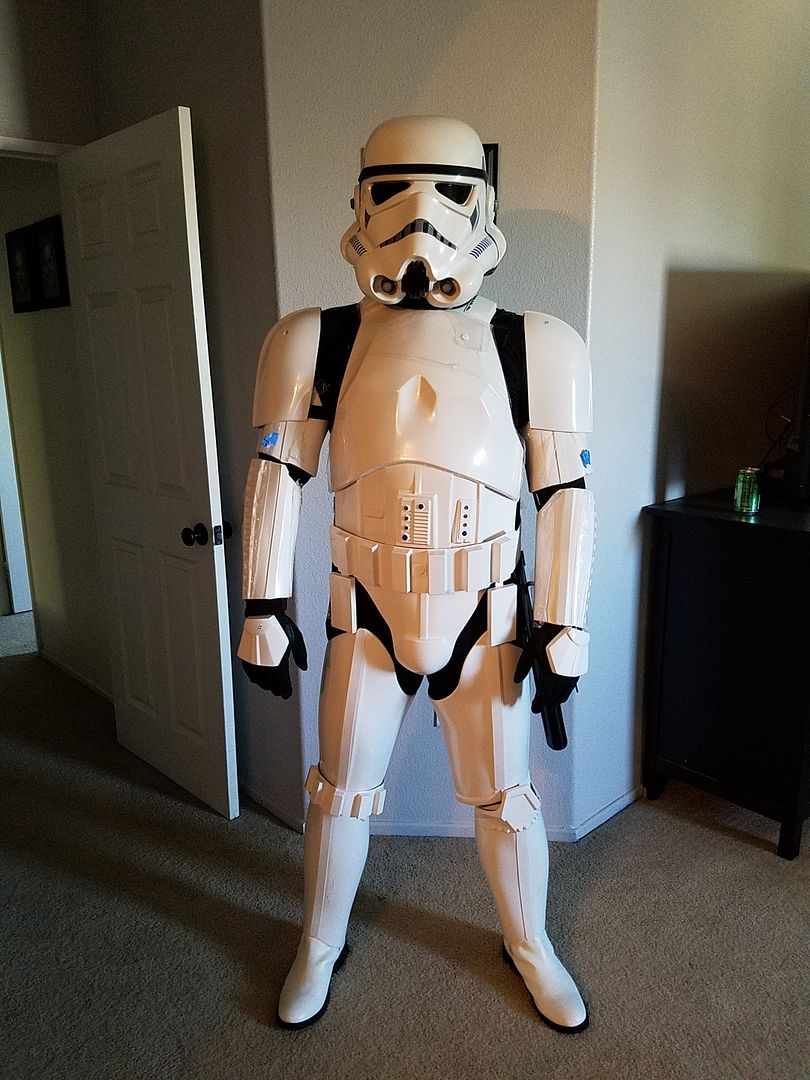
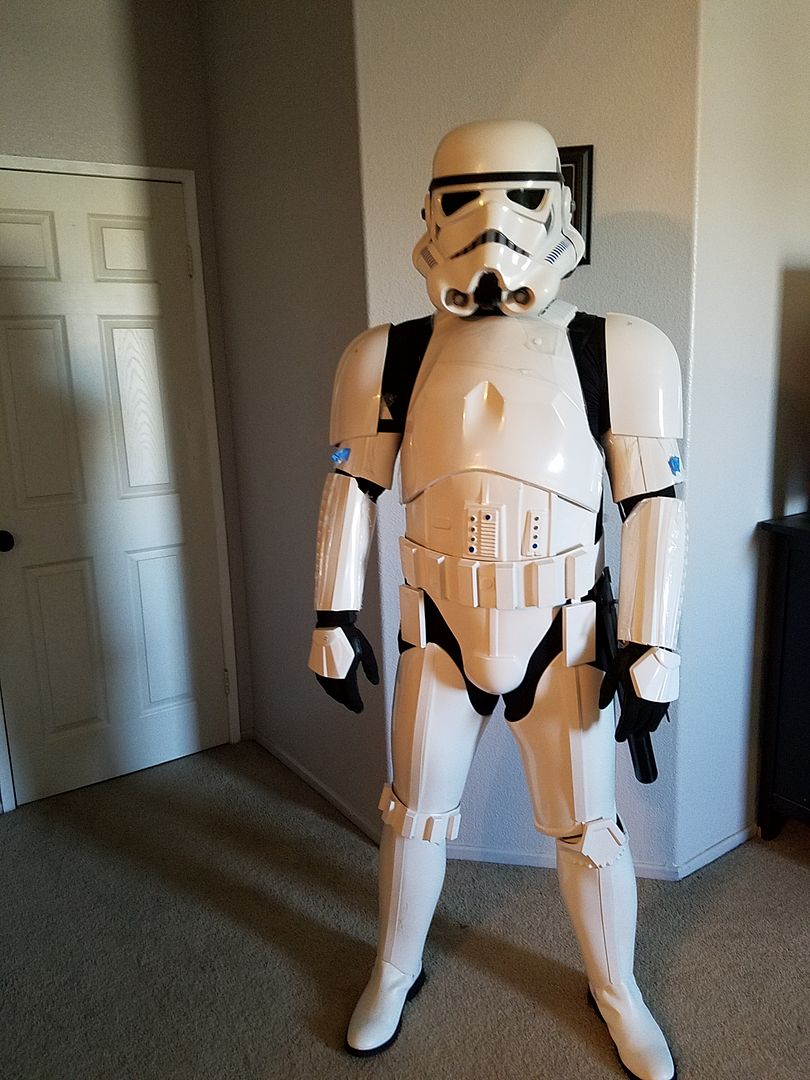
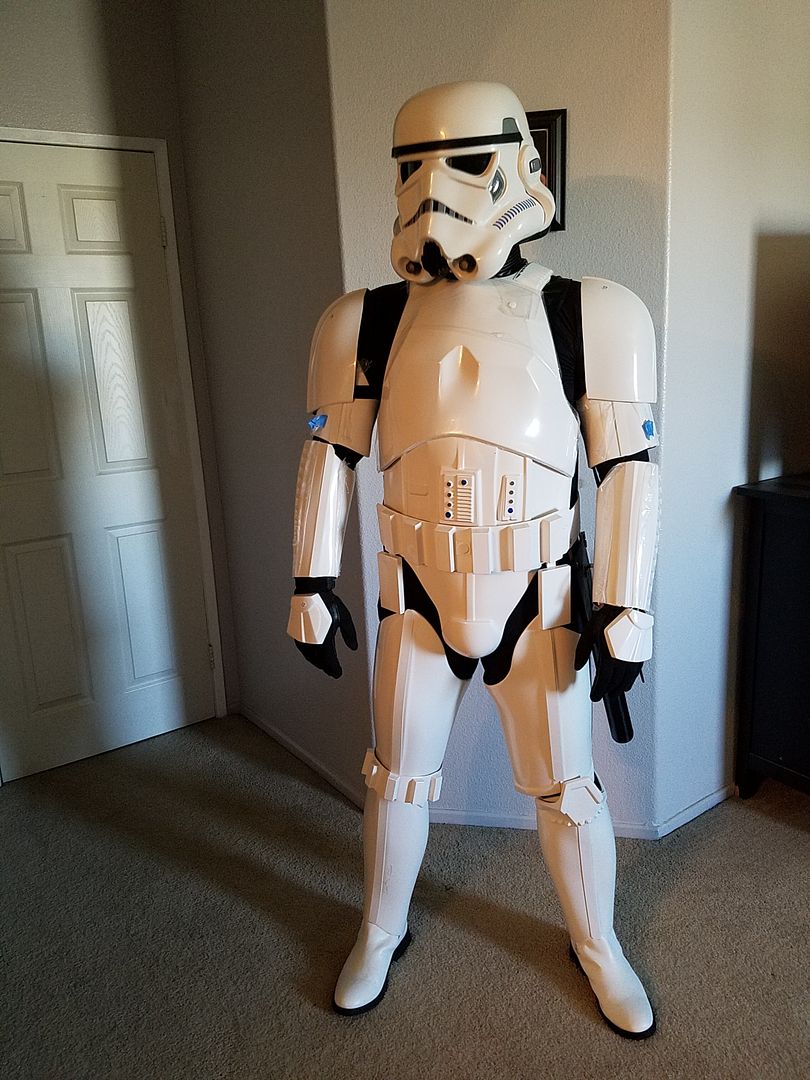
Please consider the attached for EIB status
Name: Brian Payne
Legion ID: TK-50976
Forum Name: Darkpain714
Garrison: Southern California Garrison
501st Member Page: http://www.501st.com/members/displaymember.php?userID=22178&costumeID=124
Height: 6'0"
Weight: 215
Armor maker: Anovos
Helmet maker: Anovos
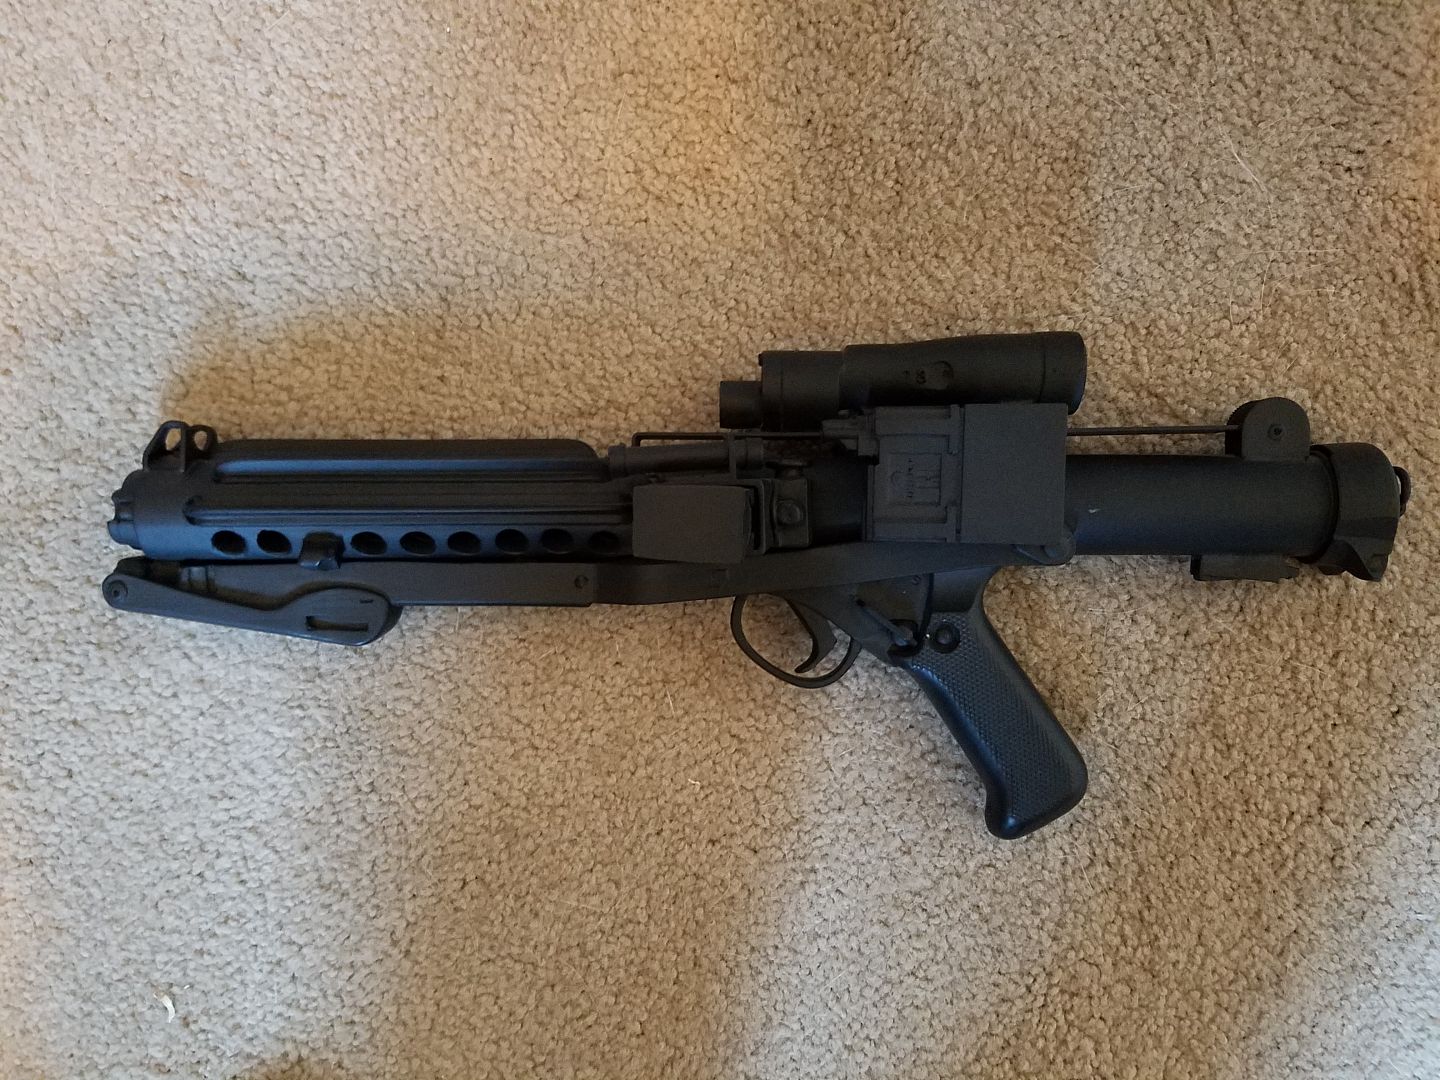
Blaster: QuestDesignCanada
Canvas Belt: Kittle
Holster: Anovos
Hand Plates: Anovos
Electronics: TK Talkie /Pyle Amp
Boots maker: TK Boots/Size 11
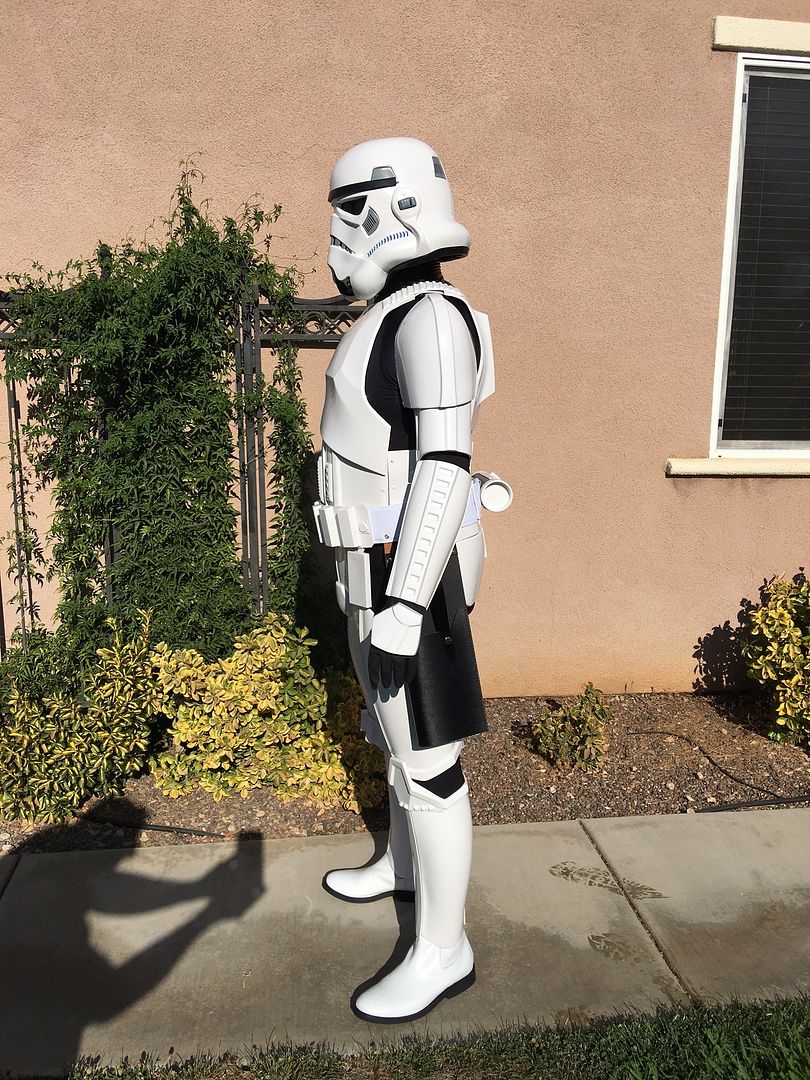
Neckseal: AnovosPhotos:
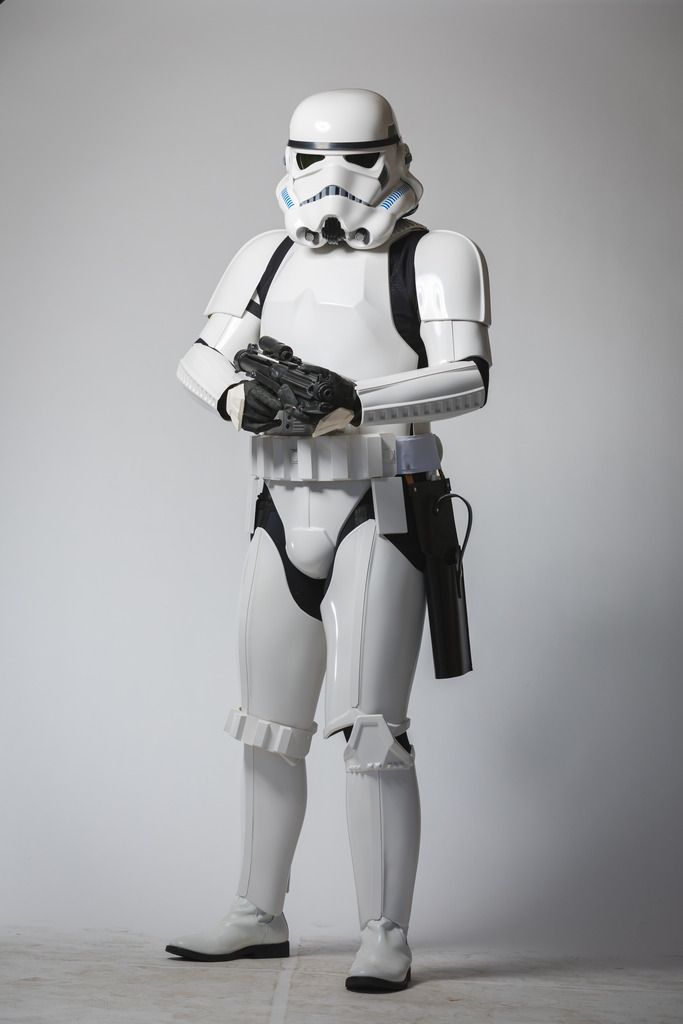
Front:
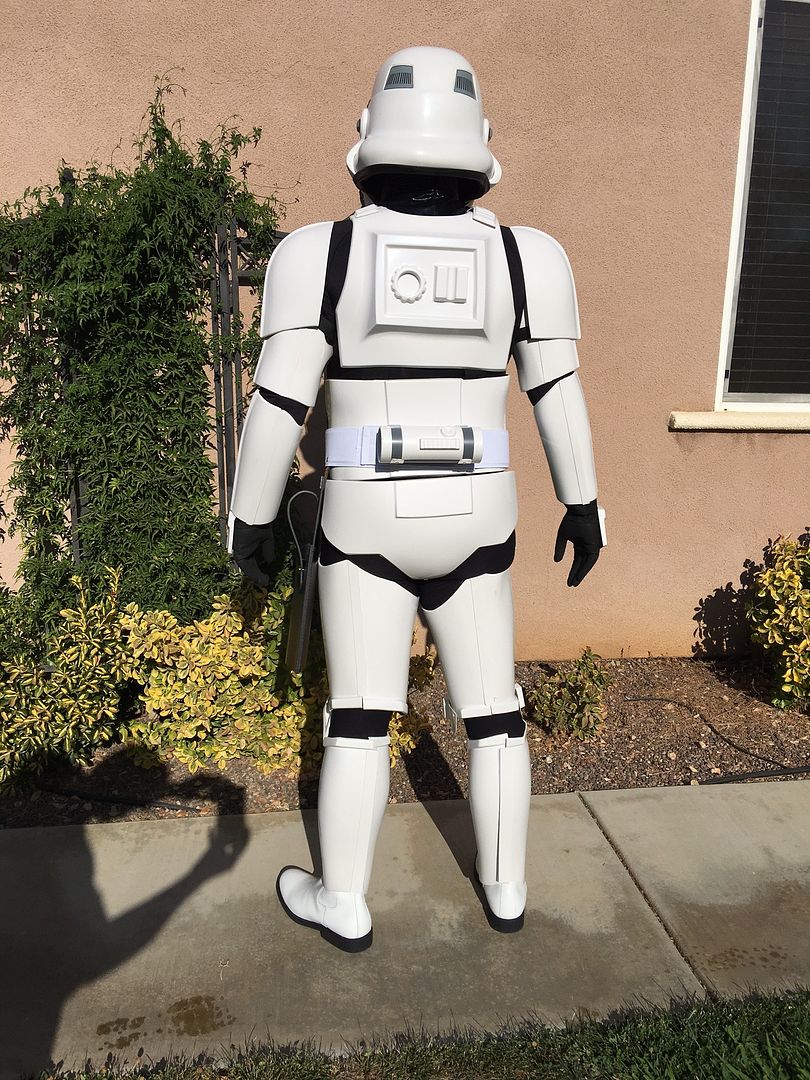
Back:
Left:
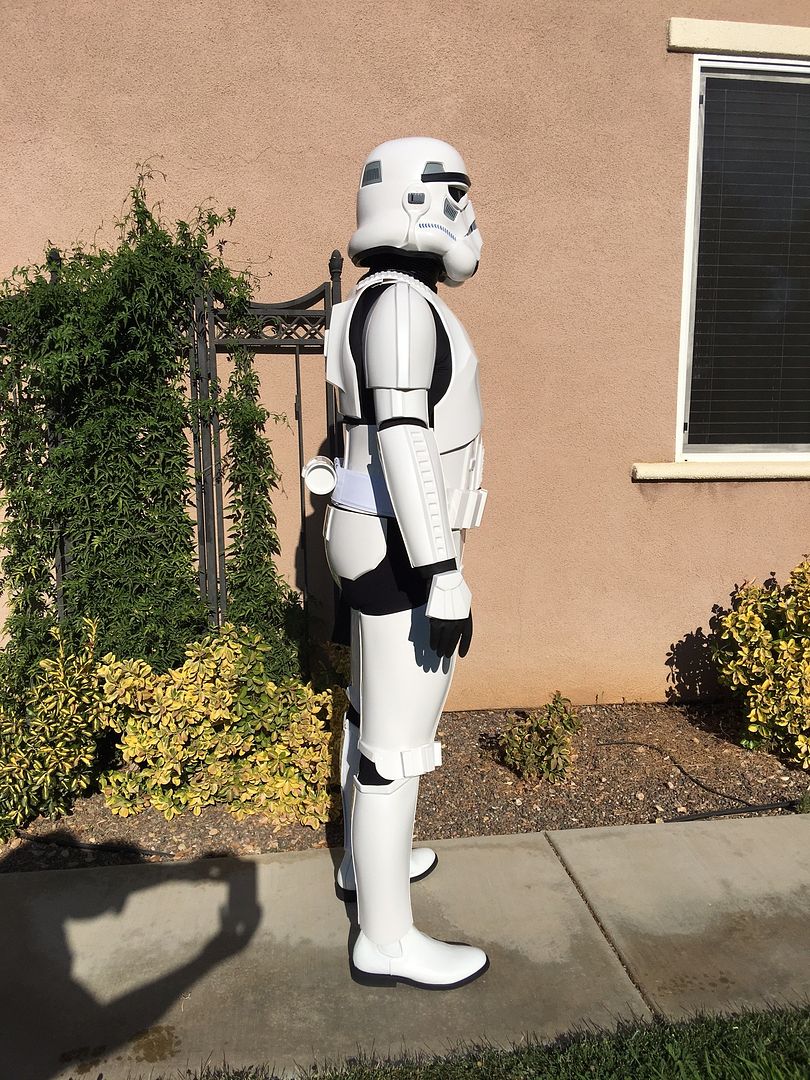
Right:

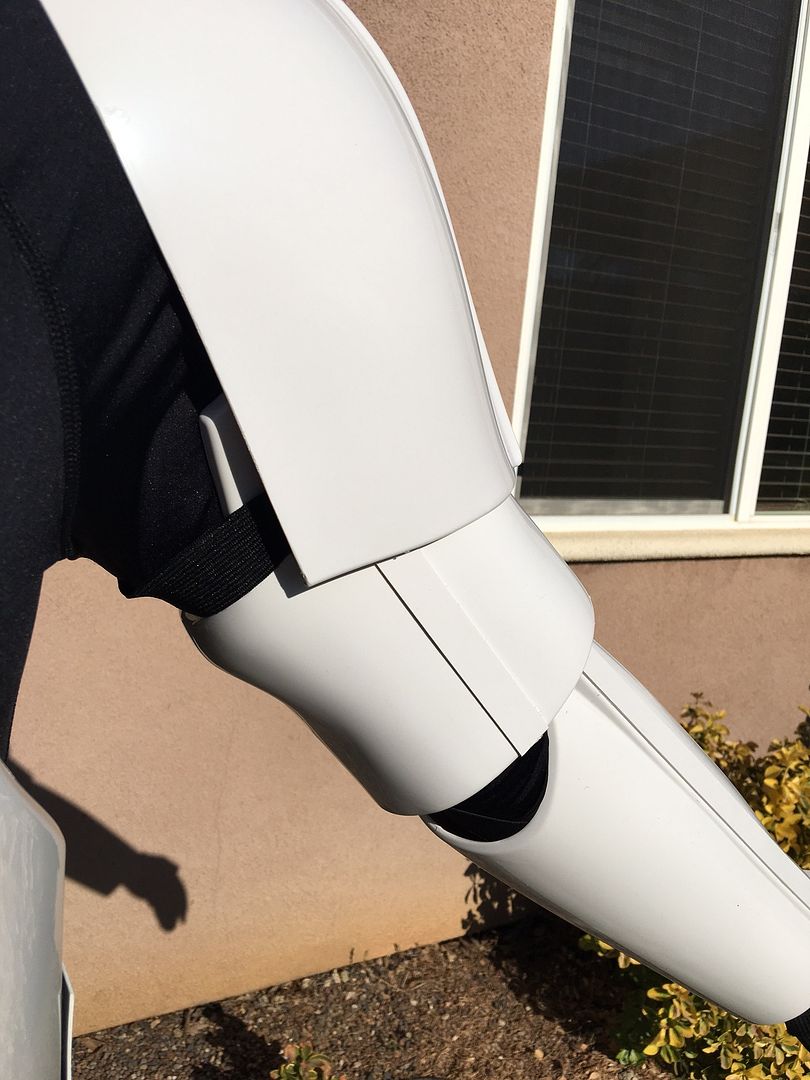
Right Detail:

Left Detail:
Abdomen Detail:
Cod/Butt:
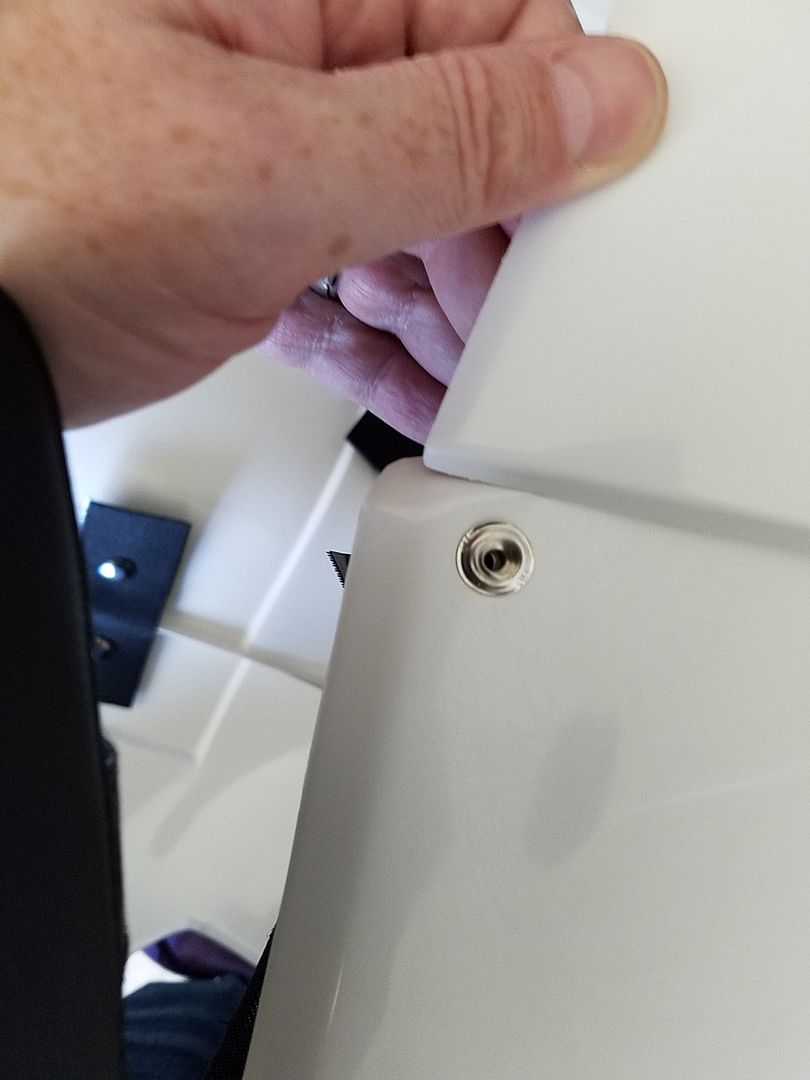
Interior Strapping:
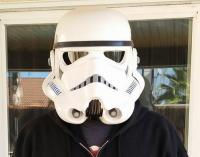
Helmet:
Front:
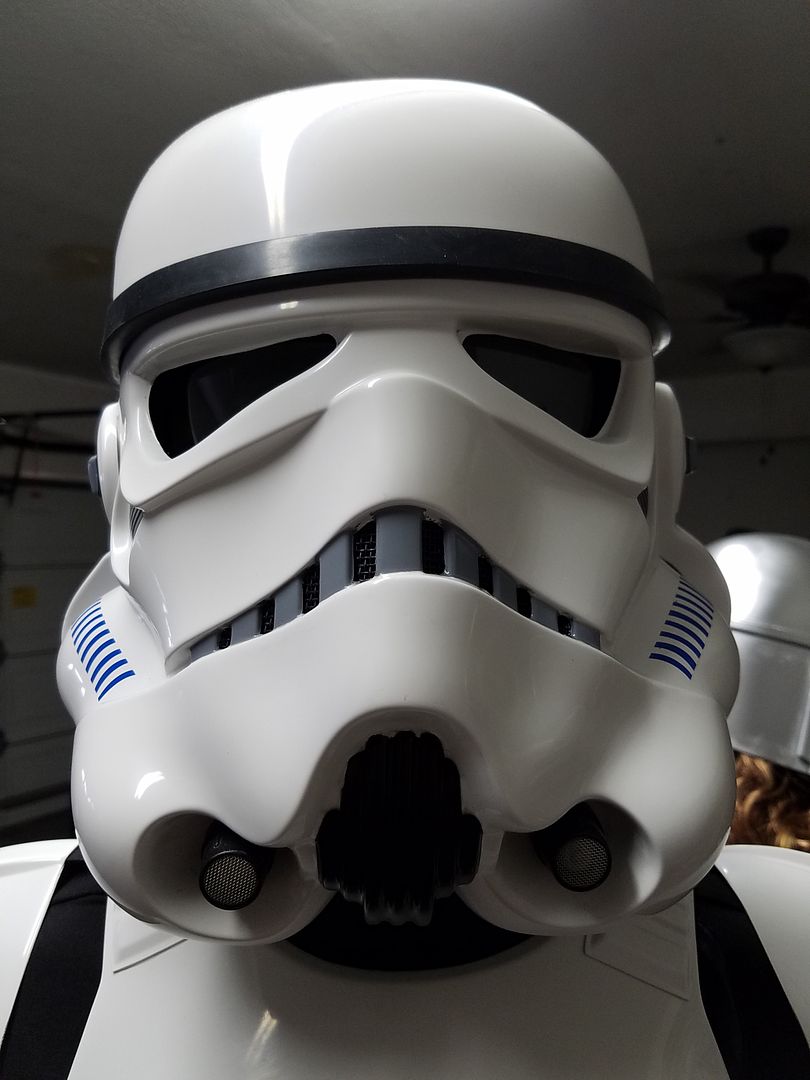
Sides:
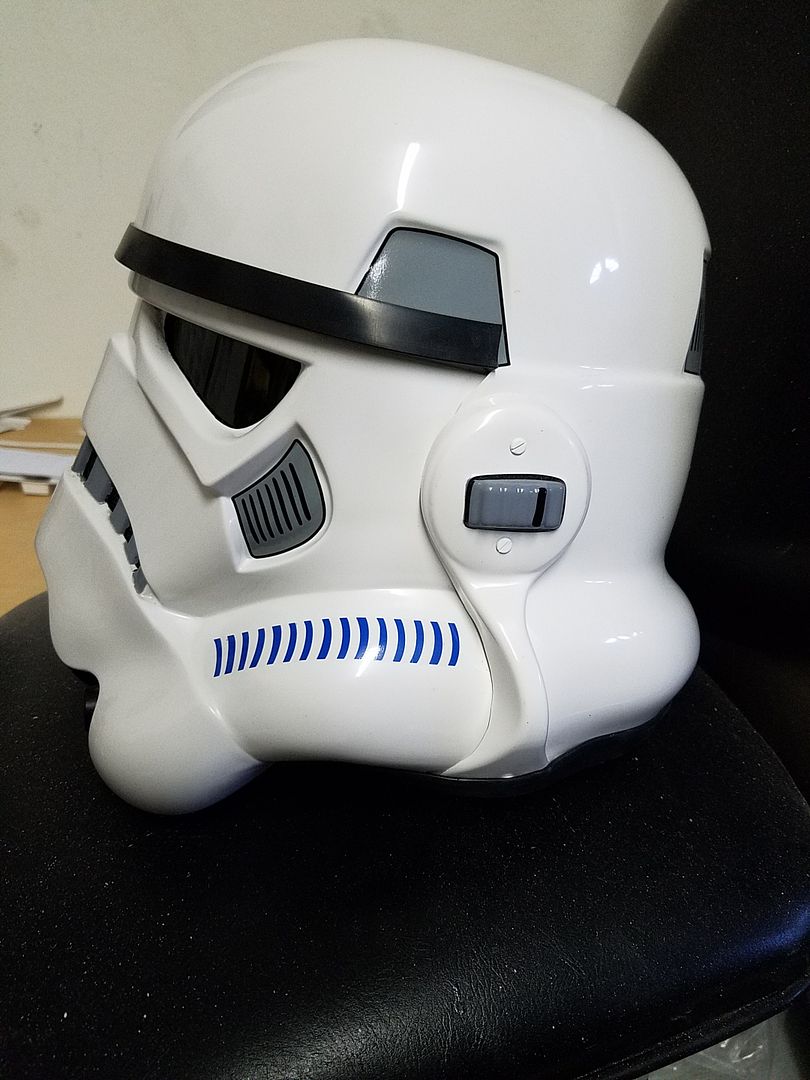
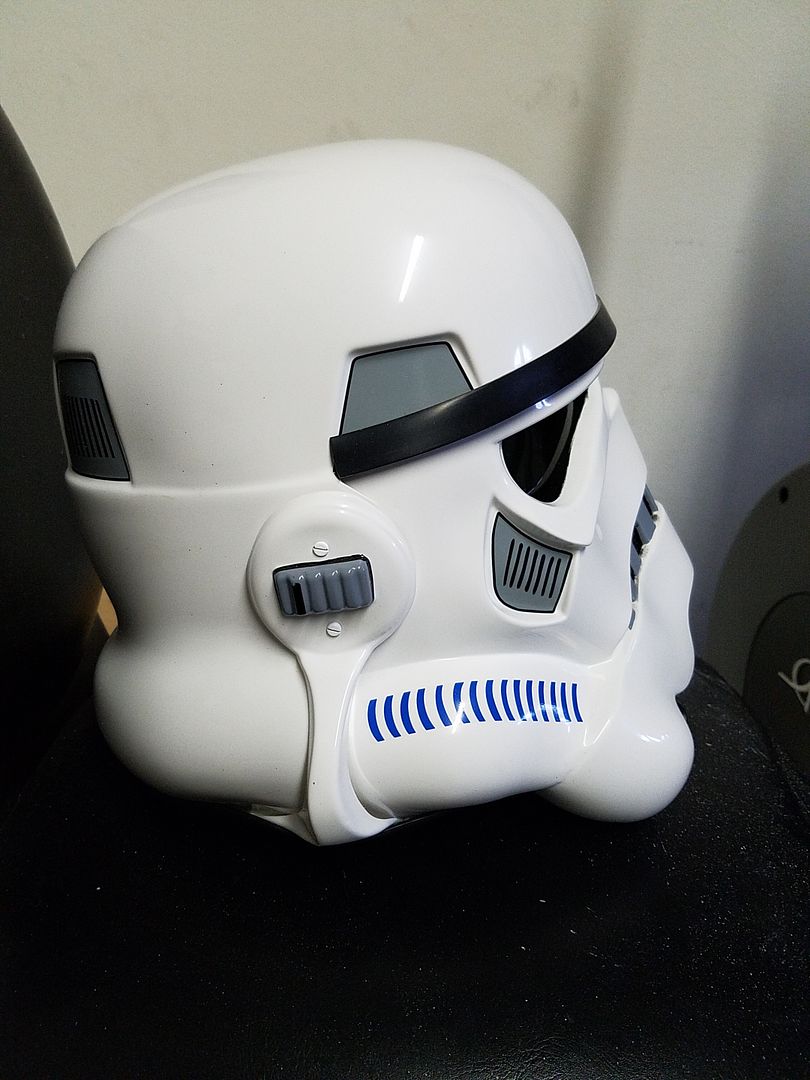
Back:
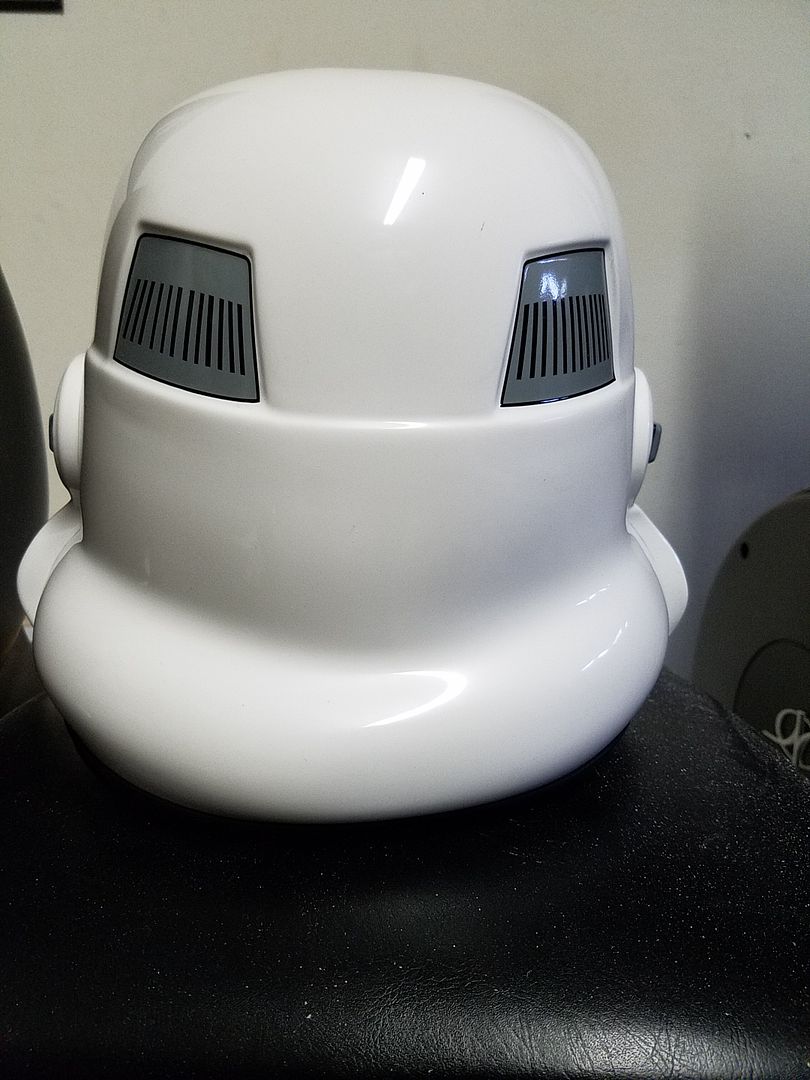
Hovi detail:
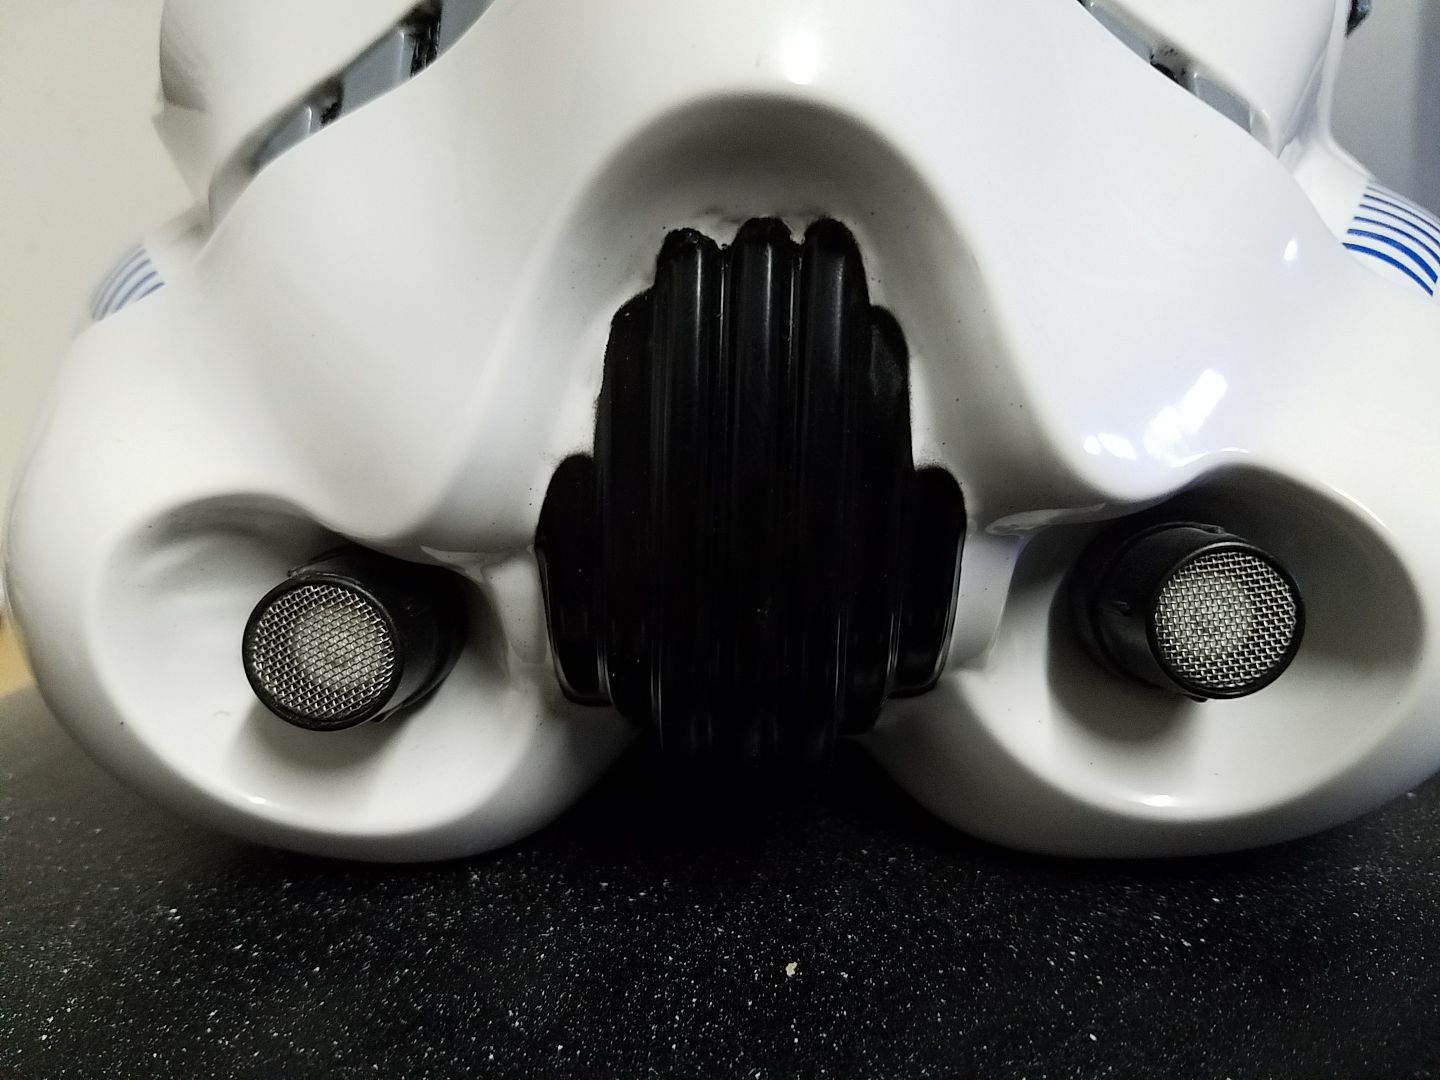
Lens:
Neck seal:
Thermal Detonator:
Belt/Holster:

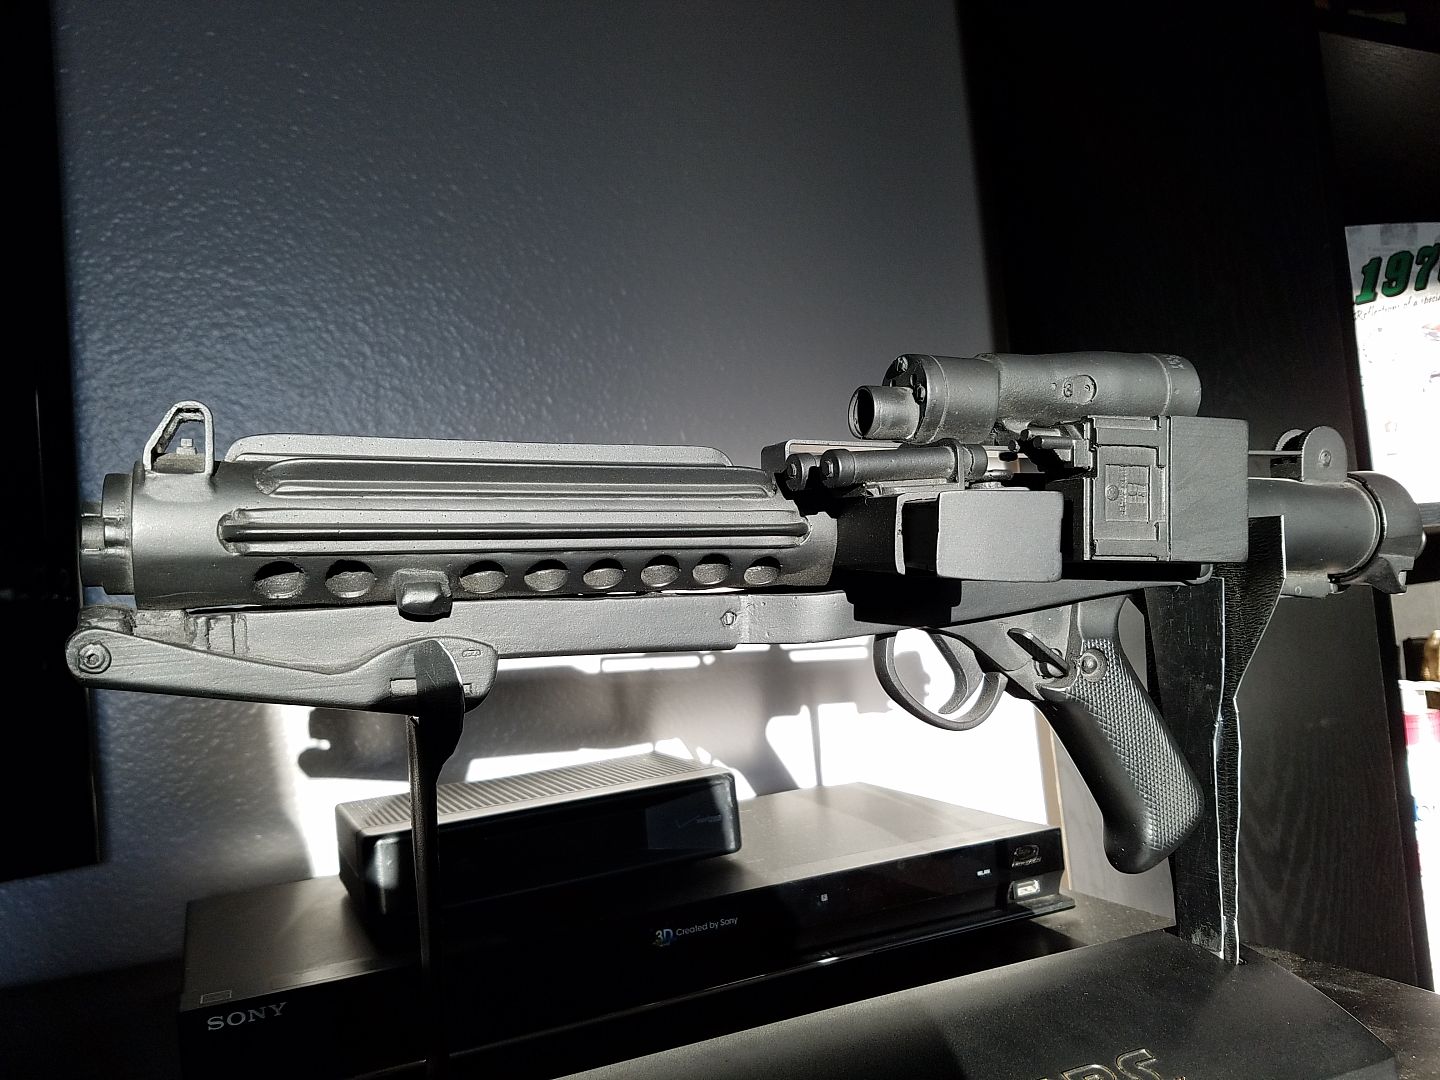
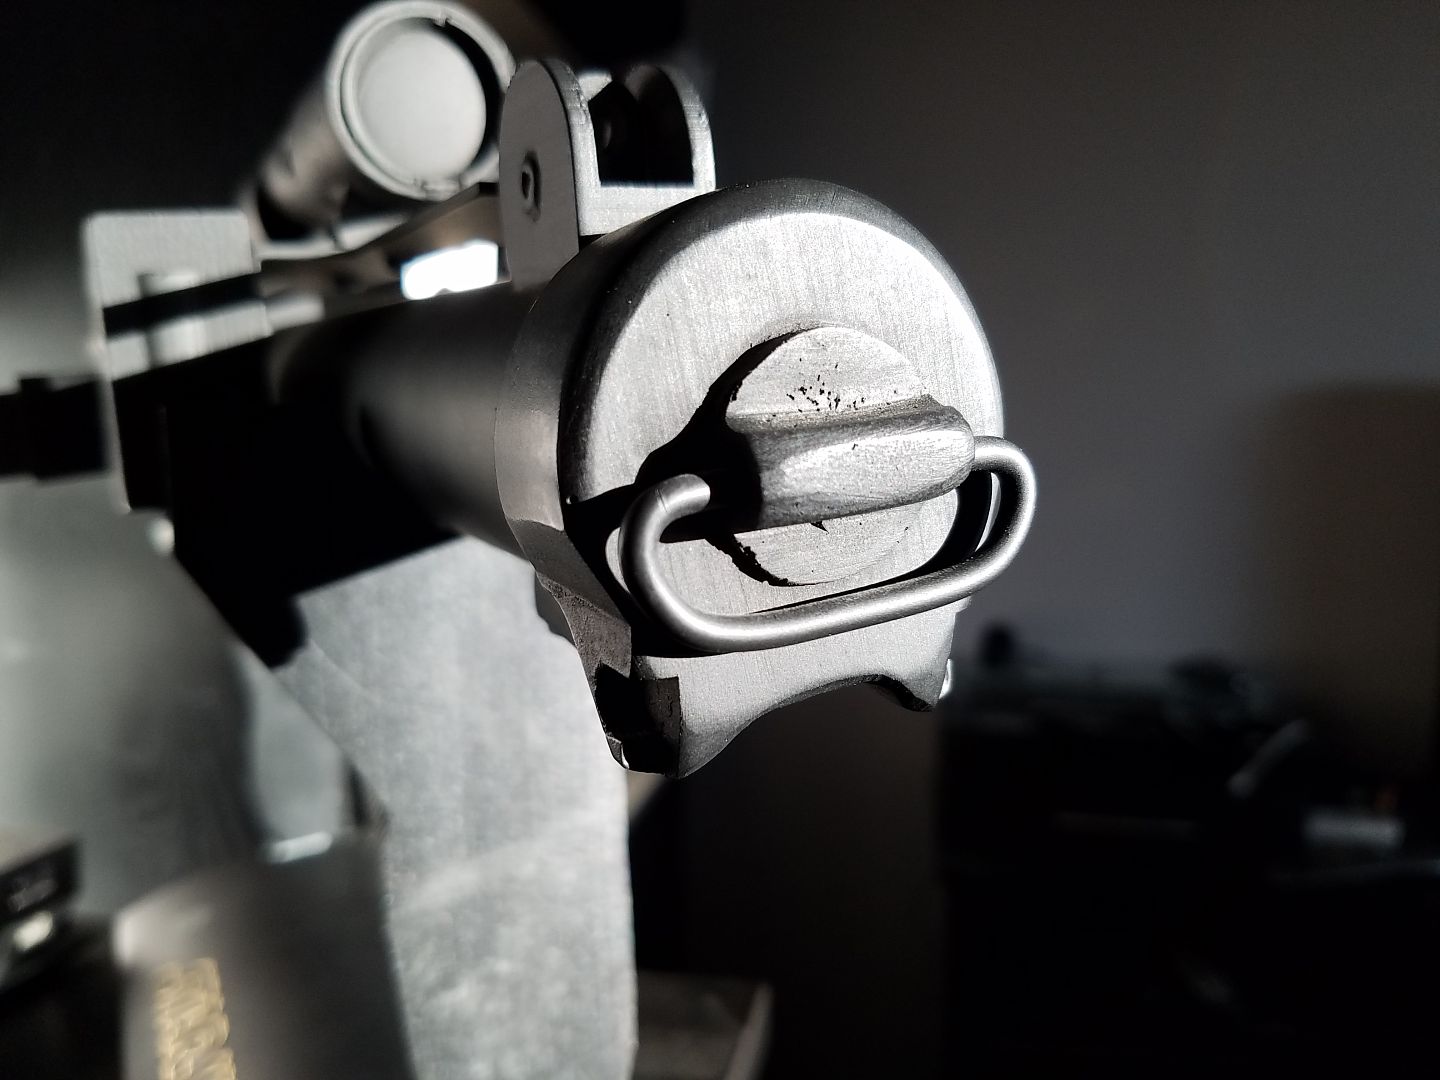
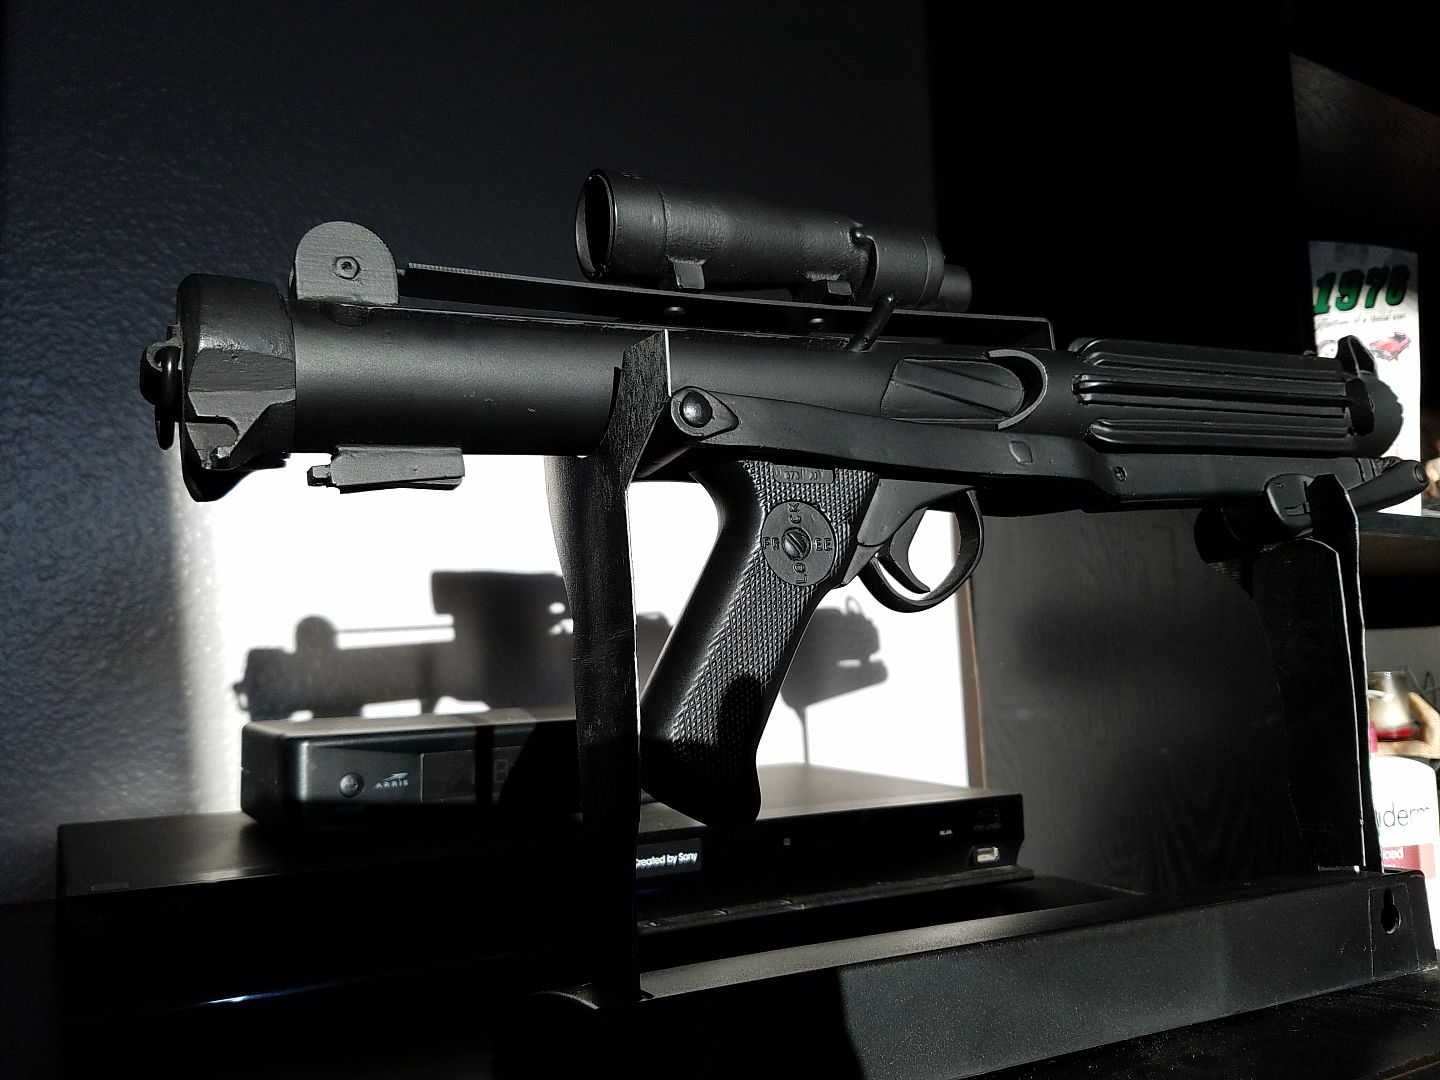
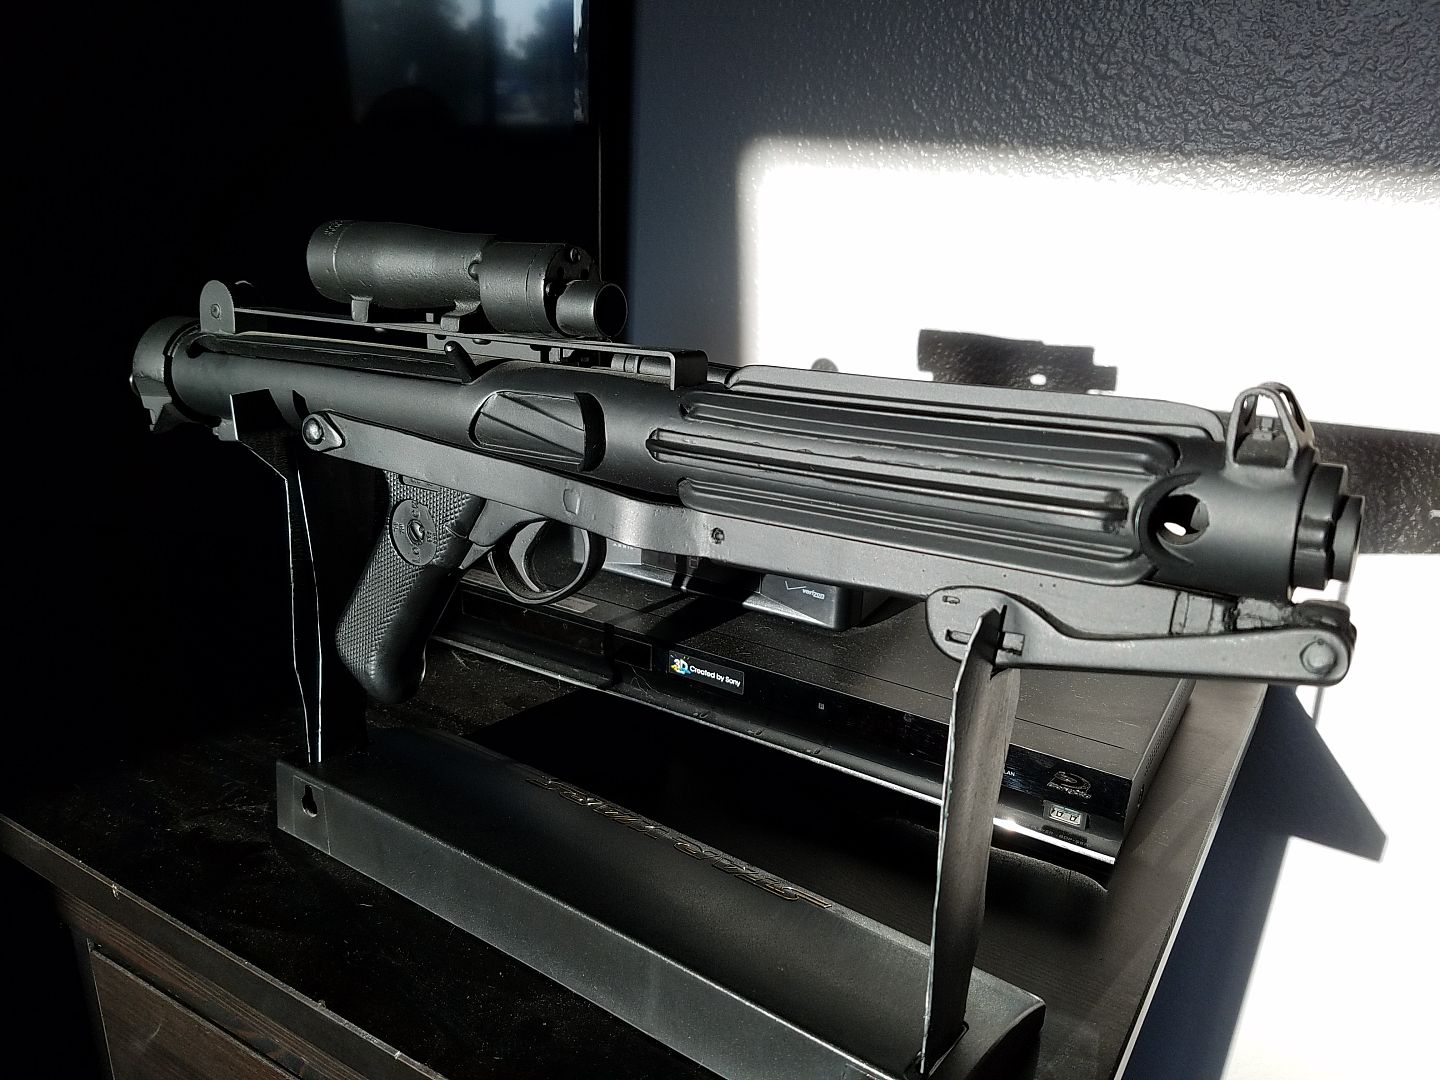
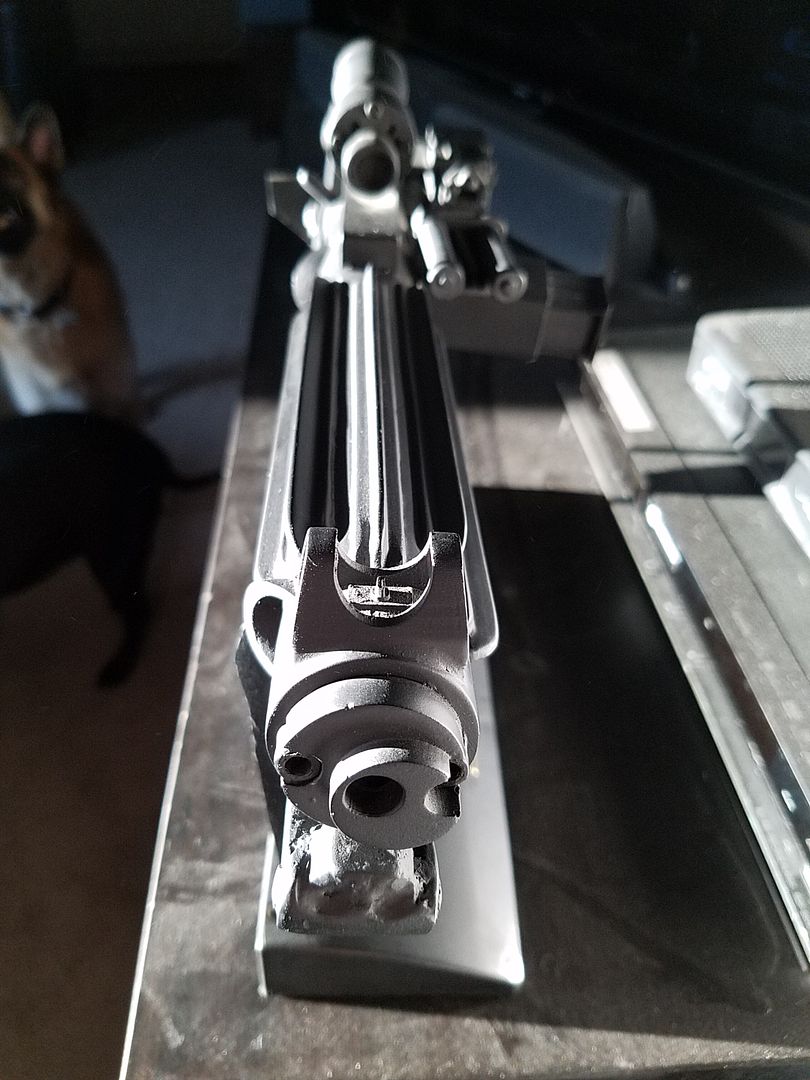
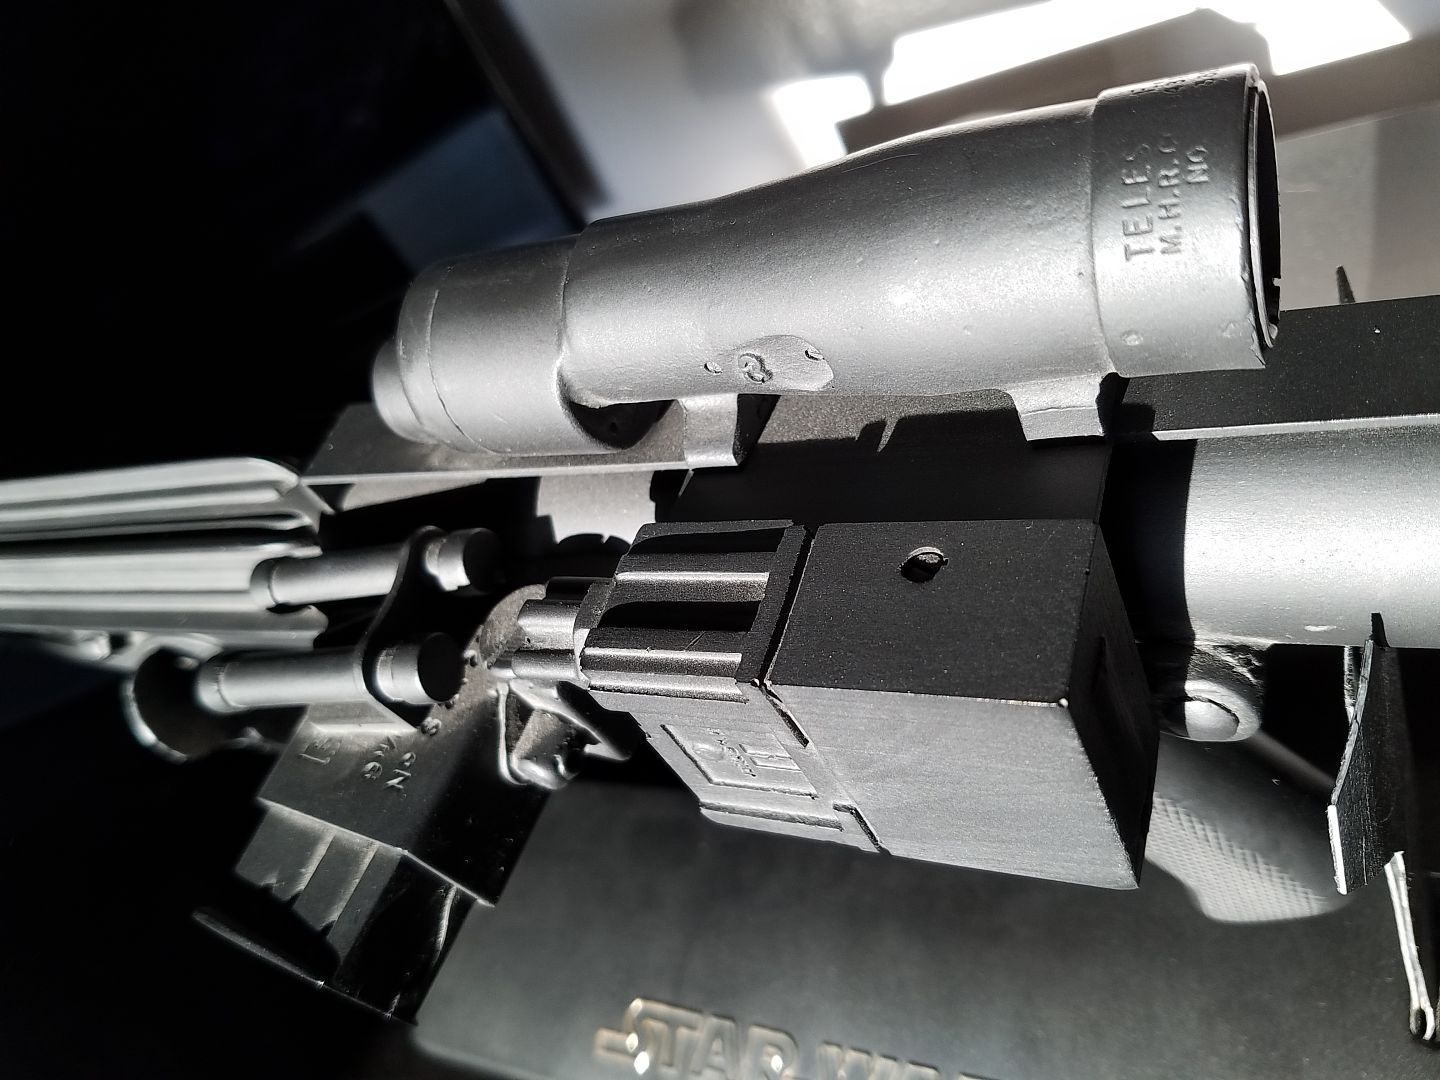
Blaster:

Additional Detail:


**EDIT***
Adding in action shot
Thank you!
-
Requesting 501st access.
TK-50976
http://www.501st.com/members/displaymember.php?userID=22178&costumeID=124
Thank you!
-
Yeah, I seem to have the version 2. But still working great. Used the same Samsung earbud box you did and its working quite well. I added a couple screws to keep the board in place as it was sliding around in there a bit too much and couldnt plug things in without opening it up. I'm still looking for an acceptable vocal mod for the mando setup. Bitcrusher alone doesn't seem to do it.
Pics:


Sent from my SM-G930V using Tapatalk
-
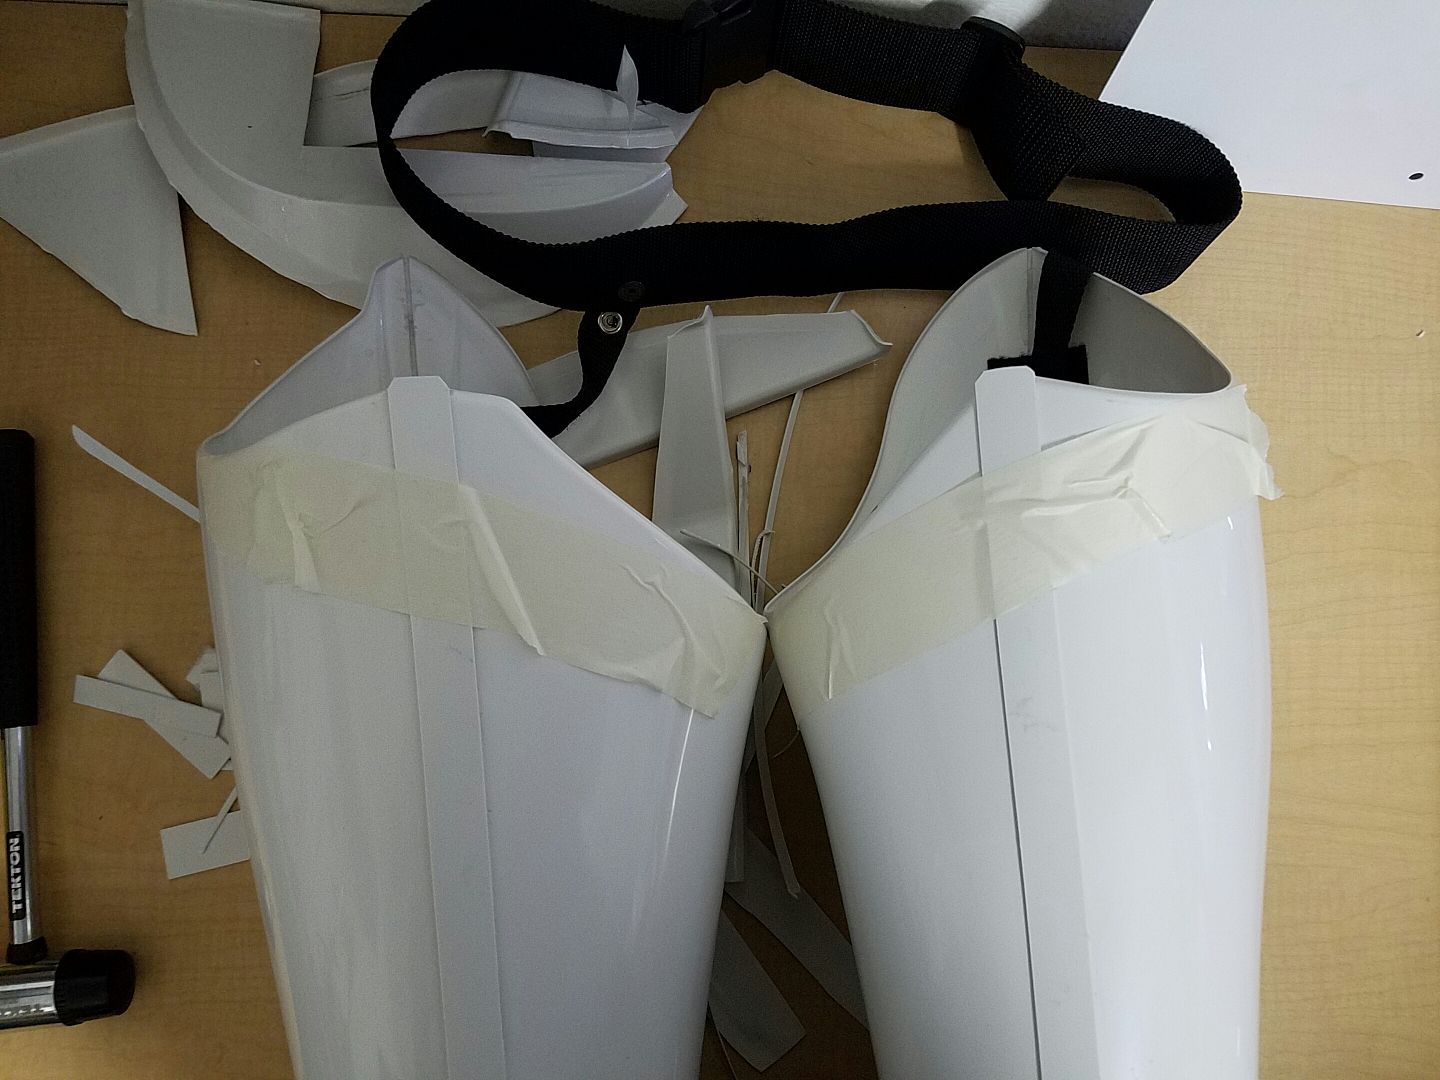
Hey there ukswrath! I've used your build thread as a guideline for my build and I'm beyond thrilled to say with the help of my Squad, I've submitted my photos for approval! However, the thighs are jabbing me in the butt pretty bad. My squad has suggested I chop the tops of the back of the thighs for a better fit and more comfort while trooping. My question to you is, will I be able to get approved for EIB and someday Centurion status if I do that?
Here is my build thread with submission pics: http://www.whitearmor.net/forum/topic/37743-darkpains-anh-stunt-build-anovos-first-build/?p=514829
Here is a rear shot from that for quick reference:

Here is a shot of the recommend cuts by my Squad. The suggestion is to cut everything off that is above the masking tape:
-
My master plan: Have one set of complete electronics to swap between TK and BH. Now to find some great bitcrusher settings that sound more... Mando-like. Thanks so much!
-
1
-
-
This happened when I first connected them. Turned out I had a weak solder spot. Double check all your solder spots and make sure there is good coverage. Also make sure there is no overspill of solder that could lead to a connection shorting out. Finally, make sure that your audio board is properly seated on the Teensy. It has to go on a certain way with pins matching.
You were totally right. I went too light on the solder. Built up my confidence, remembered my training from 20 years ago, and did it right. Now we're in business!
-
This happened when I first connected them. Turned out I had a weak solder spot. Double check all your solder spots and make sure there is good coverage. Also make sure there is no overspill of solder that could lead to a connection shorting out. Finally, make sure that your audio board is properly seated on the Teensy. It has to go on a certain way with pins matching.
Gotcha. I'm 100% positive I have the pins aligned correctly. The numbering (plus your tutorial) is super clear. But my solder, even with the easy pin headers could be the problem. I'm re-doing that now. Will let you know. Thanks!
-
So I picked up the components and I've seemingly run into a snag. Doesn't appear the audio shield is registering it all. Is there a forum somewhere I could get some help?
Sent from my SM-G930V using Tapatalk
-
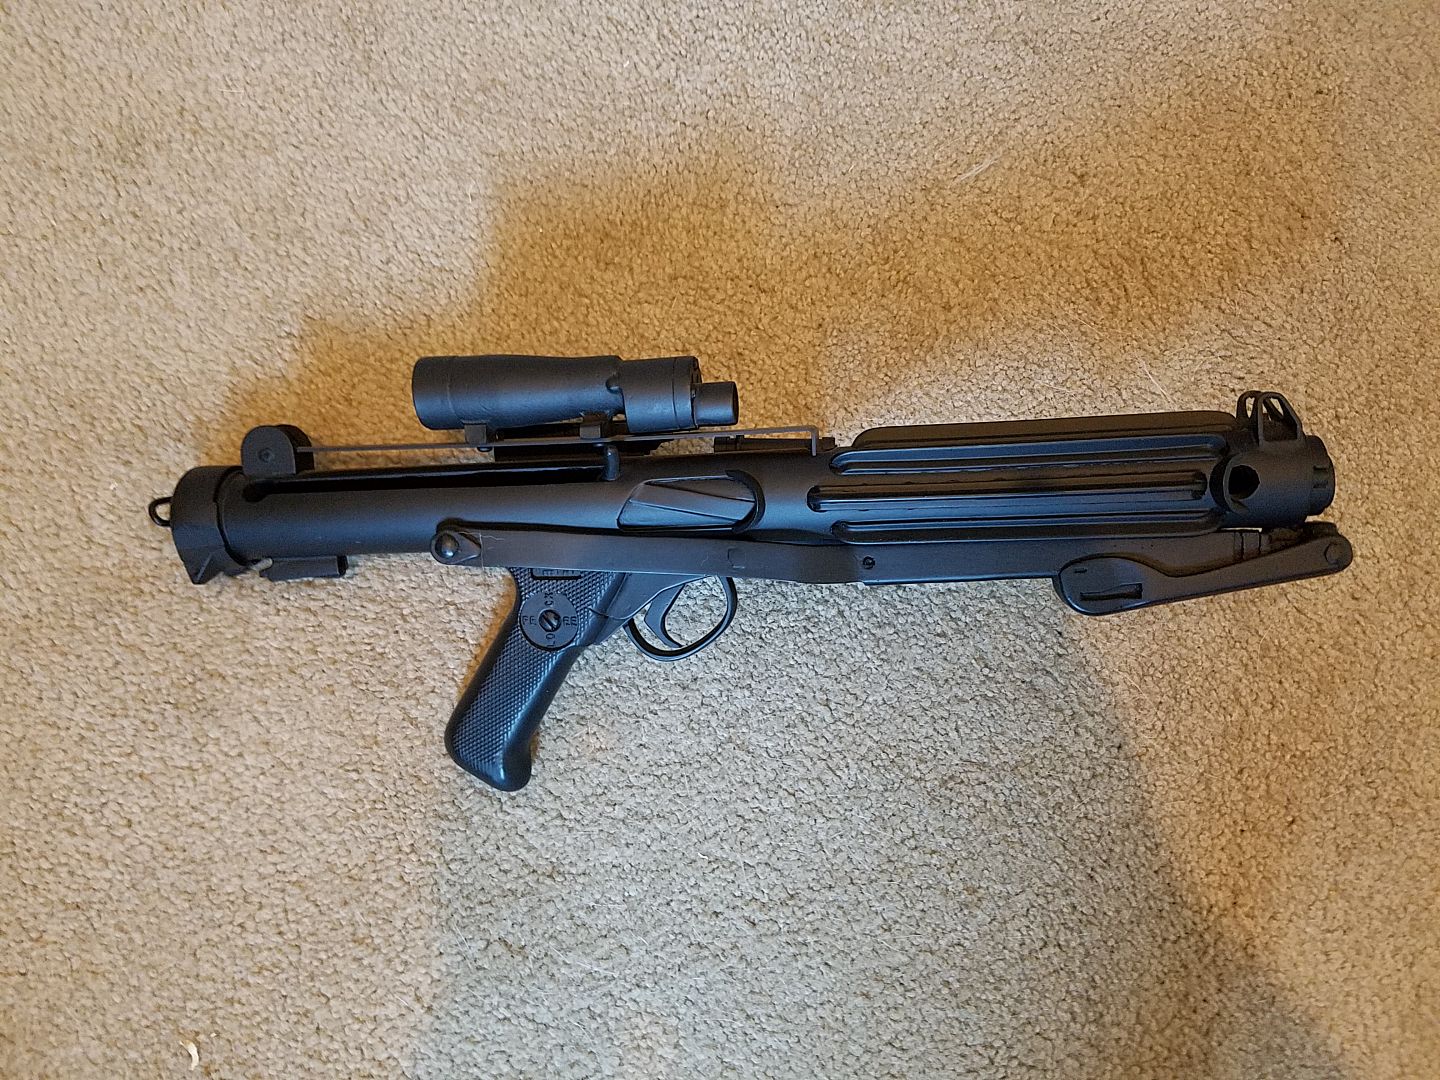
Thank you! Not sure I can do anything about that with this blaster. Bummer.Just wanted to let you know your rear sight is on backwards. The jagged edge should point backwards.
Sent from my SM-G930V using Tapatalk
-
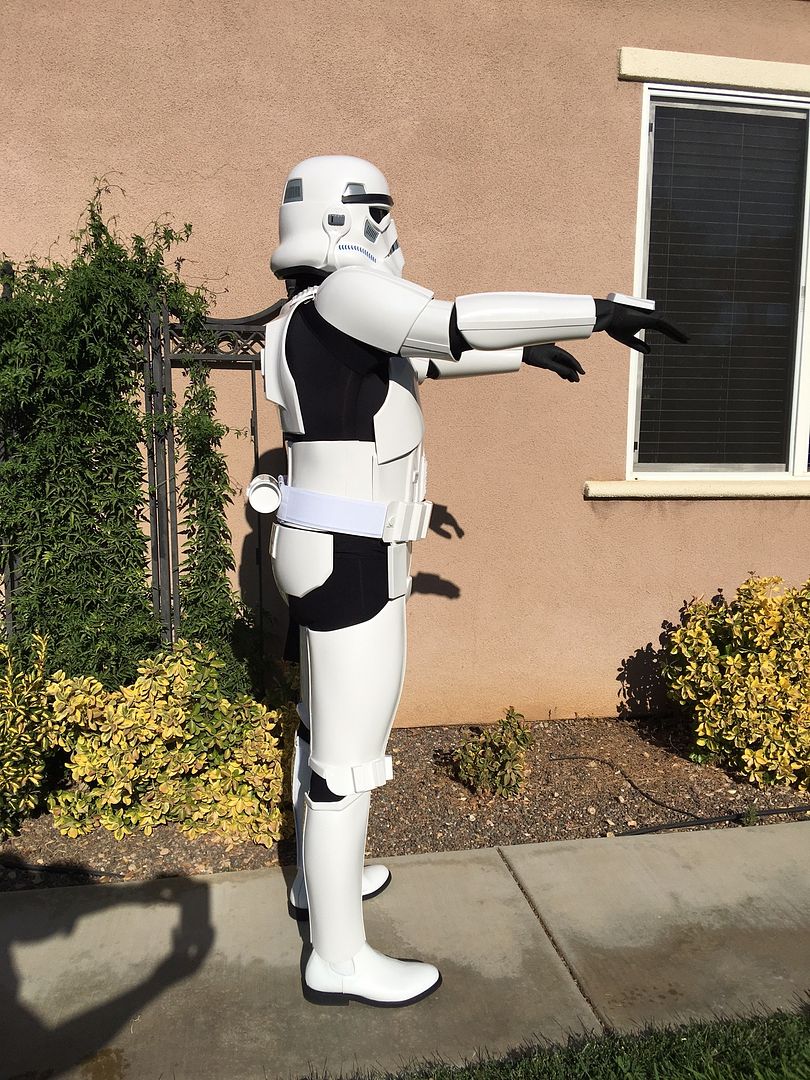
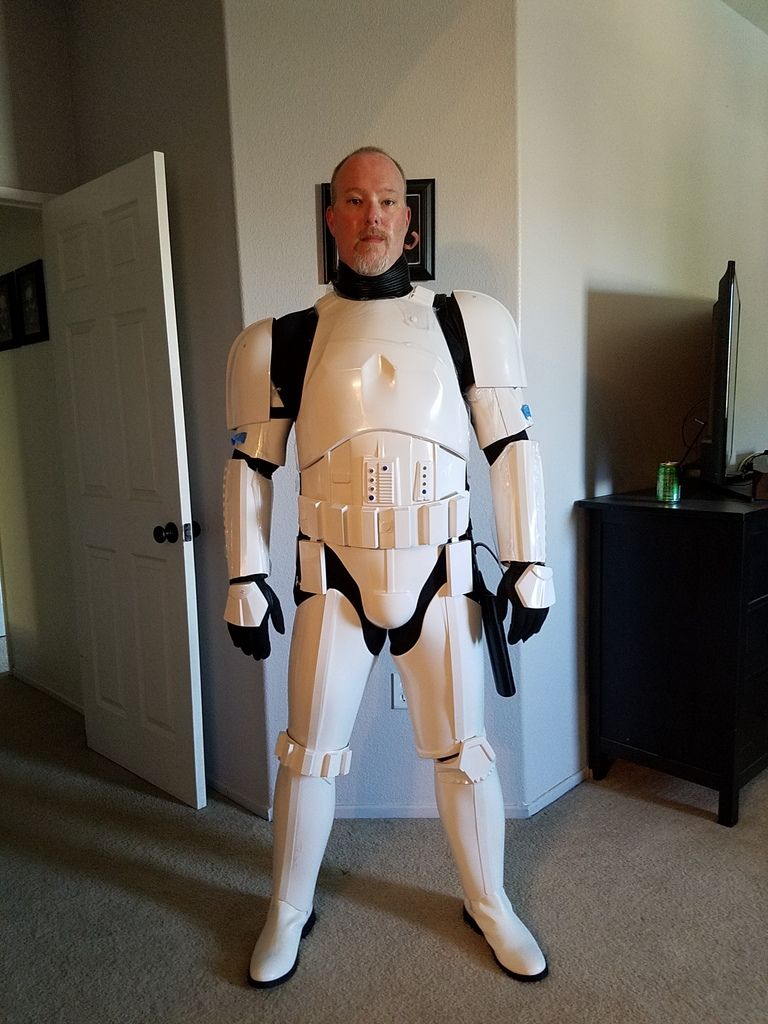
Thanks to a bit of help and a strong push to submit from my Squad, I've submitted! Here are my submission pics. Critique always welcome.
Thanks to everyone here for all the help!


-
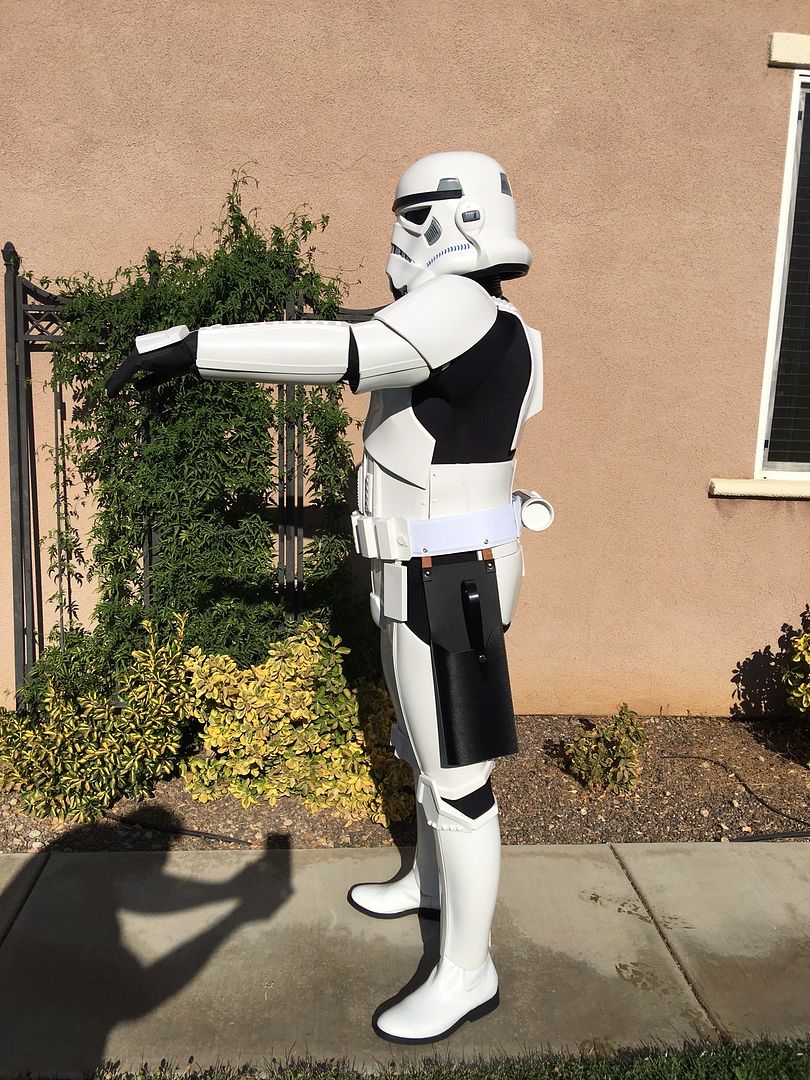
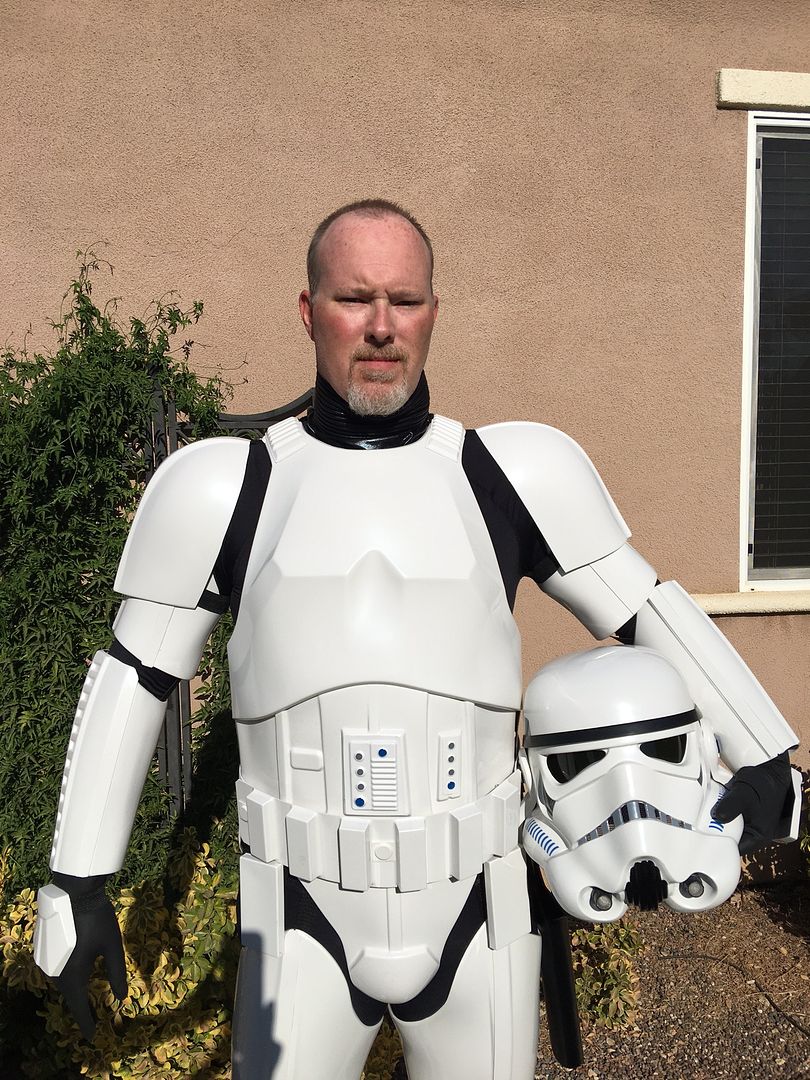
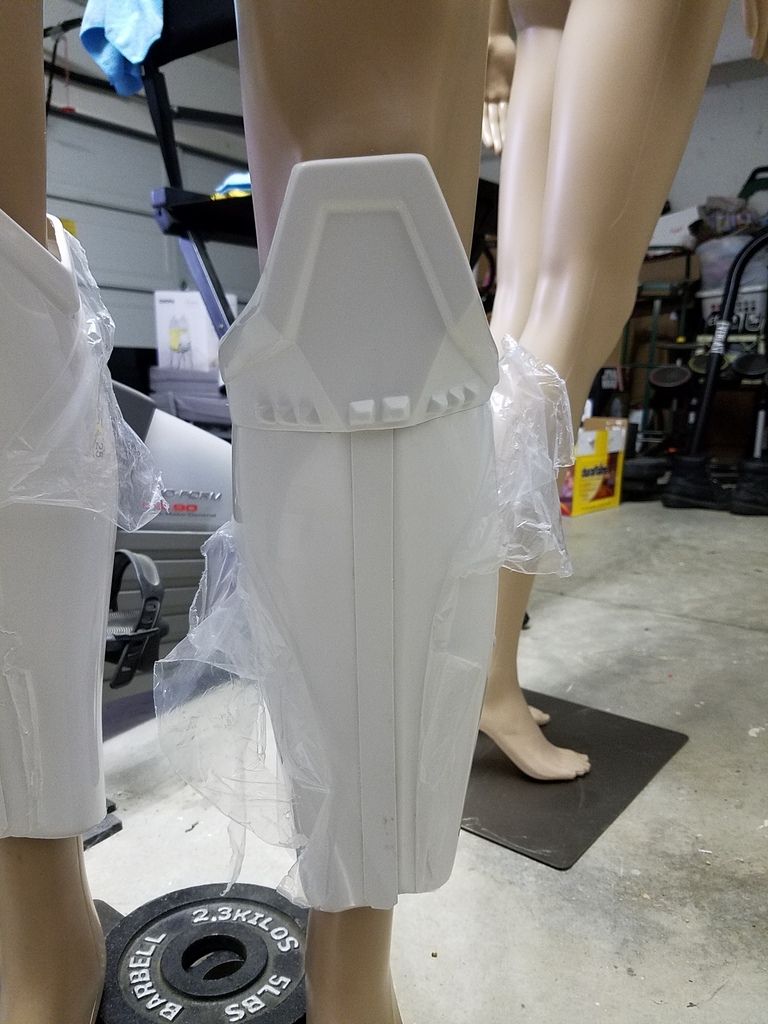
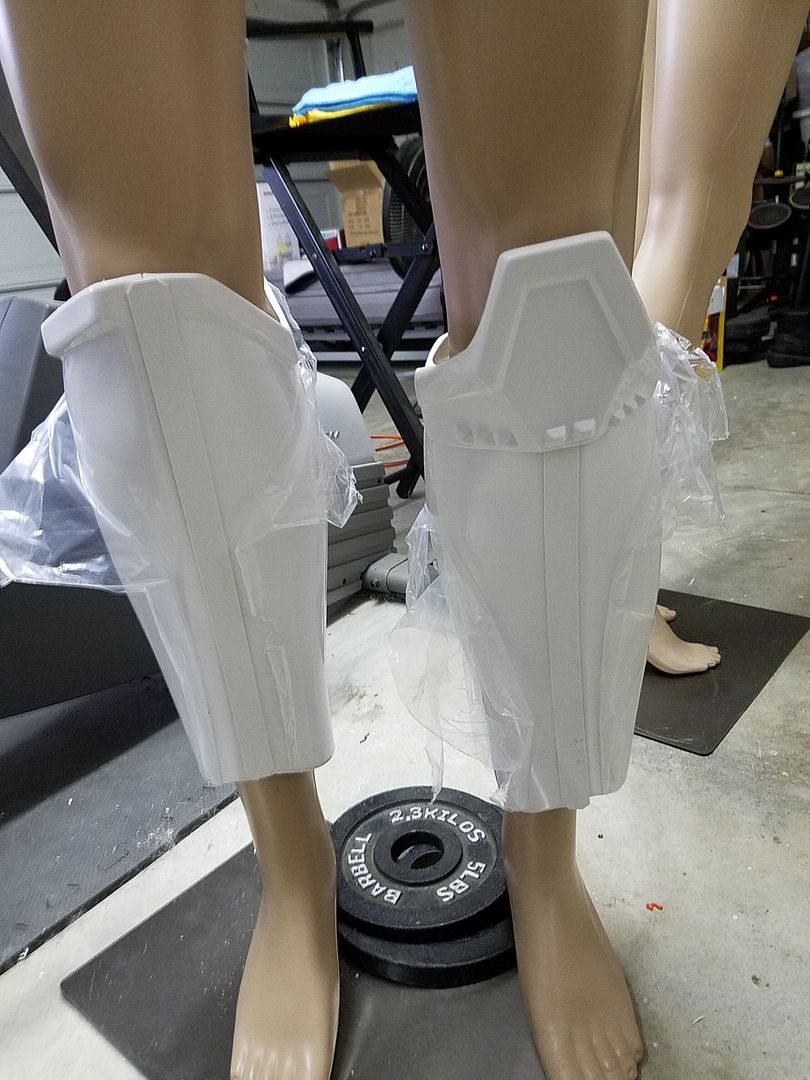
Home stretch now! Fully suited up for the first time!
Will be going to a build party tomorrow and will be requesting help with the thighs. I'm ready to strap them up to a garter system, but I really think I need to reshape in the back. Those points are stabbing me right in the butt cheeks. Of course, I didn't think to take any pics of that part.
Still to do.
- Shoulder bell strapping sew in dritz snaps.
- 3" side shims being glued in tonight
- side strapping after the shims cure
- Remove remaining clear plastic coating
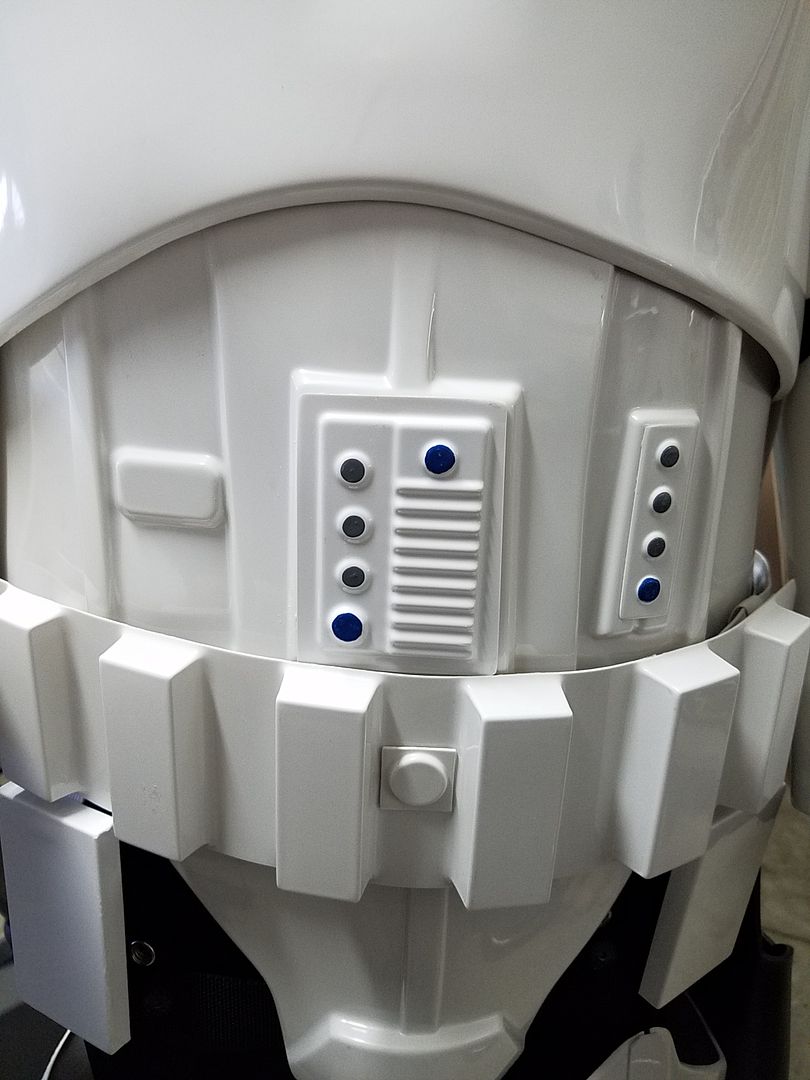
- Helmet electronics (got something special in the works for the voice system!)
Pics!!!

-
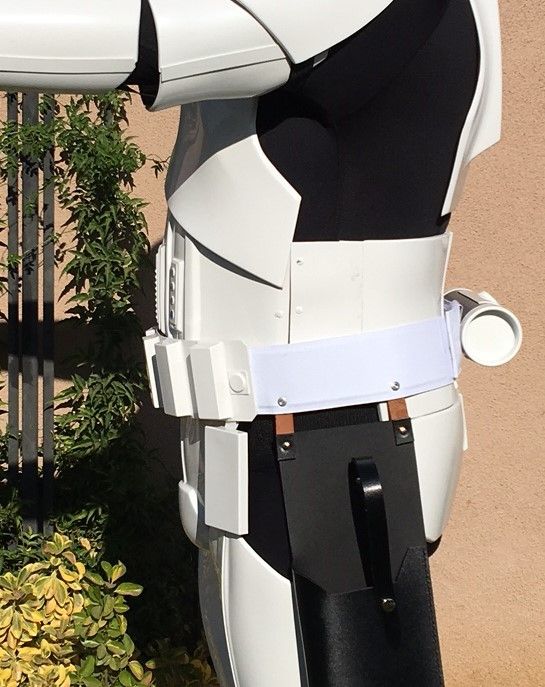
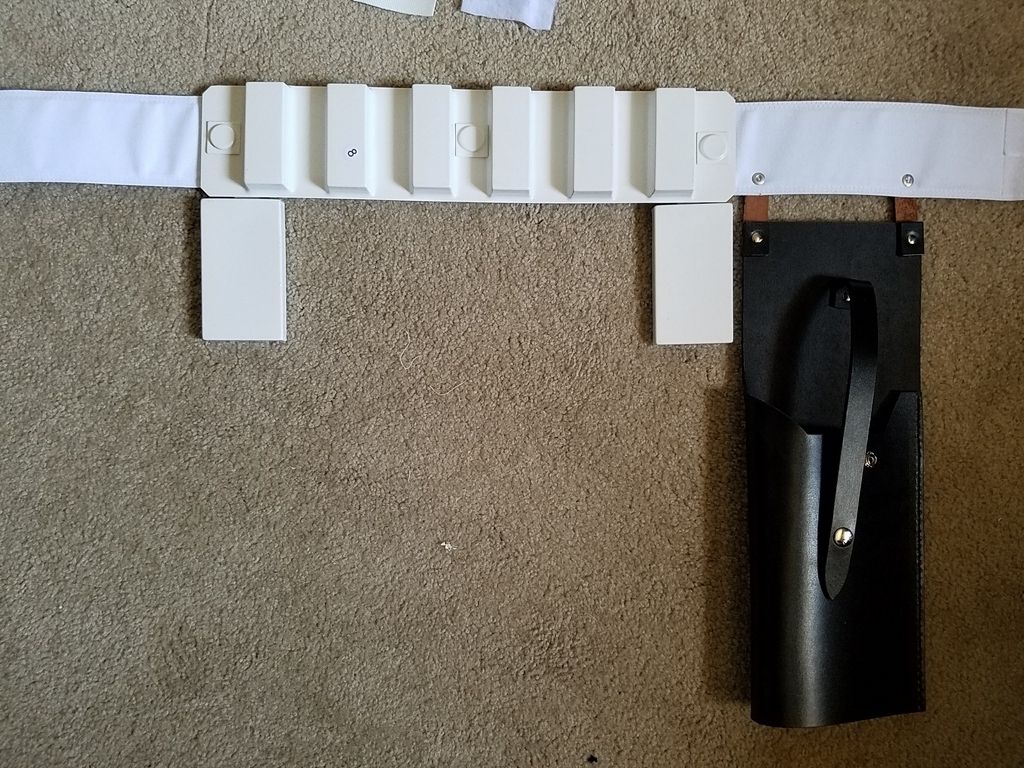
Belt! I received my belt from Kittle a couple weeks ago and am totally thrilled with the quality. Even still, I was putting that off for dead last as it seems those little caps are really stuck on there good. I was considering going for approval with the Anovos belt, but I just can't accept it personally.
First off, drill out the rivets! No problem.
Next, gently pry off the cap covers. Ugh, problem. These things are stuck so well, the under plastic is starting to tear on both the cap side AND the underside. So I'm aborting that for now.
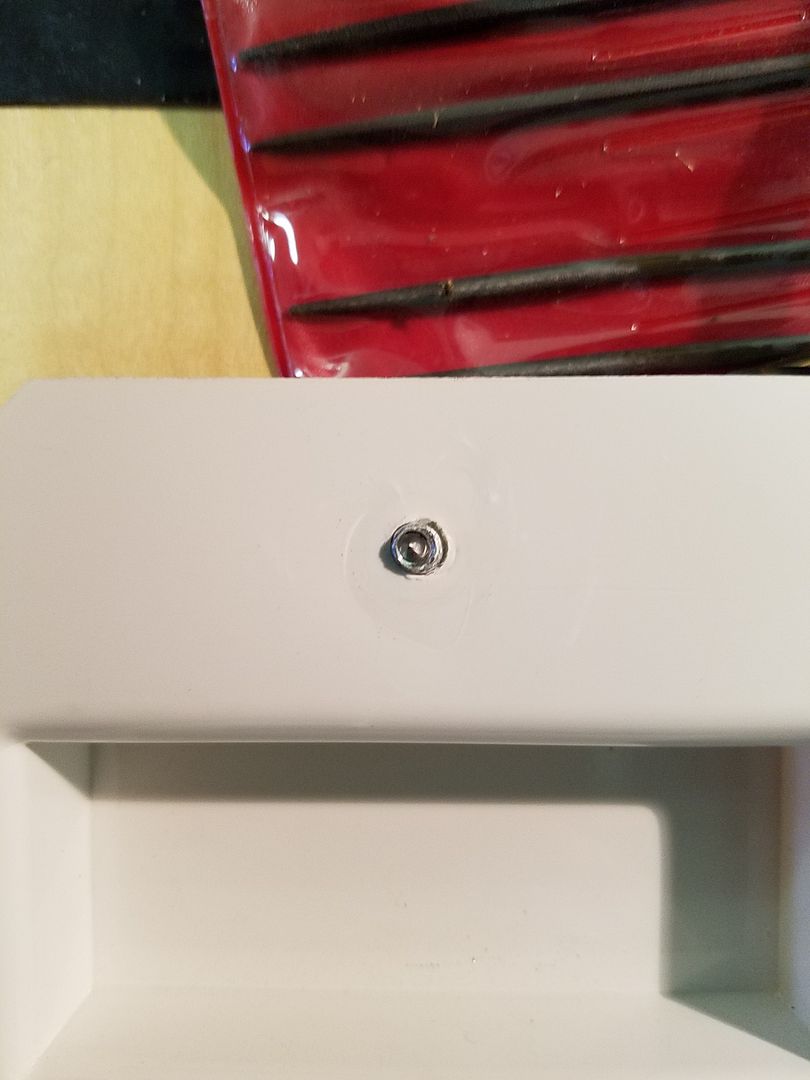
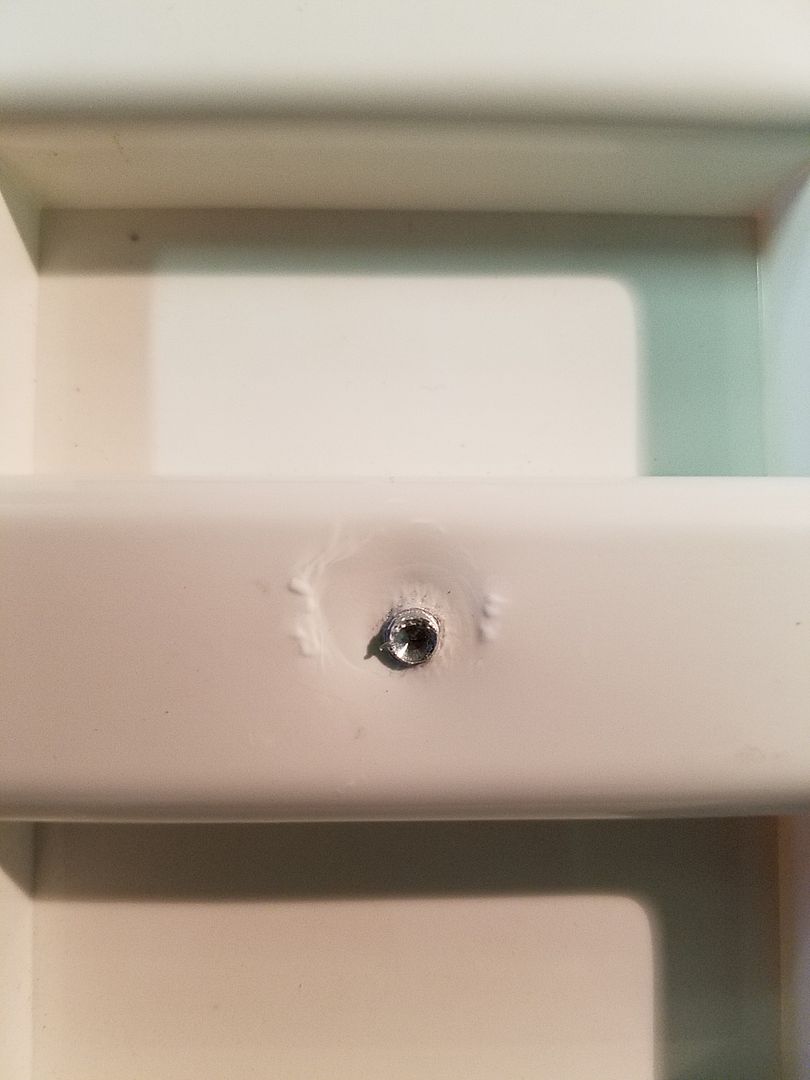
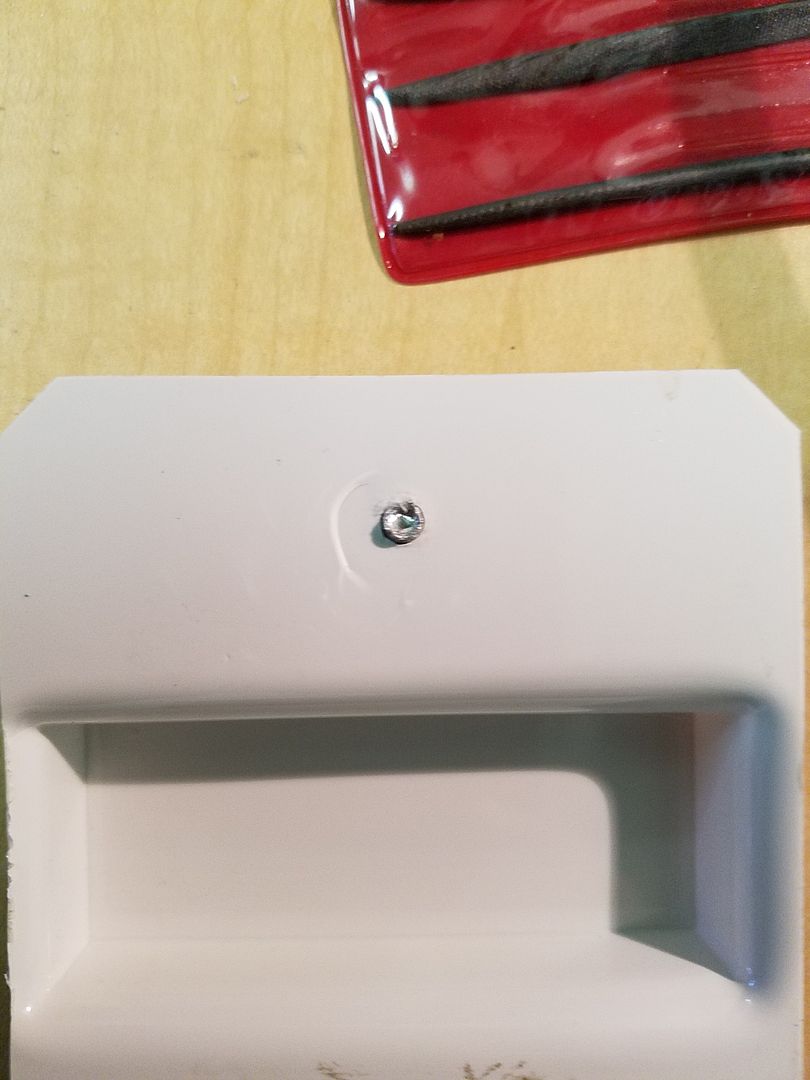
New plan. Follow this wonderful idea of using industrial velcro!:
Anyone have any words of warning on the velcro idea? Has anyone had any difficulty getting approved this method?
Belt was a quick project. All done. Velcro seems to work great. I guess I'll discover any pitfalls as I troop.
Before:
After:

-
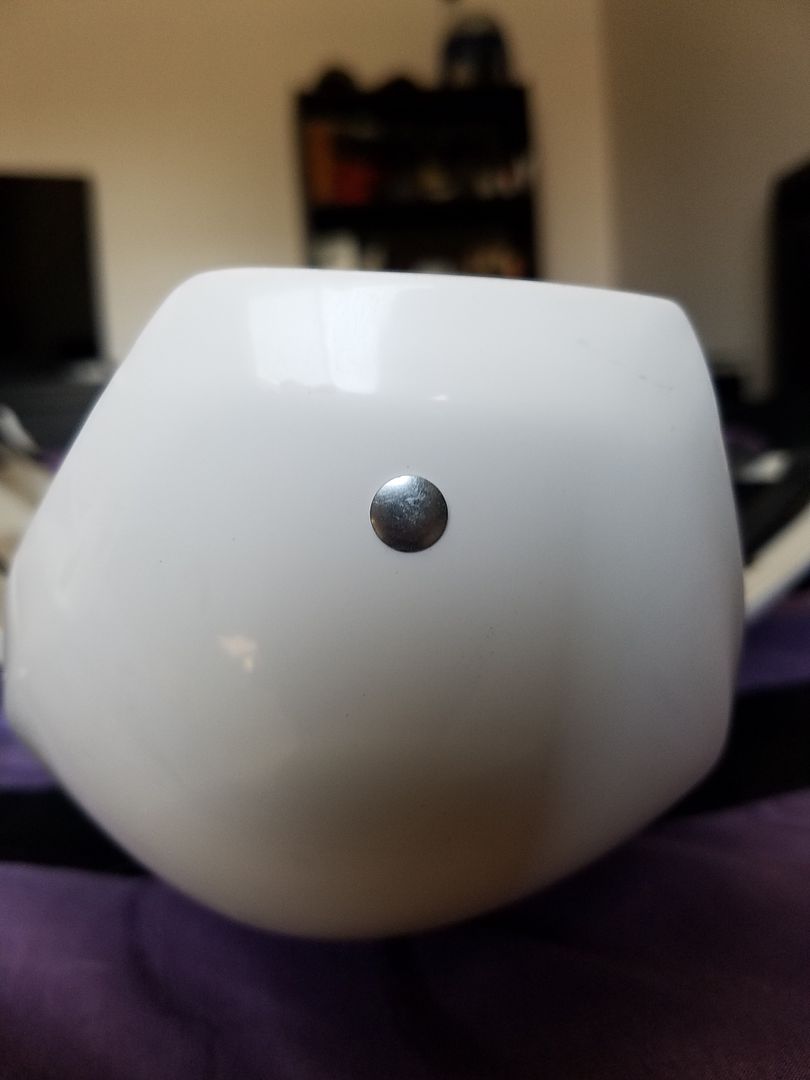
Argh! That sniper plate just did not want to glue on!
-
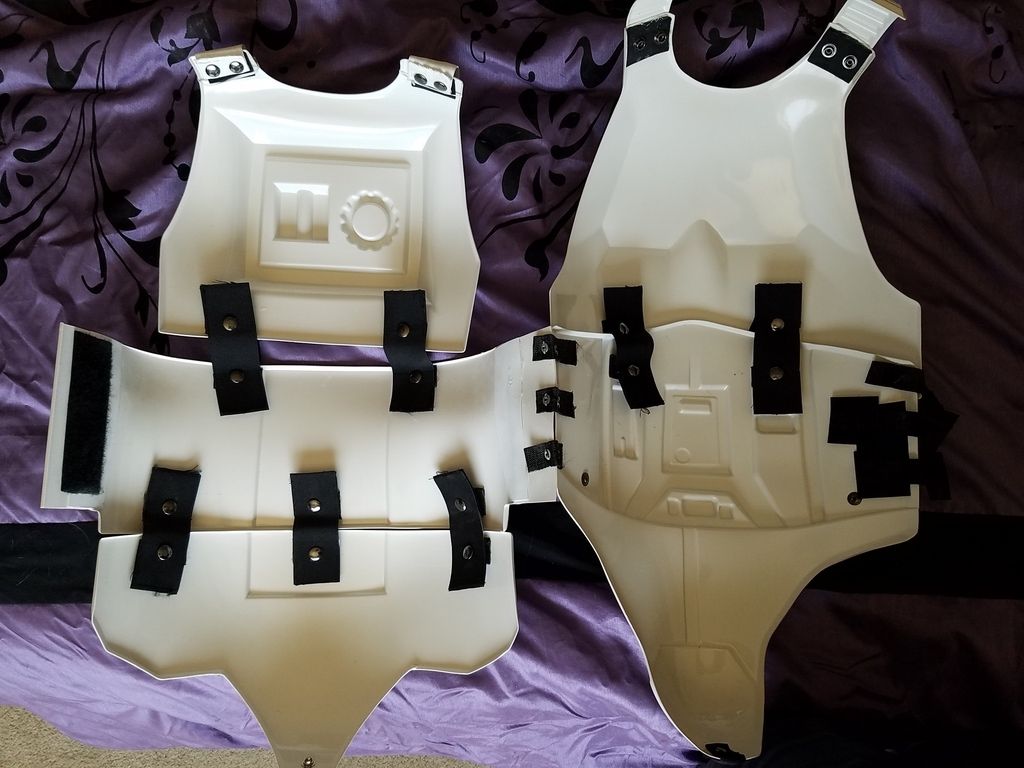
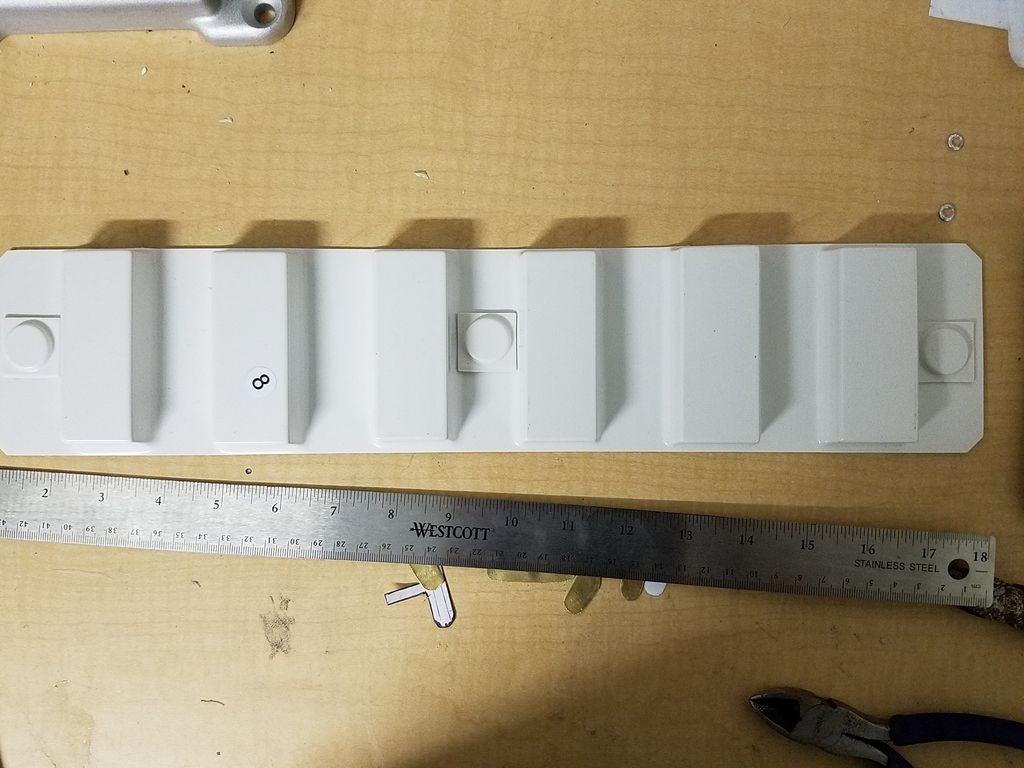
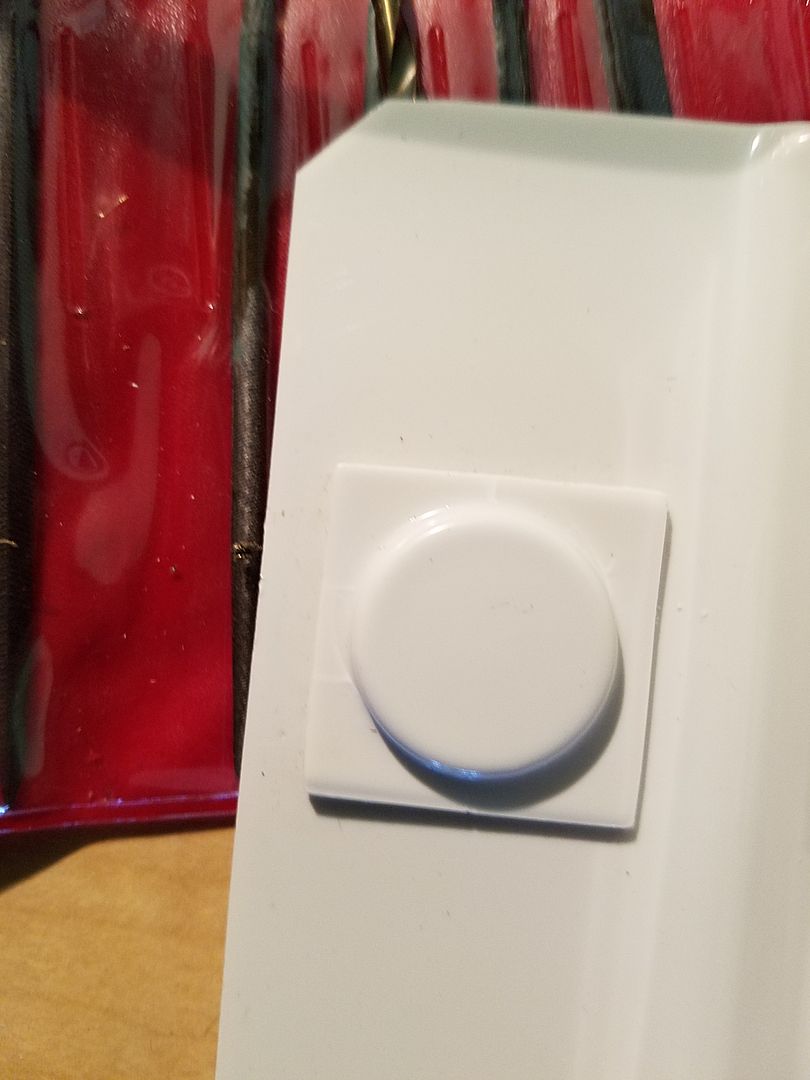
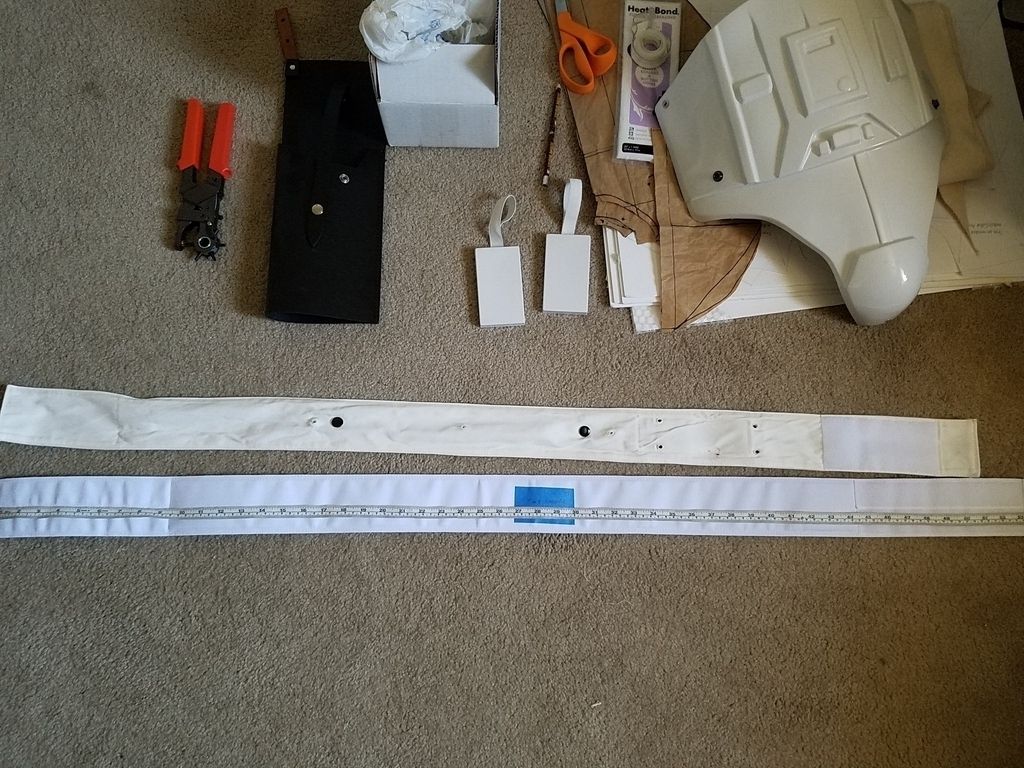
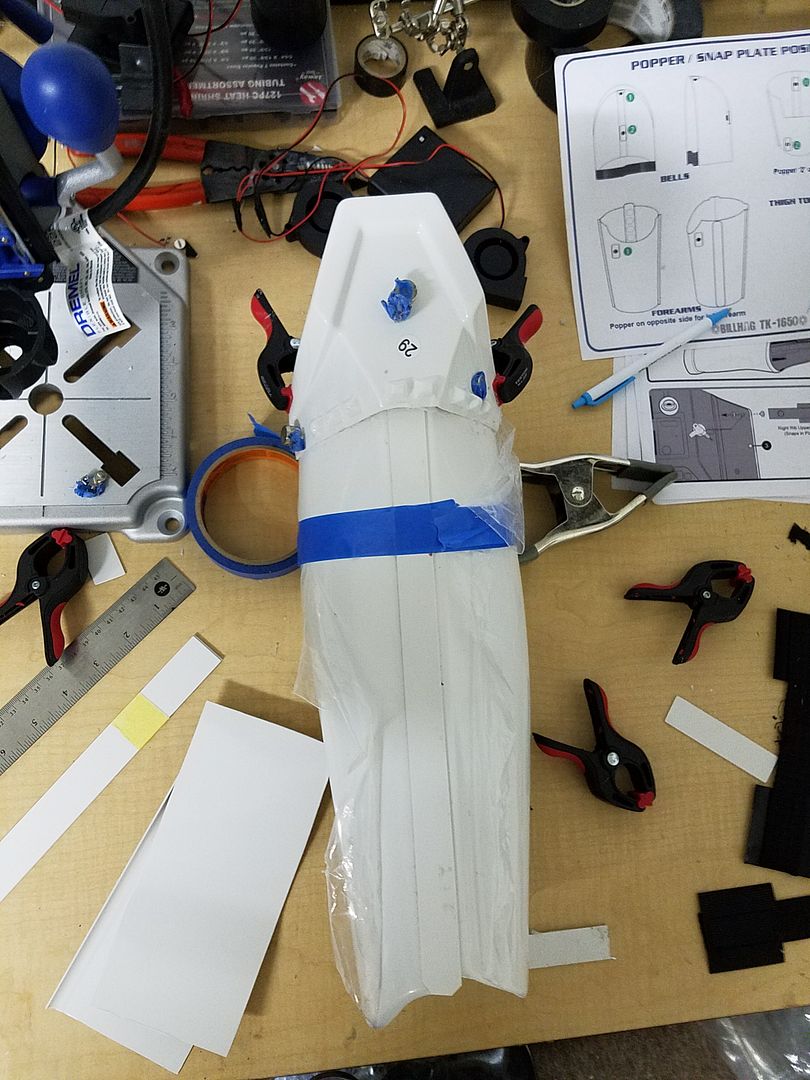
Snap plates and new rigging done. Started on the daunting task of shims. So far I've just measured and cut them out.

Got the sniper plate lined up decently I think and the ammo pack installed.


Calling it for the night.
Sent from my SM-G930V using Tapatalk

TK Talkie DIY Comm Effects
in Build Threads Requireing Maintenance
Posted
Sent from my SM-G930V using Tapatalk