

AthenaIII
-
Posts
79 -
Joined
-
Last visited
Content Type
Profiles
Forums
Gallery
Articles
Media Demo
Posts posted by AthenaIII
-
-
Daphne Blokland
TK-62317
Centurion
A4
Tony
http://www.whitearmor.net/eib/certificates/62317-centurion.png
-
8 hours ago, ukswrath said:Hi Daphne welcome back and thank you for your Centurion application. Thank you for making the suggested adjustments made by Andrew. Let's take a look.
CRL and Centurion Application Requirements:
All required submission photos appear to be present. Fantastic job on your build. At this time the FISD Deployment crew would like to welcome you to Centurion. Congratulations!

Other-Armor Fit/Assembly:
We have nothing more to add except for welcome to Centurion

Thank you!!!!! I'm so happy

-
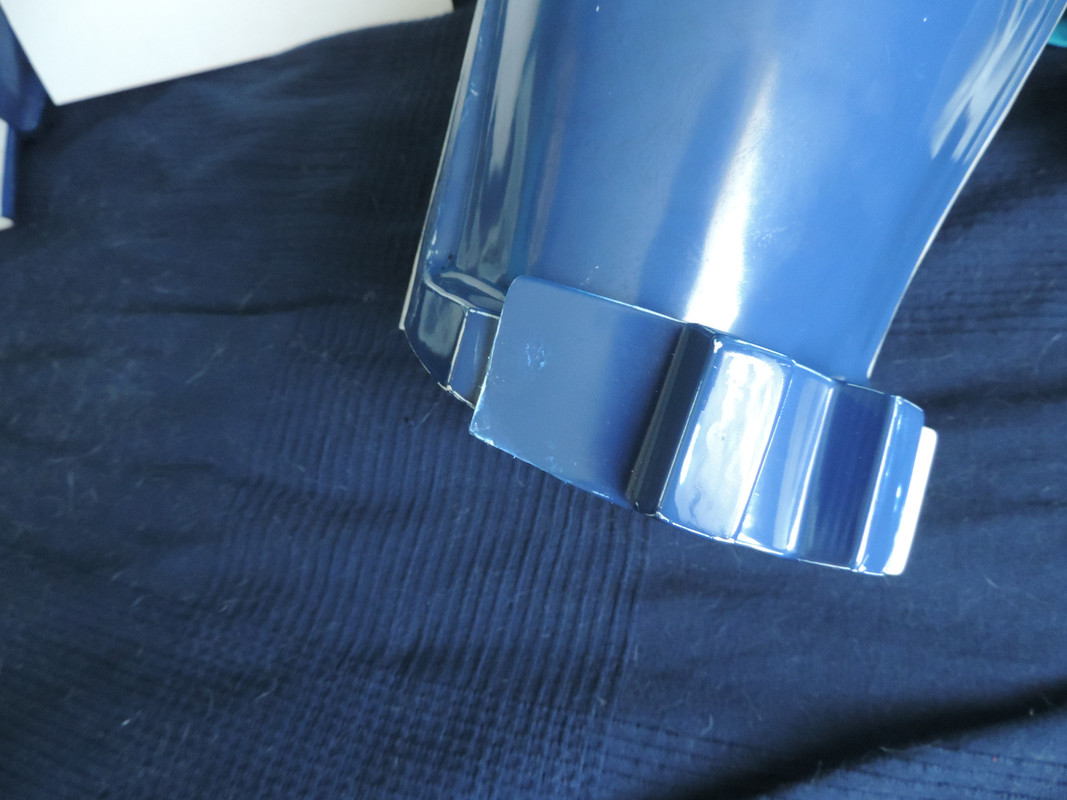
3 hours ago, gmrhodes13 said:
Yours is sitting on the ridge area not above it as you can see in the picture I posted, better image below
OH that part, I have a reason for that. The rotj armor doesn't have a pointy side. If I glued the ammo higher it would also be higher on the front, then it will be higher than it should be. If I glued it with angle, so that the ammo will be above the side it willbe a problem to glue it on the other side. Beside that you see it's glued straight. If I glue it straight and above it will look weird at the front. It will go up and you will see the thigh armor at the button.
So that why I did it like this, I can't make it like the crl because then 1 part looks like good and the other part wouldn't.
-
10 hours ago, magni said:
Good Luck Daphne!!!
They may ask for more photos. TD/sniper knee attachment for example.
Looking foward to another Centurion Commander joining the Ranks!
Thank you Randy!!! I really hope it's good enough! Been working on it for a long time!!!! If they need pictures I will make them
") 9 hours ago, gmrhodes13 said:
9 hours ago, gmrhodes13 said:Nice work, as Randy suggested there are a few images missing, you can check the guidelines here https://www.whitearmor.net/forum/applications/core/interface/file/attachment.php?id=6538
Additionally you will have to show the butt plate and backplate are joined
The CRL for the TKC had a recent update and one of the things changed was the knee ammo strip placement:
OPTIONAL Level three certification (if applicable):
- The thigh ammo belt shall be positioned on top of the lower ridge as seen in official references and is not rounded off like ANH.
Good luck with approval
Thank you!!!
That's right I showed that on the picture.
-
Trooper Info
- Name: Daphne Bloklamd
- FISD Forum Name: AthenaIII
- Legion ID: 62317
- Garrison:Dutch Garrison
- Legion Profile: https://www.501st.com/members/displaymemberdetails.php?userID=209466
-
EIB Aprroval Link:
Costume Information
- Armor Maker: CFO ROTJ
- Helmet Maker: RS ANH
- Neck seal: Darman
- Belt: CFO
- Boots: Local store
- Hand guards: Rubber gloves with Hand guards by Sonnenhein
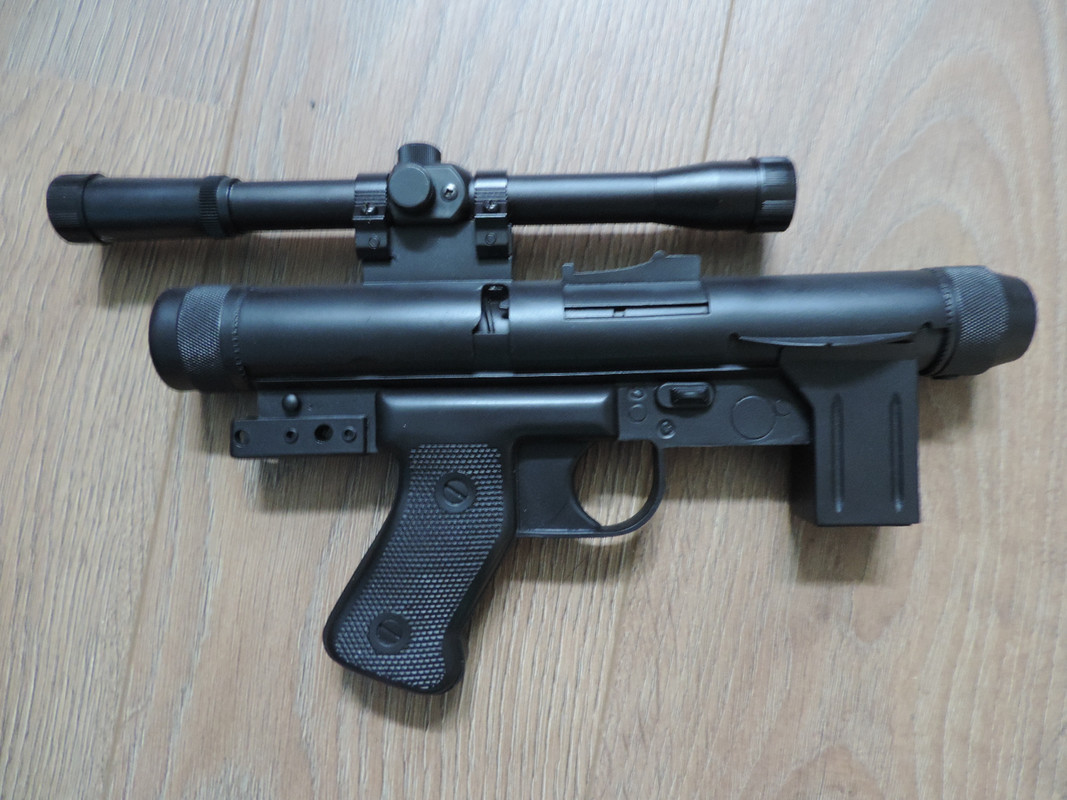
- Blaster: SE-14R
- Electronics: Homemade Fans and Hovi speakers Ukswrath.
Armor:
Full body front:
Full body back:
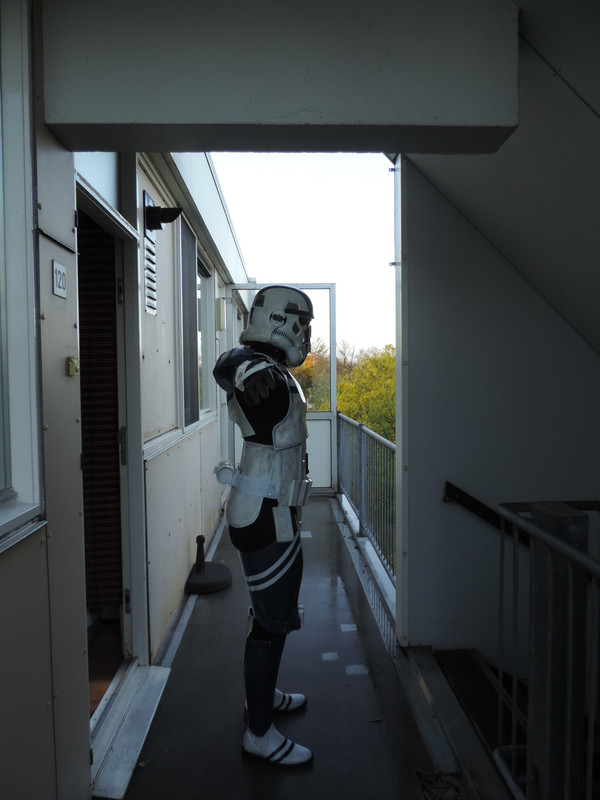
Full right:
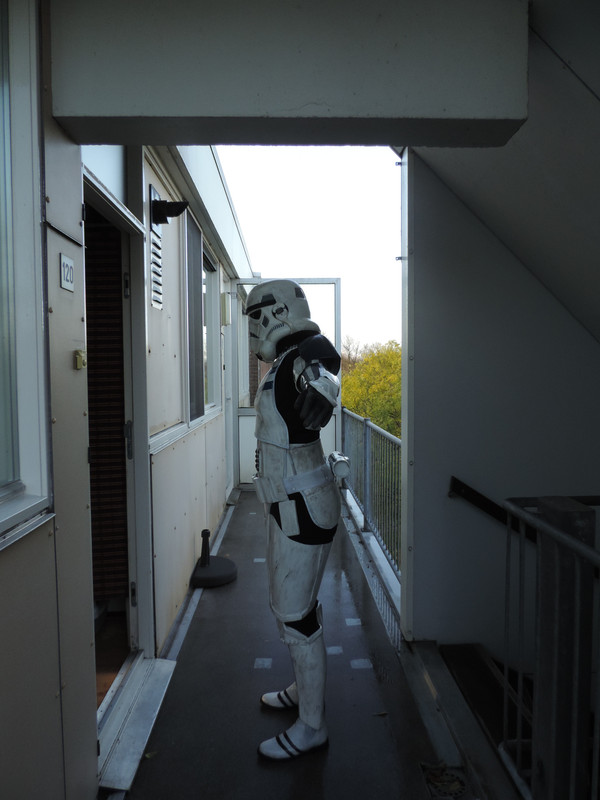
Full left:
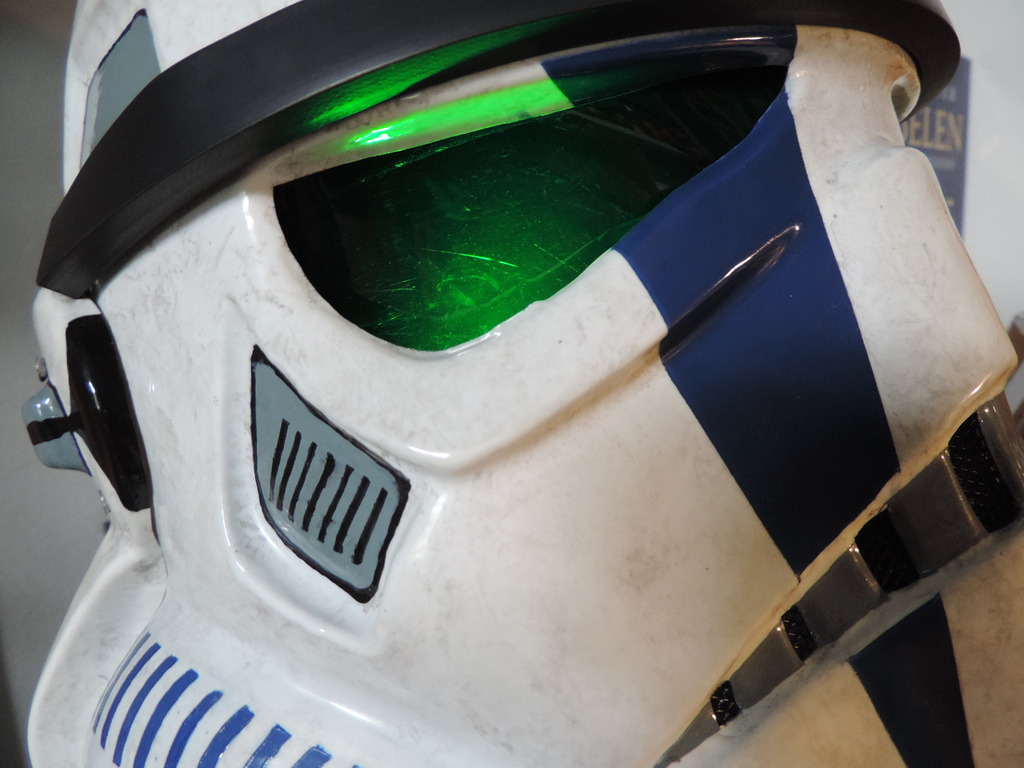
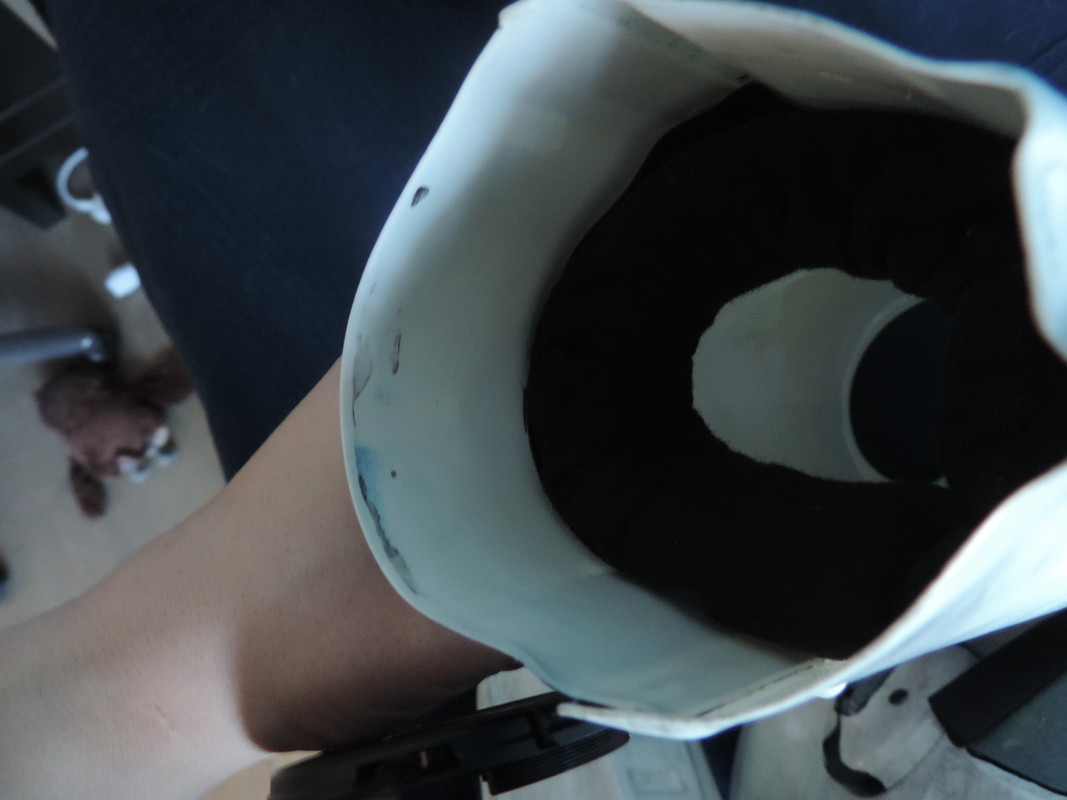
Helmet:
Front:
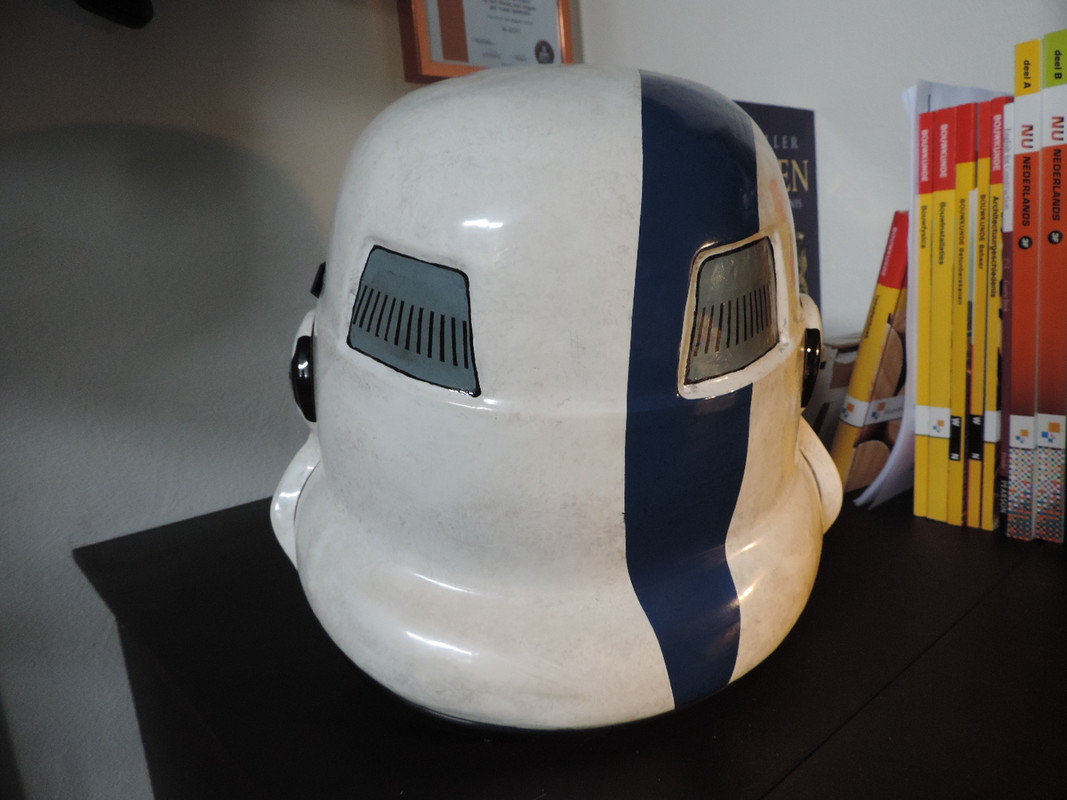
Back:
Side:

Forearm:
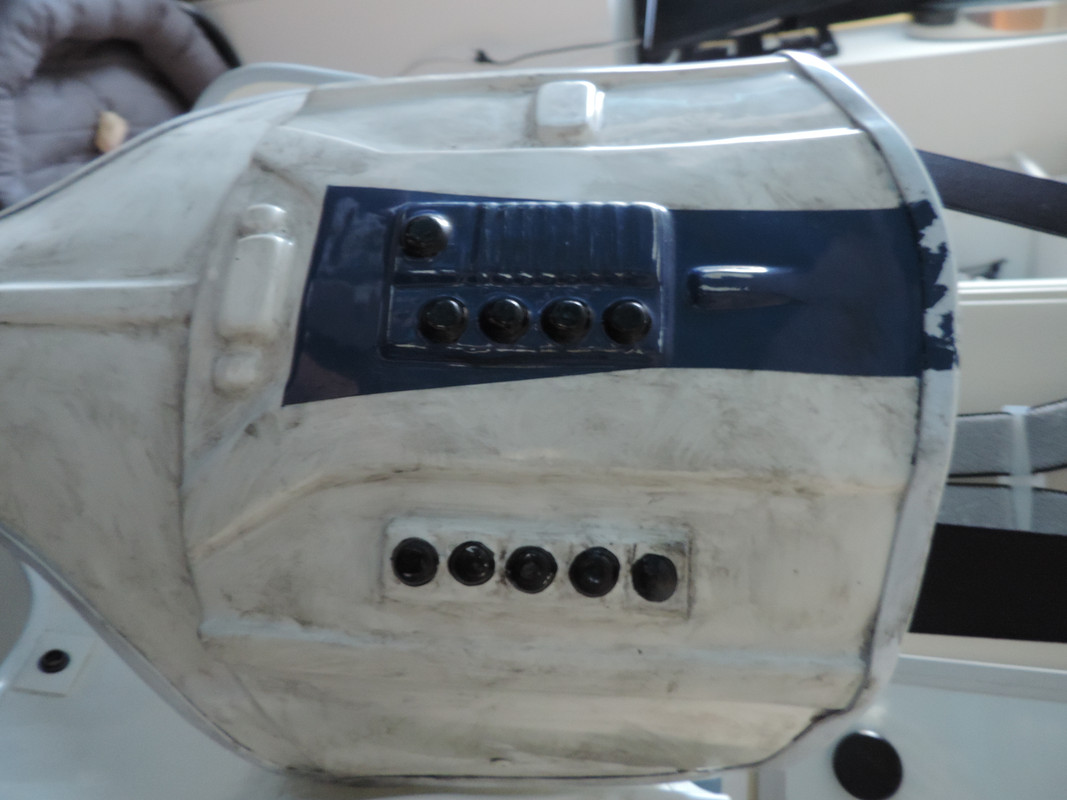
Abdomen and kidney rivets:

Abdomen detail:
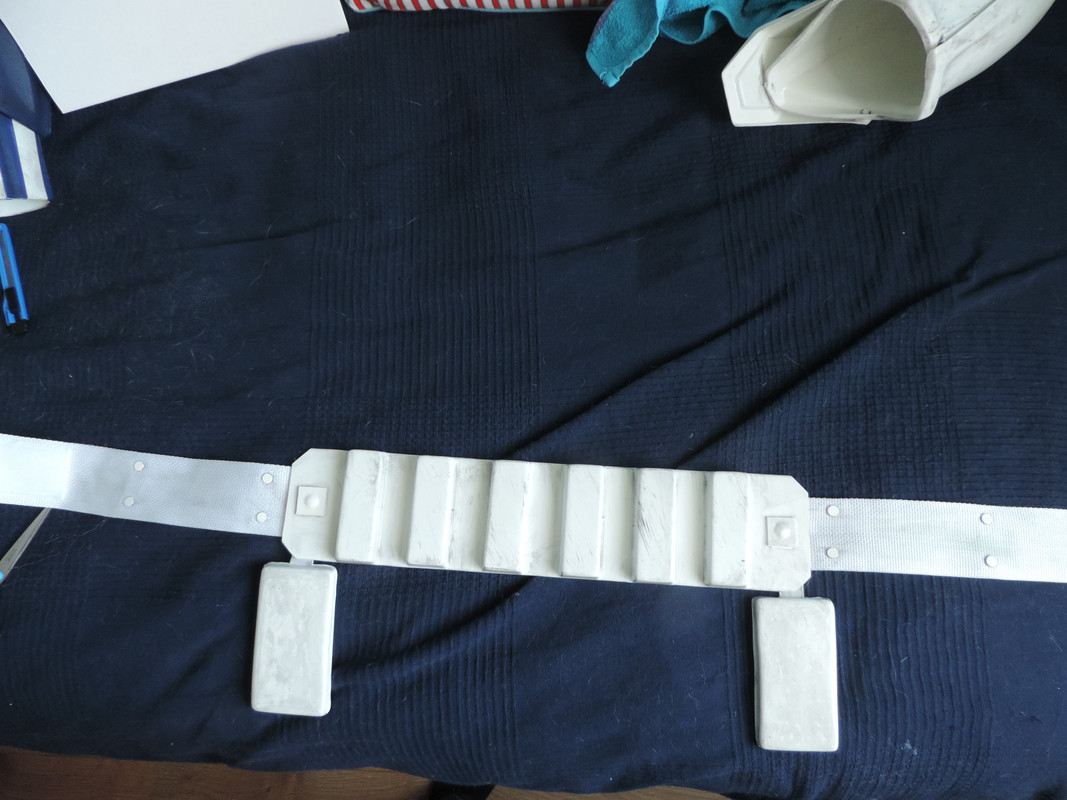
Belt:
Thigh ammo:
SE-14R:
-
WOW you are right but why?!?!?! They are grey in the game....

-
So a little update! I will add the pictures later.
I removed removed the return edge at the front of the forearms;
I painted one bump on the ears;
The belt proper has now eight Chicago screws on each side and painted them white. I used the ANH measurment;
A friend of mine is working on the overlap.
I want to change the strapping in my armor. I bought some elastic but dont know if it is durable... I have to check that.
The project is on a little hold right now. I have my intership on a construction site, so I'm wacked every day
and I have to work on the Saterday.
I have only a question. I have a shime between my torso and the back. I want to replace it but does it look better if the shime is in the background or on the same level as the rest. It's now on the background. I don't know if it looks better if it is equal with the torso and the back because of the u shaped gasket. What do you think?
@magniThat looks amazing! Love your battle damage
 (you need to paint your drop box )
-
9 hours ago, magni said:
I'm building a Commander myself and I used 8mm double cap rivets for all required.
For the Kidney I came in 4mm to the edge of rivet. My armor has the curve on top so I eyed it so rivet looked even and centered for top one and bottom one rides 4mm in and up above belt.
The ear bars are up to you.
Images have been saved by our great friends here on FISD!
Glad to see you going for Centurion! I don't recall finding one in my search. You may be a first. I'm building to Centurion as much as I can with lack of overlap being only setback.
Best of Luck Daphne!

Hello Randy!
Awesome that you are building a Commander! I really love it! Do you have some pictures? Love to see your commander :D.
The plan is to re-do the strapping on the inside, make it better. I have to order some black elastic and buttons
 .
.
I'm really excited to start on this project, hopefully it will suit better for me!
-
 1
1
-
-
22 hours ago, justjoseph63 said:
Not sure about Commander specs, as the details are not shown in the CRLs. BUT... I will try, based on level 3 Stunt requirements just until you can get some clarification. Answers are in red above. Again, please don't purchase any supplies until you get the go-ahead from someone like Tony or Andrew.


Wow! Thank you for the picture and the help!!!!
I will ask Tony or Andrew for what to do best
.
-
I'm working on my commander to get centurion status, I have EIB!
There are a few point I some help with! I have looked around on the forum, but a lot of pictures are gone....
- Forearms: No return edge on the inside of the front of the forearm is allowed.
So I have to cut it all away? The forearms are really big for my arm, I have foam in it so that it stays on. Is it a problem that you then see the foam? (it is black). (I need to resizes the length of the forearm, so it is a plus point, but I don't want it to look weird....)
-Kidney & Posterior Armor: Two rivets shall be present on each side of the kidney plate, approximately 4mm from the inside edge of the U shaped gasket or molded lip that is adjacent to the ab plate. There will be one rivet near the top and one near the bottom on each side. They may be painted white, or not.
What is the head size of these rivets? Is it 4 mm from the top and 4 mm from the side? Are Chicago screws allowed?
-Belt: The belt proper shall have (eight total) white rivets. Two rivets close to each side of the thermal detonator, and two rivets approximately an inch away from the edge of the ammo belt (The rivets form a rectangular pattern).
Again are Chicago screws allowed? What is the head size of the rivets? Sizes of the rectangle pattern doesn't matter?
-Thigh Armor: The thigh ammo belt shall be connected by brads/split rivets only - standard rivets are not acceptable.
Again are Chicago screws allowed? What is the head size of the rivets?
-Helmet: Ear bars shall have only one or two bumps painted in black (rank stripes).
Almost all of the pictures on the forum that has been shared are gone, which one do I have to paint?
I have a coverstrip at the back of my thighs, I have to replace that with a overlap. I want to make a file of this overlap and 3D print it at school. I'm not really good with that so if anyone has the overlap in a 3D file and want to share it, I would be so happy!!!! Also I need to upgrade my battle damage
.
Any help is welcome
I have been looking around but couldn't find it. Are there any Centurion Commanders?
-
Does anyone know where I can order a tie pilot form rogue one?
-
Congratulations Daphne! Well done!
Tnx Theo, Im really happy
Congratulations!!.... good job.
Tnx Louis!!!
-
Hi Daphne, thank you for your patience and welcome to your EI review.
CRL and EIB Application Requirements:
All submission photos have been posted. Your armor displays all the necessary elements to qualify for Expert Infantry. Welcome trooper!
Other-Armor Fit/Assembly:
In this section we review observations made by your fellow troopers and ourselves. Some observations may lead to suggestions to improve the overall look of your armor. If any suggestion affects any application, it will be listed separately in the above or below sections. We have a couple areas we'd like to mention.
This is most probably a photo issue more than anything but it might pay to shorten up the connecting strap between the back and kidney plate on your left side and close up the gap.

Also if you can raise your fore arm so the gap is closed up and they match, you will look perfect.

Centurion Suggestions:
Because Centurion photos show much more detail than EIB, items pertaining to Centurion might be seen there and not here. We try to point out all we can from what is seen but the final accuracy is the responsibility of the trooper. This is also where we try and get you in the best possible position for a successful Centurion application.
Not much to add, although we did struggle a little to see the level of scuffing/weathering to the Blue stripes on some parts of your armour, I think due to the level of light and reflections, so as a suggestion, if you intend to apply for Centurion, could we please ask for you to retake some of the photos so it is clear to see the scuffing matches the overall level of weathering of this great build. other than follow the Photo guide and CRL section for Centurion level, and we hope to see you there in the near future.
Congratulations!!
Thank you Andrew!
Some feedback on you feedback
the gap at the back will be solved, I’m changing the strapping on the tights. What I had is that my tights are strapped with buttons on my torso, that didn’t go well that’s what you see now. My right tight is hanging on my strapping on the inside and my left tight is button on my torso. I’m changing that !The cap on the forearms is because they don’t have strapping. Normally I use patting on the inside of the forearm, because they are too big and too long and to keep them in place. I don’t think I used it here

About the battle damage on the blue part, the paint doesn’t really show the black paint. I had to add soap to paint, so it would stay on the blue but I used matt black not satin{I think it’s more real than satin, dirt is when its dry a matt collar} it is there but you can’t really see it in a photo.
-
Great looking Commander Daphne! Well done! Good Luck!
Yes! Good to see your EIB request Daphne! Looks awesome!
Tnx Guys!!!
-
Name: Daphne Blokland
TK: 62317
Forum Name: AthenaIII
Garrison: Dutch Garrison
Armor Maker: CFO
Helmet Maker: RS Props
Blaster Type: SE-14R
Height: 177 cm
Weight: 83 kg
Boot maker: Homemade
Canvas Belt: CFO
Hand Plates: Sonnenhein
Neck Seal Type: Darman
Electronics: Homemade Fans and Hovi speakers Ukswrath.Armor Photos
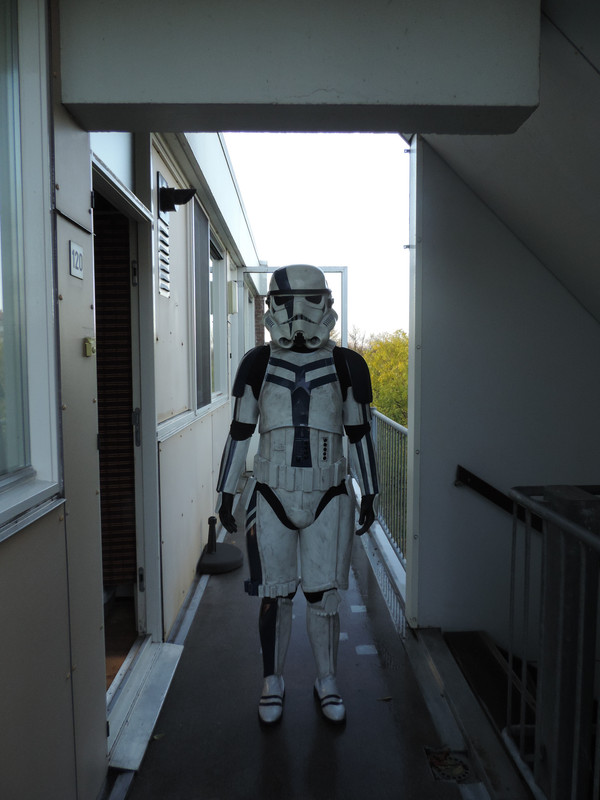
Full Body Front:
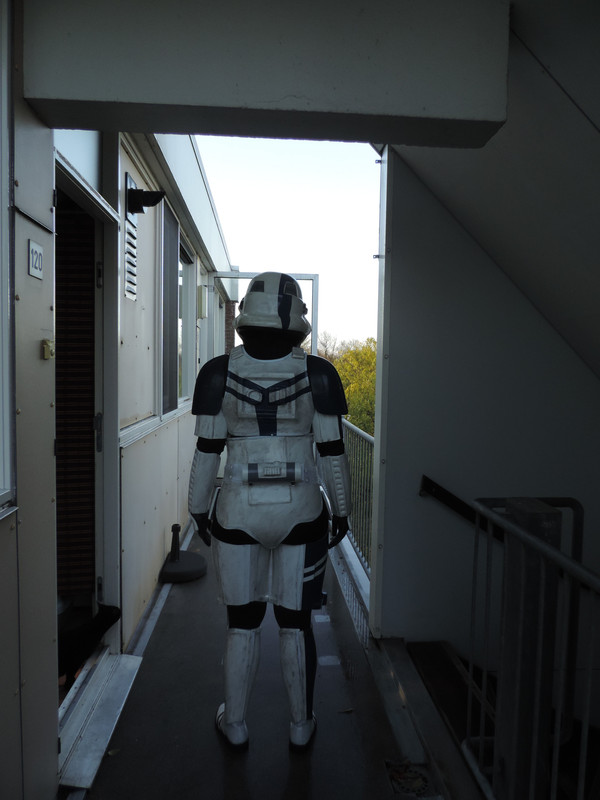
Full Body Back:

Full Right:

Full Left:

Right Side Detail:

Left Side Detail:

Shoulder detail:

Bridge detail:

Helmet Detail Photos
Front:
Side:


Back:

Hovi tip detail:

Lens color:

Accessory Photos
Ammo belt:
Neckseal:
Blaster left side:

Blaster right side:

Gloves and hand plates:

{ the battle damage is not really visible but its thereJ}
Thermal detonator back:

Action Shot:

Bucket off:

-
3
-
-
From my understanding of the CRL, it will work. Any comment from more experienced trooper?
Awesome! Then i will look for some leather!
-
Wow that's a difference but does the 2mm also work?
-
Hey nice tutorial! 1 question how thick is your leather?
-
-
Did it work with the magnets? Love the idea!!!
-
Just out of curiosity how did you assemble the holster to the belt?
-
Looks amazing!!!!
-
1
-
-
Ok just checking!
<br>Nicely done!
-
Wow looks nice!<br>
How did you do that? Bullet holes, the scratches and the grey stuff?! Looks amazing!!! You know that a commander may not have a holster right! You can make it wit buttons but may not on the belt!!!!


TK-62317 requesting TKC Centurion status [419]
in Request Centurion Status
Posted
Thank you guys!!!!