TheRealAnakin
-
Posts
35 -
Joined
-
Last visited
About TheRealAnakin

Recent Profile Visitors
1,160 profile views

-
Does anybody have an anovos discount code?
TheRealAnakin replied to greyfox's topic in Hard Armor (General Discussion)
Here's a $25 discount code I won't be needing. Good for orders over $200. Expires on June 8th, 4:32 PM.<br><br><br> 1R9G-RHNQ-VU8L -
Does anybody have an anovos discount code?
TheRealAnakin replied to greyfox's topic in Hard Armor (General Discussion)
Here's the special 10% subscriber code, only valid today: STPADDYS2017! <br> (when ordering you'll receive an additional 10% code, valid through March 31st). -
Does anybody have an anovos discount code?
TheRealAnakin replied to greyfox's topic in Hard Armor (General Discussion)
Oh, and btw. It looks like Anovos are planning a one-day special offer tomorrow. <br> For newsletter subscribers only it seems. May be worth looking out for. -
Does anybody have an anovos discount code?
TheRealAnakin replied to greyfox's topic in Hard Armor (General Discussion)
I've got a 10% off any order code (not payment-plan purchases).<br> It expires on the 20th this month. PM if you want it. -
TK-82183 requesting 501st access. <br> <a data-ipb='nomediaparse' href='http://www.501st.com/members/displaymemberdetails.php?userID=22120'>http://www.501st.com/members/displaymemberdetails.php?userID=22120</a>
-
Finally got my metal aerator pieces today. Looks so much better now! I highly recommend this upgrade to every standard FO helmet buyer out there.
-
Thanks! And thanks for the pics!.. Well.. darn it, looks like I'll have to get a metal one now.. It looks so cool!..
-
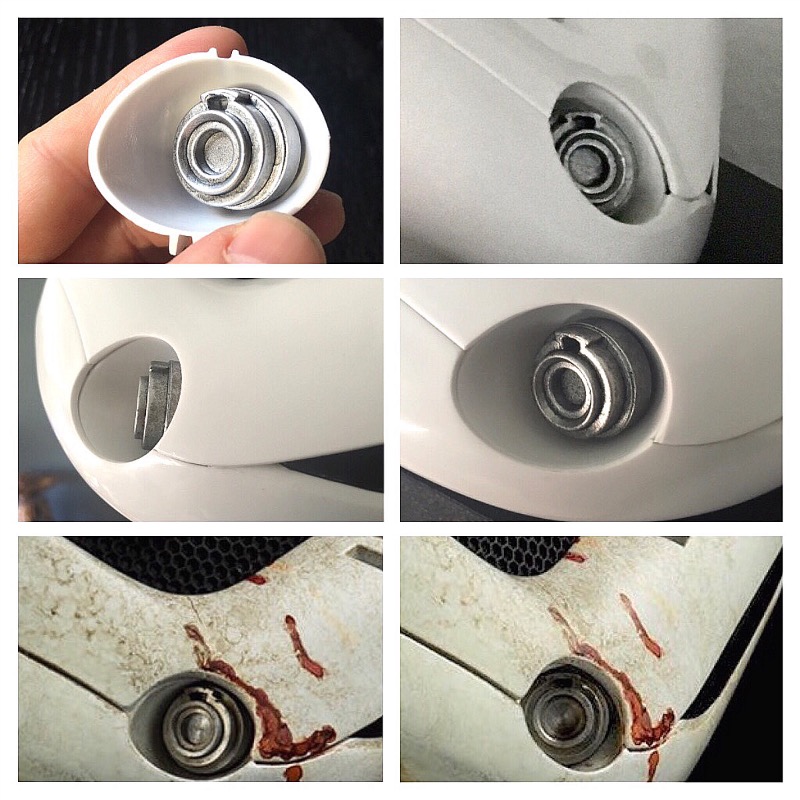
Thanks I was actually looking for an accurate one in metal for a while, but couldn't finde any, and had to settle for resin. I haven't seen VaderPainter's version, and can't seem to find it - do you have a picture of it?.. Well, I was able to remove the cavity without too much trouble, thankfully it wasn't glued on too extreme. I tried to dissolve the glue a bit first, but I'm actually not sure if it did anything or it was loose enough to pull off to begin with. The aerator part was quite loose, I only had to push it gently from side to side to make it pop out of its socket. There's a small flat piece inside the cavity part securing the aerator's (wrong) position from behind. I cut that piece off, and then I used acetone for removing the remaining and smoothen things out. Be careful when using acetone on any plastic parts, it will melt the material very quickly!! But you can actually use it at your advantage to remove unwanted parts, glue residue and paint. I started with sanding the hole in the helmet to a more uniform and accurate look, then I sanded the cavity part to fit snugly against the hole and when it looked good I began preparing the aerator to be refitted. I filled the back of the aerator with putty and pushed it inside the cavity to make it conform to its shape, creating a larger surface to apply glue on. And yeah, that's about it.
-
Congrats on getting the helmet! And yeah, the helmet looked good in every other way, but the mic-tip area really bothered me. But something can be done, and the good news are that you don't need a whole lot to correct it.
-
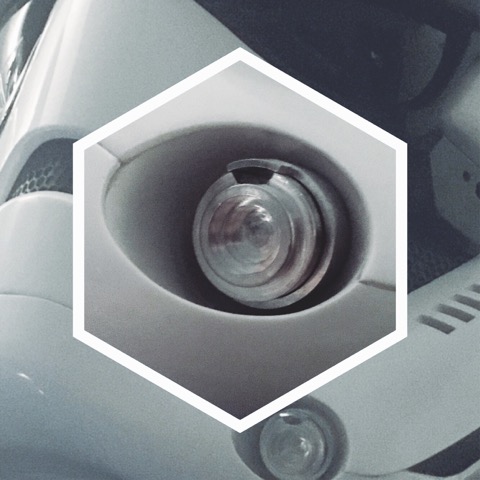
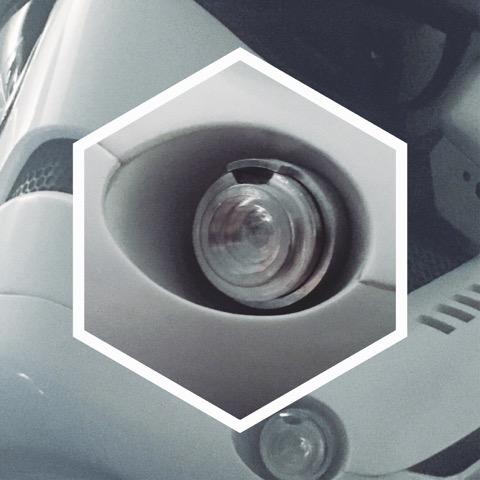
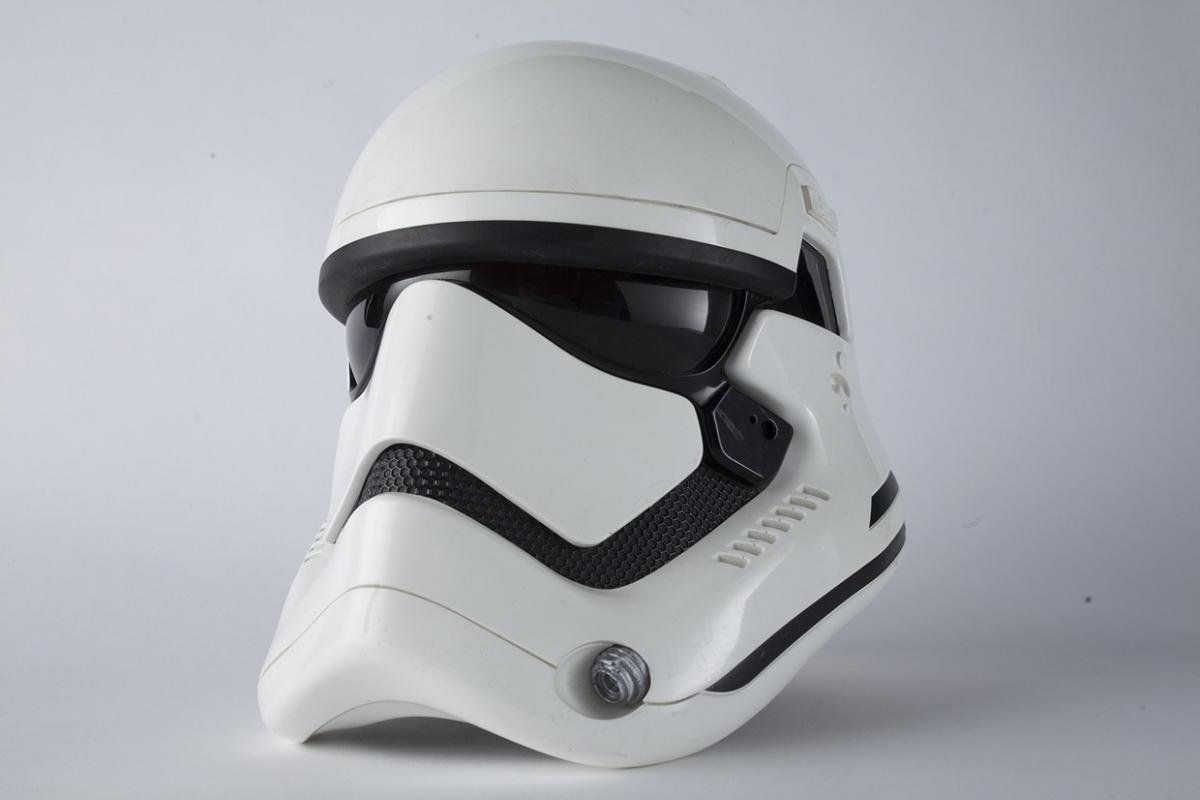
Finished the mic-tip replacement today! <br><br><br> After PropShop announced their Finn helmet "replicas" and a few nice close-ups were shown, I found that the original Anovos mic-tip wasn't all that inaccurate - it just needed to be cut and sanded down a bit, besides from being placed in a different position of course. So the one I bought for this project won't be needed anyway.<br><br><br> The paint on the mic-tip looked a bit plasticy and fake, and I considered doing a chroming of it and then weather it. But I tried weathering it first with a black enamel paint wash just to see how it'd look, and it actually made the thing look more real. So no need to repaint.<br><br> I'm very satisfied with the look now. <br><br> Now I'm just considering weathering the entire helmet to match the Jakku troopers look.
-
Anovos First Order Stormtrooper Helmet Mic Tip
TheRealAnakin replied to StarWarsTom's topic in TFA Stormtrooper
I'm in the process of replacing my mictip with a more accurate resin one. <br> I have no idea how it'll turn out. But hopefully it'll look nice and screen-accurate.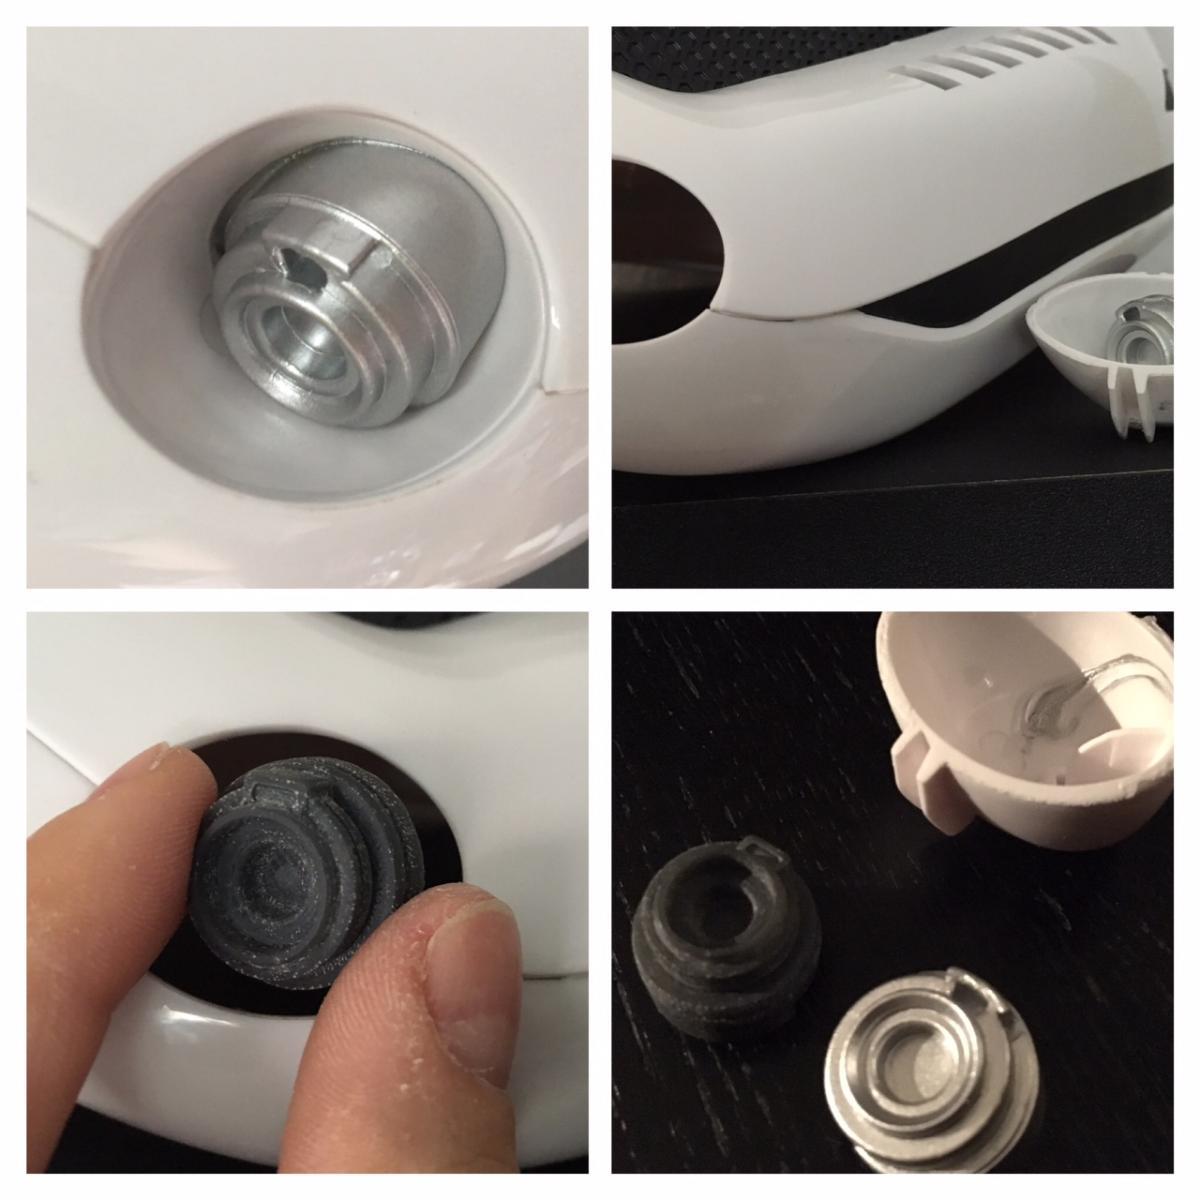
-
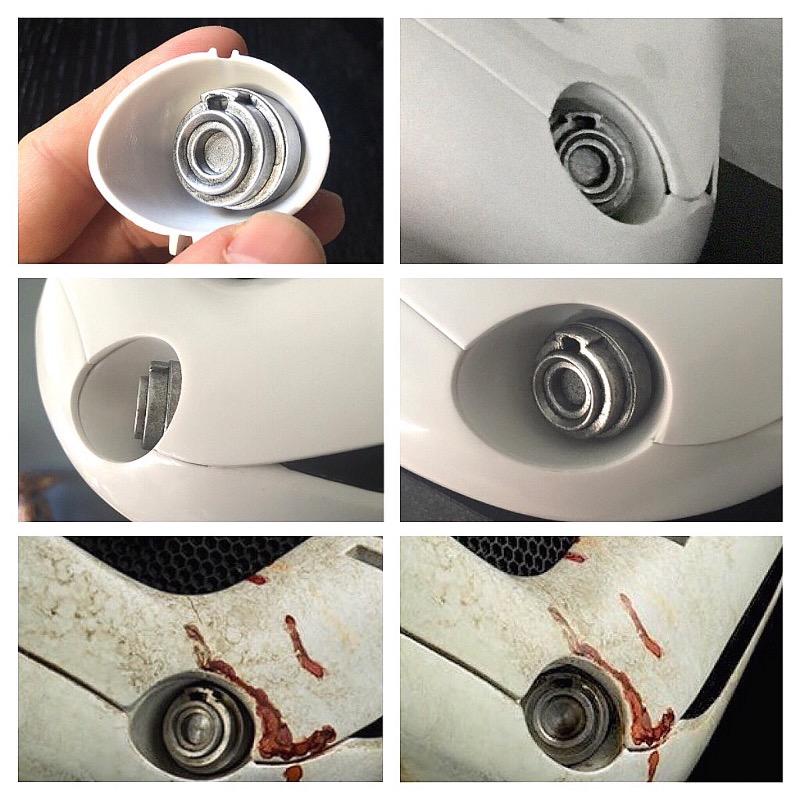
As many of you guys know, the 'standard line' version of the First Order stormtrooper helmet by Anovos has a weird looking mictip attached. It's pointed slightly downwards, it's strangely elongated when looking at it from the side, and it's missing details compared to the screen-used helmets.<br><br> I think Anovos did a great job on this helmet, it looks cool and very accurate in most places. But the mictip area always bugged me. And I knew that if I ever was to buy it, something needed to be done.<br><br> As soon as I got it, I began looking for how-tos and alternatives to the Anovos mictip. But I couldn't really find any threads here or anywhere.. just one where people were asking for help with the same problem.<br><br> After a bit of research I went to Phoenix Props, who's making his own FO helmets. I asked if I could buy just the resin mictip from him, and fortunately it wasn't a problem. The next challenge would then be to prepare the helmet for the swap.<br><br> The cavity in which the mictip resides, was a seperate piece - but I wasn't sure if it could be easily removed. To my luck Anovos hadn't used very much glue, so it came off quite easily. I brushed a tiny bit of acetone on the glue around the edge to dissolve it a bit. But I don't think it's necessary. It's also very risky bringing acetone near any plastic product, so I wouldn't recommend anyone doing so. Only if the cavity is completely impossible to remove otherwise.<br><br> Next I removed the mictip from the cavity - it popped right off with a gentle push and a flat metal object to wiggle it loose.<br><br> Now I just need to clean the cavity of glue and silver paint, sand and shape the new mictip to fit, and then paint and install it all.<br><br> Hope it turns out good. Finger's crossed...

-
Does anybody have an anovos discount code?
TheRealAnakin replied to greyfox's topic in Hard Armor (General Discussion)
Today's 10% code: WONDERSUNDAY16<br> (can be used 5 times, otherwise expires tomorrow) -
PM sent
-
Does anybody have an anovos discount code?
TheRealAnakin replied to greyfox's topic in Hard Armor (General Discussion)
Here's todays code from Anovos: WONDERSATURDAY16<br><br> It only works 5 times, and expires tomorrow, when a new code is posted on their website.