


JohnnyChaos
-
Posts
105 -
Joined
-
Last visited
Content Type
Profiles
Forums
Gallery
Articles
Media Demo
Posts posted by JohnnyChaos
-
-
if I tighten them they lift the butt plate higher
-
the back is as low as it'll go. the shoulder straps are only attached about an inch and a half on the front and back to give me as much as possible. and I heat bend the top section of the back so it sat as flat to me as pos.
maybe I need to tighten the crotch strap a bit as well. -
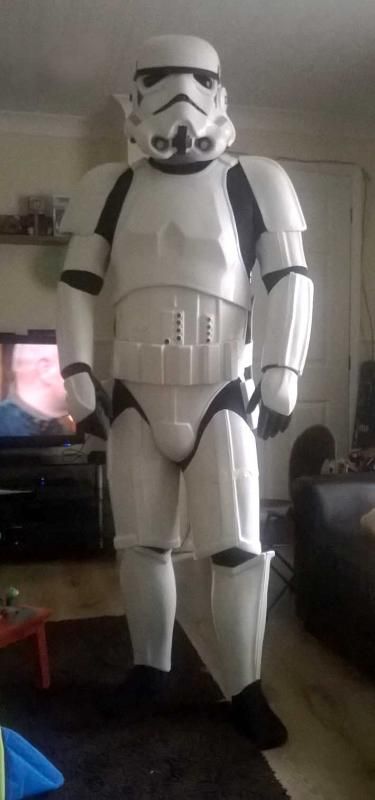
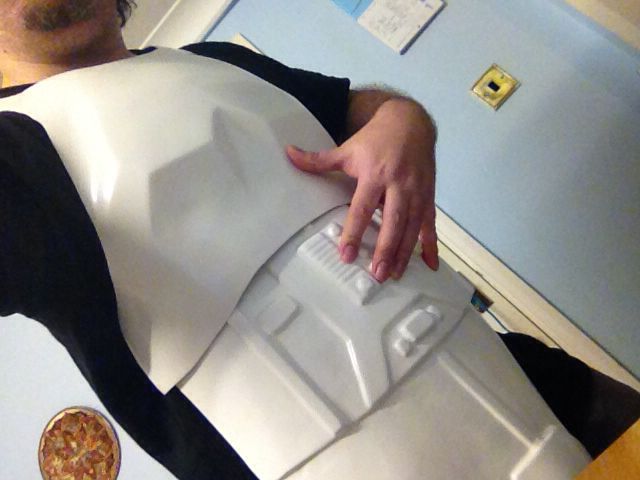
quick test fit. pleased with how it's looking.Need to get my DSLR setup next time.Going to pull my left thigh apart and trim the seam smaller.. I have a bit of room and for some reason it's bigger than the other side. I'll blame it on my man-flu.Not sure if I need to drop the lower back panel down an inch or two.
-
Painted my buttons and cut out my TD/O2 canister today while waiting for my thigh bits to glue.
-
As an arcade collector/restorer I've seen retrobright used a lot over the years, but id personally be very wary of using it on armour as its known to make plastics more brittle. It can also deform PVC and a few other plastics.
Obviously your results look good, but people should be v careful.
-
That's real cool. Is it all hand made or bought?
-
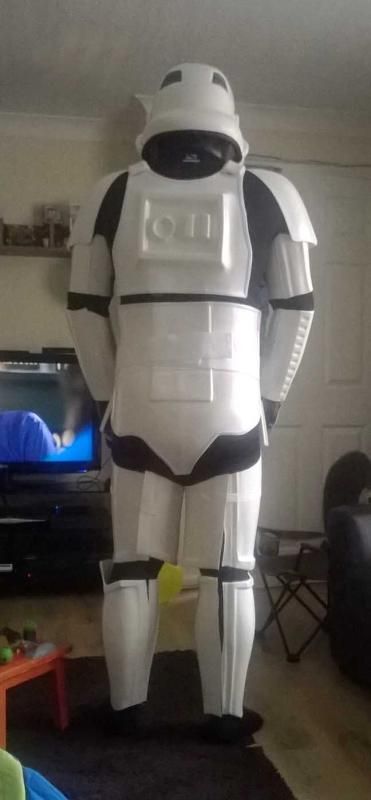
secured the rest of the body strapping linking the top and bottom sections together.. it feels much better on now.
i might need to redo the back straps to give it a bit of a gap, but will see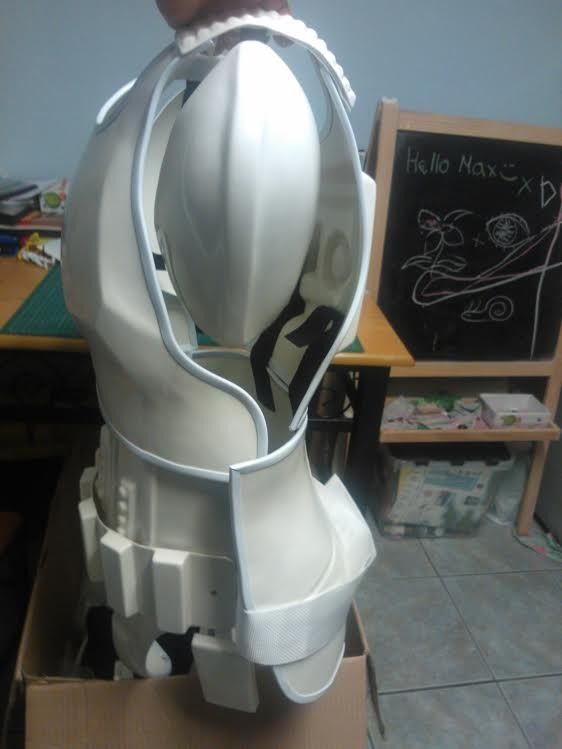
also tested putting it on with the shoulder bells already attached to the straps and it was much easier like that.

-
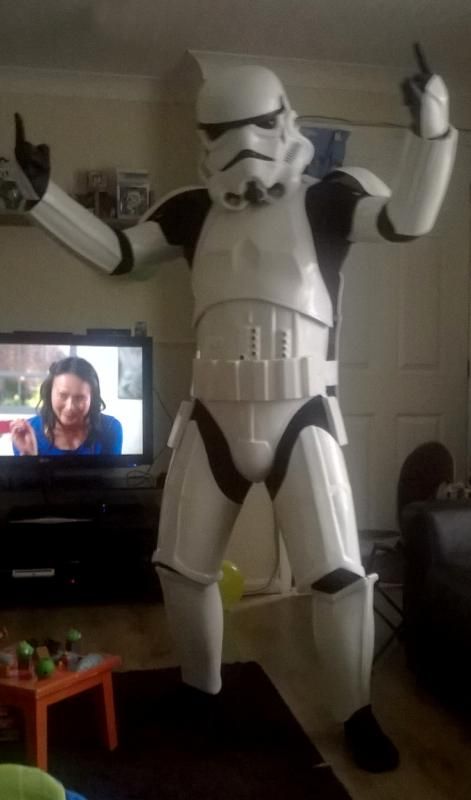
First test fits
getting there
yeah I know I need to sort the blaster and sharpie out some logos
the upper body sections aren't strapped to the lower sections.
That should straighten things out a little.
and need to adjust some other bits. but not bad so far.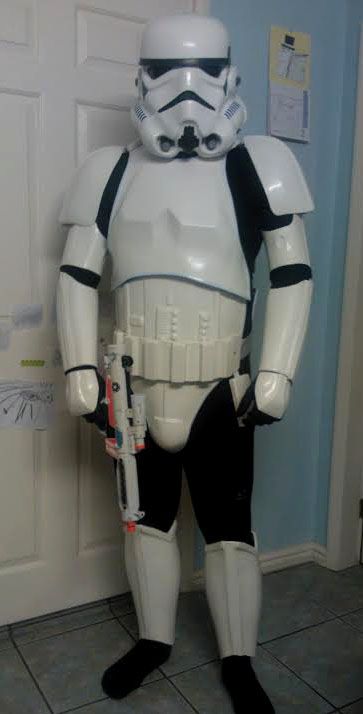 the calves will close ok. I've not velcroed them yet. need to tape them up first and see what more I can trim off them
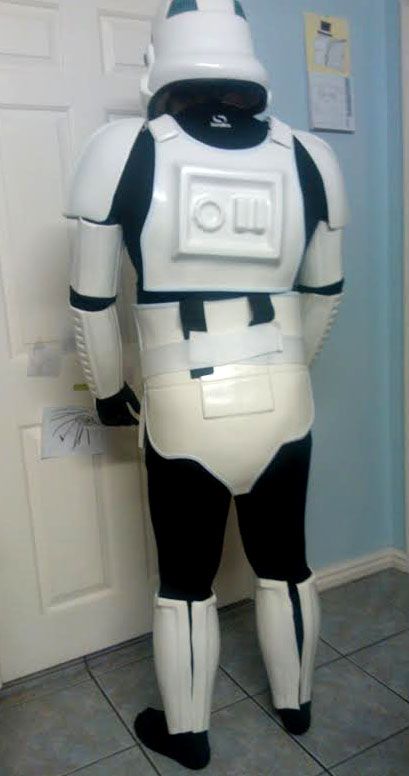 bit of photoshop fun
-
just the trusty old E6000.. so can pull them off if they change the CRL.
-
lots more clamping and heat bending tonight.
Calf fronts glued.. left the back material uncut like people suggested, just flattened it out so I've got plenty to play with, will masking tape them up once the front has set and see what's what.
I think they come up too high actually so might need to trim some more off the bottoms.
Shoulder straps secured at the front.
Main body strapping halfway done (ran out of clamps and magnets).
One more night and I should be able to put all but the thighs on to test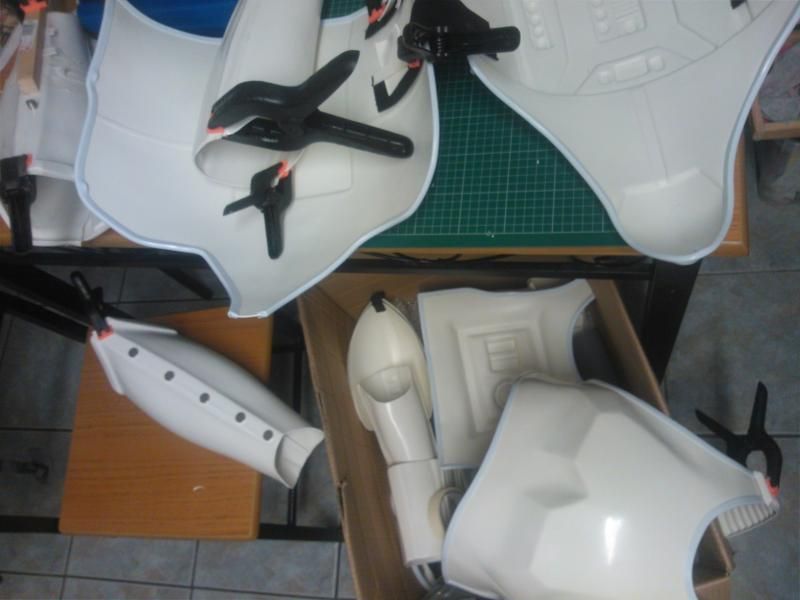
-
Just been checking this build thread out.
http://www.whitearmor.net/forum/topic/17228-another-cfo-rotj-build/
I've not seen thigh shims like that before.
https://prophetsblog.files.wordpress.com/2011/10/back.jpg
Can someone tell me is it better to cut this armour down to the original overlaps and then shim like this if needed. Or leave extra material and maybe have larger over lap sections?the ROTJ CRL just says overlap construction must be used for centurion level, but doesn't say if shims are allowed, or specify the size of overlap sections?
-
Quick check if they're going to fit.. phew... now to get the edging on.
 my first arm part didn't glue well. I figured there was a bit too much stress on the joint for the E6000 so decided to heat bend the edges for a better fit.I've got a heat sealing iron now. it's going to be good to help finish off some edges & corners, but don't think it's going to work at all for flattening out any large edge sections while keeping it looking nice.
But a strip of wood held under two heavy chopping boards worked well while I hairdryered the edge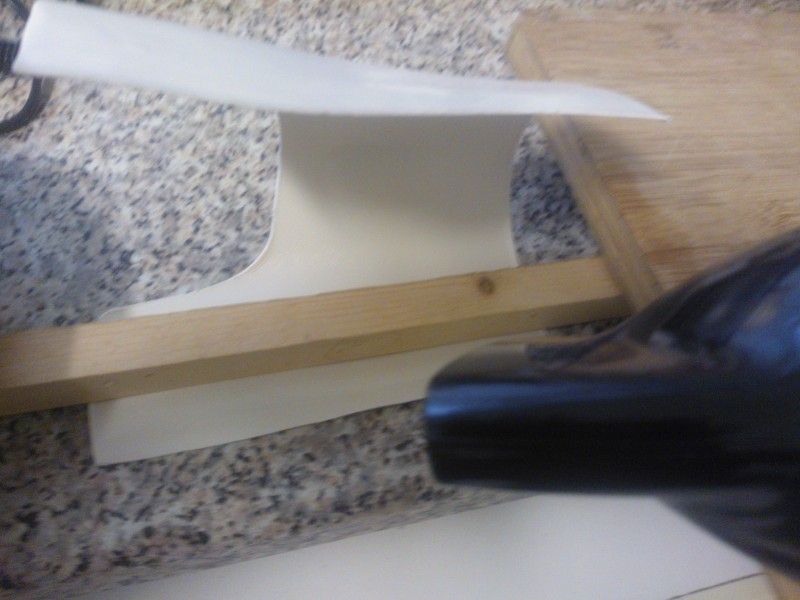 now things are coming together better.I've heat bent the finished bicep to make it more round.. it fits nicely now.
the first forearm is nearly set.
so should get the other forearm glued tonight and then on to the legs
-
I'm new to this, but looking at your pics it seems they'd match better to each other if you paired them up differently.
your current two outer leg parts seem to come down as far as each other at the foot and match each other for thickness at the top...
maybe they're supposed to be like that, but that's how it looks to me. -
thanks for the links.. I've ordered one which will arrive tomorrow.
-
Got the rest of the arm parts trimmed tonight, as well as the lower legs and shoulder straps.
and currently have the forearms clamped and gluing down one edge... so some OK progress.
unfortunately I'm not sure if the biceps and forearms are going to fit very well. I guess years of windsurfing and kitebuggying have given me bigger arms than I thought!?
I think it'll be easier to tell once the first edge is glued.
A lot of the edges seem to have a bit of a sort of double step in them (see pic).
I guess I'm supposed to cut the 1st one off, but I'd say at the moment there is a chance of it fitting if I leave it on.
Does that matter?
this is a bicep part, but it's the same on the forearms as well.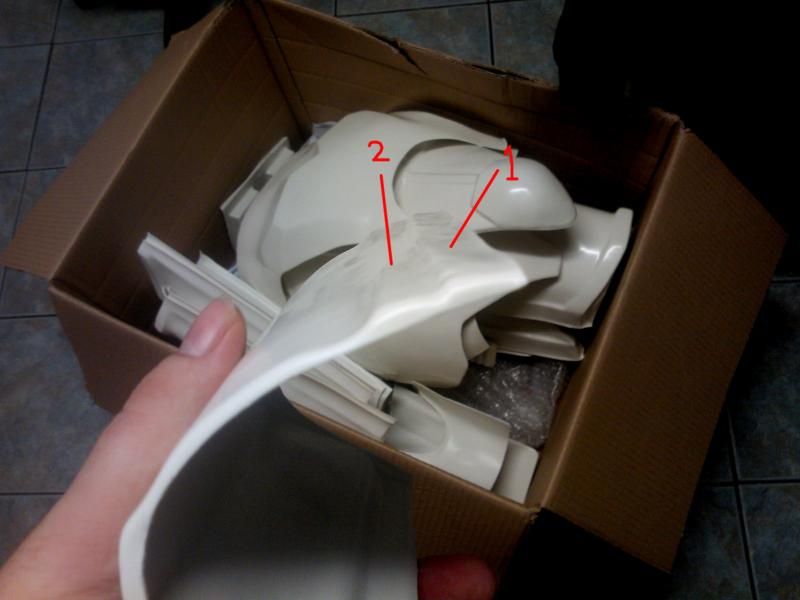
and finally.. the joint edges of the leg sections have quite an upward curve on them. rather than cutting them back until it's straight and them maybe needing to shim, is there an easy way to straighten them out to just give me more material to start with?
I did test a hair dryer out on some of the offcuts and although it did get it hot enough to straighten out really sharp curves, it was hard to control and keep it even. -
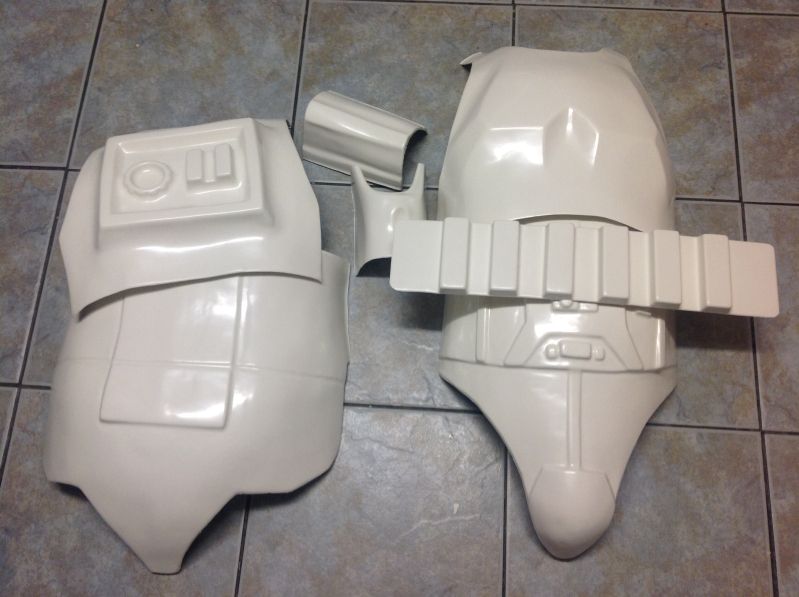
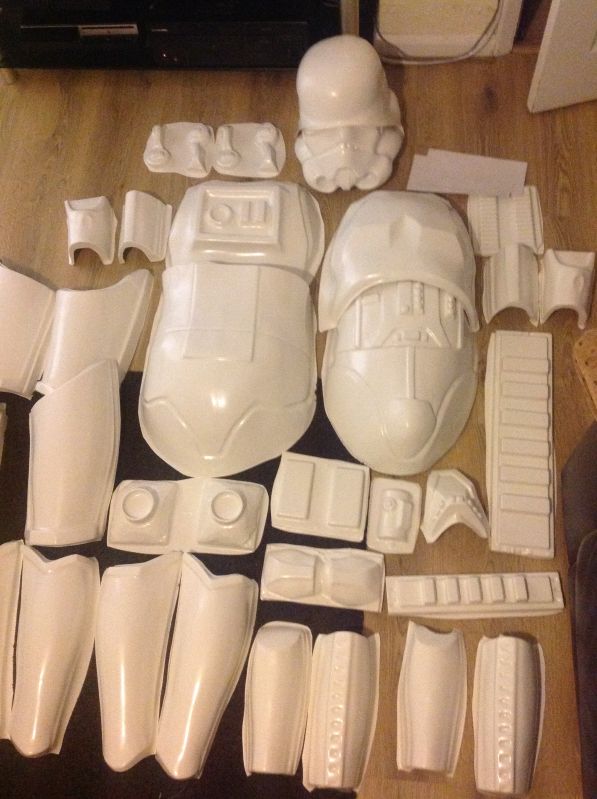
First few bits trimmed.
Going ok so far I think
-
A big box of joy arrived today
(Some bits out of shot)
Making a start right now.
-
 1
1
-
-
great stuff. looks very cool
I really need to have a go with pep. -
Nice. thanks.. will order a couple of tubes. There's a comicon in my town on March the 1st so that's my target to have it wearable
-
Think this thread might be in the wrong section if any of the mods want to move it?
Looks like my armour is getting formed on Tuesday so shouldn't be long before I get cracking on with the build.
Already got cutting tools and clamps, sanders, dremel ect, but how many tubes of E6000 will I need?
And do I need any other glue?
Need to remember to buy a rivet gun as well. That's one of the few things I don't seem to have.
-
ROTJ armour doesn't require you to close up the gaps down the sides so sounds potentially ideal for chunkier troopers
-
That's real impressive. Came out ace. Wouldn't think it was plastic.
Is that R2 a kit as well? I'd love one for my games room.
-
reading this is quite interesting.. is the info still valid..
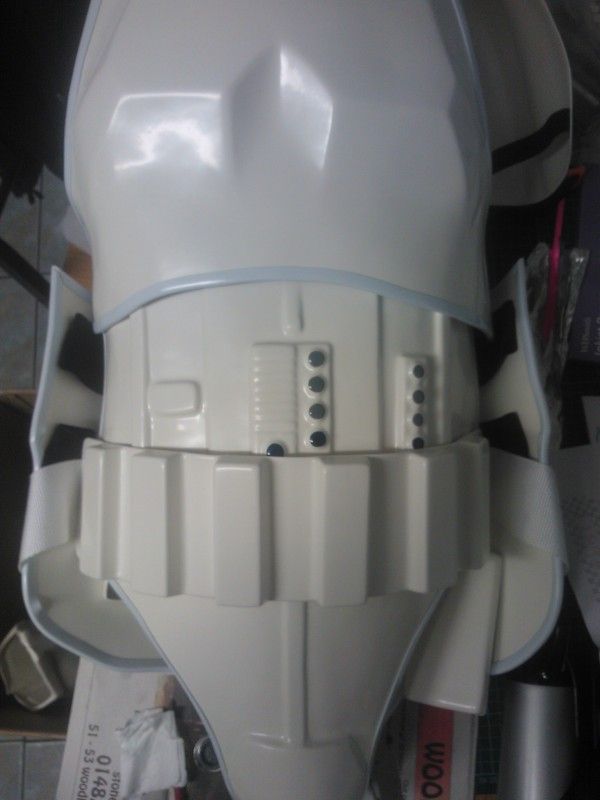
butt joint on the kidney section is best.
don't rivet it (at least not to both sides)
and ROTJ doesn't need shims?I'm planning on CFO (built the lid already) but although I take a 36/38" waist in trousers. I actually measure closer to 43"
-
A mate at worked commented on my helmet saying he thought I was ripped off as you can buy a built helmet from the original creators on Amazon for less... I did explain to him what I've learnt over the past few weeks, but he was not convinced.
JC's ROTJ Build
in Build Threads Requireing Maintenance
Posted