

maxsteele
-
Posts
865 -
Joined
-
Last visited
Content Type
Profiles
Forums
Gallery
Articles
Everything posted by maxsteele
-
I've shaped and drilled the top two holes / connected the left ear. I'll still have some gap in the front and back, but once I drill the bottom hole and tighten it down, it brings that gap in. I'm certainly not going for completely flush with no gaps. I'll drive myself crazy trying to achieve that. And - here's a front shot of the helmet with the ears on (top two screws only) That's how the brow trim is going to look. If I were to try and correct it, I'd be drilling more holes, and I'm not going to get into that whole business. I'll end up turning my helmet into swiss cheese. I see everyone always talking about how not every helmet was perfect, and each person's helmet is unique, etc... So to that, I recite: "This is my TK helmet! There are many like it but this one is mine!" I have noticed that the right ear is thicker than the left ear. I also noticed the molds for each ear are different, and the right one is squished in more down at the bottom, where the left one is flatter at the bottom. I don't think I need to worry about either the different thickness or the bottom details. I do know I'll need to trim up the bottoms of both ears so I'm able to get the S-trim on, which I'll take care of once I drill the bottom holes and cinch the ears up, so I can really see where they sit and how much I need to cut off to get that S-trim on there.
-
Are you submitting for basic 501st approval? If so, from what I'm reading, all you need to do is submit your photos to your local GML who can approve it. If you're going for ANH TK Stunt approval, the GML is the only one that needs to give a pass on it. As for the photos, it just states you need full body front, back and sides, which you have. The only thing I can think of is in your side photos, hold your arms straight out so the entire side of the armor can be seen. Right now, your arms are blocking some of the side view of the armor. If you received a response of "You need to show the costume better" with no actual specific details, I'd write back and ask exactly what it is you need to show better. It won't do much good for us to guess on what your GML is asking for.
-
That's what I thought. I found that even just adding the two screws at the top suddenly made the helmet very solid. I also like the ability to take the helmet completely apart if I need to, and I believe adding those rivets at the bottom would prevent that from happening. Now that I have the new brow trim (Thanks Steve!), I can start shaping the left ear.
-
I drilled more holes! Look out! Only the top two are drilled. I didn't drill the bottom yet. Looking at a couple of other build threads, I think the front of this right ear is trimmed enough. Once I get the bottom hole drilled and the ear screwed down, that will bring in the gap. As far as the back part is concerned, When squeezing the ear down, I saw a spot where I could take some more off of it and that should make the bottom part sit down better. Also - do I need to have a rivet at the very bottom where the cap and back meet? I have seen some people put the rivet there and then have the screw that holds down the bottom of the ear to the two pieces, and I've seen some where there doesn't look like there's a rivet there and the only thing holding the bottom parts together is the bottom ear screw.
-
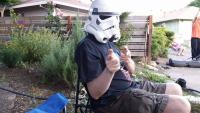
I just found this one in a "Halloween 2013" photo set:
-
While we all may find it funny, someone actually paid 844.54 british pounds for that helmet....
-
First, I want to say to everyone following this huge thread and giving me advice on my paranoid messages - "You're awesome." I have a concern about the placement of my left ear and the state of the trimming I did on the bottom of the helmet pieces. Here is what the bottom of the left side looks like. Note that my cap is up as high as it will go without the two pieces hitting together (somewhere) and stopping it from raising further: If this looks alright, then I won't talk about it anymore. Now, I measured up my left ear where it sits under the trim correctly and covers up the line where the two pieces meet. I marked with a pencil through the three holes, and this is where they end up on the helmet: This seems like a problem. And if it is, I have no clue how to correct it. From my untrained eye, this hole seems too close to the edge of the bottom part of the back. I also don't see how the S-trim will go onto the bottom at the transition from the cap to the back, because it seems like the gap is an upside down V instead of straight across. For comparison, here is what my right side looks like, and where the holes will go with that ear lining up properly: This looks like I won't have any issue at all. Advice on this perceived problem is appreciated. I'm almost ready to drill my next set of holes, but don't want to if it's going to be irreparable and incorrect. It's possible either the trimming I did on the bottom of my cap and back was too much, or I put the current screws that are holding my cap & back together in the wrong positions, but I'm just not sure on any of it right now. EDIT: I took out the screw on the left side and lined it up where the cap was more flush at the brow trim, and it actually gave me even less material to work with at the bottom, so I think I'm sticking with the current screw locations.
-
Well, I never considered that to be an issue. Ah well, I already drilled those holes. I actually haven't looked at how the neck trim goes on. I haven't really found any threads where it shows what it looks like before putting on the neck trim and how exactly to put it on. I might have missed them because I haven't been looking for them. I might be done for now. Good thing I haven't drilled any new holes into my helmet.
-
I just can't tell if the screw will go through both pieces. Screw it (pun intended!), I'm just going to drill it out at the bump and then mark where the screw will land on the helmet. If it doesn't go through both pieces, that's what the second set of ears are for! Thanks Nick.
-
Should the bottom screw hole for the ear piece go where the raised bump is at the bottom?
-
I think I fixed it! I did a combination of three things: 1) I could still see a little bit of a "lip" around the ear cup, so I trimmed that off and sanded it all flat. 2) I have a small split on the bottom of the brow trim right by that ear, so I swapped the brow trim sides (I'm getting new brow trim) 3) I shaved off a little more from the ear curve close to the cup to make it sit down a little lower. Here's the result: That looks like the right spot to me.
-
Hm, if it's not a cup trim issue, then that it a little concerning. It might be that the ear is in the right spot, but my brow is too low with where I connected the cap and back.... Sent from my SPH-D710 using Tapatalk now Free
-

Replacement brow trim for ATA helmet
maxsteele replied to maxsteele's topic in Boots, Soft Parts, and other Accessories
Heh - didn't even think to look there. Mainly I was looking for hardware stores because I'm going out to Lowes / Home Depot right now to pick up some rubber gloves, and then to JoAnns for a bunch of other stuff like snaps, glue, etc... I'm just going to bring the trim with me and see if I can match it up. Thanks! -
My brow trim for my ATA helmet has split at the bottom about an inch. I need to get a replacement. Does anyone know if there is an equivalent style of brow trim I could pick up from Lowes / Home Depot / Ace Hardware, etc...? Or if there is an online source in the U.S. to order the proper brow trim style? I've also sent an email to the ATA supplier, but I'd much rather just walk into a store and buy it if possible.
-
Is there such a thing as having your ear sit too high? This is where my right ear wants to sit in order to cover the seam between the front and back: It feels like it's sitting a little too high, but moving it slightly downward nothing really lines up the way it should. I feel like I'm at a point where I should find the "spot" where the ear piece covers all of the seam nicely, then drill my top hole through my helmet, and start shaping up the ear to fit that exact point, but if this ear cup is too high, I'm going to have to re-evaluate how the ear is shaped. Or, is my problem I didn't trim down the round part of the ear at the top enough, and the piece that's "sticking up" is a part I'm supposed to trim down more?
-
Happy Halloween! I completed my Stormtrooper helmet!
-
You are my voice of reason Glen! One thing I did notice though, I have a tear at the bottom of my rubber brow trim. It's about a half-inch split at the bottom on the right edge. I'll most likely need to get a replacement trim. It's workable now, but I'll want to get it replaced soon. Fortunately it doesn't prevent me from continuing the build or even wearing it, as it's hardly noticeable, but I know the tear will get longer.
-
It's been a long time coming, but I have drilled the first two holes and attached the face and cap pieces together! I think head-on it looks excellent. That's about where I want the brow trim to be. I like the lower brow vs. the higher brow. I may have matched up the right side a little low in regards to the brow trim and the eye. I'm referring to the eye corner in relation to the brow trim. In order to correct that I'd have to drill another hole into the face piece to adjust it slightly higher, which would just end up turning the current hole into a bigger hole, and I don't think I want that. Is this alright, or do I really need to correct it? One concern I had - on the left side, I didn't have the face / back pieces completely flush with each other at the brow line. In order to correct this, I'd have to do the same thing that I'm describing for the right side to the left side. Is this too much of a gap, or does it not really matter? Here is the right side for reference on how much closer I have it there. It's completely flush here.
-
You replied quick Glen! I had seen people mention about making a tapered recess for the tapered screw, but as of yet have no clue exactly how to do it. I was going to upload one more picture and edit my last post, but I'll just make it a reply instead. Is this the spot to put the screw that holds the two pieces together? The screw that will be hidden under the cup of the ear? I marked the spot with pencil: If that's it, then that's where I'll drill the first hole. I read about a technique of drilling the hole on the back piece first, then fitting the two pieces back together like I have, lining it all up, marking with a pencil through the hole onto the front plate, then taking it back apart and drilling the hole on the front plate. Does this seem better than keeping the pieces together like I have now and drilling the hole through both pieces at once? It seems like a piece could slip while trying to drill both holes and cause an issue there, which isn't an issue if I drill the two holes separately.
-
After spending time working on my armor, I'm starting to get back to my helmet. I really can't do much with shaping the ears until I attach the two pieces together, so I've done some test drill holes in spare ABS. How does this look? Here are the two screws attached in their proper holes. Here is an example of the larger hole vs. the smaller hole. The smaller hole is what the drill bit makes standard. I learned how to "rock" the drill bit around to widen the hole to take the second screw. Is it time to graduate to holes in my helmet?
-
Heh, thanks for considering me a hardcore fan! I painted my boss because TK boots was out of stock and it was unknown if they would get stock in any time soon. It also seems a good amount of apps for Centurion prefer TKBoots. Sent from my SPH-D710 using Tapatalk now Free
-
I'm not sure how much this would help with your issue, but I can see that you need to trim down your kidney plate. I have NE armor as well. Here is how I did the cuts on my kidney plate: It looks like you already cut the butt piece the way I did. Here's what my butt piece looks like: I haven't done any trimming on the long middle part, because I haven't fitted it to my body yet. If you kept that piece at this length, that may be why it's flaring up. It's possible that cutting that middle piece shorter will have more of a pull with your crotch strap and pull down the butt piece.
-
Did some more cosmetic cuts over the last several days. Here is my ammo belt piece: I trimmed off the extra at the top and bottom. I haven't trimmed the sides yet. Here are my Ab plate buttons: These seem to be just the right thickness on all sides. Question: Do I need to cut the extra from the top and bottom of the thigh power pack, like I did with the belt piece? I can do that, but won't if it's not necessary. I couldn't find any mention of that removed in the build threads I searched in.
-
I have another question in addition to my above post about how to cut the biceps. Should I have the front finishing strips in place and glued before I wrap around the pieces to find where to cut those to fit my body? Or is it fine to have the fronts taped up / held with magnets as much as possible and then wrap around and mark for cutting?
-
Please do not take my word as gold, but it looks like it would pass at least for basic 501st and most likely EIB. They look very similar to the Bass Amsterdam boots that myself and several others have painted: ----------- These boots received a 'pass' for basic, a 'most likely' for EIB, and a 'no' for Centurion from a DO. Most Centurion approval threads have TKBoots, which do not have any supply at the moment. There are a couple of threads that have custom boots which are painted white. A DO's take would be your best bet with Centurion approval inquiries.