


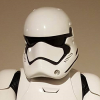
Punkers
-
Posts
165 -
Joined
-
Last visited
Content Type
Profiles
Forums
Gallery
Articles
Everything posted by Punkers
-
Where are you guys lining up the greeblies ? I was thinking they should line up where the vertical mold line meets the slanted corners
-
Is there any reference (non-spoilery) from the film trailers that shows the proper color of the greeblies ?
-
 Thank you Ty ! It has been lots of delays and such, and lots of hard work, but I'm very happy with the final results and I cannot wait to get approved and troop this weekend hopefully in it for our local sports event at the hockey game and then the premiere next week !
 -
Hey guys n' gals ! Long time no talk due to the migration to private forums and most of this taking place via other outlets or offline. But here it is, in all it's glory.... I have finished my build and submitted for approval!
-
TFA Trooper Battle/Riot Shield Interest?
Punkers replied to TK-Sonic's topic in Weapons of the First Order
Possibly Interested -
This weekend I did some sanding of the remaining parts I hadn't removed the gloss coat from, and then I did a fitting to show how my progress has gone so far. Just a few things left to do and time to start priming.
-
I don't know that I would trim it down that much if at all. The whole look of the wings under the chest might be thrown off if the gaskets don't sit just right and if the chest isn't sitting properly. I would wait til nearly the end before cutting it if at all.
-
Thank you sir. After verifying this with the masters and screen reference, I have fixed this. Good catch. I feel like I failed hard
-
This week I had a helper again, so I plowed through as much as I could to get the fit right. I first started in on the shoulder gaskets as I wanted to get the length and circumference right on them so we can be sure they will fit inside the biceps, and then find the snap locations for my snap tabs that I glued into them. After some tweaking and using the final bit of my Weir Stuck glue, I was able to get the fit about right and then attached some straps to pull it all together. I went over to Walmart and bought some straps that they sell pre-made with slide clips intended for camping gear etc. in the outdoor goods isle, and cut them to the desired length, and glued them down with CA glue. Unfortunately due to time constraints and simply just not thinking about it, I didn't take any photos to show the fit, but I plan to do that this weekend given the opportunity . But then the least expected happened... while pulling the yoke off, the bondo cracked at the seam so now I have more bondo work to do. Can I just say that I really HATE bondo, and am super scared that after all of this hard work and painting everything that I'm going to have bondo cracking away and destroy my nice paint job... Then I repeated similar methods of locating the snap locations inside the biceps for the elbow gaskets and tested their fit... Then we worked with the yoke some more and determined the snap plate locations for the strap across the front of the yoke that the chest plate will mount up to. And in doing so we discovered I may have to change the shape of the chest plate or the angle of the wings (with a heat gun) to close the gap between the chest plate and the yoke at the shoulders
-
Haven't updated for a while because there were issues with the FISD boards, and I spent that week working with AB boxes, sanding, and greeblies. Last week, I came to the conclusion that the best method to affix the AB boxes without making them appear seamless, would be to have them attached AFTER the priming and painting was done on the AB plate itself. This means that I can paint the boxes individually to ensure the seams won't get filled in with coats of primer or paint, and maintain that seamed look that they are supposed to have. So I tore into it with the advice of a few other troopers who did it before me (thanks Stephen and Dan).... Here is the hardware that you will want to pick up: #6-32 x 3/4" Bolts #6-32 Nuts #6 Washers I fashioned ABS inserts to drill four holes (per box) and mount to the insides of the boxes, which I figured would give the tightest fit against the AB plate as possible. Once I had sized the inserts and drilled the holes in them, I used a countersink drill bit to ensure the heads of the bolts would not interfere with the outside surfaces of the boxes when the inserts were glued down to the inside of the boxes. Then to test the fit, I rolled a piece of masking tape inside the box and pressed the inserts with bolts & nuts attached (thumb tight) into the box. Once it was secured with the tape, I then used the tip of a mechanical pencil to apply some graphite to the bottoms of the bolts so that when pressed against the AB in the proper position, I could visualize the location of the bolt holes to be drilled into the AB plate on the corresponding AB box mounts, and then drilled the holes. (Tip: ream out the holes a little bit so that you don't have a super tight fit and once the bolts glued down into the AB boxes that you don't have issues with them splaying out too much / little and not able to insert the bolts into the holes you've drilled) Once I was happy with the fit and able to get the bolts into the AB plate, I determined whether the bolts were too long and used my dremel and a cutting wheel to shorten the bolts a little, and then put some loctite on the bots and tightened down the nuts on the insides of the box. Then I glued the inserts inside the boxes and clamped them down for a bit. For my build, i've used ABS cement anywhere that I am gluing ABS to ABS, but you could also use CA glue (super glue) instead. And then it was time for a final fit ... All boxes are now done and ready to be attached after priming and painting... I am using two nuts and a washer for each bolt going from the mounting plate inside the box into the AB plate. You may also want an extra washer to put behind the nut on the inside of the box if you notice it starting to crack or anything on the ABS mounting plates. Then while waiting on some bondo to dry on repair work, and the inserts to glue down to the boxes, I started sanding my shoulder bells, cod, biceps, thighs, calves, and spats as I prepped for eventual priming. My point in doing this was I also was working with the greeblies on a heatgun purchase, so I figured why not kill two birds with one stone lol. Once I Was done sanding the gloss coat off of the ABS for the biceps, thighs, calves, and spats, I pulled out the greeblies and started shaping them with the heatgun. I put them face down on a piece of cardboard and then heated them for approximately 30 seconds and bent them carefully over a spray paint can to the desired shape. Once I had a good fit, I glued them all down one by one with CA glue. I also took some time working with the snap plates on the inside of the greeblies to match my female snaps that I put into the inside of the spats, and I am quite happy with the results. When I glued down the back end of the greeblies, I first snapped the male snap plates into the female snaps and slid the other end of the spat under the greeblie as I applied the CA glue and then clamped them down and let them dry overnight.
-
Clamps Goes All TFA and Stuff
Punkers replied to Clamps's topic in Build Threads Requireing Maintenance
Which chest is that ? And did you purchase it recently, or recycling a used one? I'm having a hell of a time finding the locking lid one. At least in the 24 gallon size. -
I have an advantage of an Alpha in my Garrison , so I will be trying on their belt to see the approximate fit.
-
I actually haven't put snaps in the cod yet, still checking its height etc (hopefully this week), so the snaps were installed with the plan of having the belt over the cod and snapping down on the sides. I'll be honest I added the extra snap not thinking, but I will probably just have three snaps on the cod to make sure it doesn't fall off with bending over or anything, or if it won't sit flush I'll remove it
-
I think most do Velcro or Chicago screws to attach the knee plates. I'm being adventurous and taking a chance that the snaps will work on the beta gaskets. The snaps on the spats wasn't my idea, but yes I think it's a great idea. I just have to make sure that before I glue anything down on the spat greeblie that it lines up well with the female snap and that it isn't going to take a ton of pressure to snap it in place.
-
Today I continued from my progress yesterday and focused on anything I could do to move along the stuff I was already neck deep into, trying to get them closer to completion. First I worked on the knee gaskets, trying to pinpoint the snap locations and align the gasket seams to the inside of the thighs. I soon discovered however that a trooper at the height of approximately 5'7" - 5'8" is going to run into the maximum thresholds of the gaskets, unless you have a tall torso and shorter legs (which apparently I don't). So once I tested this and noticed where they will align at the boots, I decided to only have one to two ribs inside the thighs and calves, allowing for the maximum bend at the knee and to make the overall length as long as possible to cover the tops of the boots and not have super floating spats. I slid them on, and with the calf closures still not installed (i.e. when the calves aren't closed in pre-troop suit up phase), I found that I should be able to put everything together on the leg armor and simply slide my foot through everything and slip it on like a sock , which should make the dressing part super slick with exception of tucking in the boots and attaching the spats. I finished both left and right leg assemblies except for attaching the knee plates, which I will be working on this week. I plan to "counter sink" two little spots on the knee gaskets (one on each side of the knee plate) to affix the knee plates to the gasket with, which should make moving them to cloth or other future gasket revisions super simplistic. This way I can also pop them on for approval or LFL / Disney events with the rubber gaskets, and then move them easily back and forth as needed. Here are the planned snap locations that will be transferred over to the knee gaskets... Then I moved on to the yoke and added snaps for the shoulder bells, as well as made straps to connect them. I also had my second try on of the day... I thought the shirt was rather appropriate today too . Wish I had snapped a pic of me wearing the thigh, gasket, and calf Then I started working on the AB plate some more. I finished the fitting of all AB boxes and am sufficiently happy with the fit they will have once I do some work with exactly how I will be affixing them to the AB. It was brought to my attention that to maintain the seamless look without completely taping off everything, it will be much easier to use the bolt on methods I've seen used in other builds, so that is precisely what I will be working with this week hopefully. But for today, I decided to put in the snaps for the cod piece and wanted to put snaps in to hold the decorative belt up as well... Then I took a short break from gluing on snaps and had some help from my buddy to sew my belt together. We created a combo belt & harness out of 2" black elastic, 2" nylon straps, & belt clasp, and then added 1" nylon straps to suspend the thighs with. It stretches just enough to allow more comfort than using nylon straps for suspenders. Then I added snaps for the butt plate to hang from the inside edge of the kidney, added Velcro to the back of the kidney plate halves, and fashioned a 5" strip of ABS & hook Velcro to use as a closure rather than snaps / straps or a corset closure. It fits quite well without anything suspending it currently, and even with it being somewhat tight closed fully, I AM able to slide it up my legs and over my hips to position. I plan to loosen it a little to give myself some play, and then add two snaps to my support harness (pictures coming over the next week). Then as the daylight faded and it started getting dark, I decided my last effort for the evening would be to attach snaps to the chest piece to accept the nylon strap that will cross the yoke and hold the chest plate in place vertically. So here is an overall look at everything that I accomplished today or this week (other than I haven't displayed the fit of the AB boxes since technically i'm not complete with them ) And here is another close up look at the snaps on the spats if anyone hasn't already seen it on Barcoder or Clint's builds...
-
Thanks to all of you I really appreciate the encouragement.
-
So today was the day to attach the resin detail to the chest plate. I reviewed some other builds and thanks to a few ideas, I came up with this idea. I built two tabs to glue to the resin piece before gluing down the assembly to the chest plate so that I could mark the spot for alignment easily and then better secure it. The real trick was getting them glued down, because I was using superglue / CA to affix the resin detail to the chest, while using ABS cement to affix the ABS tabs to the chest plate ... all solo today! And then there was one. Haha Then I applied some bondo to it, and while waiting for it to cure, I attached the resin "nipple" greeblies. Then some more bondo to build up a little more ... and be final result is this During the day while waiting for things with bondo to cure, I also took a page out of Clint and Barcoder's books and decided to do the snaps on the spats mod. So I built little snap plates with raised tabs like Barcoder, and I drilled the same holes in the spat to accept a male snap more flush. Keep in mind that a 5/8 inch drill bit is too large for the female side of the snap (matches the outer max dime thins of the snap head) , but I didn't have a drill bit inbetween that would work and make it fit more snugly around the snap. I also reinforced the yoke with some curbed ABS pieces and am also still debating adding fiberglass over the whole assembly too.
-
I tried to update my post but it's broken. I'll update in the morning.
-
Nice work with adding the extra ABS on the yoke. I still need to go back and add that to mine, just have been busy doing other stuff and forget to go do it. lol<br><br> Any holy super magnets Batman!! I bet that took you some time to separate each and every one of those when gluing lol. I favored clamps over magnets, except for the long straight areas because of this reason, but I also am just using ceramic magnets wrapped in masking tape to prevent them from cracking / falling apart or leaving scuff / black marks on my armor pieces. Have had those since I built my classic TK and recycled them this go around.
-
Today I worked the majority of the day with sanding... sanding... sanding... sanding... But I was able to get my TD end caps all sanded up at the seams that I had applied bondo, and got all of the AB boxes mostly flush fit (except two that i'm not so happy with so far). I will continue pulling my hair out during the day tomorrow when I have daylight again lol. Then after much deliberation, some freakouts, and some conversation with the pros.... I decided I would bite the bullet and go for the new chest detail upgrade. I was extremely hesitant because I didn't want to A ) mess it up , B ) add the extra weight to the chest plate , C ) have to pull out the bondo again lol , and D ) have it fall off or cracking and then have to deal with new paint jobs etc. But after discussion, I went for it... head first... that's right, I thought it through and decided I wanted a template for the cutout before I tore into anything. I found what I consider to be a very creative way of going about it though. Since we aren't supplied a template, I decided to take a white envelope (something a bit more rigid than standard paper, but thinner than cardstock), two clamps, and a pencil... and hold it over a light bulb illuminating the outline of the resin detail. I then traced the inside edge of the resin piece onto the envelope. The parts I could not see, I then moved one of the clamps and drew the remaining bit on one side. This left the other side incomplete, but the brain went into gear to solve this quickly... I then took a pair of scissors and cut out one side of the newly traced template. When I was finished (making sure I cut as straight as possible), I then folded the paper in half over itself and then traced the remaining bit I was missing on the other edge of the paper. The end result was I had a perfect sized template to trace over the chest plate (and not surprisingly, the size of it was nearly identical to the original detail, just slightly steeper angle and a tiny bit larger). I then took the template and traced it over the chest and pulled out the dremel with a cutting wheel. I cut the top and bottom lines carefully, and then from the back side I slowly lowered the wheel over the remaining angle pieces until I had a rough cut that resembled this. Then I pulled out an Exacto knife and some sandpaper and got the finished cutout to look like this. I am a bit at ease now, but the remaining part is to get the finish sizing correct as my template turned out to be a little too small for the detail to fit through, so I would make it just slightly larger than the actual size of the resin detail for those following this in the future Then as the daylight left me in the dust, I went inside and finished putting snap plates / tabs into my shoulder bells and thighs That's it for tonight.... more to come tomorrow.
-
Week 6 of working on the armor has begun.... and this week i'm hoping to get a lot of the finishing touches done on the main armor pieces prepping everything to be primed and putting in snaps plates etc. Today I was able to get my forearm boxes done and attached the greeblies.
-
So for week 5 of working on the kit (not really having a second helping hand for two weekends in a row), I worked on things I could primarily do myself. I was nervous about the kidney plate having too much flex at the AB joint seams (using bondo), so with some previous recommendations, I decided to go ahead and add 2" ABS strips to both sides of the kidney plate to reinforce the seam and keep it from flexing too much, lifting the bondo and cracking. Then I sanded and cleaned up the spats, and closed them up on one side so that I could prep for adding the greeblies and doing the snap mod that Clint and Barcoder have done so far (thanks guys for the tips in your build threads!) Also, this week I found out that I had missed some spots on the end caps that needed to be bondo'd to make the appearance of them being seamless, so I ran a bead of bondo across both end caps and let them sit. Still need to get back to them later next week when I have some time after work, and sand them down nice and clean. Then today (8/14) I started on the gaskets. I had trimmed them up ready for assembly previously, but today was bath day for them and then glue. I marked up the glue locations with a silver sharpie to make it easier to know about where the glue needed to be applied to keep them as clean as possible. Then it was time to glue... glue.... wait... glue... glue... wait... you get the idea. lol. Then it was time to weigh the shoulder gaskets down as I created the armpit connection.... and well I didn't bring anything with me to do so... so we got creative with some stuff laying around the house at my friend's place But they turned out quite nicely as you'll see.... And then it was time for some invention... this may very well help to revolutionize the way that the gaskets are held in place inside the forearms, biceps, and yoke... That's right... SNAPS! My friend ("build crew" of one other) came up with the idea that instead of taking the time to sew in velcro (which could pull away or tear the parts if they became brittle / crack over time), why not just put the snaps directly into the parts or use left over gasket materials from the extra glue tabs to put them on.... then got a bit ahead of myself and put the snaps directly on the extra tabs, rather than the original plan which included gluing down the tabs and then pushing the snap through both pieces after the tab was glued down to the gasket tabs. In the end, I like what I ended up with, because if I change my mind or it doesn't work out as well as I hope, I can simply sew down some velcro and go the route everyone else is going. So here is how I did it, and how they turned out so far... If you come up with other ways of doing the snaps, or have varying degrees of success, feel free to chime in for future build thread ideas etc.
-
Thank you! I decided to go ahead and put 2" strips of ABS on the sides beneath the seams, and it seems to help a lot. I think once I sand down the bondo I reapplied and affix the boxes on the sides it should be good... but before I glue down boxes or anything I'm going to triple check it to see if there is any flex left in it.
-
I am finding issues with the usage of bondo on the AB plate, and I'm debating whether I need to completely sand off the bondo and then do ABS slurry or something else to permanently fuse the two pieces together better. The ABS cement I used on the seams is allowing for the two pieces to lift a bit and create a crease where the bondo cracks or would certainly cause the paint to crack and peel, which I will not settle for. I haven't decided what to do yet, but it was suggested to glue some ABS tabs inside the seams and reinforce it, but I'm not even certain that would help. I don't have the AB boxes ready to put on yet, but perhaps the boxes nearest the seams would help create a nice seal if I were to use the "bolt on" methods I've seen some others use... I just don't know what to do at this point, and open to suggestions from the veterans.
-
Ya, I haven't worked on it for a literal 4 or 5 weeks now, but more like 4 or 5 weekends with a few hours here and there on the weeknights when I get home from work. The orange peel was almost all on my AB plate and sides of the Chest. I have gone through and sanded it down with 80 grit sandpaper and then progressed it up to 220 to get rid of it. I am fairly happy with how it looks now, but still makes me a bit frustrated that the pull had the "orange peel". I will post up some pictures once I get some more work done.
