


Echo
-
Posts
663 -
Joined
-
Last visited
-
Days Won
1
Content Type
Profiles
Forums
Gallery
Articles
Media Demo
Posts posted by Echo
-
-
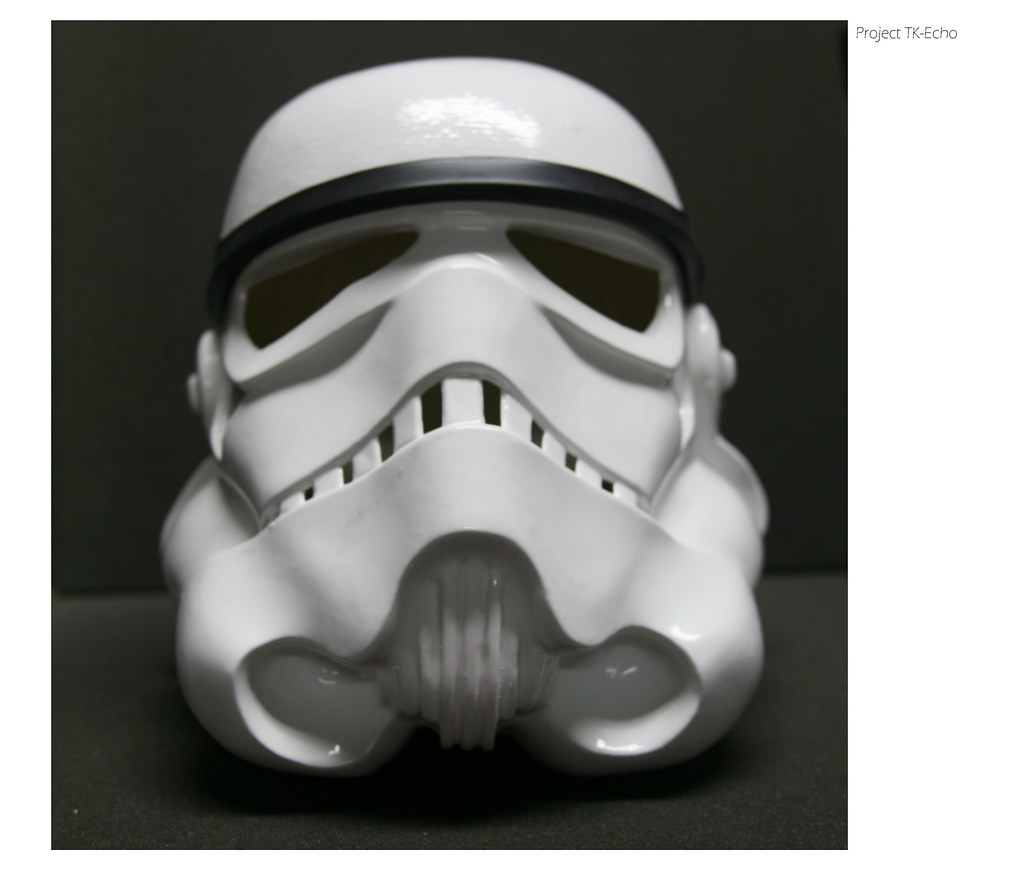
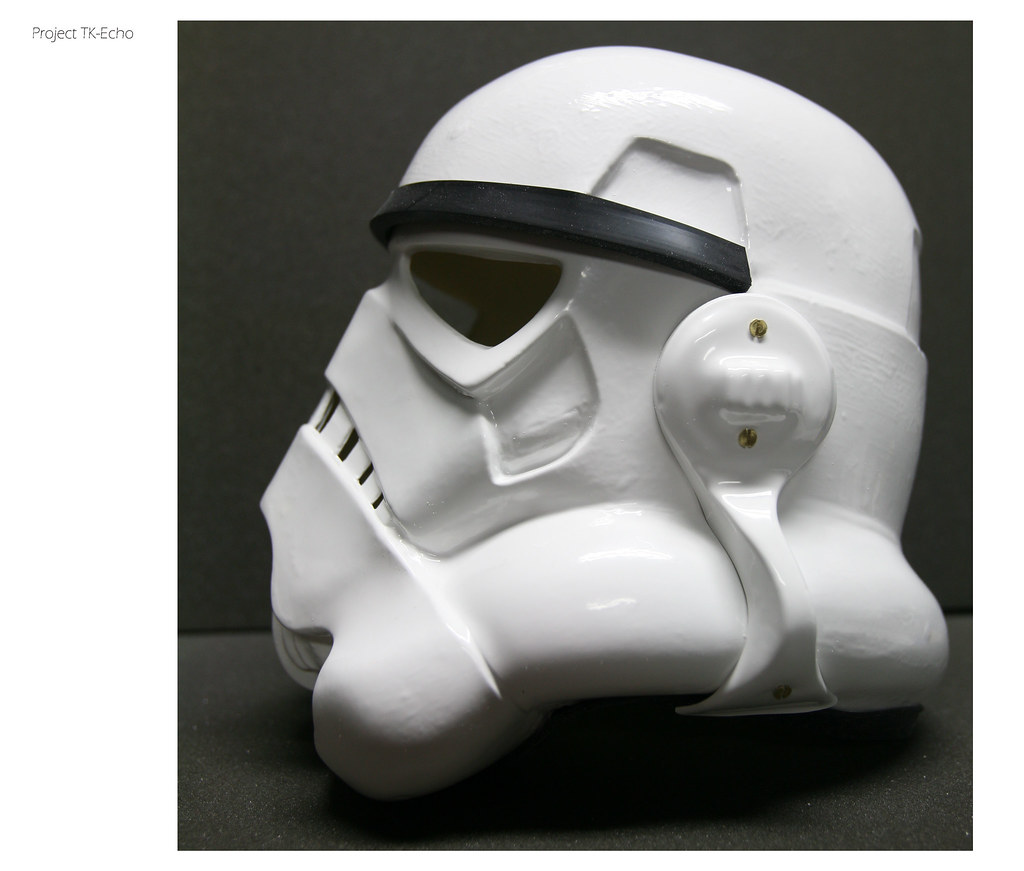
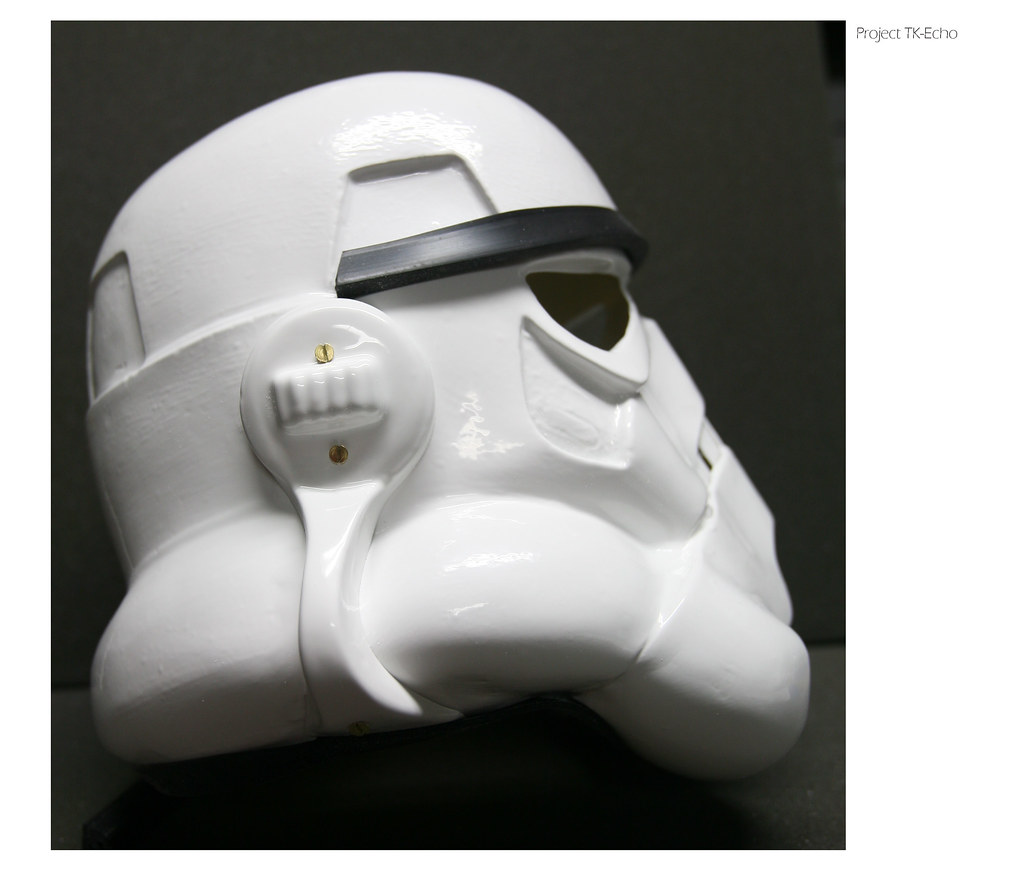
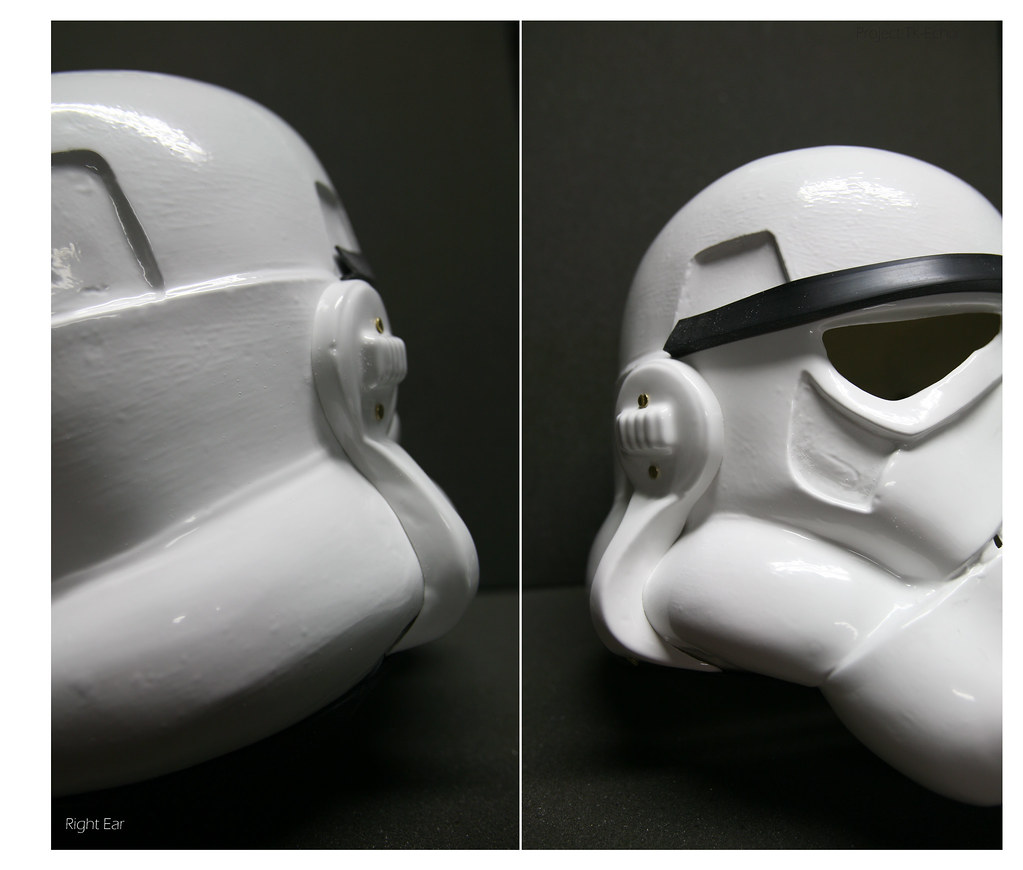
Started in on my bucket.
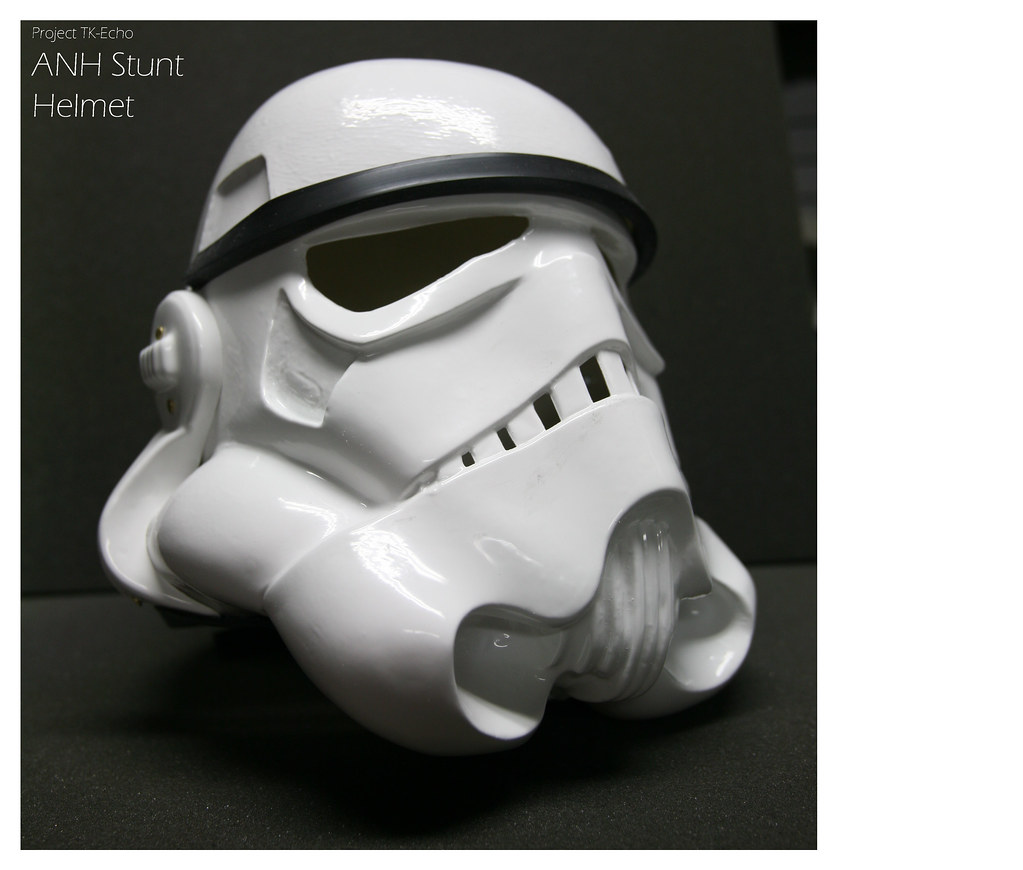
Helmet_Page_1 by Echo Rogue, on Flickr
Helmet_Page_2 by Echo Rogue, on Flickr
Helmet_Page_3 by Echo Rogue, on Flickr
Helmet_Page_4 by Echo Rogue, on Flickr

Helmet_Page_5 by Echo Rogue, on Flickr
Helmet_Page_6 by Echo Rogue, on Flickr
-
Great troop! Glad to hear your first one went so well.
-
-
I told them not to worry about sending me screws and that I could get them locally. I had found some screws at my local hardware store.
A few of the wire brackets had broken so they were sending me replacement parts anyways so they threw them in. It just confused me when I saw they were all Philips head. Planning to send them an email as a heads up to future kits they send out. I thought I would check about screen accuracy here in the forums before I did. Thx for the response.
-
For the screws would Philips head type be acceptable for accuracy? Only reason I ask is the strapping kit that RS Propmasters sent me was short several screws. The kit had slotted head screws which is what I expected, just short about 8 of them.
They were quick to respond and send me more, but the ones they sent me are Philips head type. Unless the head type doesn't matter for accuracy, someone should tell RS about it...
-
-
-
-
I bought these too. They work well, though I found I had a few snaps that wouldn't bind together well. But it was totally operator error.
I also bought the setting set that gives you a round base and a metal tool that you use a hammer to fit them together. I personally prefer the hammer tool to the pliers and used that for almost all of my snaps..
-
Thanks
 Its been really fun to document.
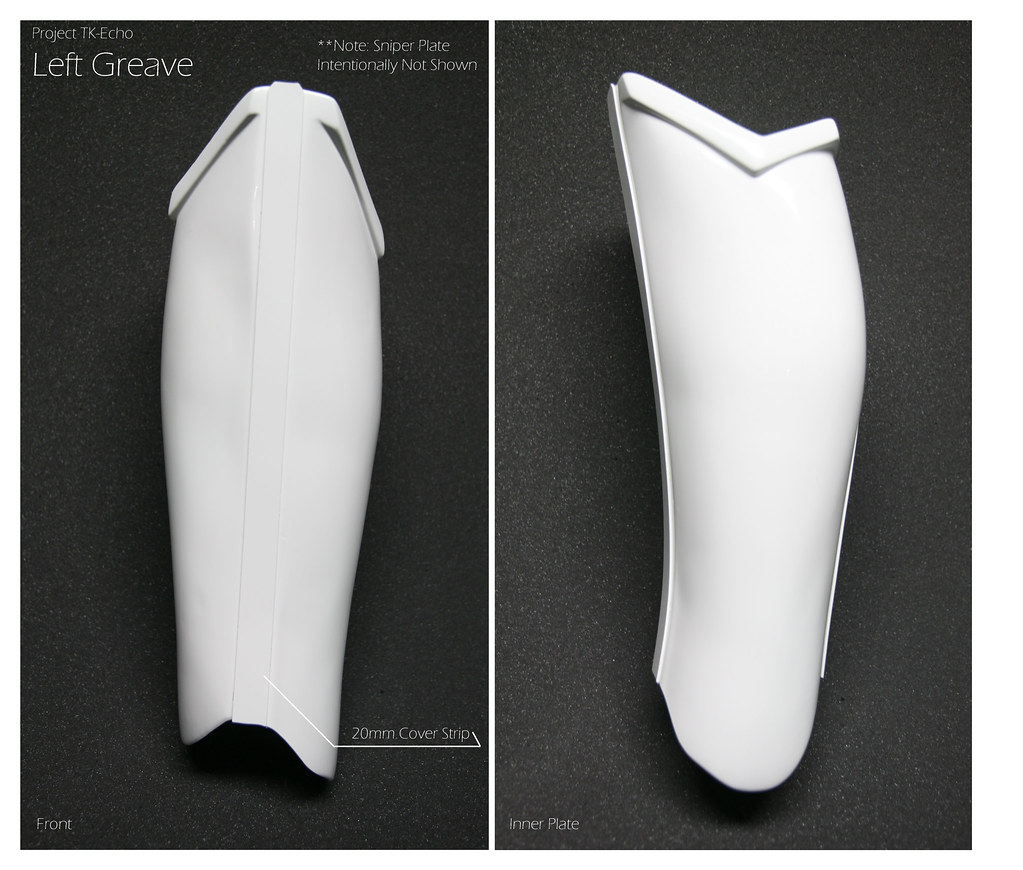
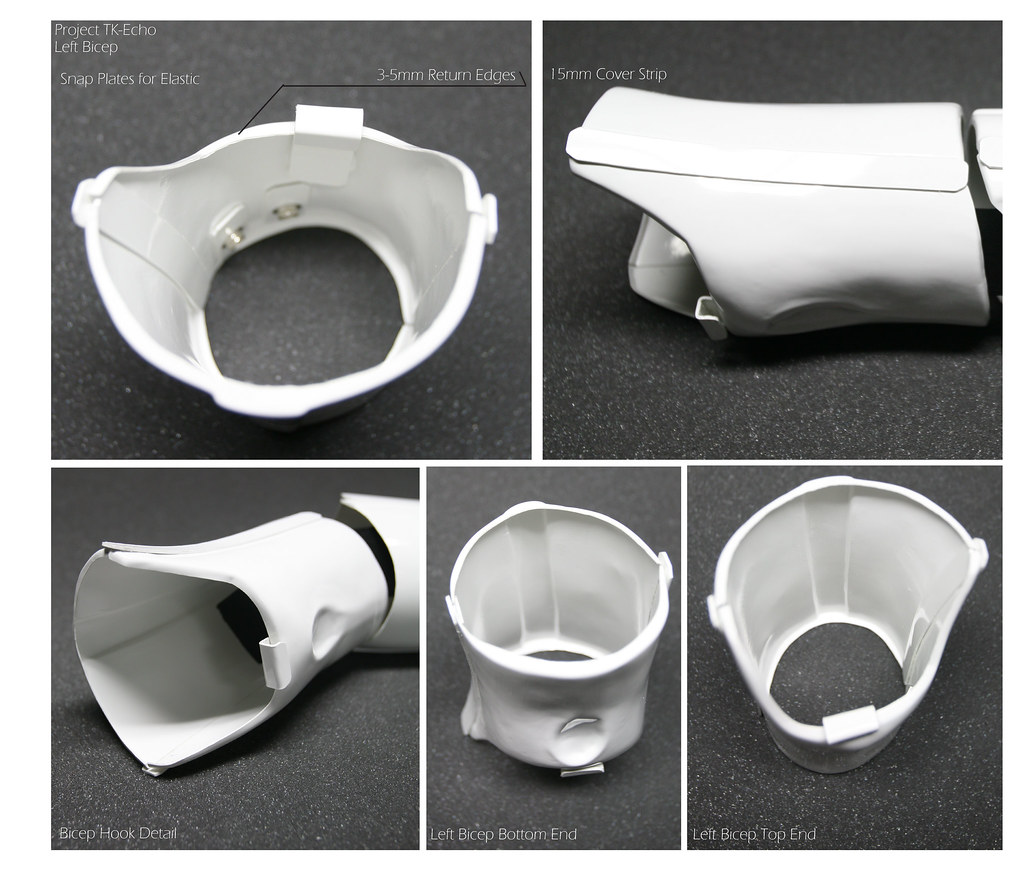
I debated back and forth for a long time whether to go with snap plates or the screen accurate method of direct gluing. Because I want to troop in this suit, I opted for the convenience snap plates give of disconnecting each piece or future replacement of elastics etc. While E-6000 is easy to remove and redo, snaps seemed more preferable to me. I will put some additional notes on these images to point out this difference so that future aspiring troopers aren't confused about why some do it one way and others do it another.
I haven't noted it yet, but I have even used inner cover strips on the seams to strengthen the pieces further, which is a deviation from the original costumes. Am planning to write stuff like that on the images too. The thought is to have these images contain all of the various bits of information I have learned through research.
-
-
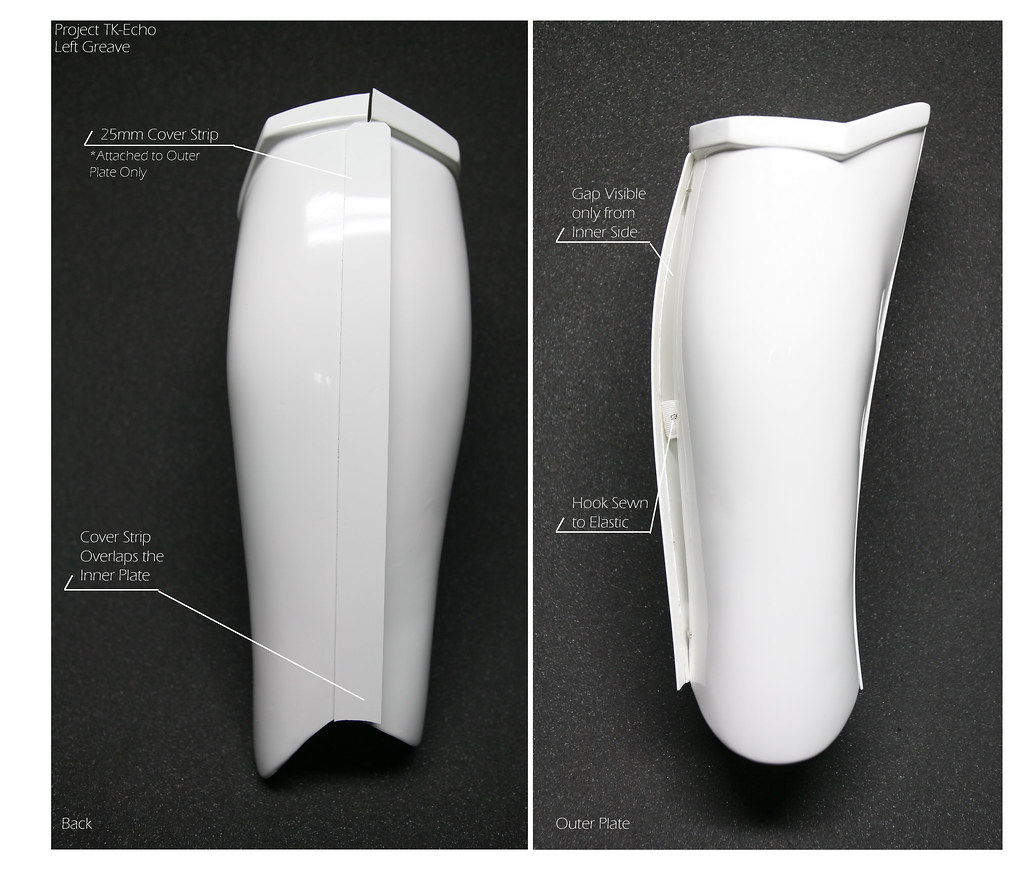
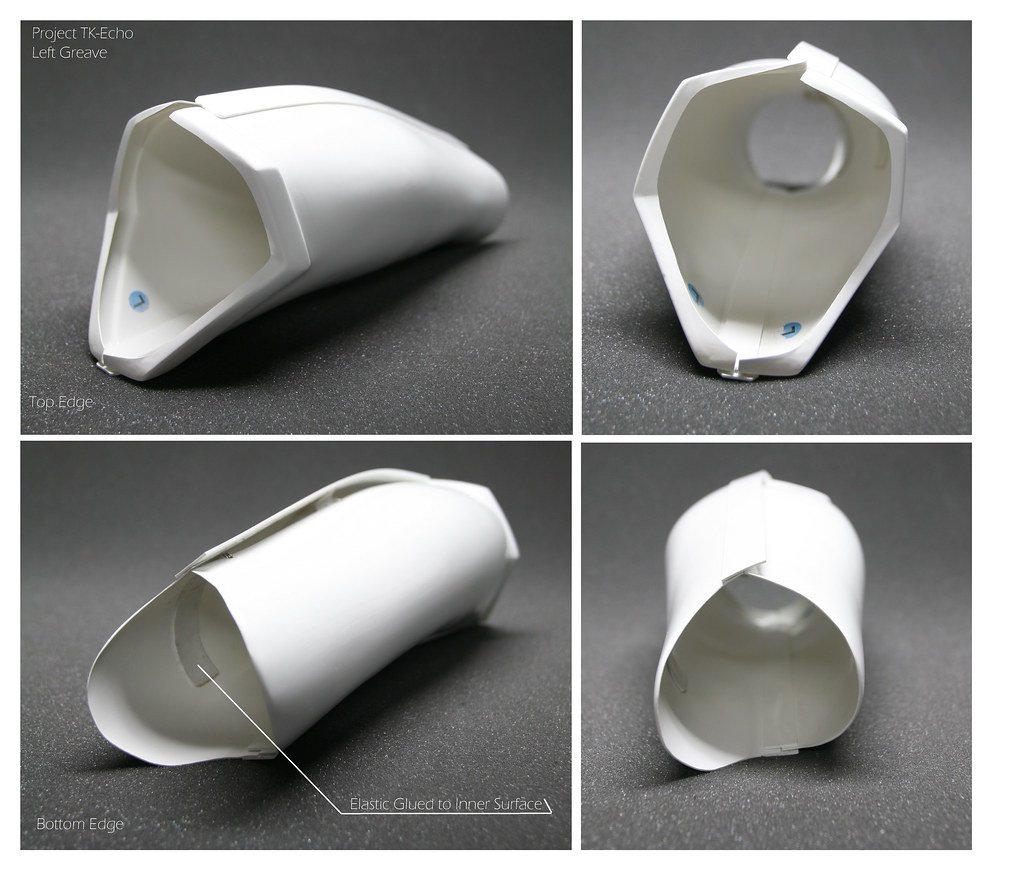
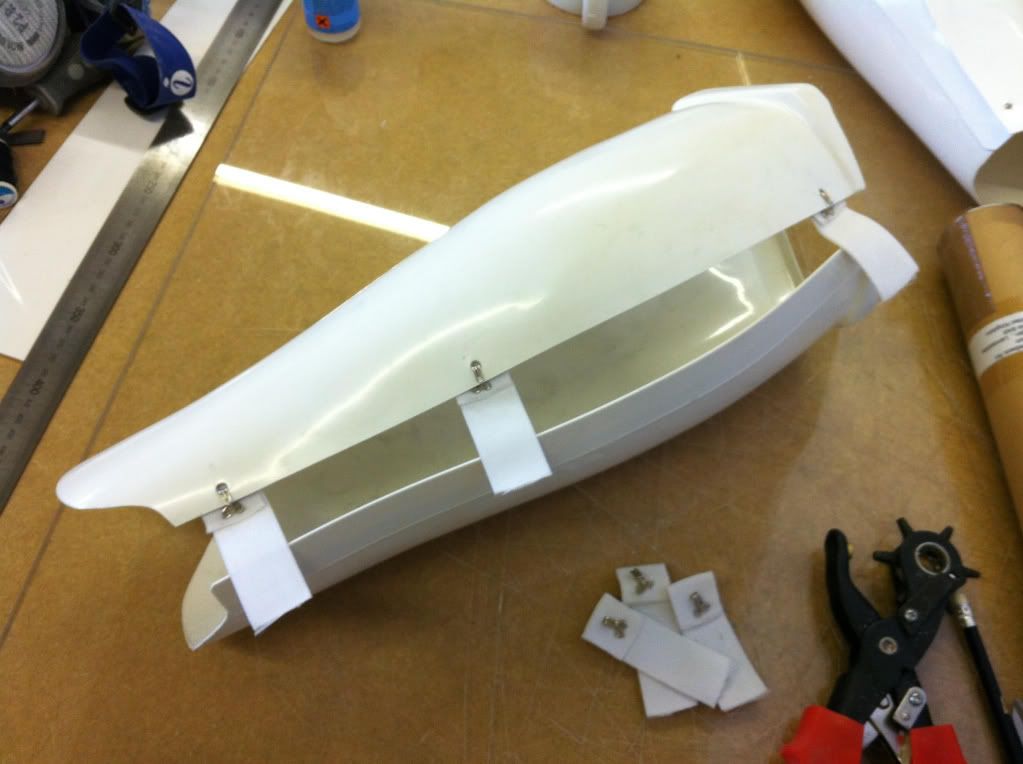
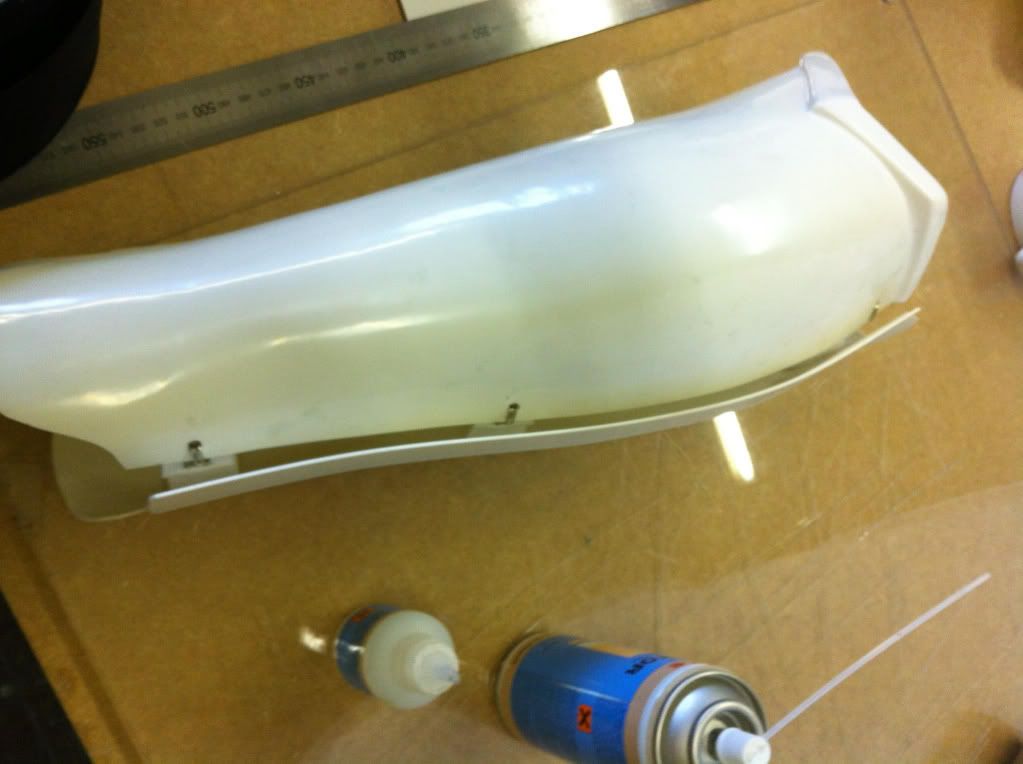
Left Greave before I attach the sniper plate to document what the top looks like before it is covered up.
Left Greave_Page_1 by Echo Rogue, on Flickr
Left Greave_Page_2 by Echo Rogue, on Flickr
Left Greave_Page_3 by Echo Rogue, on Flickr
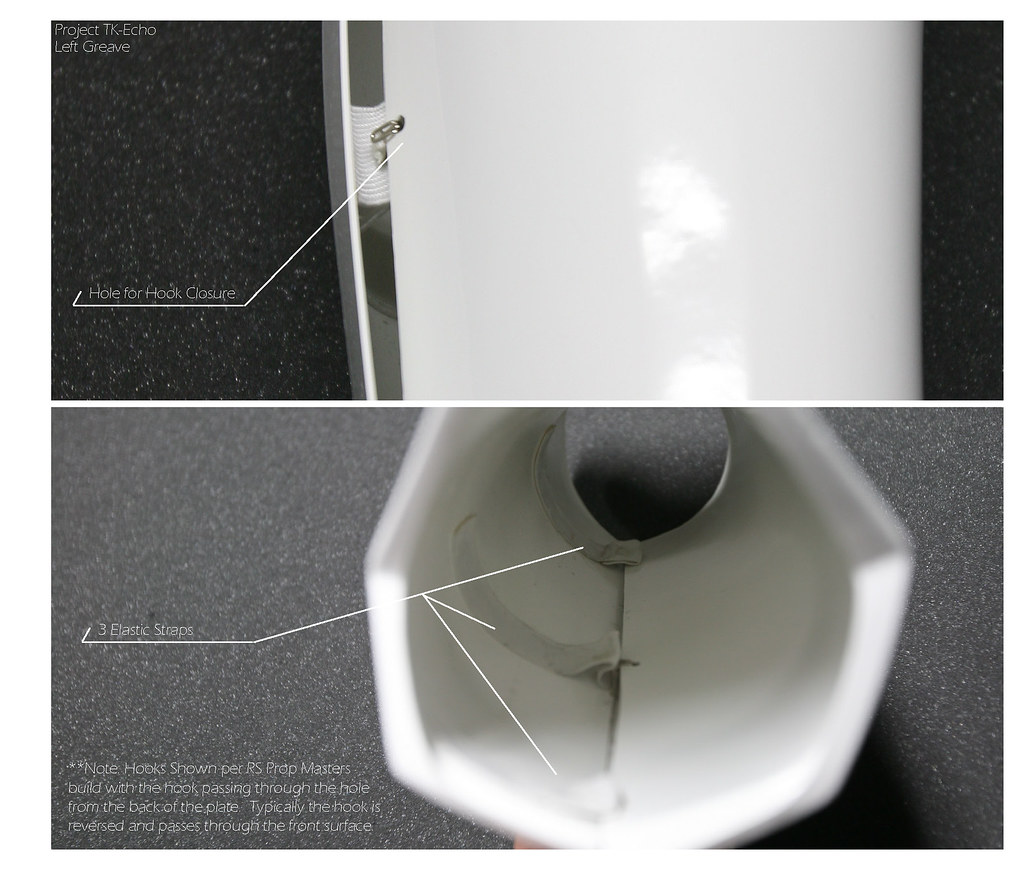
Left Greave_Page_4 by Echo Rogue, on Flickr
-
Cool Thx, definitely agree about the bottom edge of the bicep. I'm sure I'll trim it by the time I get it all fitted to my body.
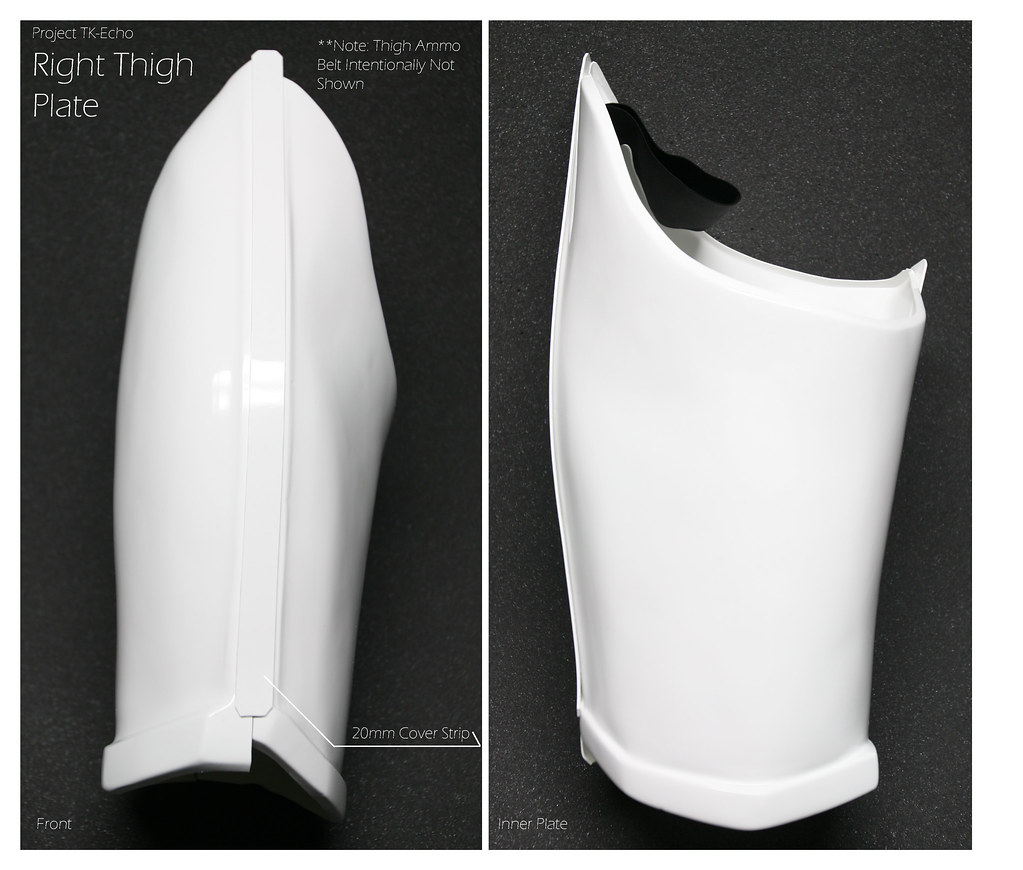
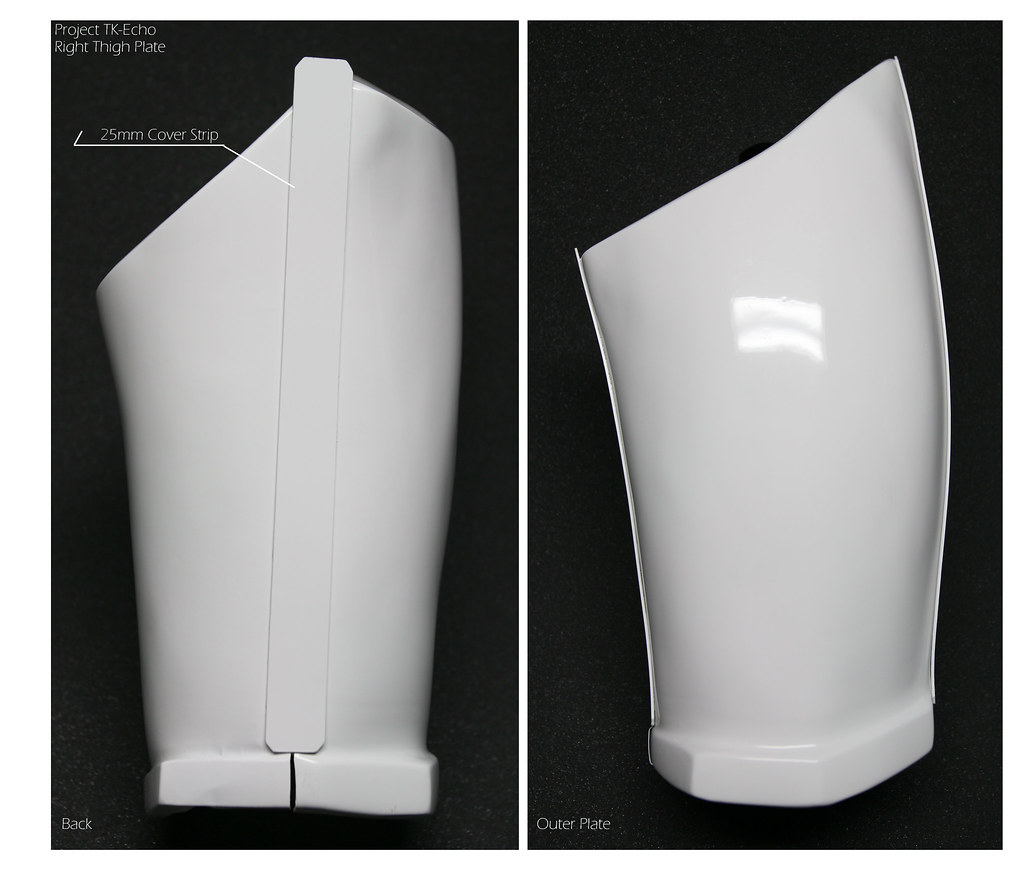
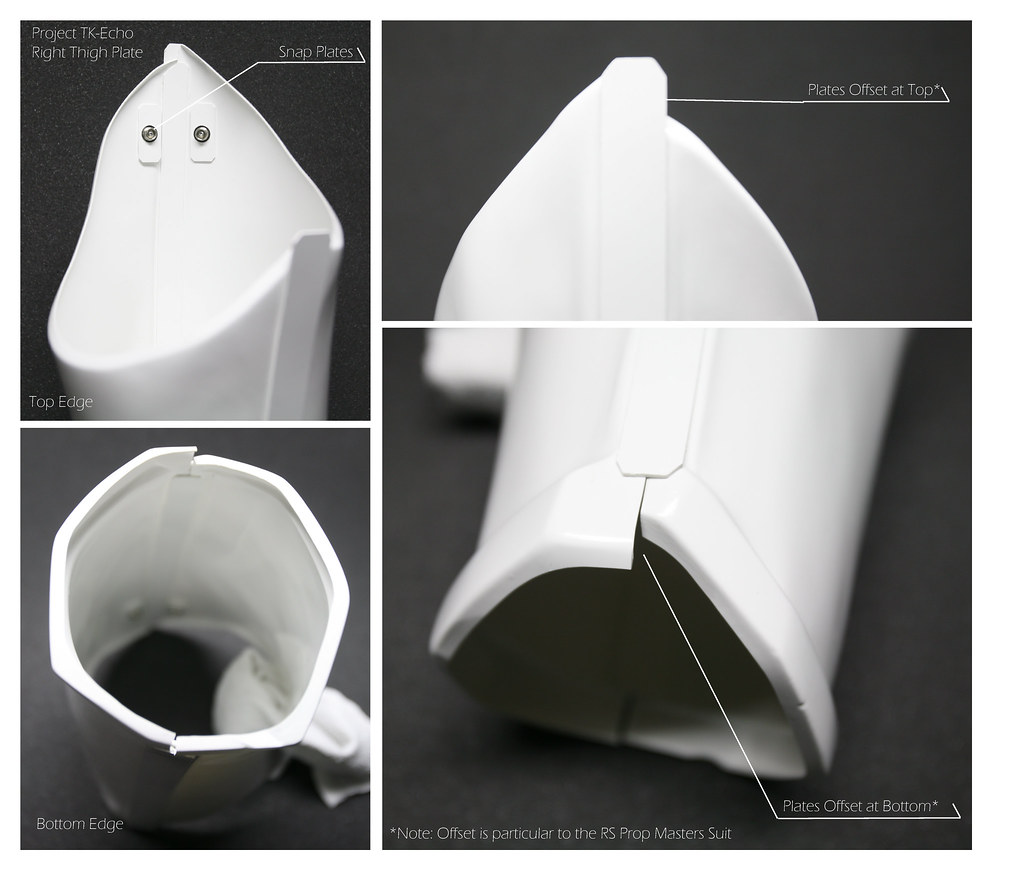
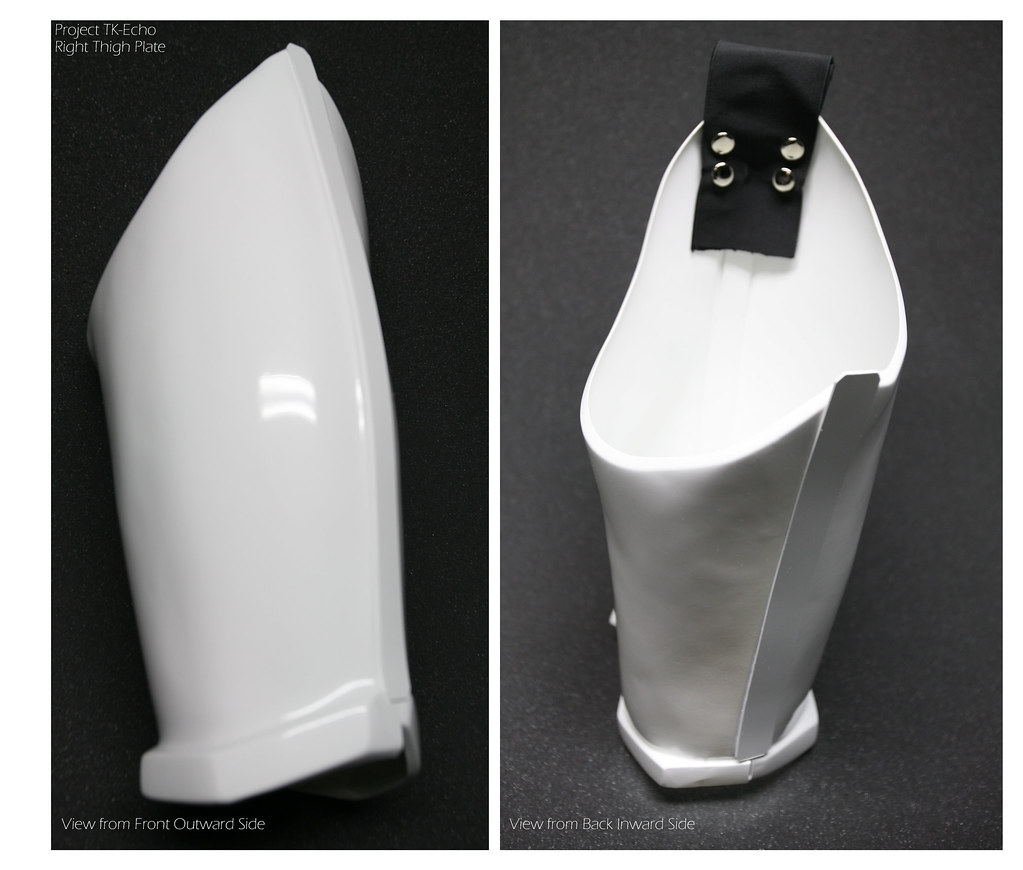
Here's the Right Thigh. I'm posting this before attaching the right ammo belt so that others can see the offset detail specific to the RS Prop Masters suit. It was something that wasn't very clear to me when I first assembled it and had to pull apart. Figured it might save someone else the trouble. Some of my photo's are more washed out than I want, I might replace them sometime later so that details along the surfaces are more clear...
Oh, & I chose to use snap plates for the elastics instead of the screen accurate method of gluing them directly to the plates for convenience of adjustments and ease of future replacement. I plan to troop in this set, so it seemed more practical. It even paid off so far as you can see by there being 4 female snaps on the elastic. I had them set too high at first and all i needed to do was add more snaps below to lower them.
I also haven't trimmed the backs of the thighs yet, though I expect that will happen for comfort heh..
Right Thigh_Page_1 by Echo Rogue, on Flickr
Right Thigh_Page_2 by Echo Rogue, on Flickr
Right Thigh_Page_3 by Echo Rogue, on Flickr
Right Thigh_Page_4 by Echo Rogue, on Flickr
-
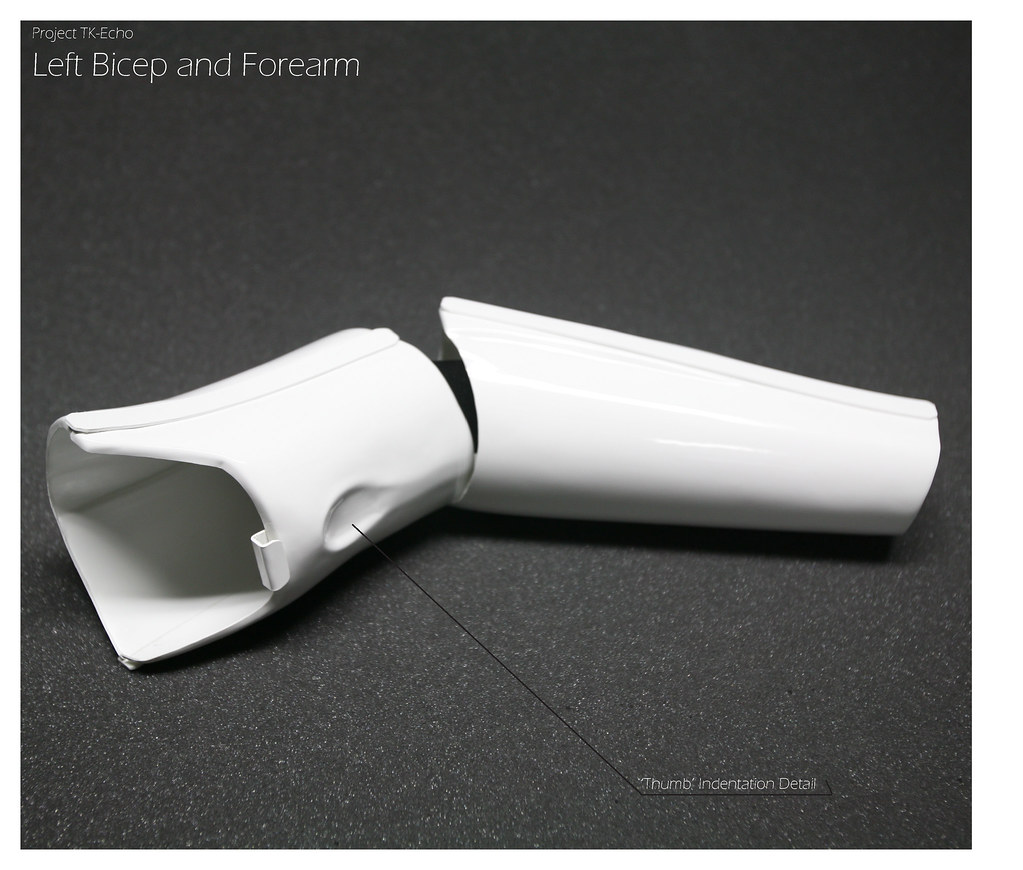
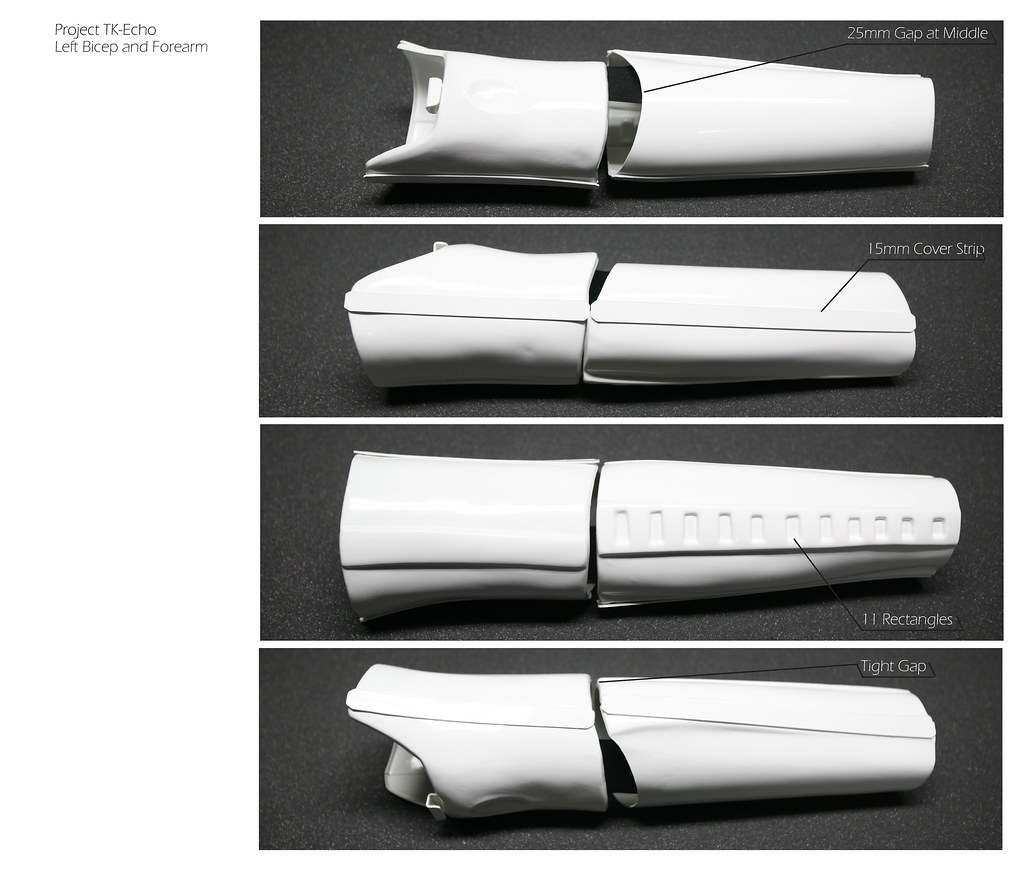
Finally had a chance to take photo's of individual parts of the suit. Here's how the Left Bicep and Forearm have come out. Right is similar so I'll skip posting it. I'll be doing this with each basic part. Let me know if you have suggestions for edges, corrections, improvements etc. Just want to make sure I get the fine details accurate, but I know the ultimate factor is how well it fits me. I'll post pics for that when I'm at that point. Thanks for any comments and help.
Left Arm_Page_1 by Echo Rogue, on Flickr
Left Arm_Page_2 by Echo Rogue, on Flickr

Left Arm_Page_3 by Echo Rogue, on Flickr
Left Arm_Page_4 by Echo Rogue, on Flickr
-
I didn't think the RS guys would be sloppy with a detail like this.. Are we sure it couldn't be done either way? I don't mind fixing it... It's just seems more logical and comfortable than having the elastic in between the two halves...
-
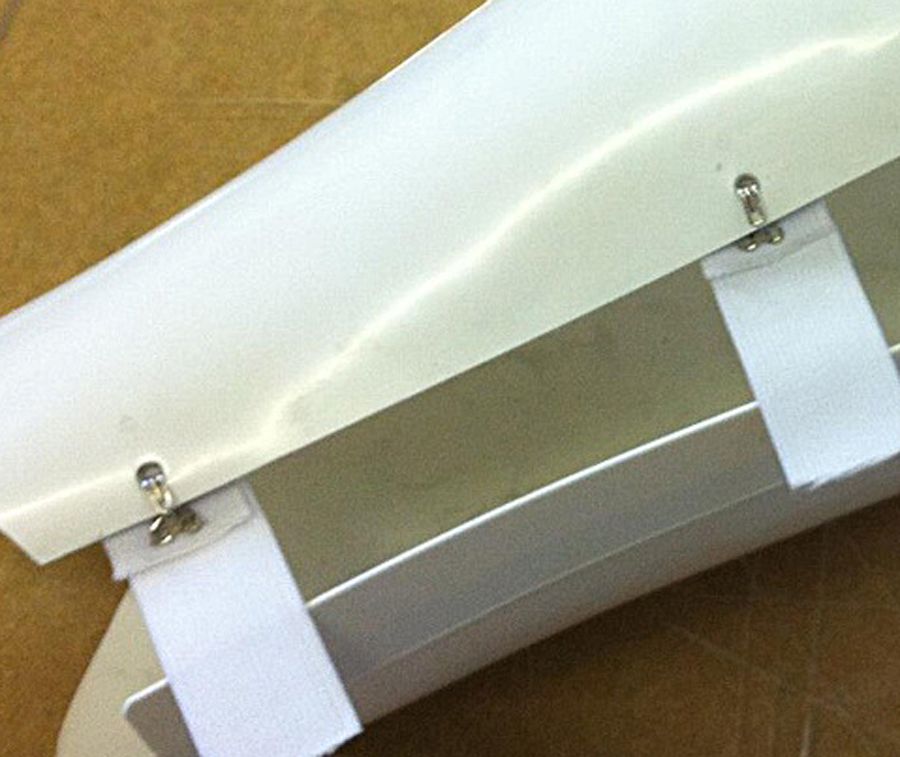
Ok I fixed the images so they are bigger & here is a blow up of one of them. It appears to me that the hook is going through the hole from the back surface, not the front surface.
-
I think I made a hasty adjustment..
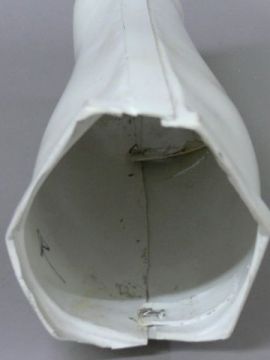
I had glued the elastic and hooks like the photo below where the elastic would be between the two halves:
Or like this
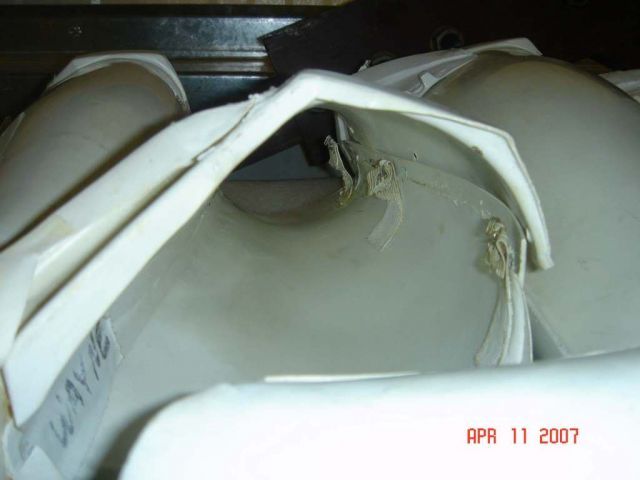
But the fit was so weird and such a struggle to unhook, I started to look at other images to make sure I did it correctly. I then went to RS Propmaster's Facebook page and found these images of their suit:

It seemed to make more sense to have the hook go through the back, so I figured I had done it wrong the first time. So last night I pulled them off and glued them that way.
Today, looking over the photo references again I realized that I had it correct the first time...
Is this one of those preference details that vary from suit to suit in the films so either is ok? Or should I pull them off again and glue like I had the first time? I'm ultimately planning on submitting for Centurion level...
Thanks
-
Thanks : )
One question / comment, the hooks on the shins are very frustrating to unhook.. Is that typical? Should I widen the holes to help or will that cause them to pop out more easily?
I had an easier time with hooks like that in High School.. /wink

-
One comment would be to shorten the gap between your forearms and biceps.
I found that if you set the elastic to where they are almost touching at the ends, it fits well. Geaux Saints has a good post with how the elastic is done that I used as a reference
-
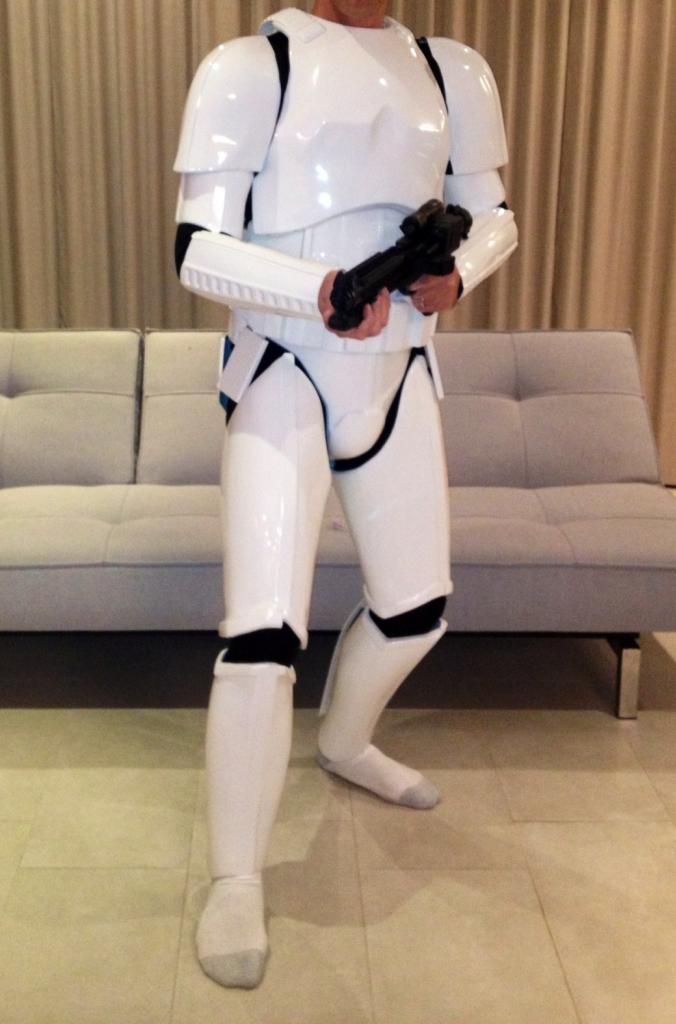
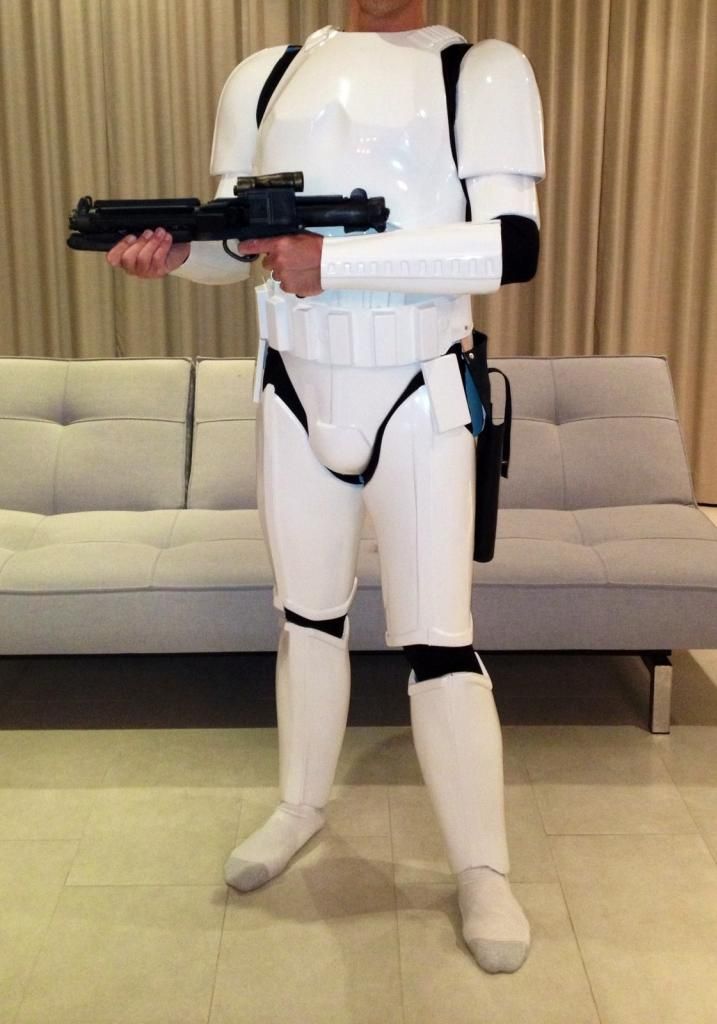
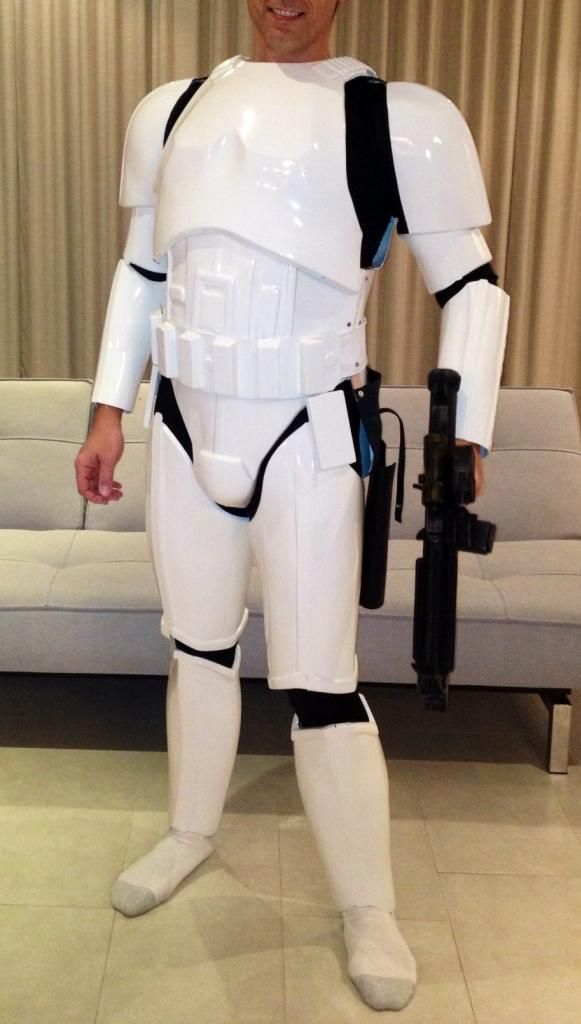
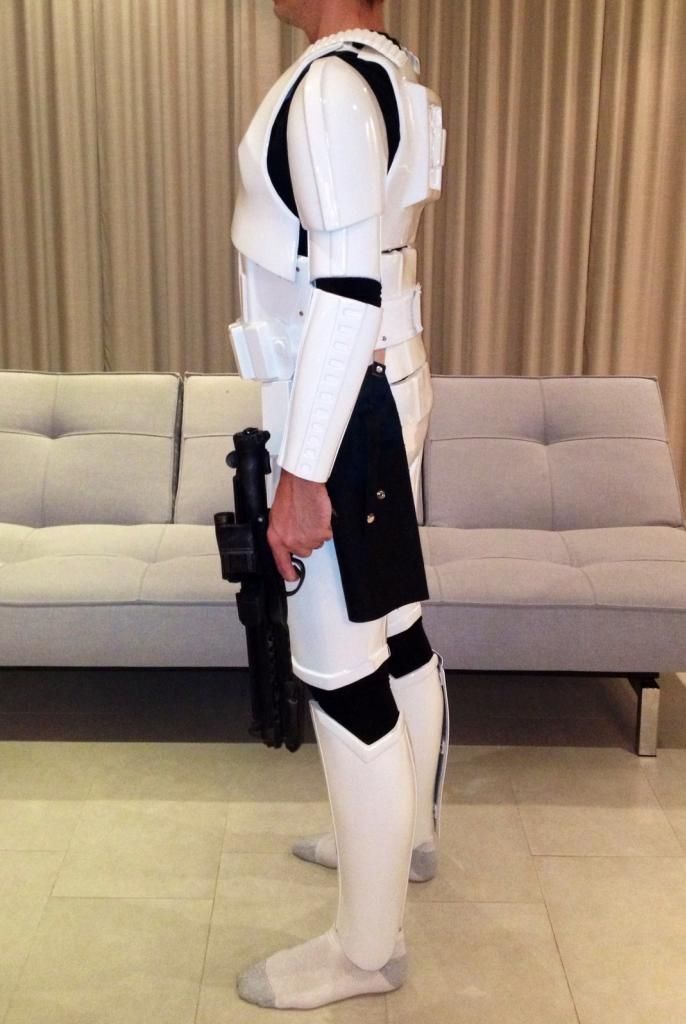
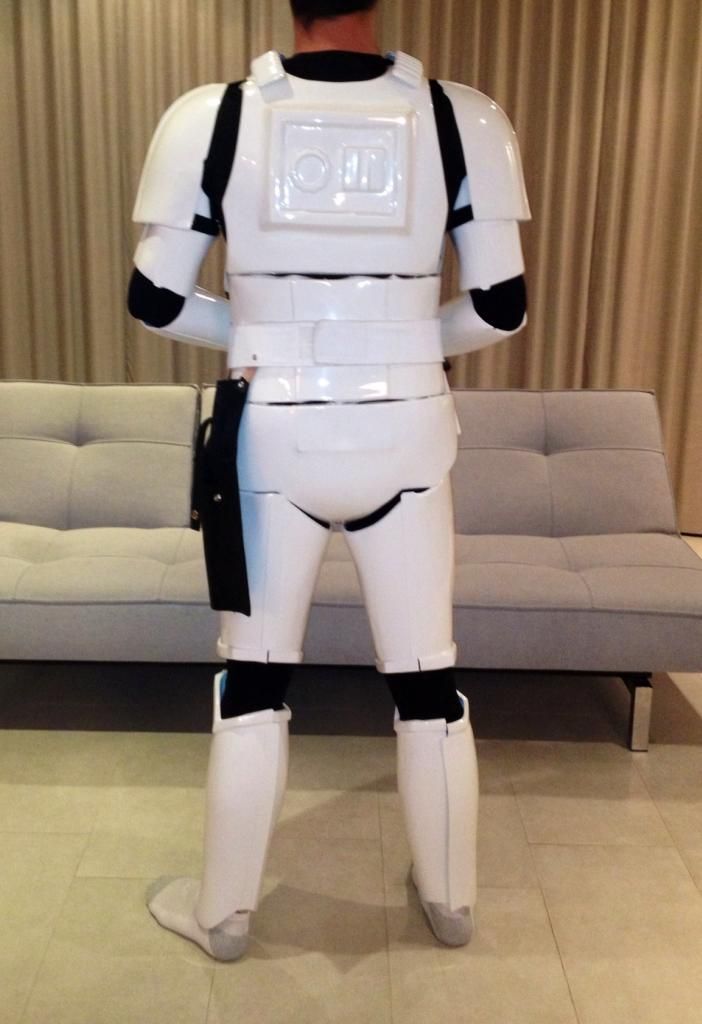
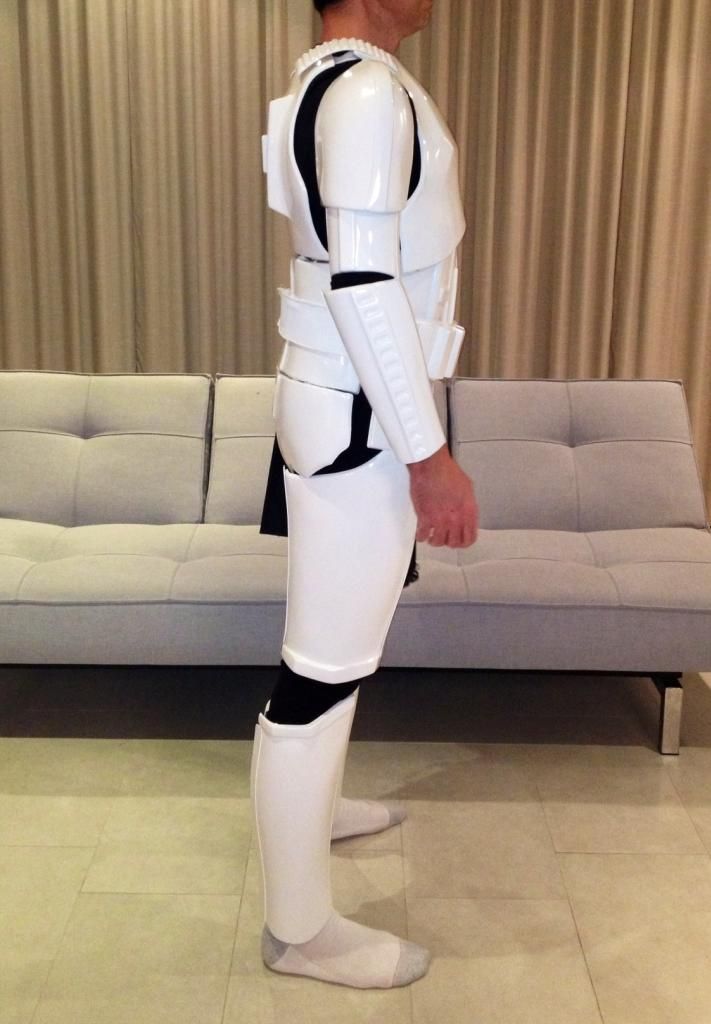
A quick update. Sorry for the low res phone pics. I was just excited to share. I'll post some proper pics soon to get better feedback. Things left to do:
Attach and paint ab buttons
Attach thigh ammo belt
Attach sniper plate
Elastic on the bridges
Build Helmet
Lots of little adjustments to do, but it feels good to see it starting to come together...
-
 1
1
-
-
Welcome
Sent using Tapatalk
-
Hi Kenny
Welcome
. The getting started section is the best place to start. One of the first things to do is decide what type you want to build. As you learn more about all things trooper, you will see there are differences between each film and even within ANH (a new hope; stunt vs. hero). Once you find the style you want, then the thread with armor makers will give you info on what options you have. Budget and timeframe are usually the next things to consider, along with deciding your preference or perspective on visual aesthetics of the suit. What I mean by aesthetics is if you lean more towards an idealized look or a screen/movie prop accurate look. Both are embraced by the 501st and many end up somewhere in between. There are definite do's and dont's for approval, however there are many things that are left to your own preference. You will learn what those are as you read threads. Best thing to do is read as much as you can through this site. It's an amazing resource.Sent using Tapatalk
-
Notches on the kidney sides should be at the bottom
-

HI from CT
in New Member Introductions Archive
Posted
Welcome