

emile1138
-
Posts
161 -
Joined
-
Last visited
Content Type
Profiles
Forums
Gallery
Articles
Media Demo
Posts posted by emile1138
-
-
Wait, are you saying the NE armor that I have from them was recast? Or their NE armor was recast by a third party, so they made a new set of armor to replace it?
I have a friend who is in contact with them right now and they're wanting to sell him the AM 2.0 kit. I'm asking the question of how it compares to the NE kit I have, because that's the one he originally wanted.
-
Does anyone have the new AM 2.0 kit and can you compare it to the NE armor they previously sold?
Also, how does it go in regards to approvability?
Thanks in advance!
-
A couple of my initial thoughts:
-The E-11 (if that's what it'll be officially called) looks like a toy to me. I'm sorry, it does. But the fact that it's designed to be a "video game friendly" design makes up for it in my book.
-The troopers do look stockier/thicker, but also, some are short and some are tall. I like this. They're not all skinny little british actors. There's alternations in height and weight! This is how an army of random galactic recruits would look like. Two thumbs up for this.
-Going off of my last point, if we're getting varying weight and height in new Stormies, maybe we'll be getting some sweet new alien Stormies too. Like an Ithorian or a Rodian Stormtrooper. I'm down with that.
-Lastly, I am going to 100% second the idea that the ribbing underneath the armor is just sections in between the armor. Meaning there's and undersuit, but separate sections of material to look like a full ribbed undersuit. No different than how we wear our neckseals now, just in every gap. This will cover up strapping too, but it's not a solid part of the full undersuit. Just snapped, glued, or clipped to the inside of the armor.
Overall, good looking suits!!!
-
 1
1
-
-
On the top of the thighs? No return edge. Sanded flat on mine.
-
I had a similar issue on my thighs and this was my thought process in fixing it and wearing them in a way that looks proper.
Check out these screen used reference photos:
---------------
As you can see, the thighs are twisted outward ever so slightly, but still lign up with the knees when standing relaxed. If you notice, when you're standing straight up, your feet aren't pointing straight out. They're pointing in outward angles. Thus, so are your shins, causing your thighs to lign up improperly when you have them attached perfectly straight.
When you're test fitting stuff, you get tense and want to point your feet straight forward unnaturally, causing the issue of misalighnment of the thighs.
Long story short, I twisted the thighs out slightly, so it fits the rest of the armor, and ligns up with the cod piece with minimal gap. If it's too out of lign with the shins when standing in a natural and relaxed position, twist them back and find a healthy middle ground between fitting in the crotch and ligning up with the shins.
Two things to remember when you run into situations like this:
1- Just do what looks good and proper. No need to freak out over small alignments. When you visit a kid in the hospital or go to a fundraiser no one is going to say, "That Stormtrooper is cool and all,but I don't want a picture with him because his thigh is 1/4" misaligned with his shins!"
2- Whatever you do, you will never look as bad as this guy...
-----------
(Yes, that is an actual screen shot from the movie)
Good luck!
-
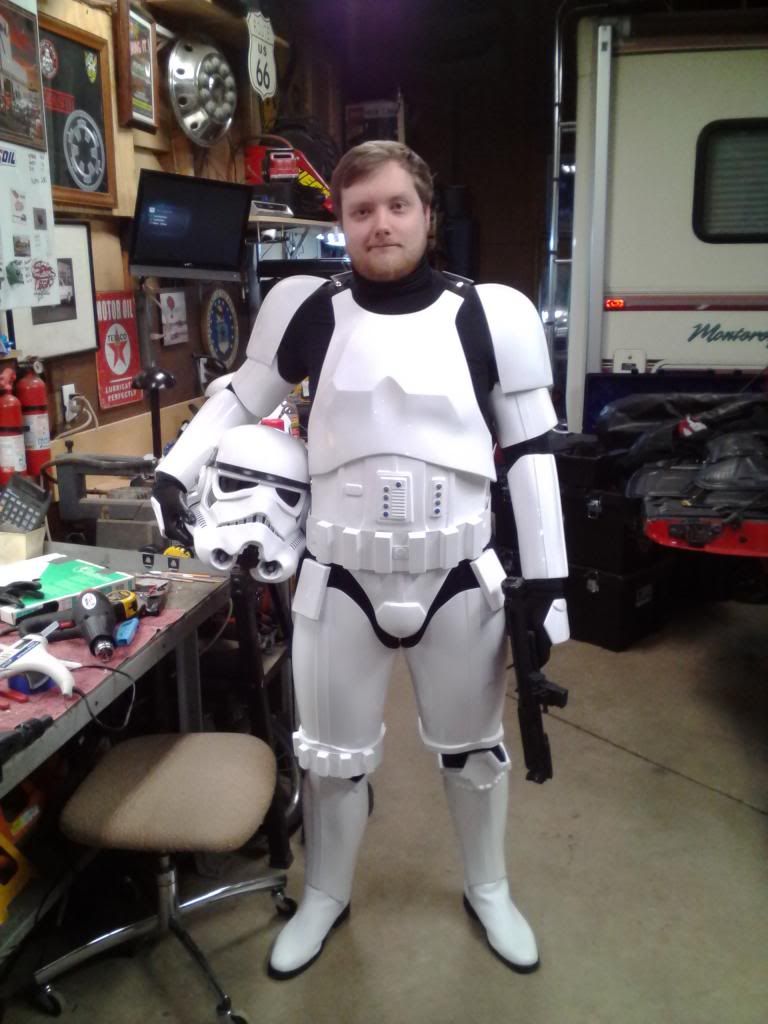
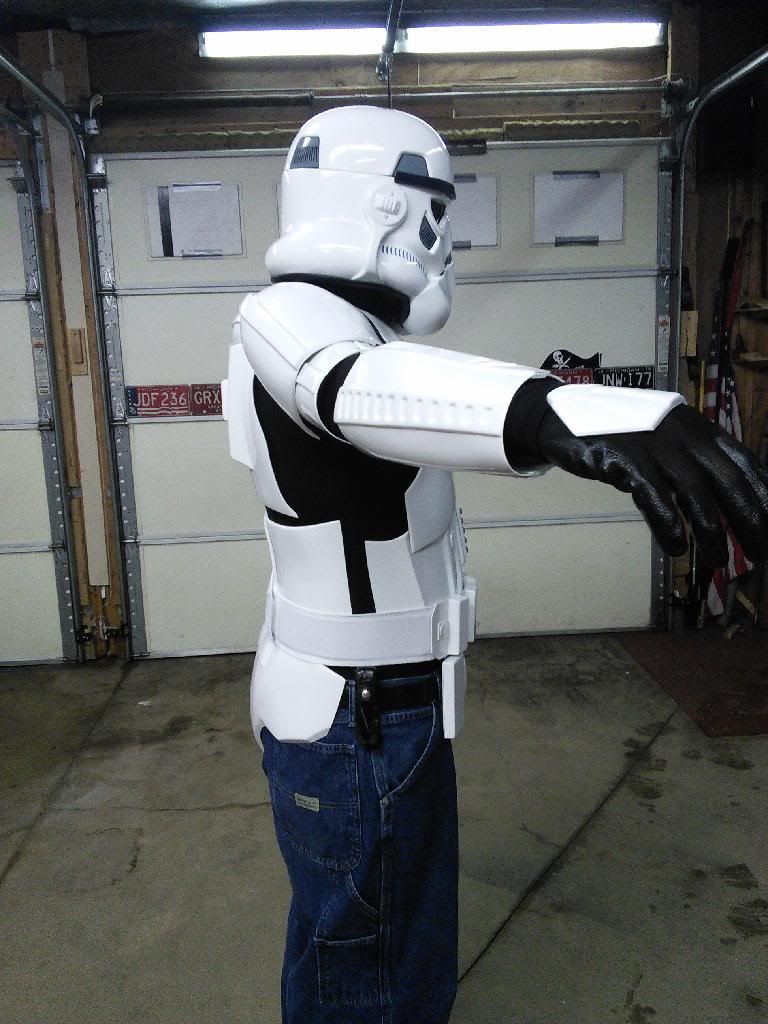
Here we are! The pictures taken that were submitted and approved! Thanks Mark and everyone on this thread for all your input!!!

(^I've always wanted to use that smiley, now I actually CAN!)
Here's some pictures for you guys:

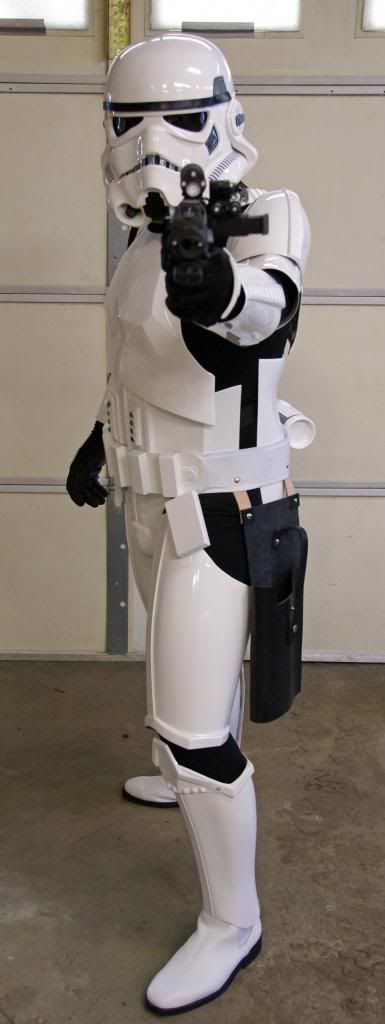
I'm considering making adjustments to go for Level 2 certification, and I also have a LOT of electronics work to do on this costume, so I'll continue to post my future works and questions on this thread

-
So, I had to do some more tweaking, but I got approved!
I'll post more pictures and such tomorrow, but I just thought you guys might like to know

-
I already have 501st status, but I'm now requesting FISD status!!
http://www.501st.com/members/displaymember.php?userID=14691&costumeID=124
Thanks!
-
Looking good! I'll be watching this progress!
-
Aside from the bickering, this thread is relevant to my interests...
-
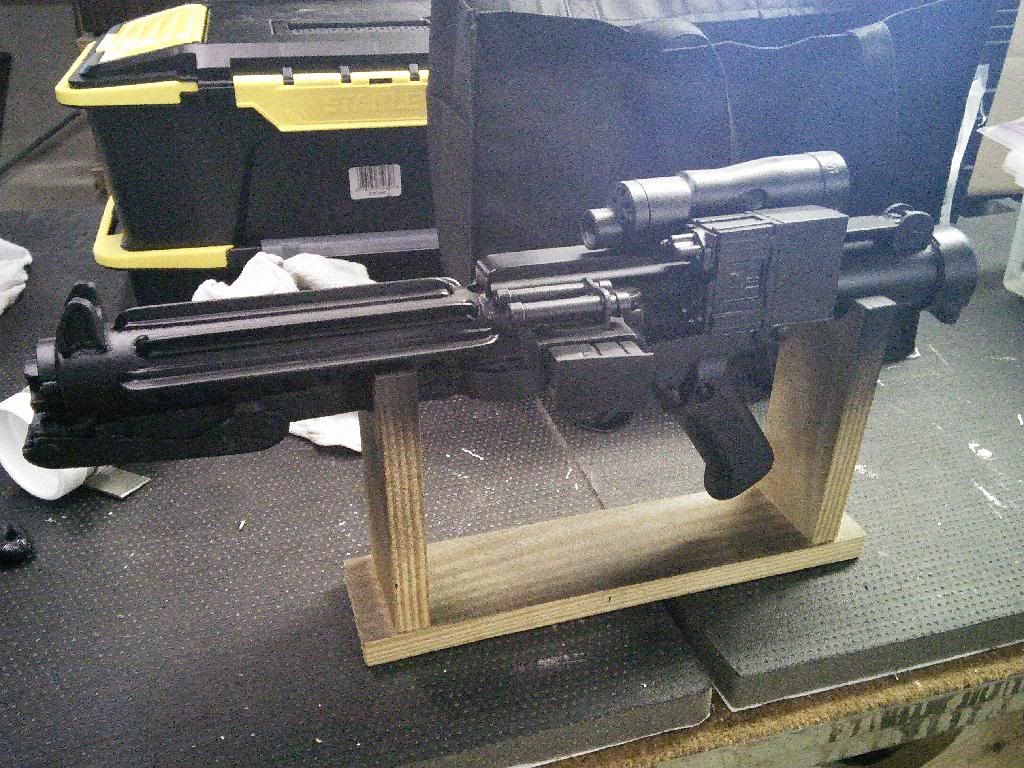
Finished up my E-11!
-
He'd better be nice...I'm his new GML.

Awwww snap, son!
-
I kinda feel that way too, but yes, it depends on the GML. If he approves me I'll still be closing up that gap later. I think it'll look better in the long run.
-
I may go EIB after a while, but I've done so much work on this guy already, o really don't want to make any more modifications unless it's necessary for basic approval right now, ya 'know?
That's good to know though, I may consider doing that later on!
But for right now, am I fine for basic approval?
-
I've got an NE helmet, with NE armor.
I just chose AM for the armor, since NE isn't an option, and the NE armor is based off of (and almost identical to) AM. -
Alright FISD brotatos. Your input is needed!
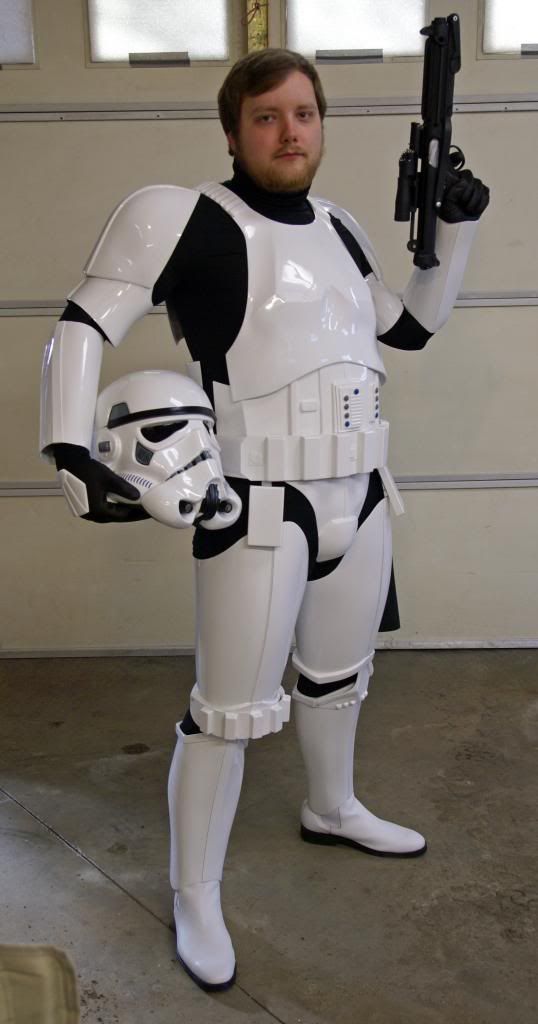
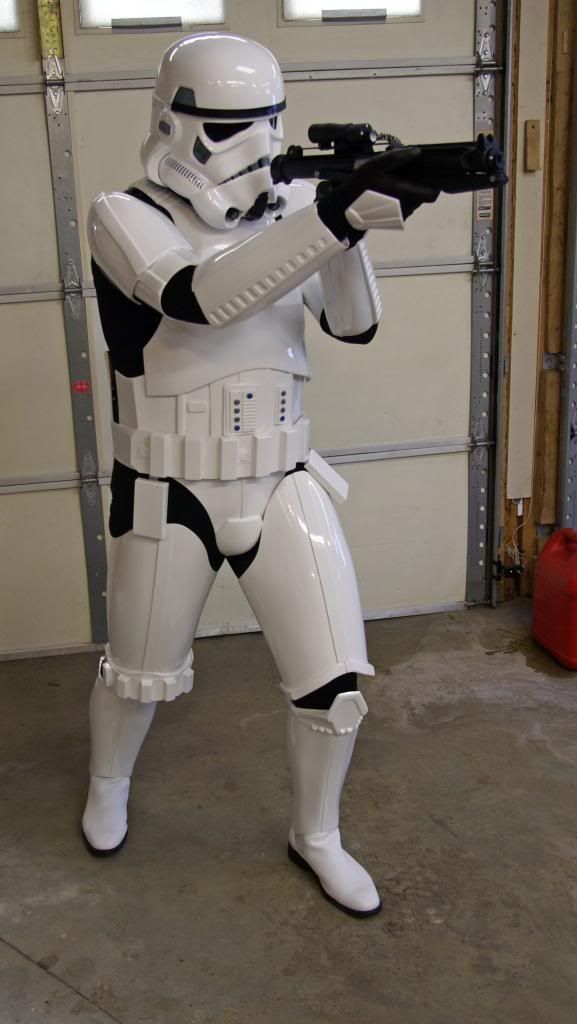
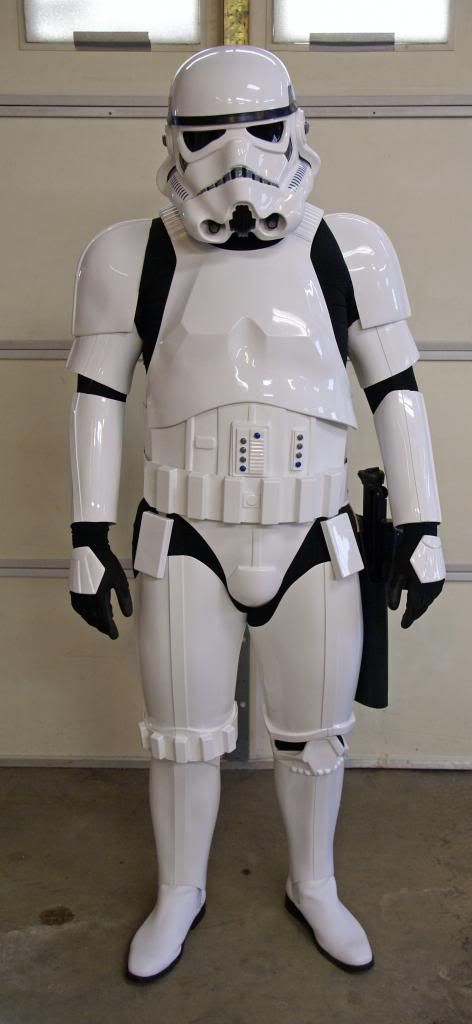
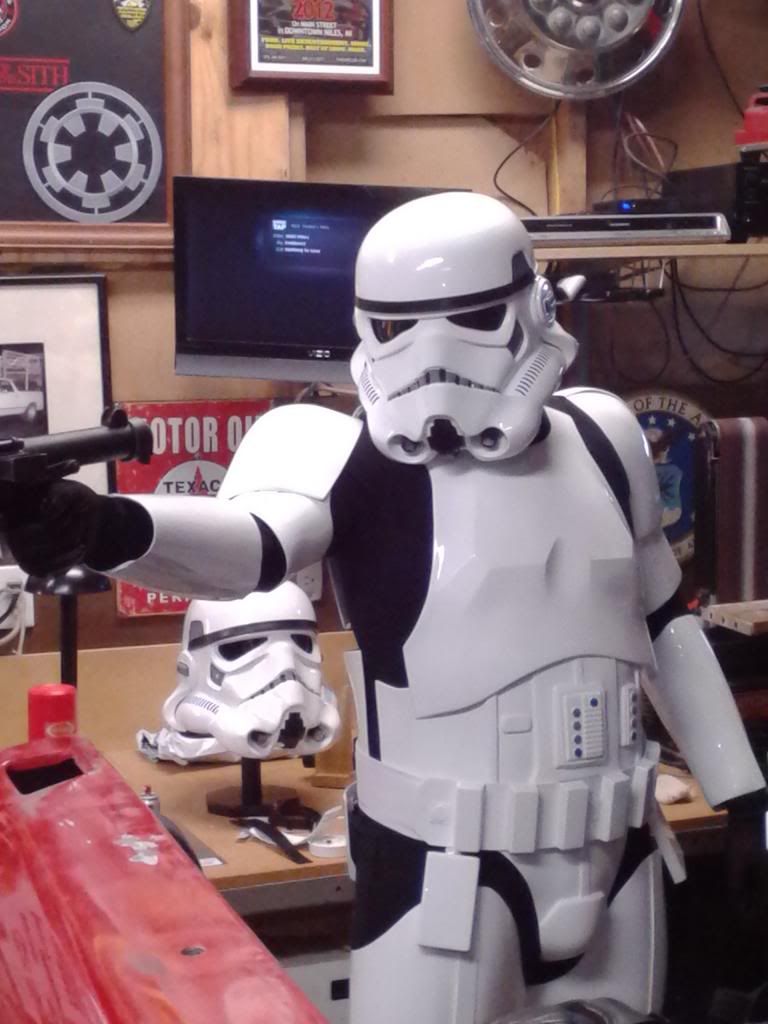
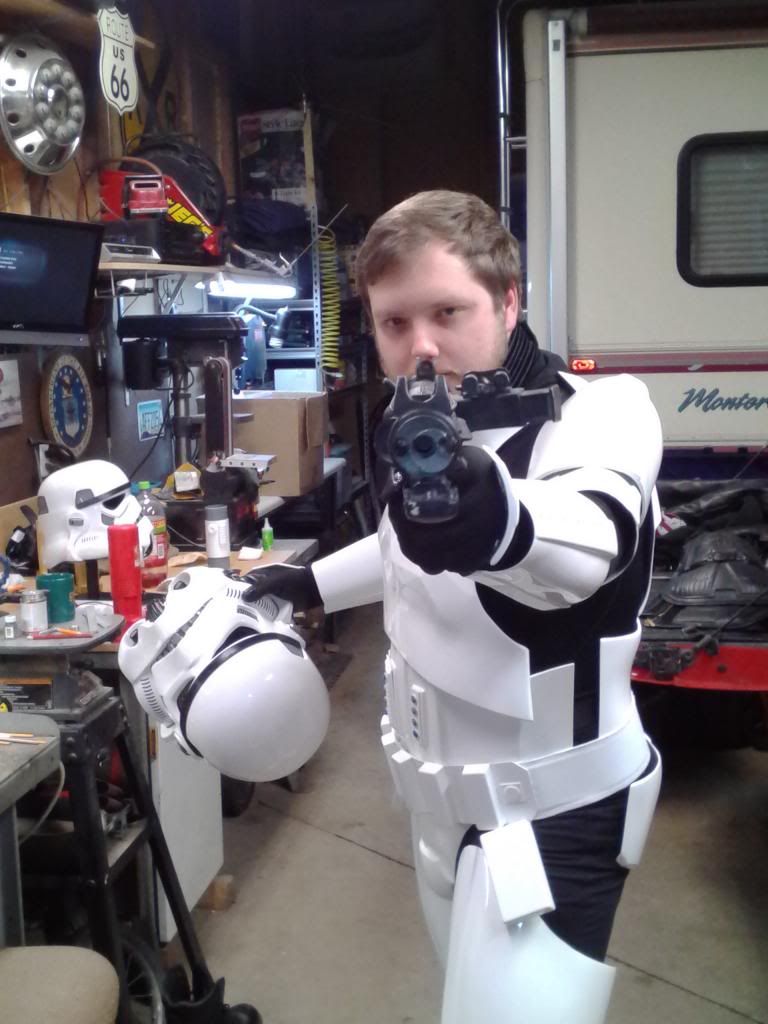
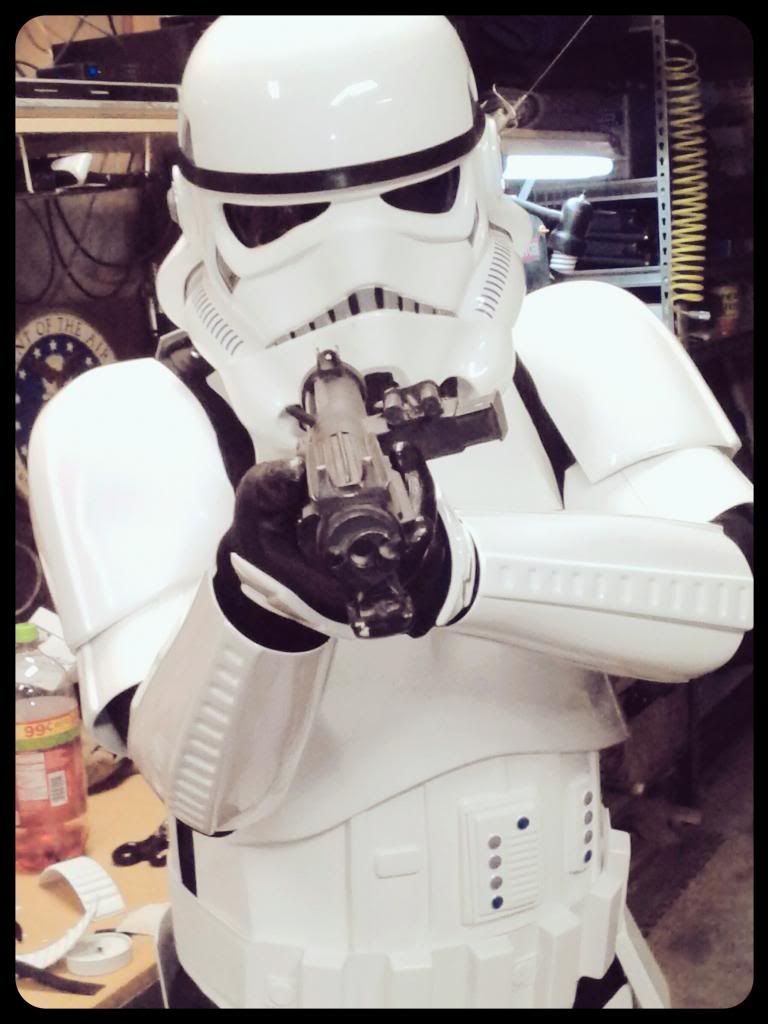
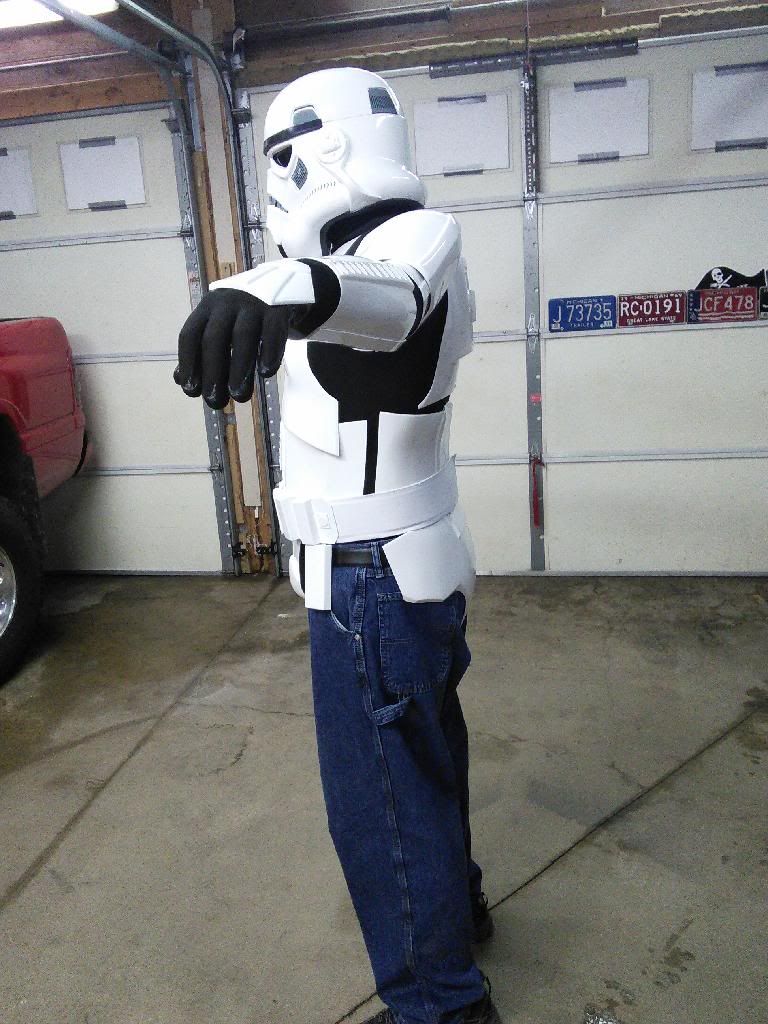
I have taken my submission pictures and I'm ready to get rolling with this guy! But first, I wanted to upload them here so some experienced people can chime in and correct me on any minor changes I may need to make to smooth out the approval process later on.Remember, I'm going for BASIC APPROVAL, so keep that in mind when giving me input!
Here are the pictures, courtesy of Curt:


And some others just for good measure/showoff rights:


I can't wait to hear from you guys!!

-
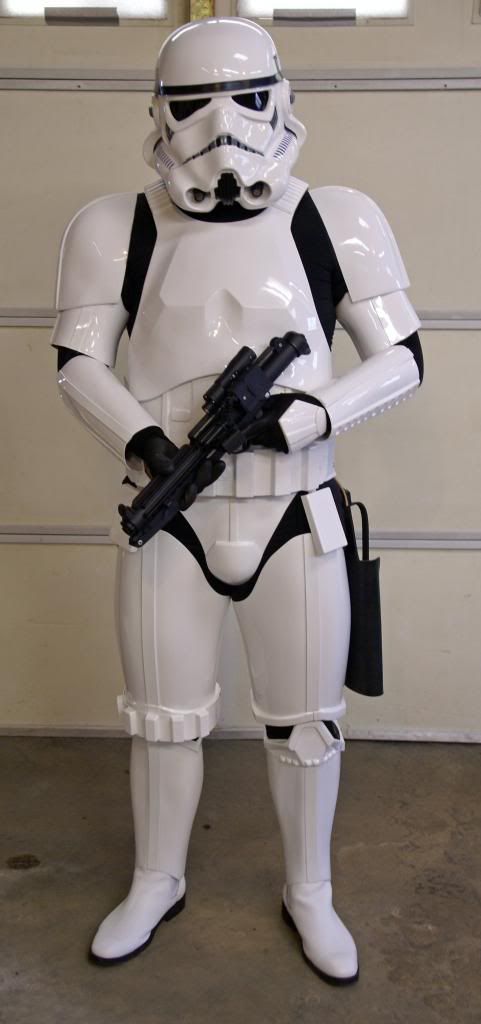
PROGRESS!! Finally...
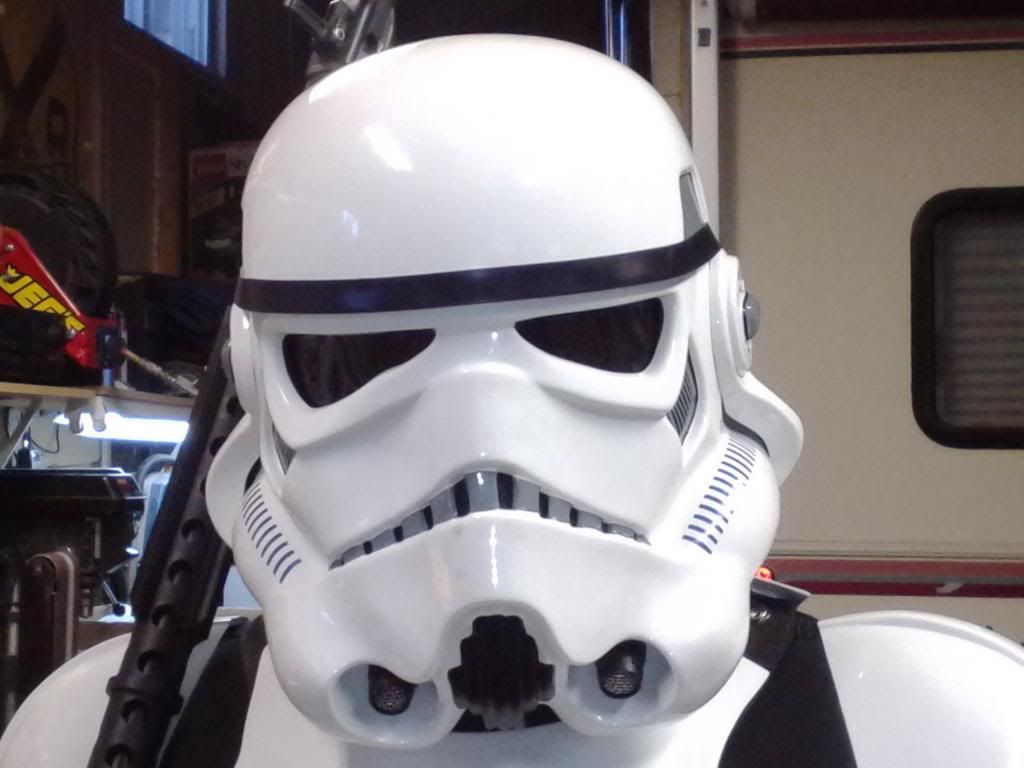
I added paint on both sides of the frown to taper it down to a point:
Detpack has been aesthetically finished, with electronics to be added later:
Holster is attached to the belt as well:
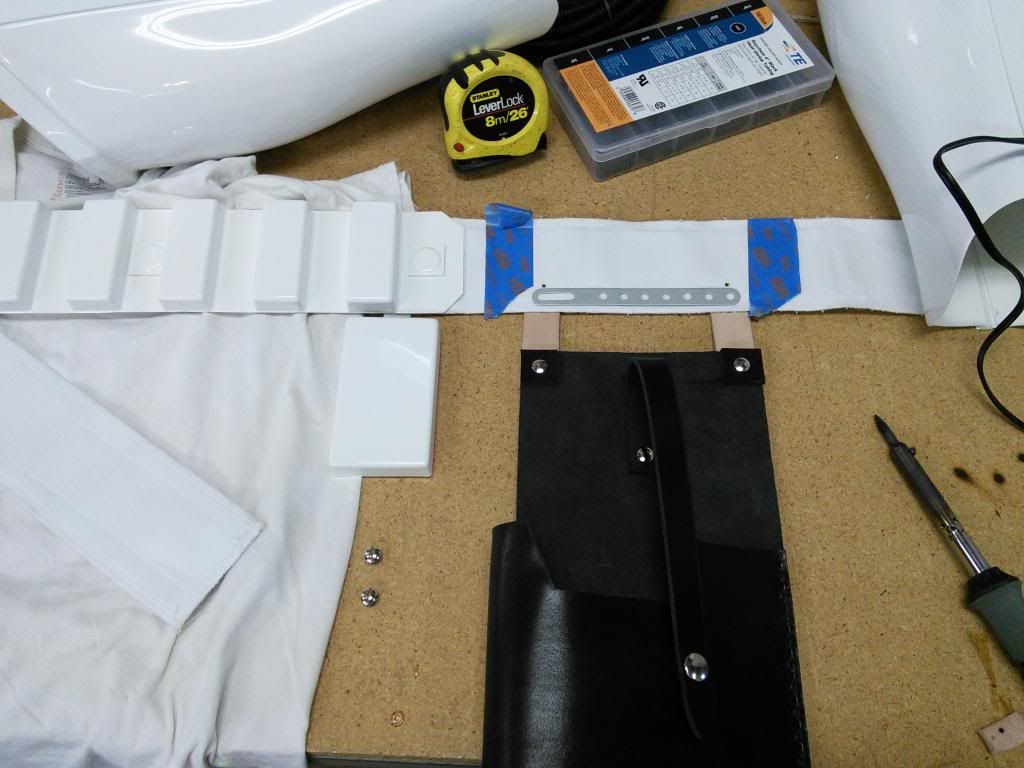
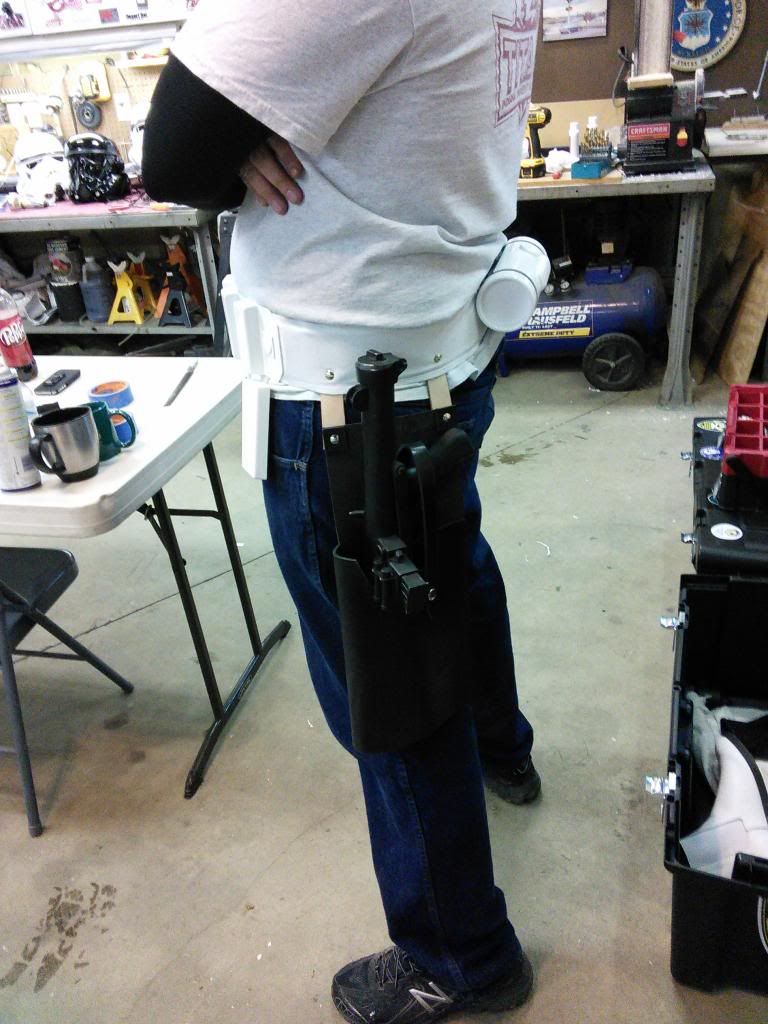
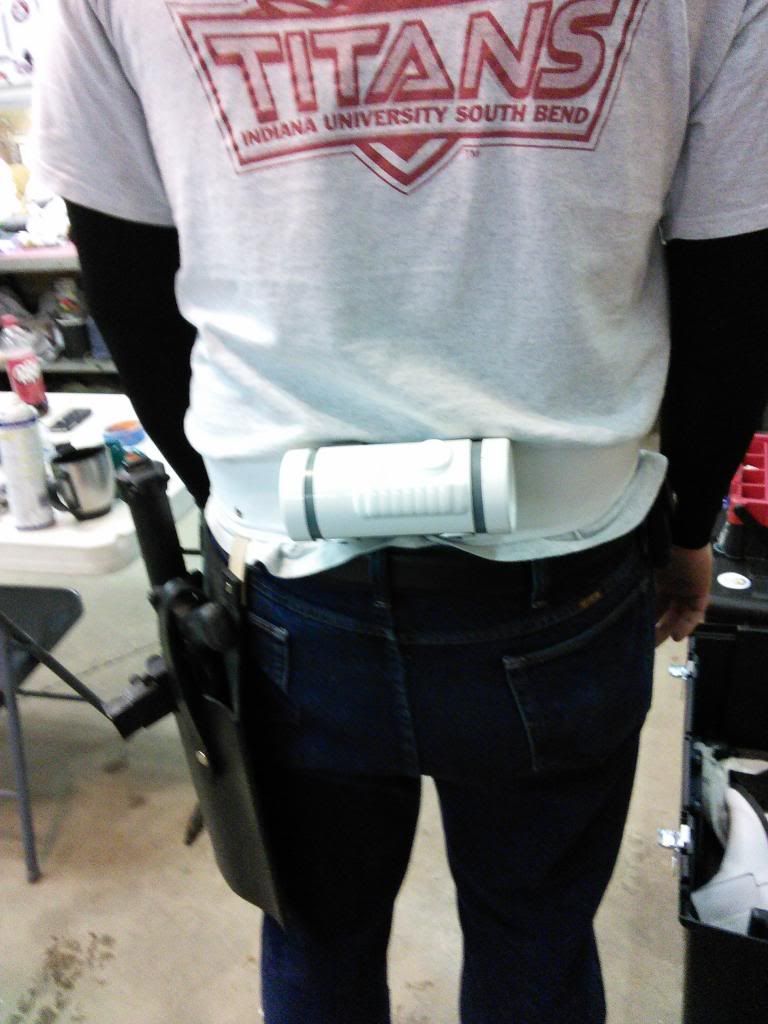
Also, my buddy Scott added some NICE lining to the inside of my hinged drop box. Now it has a nice silky cloth liner to the inside of it!
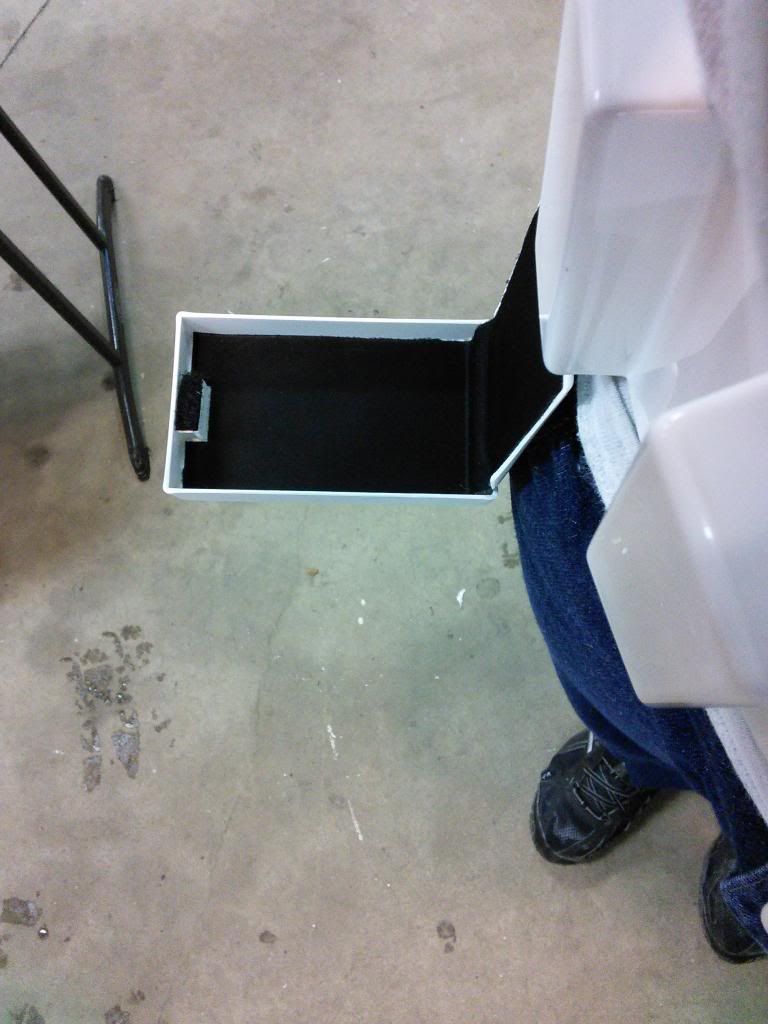
And here of some photos we took of it all together so far. Yes, I am aware, the belt is not yet velcroed in place and keeps sliding down. But other than that, what do you guys think?

I'd say I'm about 93% finished with this guy.
Comments? Suggestions?
-
I appreciate your input, but I have no idea either.
I would really like some input on this issue from someone who would know for sure, as well...
-
The shoulders, I agree with and will be fixed soon as well.
The teeth...there's no fixing that really. I cut the extra tooth out on both sides before I read the CRLs...
I understand that's what they say, but is the number of teeth cut out really something that could boot the whole costume from being approved? I'd hate to make a whole new helmet just for the teeth...
-
Darn. I was so close to being done with the helmet!
I'll fix that up soon. Thanks for the heads up!
Does anyone have any input on the body so far? -
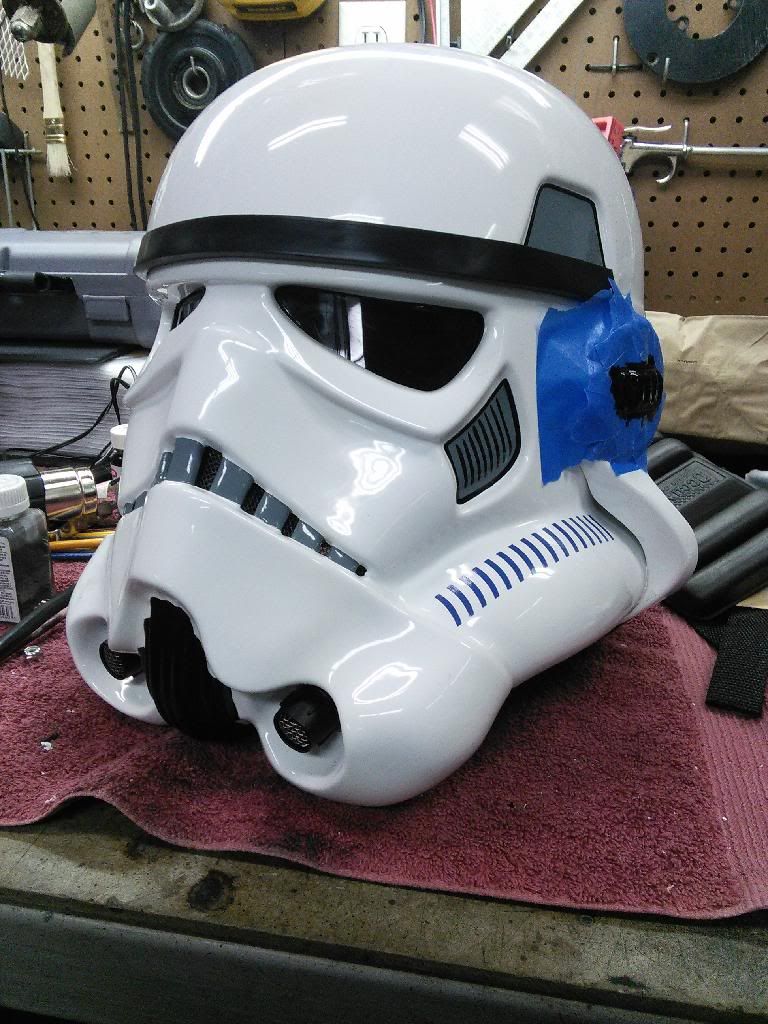
Good job! Nice lines around the ear bumps.

Why thank you sir!
-
But I eat them anywaSorry, I was in the middle of a thought and accidentally started typing it here. So I'm leaving it up there...
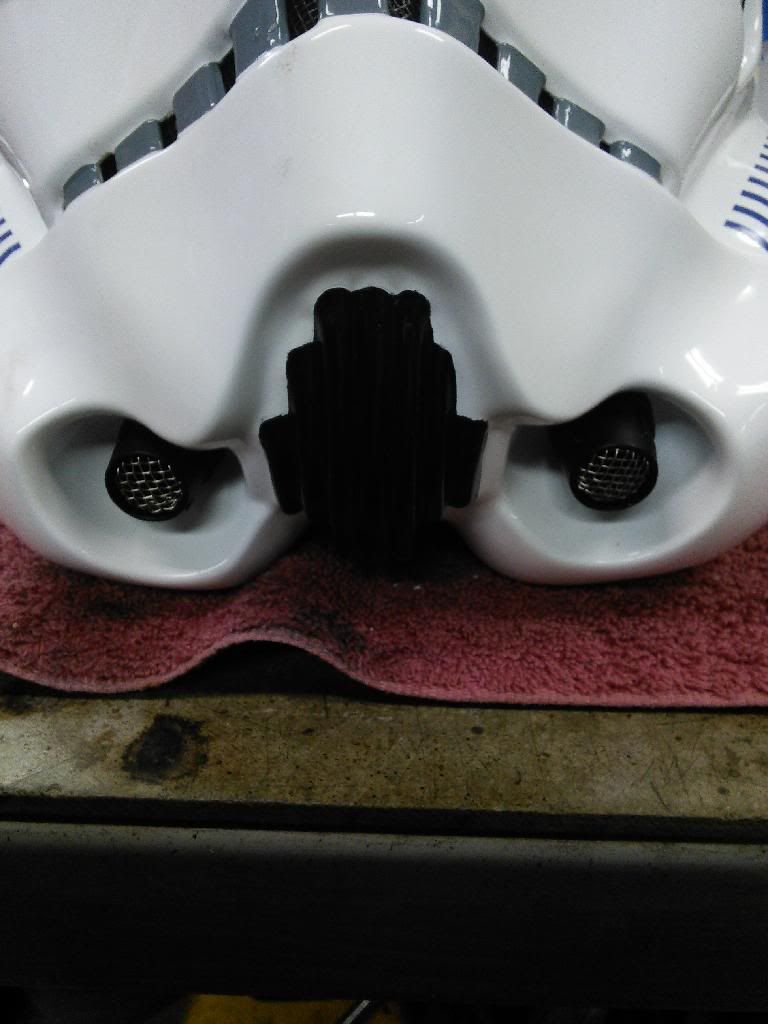
Anyways, I finished the outside of the helmet completely. I hand painted the ears... I've never tackled something like that before, so I'm real happy about how they turned out!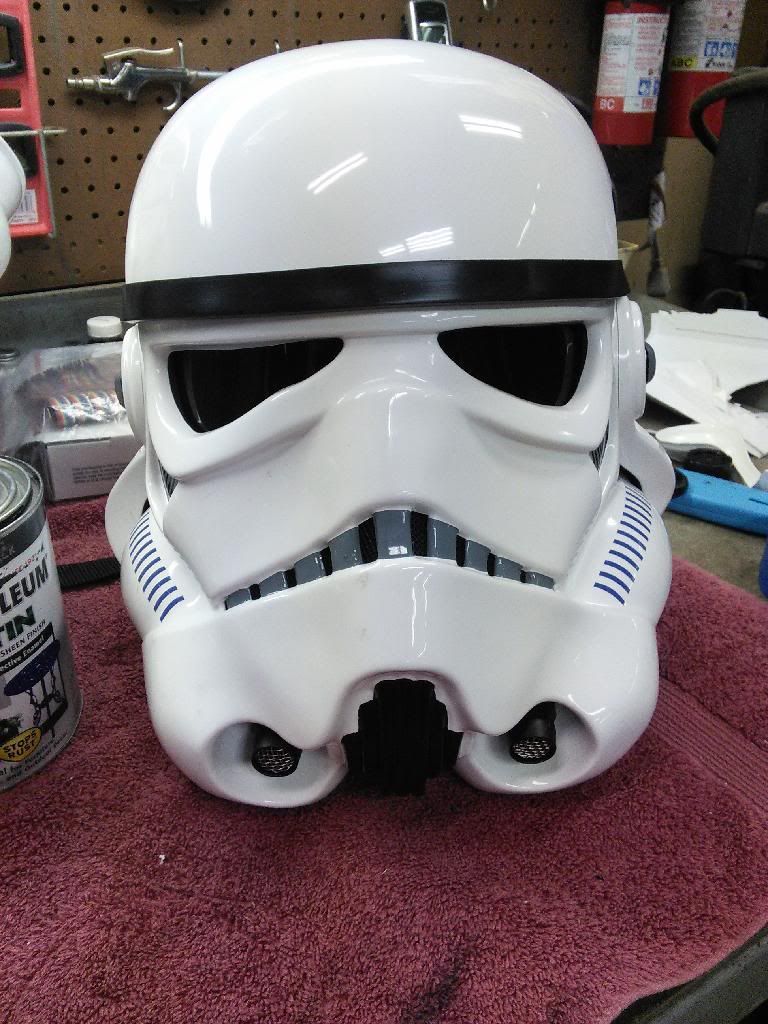
-
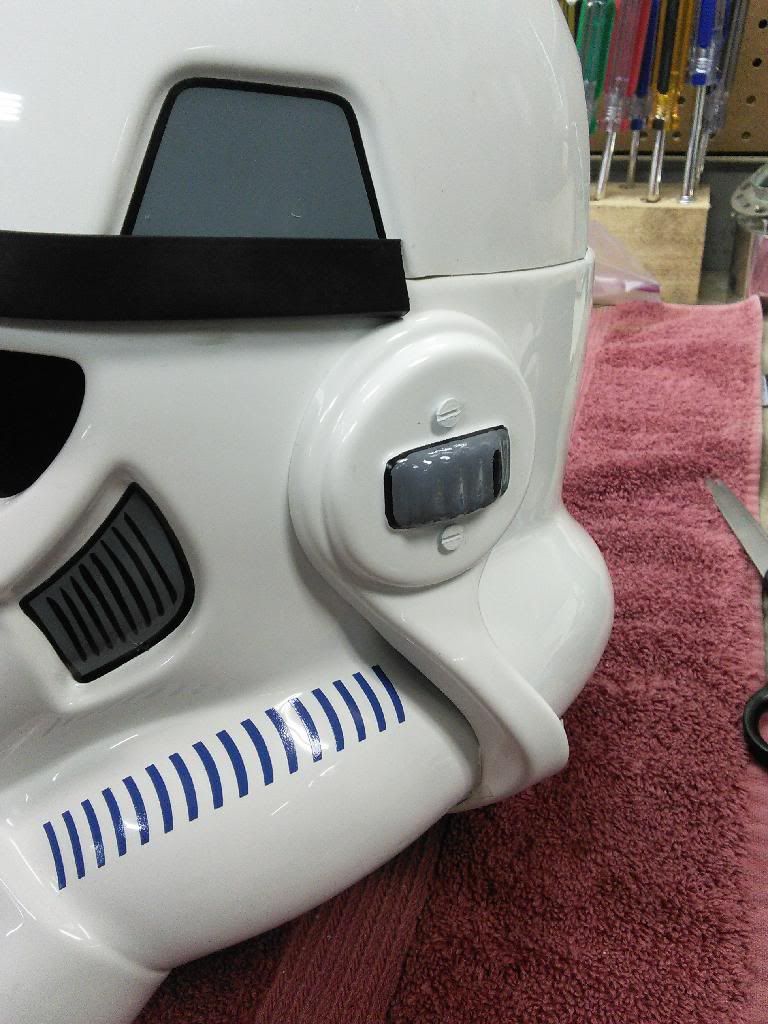
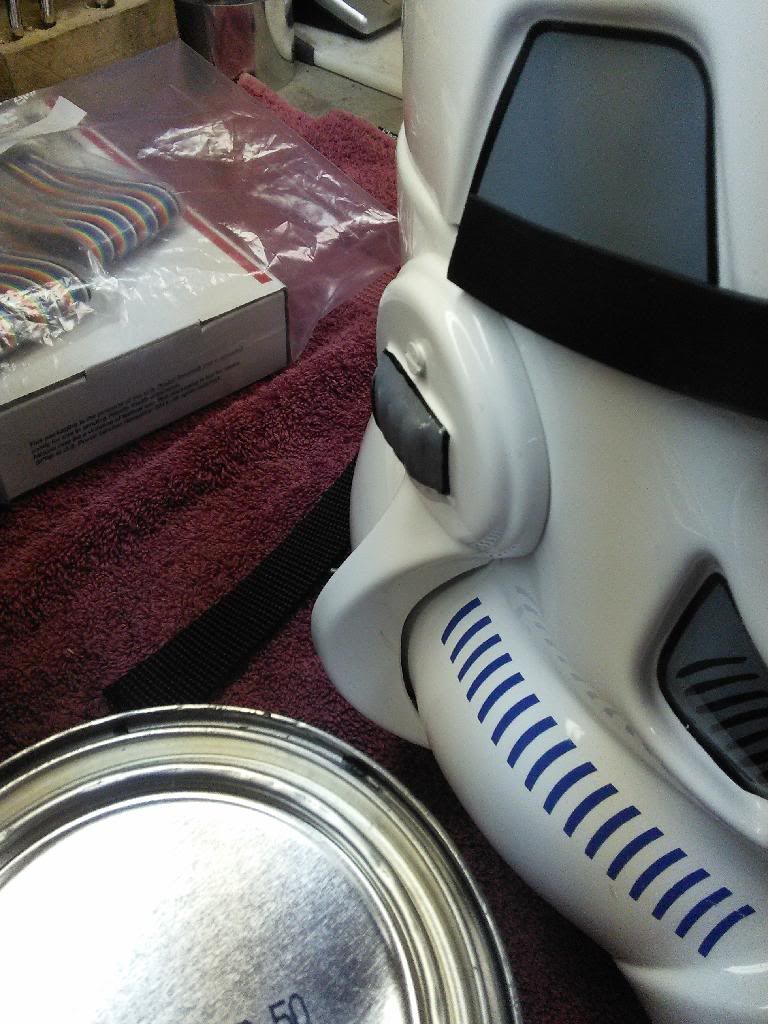
Got some more work done!
I've finished adding the decals. I hand painted the vocoder as well. It's a little rough around the edges, but it looks alright for my first attempt at this.
The ears are in the process of being painted currently, hence the blue tape on one of the pictures.
And also, the lenses have been added!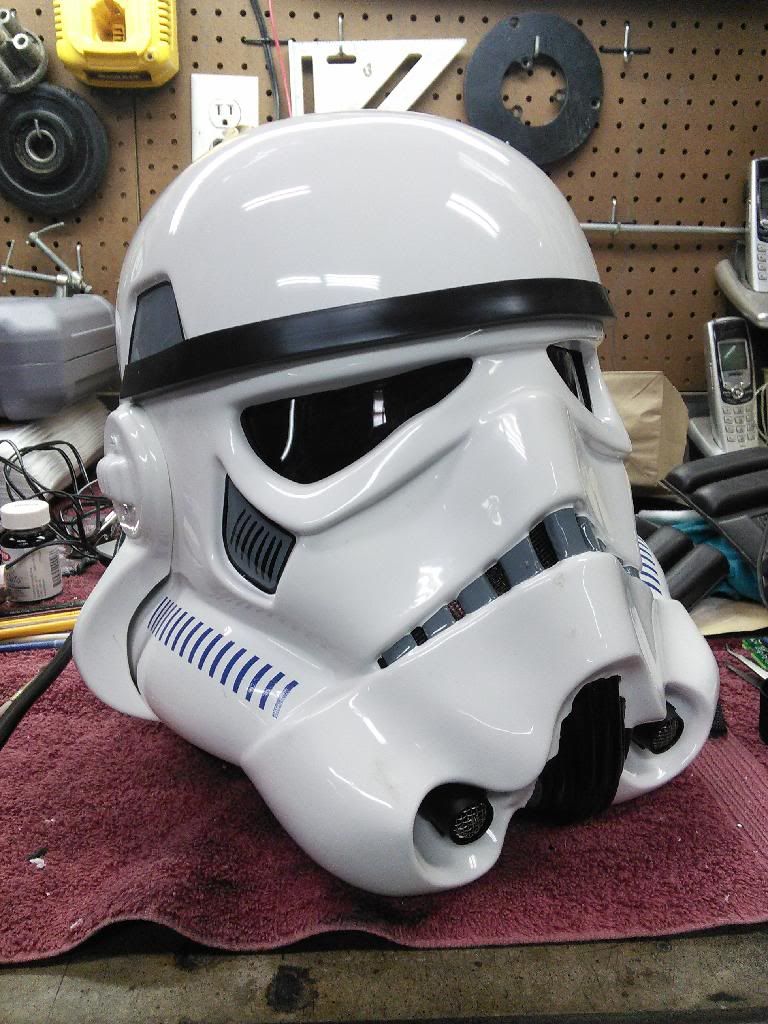
The ab buttons are painted and secured to the ab plate, which is now attached to the ab section of the armor.
Here's photos of the test fitting of the upper armor. In my opinion, I need to pull the shoulder bells in further than they are. I also still need to add the ribbed plastic shoulder straps.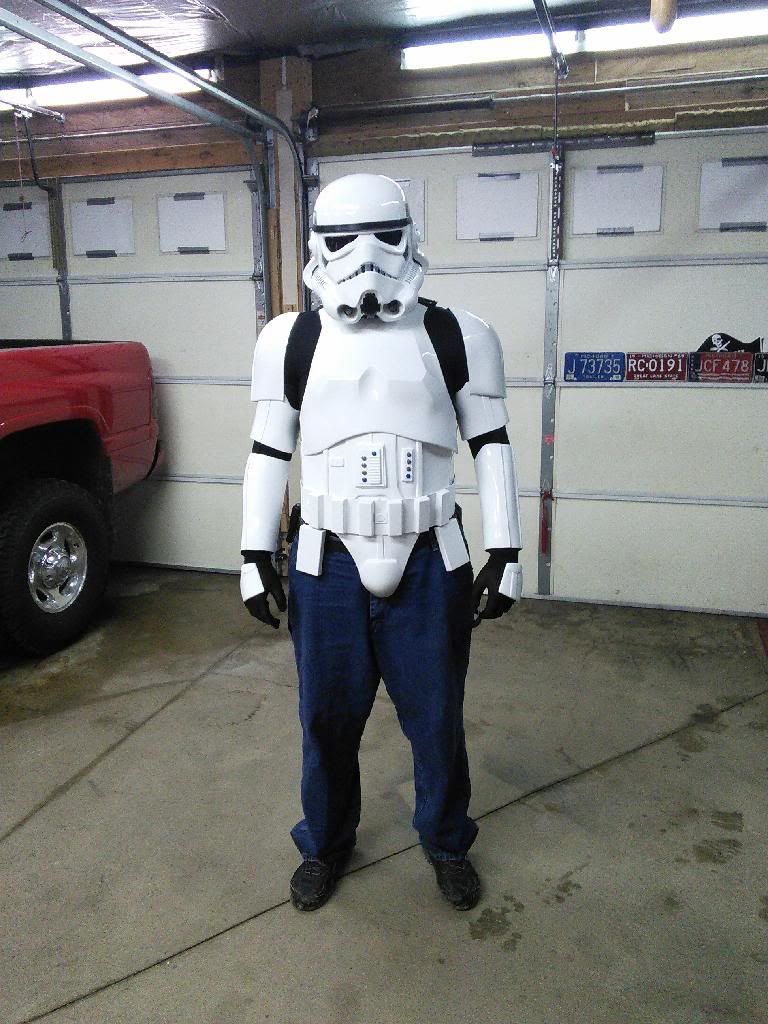
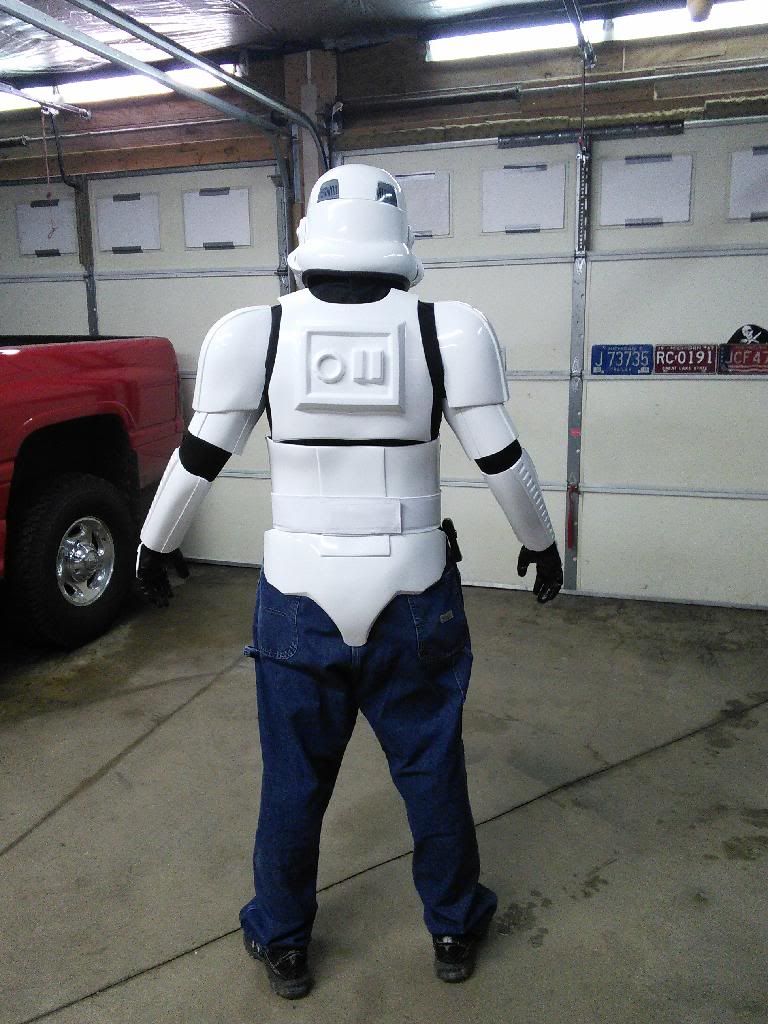
And yes. I am aware that I'm wearing my hand guards on backwards. That was an accident that won't be repeated...lol.
The gaps in the sides will be kept the way they are, but I am trying to find ways to get the tops of the ab and kidney plate to line up a little more than they do. Maybe some taut elastic?
What other suggestions do you guys have? I'm sure you have plenty to say... -
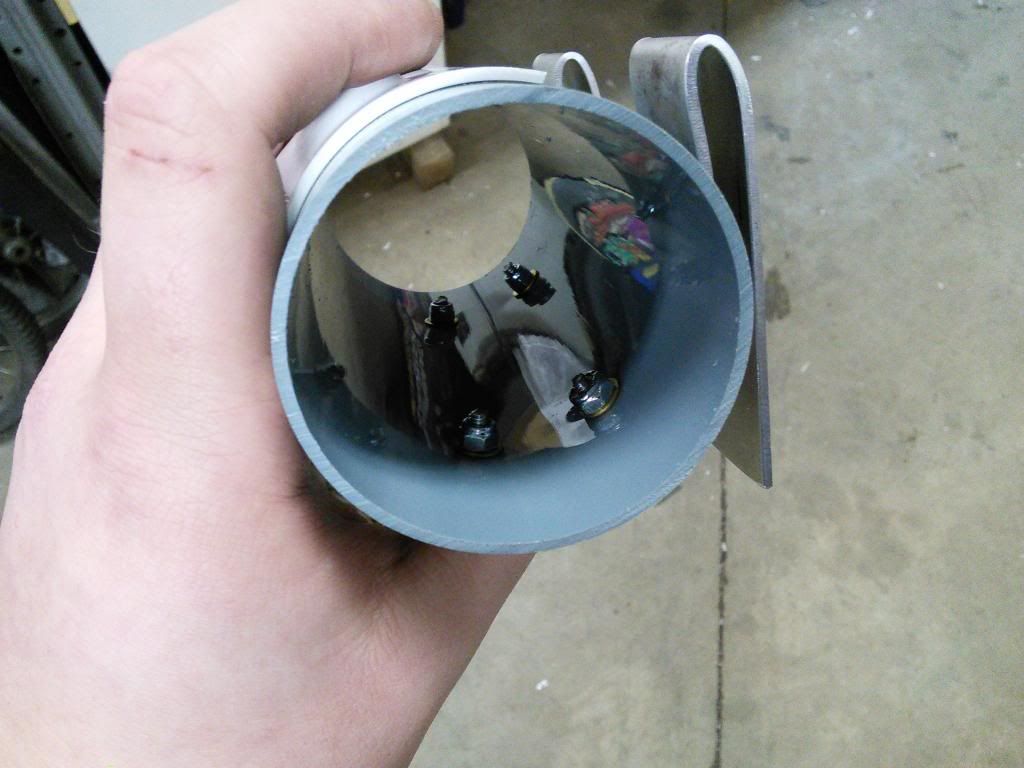
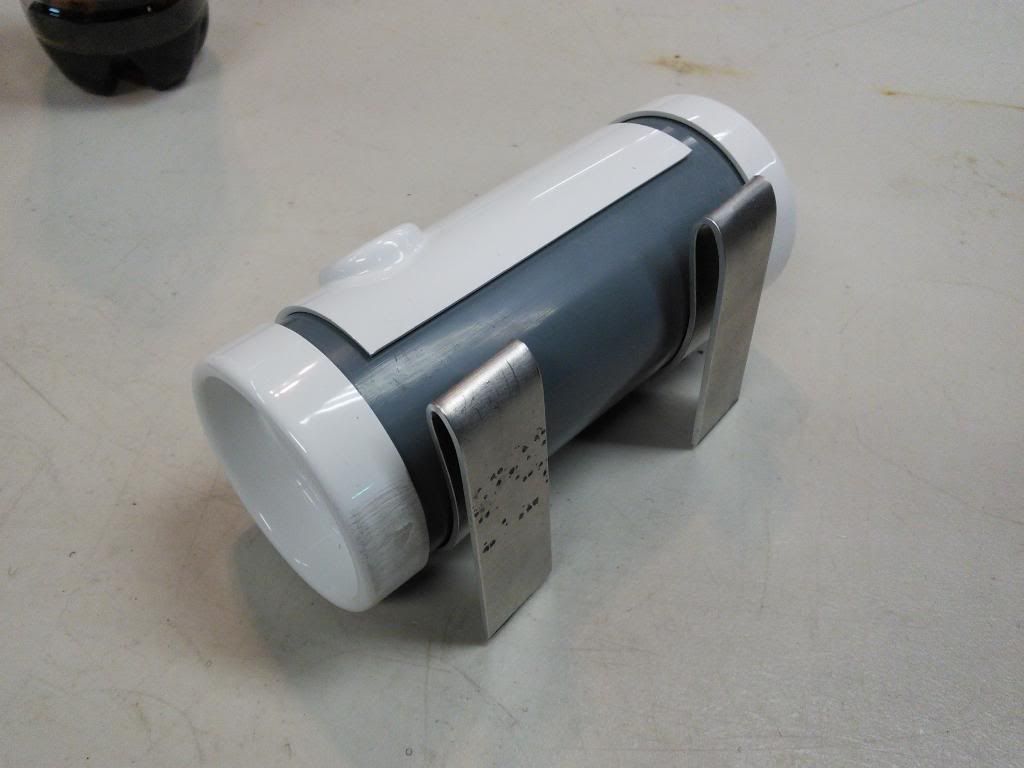
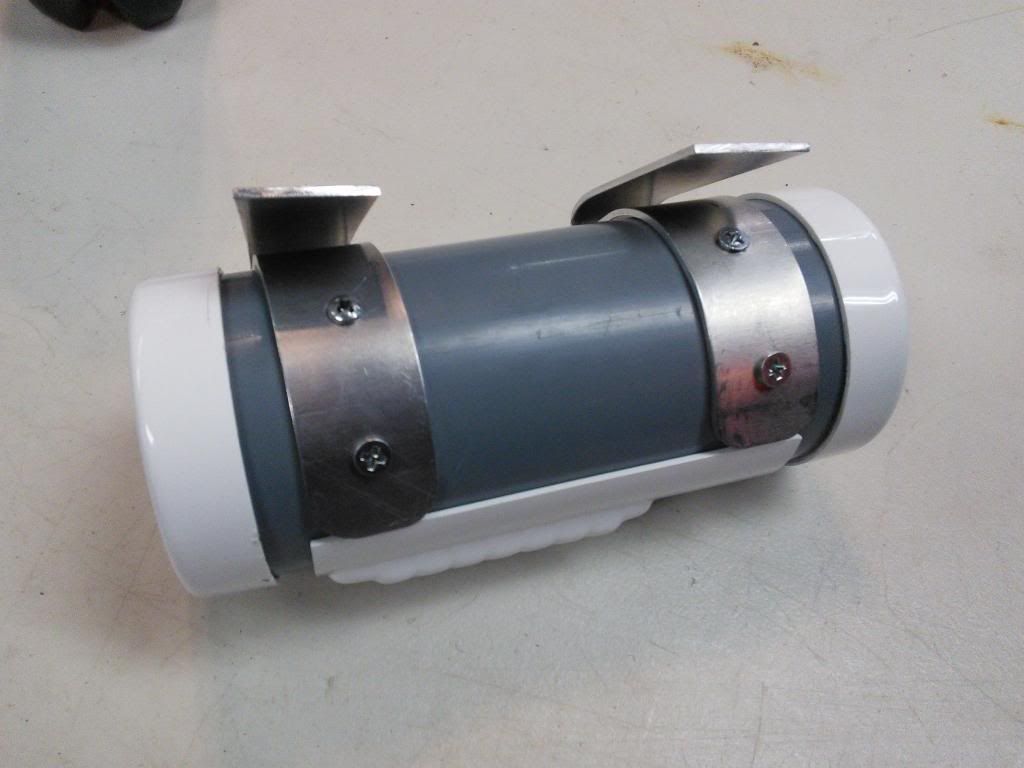
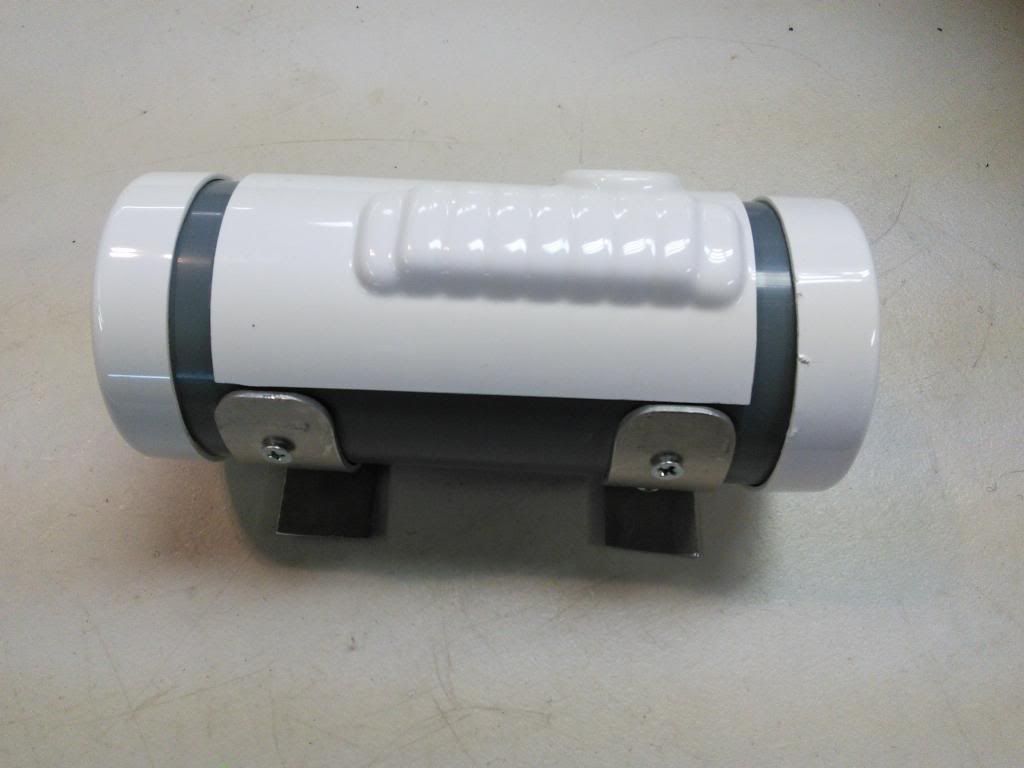
This is how you trim your button plates:
(pictures removed to save space)
Here are what my button plates look like after trimming:
(pictures removed to save space)
So, I had that picture on my computer. I printed it out even for future reference so I could use it when I get to the ab plate portion of the build.
Why did I ask for help on this? because apparently I'm dumb and didn't see that picture next to me at my desk when I asked the question, lol.
Thanks for the help in reminding me of this!
AM 2.0 vs. NE
in Hard Armor (General Discussion)
Posted
Thanks for the good info guys!
Here's a picture of the chest piece of the AM2 armor, taken directly from their Photobucket:
I'm not sure about that funny little intended ridge going on there. Thoughts, guys?