

TK9477
-
Posts
204 -
Joined
-
Last visited
Content Type
Profiles
Forums
Gallery
Articles
Media Demo
Posts posted by TK9477
-
-
Okay back on the road after a replacement belt....
As I've two blasters I need to holsters that can be interchangeable - so I went for the popper method....however.....the leather was a bit thick....
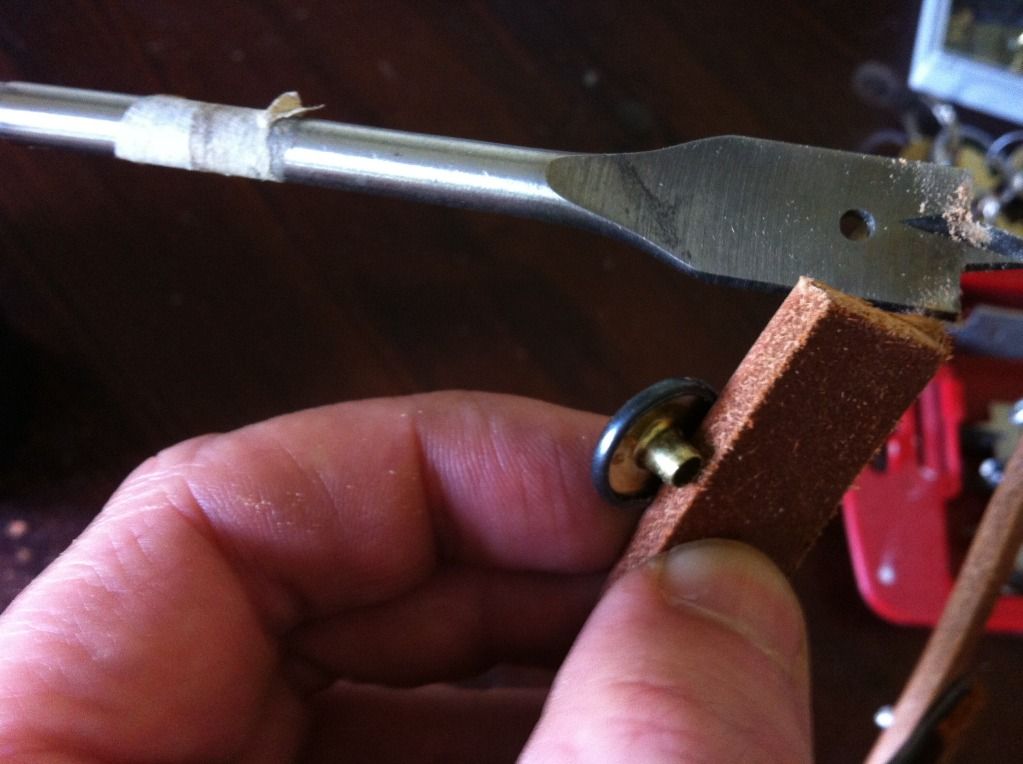
So I had to counter-bore the hole to thin it out a bit & hey presto, it worked!!!!
It was just then a matter of riveting the male snappers onthe indide of the belt.
Next was to strap the arms...

And finally I wanted to add the screws where the original brackets where fixed into the suit - purley for asthetics (like the side rivets) rather than for practical purposes..not in all the places just the real visible ones.
And so finally with baited breath I present you with TK9477
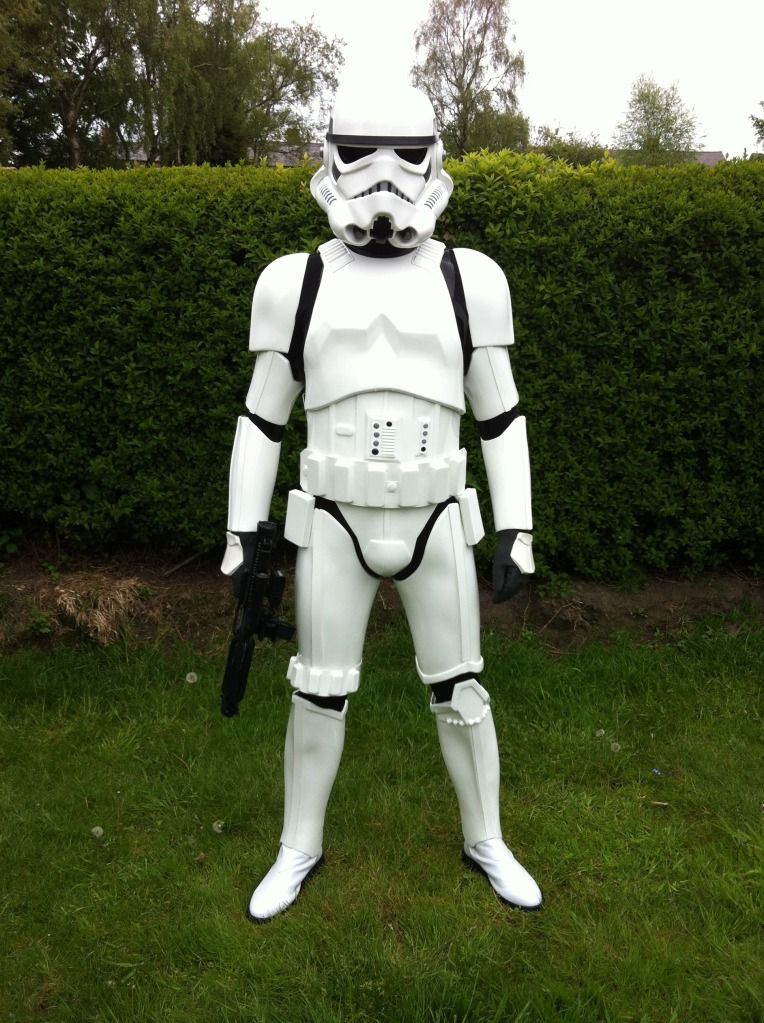
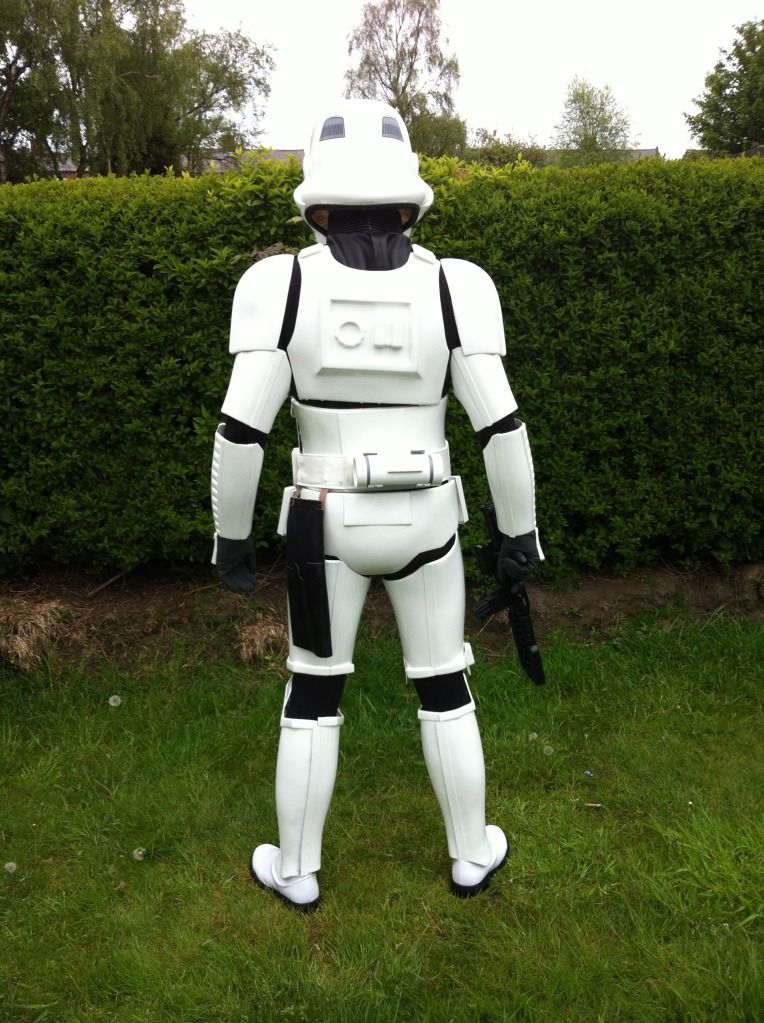
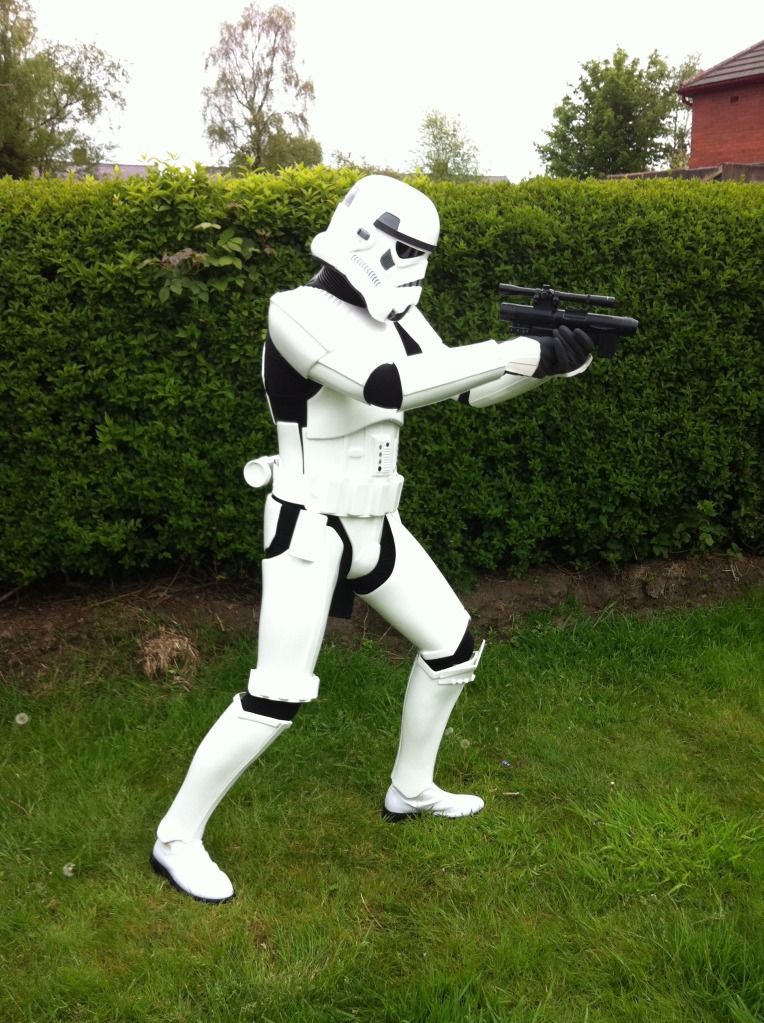
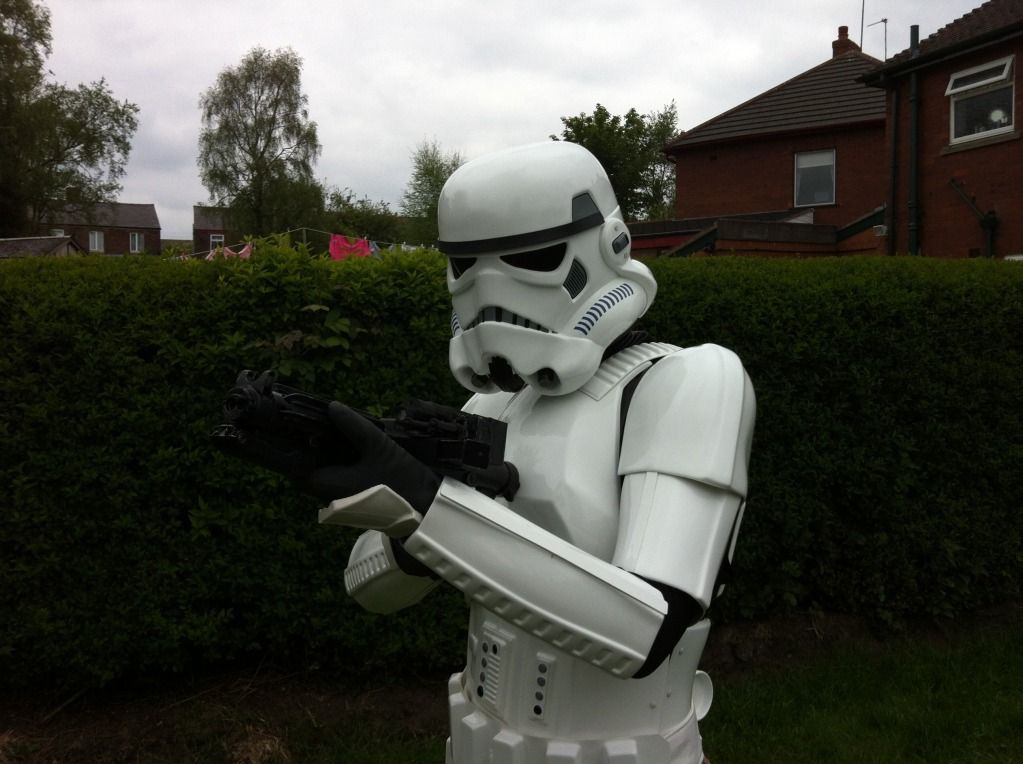
Please all feedback from you experts on how this baby looks?
My issues - does the helmet sit a little high? I can reduce the padding
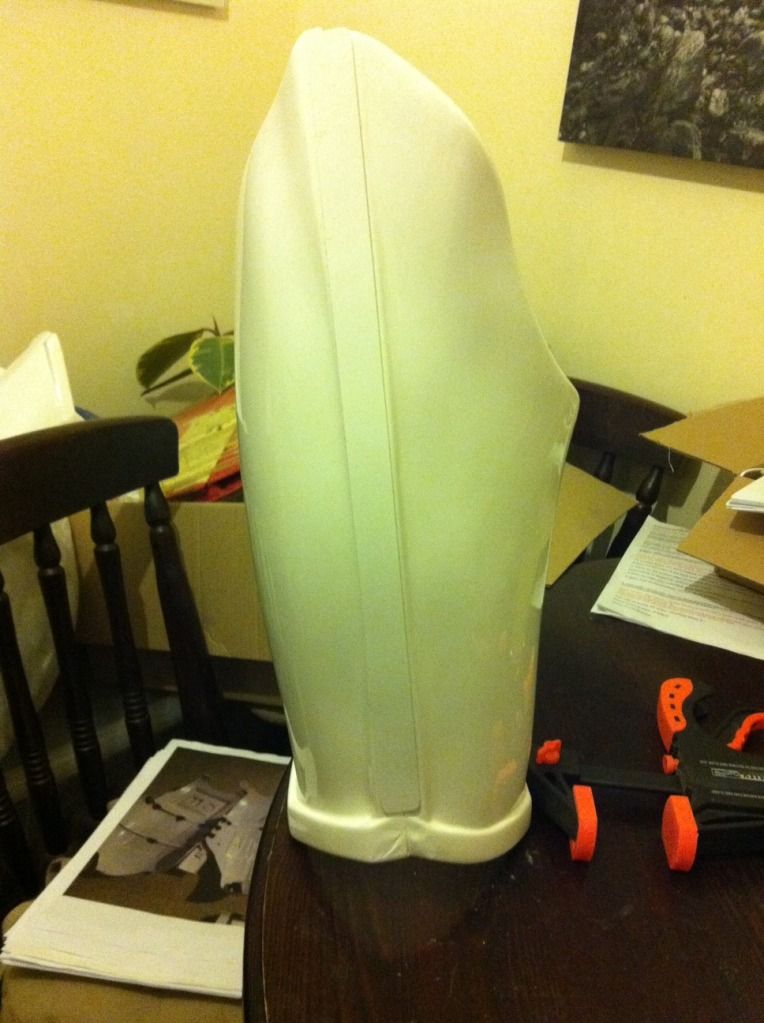
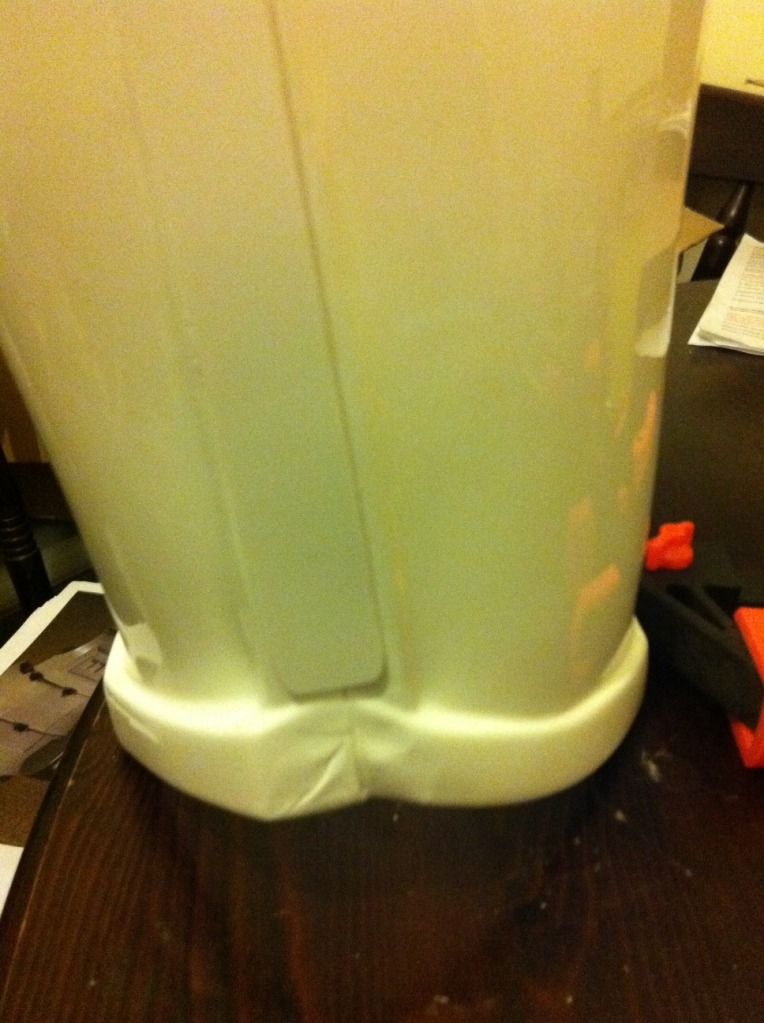
Big issue - the top of the right calve REALLY digs in to my knee...any tips? Is there room on the length of the calves to trim off an inch?
Cheers all
-
-
-
You are mental mate!!!!!
Brilliant stuff - I'm sticking this thread on my desktop

-
I would jump over to MEPD and look up trooper1.


-
Di do do dat dere dough don't di dough!

Dee-do dee-do....that pic reminds me to get booked in for a new perm
-
Stick with the lazzie band and forget about the use of velcro! I'm not sure - but I'll decide after a few troops
Would have been more screen accurate if you had leveled the snaps on the belt all the same - not sure what you mean?
Are you going for centurion? Nope
For the drop boxes, have you riveted the correct side? My TM drop boxes back needed a more cut down to fit into the front facing drop box half - yes, the back (smaller tab)...that's right isn't it?
Could it be that you glued the cover strip on the left thigh (and maybe because off this also on the right) to the wrong side!
The open side needs to point to the inside and yours looks like it points to the outside. - not sure what you mean here, I have cover strips on both thighs...front, back, inside & outside
All things I mentioned are easy to fix and behalf of this your armor looks good

-
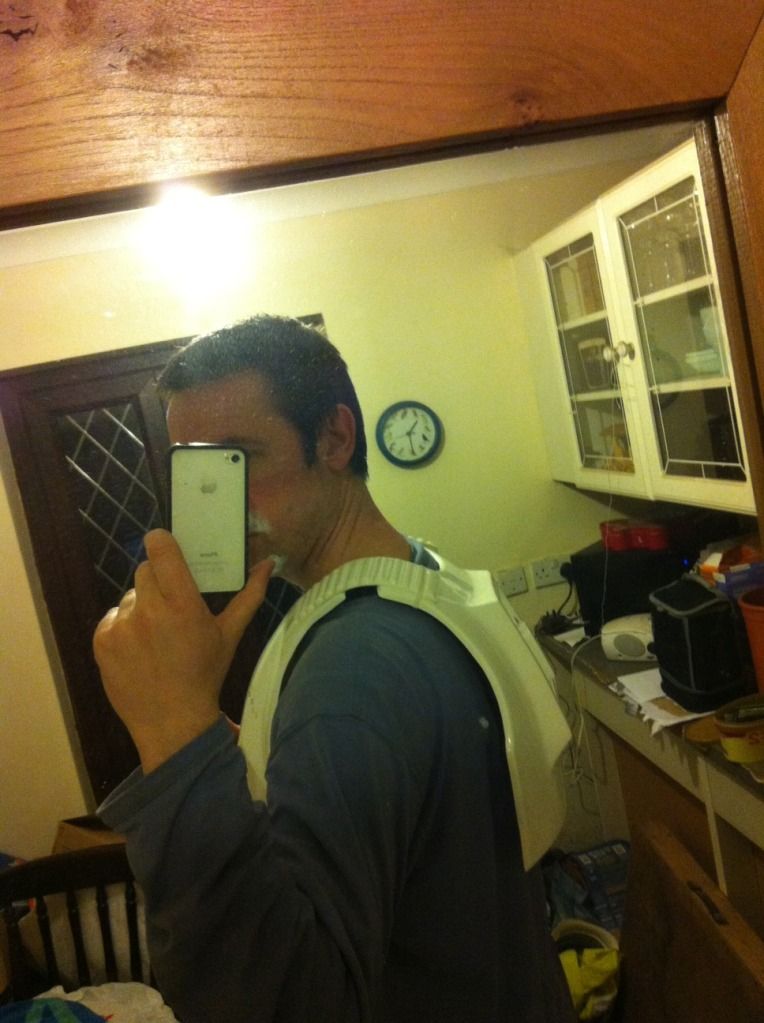
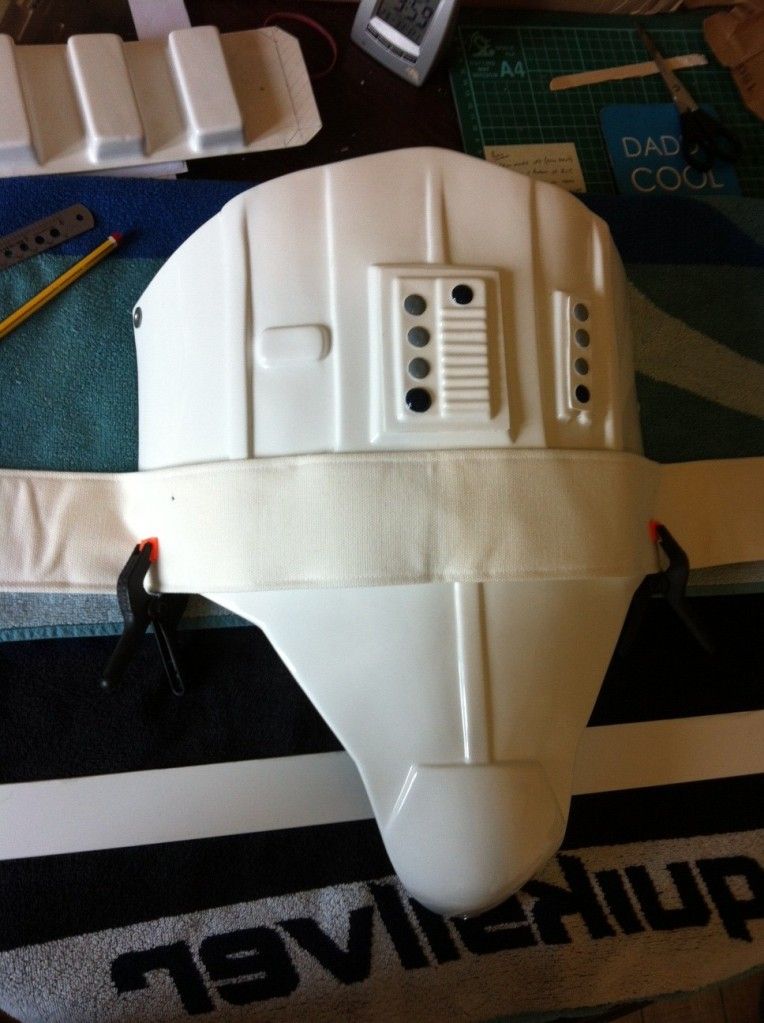
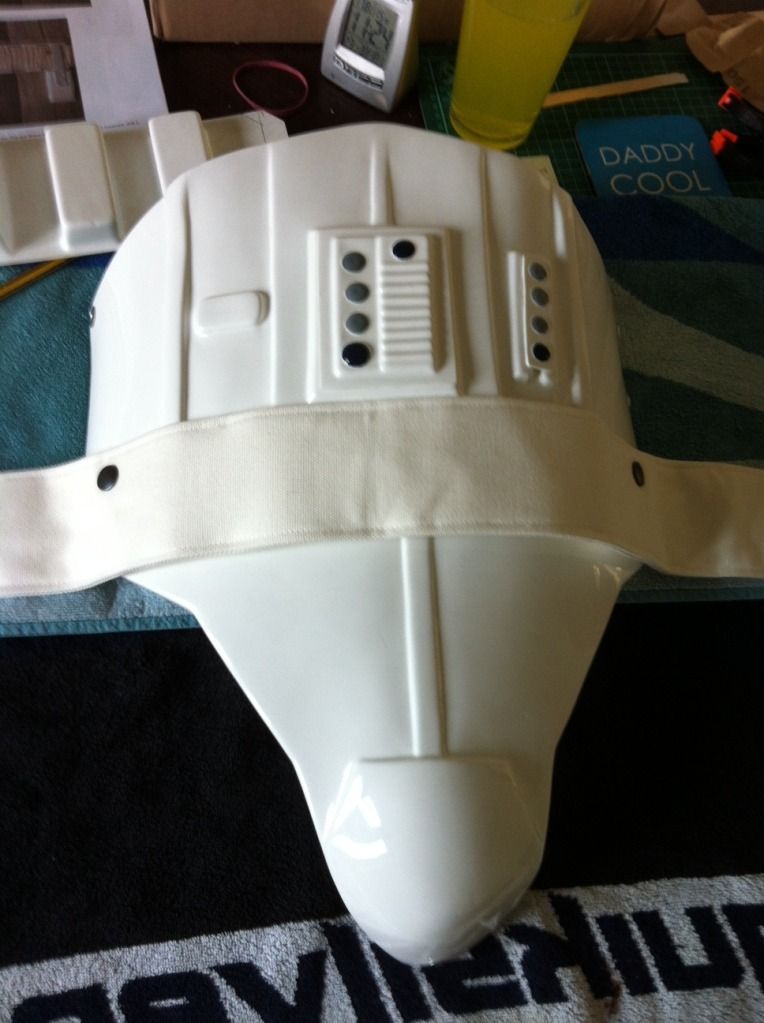
Finally I can get on with the strapping.
And this is what I've gone for.....however after a test fit I moved a few of these around as the chest needed lowering as it was sitting onto of the abs rather than just covering it and the butt needed to be tihghter to the kidney. By the way, the double snappers on the chest will not be being used for strapping but I may use them for the speaker system.
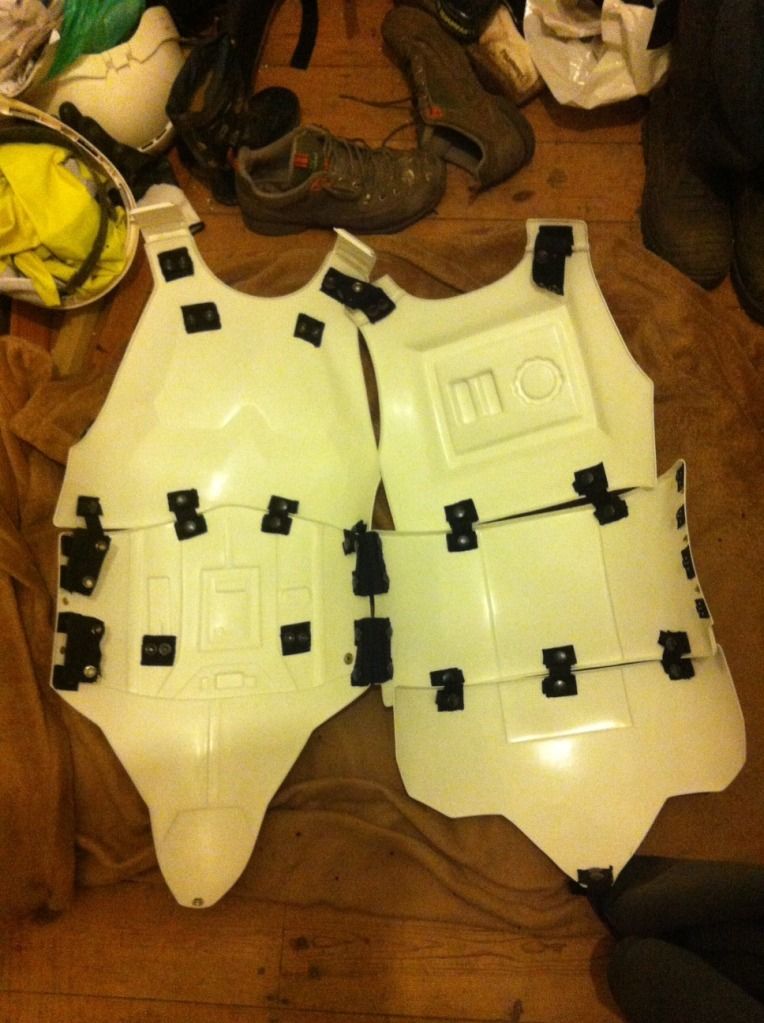
I've also took a leap of faith and deceided to listen to my more experienced brothers and use the traditional lazzie band to keep the back bridges attached to the back plate
I'm still not convinced but I'll give it a try before I get the velcro out
Hmmmmmmmn
-
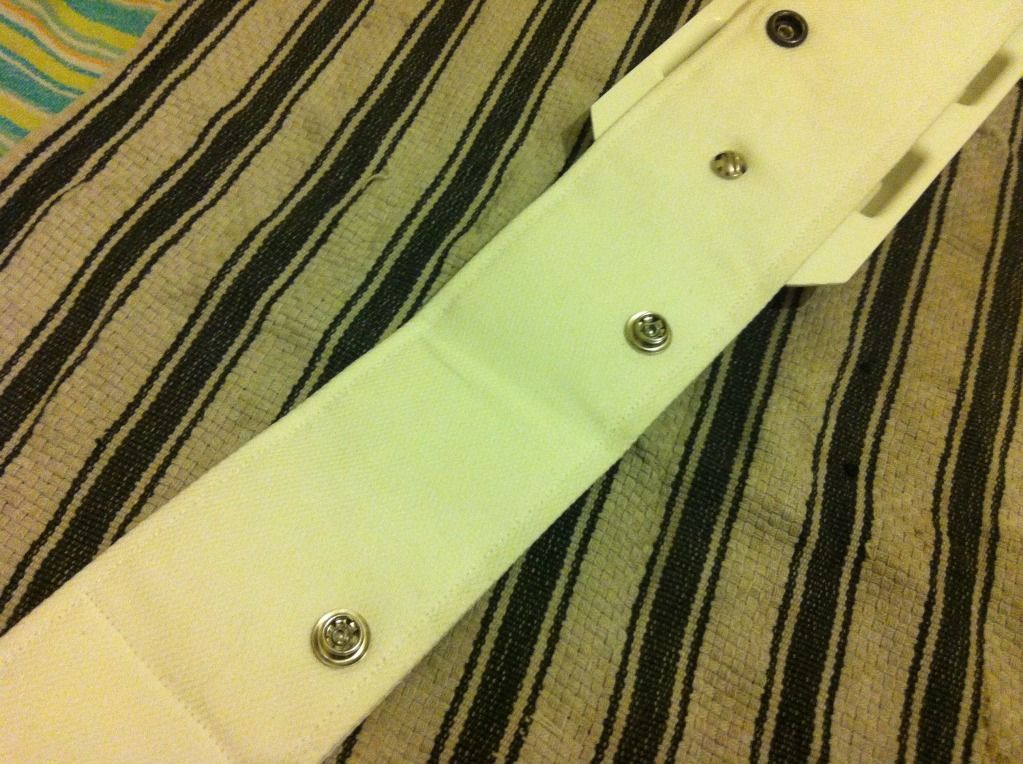
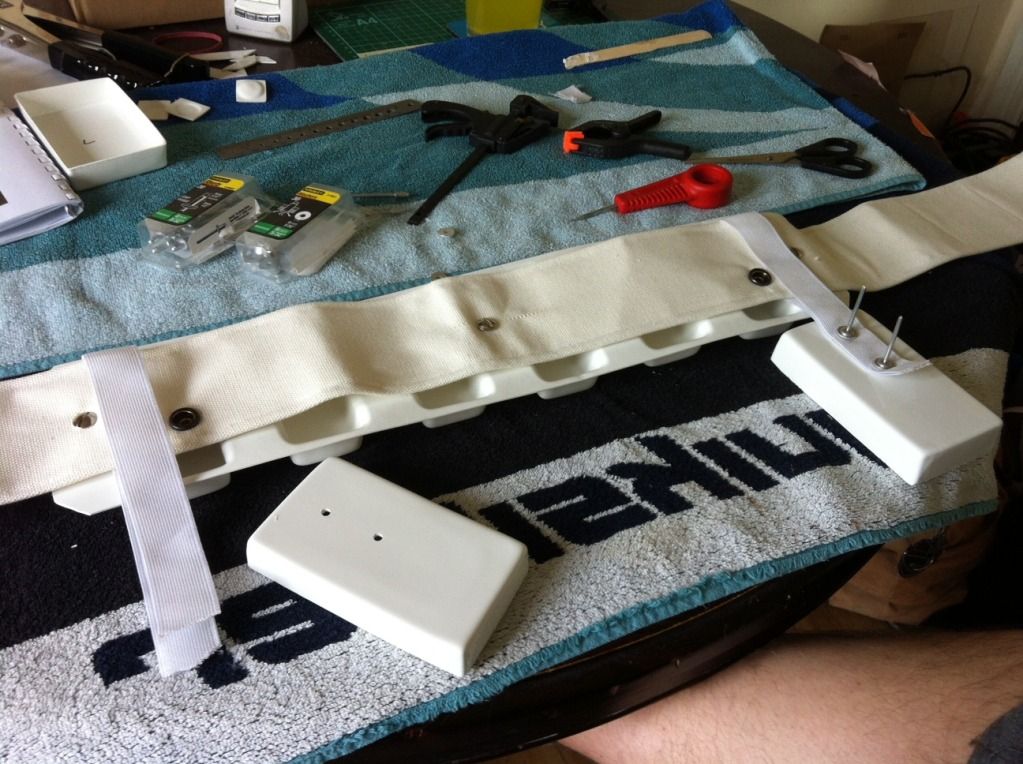
So, crackin on with the belt...
I lined it up to mark out where the poppers will go
Banged in poppers
Next I marked out the belt for full trim and to line up drill holes

Then I just placed on the belt and pooped the holes through.
I deceided (very fortunately as it worked out....my belt was too short!!!!!) to use chicago screws to attach the belt & it's cover just incase I felt the need to change the canvas belt at a later date. After drilling the holes in the belt I glued in the female chicago screw so I could gain purchase - tried it out, then cover with the plastic caps.
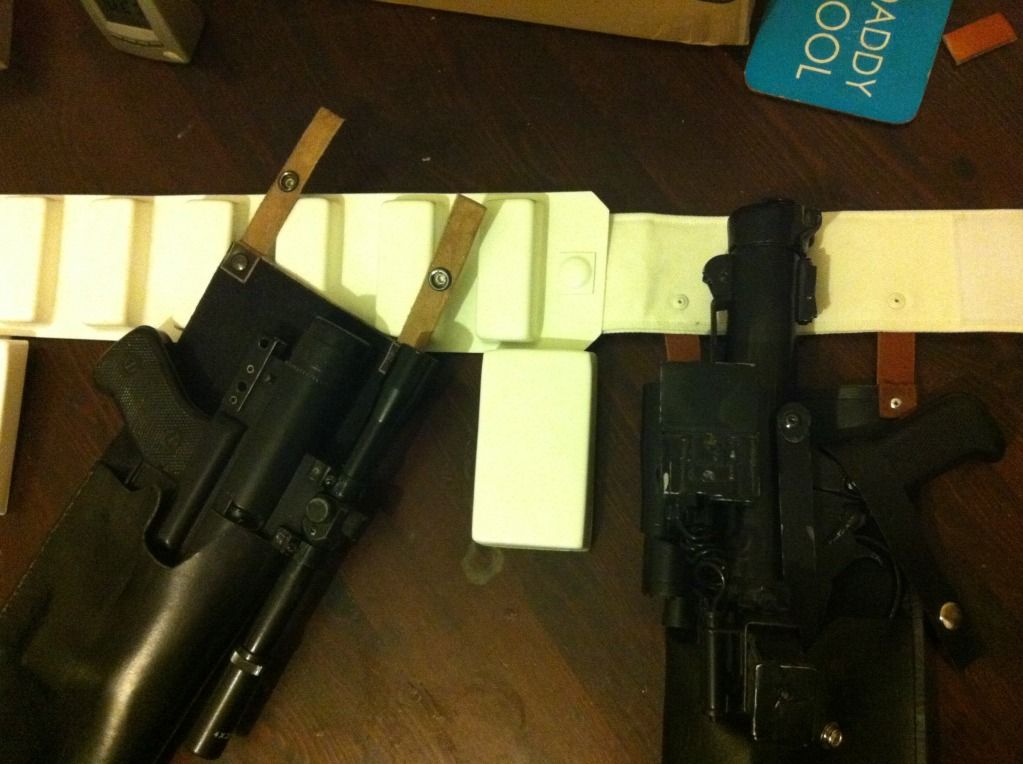
On to fitting the drop boxes - the trick mfor me was watching out for the angle of the dangle - I lined up the top of the box with the bottom of the plastic belt and placed and made sure that the elastic was between the snapper & chicago screw so it doesn't go wandering off when I'm mincing in the public domain!
-
Any more input guys and gals?
It's pretty much right - you take 2 magnets that can hold 10kg, put them together then you have 1 magnet that can hold 20kg
-
Chargers rule!! Only ever seen one in the flesh over here though - on show...they wouldn't turn it over for me though!
-
Ha ha ha - know th feeling mate - I was there this time last year!!
I'm sure someone will jusmp in if I'm wrong but here's my take:
1) The black polypropelene straps (have no give) are used for connecting each piece of the arms, connecting the chest to the ab and cod, and the thigh to shin....the only thing I use webbing for is to connect the chest plate to the back plate over the shoulders - the traditionalists on here use (white) elastic for this. I also use webbing on the female snappers, rather than plastic and also on the male snappers to give 'em a bit of extra strength
2) The black nylon elastic bands are used for connecting the arms to the top (under the chest and back plate)...not sure what you mean here? I hang my arm sections off the shoulder webbing (see above). Snapper on bridge to the top of the bell & down to bicep - then run another piece of black elastic on the insie of the bicep to the forearm.
3) Everything gets snaps- just follow TK-300's instructions on what gets a male and what gets a female snap...that's what I did but it can be done other ways too
4) On an ANH build, what do I use to connect the front to the back of the costume? ....again this is a matter of opinion but I use black webbing over the shoulders, black elastic for the kidney/abs, the belt wraps around here also & elastic from the cod to butt
5) What else are the elastic bands for?....the very thin white ones? Traditionally the are to 'tie' the back floating setion of the shoulder bridge to the back plate
-


Celebration Time!!!
-
I use garters on my TK & Cody - basic canvas ones for a few quid on the bay
-
Any pics of said weapons my brothers in arms?
-
Lovin' the sinister Tarkin.............

-
Hokey lol! We should all silently gather round the house and scare the cr*p out of him

-
Hey there - I recently bought some and will be sorting the shoulders hopefully this weekend.
PM me your address & I'll let you have what I have left over.
-
Yes mate Steve Rogers,Tango'd Fett makes them.
Cheers John
-
More progress over the weekend...some good
some bad 
Last weekend I painted the buttons for the torso using humbrol 15 & 5. I decided to attach them to the torso using superglue as the plastic was slightly bent & If I used E6000 I'd need a good clamp to keep it flush - which I didn't have.
Next up was my first mistake - I was unpclamping a thigh when I saw this...
I'd used some pretty old abs goo to add strength (which in hind-sight wasn't really required) to the parts of the thigh that weren't covered bt the internal cover strips...
Unfortunately this old goop must have been fully laced with acetone - that coupled with the compression from the clamp distorted the finish to the thigh. After crying in my beer for a little while I realised it was on the right thigh & this section would be covered by the battery pack....stoopid mistake & a bit of a let off

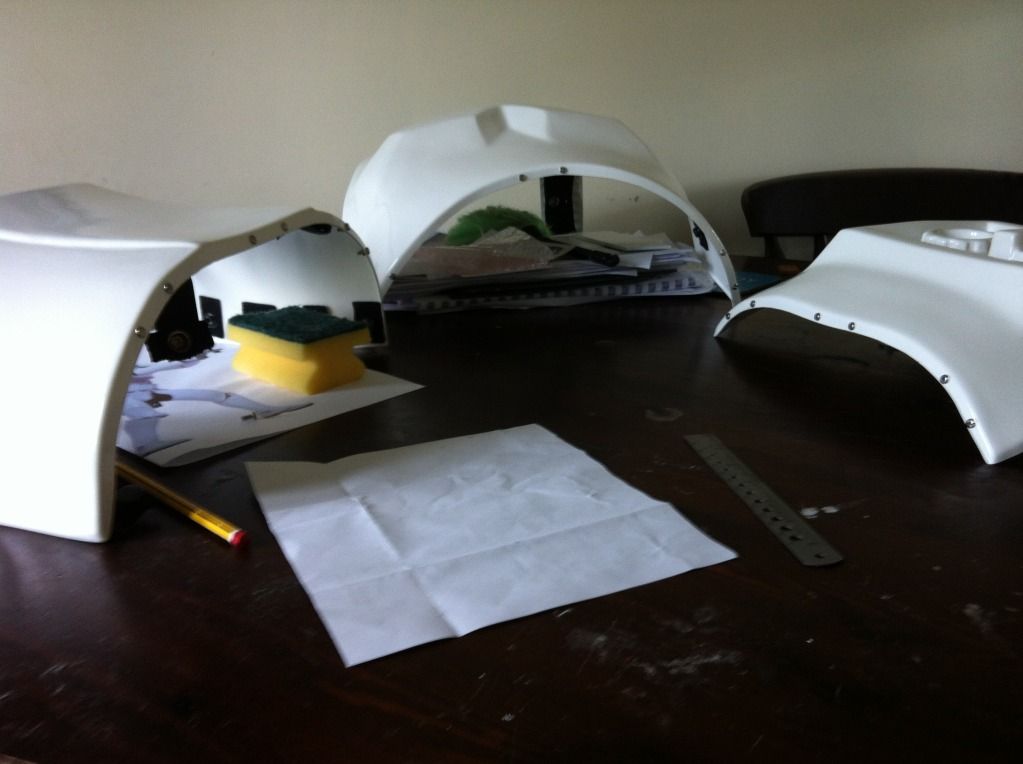
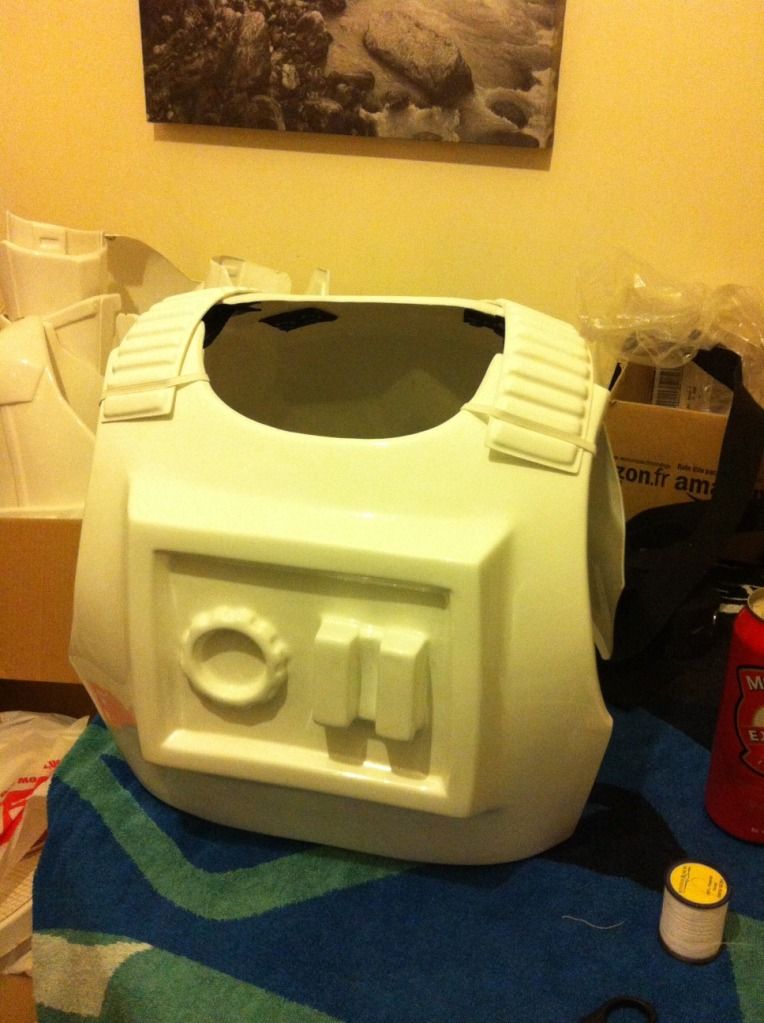
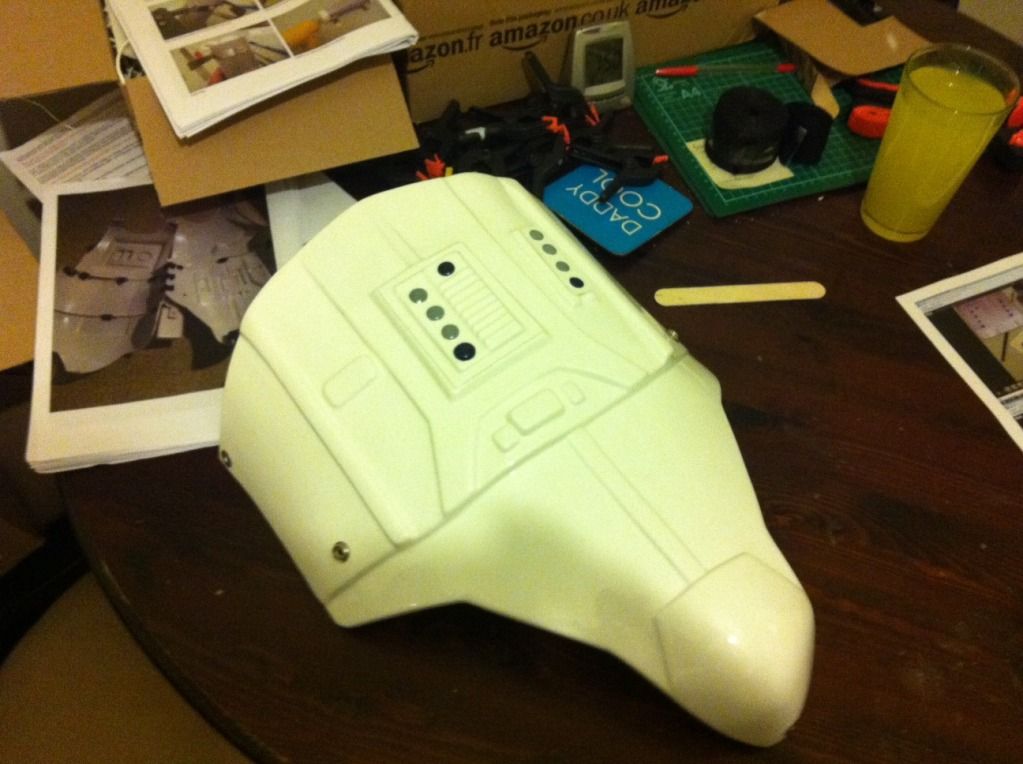
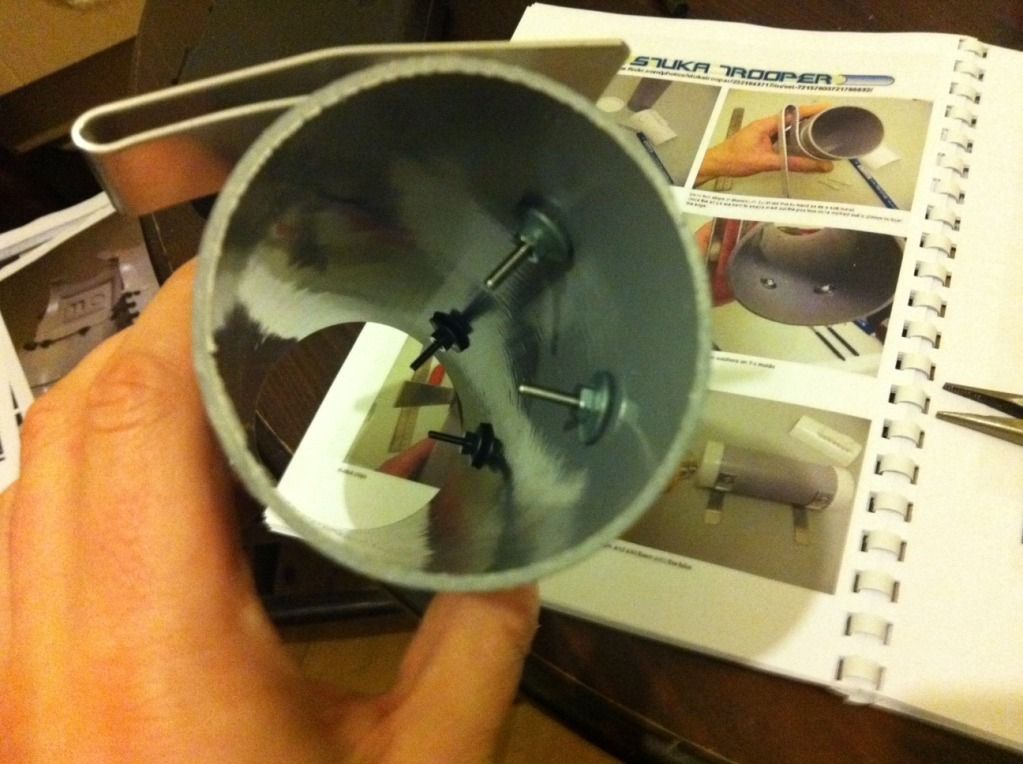
Next I started on the td.
I figured out the drill holes...

Attached the brackets (bought here on FISD)...
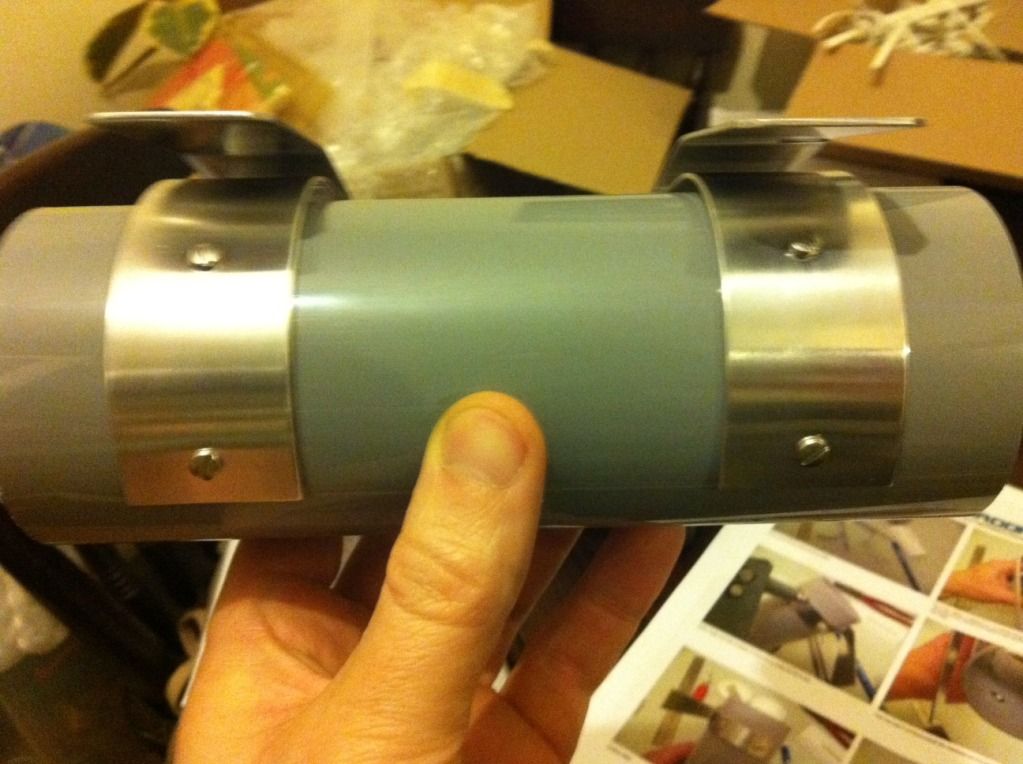
Fitted the end caps (heat gun as per TMs instruction) and detail (CA glue)...

Here was my second mistake - I hat heatgun work and was so pleased to get the end caps on without incident, I forgot to check the spacing & left the gaps between the caps & detail a little thin. The CA glue meant this is here to stay...until it falls on the floor a few times and pings off so I can trim it down.....in the meantime I'll have to live with it.
Saturday was reletivley uneventful.
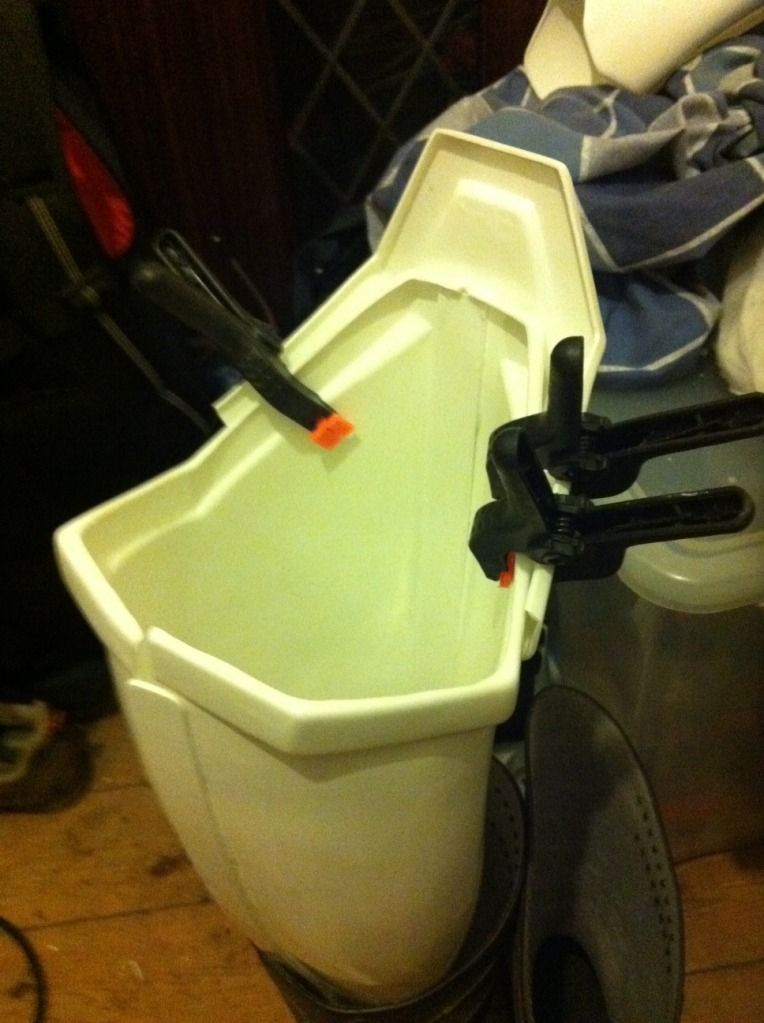
I fixed the sniper plate on the left greave..
And the battery pack - this was a bit of a monkey due to it's springy nature and although TM warned about the fiddley nature of fixing it with the correct rivets, I was determined to get it done...
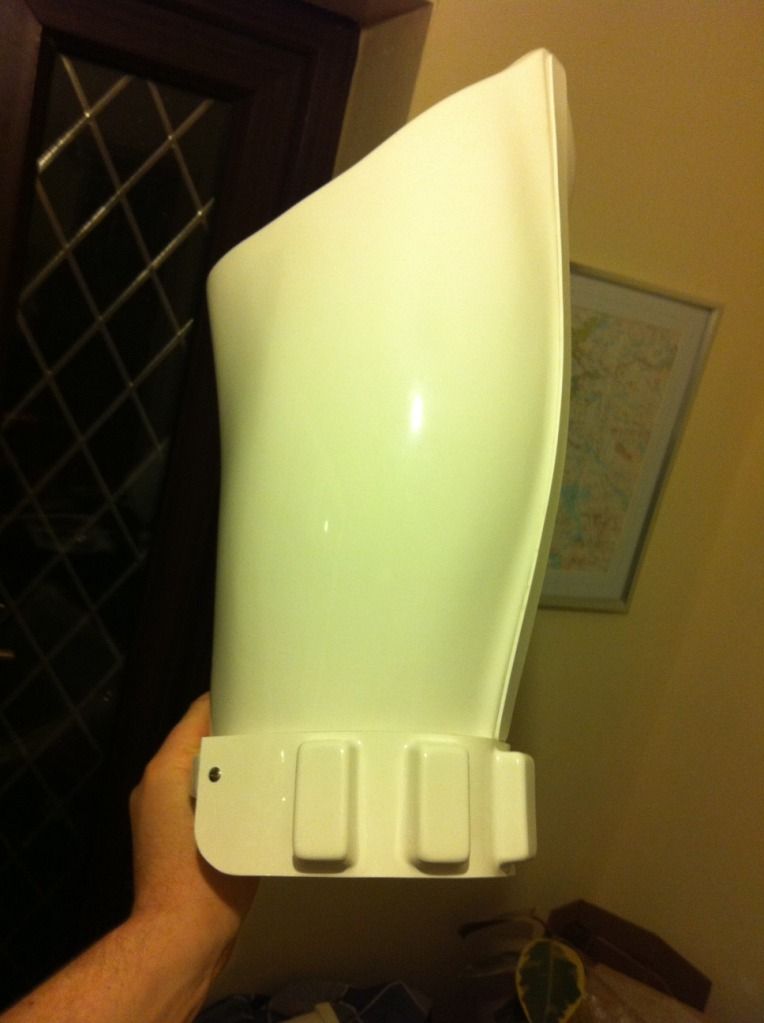
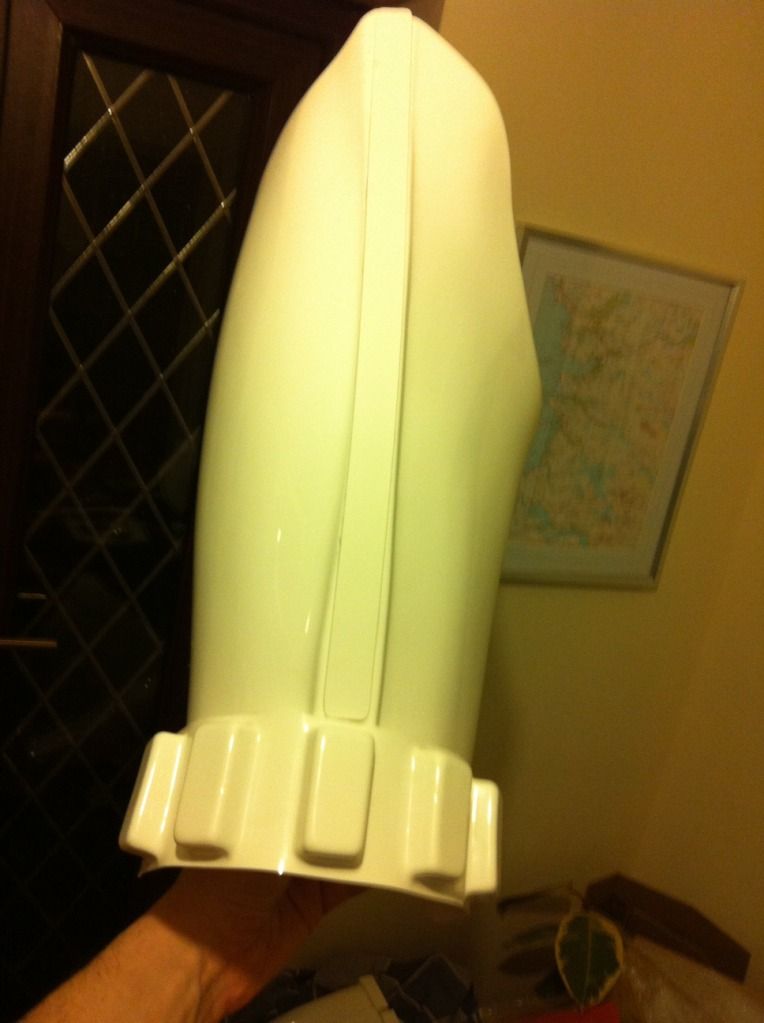
Al that was left to do was to paint the rivets white.
Next job, the belt!
-
you could go dual eib like me
2 belts/holster blasters
2 sets gloves
2 helmets
This is gonna be the plan Vern - towards the end of the year I think though.
Just a check though...is the esb e-11 same as anh type, without counter or power cylinders, but with some extra greeblies?
If so, does anyone make these greeblies?
-
 1
1
-
-
Yeh, it looks like I'm gonna stay with the anh & in the future get an esb lid with the esb handguard.
-
Okay I'm going to ask something that could have me up for a public stoning - and I don't mean the sort where we need to find a garage cos of the munchies!!!
It's about mixing and matching tk gendres.. anh, esb, rotj
The thing is, I like & dislike bits of all three, let me explain....
My preference is for anh stunt, however:
- I like the black smile on the esb lid & a satin vocoder
- I want my shoulder bridges fixed at the back rotj style (Velcro)
- I want to fix my holster with 4 snaps like the anh hero
- I want the esb/ rotj catch & hammer greeblies on my e-11 whilst retaining the power cylinders & counter
My first question...... would this hybrid be cleared?
My second question, as much as I'm a 'don't know much about art but I know what I like' kind of guy, we are a family here & I'd like to know your thoughts......have your consent if you like.
In the meantime I'll go and get my tin hat!!!
-
 & WOW!!


A Scouse TM ANH stunt WIP[*TM]
in Build Threads Requireing Maintenance
Posted
That's the one - front, inside right.....thanks for the help on this.
Bucket padding will be reduced.
Anything else?