


gazmosis
-
Posts
4,043 -
Joined
-
Last visited
-
Days Won
23
Content Type
Profiles
Forums
Gallery
Articles
Media Demo
Posts posted by gazmosis
-
-
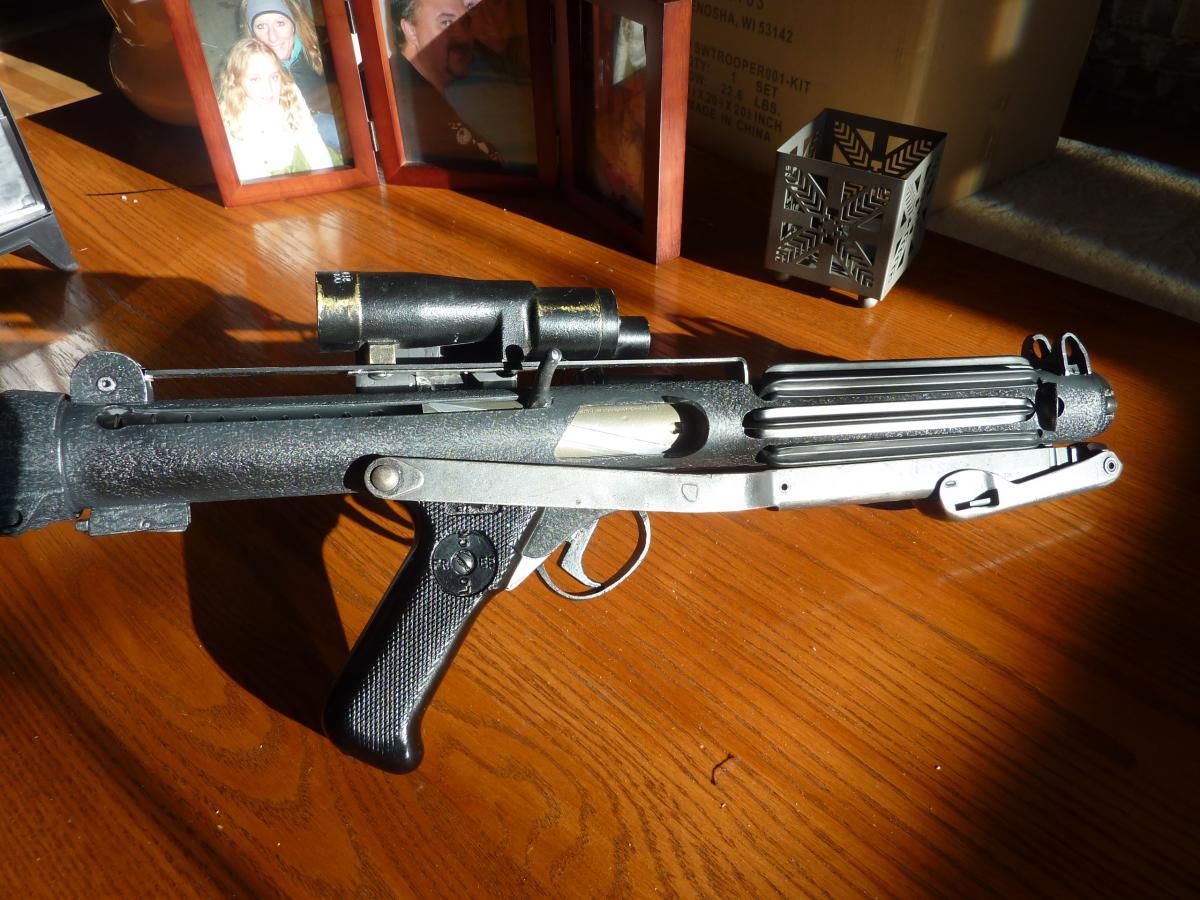
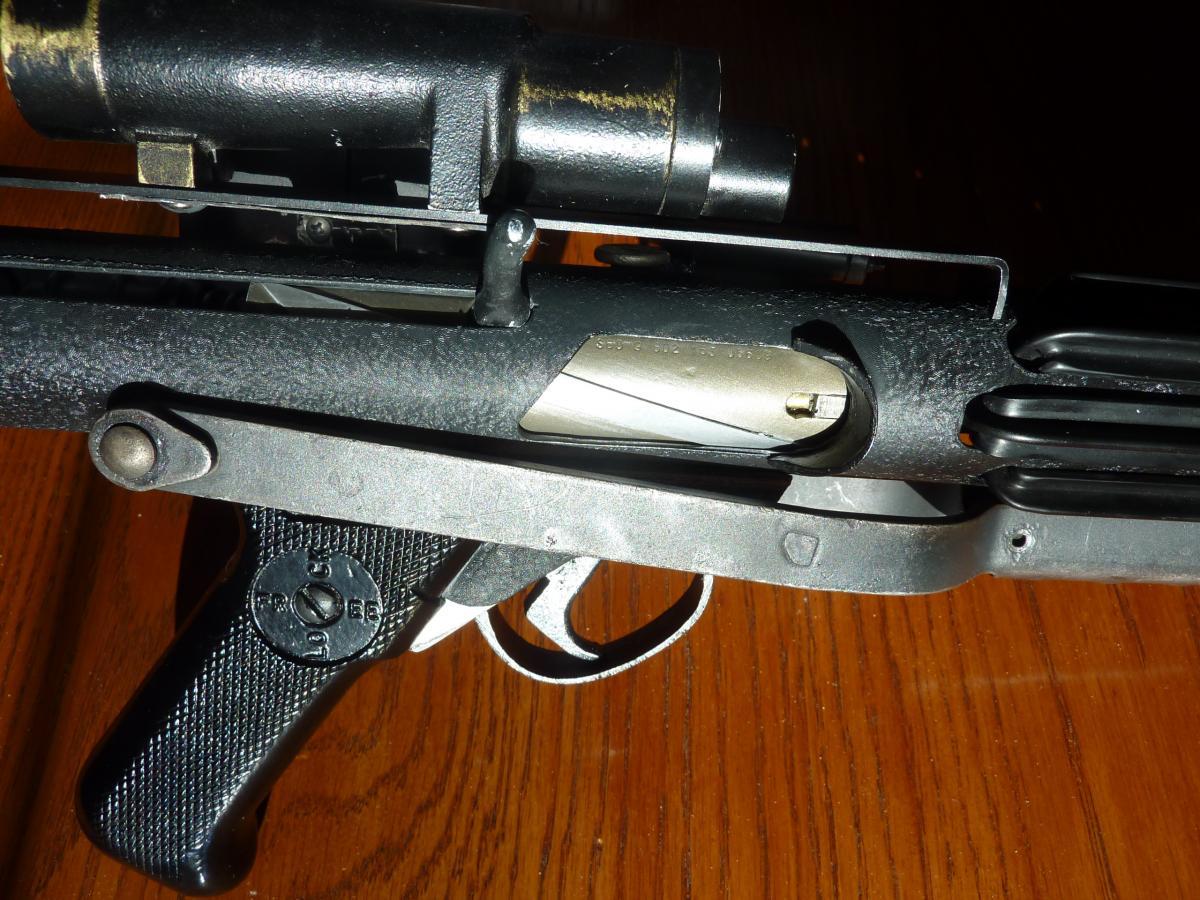
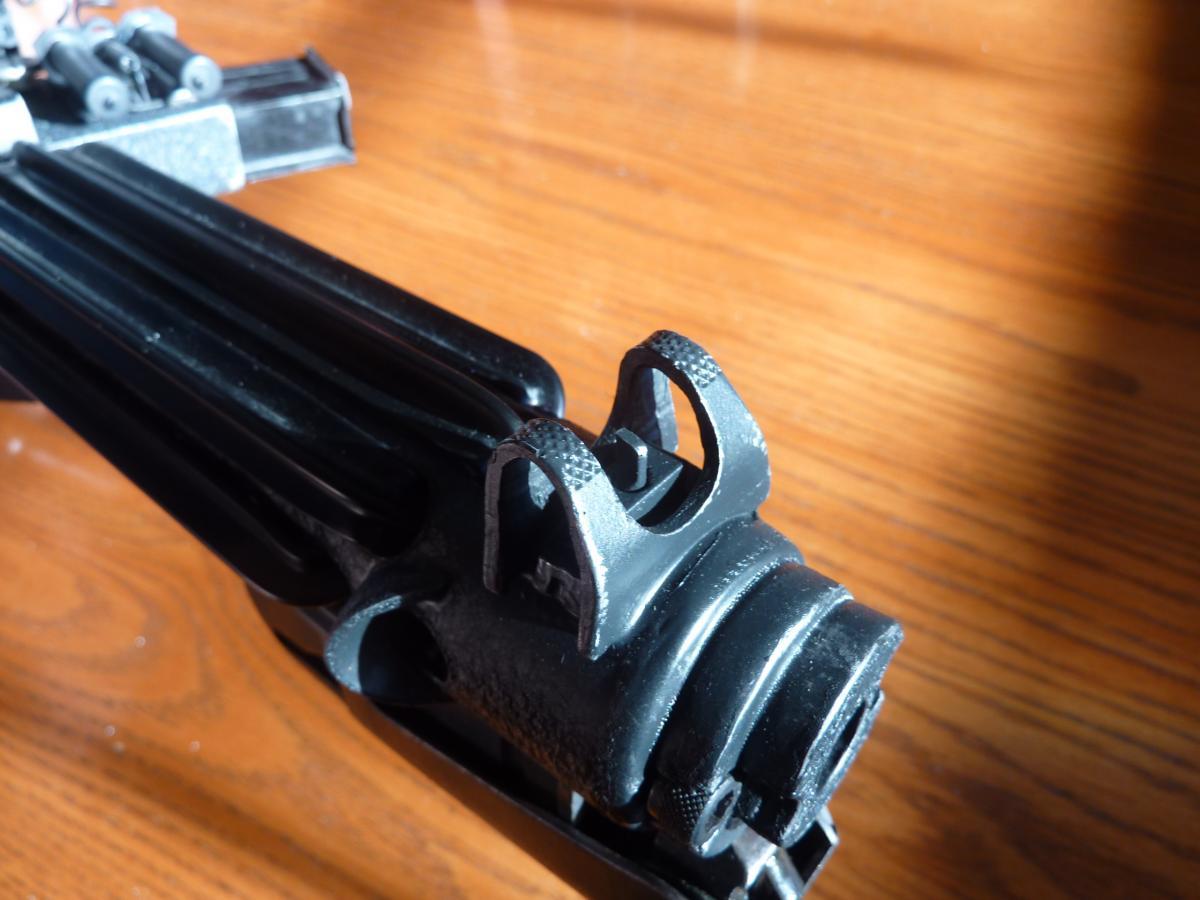
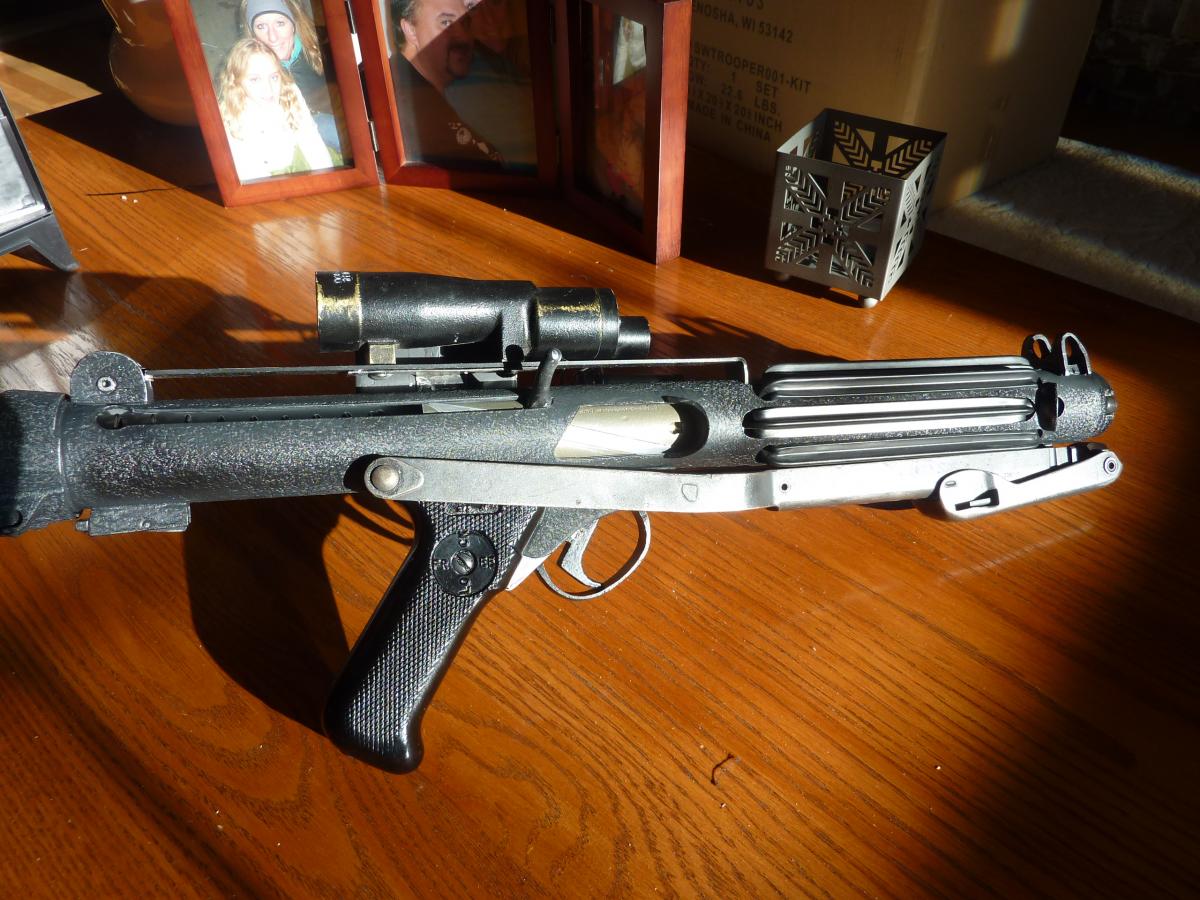
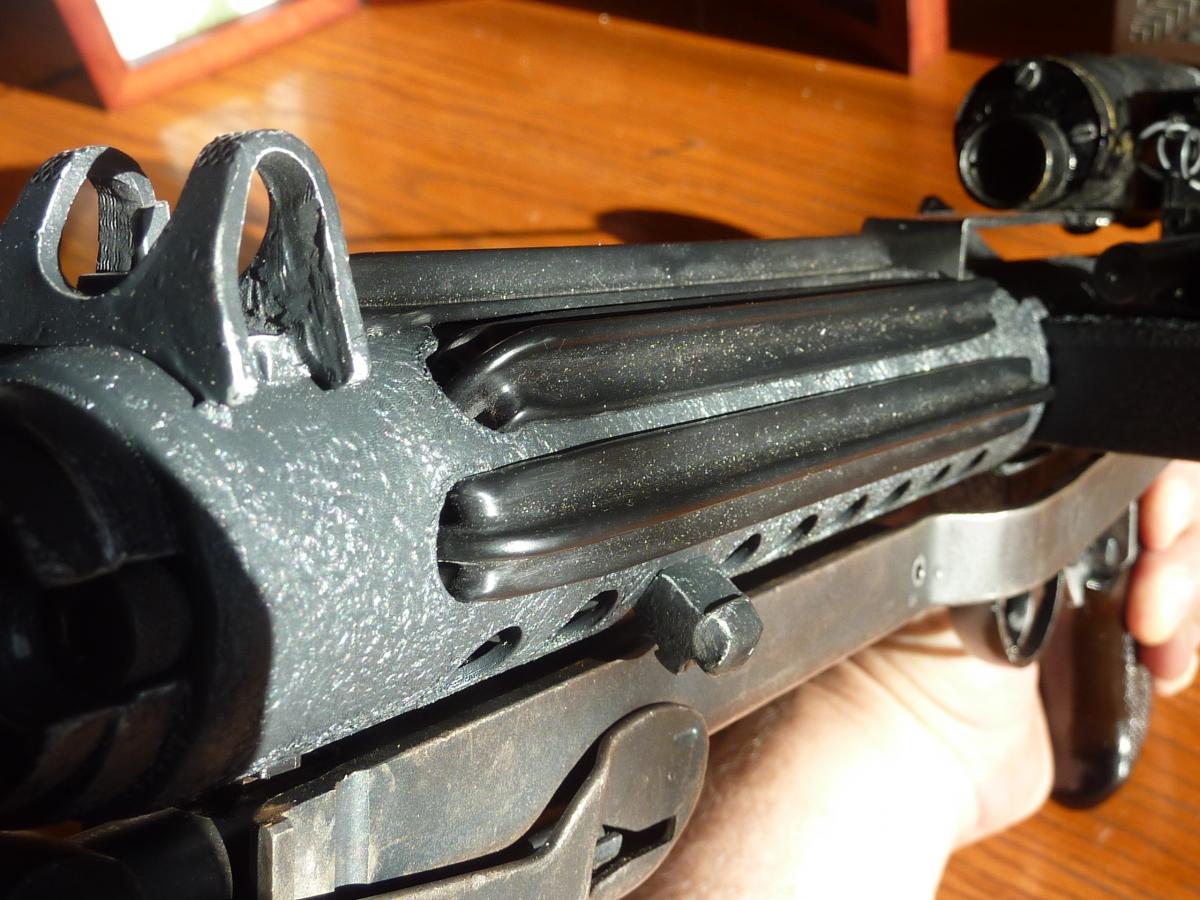
My daughter will be getting the new Anovos Armor. Provided she keeps doing well in school. Anyway, During our wait for her armor to arrive, I built her blaster. It was a DOOPY PIPE KIT. I needed to get an acrylic receiver tube (Thank you usaeatt2!!), scope, scope rail, and counter. I bought a Sterling kit from APEX a while back. I took molds of many of the inadequate parts to apply to her blaster like the bolt/charging handle, the front sight, the lock ring track for the butt cap,
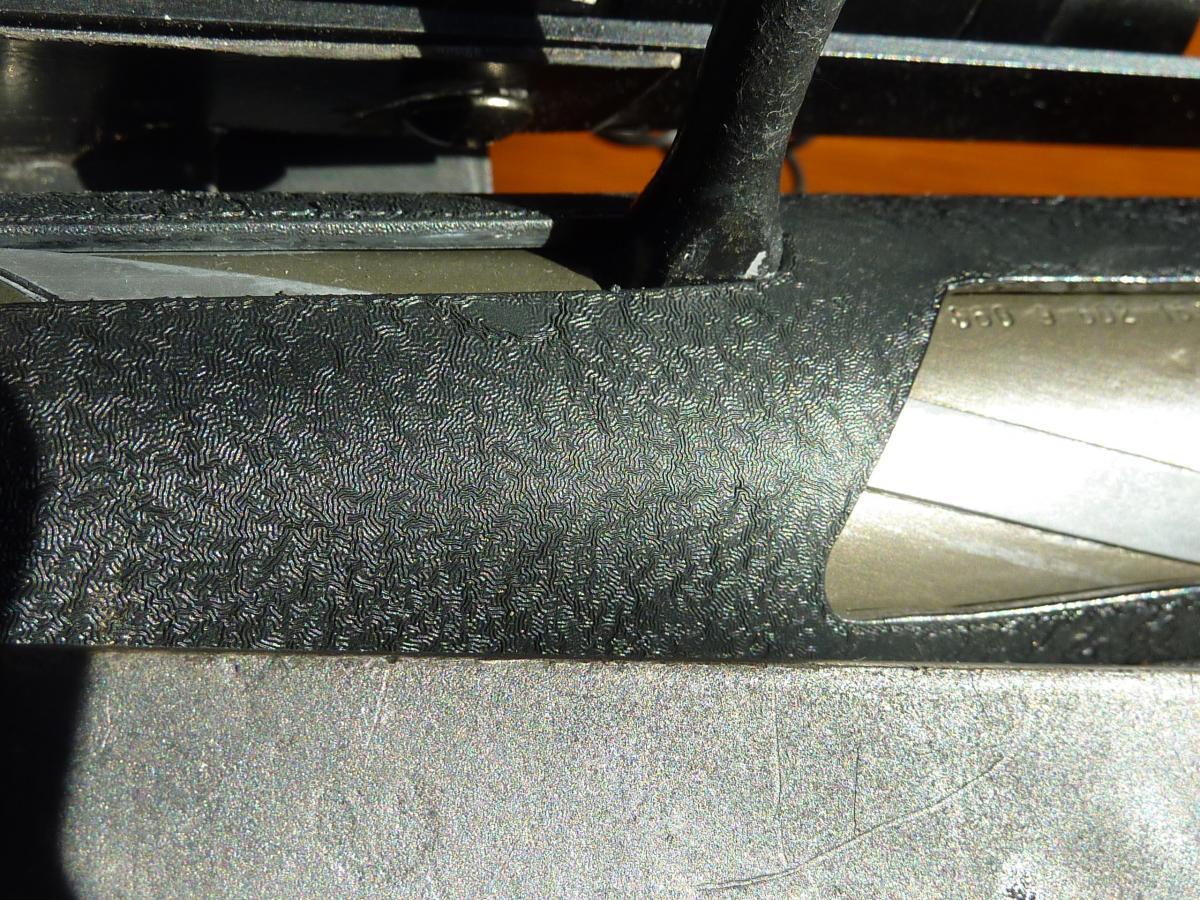
the hinge mount for the folding stock. I also acquired a resin barrel replica also made by usaeatt2 (Aaron Trebel) This made it possible to incorporate many real parts into her build. I used the folding stock, butt cap, front barrel screws, and the inner spring althouigh I needed to cut it down because it was way too much pressure for the plastic parts. I also applied the crinkle finish. This might not be entirely accurate to the film, but it gives an authentic look to the finish many Sterlings had.
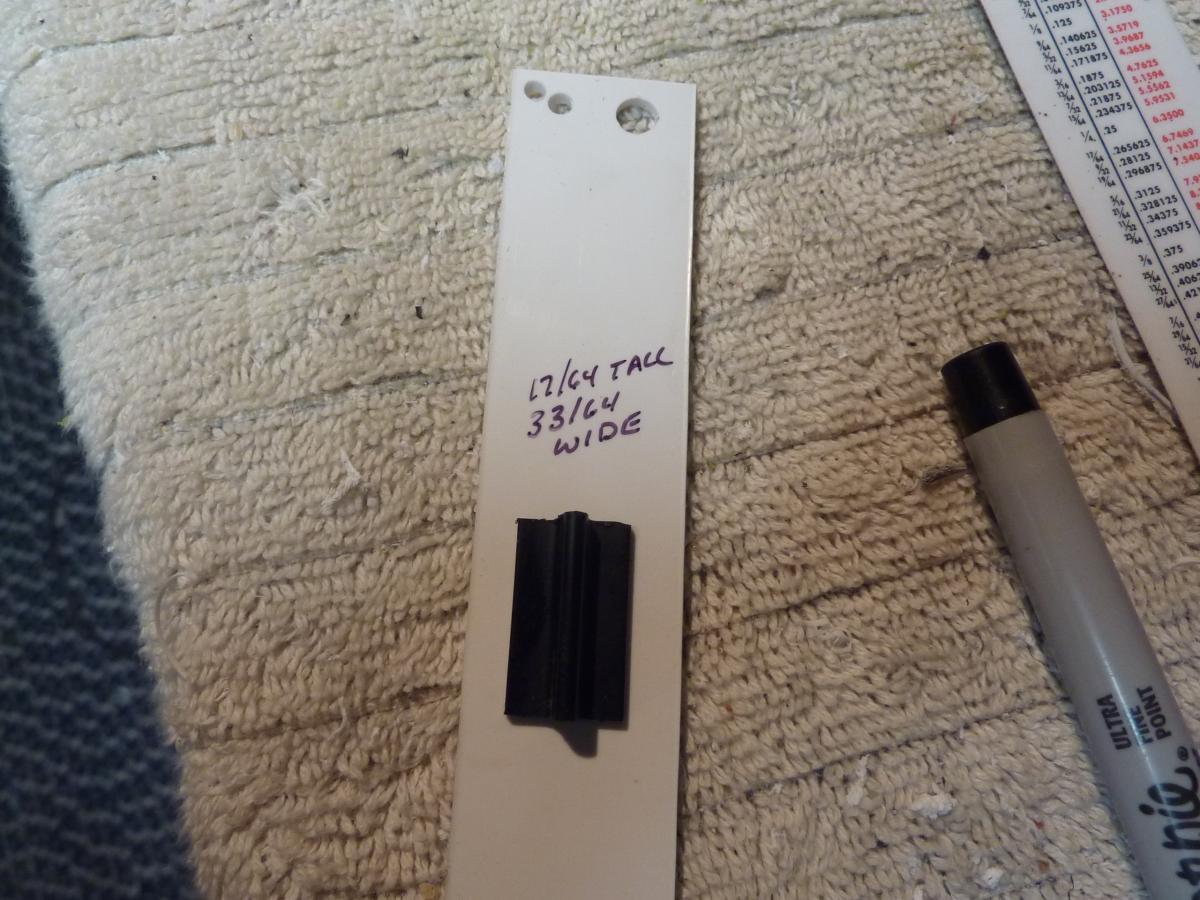
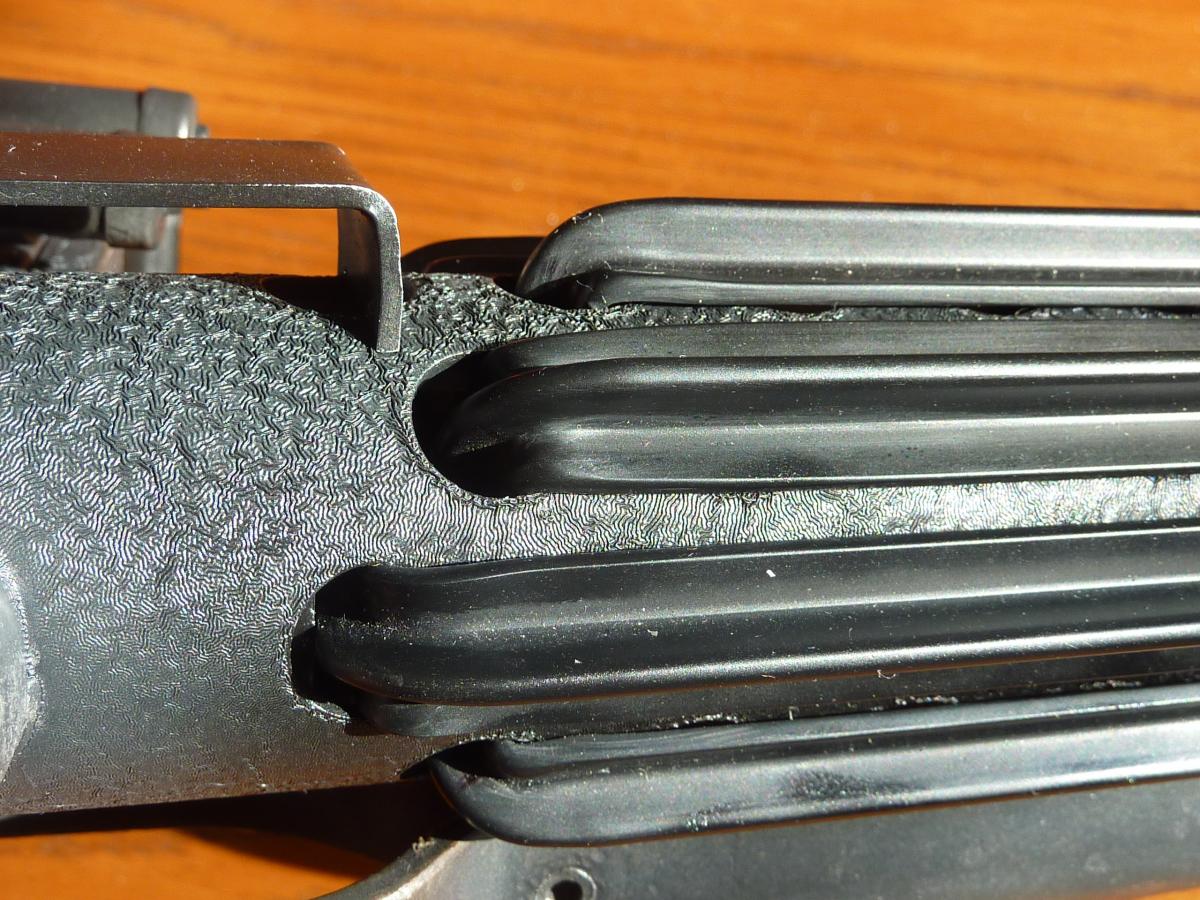
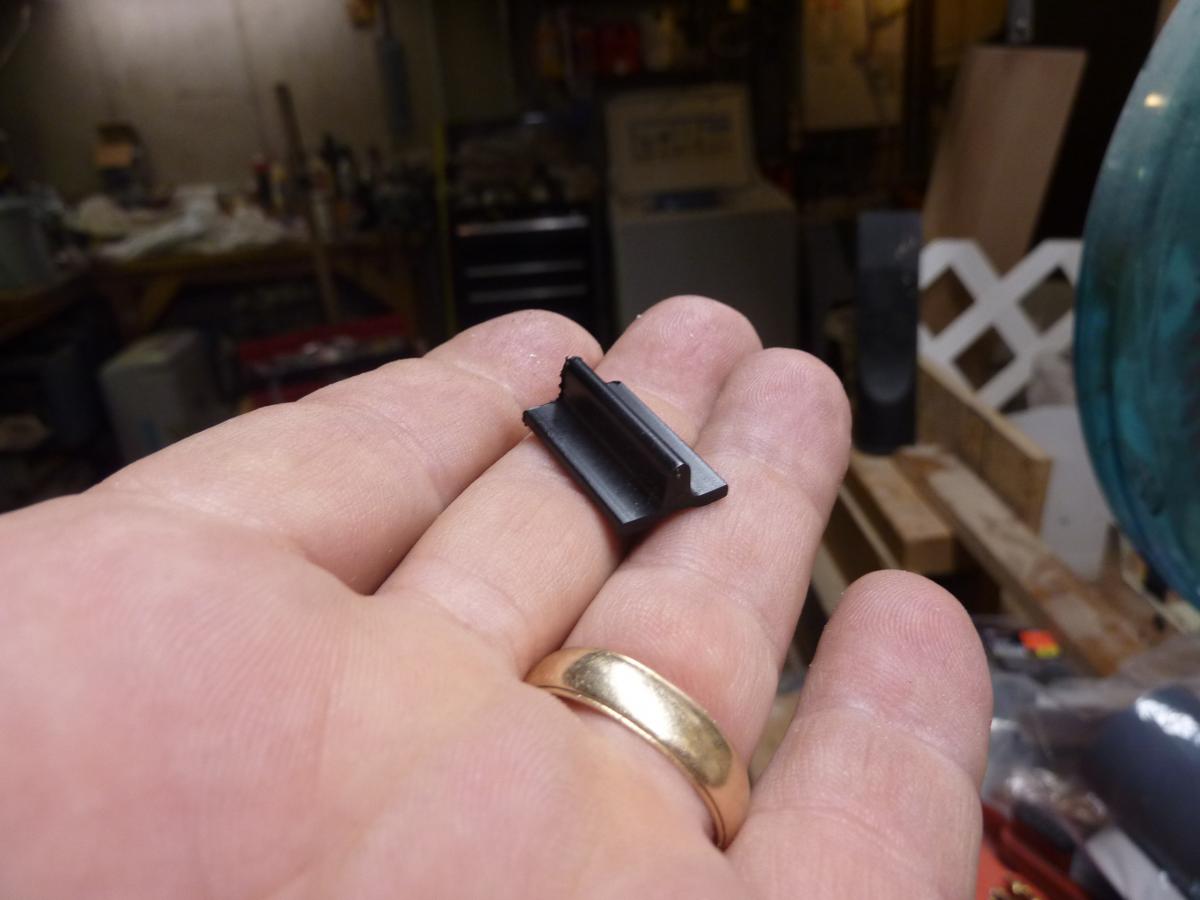
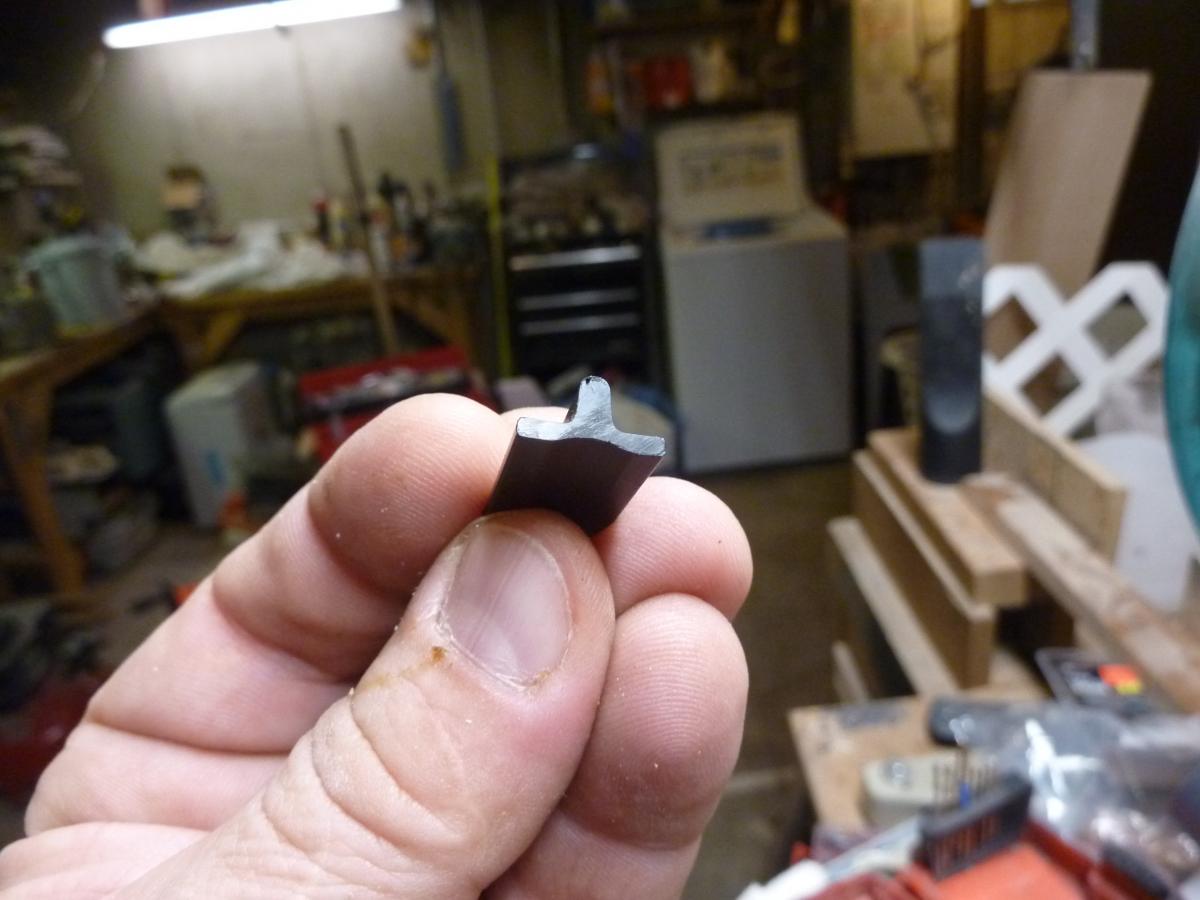
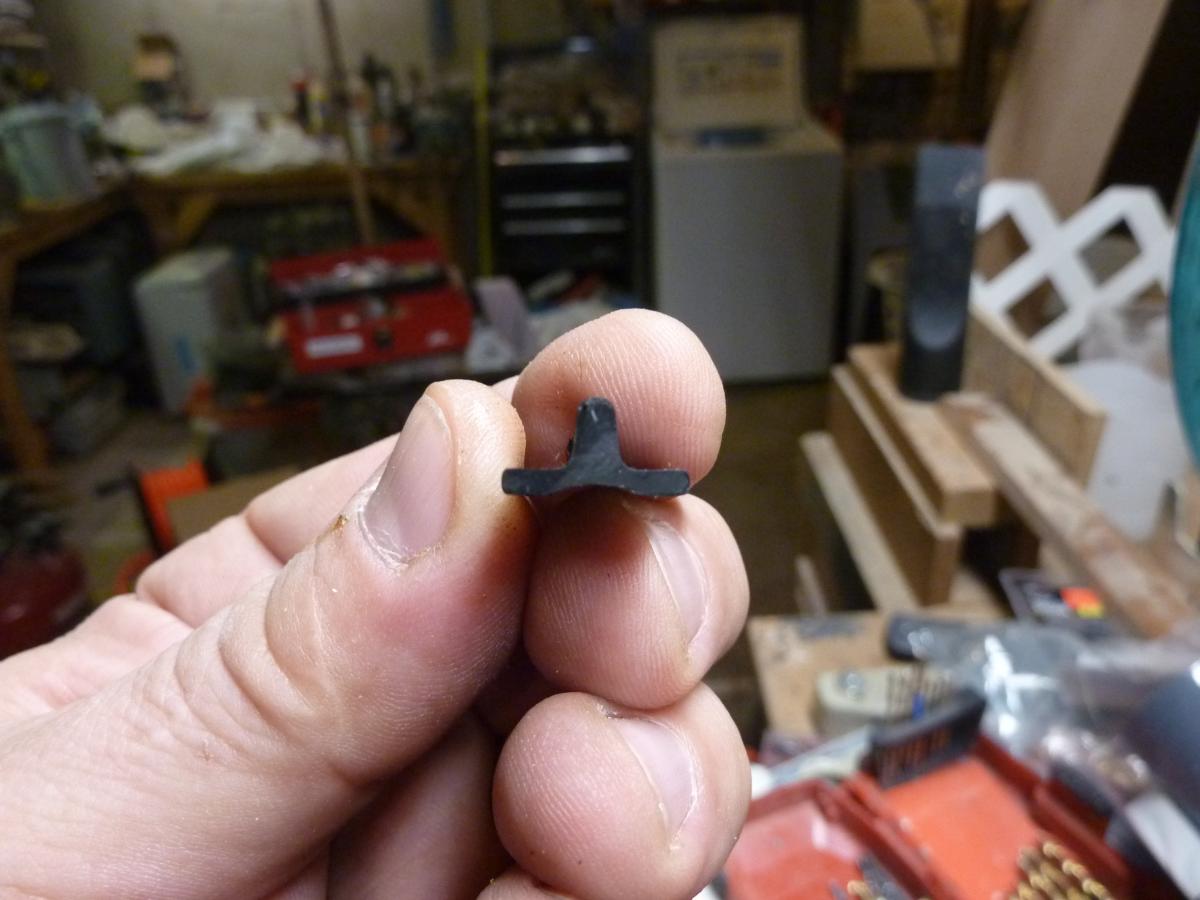
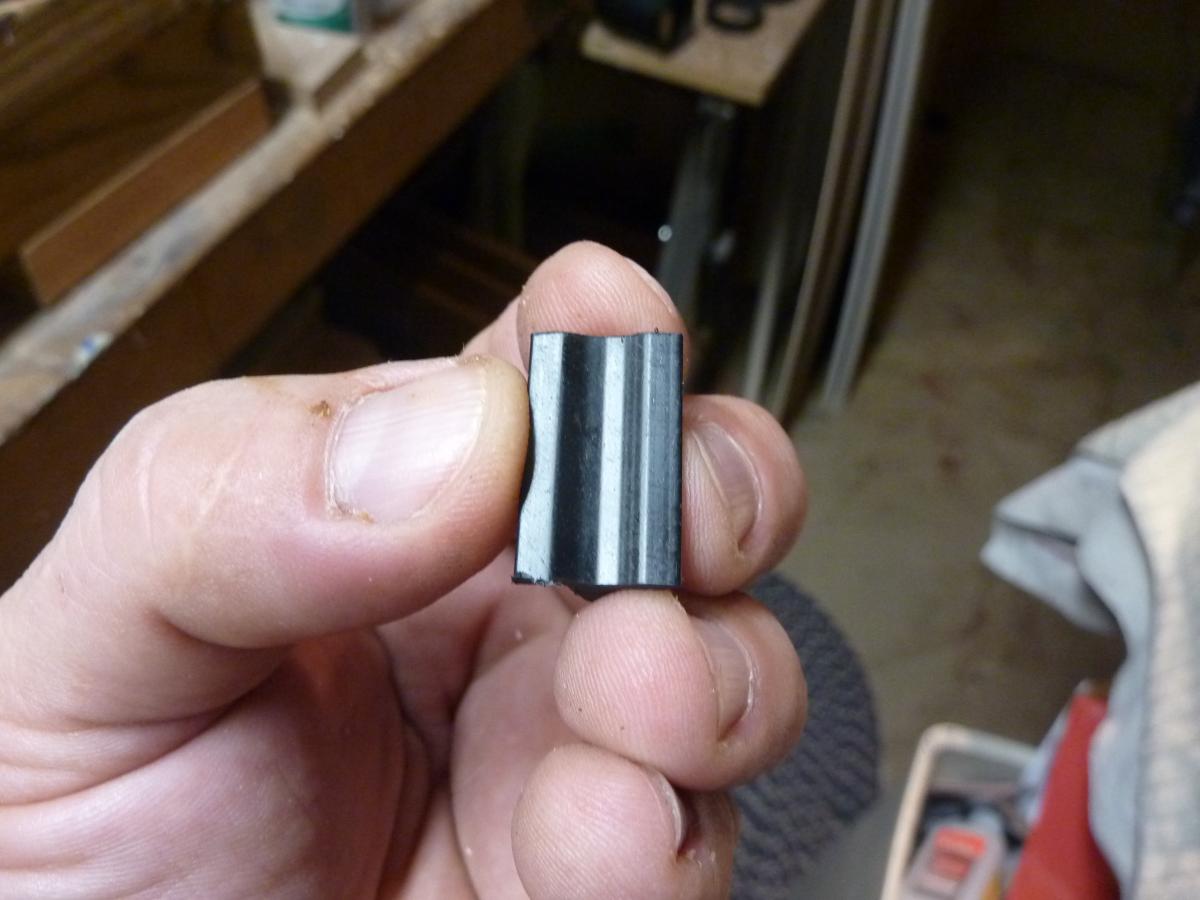
ANYWAY!!! This thread is not so much about the blaster as it is about a suplier for affordable, accurate T-Tracks. If this was repeated I apologize. Earlier this year, I was blessed to receive a set of T-Tracks from a fellow trooper as a gift for helping him out. They are from http://www.toddscostumes.com/costume-supplies/star-wars-prop-builders-supplies/star-wars-prop-makers-t-strips/. Kit #4 is what we want and it is $24!! These were awesome to work with!!! the heated evenly, bent perfectly, and I needed to trim the sides to fit in the vent holes properly but was able to fine sand them down so the cut marks didn't show. First pics are of my Daughter's blaster and the T-Track pics and measurements are below.


-
 3
3
-
-
Thanks, guys! The polishing was just good strong elbow grease. I don't think I would have the confidence to use a rotary buffer of any kind. The plastic on this helmet is very thin and too much power can build heat that might warp or even melt the plastic.
-
I use Meguilars automotive rubbing compound. Novus polish also works very well
-
1
-
-
Nice work so far. It's really coming along!!! A couple things that you will need a little touch up on. First, your frown pain should be limited to the teeth alone. The way you have it is more like ROTJ. Secondly, the details on the helmet for the exception of the ear rank bar area were all decals. Front, rear traps, tears and tube stripes were all decals that you can purchase here:https://trooperbay.com/esb-helmet-decals.html
-
Stop...you're embarrassing me

-
1
-
-
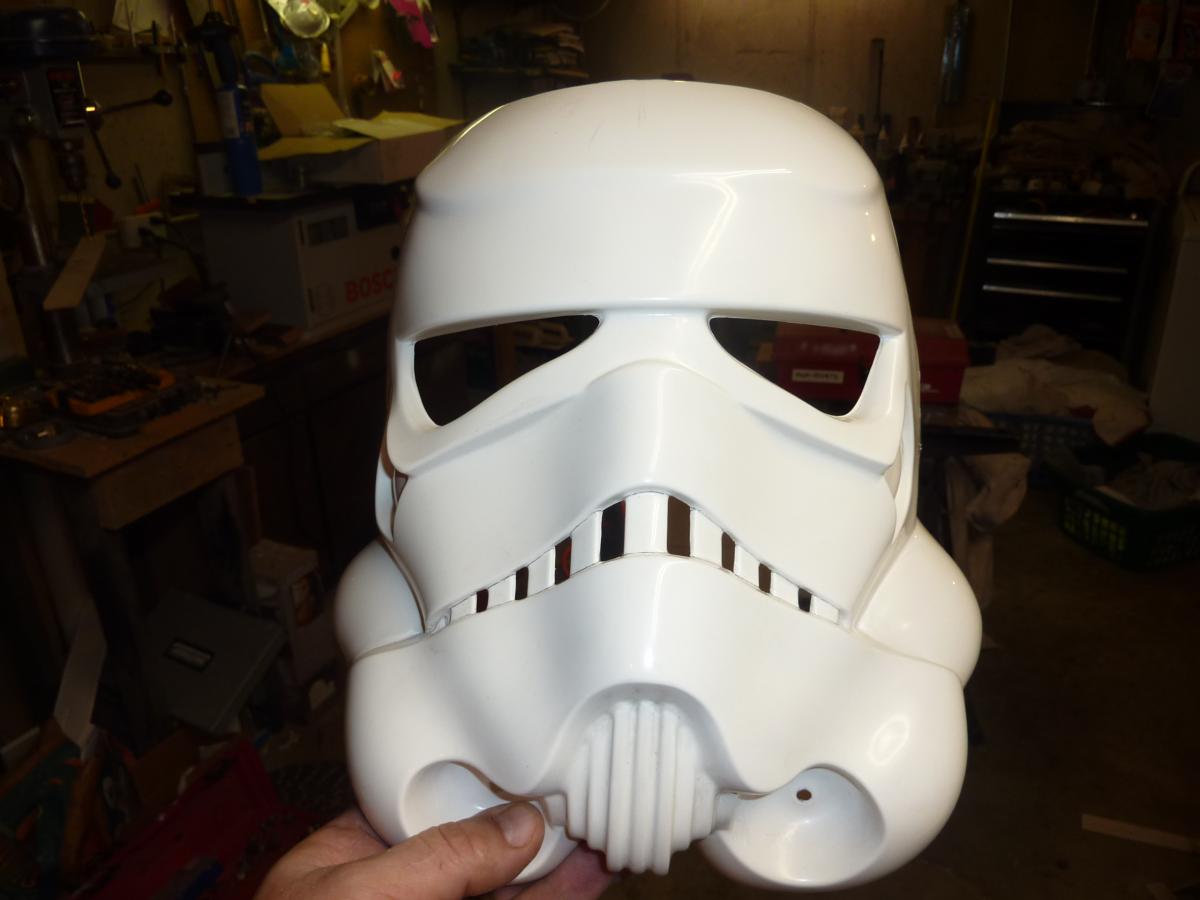
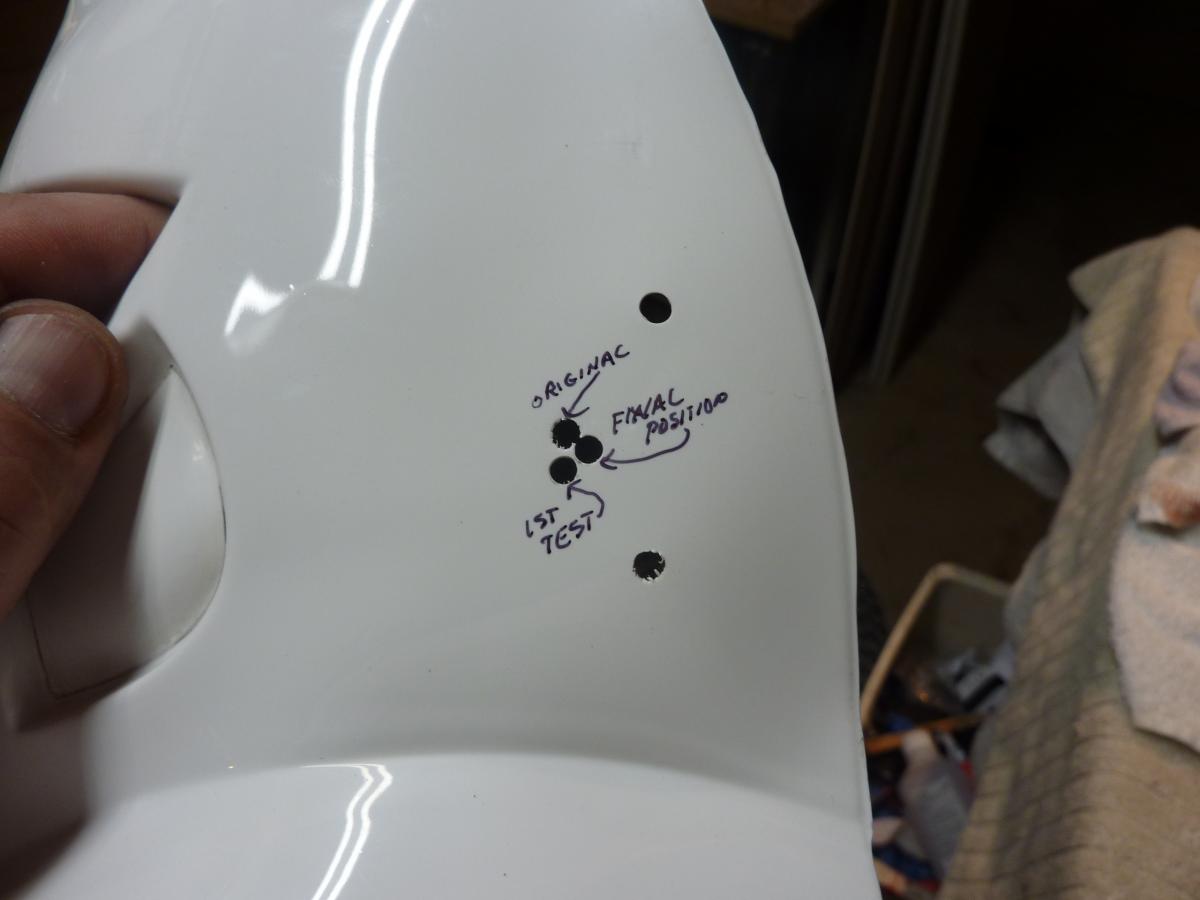
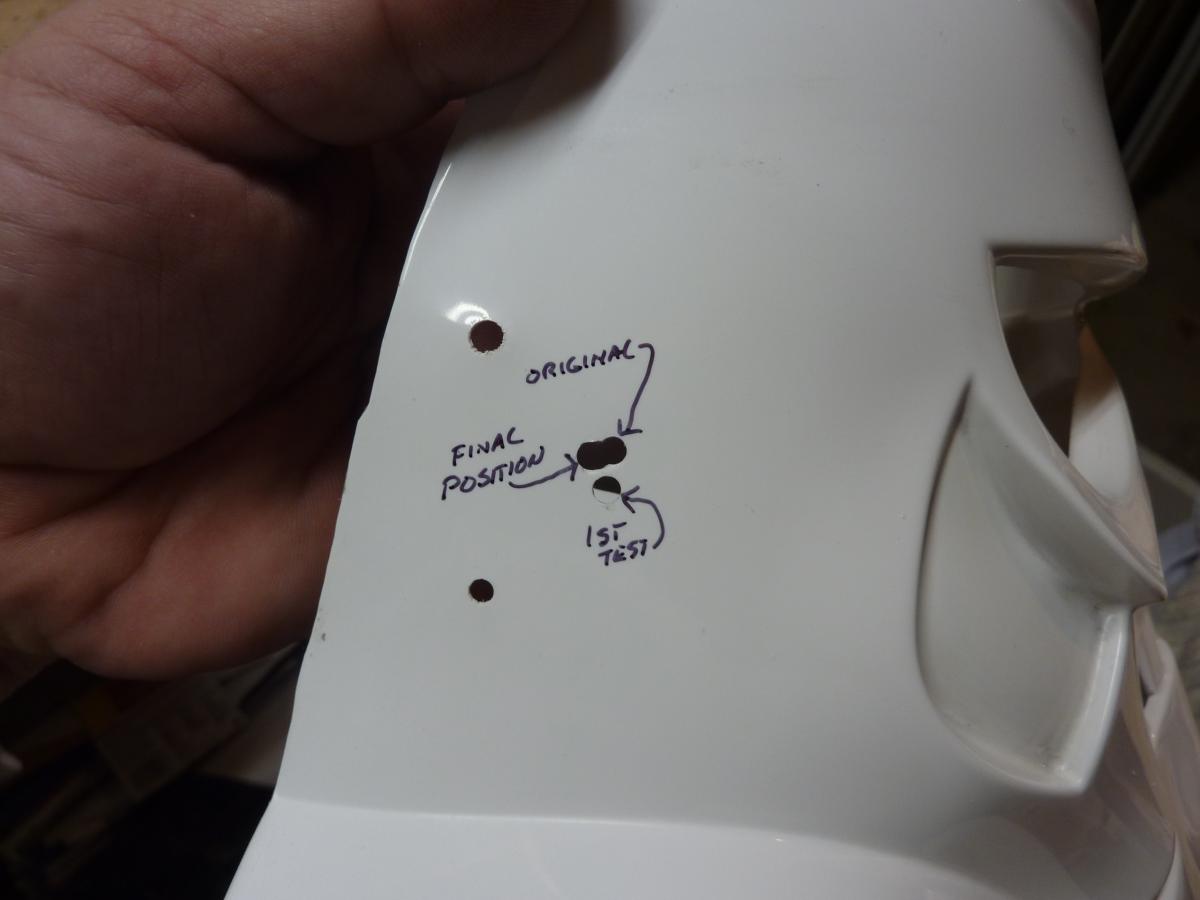
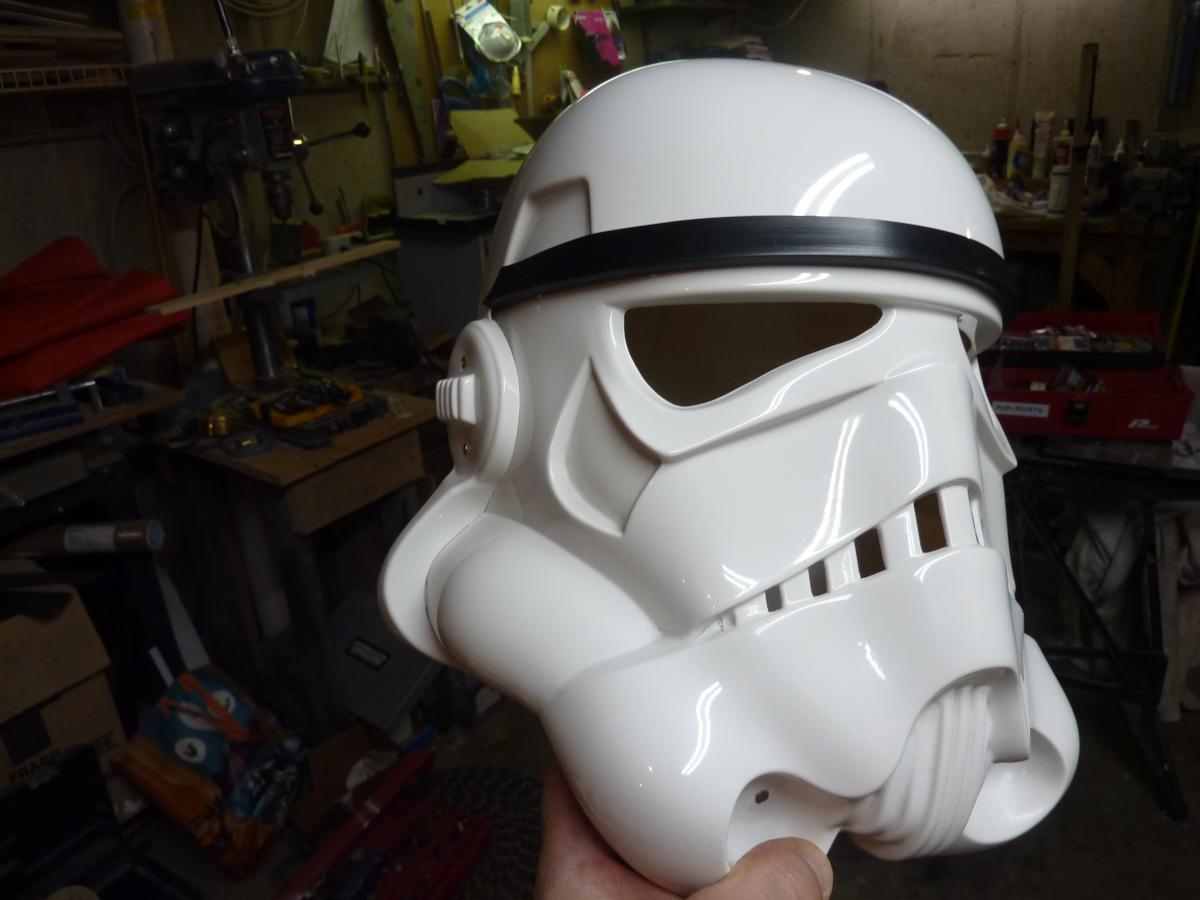
Ok, we all know the things we like and dislike about the new Anovos helmets. I know they were going for replicating a specific helmet they saw in the archives but I still like my ears to have as little gap as possible. This is going to be a challenge because of how much they already removed. I am also particular about hand painted details so I need to do some transfer stripping. This helmet is paper thin. The ears are, too! Clearly NOT the same thickness of plastic used on the body armor.
First the disassembly:
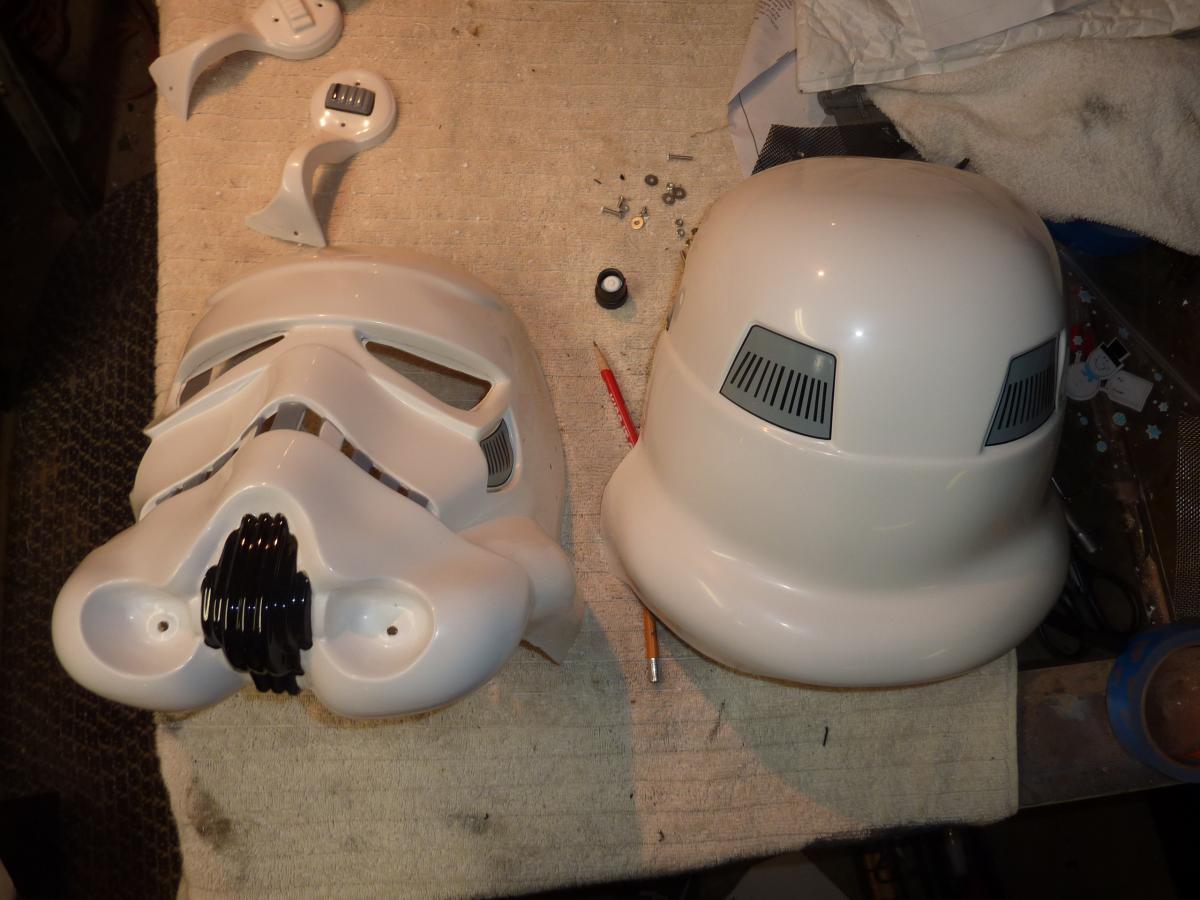 The first thing I noticed was that the ear screws were the kind we are all looking to use on the thermal detonators. They are flat bottom, pan head slotted screws.
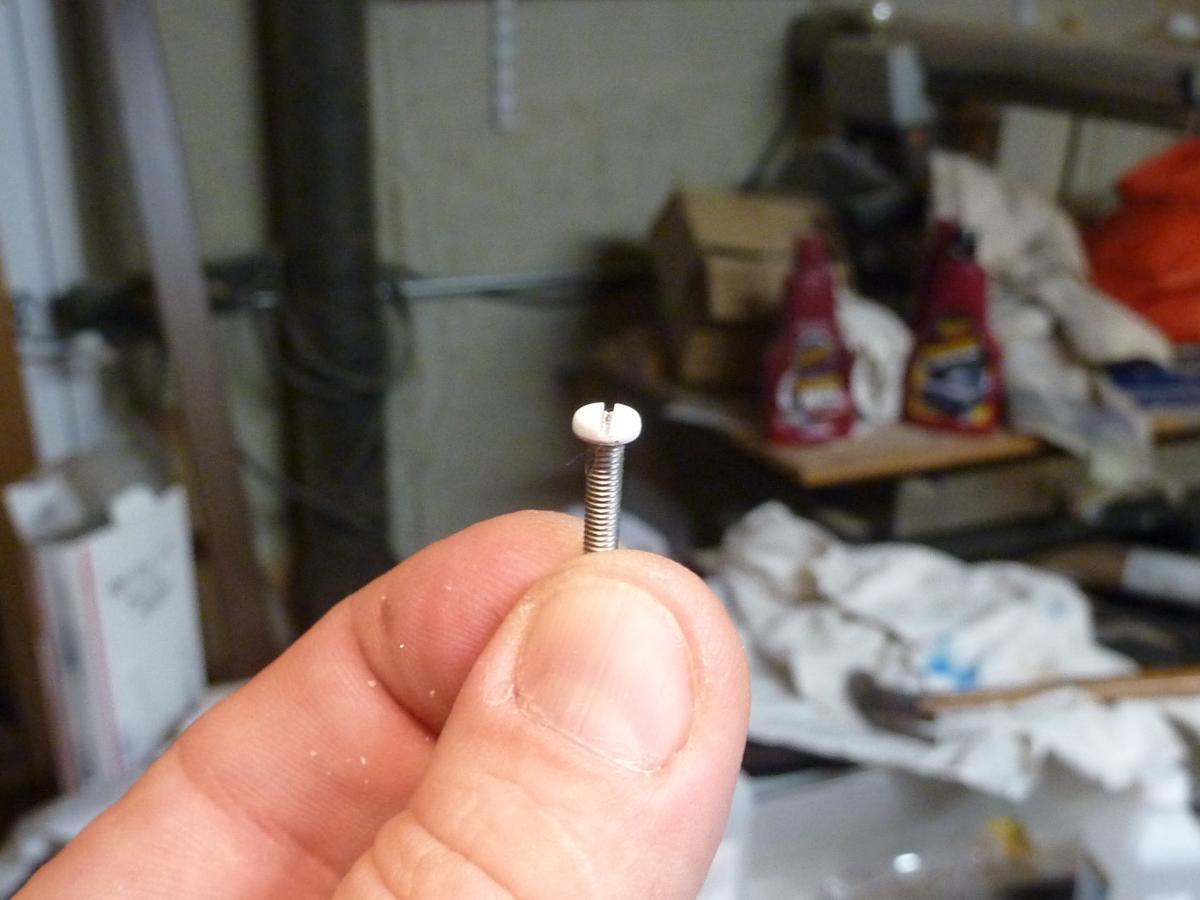 Because Anovos provided wedge head phillips screw for the TD, I will replace those with the helmet screws and replace the helmet screws with the correct angled screws.
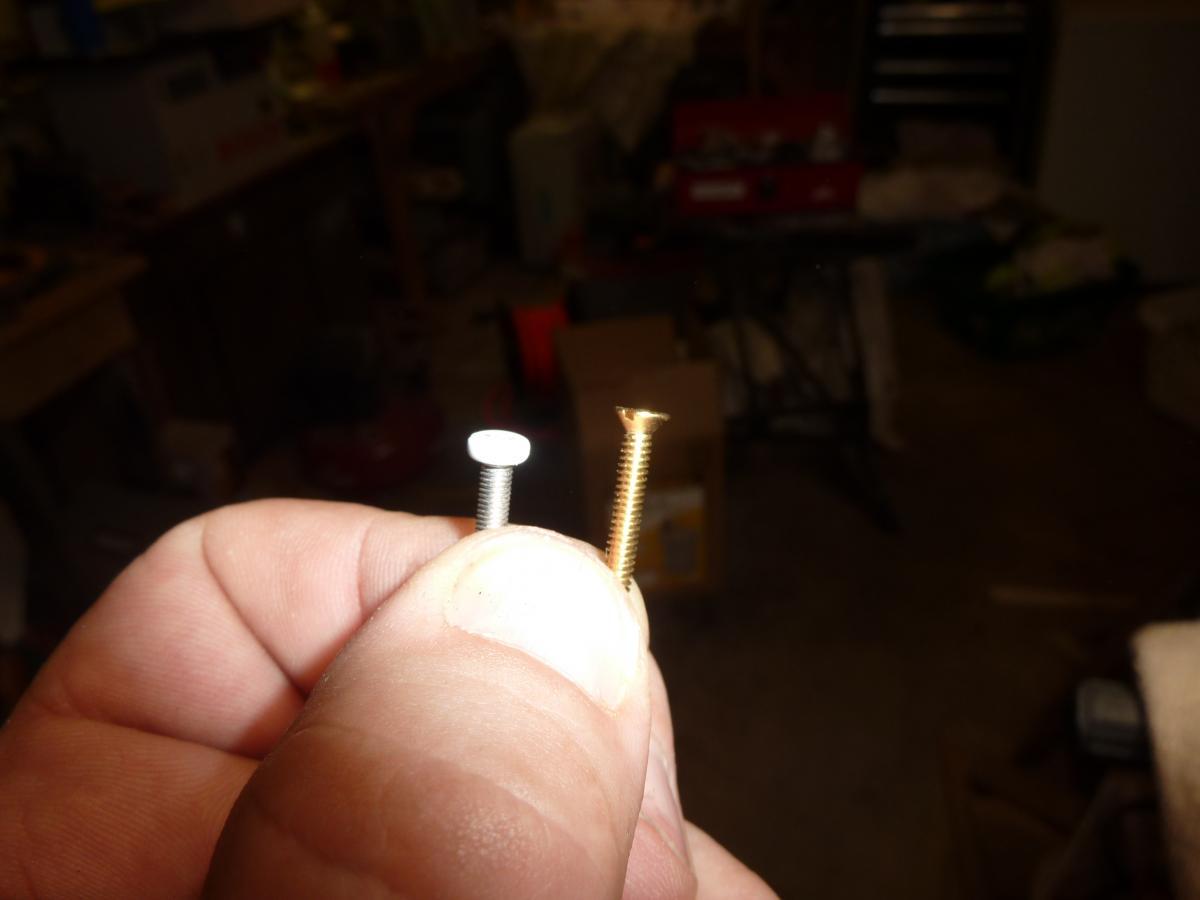 After removing the hovis, I am going to swap out the fine mesh screen with the better stuff on the right.
 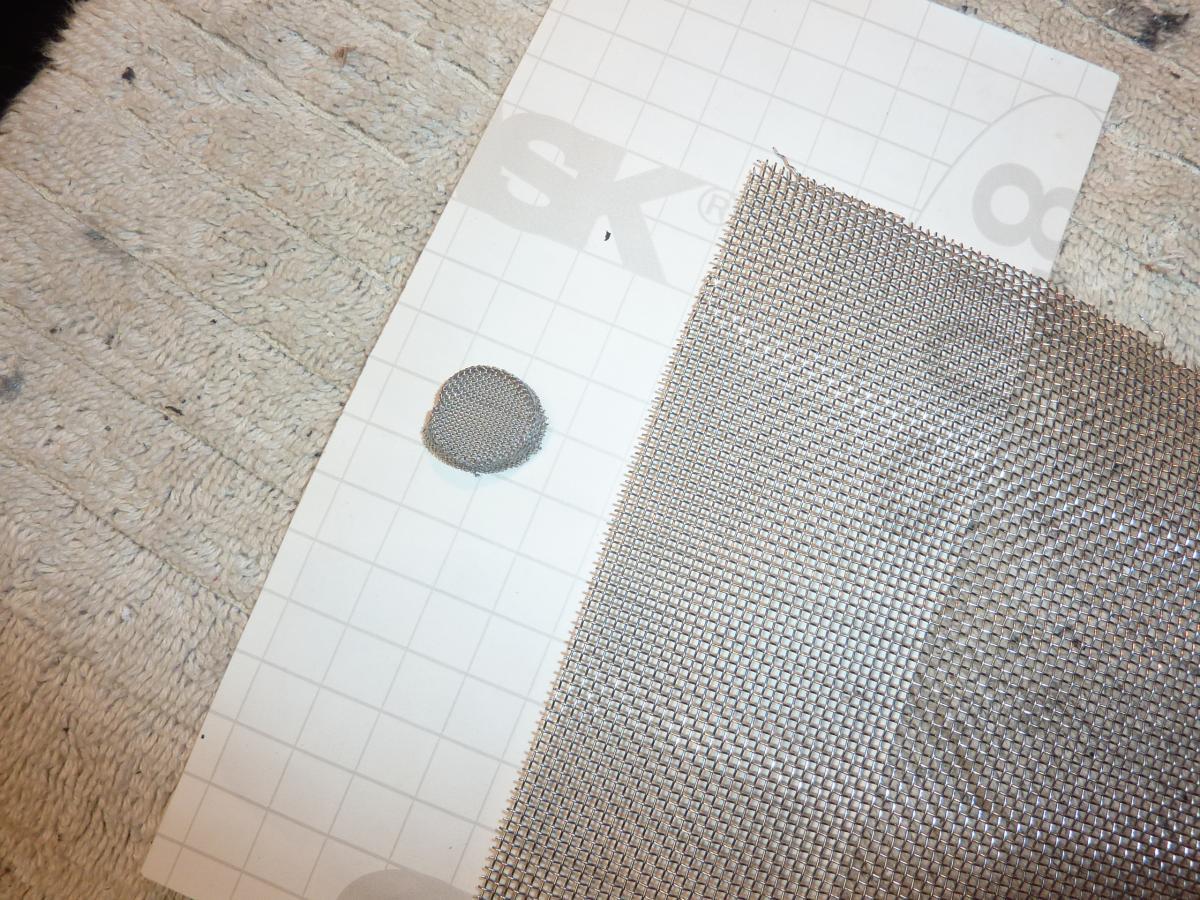 Nice hovi tips, though. Well done. No markings on the side, but well done. Anyway, I am also going to swap out the brow trim. Their brow trim was too loose and cut to mimic that trooper whos brow trim ended within the trapezoid. I like going to the ends. Just my preference. I will use the UK -US52 trim seen on the right.
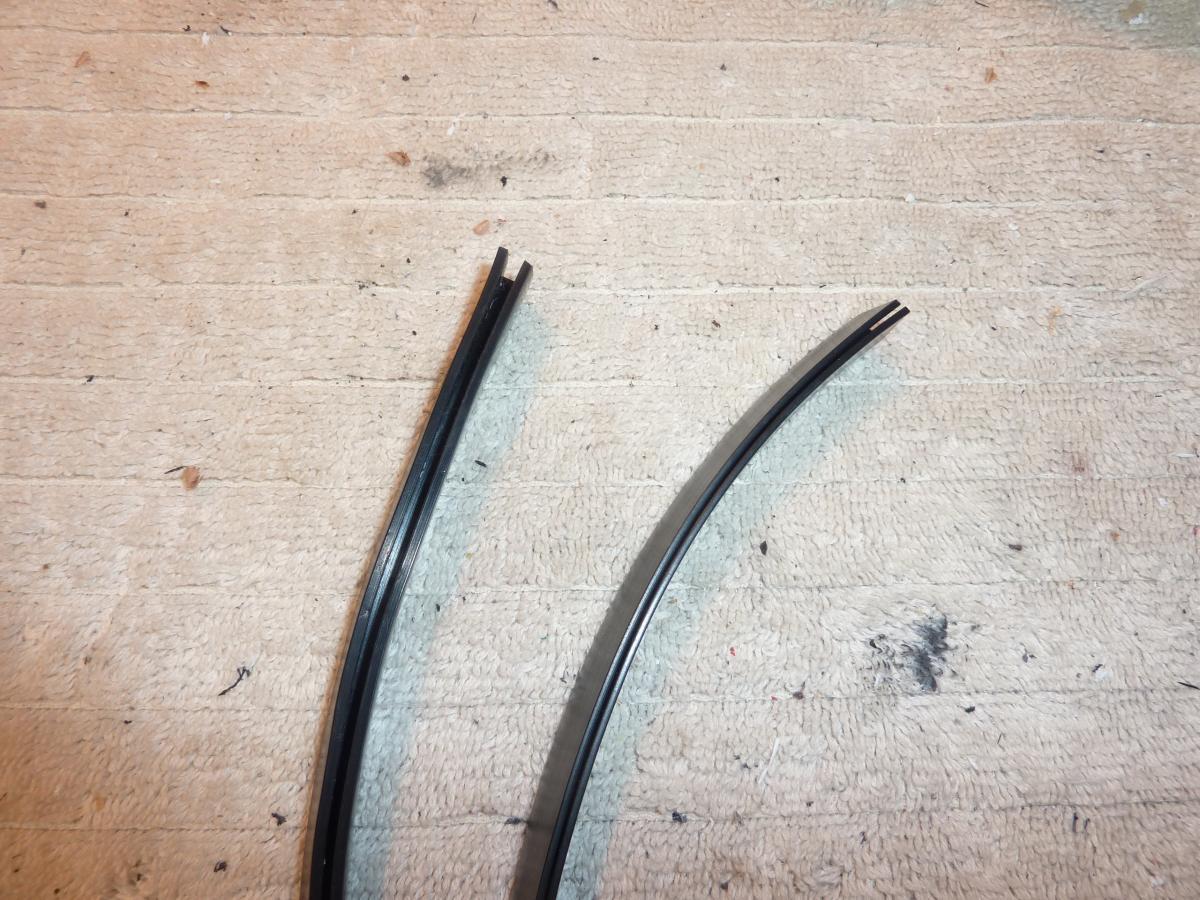 It is almost identical but just a tad less shiny and tighter fitting to grab the brow.
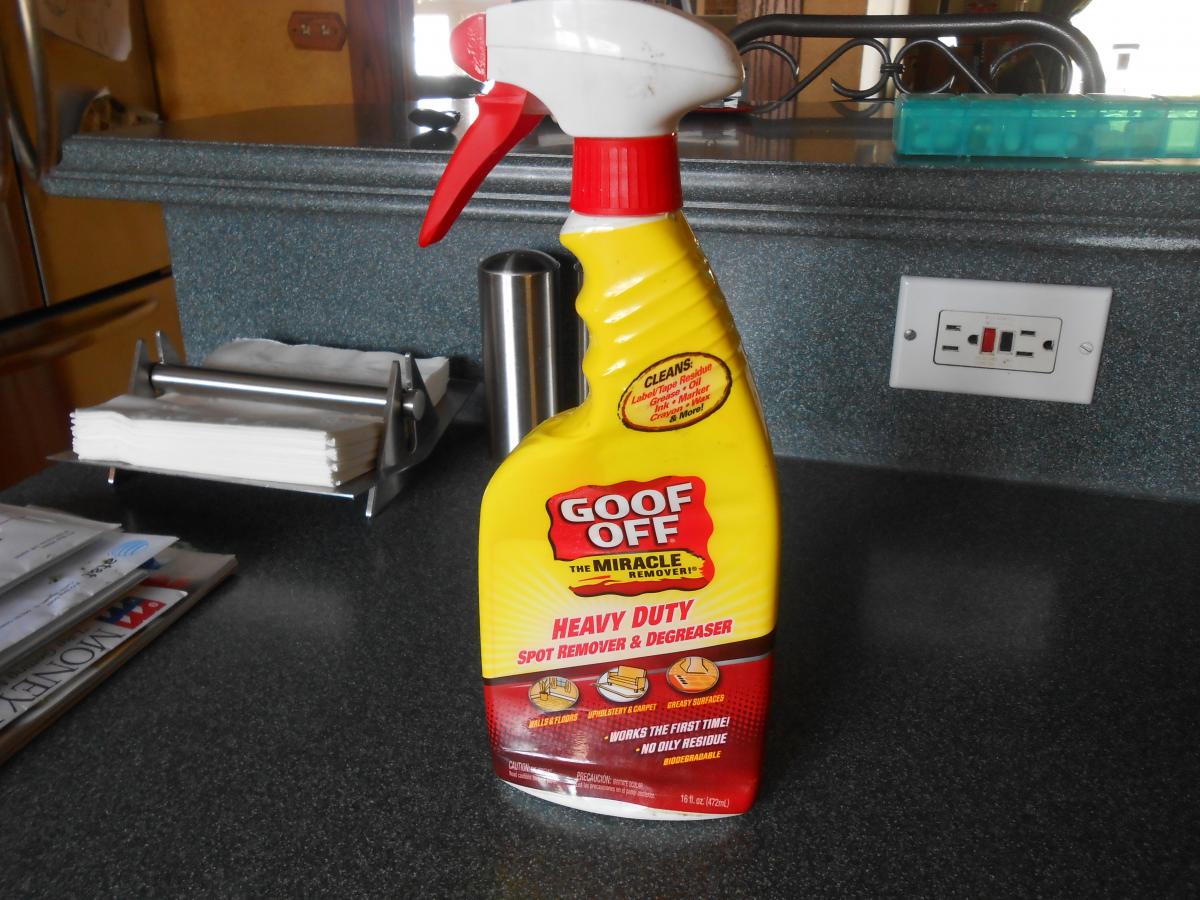
 With the helmet apart, I can start stripping the transfers. I only found two things that took them off: alcohol and goof off. The goof off required a little elbow grease, but worked much quicker.
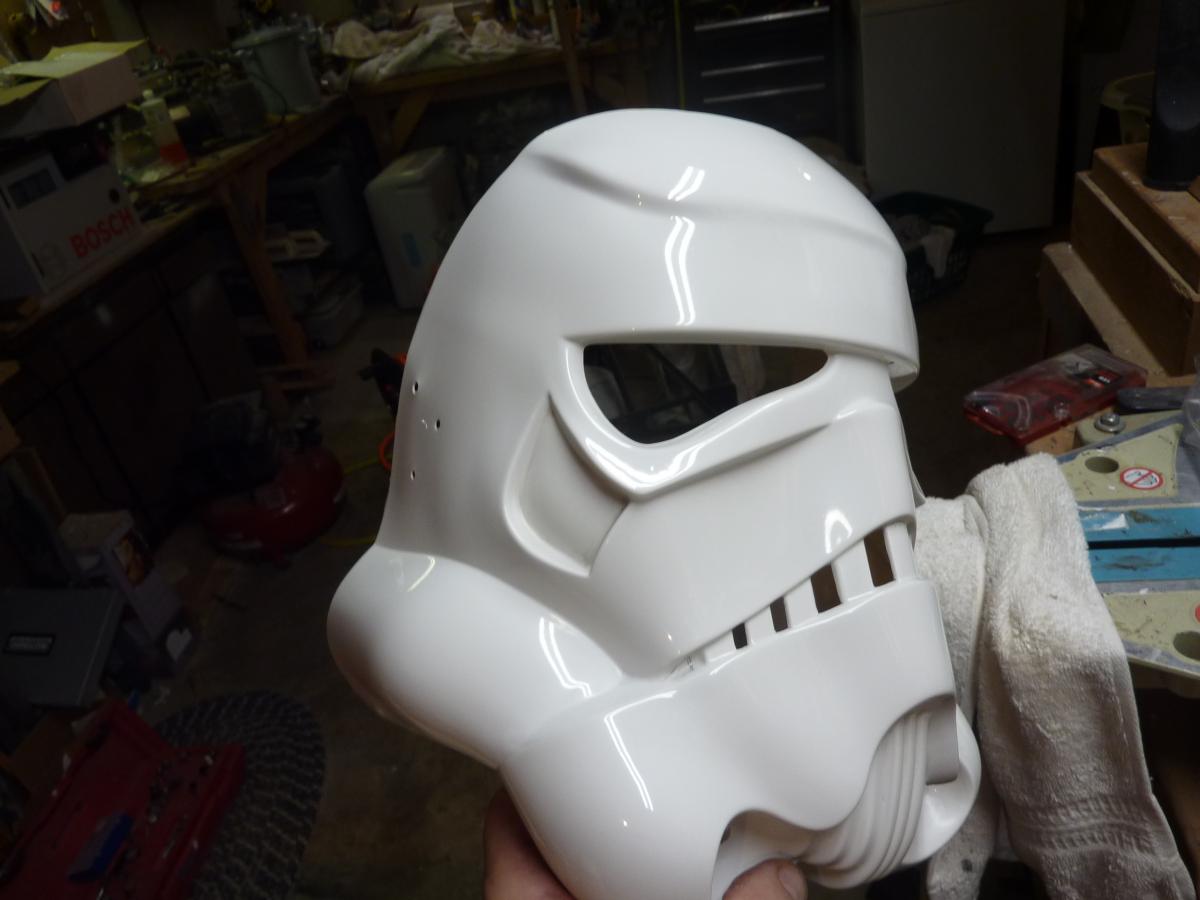
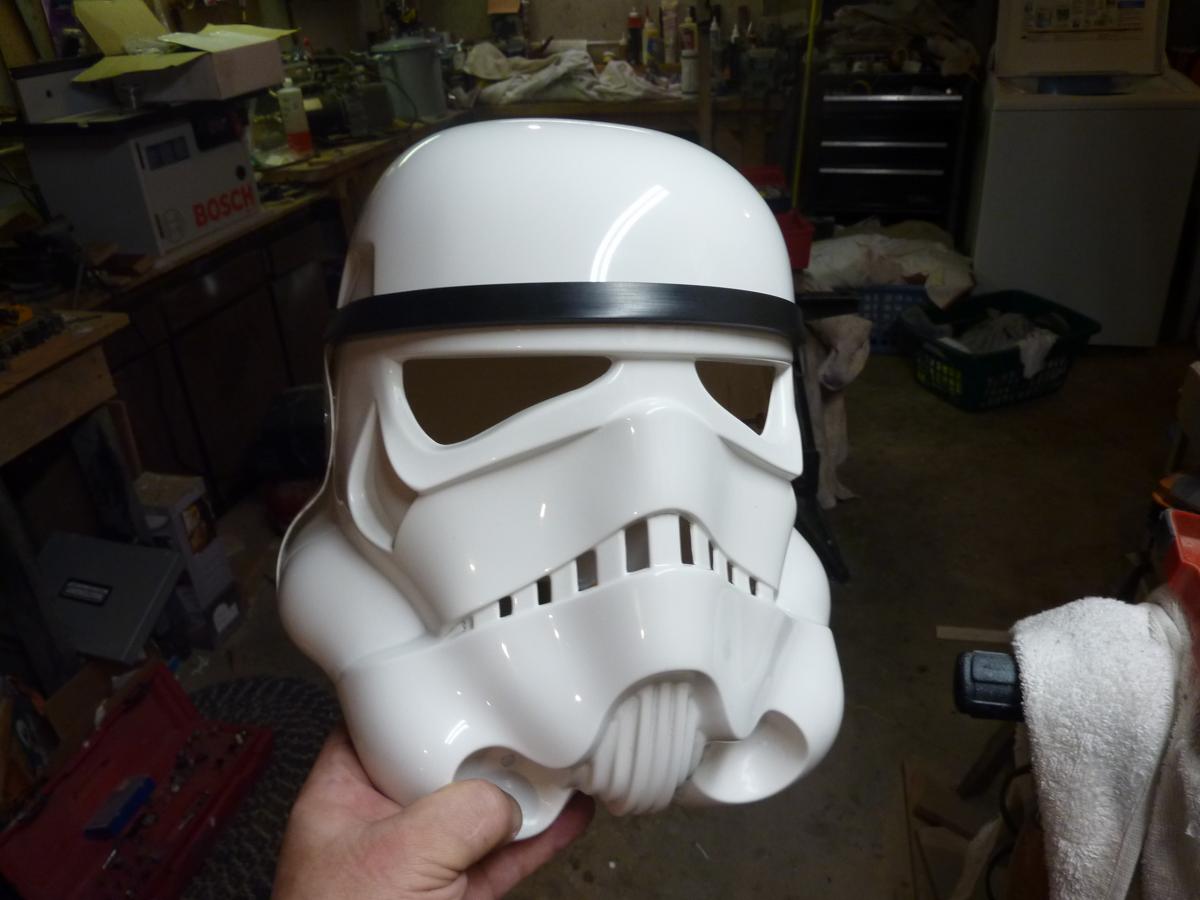
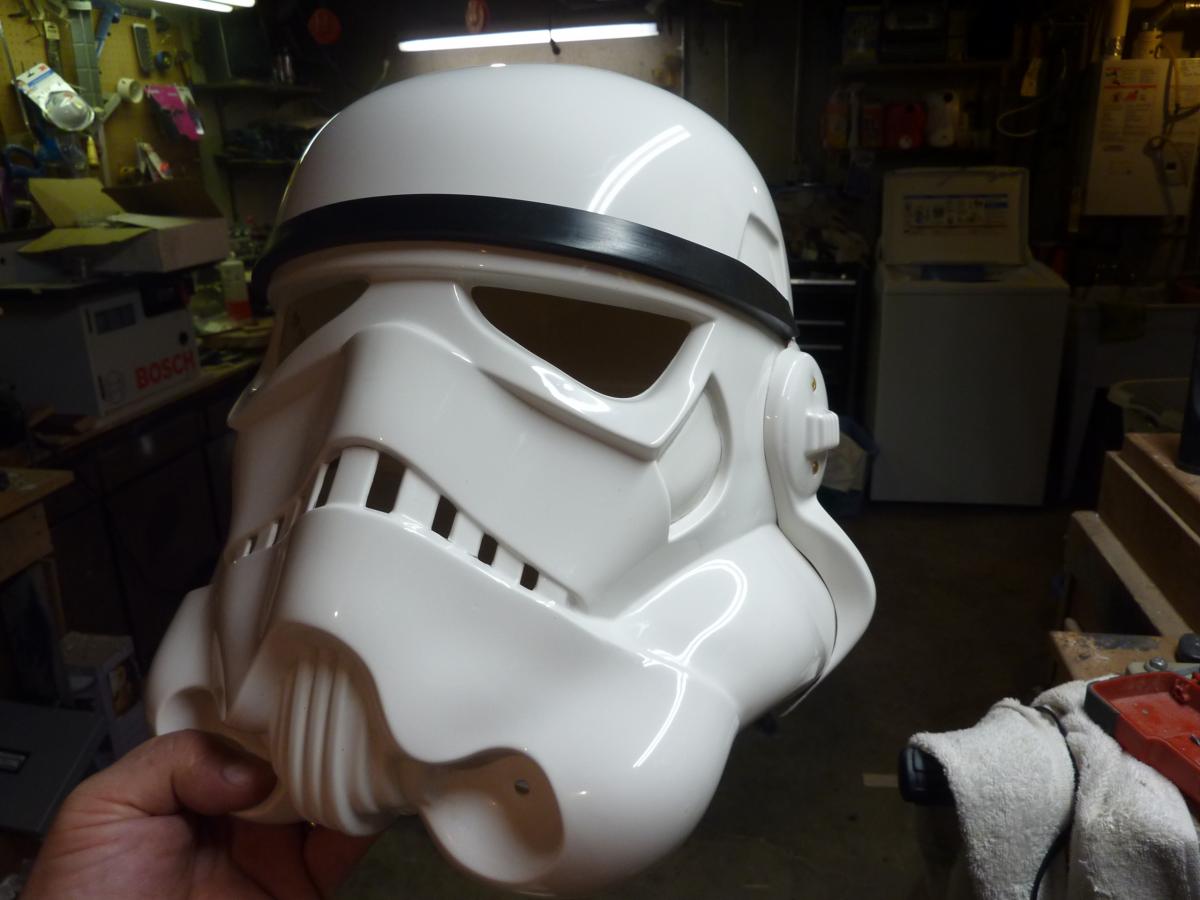
 With the helmet clean, I can start trimming. First I opened up the eyes a bit. Then started work on cleaning up the tooth openings and making the recessed ones on the right side (as you are looking at the face) a little larger.
  While I had the face exposed, it was a good time to polish it. Note the reflections of the twin bulb worklight.
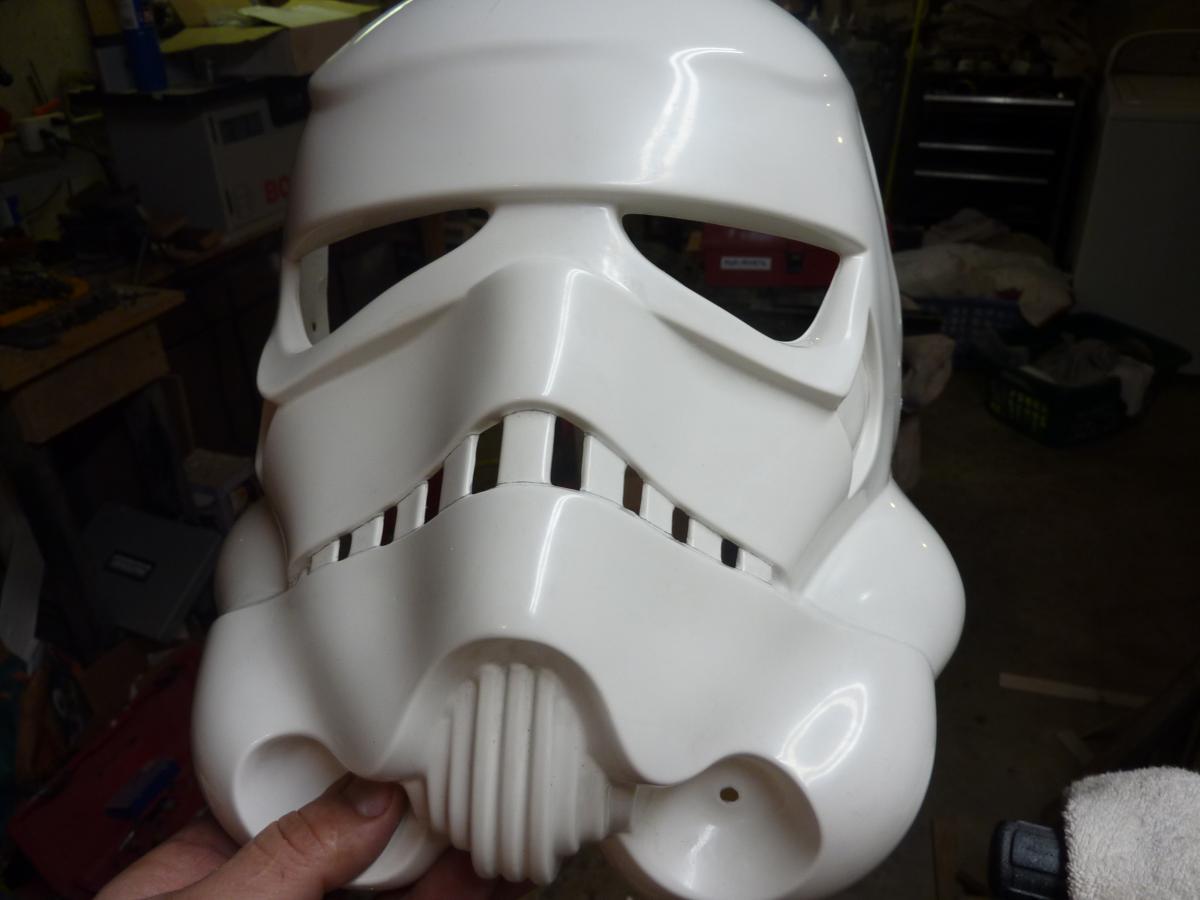 and after polishing:
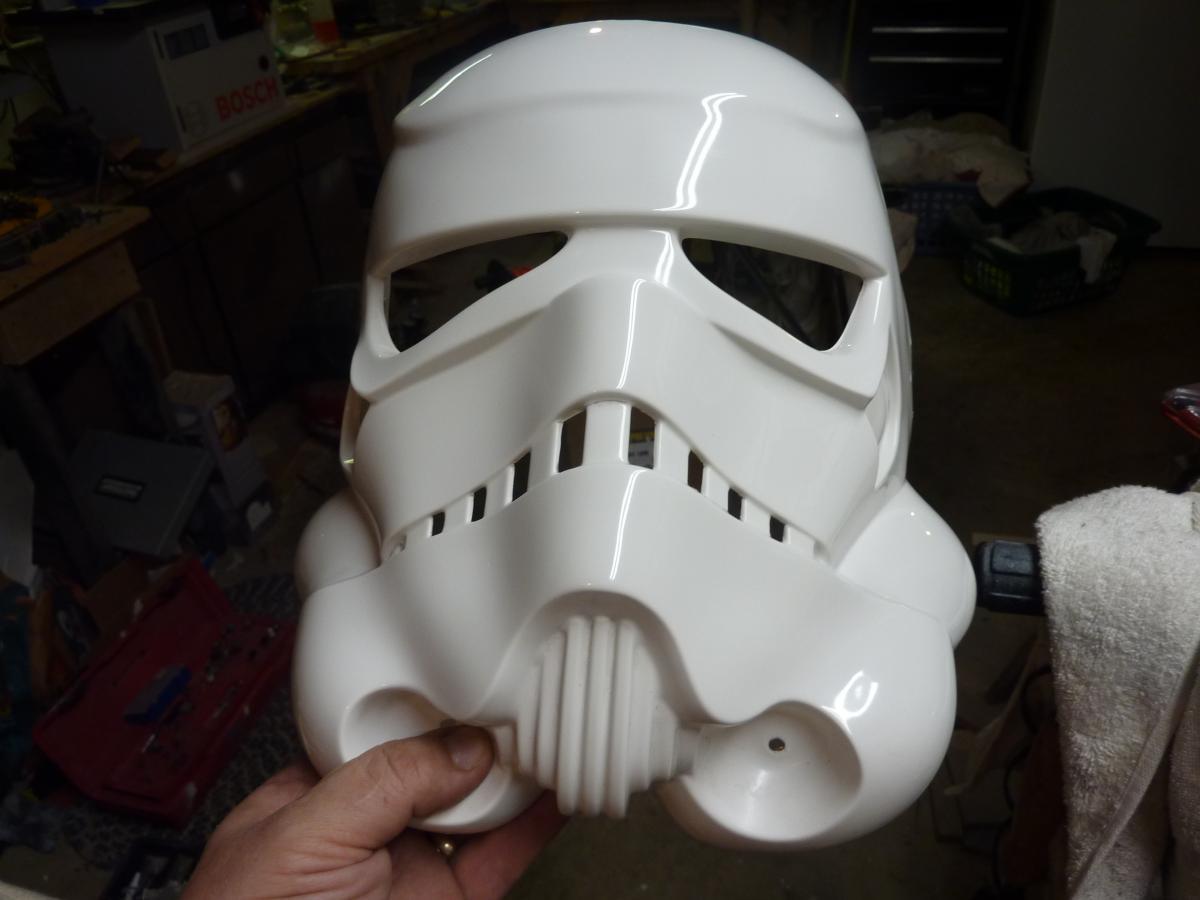
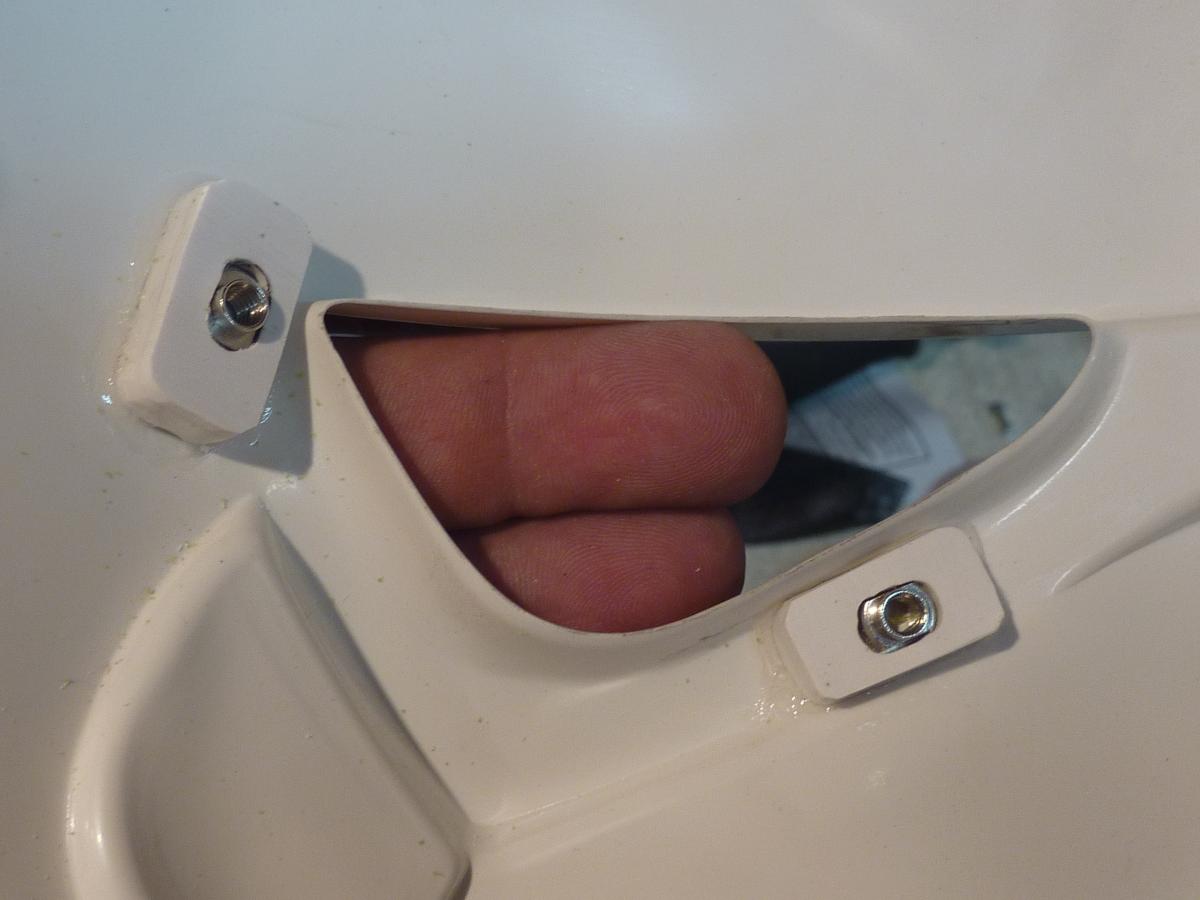
 At this time, I also constructed the lens mounts from the hockey helmet screws.
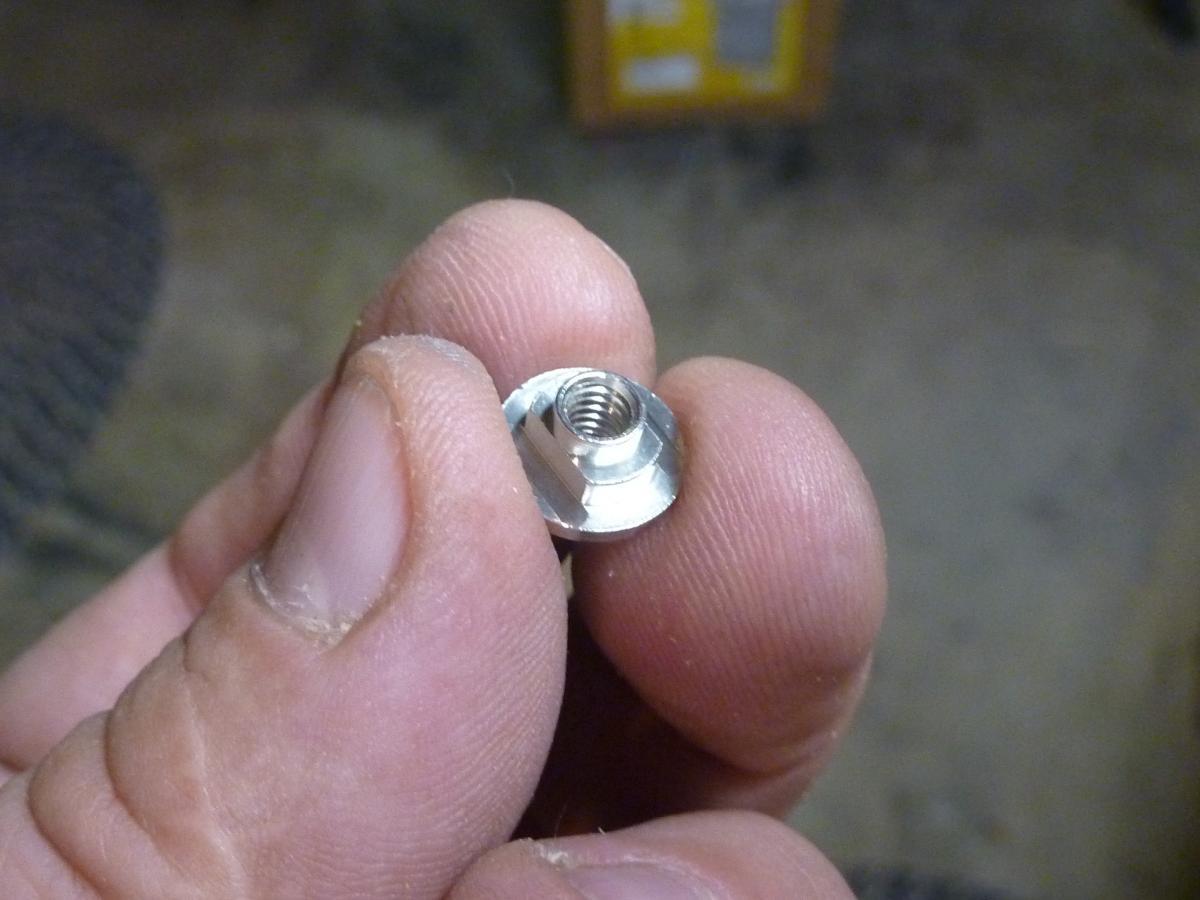 After building a stack of scrap ABS around each and some trimming I glued them in place.
  I used the provided lens material to make individual lenses.
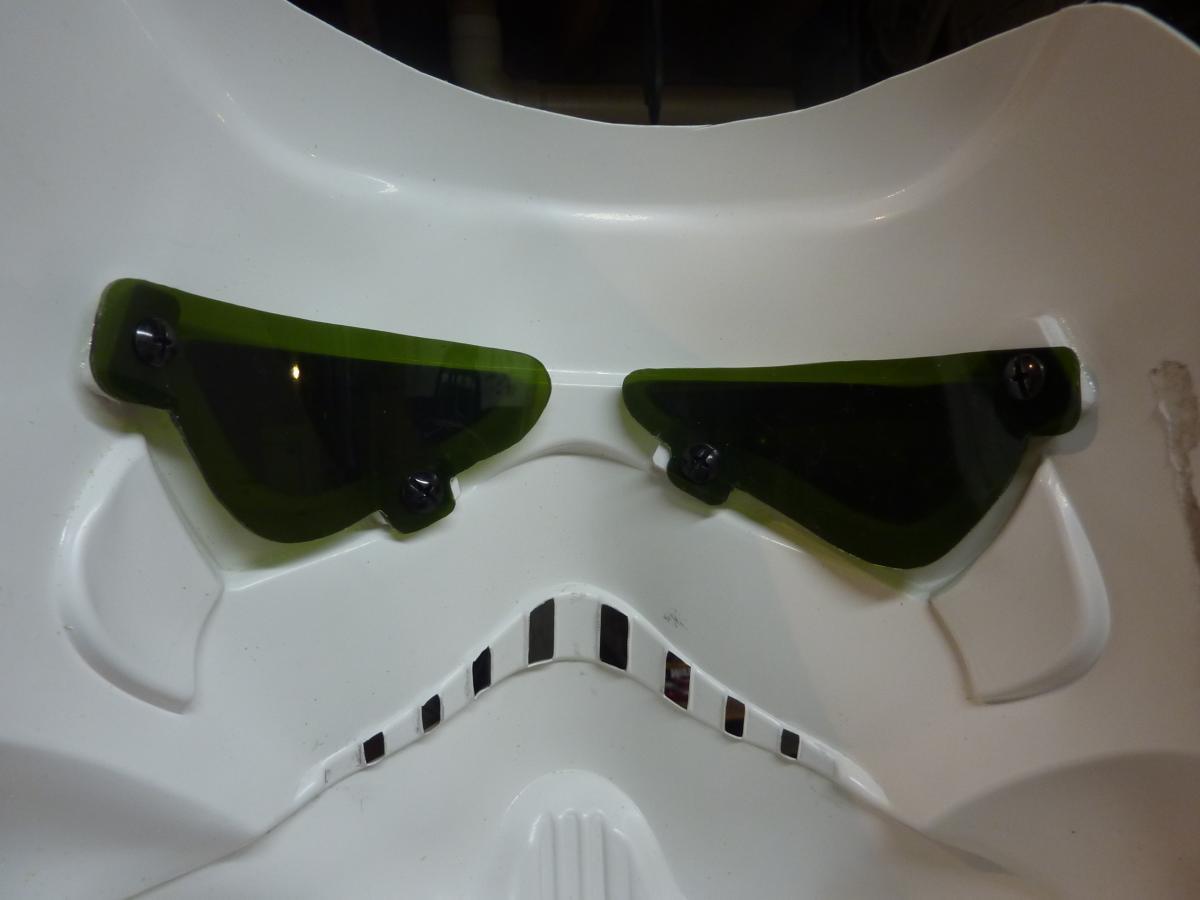
 I removed the lenses and set them aside.
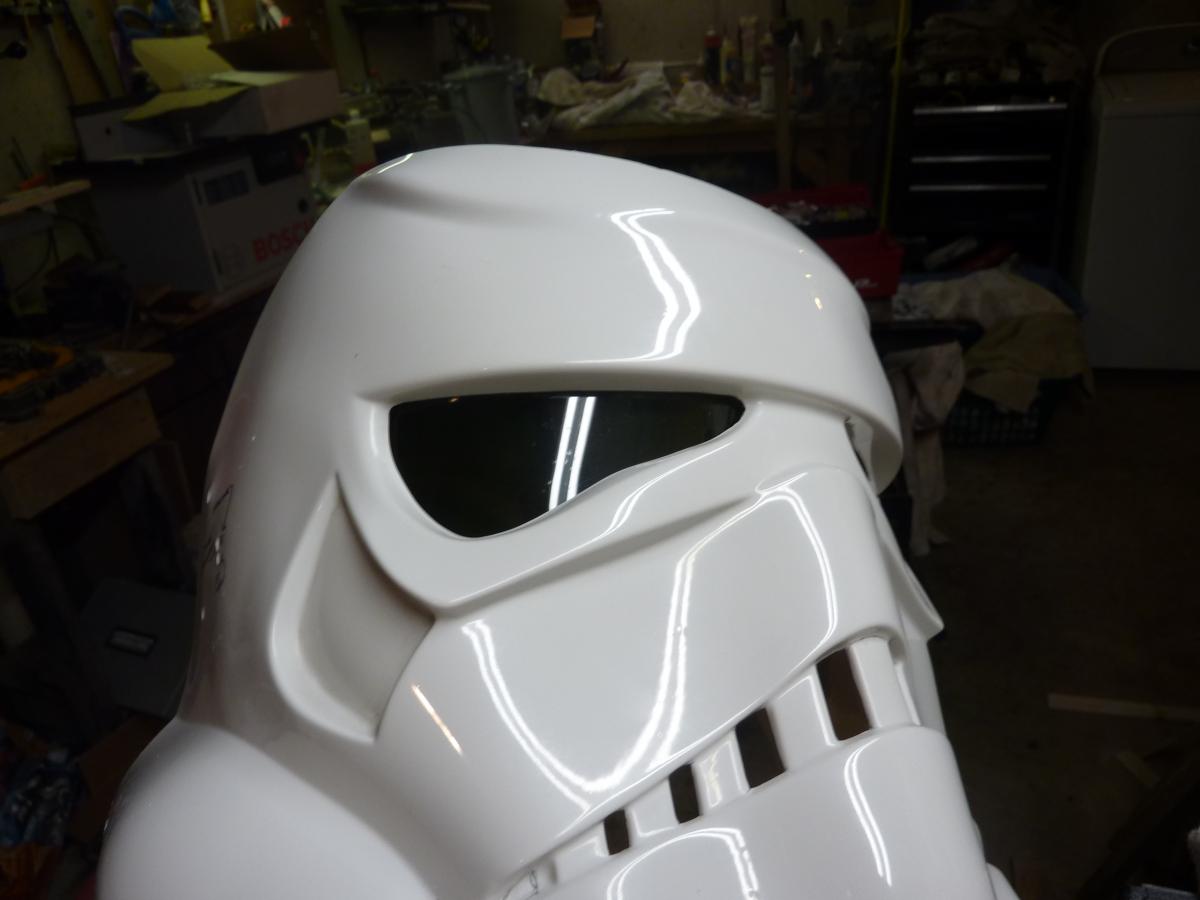
 I needed to lower the main cap on the face slightly so the ear position would move down as well. I cut my new piece of brow trim and tried several positions on the helmet before settling on one I was happy with.

 I am happy with this placement.
  I removed the temporary screws and riveted down the cap at the ears and around the cheek.
 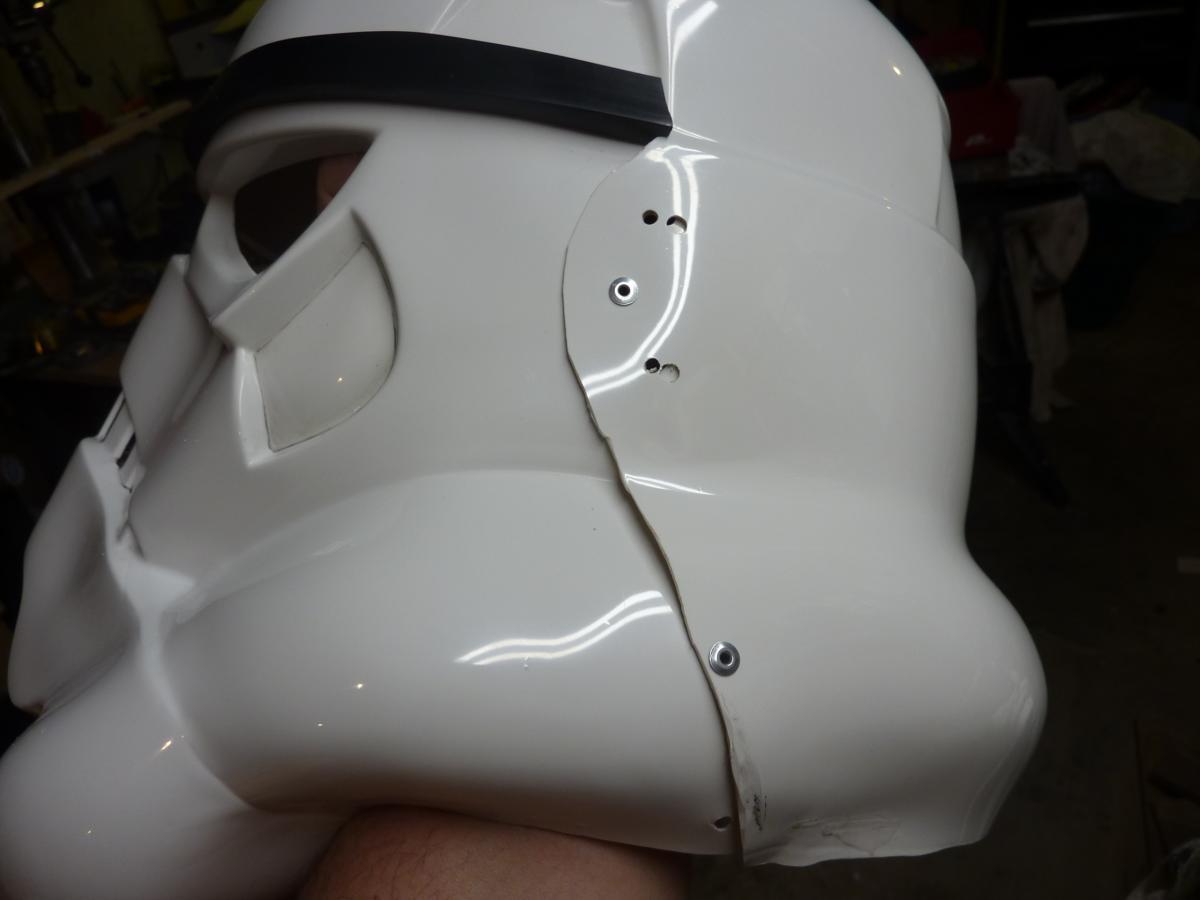 I got to work on the delicate job of re-trimming the ears out. The round portion was already thin so I had to really watch how much I took out. I was not entirely happy with the right ear, but it was a lot better than it was.
 The left one came out a bit better.
  Painting is next!!!
-
10
-
-
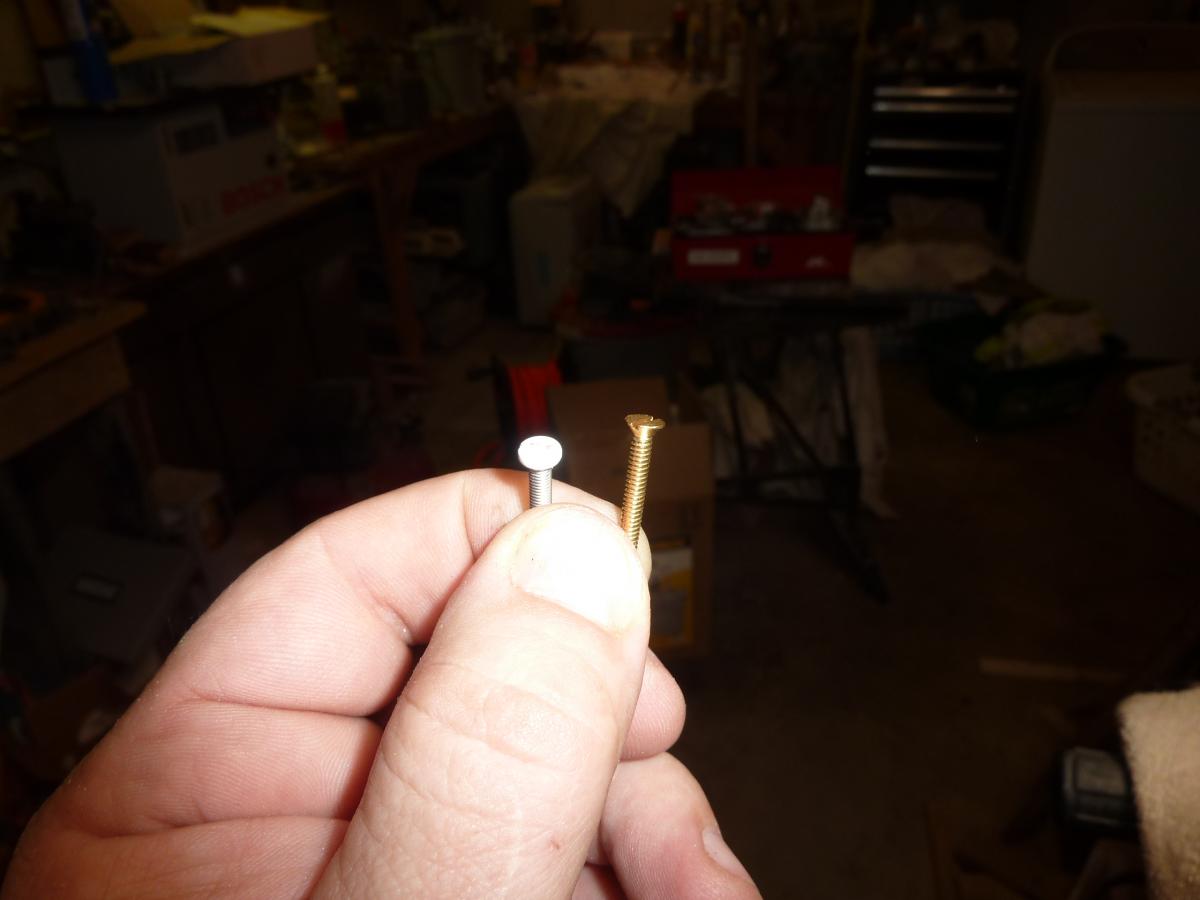
Another tip.....the correct screws for your thermal detonator are available on your helmet. Although you will need to paint them black, you can swap out the ear screws for the proper 4-40 brass tapered head machine screws. Also, your gap between the belt clip and the end caps are a bit enthusiastic. They should be right up against the caps.
 The ear screw is on the left and the replacement is on the right
That pic doesn't show it too well but trust me the ones on your helmet are the correct ones
-
1
-
-
I wouldn't start the ears until you have the cap and the face married. The way the ears are trimmed can differ when moving the ears even a little.
Start by establishing your brow position. Make sure your brow trim is installed while fitting the cap to the face. You want it tight fitting across the brow line. Make sure the cap is centered by aligning the front of the temple traps with the upper, outer corners of each eye.
Drill your center mounting hole on the ear portion of the cap in advance so when you find your desired browline position you can mark it right away. MARK ONE SIDE AT A TIME. After marking and drilling the one side, use a screw and nut to temporarily secure it. With it tightened, pull the brow across tightly and mark the opposite side. Drill and secure that. Check your position and make sure your brow is level across. If not, you can undo the screws and adjust the holes in the face. they will be hidden. Once all is good, then you can rivet everything in place or some makers include a screw. I suggest installing an extra rivet on the cheek tube to keep things from moving.
-
1
-
-
Great work!! The only thing I see that might affect your EIB application is the lack of a rank bar on the ear portion of the helmet. You will need rubber handplates should you decide to go Centurion. Nice work!!
-
1
-
-
-
I looked at the rivet covers closely and they don;t seem to be glued down outside of the round portion. Perhaps the cover is glues to the rivet?? I have never had much luck prying off rivet covers without damage happening somewhere
-
1
-
-
It's not bad although in the past the rear sight is way too tall and has been mounted backwards. I wonder if that was fixed along with the latest upgrades?
-
I kinda wish the belt was uncompleted. That cloth belt looks very flimsy. The potential exists for major damage if you tried to pop off the rivet covers to replace the belt with something a little more stiff.
-
1
-
-
This will be a day long remembered!!! Awesome work!!!
-
2
-
-
Very nicely done!!
-
1
-
-
although for approval the rivet covers (as these are known as) are not looked at too carefully, stick with the ones on top. They are more like the ones in the film. However, sand down the profile of the square area. The originals were just small, coin sized disks that were vacuformed over so the the surrounding flat, square area was just the thickness of the plastic sheet being formed.
-
2
-
-
Typically, the overall width of the waist belt and the power pack that goes on the lower right thigh are trimmed almost down to the raised boxes. It would be a good deal of work to change this on your waist belt considering all the careful work you have put into that but the thigh pack can still be trimmed down. Nice job so far!M
-
I love watching stuff like this develop
-
Please PLEASE take the prep of this seriously. Unless the proper amount of time is given to the primer to bond to the armor surface, it will begin lifting (or crinkling) upon the application of the top coat. 2 things have worked for me: Apply the primer to all parts and let cure at room temp or better for 7 days minimum. After 7 days, sand if you wish then apply all planned coats 10 min apart. OR......... apply primer, wait 15 minutes then apply top coats with no more than 10 minutes between coats.
-
I would just deal with the extra black space between your shin top and thigh bottom. The white knee cap will lessen the appearance of this black area. I would not have those kind of cahones to cut a shin in half and try to join parts with that amount of molded details in it.
-
This is supported in the opening attack on the village. Just before landing, the film shows them lined up in the transport. Every helmet is at a different height.
-
3
-
-
the fact that someone told someone that they made it is just a lie. Rubies Costume company made this
-
If using CA glue, it is helpful to get the insta-set that is available. One drop on your glue application will instantly harden it and keep it from running. IT also sets the parts instantly making moving on to your next part that much quicker.
-
You look fantastic, Chris. Well done!
-
1
-


Christina's Anovos ESB TK build
in Build Threads Requireing Maintenance
Posted
Looking forward to your build, Christina! "goof off" worked best for me when removing the transfers.