

TI-3844
-
Posts
51 -
Joined
-
Last visited
Content Type
Profiles
Forums
Gallery
Articles
Everything posted by TI-3844
-
IIRC, the trooper in the DS scene was called THX-1138 in the 1976 novel adaptation...
-
Stormtrooper picture question...
TI-3844 replied to SecretApprentice's topic in Hard Armor (General Discussion)
I thought the ROTJ E-11 were made of MGC blank firers...? -
Mic tips and speakers
TI-3844 replied to trooper1's topic in Boots, Soft Parts, and other Accessories
I guess it all comes down to what one wants. I, for one, am very interested in keeping my sound system enclosed in the helmet and will sacrifice accuracy accordingly. I changed my Keith Hovis to a pair of Stomper's excellent speaker-tips in order to have as little hassle with wiring and external speakers as possible... colour of the mic tip innards and different mesh is a small price to pay for integrated sound, IMO. -
Ditto. I put the Dremel to my AP after I got tired of pinching my ears... go slow and cut a little at a time!
-
GF and AP Helmet Differences
TI-3844 replied to dougefresh's topic in Hard Armor (General Discussion)
That's what both GF and AP told me. So, the dome itself is off, to say the least... what about the faceplate? -
Have you checked with your nearest Garrison's GML (Garrison Membership Officer)? As fas as I know, the 501st doesn't approve memberships on a central level - you'll have to go through your "neighbourhood" garrison. Check with them - I'm sure they'll sort you out.
-
Well, while not being from the US, there's been news reports around for a considerable time about people getting arrested or even shot because of toy weapons wielded openly. I can appreciate that LEOs hate replicas and realistic toy guns - it's their necks on the line out there. Over here in Sweden, transporting a firearm inside the car (in the back seat or so) is a felony. Rifles, for instance, must be kept in the trunk, separated from bolt and ammo. A good idea when transporting prop replicas as well... Actually, some guy at a firing range nearly called the cops on me once - and now we're talking real firearms. He thought my 12-gauge autoloader (say that with a Schwarzenegger accent and you know which gun I mean) was am assault rifle, and jumped at it. After some explanation (such as - why would I shoot an assault rifle on a skeet range?) and showing the bore of the shotgun, he calmed down considerably... Let's be careful out there...
-
Don't know why you quoted me... I was referring to the hand plates.
-
Those look just like my gloves... and the handplates look fantastic... yes, John, color me interested in a pair, should you want to make more sets!
-
Ribbed Neckseal Question
TI-3844 replied to ManInWhite's topic in Boots, Soft Parts, and other Accessories
TK409 offers an excellent neckseal... check with him for availability. -
Yeah - I went to my local paint and chemicals dealer and found a pair of rubber chemical gloves with fabric lining... they feel OK and definitively look the part!
-
HOWTO: Make your own ABS repair paste
TI-3844 replied to TI-3844's topic in Tutorials, Tips and HOWTOs
Ouch! Parabellum, that sounds painful... hope your neighbour isn't in too much pain... Let us know how it worked! And thanks y'all for your comments! I'm happy my modest little contribution can help out fellow ABS-wearers... -
Elite Boots Question
TI-3844 replied to TK-9805's topic in FISD Expert Infantry Badge (EIB) Requirements
Garrison Membership Liaison. -
Cheers. Thing is, I'm afraid new armor is not an option, unless there's an accurate one that's bigger than the FX. The AP shoulder bells didn't fit my shoulders, so I guess that rules the ANH-accurate bells out...
-
Tell me about reshaping the FX thighs
TI-3844 replied to TI-3844's topic in Assembly, Mods, and Painting
Thanks! So if I'm reading this correctly, in order to reshape the thighs, you simply adjusted the angle of the back seams? Sounds like a plan... thing is, I'm not sure whether I'll have to shim or not. My initial idea was to glue the fronts and heat the thighs to submission. Once the shape's more rounded, I'll see if I can wear them as-is or if I need shimming... does this sound like I'm going the wrong way about this? -
I'm sure this is old news for you FX wearers, and is probably covered in an armour-building tutorial/blog somewhere, but I thought I'd check with you knowledgeable guys... thing is, the shape of the assembled thighs is... interesting. They seem to be wide and squarish, not oblong in a thigh-kind of way. I thought I'd check with you guys - would it be an idea to use a hot air gun and reshape the thighs for a more anatomical fit? Also, any direct tips/instructions on how to do it?
-
What the title says... has anyone tweaked their FX bells for a more SA look? Or is it not really worth the effort?
-
I'm positive it will work next time... only take your time! Yeah... I'm quite familiar with the "enthusiasm getting the better of me" thing! That's why I - among other things - may have to find a new pair of biceps parts for my armor, unless I can... fix... well, dang. And no, it wouldn't be the first time for me either... Spray painting generally is a b*tch. Last thing I painted myself was my Vader armour, and I did it under conditions similar to yours. Guess what happened when I removed the masking tape... Go for it again, in an indoor controlled climate environment, if possible. Otherwise yes, wait for better weather. Outdoor painting is a hit/miss issue every time, IMO... either the climate botches things up, or one has a nice layer of dust and bugs in one's shining new paint coat... Best of luck to your project!
-
The dappled texture you mention sounds like "orange peel" - you might be holding the spray can too close to the plastic, spraying in bad temperature/humidity conditions or spraying too thick layers of the clearcoat. Try to keep a good distance to the plastic surface and spray several even, thin layers of clearcoat instead of a few thick coats. Also, avoid cold and humid conditions when applying the clearcoat (and spray paint in general).
-
HOWTO: Make your own ABS repair paste
TI-3844 replied to TI-3844's topic in Tutorials, Tips and HOWTOs
Here are a couple of fast pics: ----- There we have it, just below the eye. Ouch! --------- Here it is, repaired. The smudge is all that's left of the gouge... either the beaker in which I mixed the acetone soup or the stick I used for stirring is cause of the discolourisation. I really don't have pics of the process itself - it was something I came up with in desperation for ruining my new helmet, so I kinda acted fast. I didn't really write down the process either, so the below stuff is from the top of my head. Essentially, it goes down like this: 1) Cut thin, short strips of matching ABS into a (clean) cup or similar. A glass vessel is preferred! Don't go pouring acetone into a plastic cup... 2) Carefully pour acetone so the fluid covers the ABS shards. Go easy on the acetone - add a little at a lime instead of drowning the ABS shards. We're talking really small amounts of the stuff here - a couple of thimbles worth of shards and acetone. 3) Wait. Depending on the thickness of the ABS pieces, acetone dissolvation time might vary. Check progress every now and then, stir a little with a (clean) rod or stick. Apply more acetone if plastic won't dissolve in a satisfactory way. Go easy on the acetone though - you want a runny, but not watery substance 4) When the acetone/ABS concoction is a bit on the runny side, begin applying to damaged area on armour or helmet. Easy does it - make sure you fill the gouge properly. 5) When happy with the results, leave alone and let the acetone dissolve fully. ABS hardens and fuses with your armor/helmet. Regarding drying time, it depends on amount of ABS goo used and size of damaged area. YMMW. If your ABS milk is runny enough, it will just fill the damaged area - no need to sand. Still, if you get a bump, sand it down with fine-grit sandpaper, buff out the rest with Novus, and you're done! What else... oh - one must remember that acetone starts dissolving right away, so one must keep an eye on the process all the time, and when the mixture is done, use it right away to repair the armour/helmet. And, as Smitty pointed out, this stuff is really flammable and generally unhealthy. Be careful! Hope this helps, guys. -
HOWTO: Make your own ABS repair paste
TI-3844 replied to TI-3844's topic in Tutorials, Tips and HOWTOs
I'll try to post some before/after pics later today. -
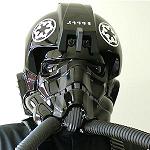
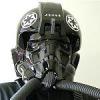
When I was trimming the eyeholes on my AP helmet, disaster struck - my Dremel wheel accidentally touched the bucket just below the right eye. The result was a nasty and kind of deep little gouge. I figured that Bondo and similar products were out of the question, due to the colour difference - I had no desire to repaint the entire bucket. So what I took a scrap piece of ABS and grated it into small shreds. I put the shreds in a little beaker and mixed them with acetone until I had a thick, white goo. I then applied said goo into the gouge and let it cure, sanded and Novus polished the spot. The gouge is unnoticeable to the touch and barely noticeable to the eye - the ABS goo got a slightly darker shade, probably due to some kind of overlooked impurities in the beaker I used. So there you have it - a repair paste that matches your armour (just be sure you use a beaker that's not been used for paint before).
-
Hi - new TK in the making here, requesting 501st access! http://www.501st.com/members/displaymember...cfm?userID=5721
