

Hedjii72
-
Posts
161 -
Joined
-
Last visited
Content Type
Profiles
Forums
Gallery
Articles
Media Demo
Posts posted by Hedjii72
-
-
That turned out awesome! You should be very happy.
-
The logo doesn't show through the edge of the chest plate?
-
While we're on the topic, can anyone post links of some decent undersuits? I'm not entirely sure what to look for.
-
Yep, mine fits exactly the same way. Tight everywhere except the arms. I was very disappointed, and they were not too accommodating with exchanging sizes. Avoid.
-
Arrrrghh!

I was so close to being "done".
So I took my painted thermal detonator. Paint was great and shiny smooth. I applied Zap a Gap to the inside of the caps. When sliding them on, they slipped and made a mess of the paint. Really, they seem a bit too small for the AM pipe section.
So I masked off the white parts which were all glued on, and went to touch up the spray paint, and it crackled and made an absolute mess.
This is what it looks like now.

I know that overall, it really is a minor setback, but I was so close to being ready, at least for Halloween.
I think that once the wallet regenerates, I will order one of Jesse's Thermal Detonators. This was a real bummer.
-
I'm no expert. Only have one helmet under my belt. But you'll be surprised how much everything falls into place once you tighten the screws in the ears. The tension just seems to distribute evenly across the whole helmet, making everything snug.
Can you show more pics of where you think you trimmed the ear too much?
-
Shoulder bridges are done.


I used Zap A Gap and Zip Kicker to glue the elastic to the inside.

Here is one of the Thermal Detonator clips. The smaller hole on the inside is where the rivet will go. The larger hole on the outside is to accommodate the tip of the rivet gun.

-
Little by little, I'm getting there. Details time.
DROP BOXES:
Not much to say about these. I did follow Panda's build for the most part. I had a hard time getting the inner drop boxes to go in, until I notched the corners a bit to give it more flexibility.


Got some Testors Gloss White and painted my helmet screws and my brass fasteners for the knee ammo.


Here are the straps for my arms:

I said to my Wife, "Honey, I've got scary news and scarier news. The scary news is I just tried on a garter belt. The scarier news is I made it myself." Just some elastic riveted onto an old belt.

Ab buttons. I did shave quite a bit of depth off the panel. The nuts that came with the kit didn't tighten all the way up the threaded billet, so I got some regular nuts for them.

SHOULDER BRIDGES:
These were actually a little tricky. I decided to count up 5 ridges on each side, and use that as a measurement of how far down to position them. But they didn't really lie flat against the chest, so I used a little heat to put a slight bend in the end pad so it conforms to the landscape of the chestpiece better. The E-6000 really wanted to shift around a lot. It's also difficult to know exactly how the floating end will fall in the back without wearing them, which is impossible with all the clamps. Hope this dries OK.


THERMAL DETONATOR:
Knowing full well the limitations of the accuracy of the AM Thermal Detonator (or is it O2 Canister?), I decided to delay an upgrade for the future, and use the AM one for now. I didn't want to have an unsightly seam, so I decided to glue first, paint second. This could work against me when trying to rivet the clips to the canister, but I'll have to manage somehow. For the clips, I bought two belt clips from Tandy, inspired by TKittel's build. http://www.tandyleatherfactory.com/en-usd/search/searchresults/1240-387.aspx They are very difficult to drill through, even with a titanium bit. It could make riveting them out of the question. We'll have to see how that goes.
At any rate, here is the canister, shimmed on the inside and painted.

Next up, I have to mount my audio system and my helmet fan. I also have to build up enough courage to trim the ab piece just a little bit more. As for the back plate, I'll probably keep it for now, and try to trim it after Halloween. Whew!
-
-
Exactly. It's just a few little details here and there that can elevate your build. For something you're going to spend so much money and passion on, it's worth it to build it lovingly. It's not necessarily about the bucks, either.
The other thing you may find, is that as you build something, your idea of what looks "right" evolves dramatically, as a natural result of spending time studying reference photos. No one should ever look down their nose at another's build, but likewise, no builder should dismiss the benchmarks that can make their costume look as good as it can.
-
I know... I'm thinking about it... Hmmmm.
-
Power Girl distracted me.
-
 Ayyyyyyyyyyyy!
It worked! Oddly the Mac links didn't work for my Mac, but the PC ones did.
-
I'd love to get another of these helmets for trooping if they weren't so pricey. Gorgeous.
-
Hi Dan,
Your height and weight are absolutely identical to mine. I'm fairly new at this, but I am building AM armor with an AP helmet, which is also ABS. There is a slight color difference, but the movie suits had this too. There are lots of other great helmet choices out there.
If you'd like, check out my build thread to see what you might have in store, should you go this route:-------
-
Sorry, Tom... That's not working for me either.

-
No, that's not working either.
-
Great read! But I'm unable to download the pumpkin templates zip.
[#10171] You do not have permission to view this attachment. -
Is that elastic snapped to the suspenders, or independent of them?
-
HUGE Update!
My TKboots came in, and I couldn't resist a test fitting. PLEASE, my fellow FISD brothers, if you have any thoughts or criticisms, please post them. Tell me what you like and what you don't.
Things missing: Drop Boxes, shoulder bridges, raise right shoulder bell, ab buttons, thermal detonator, crotch snap, brass fasteners on ab, white paint on brads and screws
Things to improve: raise right shoulder bell, possibly trim more off the ab plate, as it looks a bit bulky in the middle, re-do helmet padding so helmet sits lower. I may also trim a bit of meat off the chest wings and the back plate wings.


How am I doing? Hit me with some feedback! I'd like to one day go EIB and perhaps Centurion even.
-
Mine should be here either tomorrow or Thursday. Can't wait
Hey, me too! Hopefully soon I'll be joining your Garrison, Josh!
-
Thanks so much for the advice, Brian!
I've replaced a few straps with the female snaps re-done. You're right, the pliers are good for getting it started, and then the setter tool finishes it off. The good news is that the straps seem to be holding better, and I don't think I'll have to rip out all the male snap plates.
Did some test fitting over the weekend. I'll post pics soon. Not sure if more trimming is needed for everything to sit right. I'm always terrified I'll trim off too much, so I'll be looking for some feedback.
Ordered my lens material and helmet fan! Woooo!
-
Bummer... my thinking was that polishing first would affect paint adhesion. Truthfully, I was hoping to give this thing some major shine with some automotive polish.
-


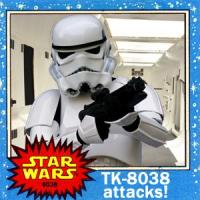
Hedji's AM Build! I'm Gonna Need A Bigger Boat!
in Build Threads Requireing Maintenance
Posted
Well, I made my deadline! The thermal detonator turned out acceptably. It'll do for now. Next up, I need to upgrade my blaster by paying off my hyperfirm, and get a new thermal detonator.
I have to take more pics from all angles, and send them to get my approval also.
I have a suspicion I need to trim the wings on the sides of my chest and back armor a little more. Please take a look at my pics and tell me what you think: