


kwdesigns
-
Posts
460 -
Joined
-
Last visited
Content Type
Profiles
Forums
Gallery
Articles
Media Demo
Posts posted by kwdesigns
-
-
No the font ab box will be attached and be part of the same pull. I just didn't have it attached in the previous pics.
Here... you can see it now.
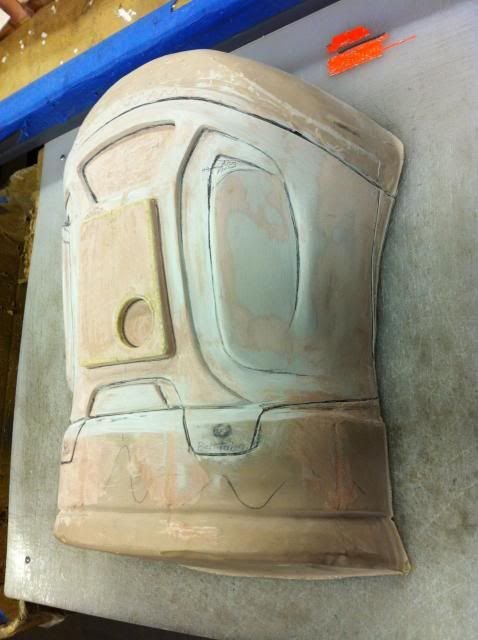
I feel like something should be inside the round hole. That it should look more like a recessed ring and not a hole. So I'm working on that still.
Kevin W.
-
Thanks guys!!!
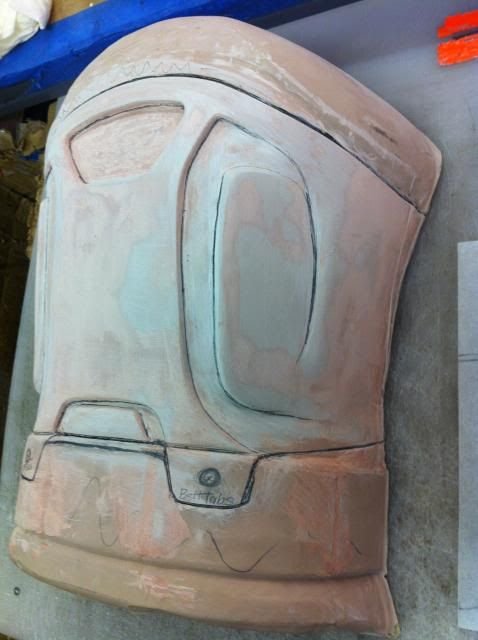
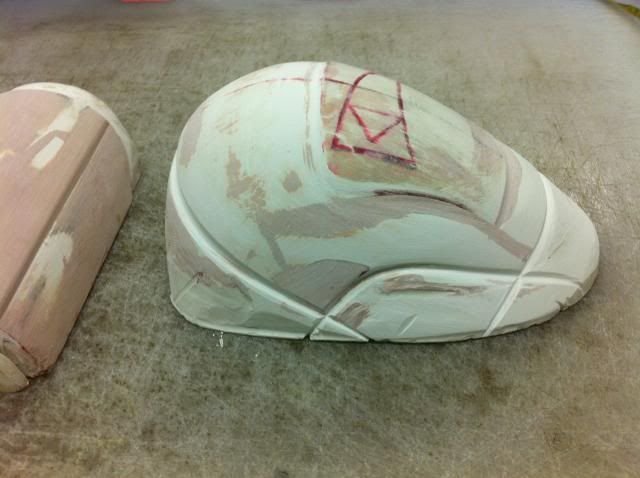
Adding in the cross hatch section was a last minute thought. I didn't like it too much. So I took it out.
I still have more clean up to do on the mold...
I've added tabs to the bottom of the Ab to snap the Belt in place. I also lowered the top edge of the ab a little bit.
-
This RMQ Ab Plate is a little taller than normal TK's because the belt will sit lower and I left plenty of room for the top of the ab to sit under the chest for taller guys.
The base sculpt of clay was applied over a vac formed pull of my Season 4 ab plate. I heated up the top area of the ab plate and pushed it flatter.
Kevin W.
-
Then apply silicone and some keys.
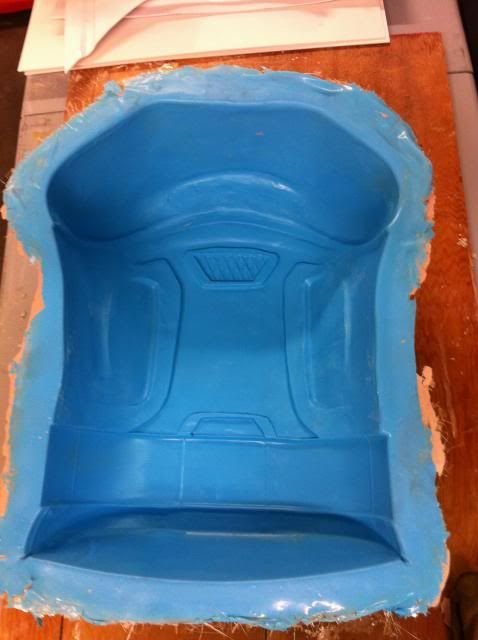
Now I can make the positive side vac-form-able mold.
I will add the raised rectangle to the ab section of the final mold.
Kevin W.
-
More to show...
This process takes a lot more time and cost more money because this sculpt get trashed after words.. It's been a while sense I've worked with clay so the final mold will need some final clean up.
-
@R5SB - I haven't seen that before. Thanks for sharing. It would be cool if they used something similar to RMQ Concept TK.
I have a bit more of an up-date...
Here is the list of what is left for me to still do...
Finish back (Its about 90% done)
Yoke & Side Connectors (easy after Chest and back are completed)
Ab section
Kidney Section
Belt (front-back)
Belt Amo Boxes
Cod
Handbacks
Lower Legs
Kevin W.
-
First Off. A big thanks to Eric for adding this RMQ build into the news letter. It was a real surprise for me to see it and very motivational.
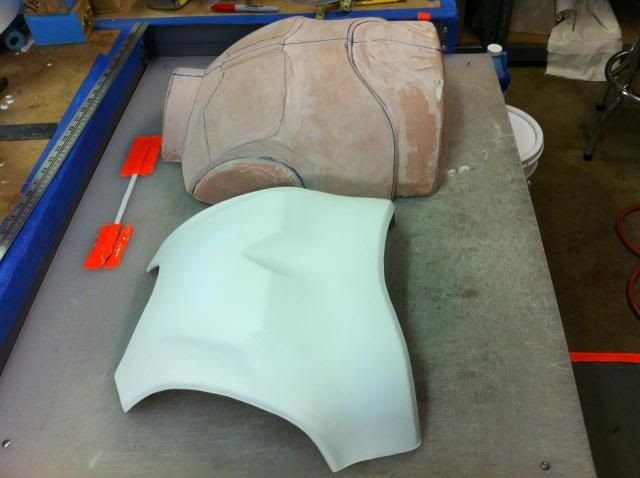
I've been swamped with real life stuff. But thought I would post some pics of the back... I wanted to show where I plan on making the 'Yoke" stop in the back and what it will be shaped like.
Also in doing this piece I strongly feel the the raised rectangle will need to be vac-formed separately, Like the Kashyyyk troopers and attached to the back. it is just to tall and sharp angles to be able to get a good vac-form draw if left as one piece.
In fact the chest and back with have a total of (7) vac-formed parts just to put it together. 1) Main chest, 2) Front neck ring "to be cut from chest and glued onto the Yoke", 3) Yoke, 4) Main Back "keep the back half of neck ring attached", 5) Back Rectangle "glue on to main back", 6) left side connector & 7) right side connector.
More to show later...
Kevin W.
-
They look """GREAT""" Stephen.
Kevin W.
-
The helmet on the floor with all the pats is different than the one being worn with the armor.
Kevin W.
-
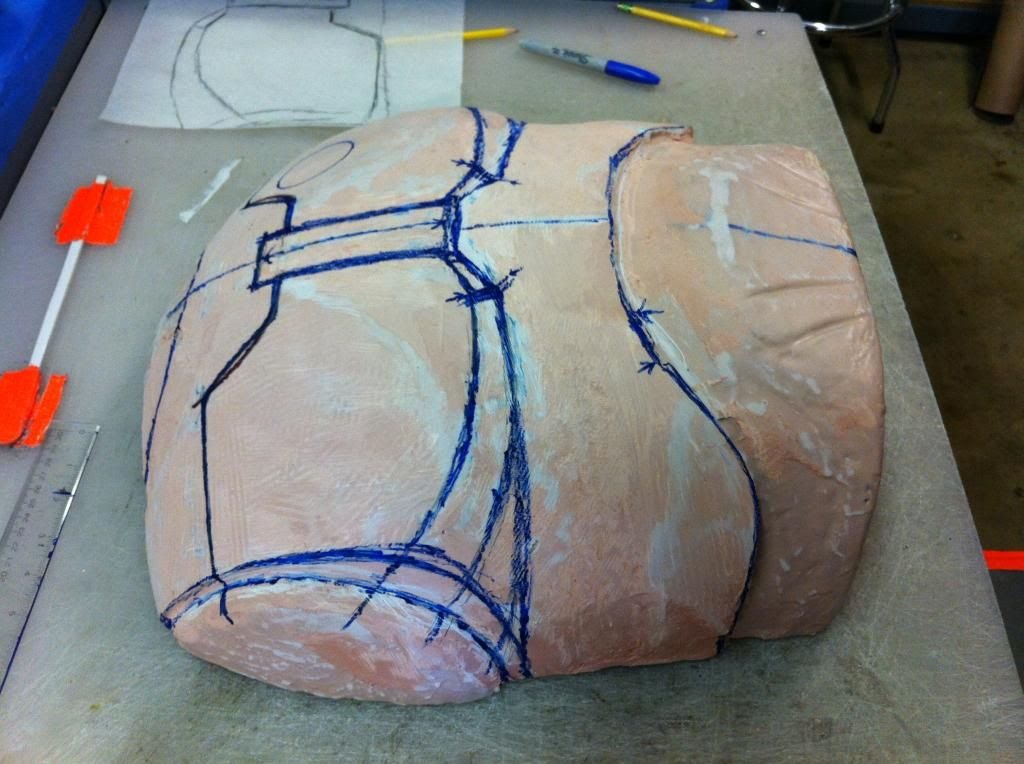
Time for an up-date...
I'm pretty happy with the RMQ Chest... I'm working on the back now. I will finish the detail around the neck later.
-
So I thought I would bring my old thread back from 2010 to life. I made it to EIB with this build and I know there has been some changes sense then.
You can see my build thread in the link provided in the first post.
What do I need to do for the next level?
Latex Handbacks, Leather Boots, What else???
Kevin W.
-
Stephen Those pics are very inspirational. I wish I had more to report about the armor but I have been slammed with other responsibilities.
The good news is I got my Boots from Pete yesterday and they fit great!!! So I can soon start on the lower legs of the armor. I wanted the boots first to make sure the shins and caves will fit over the boots correctly.
I also got the Heather Gray Under-armor from Pete and it matches the grey elastic I found to use for the harnessing quite well.
Kevin W.
-
Once we have a squad of concept troopers, we'll need a concept Vader, too- who's gonna be the first?
The Concept Vader has already been made. I have seen a few of them now. I saw one at Cel 6 in FL.
Kevin W.
-
I think making the holes might be a bad idea. The cut edges of the holes will reflect the light. hence you will see the holes. I think the bulb area illuminates great. Just smooth out the transition from the blub to the blade and it will help.
I'd like to see what a white light would look like.
Kevin W.
-
Sorry I'm not on Facebook so I can't see it. But I'm sure it looks good.
Ya I know your saying... What!!! Not on Facebook. Yep its true. Sorry.
Kevin W.
-
Thanks guys. I'm glad you are liking it. I want to make the Yoke because I think it would be the best option to cover the chest and back joint at the shoulders.
As for size it's just a bit smaller than my S4 Animated clone. I have my buddy's C3PO here so I have been looking at the chest and back to give me an idea of how the neck-ring might be. I think it might be similar in size to TE derived chest. I also have a CAP/ATA set of armor I could compare it to later.
I know this RMQ TK will be bigger than C3PO.
I have to say after spending so many years sculpting the various clones, movie and animated, wearing a TK, and further inspecting the C3PO, I can clearly see all the inspirations and similarities of these costums in the RMQ concept TK.
Kevin W.
-
Well tomorrow will mark 2 months from the time this thread started. So I thought I should show some more progress.
I decided to use my initial S4 Chest as a base.

-
O'man that is looking sweet!!!!
Do you plan to make a mold and cast them or are they just going to be one off's?
I'd like one either way...
Kevin W.
-
Yes the shade can vary even if it is from the same supplier. It all depends on what Bach it came from. A batch could be a thousand pounds worth of melted ABS in a drum them rolled out to what ever thickness is required.
Think of it like you just went to a paint supply store and ordered a gallon of a custom mixed paint. Then went back the next day to get more because you didn't have quite enough, the chance could be that the next gallon you get could be slightly different.
Kevin W.
-
 1
1
-
-
I'll start on the biceps next week so that can give time for others to share some input. But I think making them look like the GG bust is a good idea, with the wide flat spot and the cut out dip for the armpit.
Kevin W.
-
I'm asking because I see all the options I listed in various images. But the Smooth Oval all the way around I do see more of.
I also like what the GG bust looks like with the wide flat area below the end of the Shouldebell. It would help tie the look together with the look on the back of the Thighs I made and I think it would help keep the shoulderbell in place.
Kevin W.
-
Thanks I'm glad you guys like the detail on the Forearms.
What do you think the Biceps look like???
1. Are they just a smooth cylinder all the way around???
1a. Are they smooth cylinder all the way around and just have a slight dip for more room under the armpit???
2. Are they smooth all around with a dip for the armpit and have a wide raised flat area on the outside of the arms???
2a. If so would the flat width area be the same as the width of the raised long rectangles I made for the forearms? or wider???
3. Are they smooth cylinder all the way around and only have a deep / cut out on the inner part of the elbow area so your arm can bend easier???
3a. Are they smooth cylinder all the way around and only have a deep / cut out on the inner part of the elbow area so your arm can bend easier? And have a raised flat area on the out side of the arm and how wide???
Kevin W.
-
Stephen I think that is a great choice for making these Concept Lightsabers.
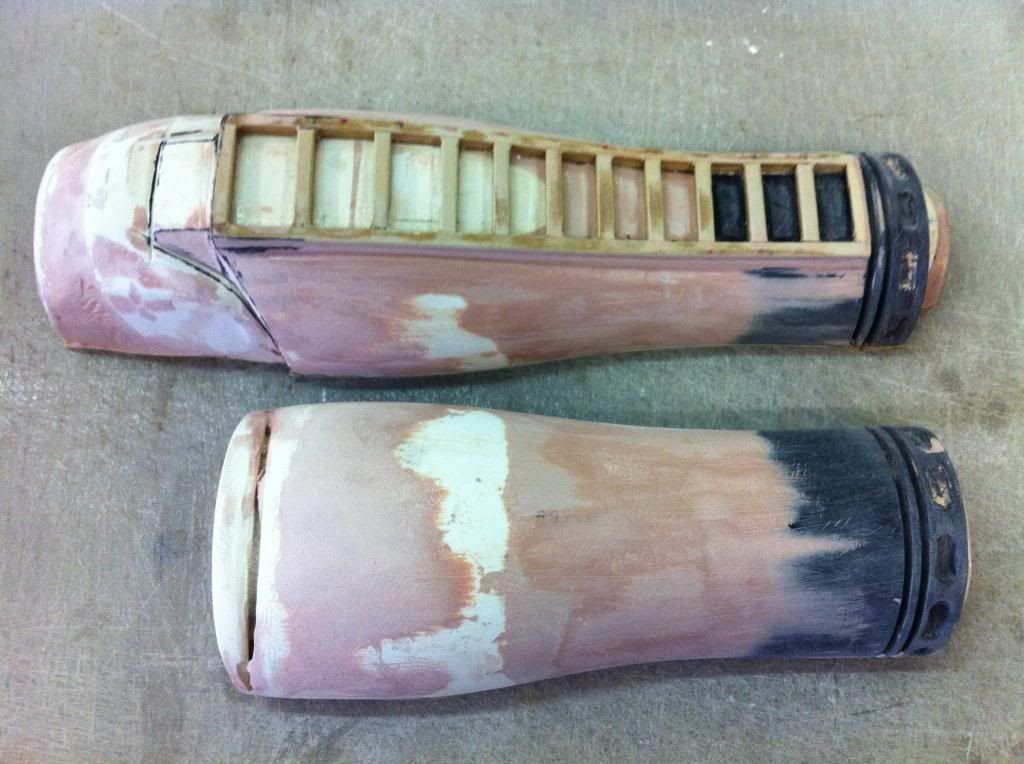
OK so here is what the Forearms will look like. I still have to make 2 finished molds and correct the arms cut out near the elbow to be a Left and Right armor.
Those that might know me, know that I am a little bit of a numbers guys. So I thought I would incorporate "1138" in the armor....
On the long strip of rectangles there is a total of "11". "3" larger & "8" smaller rectangles. = "1138"

-
I'm working on the forearms now. I'll gets some pick up soon of them.
I plan to make the raised rectangles slightly off to the side of the forearms rather than directly on the backside of the arm.
When I look at the drawings, the long rail of rectangles can be seen even when looking at a front on view. So that must mean they or off to the side and towards the back. NOT like the GG bust.
The forearms I make will have a true left and right.
Kevin W.
Ralph McQuarrie's Concept Stormtrooper "Armor"
in Concept Armor
Posted · Edited by gmrhodes13
photo updated
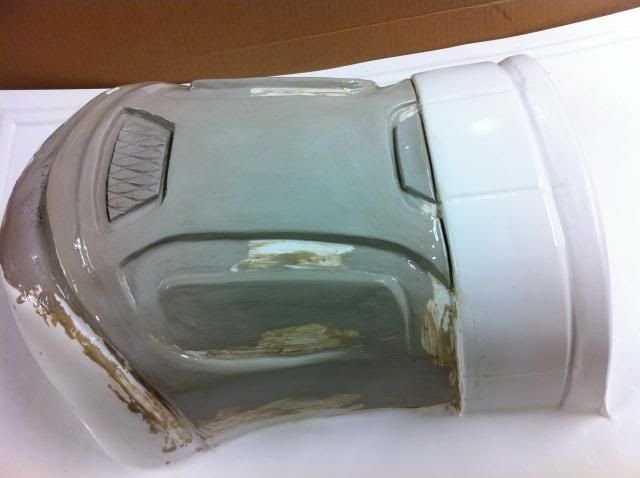
Well guys I made a cast of knob that my kids broke off my Audio Receiver. After looking at all the ref pics, I decided not to add any dial marks to the knob. In most of the images it looks smooth like a button to me.
So here it is... Done with the Ab Plate!!!
Kevin W.