


Slouch
-
Posts
12 -
Joined
-
Last visited
About Slouch

-
 Requesting access please. https://www.501st.com/members/displaymemberdetails.php?userID=39872 Many thanks
 -
G'day there - new TK recruit from down under
Slouch replied to Slouch's topic in New Member Introductions
Thanks Glen - that's really great feedback. I did order a replacement thigh ammo belt, so will get that fixed up prior to submission. The shoulder bridge large tabs at the back are a bit of a pain. I've got pretty broad shoulders (reminds me - shoulder bells also need trimming) and there's a chance they'll be too short if I lop those tabs off. I've debated about that. I've got replacement chest button plates as the original owner shaved them down when they purchased. It's on my to do list. I just wasn't sure if I'd be able to get basic approval first and then go back and fix a few of those other steps. The velcro being shown was a bit of clumsiness in the photo. It's usually covered, but doesn't sit as flat as I'd like, so the hot water bath sounds like a good idea! Thanks for that link too. Really appreciate it! Cheers -
G'day there - new TK recruit from down under
Slouch replied to Slouch's topic in New Member Introductions
Thanks mate - that'd be terrific. I went to Supa Nova Melb yesterday and it was fantastic. I get up to Sydney a bit, so will be sure to sing out ahead of time. Cheers -
G'day there - new TK recruit from down under
Slouch replied to Slouch's topic in New Member Introductions
Good spotting! I was repairing a crack and put a filler piece in and completely forgot to refinish that section! Thanks for the reminder. Cheers -
G'day there - new TK recruit from down under
Slouch replied to Slouch's topic in New Member Introductions
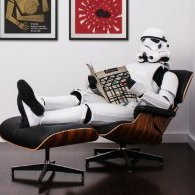
Hi Brains-trust - an update after I finally received the parts my kit was originally missing. I was nervously checking the tracking from the US for weeks. It took two weeks to scoot around the East coast of the US, then one day to San Fran and then next day it was at my house in Australia! New shoulder bells and button covers for my belt have made me (well, my kit) complete! I do have a spare ammo thigh belt that I'll replace at some point as I don't love the original. I *think* I have finally finished my kit and am about to submit for basic level approval, but if you see anything that needs fixing in the meantime, I'd really appreciate your feedback. Hopefully some quick adjustments I can make to get everything looking tip top. Going off the previous (much appreciated) advice, I changed over the cover strips on my shins to the correct sides. I adjusted my strapping as best I could to balance it out and it's feeling good to wear. Also heat bent the ABS belt to better contour to my body and it's a big improvement. Full Front - Helmet on Full Back - Helmet on *I'll get a better image for my submission with the velcro lined up, but it was an oversight for these pics. Left Side - Helmet on - Holster measurements were all checked. The leather is a bit softer than I'd hoped and gapes a bit, making the straps look crooked, but they'd 100% correct according to the CRL. Right Side - Helmet on Waste Up - Helmet off Action Shot *I probably should have thought of something more creative, but my wife laughed when I said that was a requirements, so we wrapped up the shoot. Any feedback would be awesome and hopefully I'll be joining your ranks soon! Cheers - Chris -
G'day there - new TK recruit from down under
Slouch replied to Slouch's topic in New Member Introductions
Thanks mate! Literally got started as soon as I read Glen's reply. Stripped off the cover strips for the shins and reglued them and made some adjustments to the strapping. I took the padding out of the helmet. I think it's just my long neck making it sit high. I can barely get my head in it as it is, so it might just have to sit a bit high. A balaclava will help his my chin and I've blacked the inside of the helmet out. How do the shims go with the ab rivets? I've already placed them. I could undo and shorten the elastic, but it might make the torso somewhat skewed to the hinged side. Might just be easier to lose a few kgs! The trickiest part is getting my wife to spot things that look out of place when taking the photos as she has zero interest [emoji28] Can't say she's up to speed with the CRL [emoji51] -
G'day there - new TK recruit from down under
Slouch replied to Slouch's topic in New Member Introductions
Thanks heaps - definitely more to take out of the biceps. Most of the others seem to be in line with those guidelines. Cheers [emoji1360][emoji380] -
G'day there - new TK recruit from down under
Slouch replied to Slouch's topic in New Member Introductions
Thanks Brian - the tops of the biceps are fine, it's the bottom of the left arm that is VERY snug. We actually heated it a little to reshape it slightly, as it was more of an 0 shape, rather than an O. That helped. I've left about 2mm of return edge on the bottom and perhaps 3-4mm on the top, but will shave some more out. That might let me cut and shut it for a cleaner look. (That's the bottom edge). I've taken the return edges completely out of the forearms and will do the same on the new shoulder bells too - thanks! -
G'day there - new TK recruit from down under
Slouch replied to Slouch's topic in New Member Introductions
Thanks so much for the fast reply, Glen. That's exactly the info I need and is incredibly helpful! I've been speaking a lot with our GML, but was trying not to bother him with every little thing until my kit is good to go. I'll have all of these fixed (hopefully) by the time my new parts arrive. I have asked for a new ab plate to be made by WTF. That was one of the first things I felt comfortable trimming/sanding and of course I did it wrong! haha. Great tip about the belt and using the hot water - I had meant to ask that, but forgot. Great solution! I'll move those ammo boxes too. Shin cover plates - will do. Elastics - easy, thanks! The bicep cover strip is a bit of a headache. The left is insanely tight - I'm not exactly a bodybuilder, but can barely get my arm in it. I'll see what I can do to reduce that gap. I'll adjust the TD clips and see if I can rotate that. My wife clipped that on and had no idea what I was asking of her. I'll tighten up those elastics on the shoulder bridges. I only have a tiny thin piece of padding inside the top of the helmet. My head is pretty big and I do have a relatively long neck, so that might be harder to fix. I can see perfectly out of the lenses, but will see if it looks better with no padding - just less comfortable. Again - really appreciate the feedback and advice! -
G'day there - new TK recruit from down under
Slouch replied to Slouch's topic in New Member Introductions
Helmet pics. I still have a little work to do on the padding and need to install the fans. I ordered a super small Power Bank to insert into the helmet. It turned up and it was pretty big, so any links to more compact options would be awesome! There's a slight gap between the ears and the helmet that bugs me. I do have the spare set that I may attempt, but after I butchered the first one, I'm still pretty hesitant. Hopefully not a barrier to getting approved. -
G'day there - new TK recruit from down under
Slouch replied to Slouch's topic in New Member Introductions
OK - so here's the progress shot of my armour. I'd love your feedback and advice. Disclaimers: I am waiting on replacement Shoulder Bells, ABS Belt Button Covers and a new Thigh Ammo Belt. I didn't paint the rivets on the thigh as it's going to be replaced soon enough. This is probably the first time I've had everything on at once. My wife doesn't know what to look out for to fix, so I didn't test her patience any more that was avoidable My strapping still needs some adjusting. I haven't put the elastic straps on the incorrect shoulder bells, but this will help hold everything closer to the chest and in the correct position. I am rocking a Dad-bod, so couldn't get the torso as tight as I'd like, but Christmas was only a few months ago. Hopefully that will tighten up a little. I'll put up helmet close up pics in a separate post. -
G'day all - long-time lurker, first time poster (so I made it a doosie). I thought I should introduce myself and thank the collective group for some amazing build threads and tips/tricks that I've learnt here. Some background - Chris from Melbourne, Australia - As a kid, I asked Santa for Stormtrooper armour EVERY.SINGLE.CHRISTMAS, but he never came through. At 39 years of age, I gave up on my hopes (and belief in Santa ) and took matters into my own hands. I saw what looked too good to be true on Facebook Marketplace (Spoiler Alert: It was) - an unfinished TK Kit with boots, undersuit, gloves, neck seal, etc for $100! I jumped on it. I didn't have any knowledge of FISD and little awareness of my local 501st (Knightfall) Garrison - though I'd has some brief discussions with some members at various events over the years. To my initial disappointment, it was pointed out that my bargain kit was an FX recast and was unlikely to get approved. I felt like this slammed the door on my dream, but it introduced me to a terrific group of people who have blown me away with their support, encouragement and assistance to continue my journey. On the plus side, for $100, I did get the boots in brand new condition, the undersuit and soft parts and I have a spare set of armour. I’m trying to decide if I leave this on a mannequin or cut it down for my 9 year old son. 9 year old me would have killed for that, so I’m very tempted to oblige, but I’m also seeing how fast he’s growing, so focusing on getting my kit finished and approved first, then see how we go. What I am hoping for is your feedback and any tips you can provide prior to submitting my ANH Stunt kit for approval. I’m stuck waiting for a few final (replacement) pieces to be delivered from the US, but hoping I don’t lose time once it arrives. I feel like I’m sooooo close, but want to make sure everything else is correct in the meantime. Any tips would be super helpful. I'm quite handy with most tools, but completely lacked the confidence to start from scratch, as ABS seemed so fragile to work with and mistakes would be EXPENSIVE. A local Knightfall Garrison member (Hi, BrenTK if you're reading) - lives locally to me and has been the experienced master to my clumsy Padawan. I can’t believe how generous he’s been with his time in guiding me through the build and how patient he’s been as I fumbled my way through. Now, as I near the (hopeful) end of my build, I feel like I could go again from the beginning and would fly through it. I’ve learnt so much and really enjoy seeing how well the components come together. After my first misstep with the dodgy armour, I was pointed in the direction of another local member who had purchased a WTF TK kit several years earlier, but never had the time to complete it. A lot of the (very) rough trimming had been done at an armour party years earlier. Some trimming and painting had been done on the helmet, so that did speed up the process somewhat. It did look pretty rough, as you can see from the photos below, so I was sceptical that the kit was salvageable, but I’ve been so impressed with what you can do with sandpaper, ajax and some orange cleaner. It’s mostly as good as new! So – getting into the build itself, I laid everything out and did an inventory check – it was missing shoulder bells and two abs rivet/button covers for the belt. (DAMN!) More on this later in the thread. Getting started: Cutting, shaving and sanding. Scrubbing lots of rough texta marks off the armour was fun. The original owner was about a lot shorter than me, so thankfully it hadn’t been trimmed anywhere that would have impacted it fitting me. I’ve also got a relatively big noggin, so thankfully the helmet fits…. Just. Little by little, BrenTK helped me chip away at my kit. We got the helmet finished pretty quickly. I ordered some correct decal stickers from Trooperbay on Etsy as well as the mesh for behind the teeth. These arrived super quickly. I nervously applied the stickers and mesh and installed the lenses. I also got over confident with one of the ears and decided it’d be a great idea to trim that down quite hastily. They were originally super chunky and looked out of proportion. This was one of my bigger mistakes, but BrenTK was able to salvage the ears/save the day. When it comes to trimming, I've learnt how important 'little by little' is. Once I got through all the trimming, gluing was the next obstacle. When I did my first joins (without adult supervision), I thought it was a piece of cake. I lined everything up, popped on my clamps and magnets and let it set. The next day I realised pieces do slide somewhat with all the fiddling and I ended up with a substandard, uneven shin join. Unfortunately it was the right shin, so no Sniper knee plate to save the day. As my confidence grew, I took the calculated risk to remove the cover strip, separating the sides, and re-glued. This time with tape ensure the join set correctly. I was heaps happier with the end result. Same deal with my right forearm. Super chunky, but I do have big hands and skinny wrists/forearms, so it was a balancing act. I ended up separating, cutting down and regluing. Its a tight squeeze to get into, but looks much better. I've trimmed 99% of the return edges out. The top of the Sniper knee plate dug into my kneecap once it was assembled and I knew it’d be an ongoing problem when trooping. That also put a stress fracture/crack into the side of the plate itself. My armour mentor had the wise idea to insert some small square pieces of ABS to block it out slightly. This resolved the issue, but didn’t look great from above. I ended up filling around that to hide all the nastiness and I’m happy with the outcome and comfort. I watched some tutorials from RS Prop masters and was surprised how fast (and borderline recklessly) they threw their kits together, yet still got a great result, mostly true to the original construction (funny how effortless it looks when you're an expert!). I did pick up some great tips there too (as well as here in some of your tutorials) and did as much as I could without bothering BrenTK too much. Now, I’m sitting and waiting for WTF to make the last few pieces and ship them to Australia. I held off on ordering earlier, just in case I ruined any other pieces. Shipping to Australia is more than double the cost of parts themselves, so I’m not keen to make that a habit. While I’m waiting, I’d love your feedback and advice and to mooch off your collective years of experience so that when the final pieces do arrive, I’m pretty much good to go and don’t have to waste the GML’s time with too many adjustments I can make ahead of submitting my kit for approval. Detailed pics to be uploaded shortly. This is my first ever crack at any type of costume, but I definitely have the bug and can see why you’re all so passionate and set excellent standards. Basic approval is the short-term goal, but I would love to work towards achieving Centurion if that’s possible with this kit. If there’s anything else glaringly obvious, I’d appreciate the heads up. If more/better/different angle photos would help, please let me know. I’ll do up a separate post about my second dodgy purchase – my 3D printed E-11 blaster, but am relatively surprised how well it came together in the end. Thanks again – this looks to be an awesome, helpful and welcoming community and it’s helping fulfil a lifelong dream that Santa screwed me out of! Cheers, Chris
