ackme
-
Posts
2 -
Joined
-
Last visited
Content Type
Profiles
Forums
Gallery
Articles
Everything posted by ackme
-
Accurate E-11 Model with Light/Sound for 3D printing
ackme replied to ackme's topic in ANH BlasTech E11
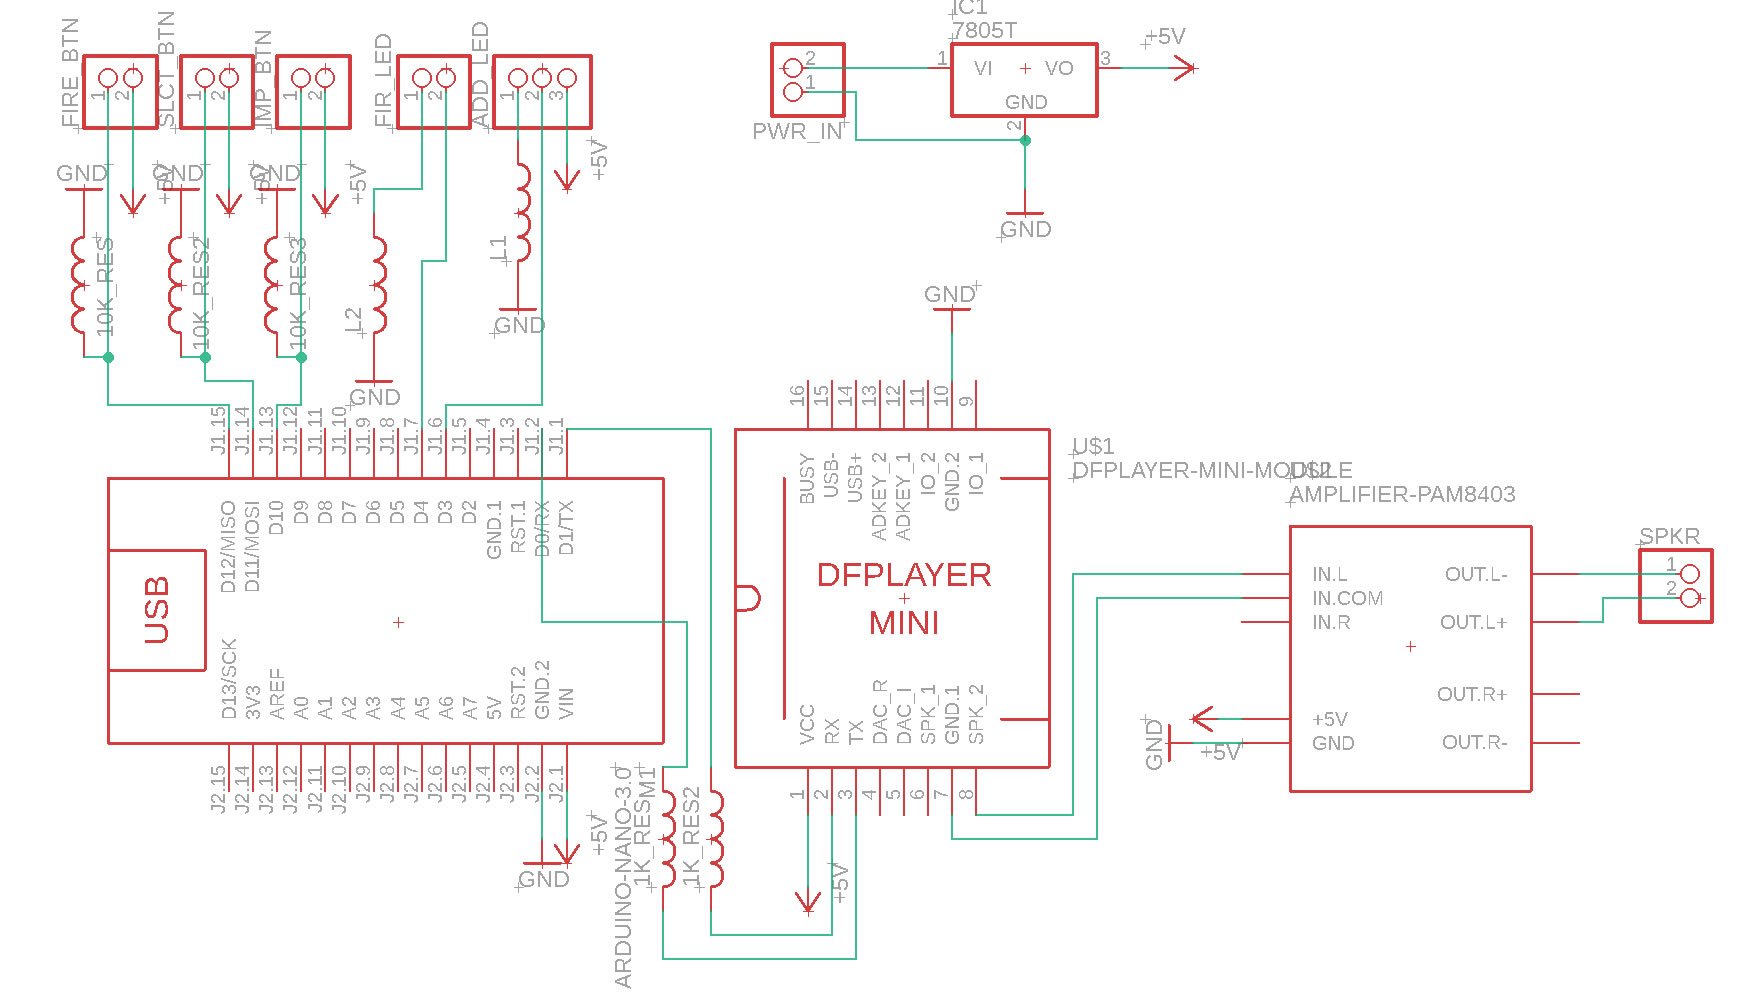
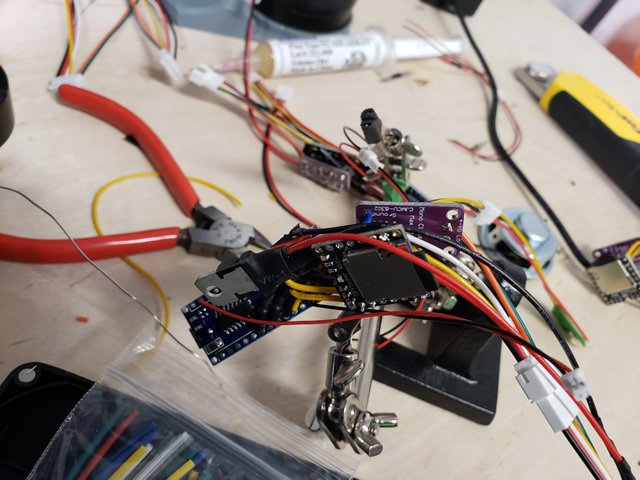
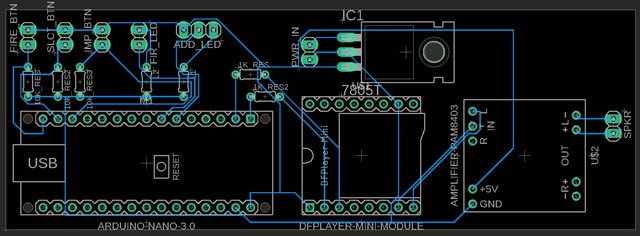
I'm going to do up a V3 one next week, it's already printed in a box. I'm considering doing a video on assembly and wiring depending on how busy work gets, but a 'how to' pic build guide is coming at least. Here's: - the vector image of the sight. To make it I printed this on some transparency and airbrushed one side red lightly - the Arduino code, it's a WIP but it does work. I have another direct drive version for the front emitter rather than the neo-pixel, I started off with a 3W LED, but I think neo-pixels are more ubiquitous. If you want the 3W version let me know. - The circuit diagram. I think I have everything labeled. Everything with gnd can be connected together as well as +5v. The 7805T is a step down from a 7.4Lipo, but you can just as easily step up from 3.7. V4 will have that as well as USB direct charging. edit: in the diagram ignore 'imp btn', that's from V1 where the imperial march had it's own button, it's now a long press of the fire select, and the fire LED is 3 pin now for the addressable light strip. I'll post a detailed parts list and guide next week. E11_Sight.svg E11blaster_V1a.ino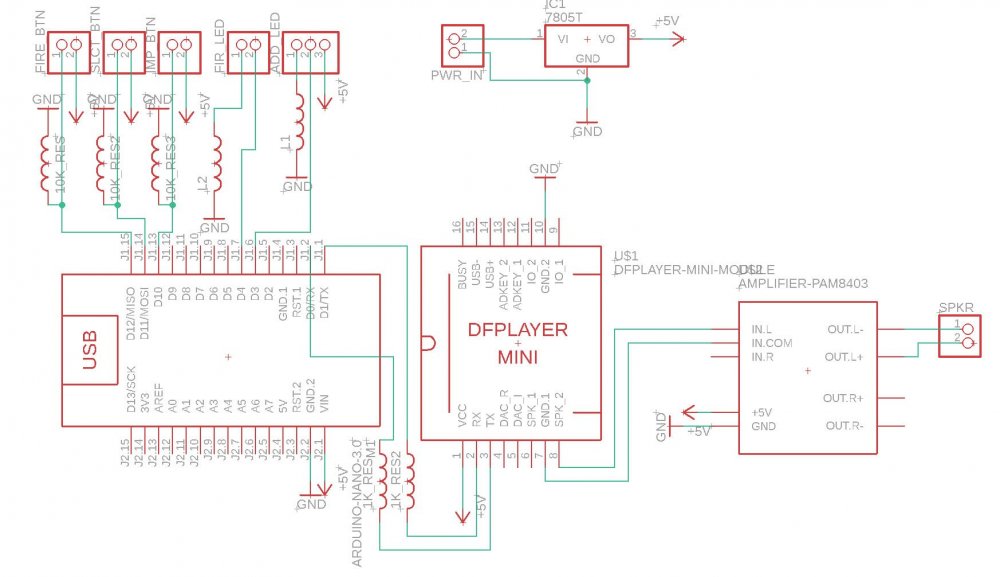
-
https://www.thingiverse.com/thing:4087124 Hi all, I just spent about 100 hours modeling an E-11 for 3D printing and giving it away for free. I made it as true to life as I could as well as adding in support for light and sound elements. It has: - Working trigger/selector with light and sound changes by mode - Light up scope - Addressable LED fire effects with focusing LED on front, range is about 10M with indoor light, not a laser so eye safe - 3D printed spring with cycling bolt - Removable magazine with battery inside - Removable rear cap with D ring mount - 3W speaker, as big as I could get to be heard in noisy areas - Plays the imperial march when you hold the selector for 3sec - discreet wiring guides, no wires are visible or in the way - Stock folds out and locks in place - All major parts are removable via snap lock or screws, so you can upgrade or replace anything without a full rebuild (and get at the electronics) I'm trying to improve the model as much as possible so feedback and suggestions would be appreciated. If anyone wants a custom TK number on the Hengstler let me know and I'll model one for you.