


Stormy3D
-
Posts
144 -
Joined
-
Last visited
Content Type
Profiles
Forums
Gallery
Articles
Media Demo
Posts posted by Stormy3D
-
-
This is simple if you understand electronic theory, as mentioned in your other thread. Once you understand this the sky is the limit. The key point here is what exactly you plan to run, the voltage input, amps the items draw, how/if the items will interact with each other, etc. If you give us an idea what exactly you're going to run we can better assist you. So far you mentioned fans, anything else? Note, the battery back you've mentioned is quite large and will only fit in your chest plate or elsewhere so you'll have to run a power cord into your helmet.
I plan to just use fans so far, thanks for the info!
-
Hey, guys. As I said in an earlier post, I know near to nothing about electronics. But I have been learning but I am yet to find out how to make one power source power multiple electronics? (Provided, of course, the power source could provide enough power to those electronics) . The design I am planning is based on this one: http://www.whitearmor.net/forum/topic/39469-howto-super-clean-helmet-electronicsinterior-build/, with some other components such as Ukwarth's setup. The power source (12v) I plan to use is this: https://www.amazon.com/gp/product/B00VE7HBMS . The fans I currently have (12v) are these: https://www.amazon.com/gp/product/B015S5XFJE . Again, I want to know how I could modify the power source to power both of these fans, and possibly, more systems. Thanks!
-
There are tons in here floating. UKSWRATH is the man!!
But! Where are you located?
Washington State!
-
Hey, guys. I am currently working on a helmet and thought it would probably be a good idea to install fans and a voice changer. But I know almost nothing about electronics. I currently have two fans on hand, but I have no idea how to work them. (I only bought them because there were only two left. Link: https://www.amazon.com/gp/product/B015S5XFJE .) Do you guys have any tutorial for learning the basics of electronics? Thanks!
-
Post in the "New Members introductions" page, and you will get more detailed responses. If you are ready to join, without further advice, go here: https://www.501st.com/members/join_form.php. Good luck!
-
 1
1
-
-
-
I was hoping for aroind Apr 1 but life and technical issues got in the way

I am finished with the code and am wrapping up final testing and updating the tutorial and documentation. I did a final field test with myself and another TK this past weekend and the only issue I had was forgetting to recharge my wireless mic

I think I should have the new code and documentation ready within the week and will post here an on the TKTalkie FB page when it's ready.
Sent from my SAMSUNG-SM-G930A using Tapatalk
Thanks! I'm planning on building one. Can't wait!
-
Quick question, when will V3 come out? Just a quick question. Thanks!
-
I just have to say I'm quite impressed with the level of support in these forums. A question never goes unanswered. Thanks Kalani and Joseph for the input/feedback!!!
Very right! I am amazed with the support on these fourms.
-
I wish I would have read this thread sooner. Do you still need screws? If so, I can hook you up. If your wanting the correct brass screws and nuts or just steel screws and nuts, pm me and I will give you what you need. While the are painted, I think the unpainted brass screws and nuts on the inside of the helmet looks really nice personally. <br><br>
I've gotten a lot here from everyone, this is my small way of trying to give back.
I no longer need any, but thanks for the amazing offer!

-
1
-
-
If you want the REAL deal screws, you need to source brass screws of the right size and type, which are REALLY hard to come by. Very few bother with that, since the screws are painted anyway so you can't actually see the metal.
Fortunately, there are readily-available screws for the ears at your local Home Depot or Lowes.
The Anovos ear screws, by the way, are nearly perfect for the TD. (and the Anovos TD screws are entirely wrong) So pull out those stock ear screws:
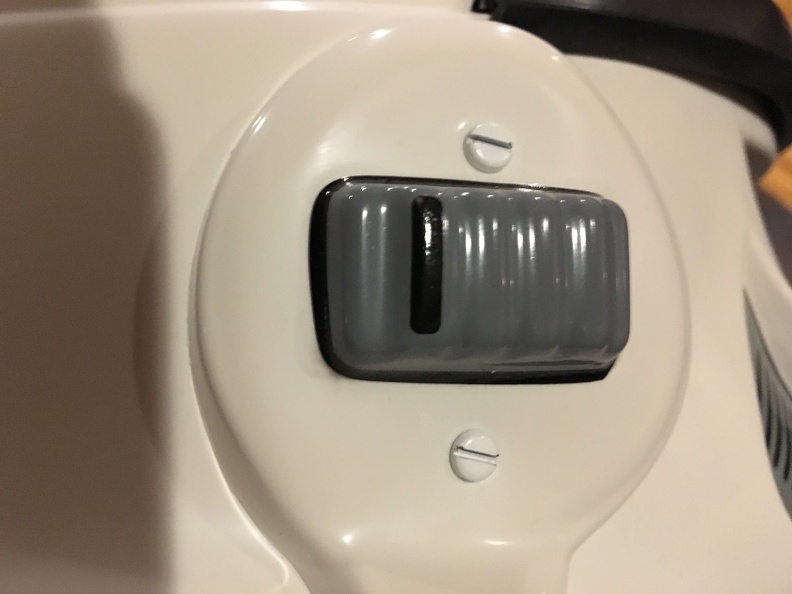
... and use them in your TD. Then get yourself some electrical box screws:
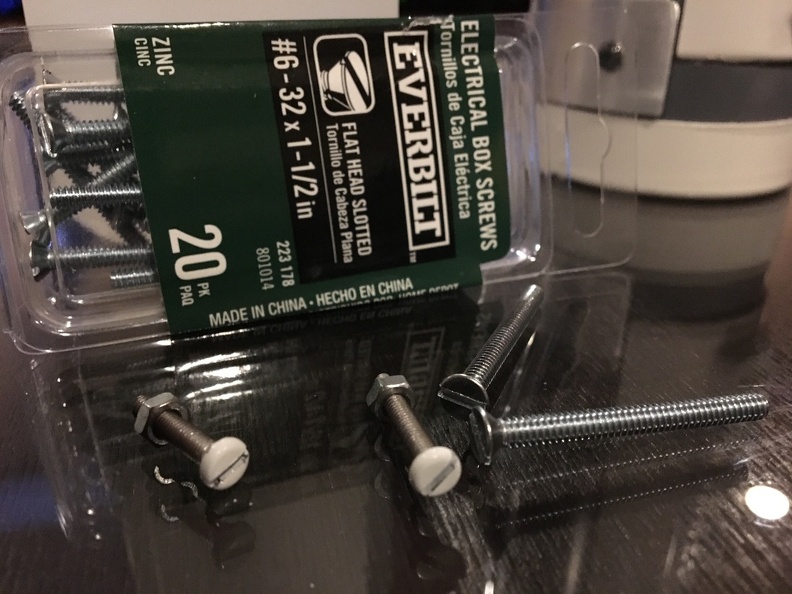
Naturally, out of the box, they're too long. Assuming you don't want to get jabbed in the temples, just cut them down to the same length as the Anovos screws:
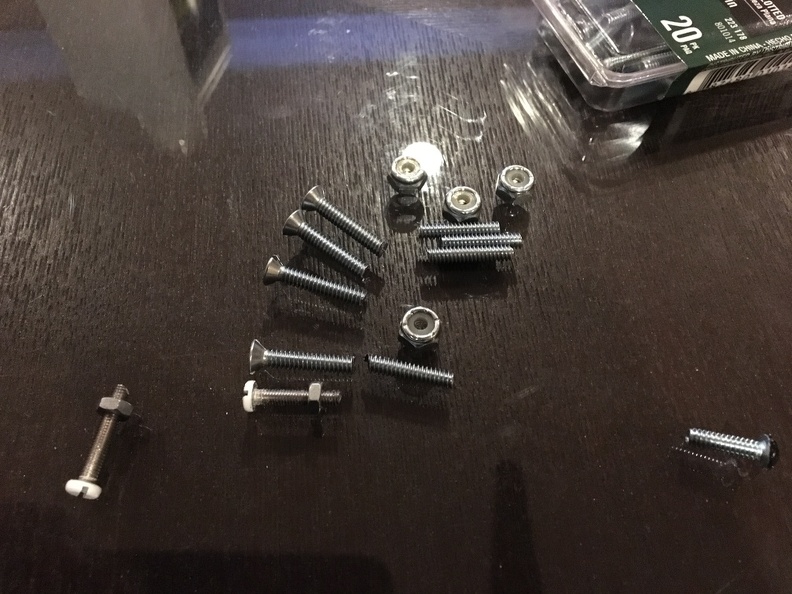
... and screw them into your helmet:
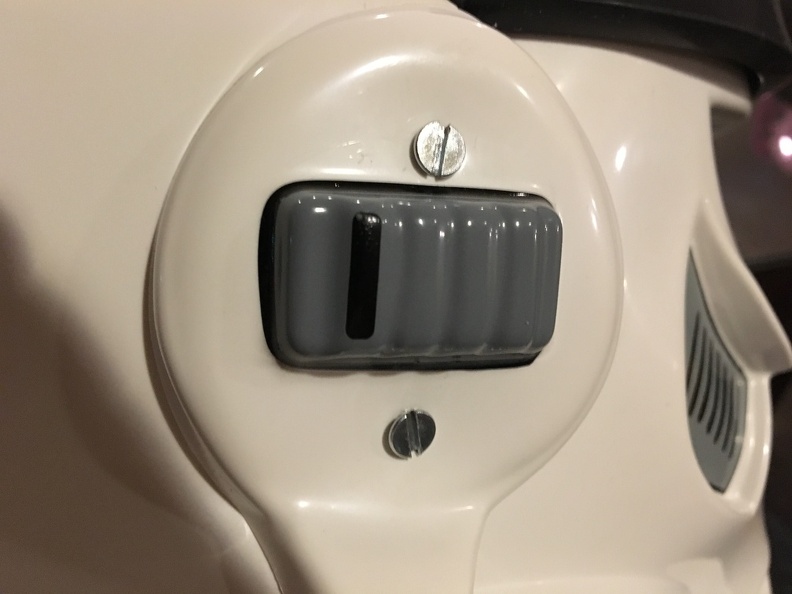
And finally, paint them white. Nice and easy accuracy mod, that's not expensive. My favorite!

My greatest of thanks! Very detailed and smart tutorial!
-
1
-
-
Hey, guys. I went to the fabric store today, and the closest thing I could get to white (That was canvas cloth) was this eggshell white cloth. (It actually isn't the color of eggshell, a few shades darker than pure eggshell white.) I was wondering if this is the correct off-white color. I just want to know so I don't have to build a belt then realize it can't be accepted.
Here is a picture of the cloth in two different types of lighting:
Under a white lamp:
----------------
Under a strong yellow lamp:
-----------
Under both combined:
-
Amazing! Great job troopers!
-
On 4/5/2017 at 6:46 AM, gmrhodes13 said:
Google search is thy friend

----------
Thanks! Just wasn't sure if that was accurate. Thanks again!
-
Wow. That is amazing!
-
1
-
-
Hey, guys. I am going to make my own holster on the cheap, but I need measurements. I have found some, but they are all different measurements. I don't think the CRL has specific measurements for the holster, but I want to be as accurate as I can. Thanks!
-
There is a great thread on it here:<br><br>
<a data-ipb='nomediaparse' href='http://www.whitearmor.net/forum/topic/19398-howto-use-novus-plastic-polish-12-and-3-ah-ah-ah-i-love-counting/'>http://www.whitearmor.net/forum/topic/19398-howto-use-novus-plastic-polish-12-and-3-ah-ah-ah-i-love-counting/</a><br><br>
Best of luck!
Thanks! How could I have missed it?
-
Hey, guys. I am in the process of making a vacuum former, but I need a heat source. I can't use the same oven that I cook food in, nor do I want to buy a whole oven just for this project.
I have looked at heaters, lights, etc, but I am not sure if they can melt plastic, or if they are sturdy enough for a vacuum former. Or they are in the hundreds in cost. What do you guys use for a heating element? Where could I buy a cheap, but effective, heat source? Thanks! -
I was making my helmet today, and a slip of the knife caused a slight scratch on my armor. From a distance, and with certain lighting, it is not noticeable, but it is really bugging me. The same thing happened on my helmets ears. Do you guys have an idea for getting rid of scratches on armor? Thanks!
-
I find a google search normally comes up with what I am looking for
Yeah, most tutorials I find aren't that clear. Thanks though!
-
I've used this tutorial to build my vacuum machine with a size of one squaremeter

http://mynocksden.com/diy-vacuum-former/tools-for-the-job.html
It's not perfect, but it's a good start
Thanks!
-
I don't know if there's a tutorial for a large former based on exactly what you want. You'll have to do a bit of research on your own coupled with the knowledge you gather from the tutorials you find on smaller sized machines. Then once you have an idea of how it all works and what's needed to scale up to what you want, design it and build it. It's what I did when I was building my CNC Router.
I think I have some blueprints I found online somewhere for a former... maybe... might have lost it when my HDD crashed. If I find it, I'll send it off to you. It's a nice start to get an idea of what's needed.
Ok. Thank you!
-
Hey, guys. I was thinking of creating my own vacuum former someday, but I can't find a decent tutorial. (Most of them create formers far too small in size) could you guys tell me some advice where to find a decent tutorial? Thanks!
-
How to make one power source power multiple electronics?
in Electronics for Helmets / Blasters
Posted
Smart. I think I'm going to try that!