BadVoodoo-18
-
Posts
16 -
Joined
-
Last visited
About BadVoodoo-18

-
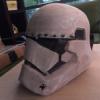
Slowly but surely coming along... Yet, still more sanding, smoothing, and filling. Sent from my iPhone using Tapatalk
-
Thanks The brow will be leveled out a little. Every pep file I could find has the brow very prominent.
-
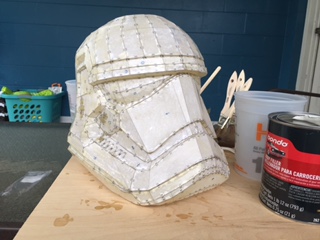
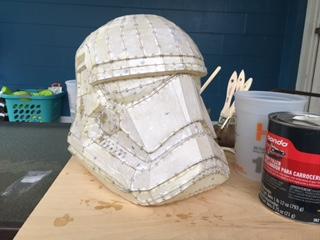
Finished the first coat of bondo last night, and I'm just about half way in to sanding it smooth. The foundation stage of this helmet is just about complete. The next few weeks will be spent fine tuning the overall shape. Still have a lot of work ahead of me. Sent from my iPhone using Tapatalk
-
Great weather, a couple good movies, and some bondo work. Not a bad morning... More bondo tonight... Sent from my iPhone using Tapatalk
-
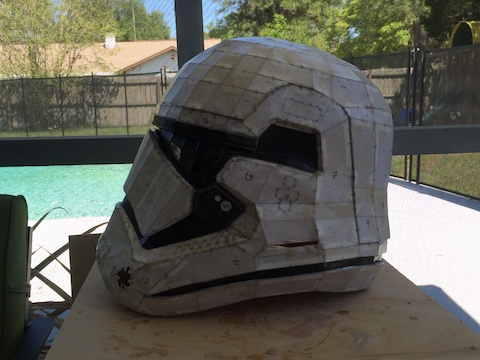
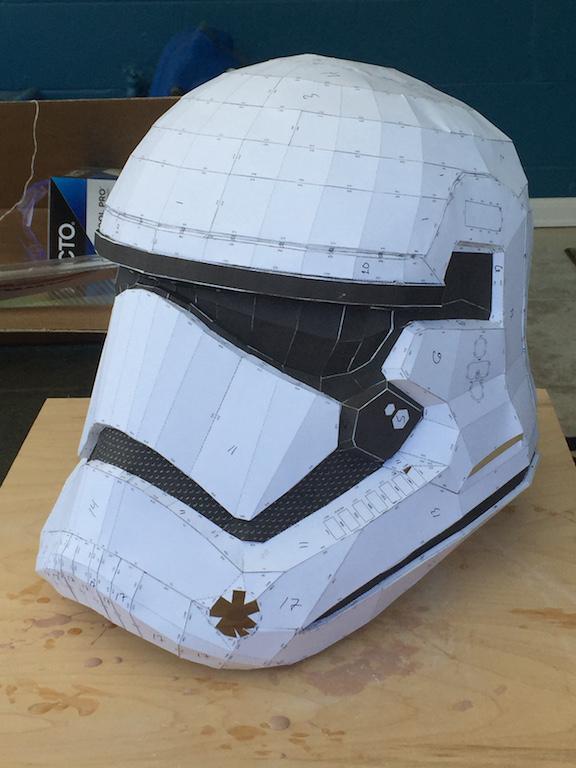
The black pieces sucked and probably took the most time. I could not find dimensions for the new TFA buckets anywhere. So instead i found the dimensions from the original trilogy. Which averaged 12.5" x 12.5" x 12.5" give or take a 1/4" in either direction. From there I studied side by side comparison photographs to determine the approximate size of the TFA.
-
It can be tricky. The first thing you'll need is Pepakura viewer or designer. The designer will let you modify and resize a pep file. But they both only run on PC. Unfortunately I have Mac, but I was a able to modify the viewer to run on Mac. Since I could only get the viewer, I had to find a file that was already the proper size which is why the last pep build was trashed. Once you get the software and a file, you'll need card stock. Most people recommend card stock with minimum weight of 110lbs. I've gotten by with 60lb, but the resin can quickly cause it to sag if your not careful. Here's a link to a guy I've found on YouTube. He does a great job explaining all the steps as he walks you though a Halo pep build. One thing I completely agree with him on, is the use of hand tools over power tools. It's more work, but you have better control and detail with hand tools. I've probably spent every lunch break for the last 4weeks going over and over his videos, studying every aspect. http://youtu.be/KAJl3ty-gVg A few tips I can offer; -after printing, I go through each page and lable every piece per corresponding page number. -I cut and score everything page by page, and store each page set in a different ziplock bag. It really helps keep you organized while gluing the build together. -expect to spend the first week or two cutting and scoring all the parts. - when you start gluing your helmet together, I've found working from the top down works the best. -a lot of guys use hot glue, I personally prefer loctite gel superglue. The hot glue makes it very lumpy, and stingy. Superglue gives you a cleaner finish. Just wish careful, you caneasily glue you fingers together or to the paper. -last, take your time and don't rush it. This will be the base from which you helmet will be build off. So the better it is, the easier it will be later.
-
Sent from my iPhone using Tapatalk
-
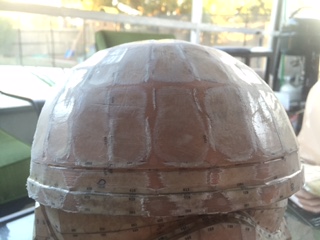
Fortunately the temperature warmed up enough to do some bondo work today, nothing for show, but more for strength and cushion for sanding. Also got a couple hours in this evening to continue sanding down the high points. Overall, I'm pleased with this fourth attempt. Goal for tomorrow is to finish up the high ridge points and do one last bulk coat of bondo in the weak points.
-
Knocked down a good chunk of the ridges tonight. Should be able to finish up the ridges tomorrow and patch a few spots that sanded through. Hoping to start applying the exterior coat of bondo on sunday. I can't even explain how great it feels to finally be done with cutting and glueing card stock!

-
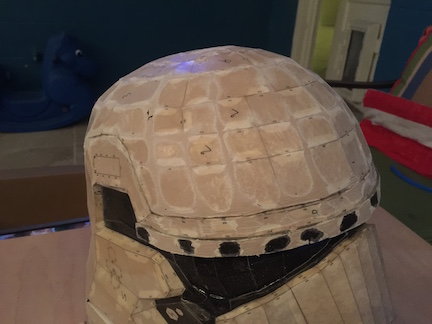
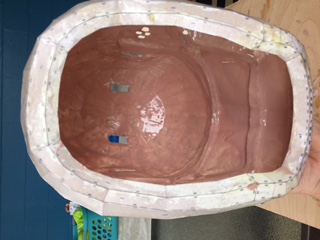
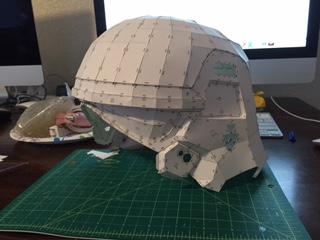
After a week and half, the new pep file is finished. Its finally the right size and close enough on shape that i can work with it. I was able to get good coat of resin on the exterior. The interior has a thin coat of rondo followed by a thicker coat, so there is a good backing in the event sanding runs through the first coat. Temps are going to drop again so it looks like i'll be doing all sanding this weekend until it warm enough for bondo. Time to get dusty...

-
Well... Minor set back. Sizing was off, which I figured was going to be the case. But through a ton of research, and photo comparisons, I've got the pep sized out to proper dimensions. Took a week off for my own sanity and started the new pep build last week. I'm on track to finish up sometime Wednesday or Thursday. I've pretty much got this Pepakura down to science. On the plus side, weather looks good for glass work this weekend.
-
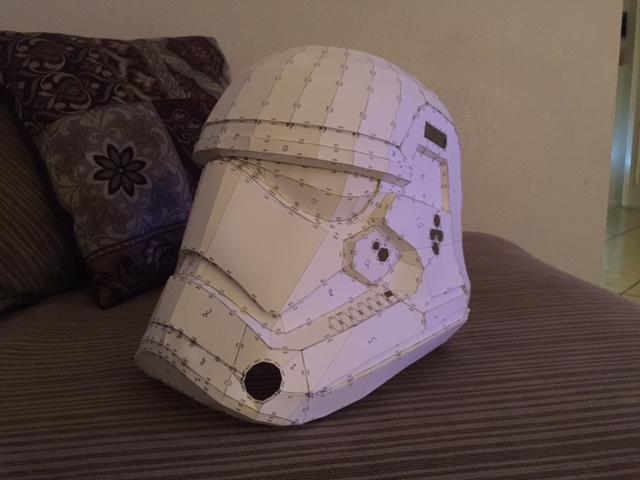
The size did concern me a bit, but having my concern confirmed now, does anyone have a rough height and width of what they feel it should be. I can't find any images that offer background objects to get a good feel for the size? Thank you to anyone who can shed some light on this issue.
-
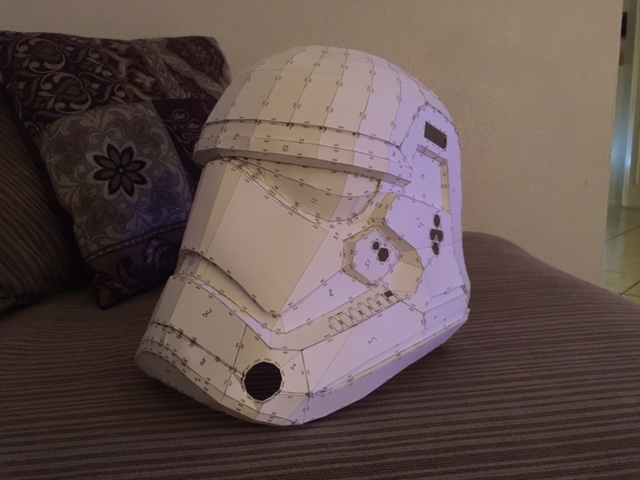
Thanks, honestly I'm not sure which file it was. Looking back on your build, I think it is the same as your first. My only complaint would be that it's slightly narrow at the base. But a few build layers of bonds should help correct the issue. Worst case, I just trash it and start over. Out of curiosity though, what issues were you having with it?
-
Thanks guys, patience is definitely something I've got. This is actually the 3rd pep build. The first 2 were both different files which i didn't agree on the scaling or design. But as they say, Third time is the charm. So by the third attempt, i changed to a different pep file, switched from hot glue to loctite superglue, and began working from the top of the helmet downwards. All of which definitely improved the precision of detail. As it stands now, i've applied a good coat of resin to the exterior/interior and 2 coats of rondo to the interior. Tonight i was able to squeeze in a half hour with the rasp knocking down all the high ridge points, (well, about a 5th of them). So the rest of the week will be spent on the ridges and bulking weak spots on the interior that have started to show. First coat of Bondo hopefully will be applied friday (weather permitting). *Apologies on the disproportionate photos. I'm not very tech savvy. But i'll get better formatting down for this weekend.


-
Well I figured it was about time to pull the trigger on my own First Order TK. This will be my first build with the ultimate goal of earning my way into the 501st. I've spent the last few months reading up on as many posts as I can. The caliber of talent is unbelievable, even more impressive is the team work. <br><br> I'll admit I'm a little ambitious right now with a 2 year old and a pregnant wife who's due in a couple months. However Ive finally been able to move back to 40hrs/4days a week, freeing up Friday to work on this build so I'm up for the challenge.<br><br> I know pep builds are not always favored by some people, but I've decided it will provide a good foundation from which to build on, and sculpt to the proper dimensions for the helmet. <br><br> I'm a strong believer in constructive criticism. A different set of eyes can always shed new light on issues that might not have been seen. So please feel free to share any thoughts and opinions. <br><br> I look forward to getting to know everyone, and getting some feedback. I'll have pics posted here in couple hours.