

steamboatphan
-
Posts
175 -
Joined
-
Last visited
-
Days Won
1
Content Type
Profiles
Forums
Gallery
Articles
Media Demo
Posts posted by steamboatphan
-
-
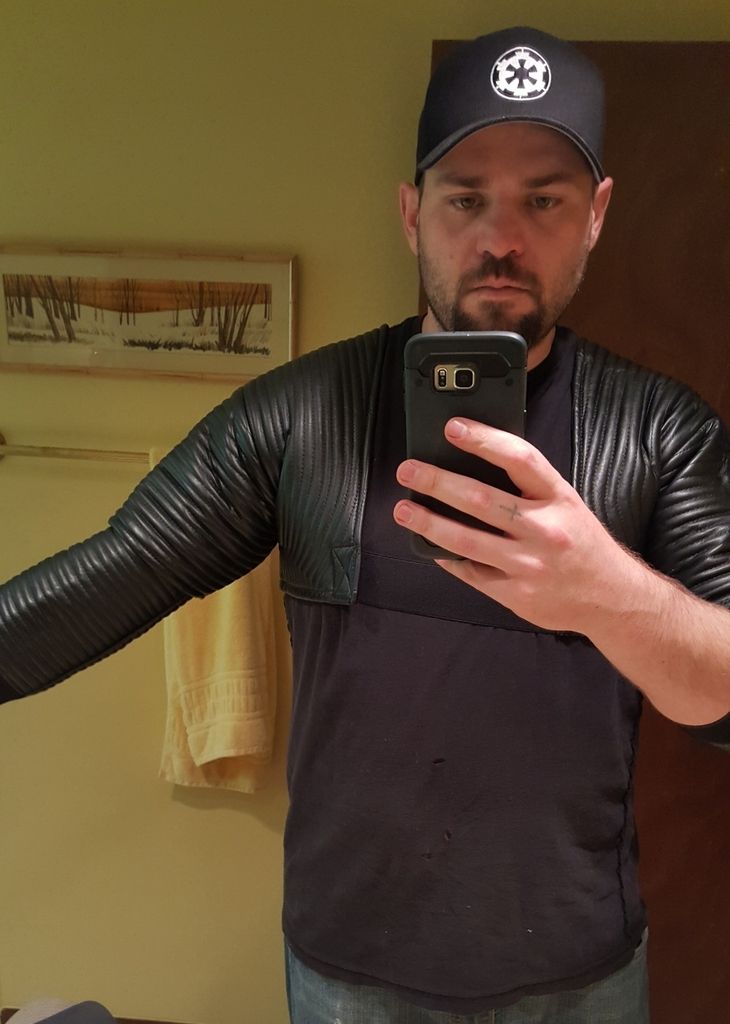
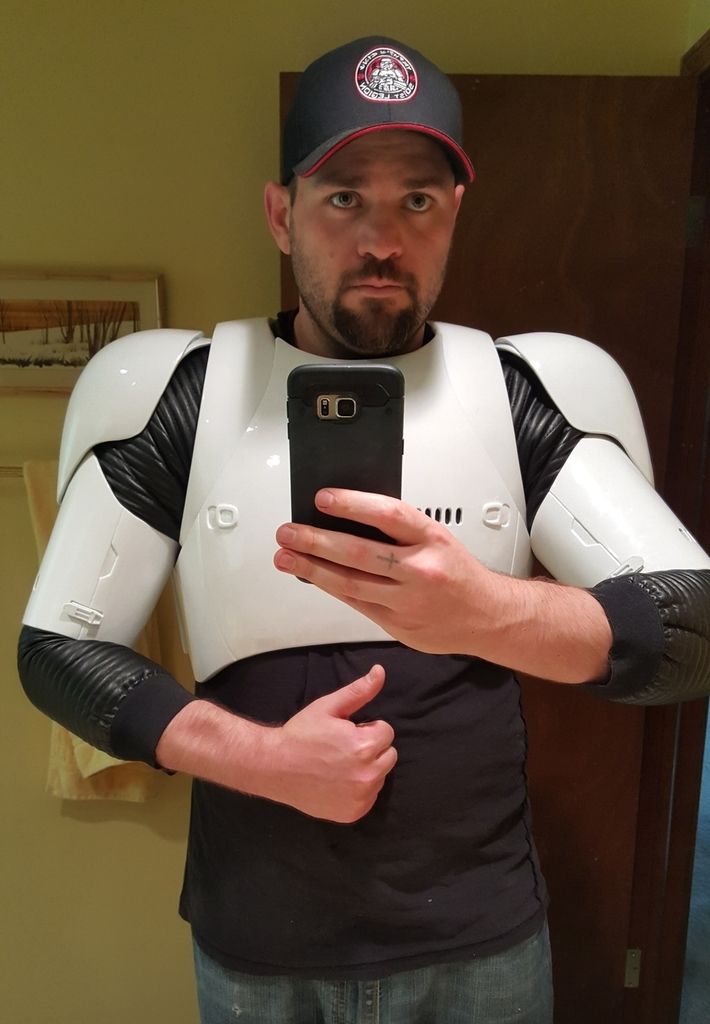
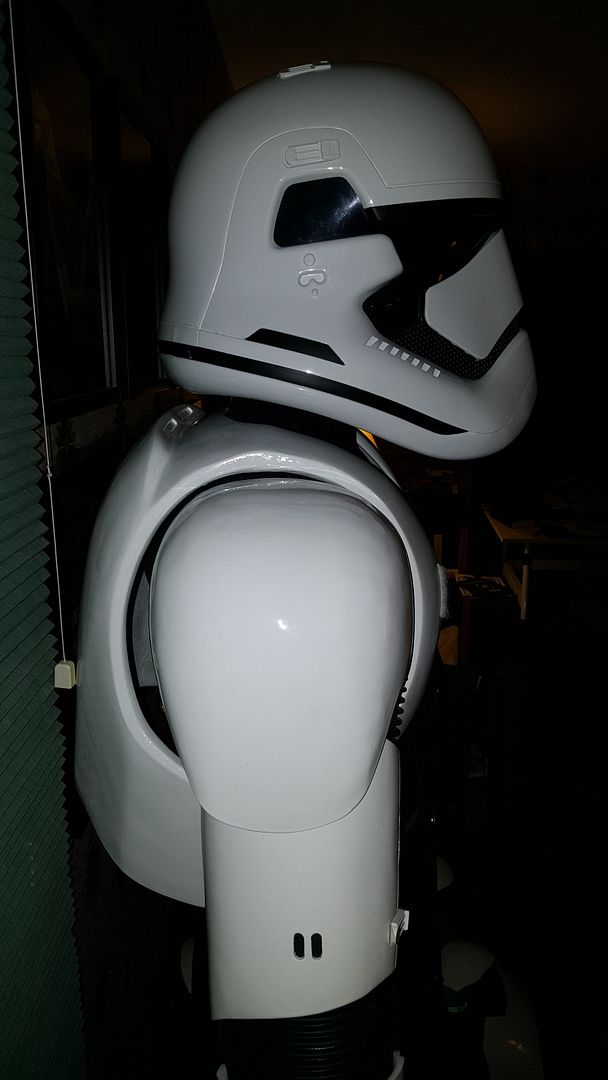
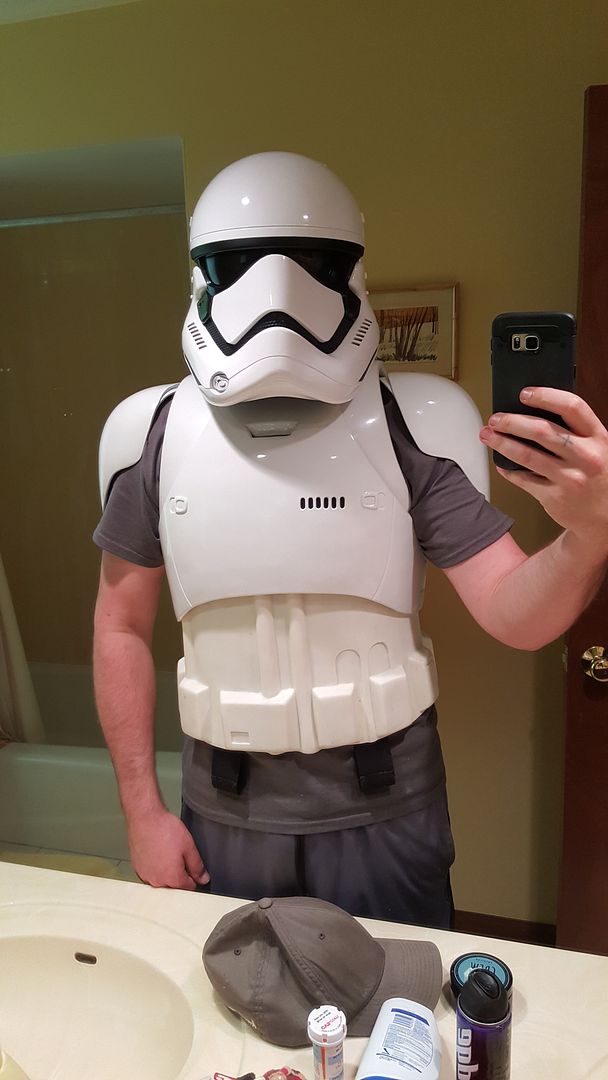
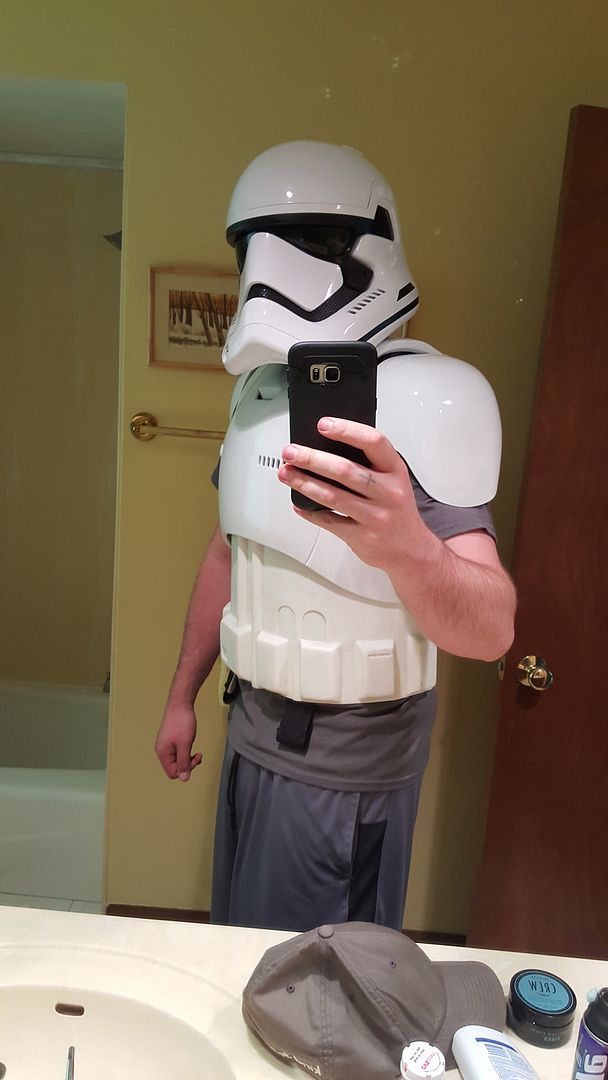
After completing the belt, I was pretty much done with all of the armor (minus the shins and knee plates)
I was able to try on all the armor that i had done, and i gotta tell you, I geeked out pretty hard when i looked in the mirror

Jim's armor is a work of art. The ability to sculpt something like this by hand is truly incredible. I believe that this armor will stand the test of time longer than flimsy ABS will.
I know i'm forgetting some stuff in this build thread... I still need to show you guys how i attached the chest plate on and some other random stuff.
So here you go: a 90% done Jimmiraquois First Order Stormtrooper V3
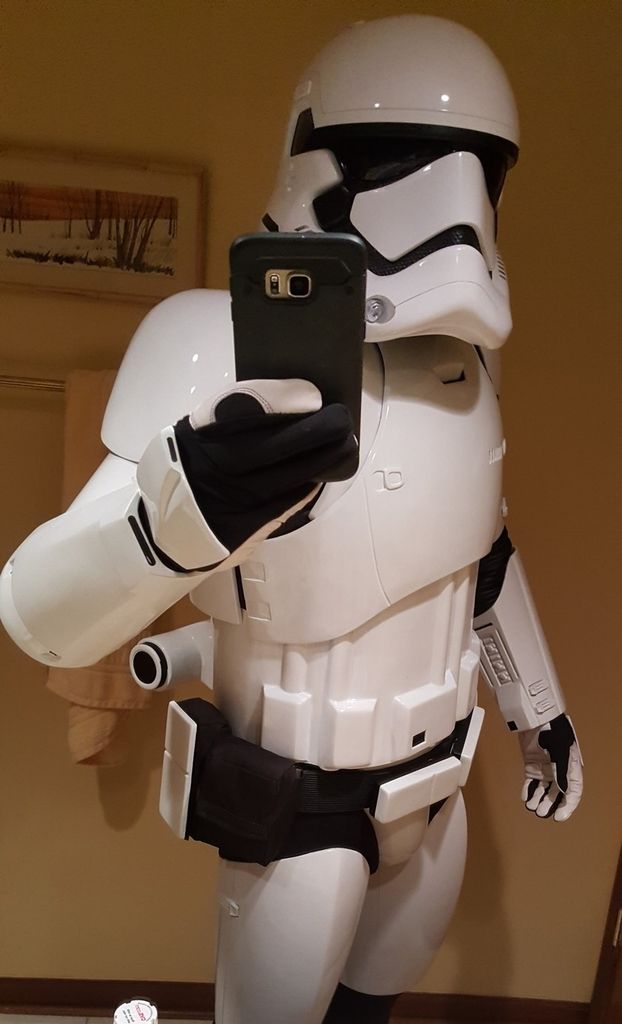
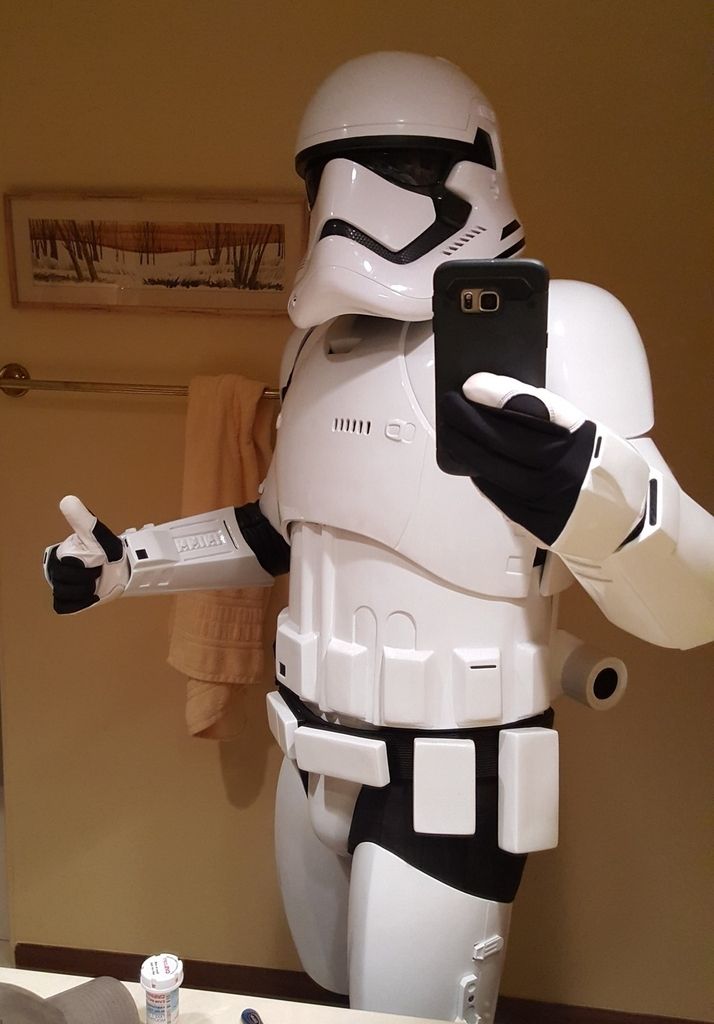
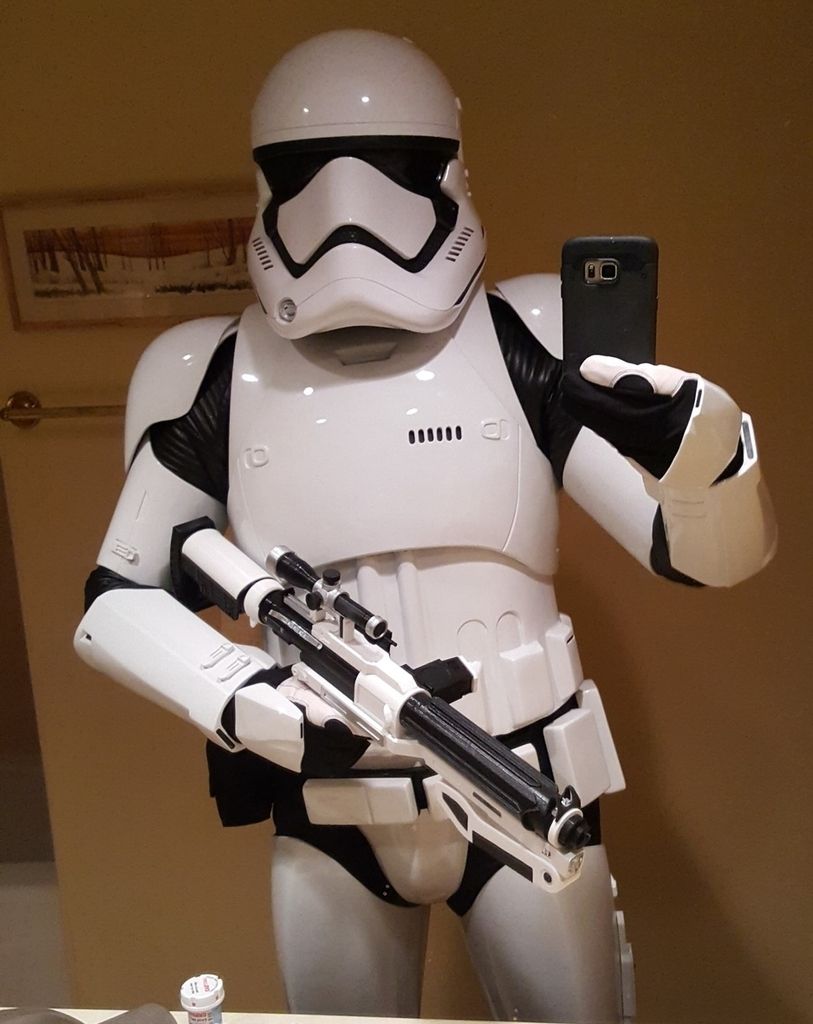
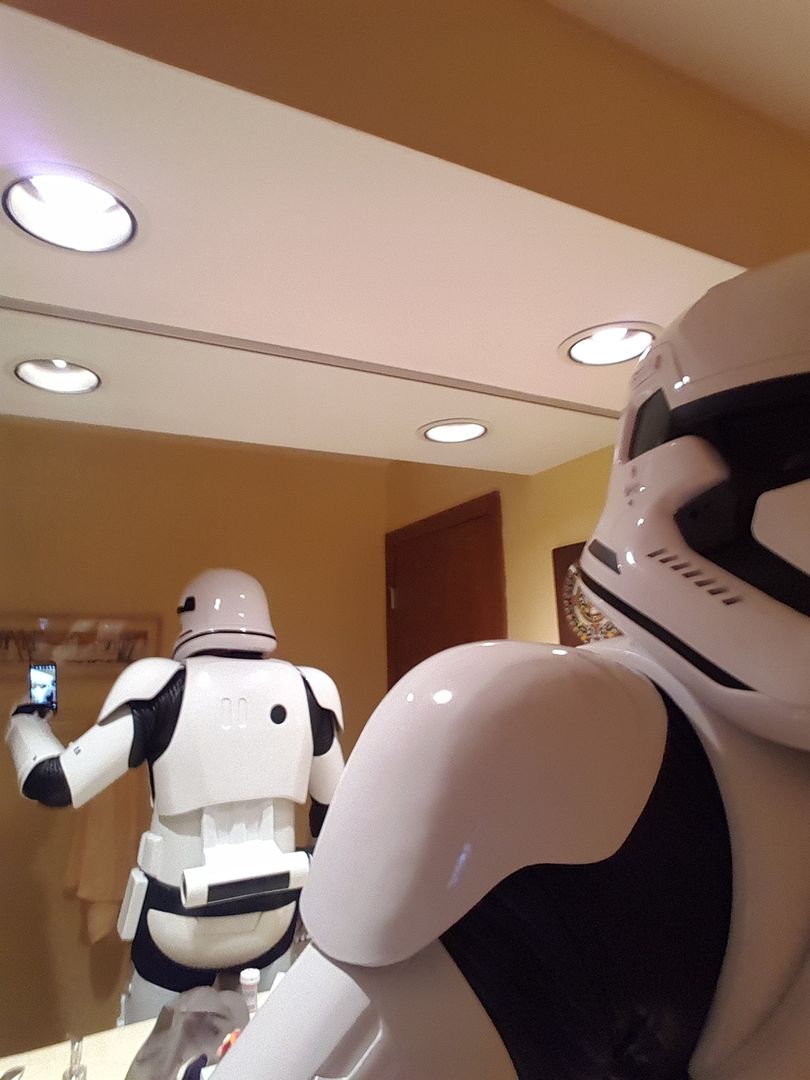
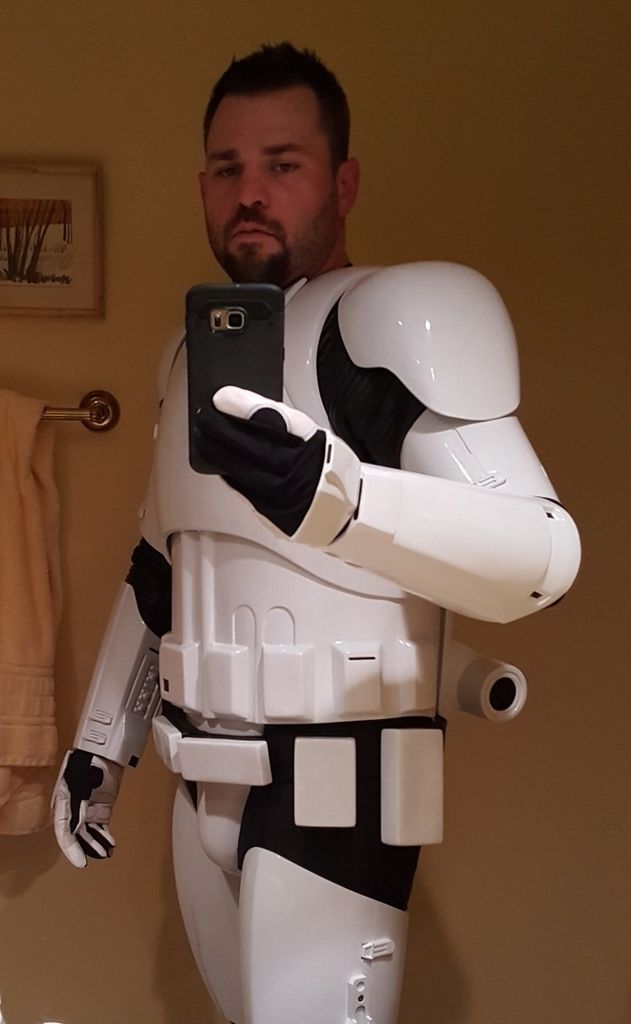
I got dressed on my own and didn't have anyone to take my picture at the time... better, full body, outdoor pics to come once i'm 100% done
I definitely put my TD on crooked in these pics and i need to still add a snap or velcro to the cod piece to keep my belt in place.
I also wont have that gap between the chest and back piece once i have a helper giving me a hand. putting the TD on crooked probably had something to do with that too

All and all, I think i look pretty badass!
-
 8
8
-
-
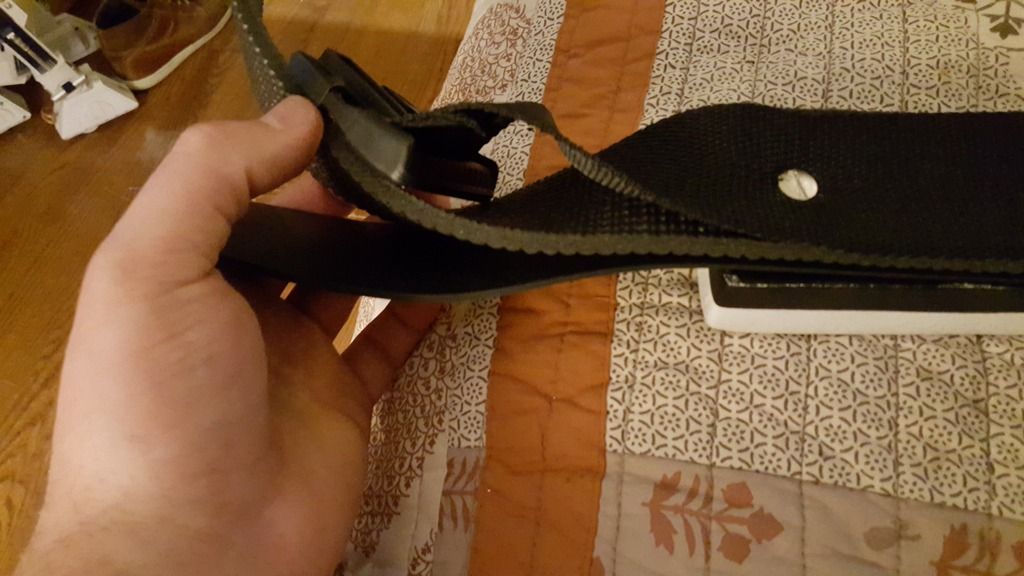
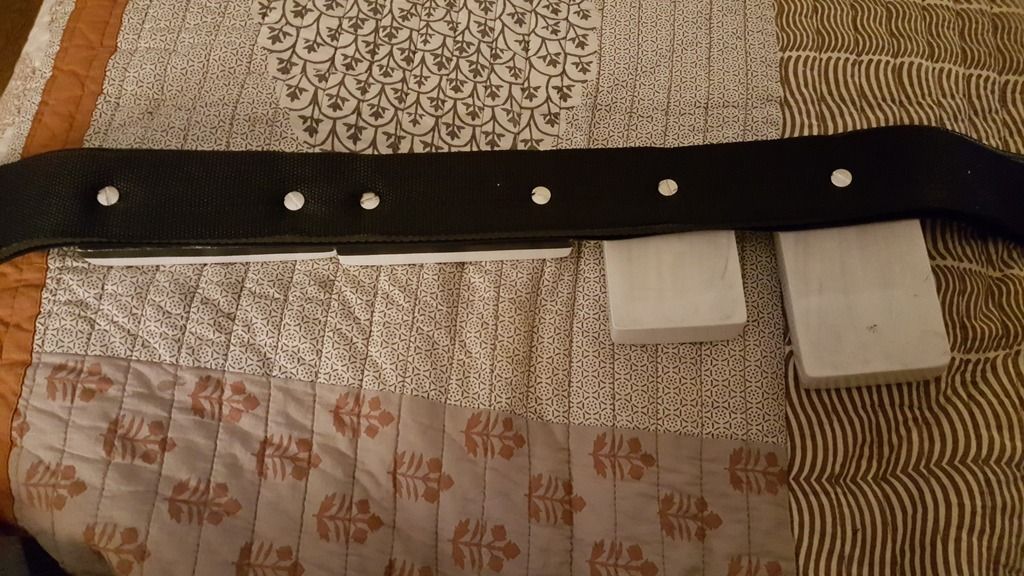
Next I cut up a cheap yoga mat i had laying around for the middle section of the belt. I kept it really long when attaching the boxes, so that i could trim the yoga mat and ribbed rubber material accordingly after the boxes where mounted.
Important: Be sure to measure the nylon belt over your cod piece and butt plate. Once you have the correct length, sew the buckles on at each end.
The boxes should go in this order:
I marked off the spots where i was going to punch holes in the belt by feeling where the chicago screws hit and making a small puncture in the fabric. Invest in a leather punch tool (it'll come in handy here) I'm sure there's a better way to do this, but this method worked out pretty well for me.
Once the chicago screw was through the fabric, I could push the foam right on top of the screws and it'd leave a small mark showing me where to punch a hole. Measure twice, punch once. Keep the belt taut when doing it this way.
Finally, cap the chicago screws. DO NOT screw them too tight though. I added CA glue and accelerator to the tops of the screws also.
Before you just start gluing or attaching all the layers together, REMEMBER, this will be curved around your waist. If you attach all the layers while it's flat, they will bunch up and "ripple" when you curve it to put it on. I recommend closing the buckle and seeing where the pieces lay. Try it on... several times, if you have to. It was definitely a trial and error process for me.
I attached the foam to the nylon with chicago screws in several spots and the foam/yoga mat stops just shy of the buckle. The ribbed rubber material was CA glued right onto the buckle:
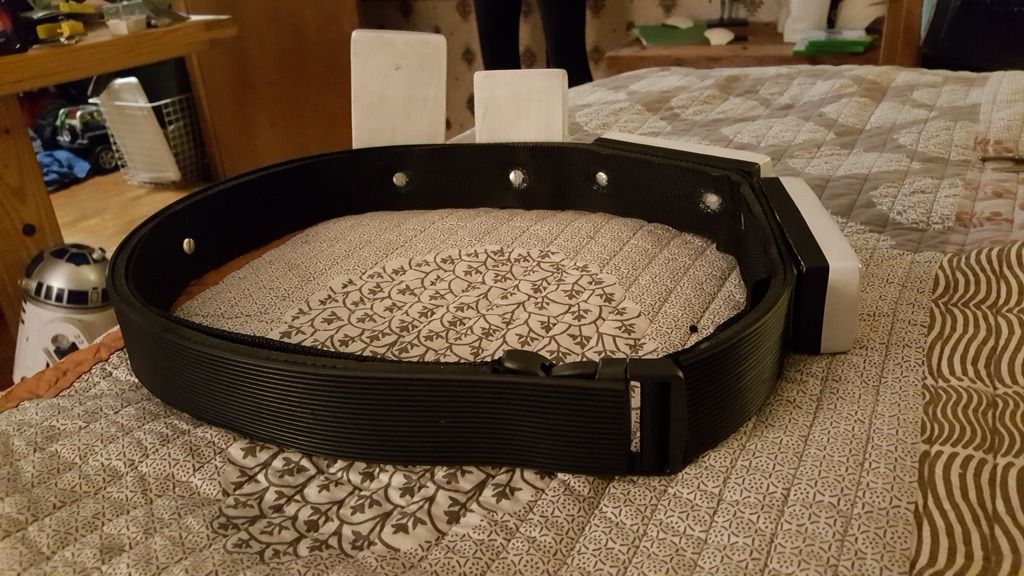
Use E6000 to glue the rest of the pieces together once you have the curved shape you like. The way i have this set up, The black pouch WITHOUT a white cover on it will cover the belt buckle. No buckle should be visable, per the CRL.
-
2
-
-
Ok, so i assembled the belt using my idea with the velcro strips and chicago screws. Here's a pic of how i attached them:
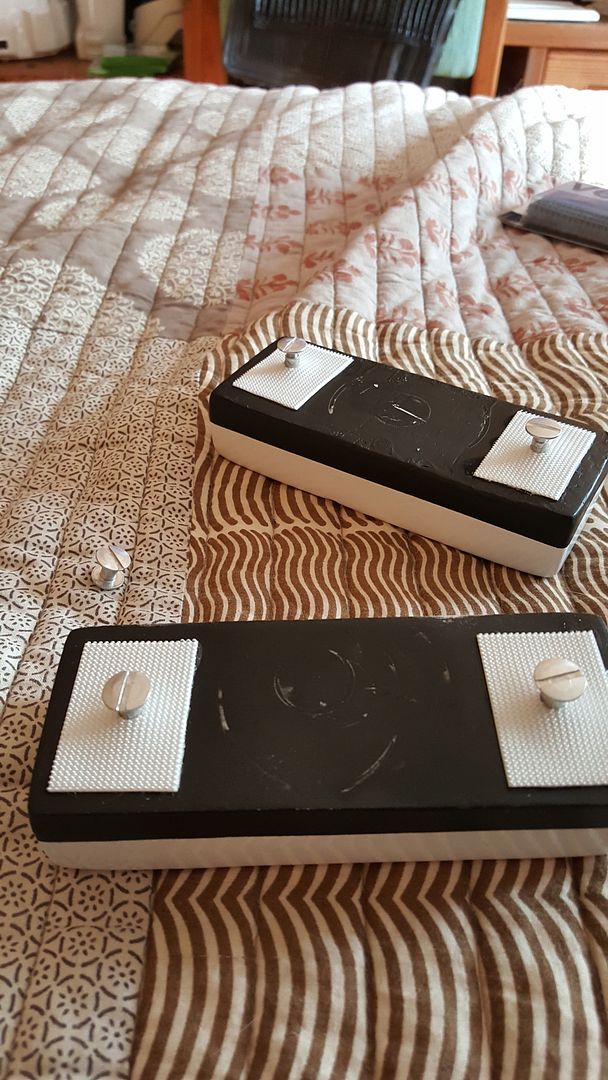
I added a couple dabs of CA glue on the sticky side of the velcro (one on each corner and on the end of the chicago screw) Note: There is no drilling into the boxes involved with this method!
-
2
-
-
That is one shiny crotch!
Sent from my SAMSUNG-SM-G928A using Tapatalk
-
1
-
-
Walter: just sign up at theRPF.com and you can view the link. It's free to sign upOk. Ya i can't loginto the link you have Need to be a member I guess
Sent from my SAMSUNG-SM-G928A using Tapatalk
-
No. The link to this kit is on the first page of this thread. Fnarmour.com has great gaskets, but their armor looks off to me. Some say it's a recast too.Not sure if been asked. Is this the same armor kit you get from FNARMOUR.com ?
Sent from my SAMSUNG-SM-G928A using Tapatalk
-
1
-
-
Thanks brutha. I'm hoping to have the armor done by next weekend (the 27th)Looking siiiiiick!!!!
Sent from my iPhone using Tapatalk

Sent from my SAMSUNG-SM-G928A using Tapatalk
-
2
-
-
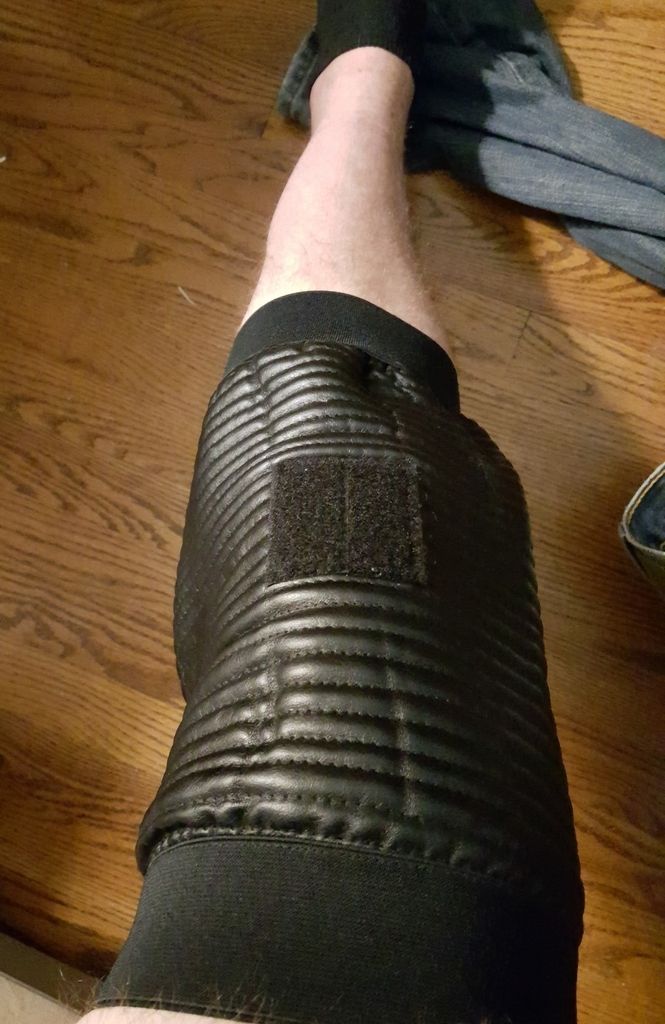
Fabric gaskets showed up today!!! I'm impressed. these things fit me perfectly, and it only took 7 days to get here from Ireland.
The back two straps are sewn into the gaskets, the front strap velcros in place. I may add more straps to get it tighter on me.
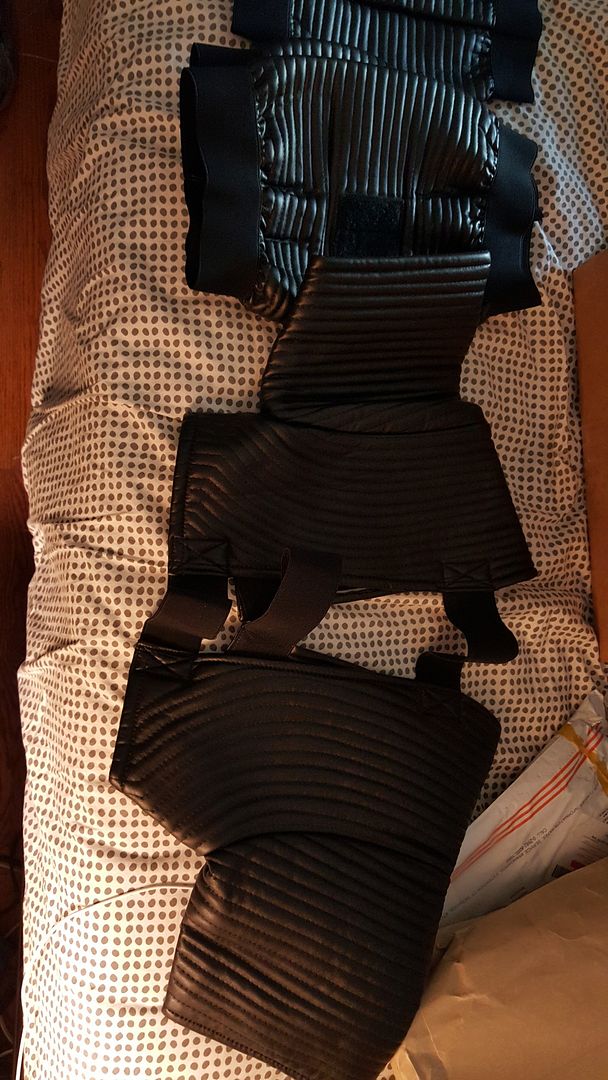
The leg gaskets are a little baggy in the middle. i will probably have them sewn tighter later on.
-
3
-
-
These are chicago screws. The velcro is just so that the vertical boxes don't sway back and forth. I'm not trying to drill into the boxes, so the velcro creates more surface area to be glued. Assembling tonight, pics should clear this up...
Sent from my SAMSUNG-SM-G928A using Tapatalk
-
I've been toying with ideas all week on how i'm going to attach these boxes to the belt without any drilling... and I think I've got it. This is a "rough idea", but I can't seem to find anything wrong with it so far.


Now, the sticky side of the velcro goes onto the boxes with the help of some CA glue, so that it won't go anywhere. Then, all I have to do is punch holes in my belt accordingly. I can also add soft side velcro to the belt under the boxes.
Lemme know what u think. Gonna start assembly tomorrow.
Sent from my SAMSUNG-SM-G928A using Tapatalk
-
Thanks but i meant how tight are you going to build chest and back to the abs?
the chest plate literally lays right on top of the ab section. there is MAYBE a millimeter or two gap. (this is why i have the soft side velcro under the chest plate to avoid scuffs)
the back piece is also laying right on top of the TD. So to answer your question: its a tight fit.
-
1
-
-
I have 2" elastic connecting the chest to the back piece. At 220 lbs, the ends of each piece touch perfectly together. Also, to prevent paint scuffs, I added some soft side velcro to the inside of the chest plate (bottom center). I hope that makes sense.Just bringing this up again, because it might have been overlooked, and i am really interested in your opinion

Sent from my SAMSUNG-SM-G928A using Tapatalk
-
My fabric gaskets are coming either tomorrow or the next day. After trying all this armor on, I can truly say that having breathable fabric instead of rubber will make a WORLD of difference! I went to http://www.fnarmour.com to buy the gaskets. They were $100 bucks plus 50 something dollars for express delivery (10 days or less). They ship from Ireland. This site also makes vacuum formed ABS armor, although there is a lot of speculation going around that they may be a re-caster. Don't know... don't care... I got Jim's armor, and am really happy with it so far. And hey, you cant re-cast gaskets
Pics to come when they show up!
-
3
-
-
I'm getting so close! I wanted to try everything on tonight. I'm actually amazed i was able to suit up this much on my own. I'll definitely need a helper on troops.
Things to do still:
- Widen the shins
- Assemble the belt
- Assemble and figure out how i'm gonna attach the spats
- Minor tweaks for keeping everything in place better

Yes, I know the yolk is poking out the side there... I'll add a strap connecting each yolk piece.
-
3
-
For attaching the TD, i am using 2 long strips of industrial strength velcro. Easy enough. i might add snaps to the inside of the abs and have nylon wrapping over the top and glued to the TD. 2 long strips of velcro and it's stuck on there pretty good though.
I noticed the opening in the back wasnt dead center on my back, so thats why the TD looks askew.
-
1
-
-
That's definitely an extra elbow gasket. Jim must've been packing in a hurry or something. Lol.
Sent from my SAMSUNG-SM-G928A using Tapatalk
-
1
-
-
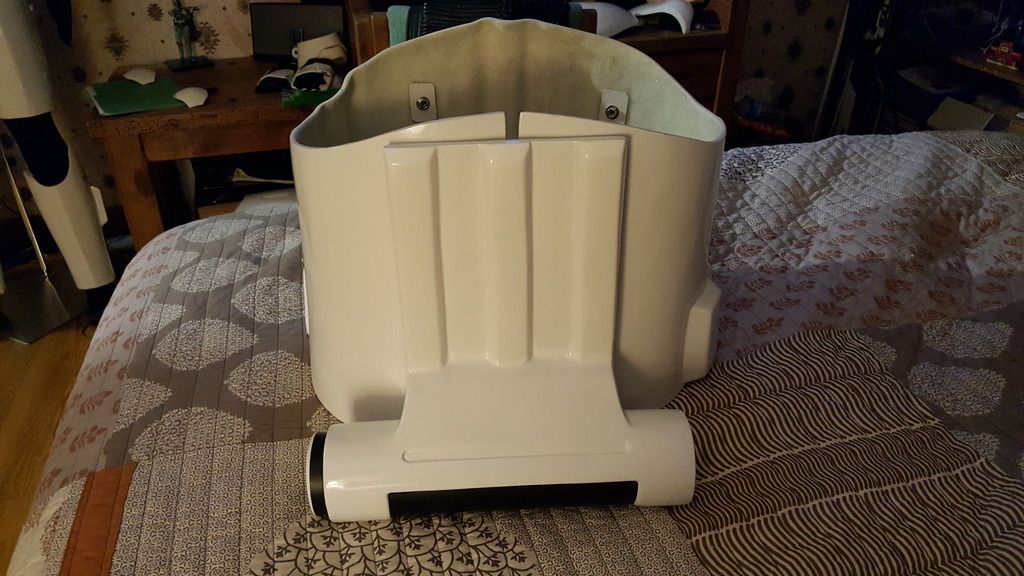
Ab section primed and painted!!!
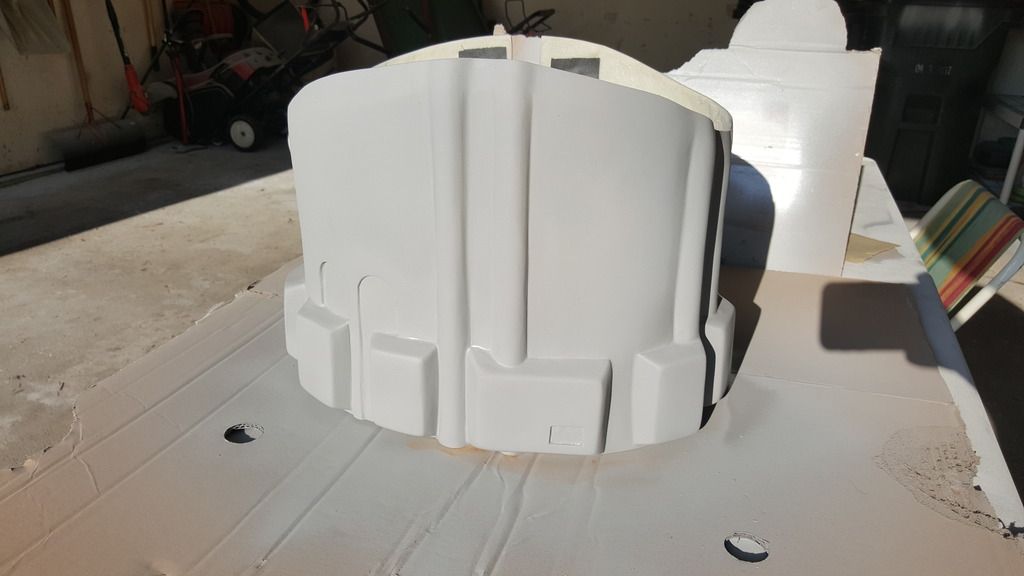
Its hard to get the color of how this really looks on camera. I assure you though, it is bright white, and matches the Anovos bucket.

-
1
-
-
Shoulder bells are now attached using two nylon straps on each bell. They are connected to the yolk via snaps on both ends. I'm not sure whether or not i want to have the bells attached to the biceps at all at this point. I may just leave them free floating for more arm movement. Getting the biceps over the rubber gaskets was a pain in the an impolite person. They still need to be an inch or two higher up, but the gaskets cant get any tighter on me. I literally had to lube up the gaskets with vaseline to slide the biceps up! LOL
anyways, i'm hoping the fabric gaskets i have coming will be easier to work with (and not as thick)
-
I still need to paint the horizontal boxes black on the bottom halves. I'm thinking of using a combination of belt loops on the back of the boxes and velcro. Will keep you guys posted. I do know that I want to avoid drilling.Any update on what you plan to do with the belt?? I'm in the same position as yourself and about to start but unsure how/what to do
Sent from my HTC One_M8 using Tapatalk
Sent from my SAMSUNG-SM-G928A using Tapatalk
-
i use a product called "Sticker On!" for applying decals. you spray the surface and the decal, and it allows you to slide the decal into place and remove air bubbles.
-
2
-
-
Trooperbay decals applied....
-
4
-
-
Recast or no?
-
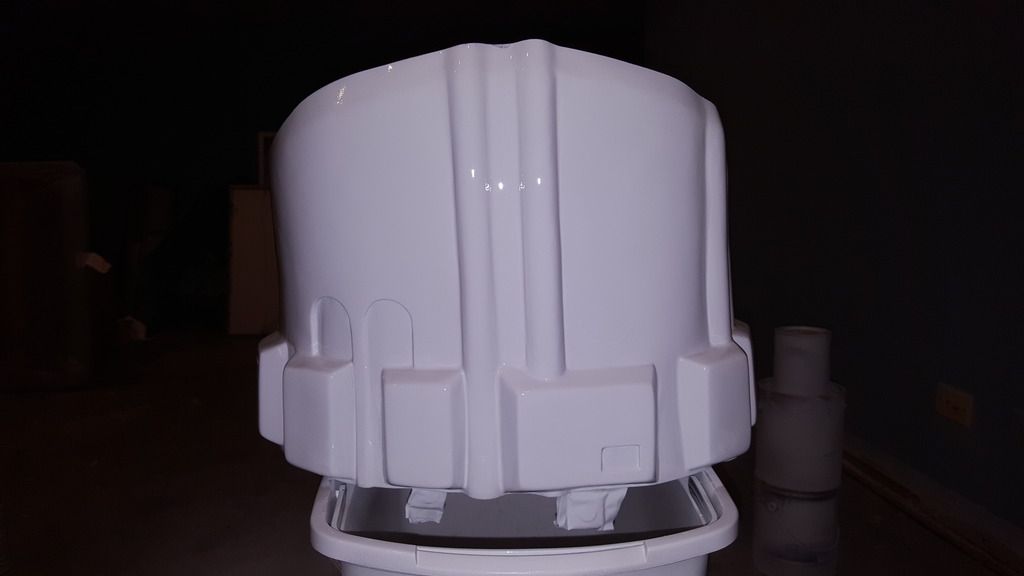
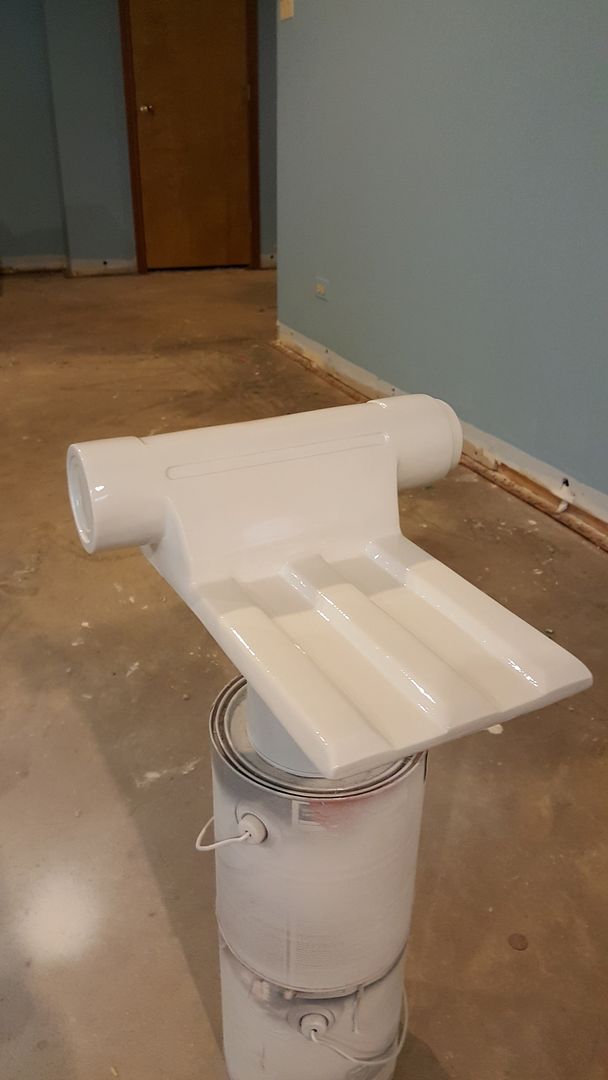
After a lot of frustration with the orange peel on my TD and belt box, i was able to sand down everything (which was very time consuming) and fill in some missed pinholes with apoxie sculpt. I literally just laid the paint down in this pic. several VERY LIGHT coats. i hope it stays this nice
-
5
-
-
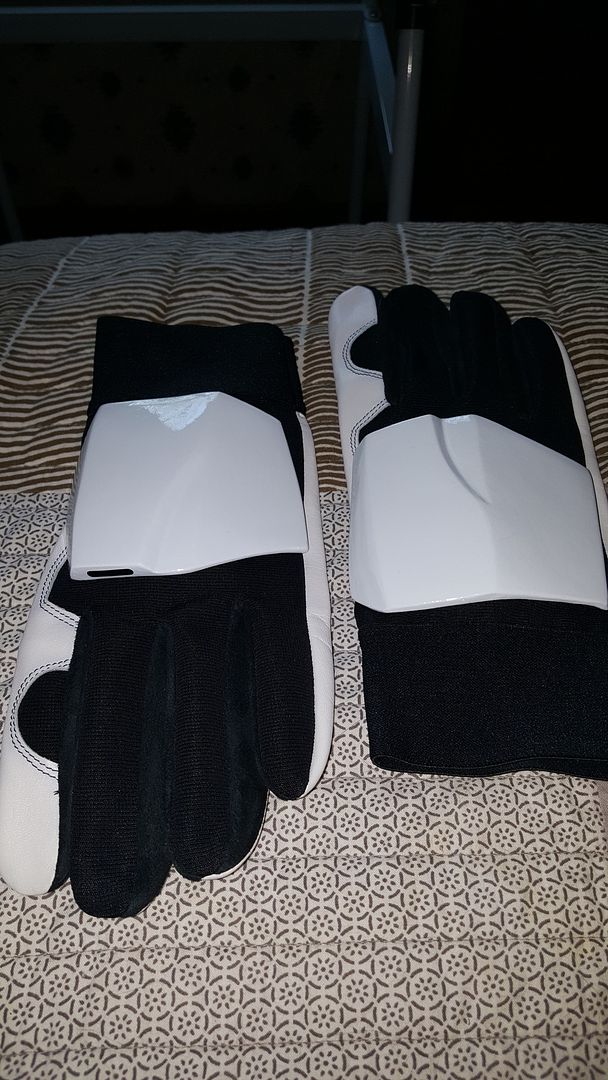
My ImperialBoots gloves showed up today via DHL express. Shoutout again to Francois for getting them here so fast! great customer service.
-
3
-
DYNAMIC1 FO WIP
in Build Threads Requireing Maintenance
Posted
Looks great!
Sent from my SAMSUNG-SM-G928A using Tapatalk