

TK 22686
-
Posts
126 -
Joined
-
Last visited
Content Type
Profiles
Forums
Gallery
Articles
Media Demo
Posts posted by TK 22686
-
-
Does the MR1505 fit under the Chest Armor? I know the MR1506 should without a problem...but the MR1505 is a little bit thicker and longer. The 4-6 extra hours of battery life would be excellent though...for a mere 4 extra dollars.
-
This is my first build, so I could be wrong, but UKSWrath's build thread recommends ordering a bag of 15 S Poppers in addition to the Tandy snaps. I believe the S Poppers are the ones that are visible and the Tandy snaps are internal.
That's right...The S Poppers he uses are for all of the ones that you can see on the armor, as well as connecting the belt to the Ab Armor. I don't even think he uses the full 15, but that's the smallest size they come in. They're literally about $3 for the poppers and $7 for the setter. I'll be picking those up in addition to my Line 24's.
-
Anyone know what the screen accurate screws (type and size) are that are used in the Ears and TD....and possibly where to find them?
I have the Anovos helmet, and looking to upgrade these to the proper ones for screen accuracy.
-
Ha! I'm looking it over, making a diagram to make sense of it all. I'll have to look at what I've got in my kit when I get home tonight. You used S poppers when Line 24 snaps would work in their place?
-
Gotcha!...I reached out to Ukswrath about what he used...as I know he had a mix of Anovos pieces and others. He has mentioned that he is one who approves Centurion Applications and they always recommend changing this and that...and It would be the recommended, most accurate list that I'd be interested in seeing...so we'll see what he says.
It gets confusing when people are throwing out Line 24's, S Poppers, Chicago screws, Split rivets, speed rivets, slot head screws, pan head screws, V head screws, etc. Especially when it gets to the size/length of some of these pieces. Thanks for your help!
-
Since you're one of the those who looks at and approves Centurion Applications....do you have a comperehensive list of Screws, Snaps, and Rivets to use on the different parts. What is supplied in the Anovos kit and what should be swapped out for screen accuracy? I've been trying to piece this together, but it's proving difficult.
Helmet (ears):
Ab/Cod to Kidney:
Right side of Kidney:
Cod and Butt plate:
Plastic belt to Cloth:
Cloth belt to Ab plate:
Am I missing any more?
-
Last question, I promise....I'm reading about screen accurate builds as far as screws, rivets, and snaps.
Do you have a list of what screws, rivets, and snaps are necessary for things like: Helmet Ears, Ab/Kidney connection, Cod/Butt connection, TD clips, Belt armor to cloth, and Belt cloth to Ab Plate.
I'm trying to get a comprehensive list going to see what is recommended to be replaced from the Anovos kit, but it's hard to piece this stuff together. I'm looking at Centurion suggested fixes for accuracy. -
Does E6000 work instead of CA glue. CA Glue seems so permanent...at E6000 seems like it would hold, but makes removal easier for any necessary repairs.
-
Thanks for the info...looks like I'll be hitting up Mr. Kittle for one of his belts then. Was planning on just modding the Anovos, but looks like I'll get to play doctor. I like what you did with the Garage Sale sign and not fully ABS pasting it. If I happen to do a little damage (and it always looks like the middle one) I'll probably just end up doing that as a fix.
I was close to #1000, 2 off..
I'll have to look and see what I'm going to need for screws, fasteners, etc...versus what was supplied by Anovos. I'm trying to keep the cost down as I still have higher $$ items I need to get...but this is quickly adding up more and more.
-
Why is the cloth part of the Anovos belt unapprovable at Centurion? I understand it is flimsy...but seems like if you supported it with ABS strips covered in cloth adhered to the back of the belt, you would not have that problem.
-
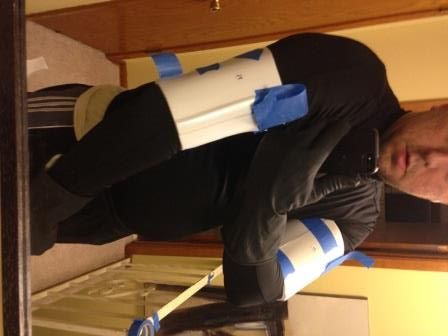
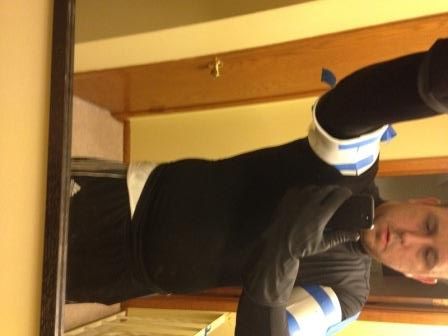
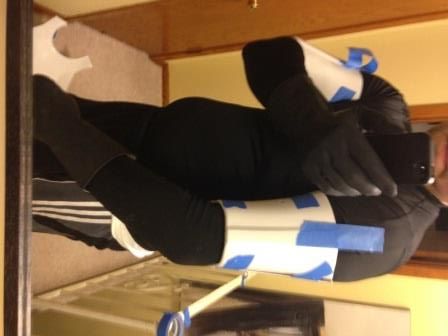
Gah!...I've been too busy lately to do much work on the kit...I did take advantage of the nice weather one of the last few days to really get in there and sand out the body pieces....Ab/Cod, Butt, Kidney, Chest, and Back. Now I can start thinking about strapping those together....I'll have to run to Tandy's in Bloomington to look at getting snaps.
Anyone know how often they go on sale? I know they had them half off sometime within the last month on the website. I'm looking to go the 100 snap route so that I can double snap on the main pieces, and then single snap the further out from the body I go.
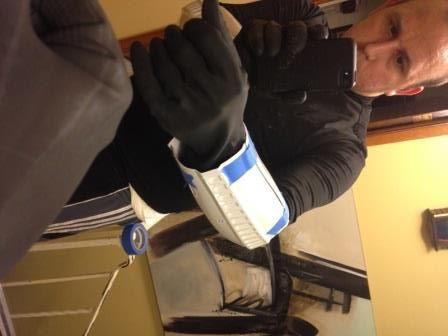
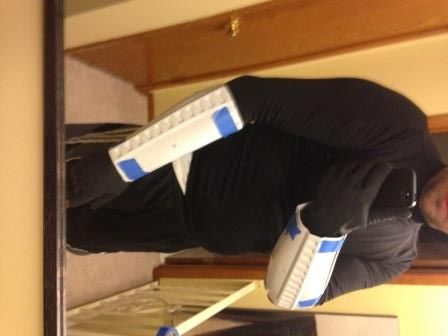
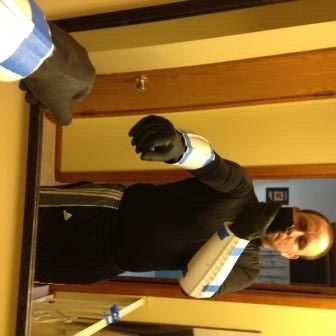
I'll get up close up pictures tonight or tomorrow of my hand guards, forearms, and biceps before I glue them.
-
Any idea how often the snaps go on sale? I know a few weeks ago they had them half off on the website.
I'm most likely going the 100 snap route so I can double snap the body and more important pieces, and single snap things like the shoulder bells, arms, thighs, etc.
-
I'm planning on using the Anovos strapping to get the spacing and everything down...and then swapping out the pieces for snaps as I work through the armor. That way you don't have to re-adjust glued on snap plates and can get the best feel for how things fit without looking like a member of the Blue Man group.
Question about the Line 24 Snaps. I've recently seen that Tandy has changed the design of their snaps. They're stamped to say "Tandy" on the backs and I think fronts now. Does this matter? You don't see the snaps anyways, right?
Someone said that the new Tandy snaps were unusable. I want to know if this is true before I put in an order.
-
 1
1
-
-
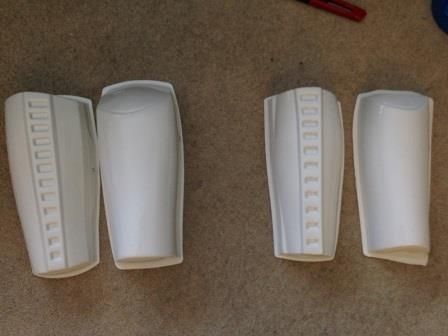
I fitted the biceps next. I don't have any trimming pictures to post right now, I will take pictures of the halves when I get home from work...but I really didn't trim off a whole lot on the sides for the butt joints. The left bicep had a big curve in it from the cut line, so I trimmed off enough to make that straight and flat. Otherwise, I just sanded them down to make the butt joints flat and they're just big enough that they'll slide down if they're not attached to something, but they're not floppy on me. Guess I've just got some guns
 .
.
-
I wanted to start with the Forearms. I figure I would work up the arms to the shoulder bells....then the torso, and then the thighs, followed by the shins. The 2 most iconic things for me on the outfit are the helmet and the forearms. I started with scoring/snapping.
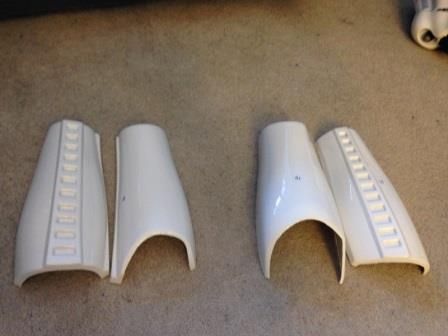
Now to rough fitting and cleaning up the butt joints on the front and back.
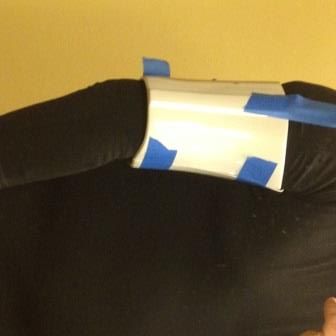
I have enough room in the wrists to get my hands through and the forearms slide up and down without effort. They will be connected to the biceps, so I'm not terribly worried about the extra room. I have about 1/3" gap all the way around between the armor and my arm, so I believe I'm good as the recommended number I remember hearing was 1/2" gap. The return edge has been removed and I'm at the point of gluing them together if things look good.

-
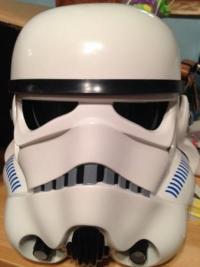
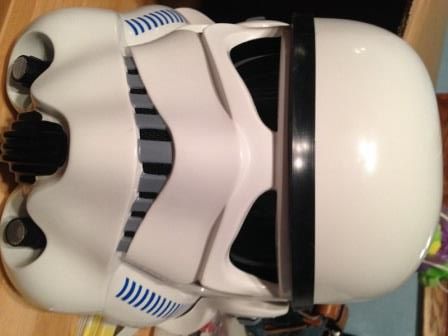
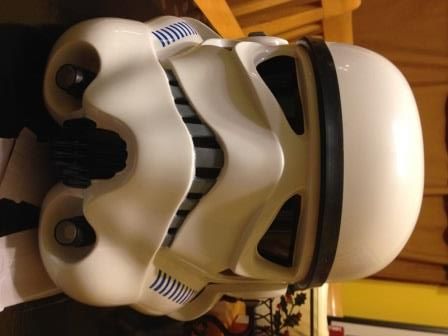
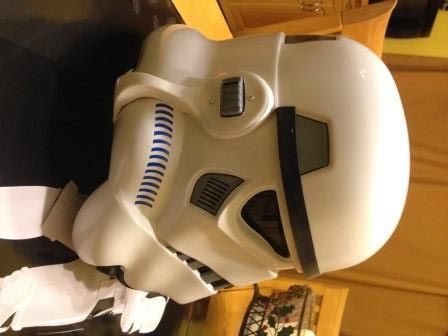
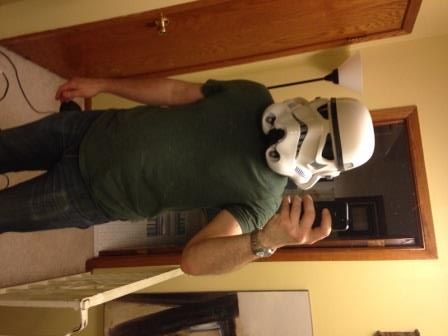
I'm also keeping the velcro lense install method, not switching over to a screw in set up (at least not yet). I dremmled a notch into the visor so that wasn't bumping into my nose. Highly recommended if you go this route. This is also the helmet after cleaning up the eyes, all that is left is adding the helmet pads I'm making myself, and then looking into a fan system coupled with a voice mic for an iComm and Aker set up.
-
Looks like I've bound and gagged a trooper. It was for the best. The plasti-dip has made the helmet much less disorienting (all the white and light) and now I can go about adding all the fun stuff back to it.


-
I had to try the helmet on. When I first looked at it, I knew that the hard hat liner would have to go, the eyes would have to be trimmed, and the mouth mesh would have to be re-glued. I was going to Plasti-dip it anyways...
-
This was BBB day. I could barely fit this box into my Focus. I had the seat reclined all the way back and moved as far back as it could go. The thing kept turning the radio off on me when I would come up to a light.
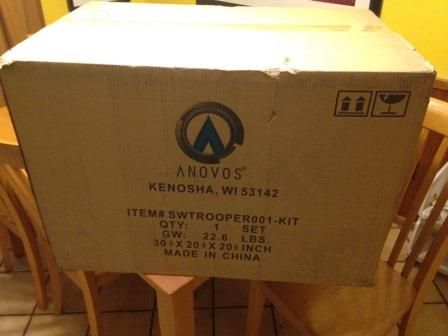
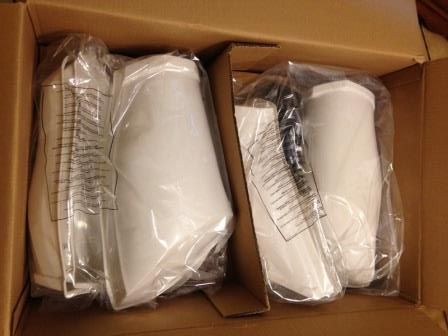
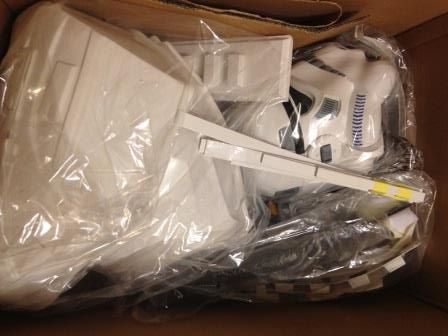
The contents came in 2 layers. It was all a bit overwhelming at first....
-
Hello everyone, I figured it was time to actually make a build thread as I'm finally getting into the meat and potatoes of this kit. I've had it since sometime in February and put it off to the side for a few weeks as I looked at other build threads and did my research.
I completed the rough trimming in a day or two and stopped again, not wanting to cut into the pieces for fitting as my soft goods hadn't arrived yet. I got my undersuit and gloves Monday and now I'm pressing on with fitting and then gluing.
I need outside opinions and other sets of experienced eyes to make sure things look/fit good and that I'm on the right track. I already know that I've got about an inch gap on each side of my Ab/Kidney plate connection, so I'm debating on shimming or not. I could really work out and tone up, and that gap would disappear. I am aiming for Centurion CRL's and will be building it according to those standards, with the possible exception of the issue mentioned above, and possibly re-submitting for Centurion when I can suck it in and close the gap.
Update #1: 4/11/2016 - Added work from over the weekend. Helmet Accuracy updates, TD work, and Shin contemplation
Update #2: 4/12/2016 - Finished the Thermal DetonatorUpdate #3: 4/17/2016 - Hosted my first armor party, worked the Anovos belt, sorted out the shins, worked the thighs, glued the left, front forearm and bicep....and other various trimming and sanding.Update #4: 4/20/2017 - Posted pictures of completed left arm, velcro'd padding, and beltUpdate #5: 5/18/2016 - Posted pictures of hot water bath work, button gluing, and finished arms.Update #6: 6/1/2016 - Posted pictures of thigh and shin gluing, more hot water bath shenanigans.Update #7: 6/9/2016 - Completed the front of the thighs and shins, glued my shoulder bell elastic that goes around the bicep, had an Aker Amp order problem, received my iComm, received my HFx E-11 Centurion, made some of my double snaps for the main body armor piecesUpdate #8: 6/9/2016 - Completed the thighs, working on Kidney Plate shims, Have front of shins glued, deciding on the backs of the shins. -
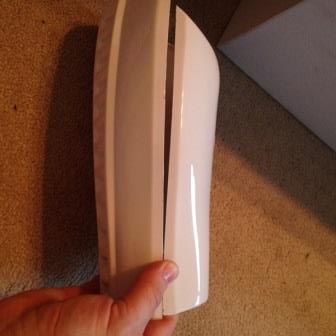
I think Ukswrath's method of marking the butt joint and return edge and clamping a metal ruler to use as a trimming guide will get you 90% there in having a flush edge, but then you'll want to do a quick sand just to make sure that nothing is going to jump out and jab you. I think I'll go that route and just do my curve return edge sanding using a dremel. That will most likely get the job done for me...unless someone lets me borrow their belt sander when I ask around.
-
I've got a few TK armor sets for Pep files...and none of them are accurate. I'm actually hoping to scan in my Anovos armor and make pep files based off of those pieces as they seem to be much more on par with what TK armor should be. I'm still doing it, but at a much slower pace and as a side thing now. I bought my real kit that I'll use to pass my CRL standards to get into the 501st.
I did come across a great set of FOTK pep files that I'm focusing on as I heard the base price of that armor through Anovos would be at least $1500 to $3000. That's a little rich for my blood. I would love another OT TK set so I could do a Shadowtrooper...but I'd love a FOTK set as well.
-
Hello everyone...I'm relatively new here...soaking up as much knowledge as I can as I am attempting to build my Anovos armor kit.
I've always wanted to dress as a Stormtrooper. I've loved Star Wars from the first time I saw Episode 4 when the Gold Box Edition VHS tapes came out. I always thought the Dark Side was much more interesting than the light (who wants to run around in bath robes?
) and if not Darth Vader....a Stormtrooper was the next best option.I'm here because I saw the kits released by Anovos and pulled the trigger. Too late perhaps as when I bought them, they were $650, and I missed out on the $350 sale. I would have gotten an ATA suit, but the wait was about 8 months and I really wanted it sooner than later...plus it came with all of the soft parts, minus the boots. What I really hope to do is bring the magic of Star Wars to others, especially the kids. I'm hoping to get involved with some charity work and do what I can to give Star Wars the possible face it can have.
This leads me to a question, and I've already registered with Central Garrison....is there anyone in the MN area who could aid me with properly fitting the armor and making sure it looks up to par? It's my first set, but I want to do it right. Thanks everyone!
-
Question, what would be the best way to go about acquiring an accurate as possible, centurion level E-11 Blaster that would keep the cost to a minimun? I don't have much experience working with wood, metal, or PVC...and if anything, would keep it to PVC with a Resin Mod kit.
I would love to just buy one outright, but understand that you're talking anywhere from $125 to $300 for an accurate, complete E-11 Blaster.
Anovos Helmet Rebuild
in Assembly, Mods, and Painting
Posted · Edited by E_Palpatine
Did you end up going wit the M3.5 Brass screw for the ears and using the supplied ear screws for the TD?
Answered my own question, love it when that happens. Thanks for the research and trial and error...I'll be swinging by HD to pick up those screws and update my ears. What did you use to paint them white?