

JDTrooper
-
Posts
25 -
Joined
-
Last visited
Content Type
Profiles
Forums
Gallery
Articles
Media Demo
Posts posted by JDTrooper
-
-
That's awesome. Thank you Andrew!
-
Hey James Sly or myself will be with your shortly. Can you do us a huge favor and post your EIB app link at the beginning of this thread. Thanks brother
Tony - Absolutely, done. Thanks!
-
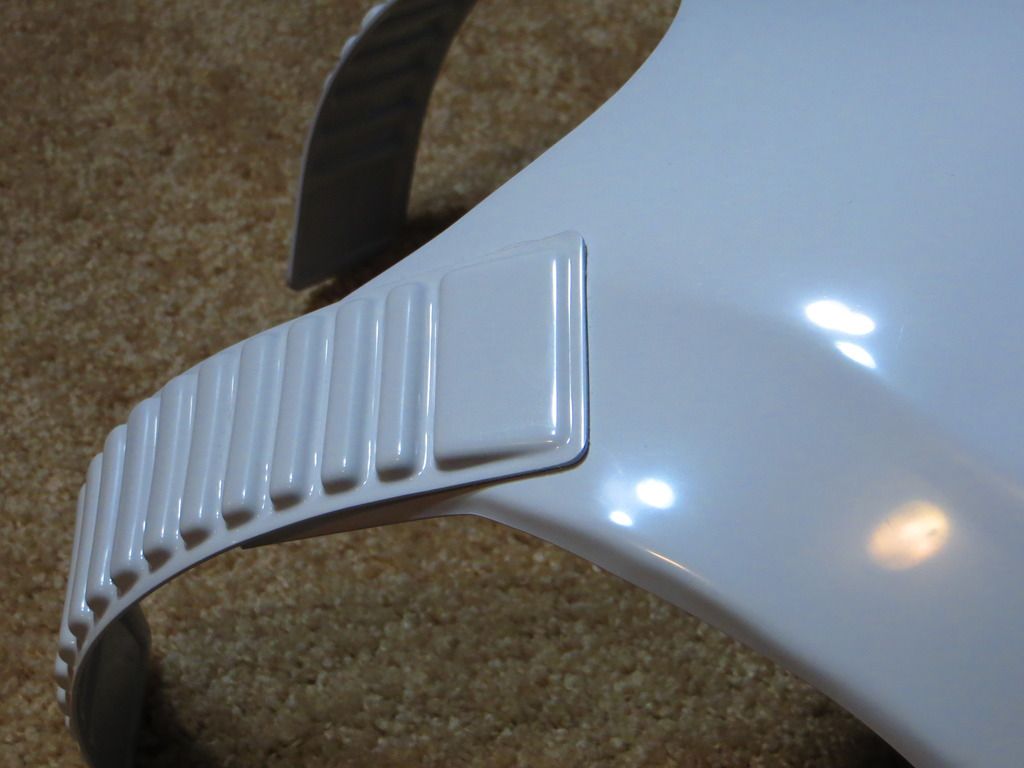
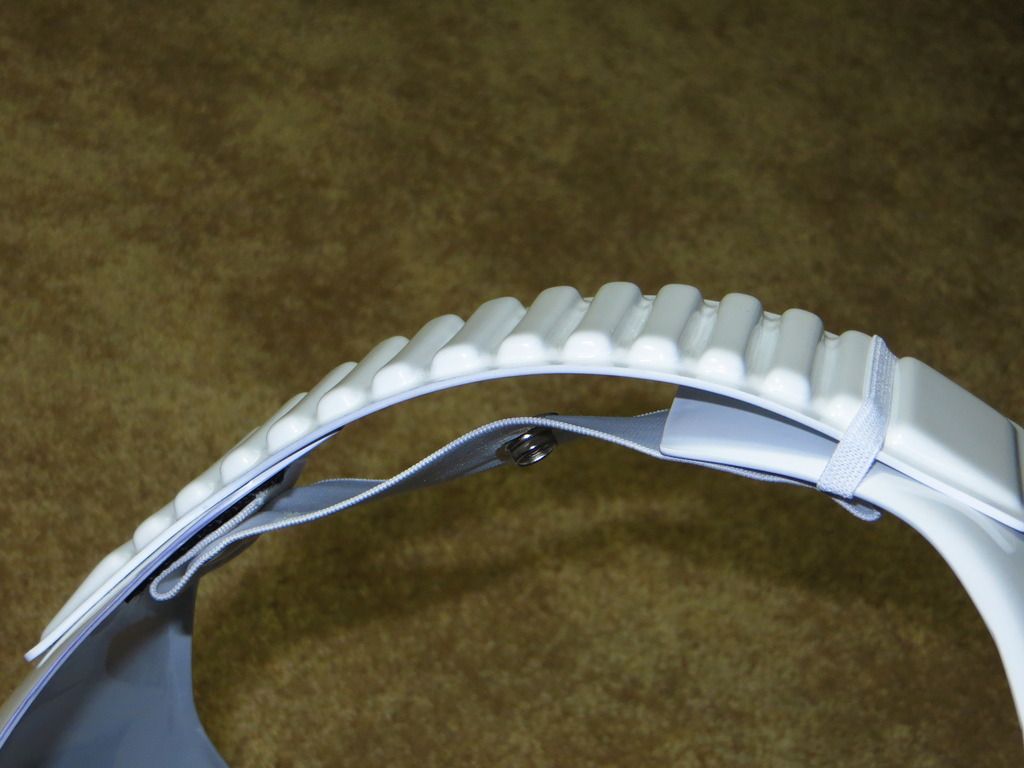
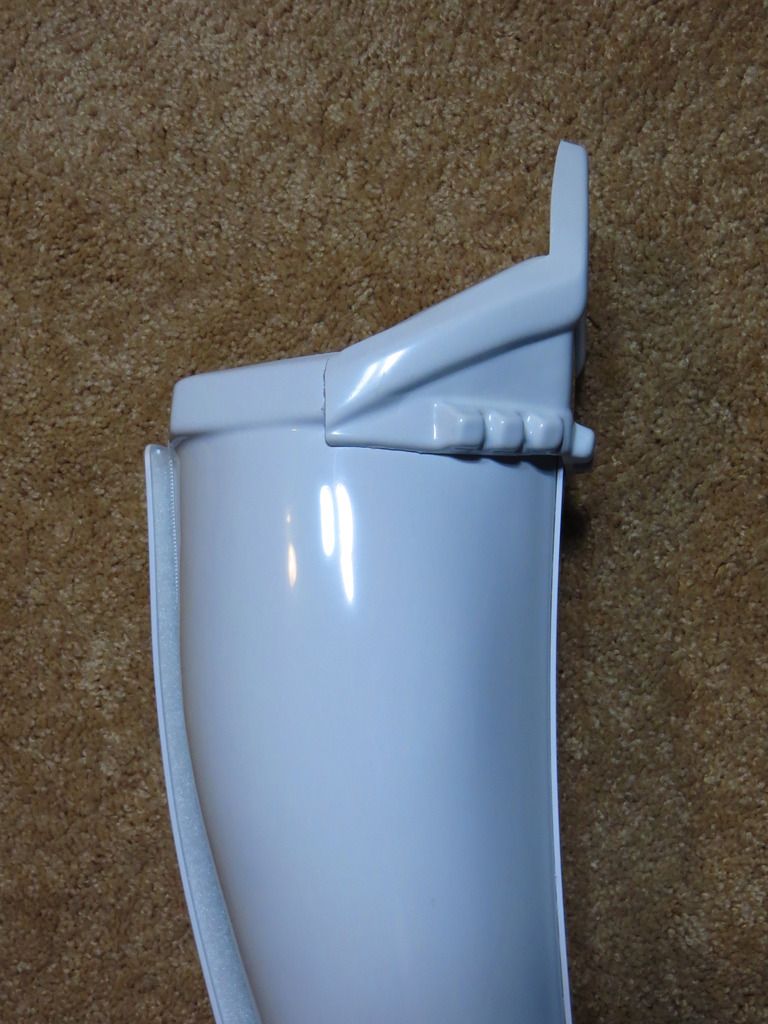
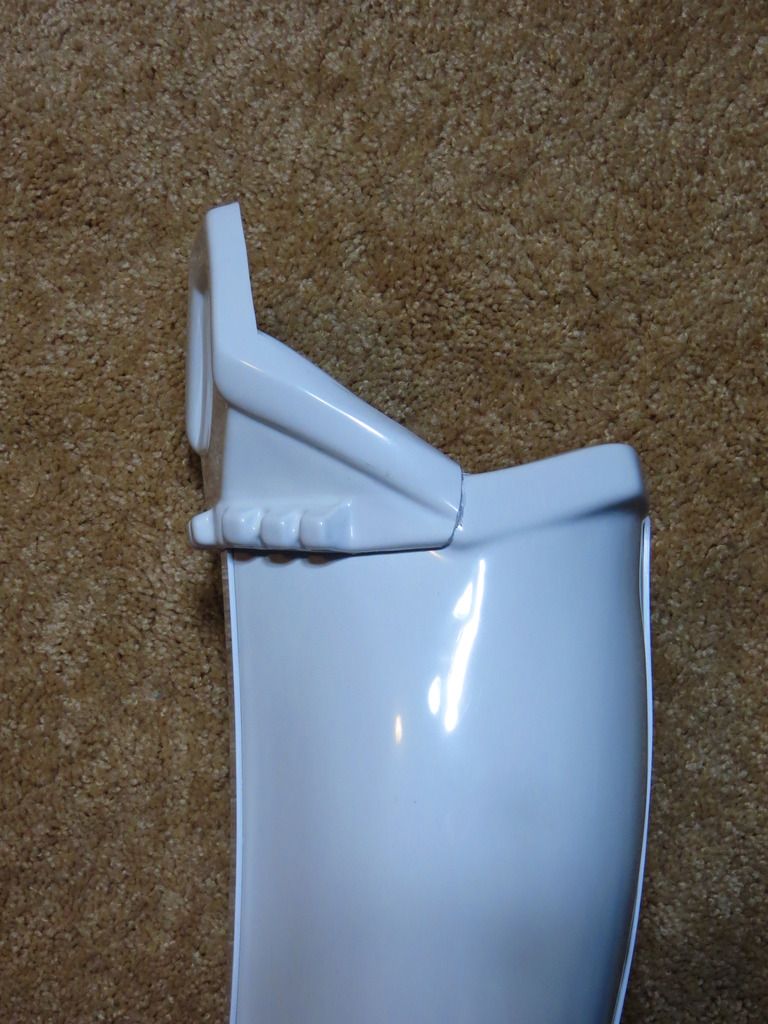
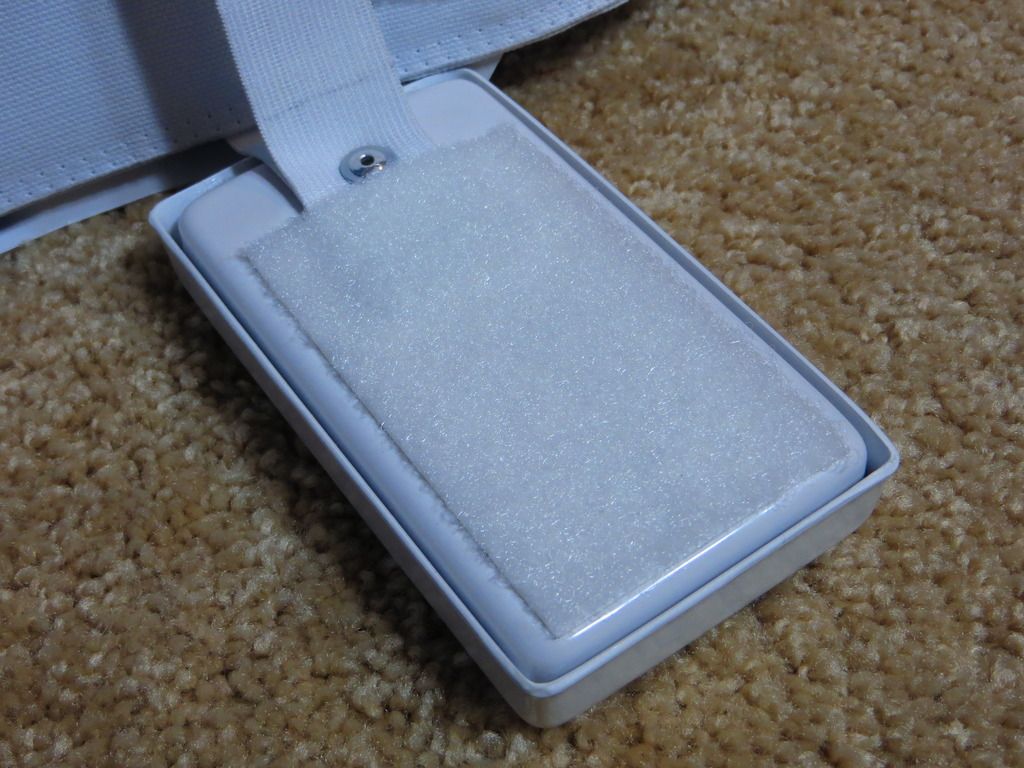
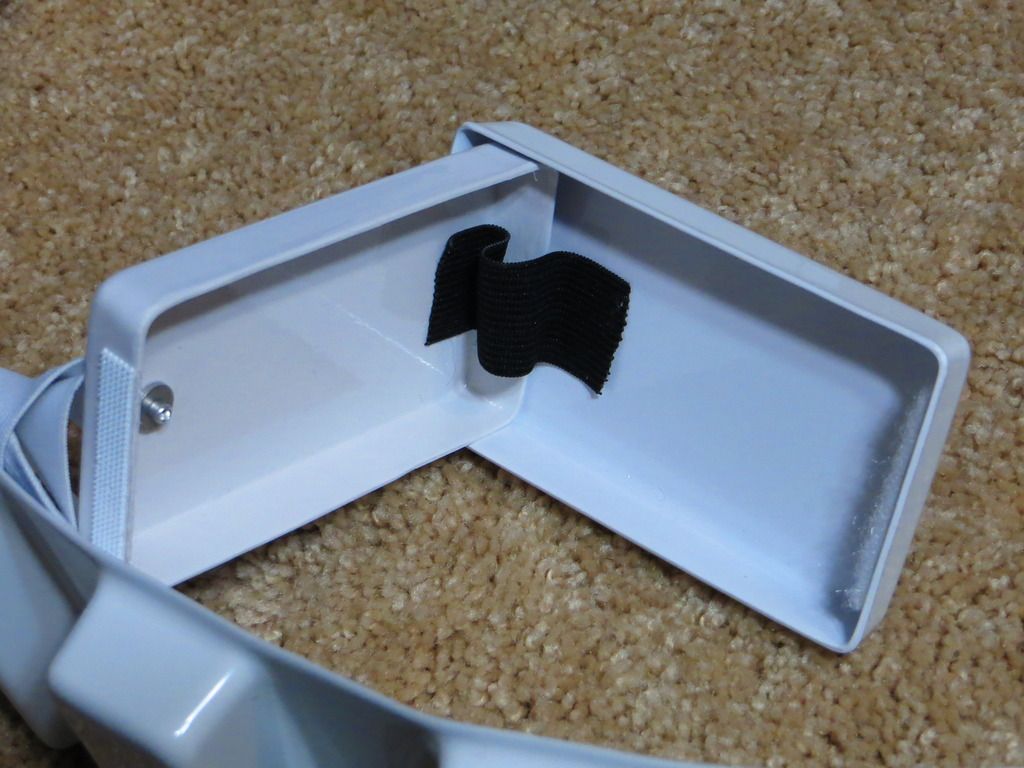
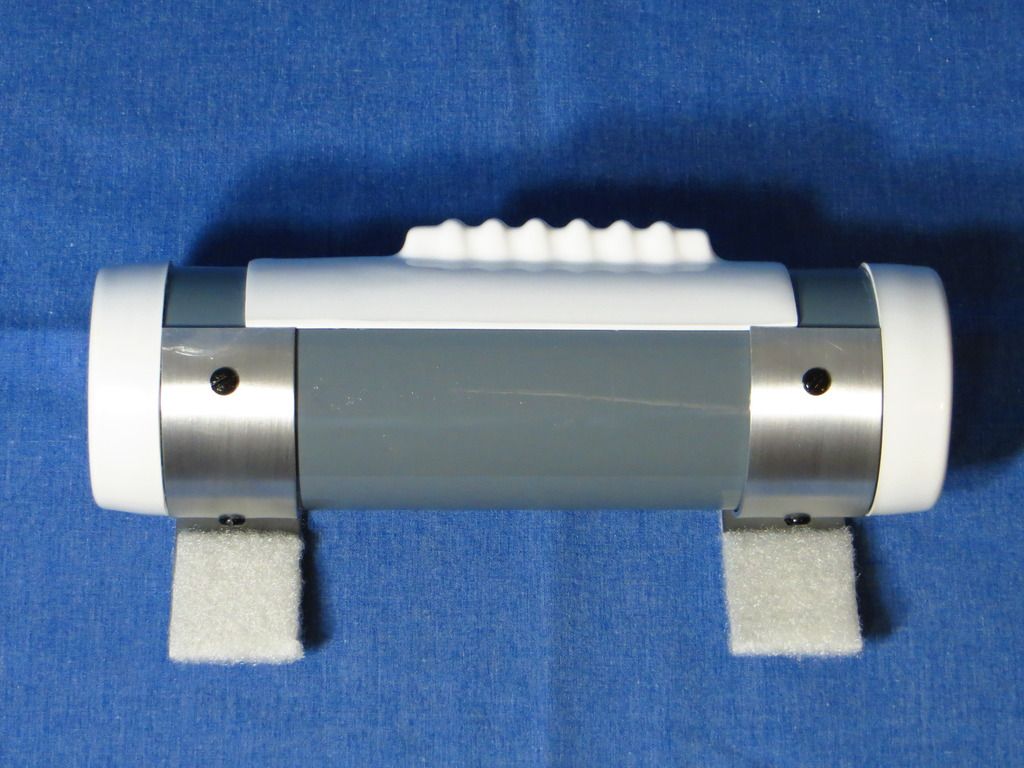
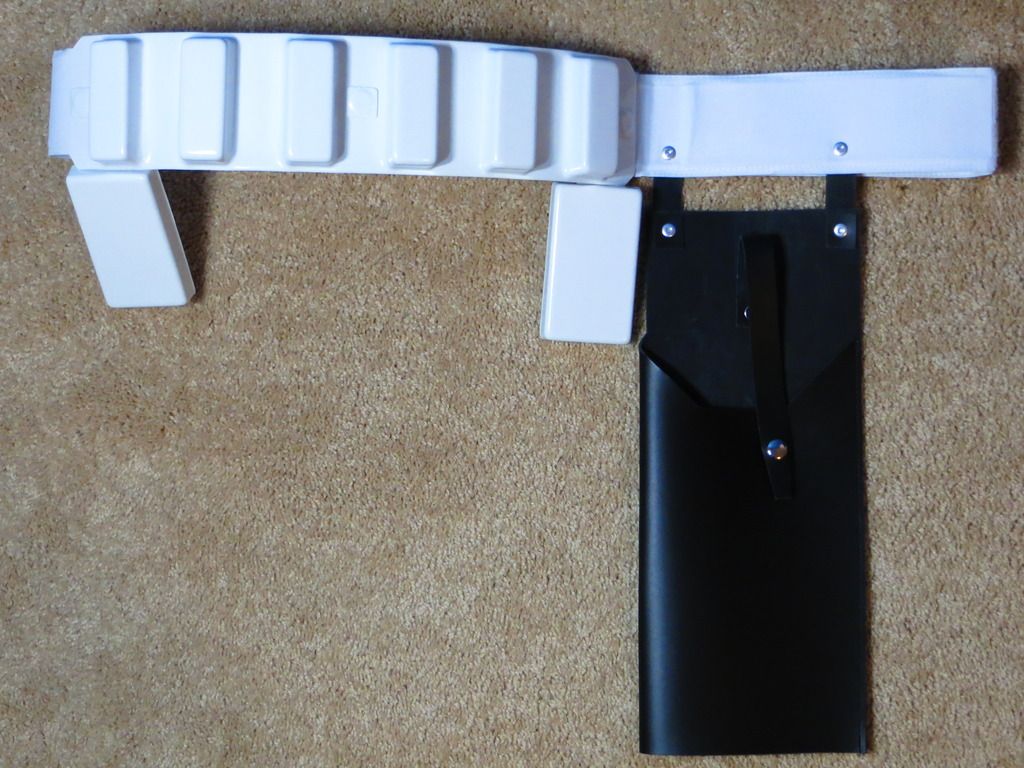
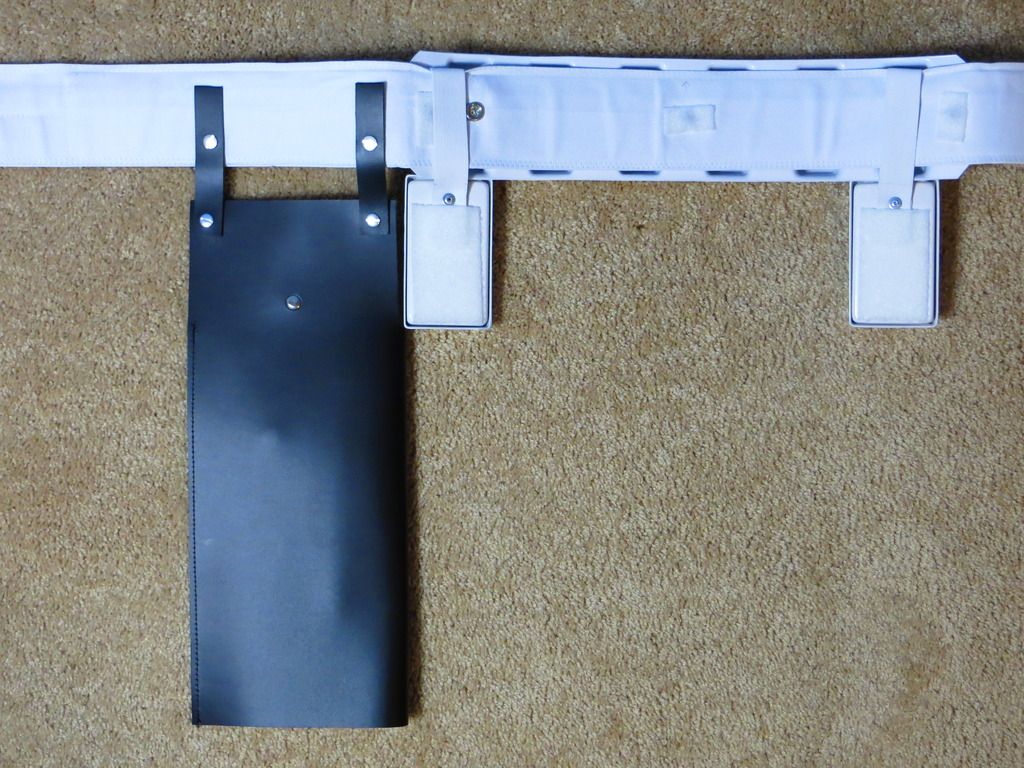
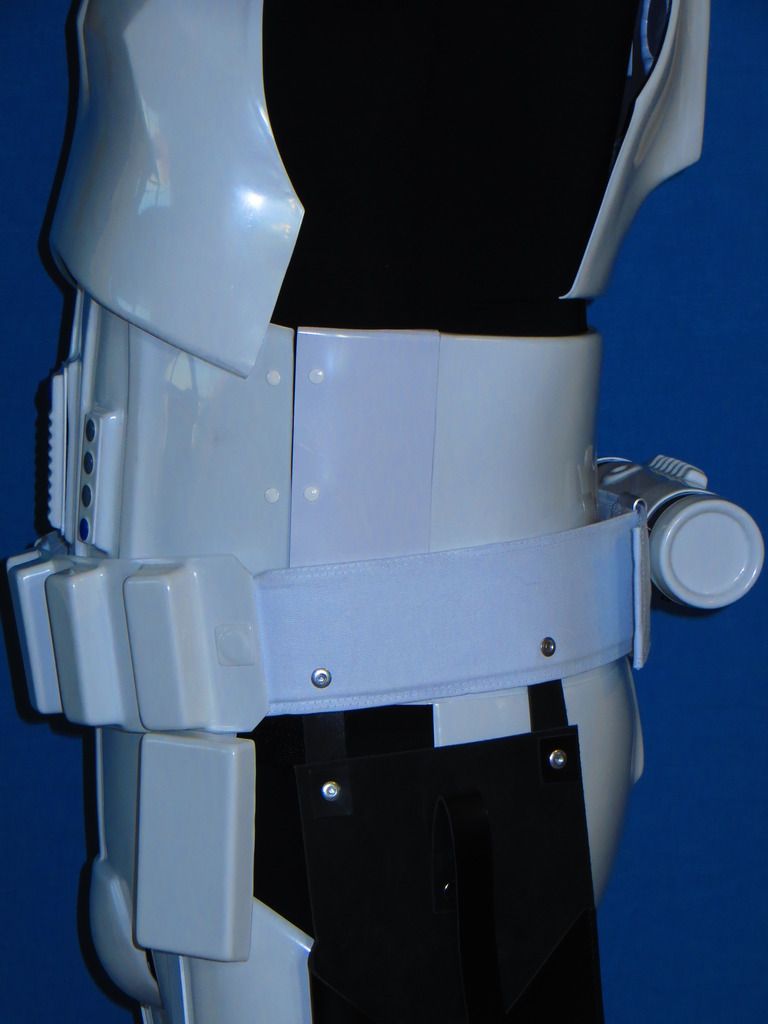
Can you share more about the Velcro on the TD, how it attaches to the belt I assume to keep it from being lifted off? I've been wondering how to make it more secure.
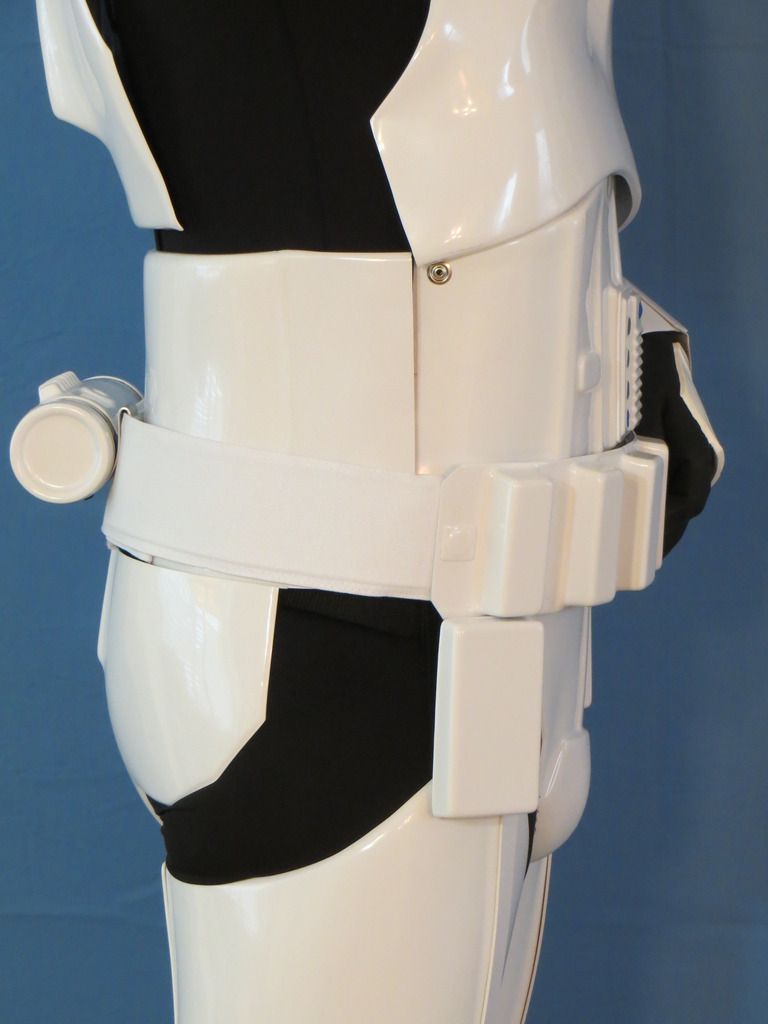
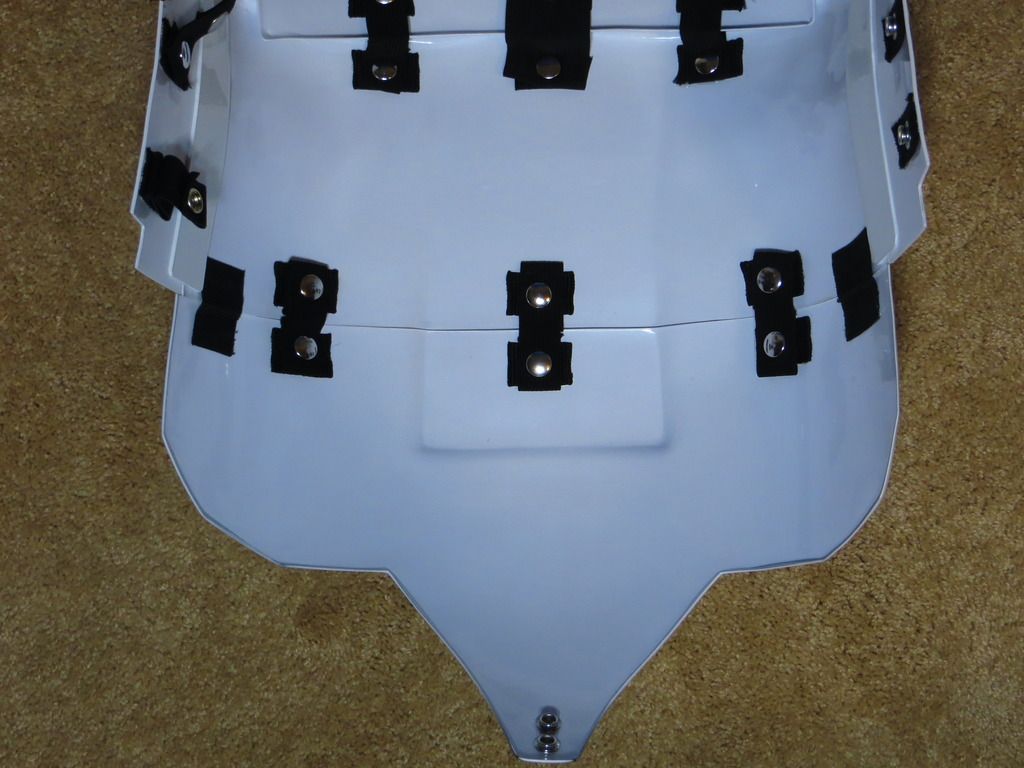
I added the Velcro to the TD clips for a couple reasons. One, it keeps the TD better secured to the belt. And two, it helps prevent the metal TD clips from scratching the kidney and butt plates. If you have any other questions, just let me know. Thanks!
-
 1
1
-
-
Great Tip from Jay

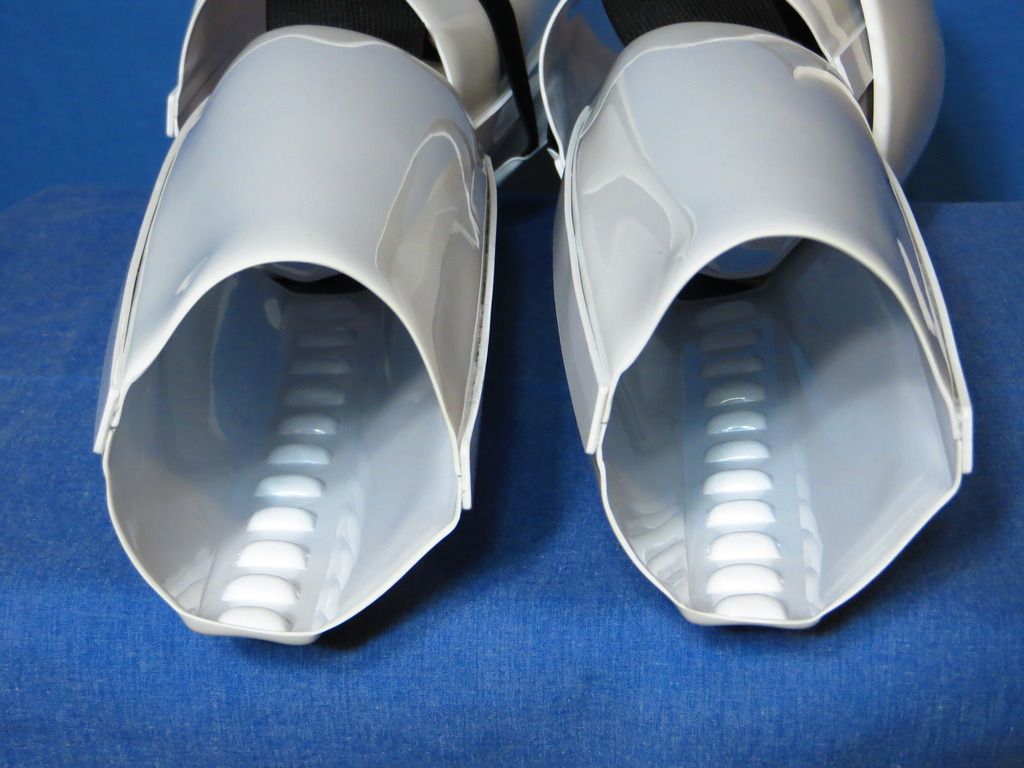
Per your recommendation, I have cut out the excess return edge from the front of the forearms. Thank you all for the compliments and recommendations.
-
1
-
-
Basic Information:
Name: James Suerdieck
Legion ID: 11075
Garrison: Garrison Carida
Mandatory Information:
Armor Maker = AuthenticProps (AP)
Helmet Maker = AuthenticProps (AP)
Blaster Type = DoopyDoo’s
Optional Information:
Height = 5’ 10”
Weight = 185 lbs
Boots Maker = Imperial Boots
Canvas Belt = TKittell
Hand Plates Type = Trooperbay
S-trim = Trooperbay
Electronics = TK Products
Neal Seal Type = Darman
Holster Maker = AP
TD Belt Clip = ukswrath
Rivets = Echo
Inner Drop Boxes = kwdesigns
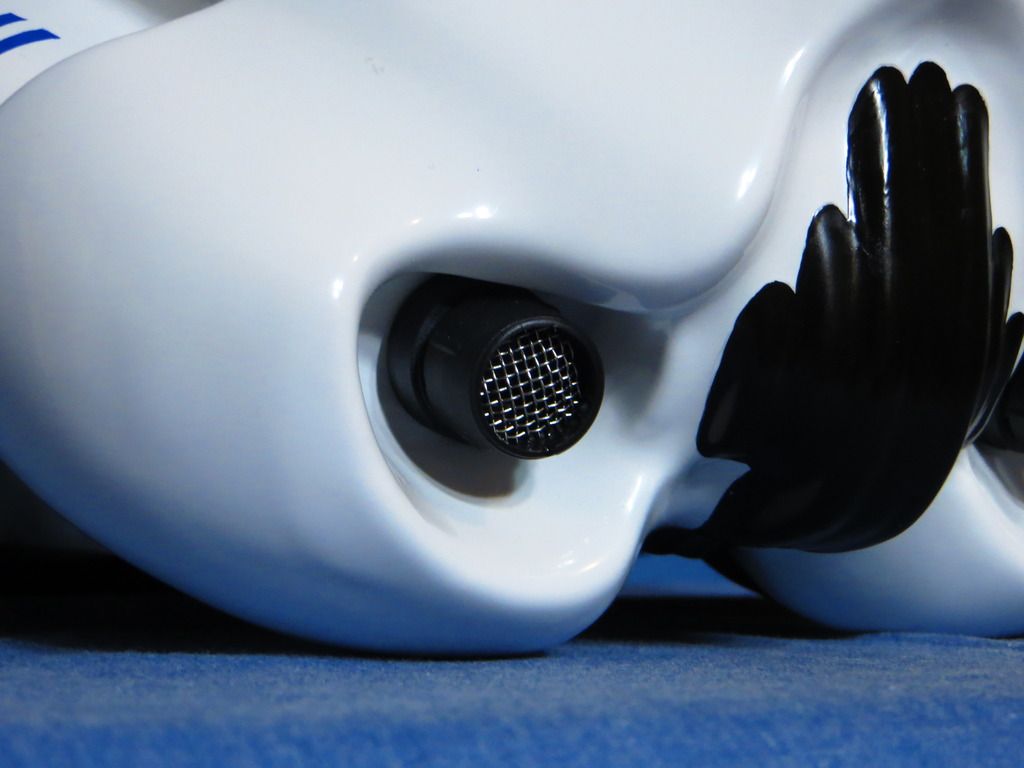
Mic Tips = VaderPainterStudios
EIB Application Link: http://www.whitearmor.net/forum/topic/34061-tk-11075-requesting-anh-stunt-eib-status-ap-512/
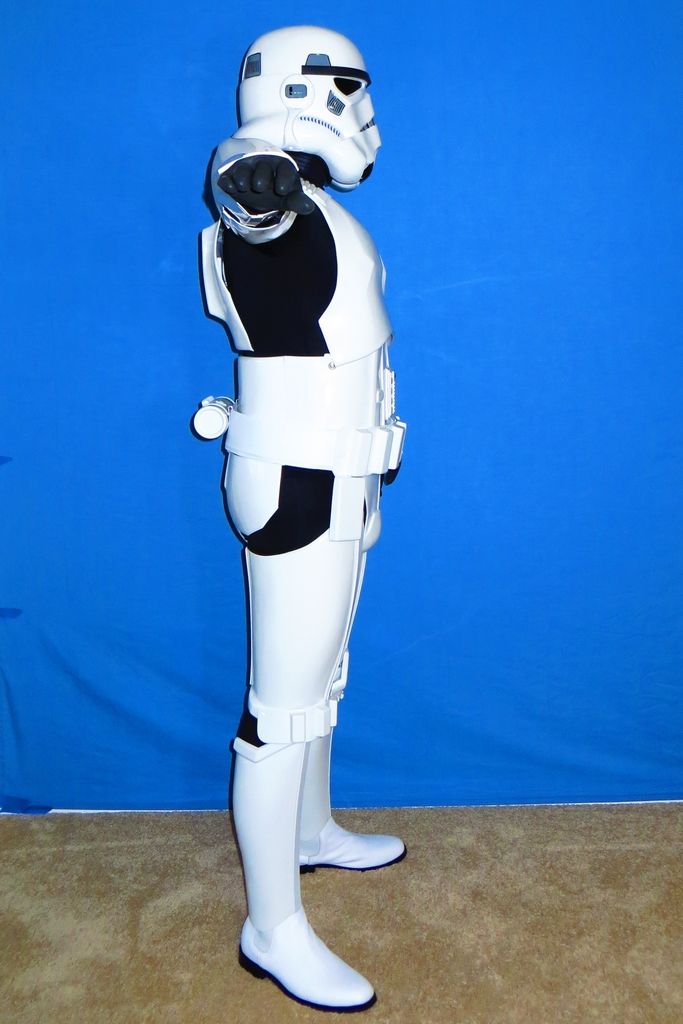
Full Body
Front – Arms at side
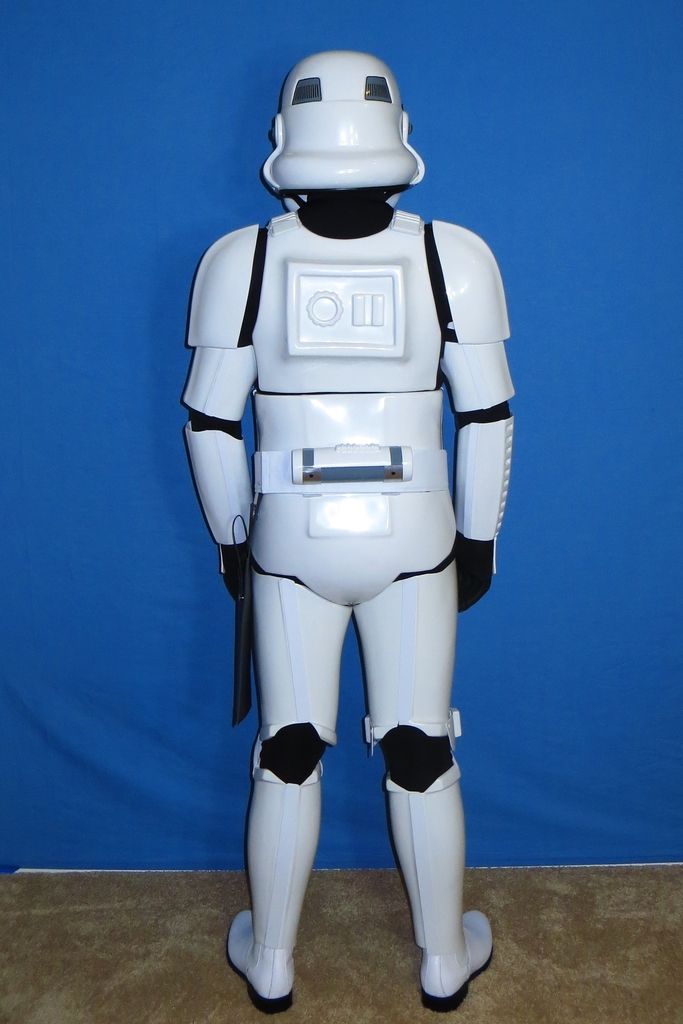
Back – Arms at side
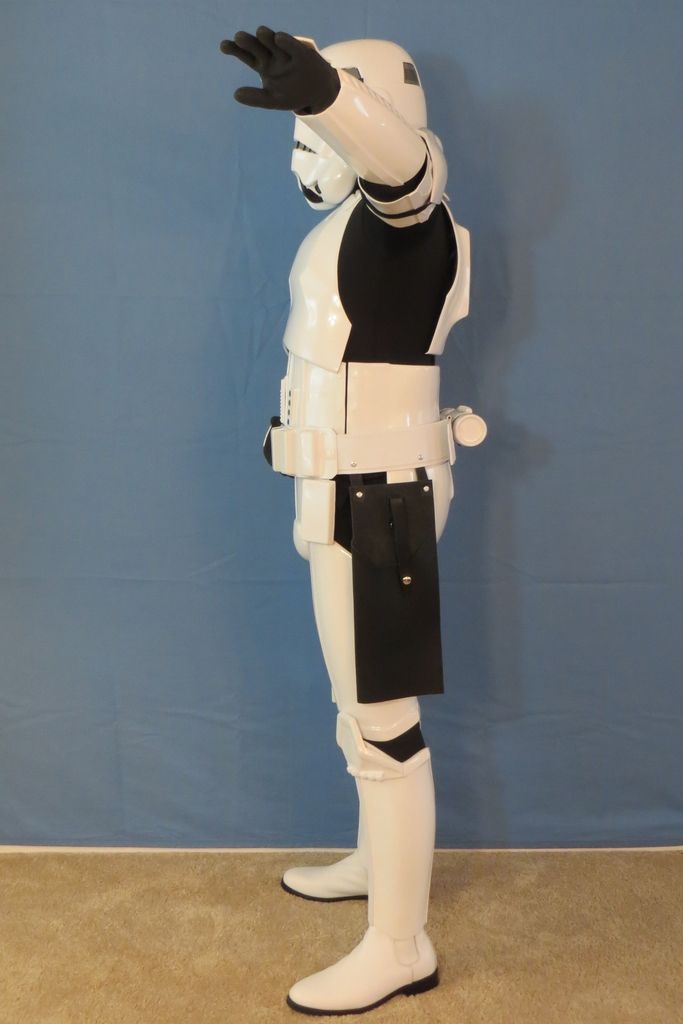
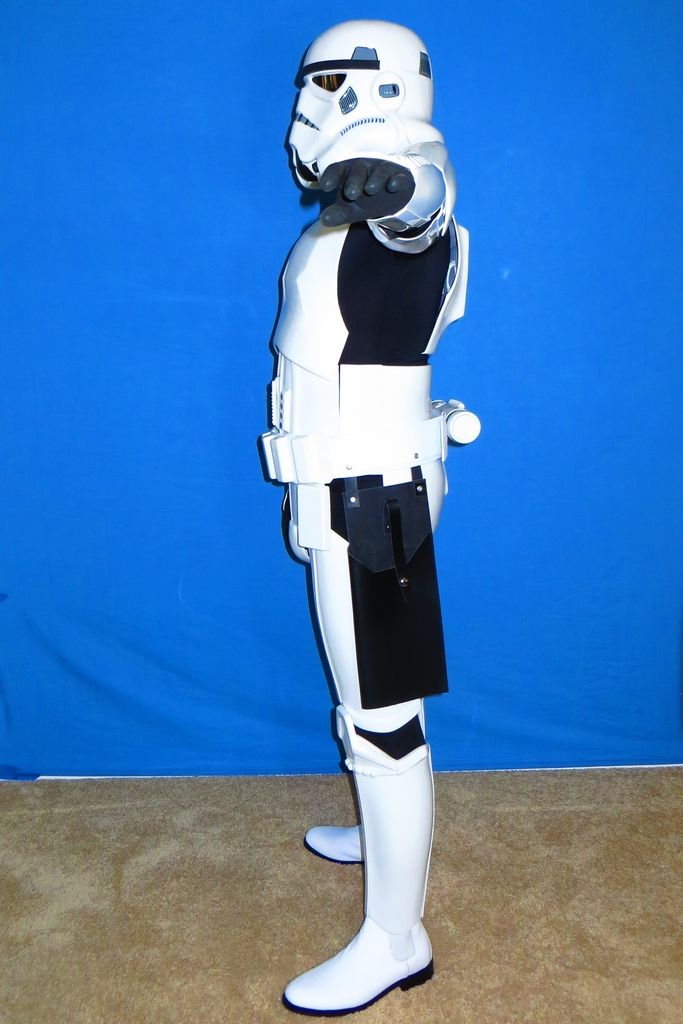
Left – Arm raised
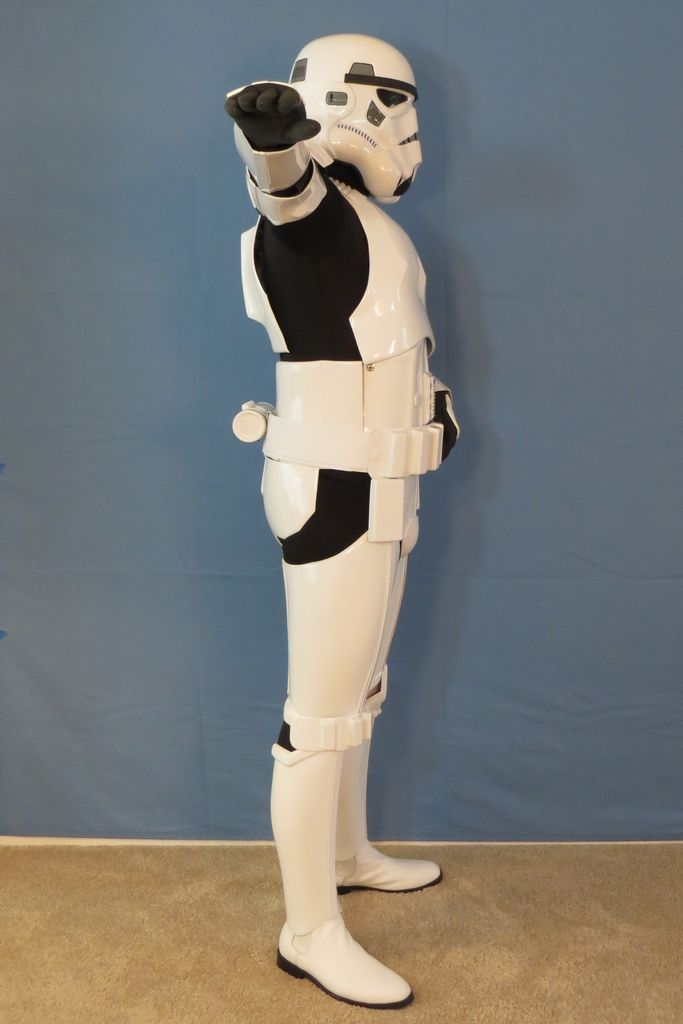
Right – Arm raised
Right Side Detail – Arm raised
Left Side Detail – Arm raised
Armor Details
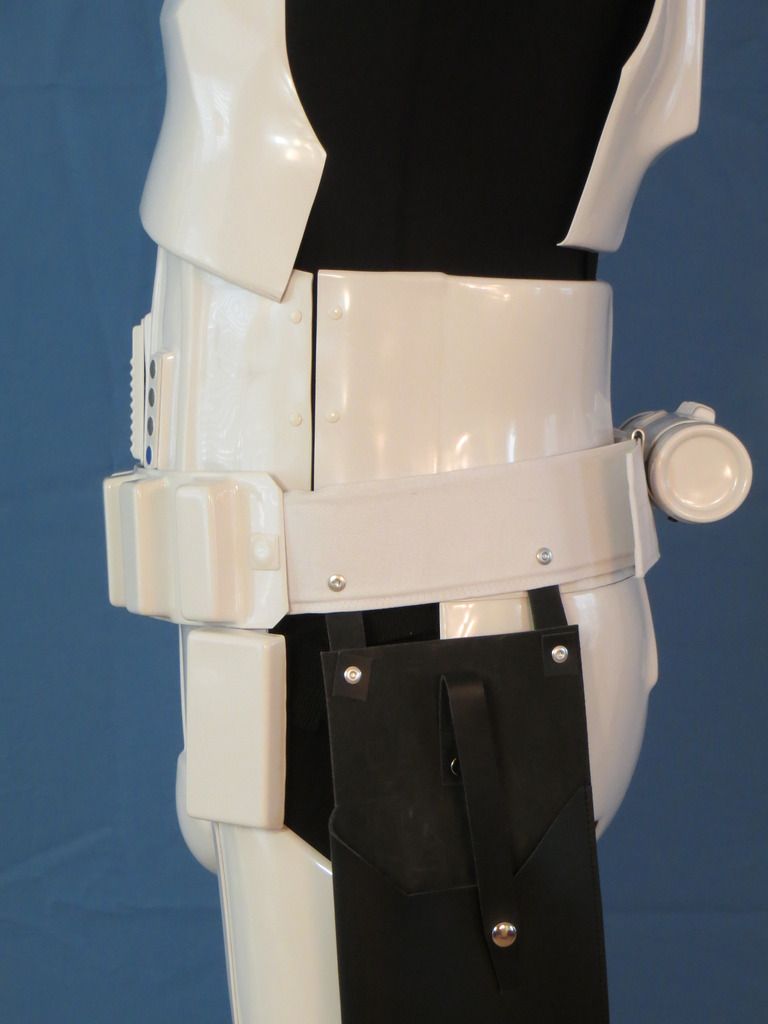
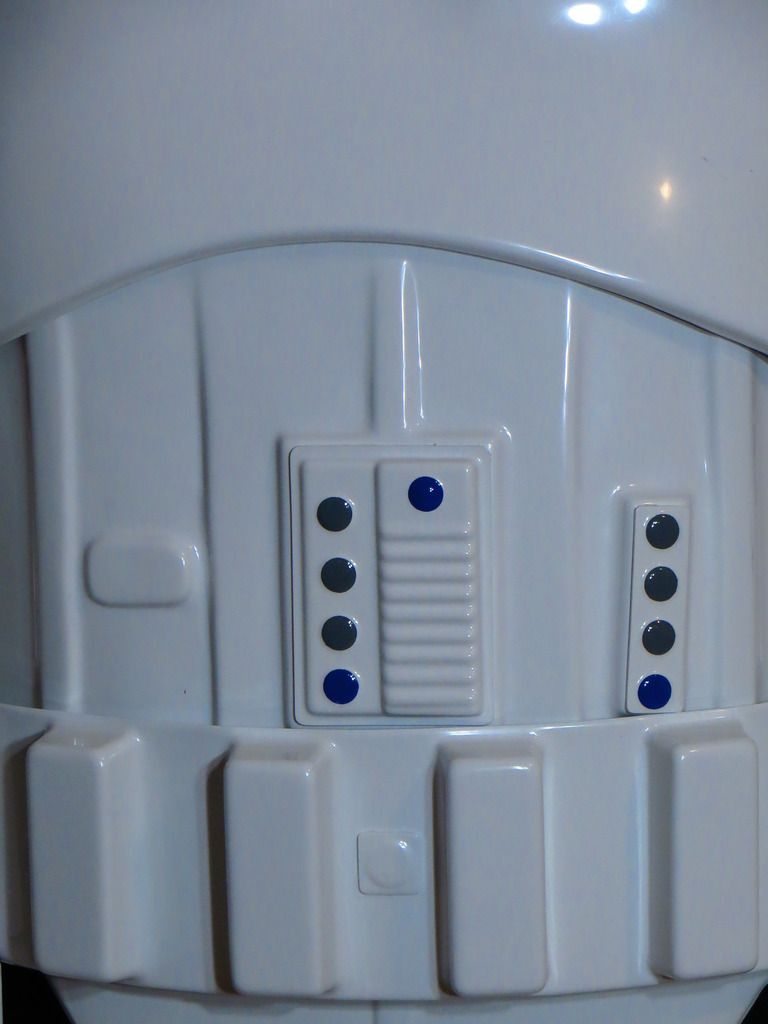
Abdomen Details
Butt/Kidney – Fixed: No
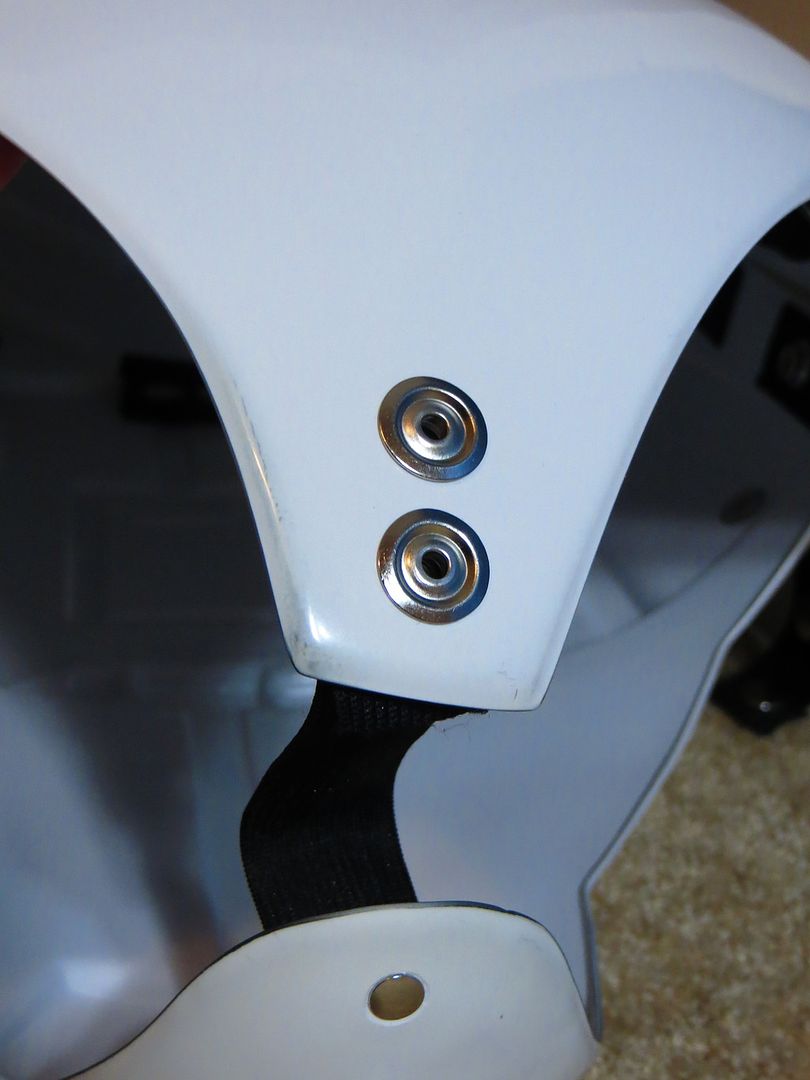
Shoulder Bridge Back
Shoulder Bridge Front
Back/Chest Connection
Thigh Pack Attachment
Knee Plate
Drop Box Back
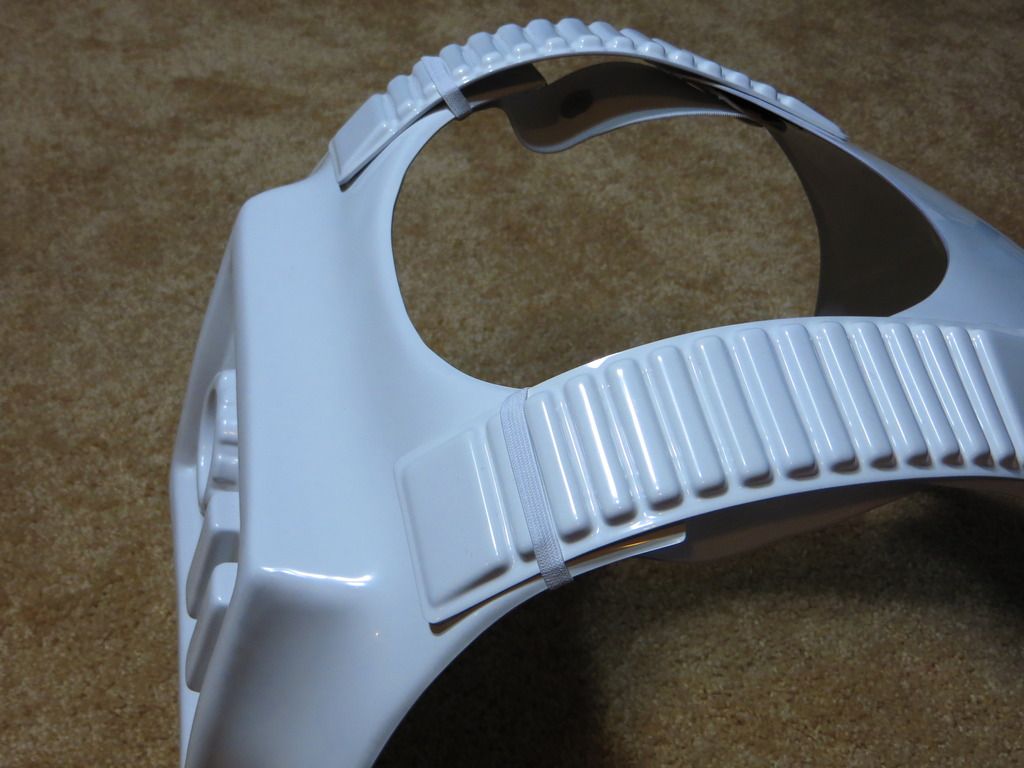
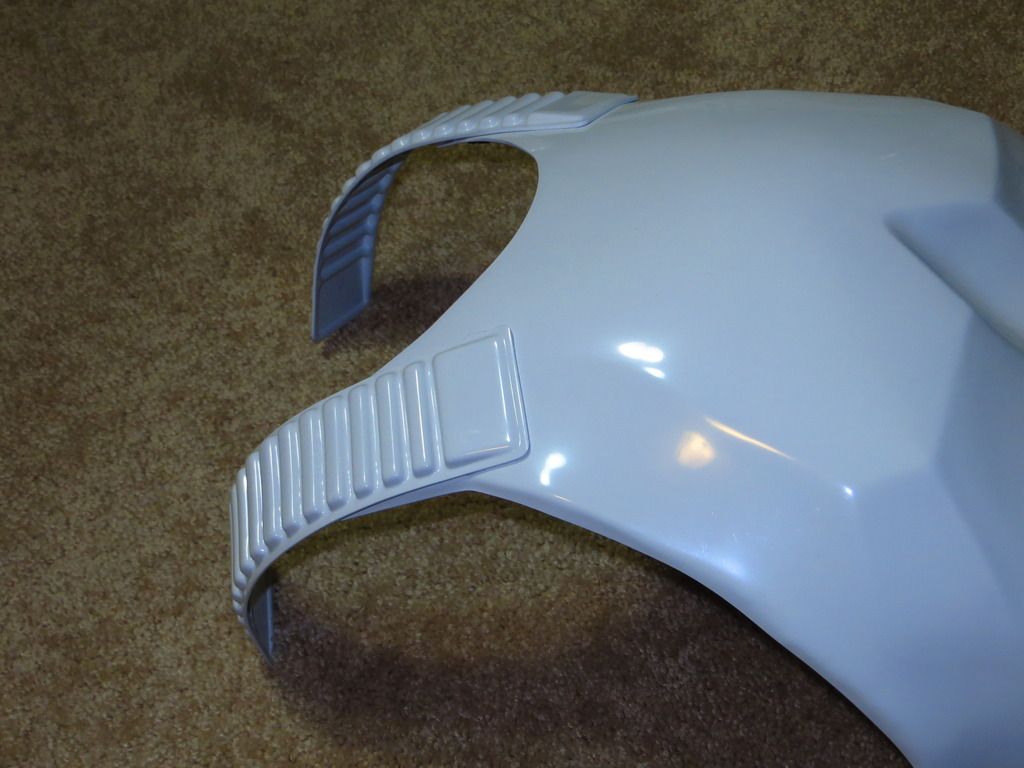
Cod and Butt Plate Attachment
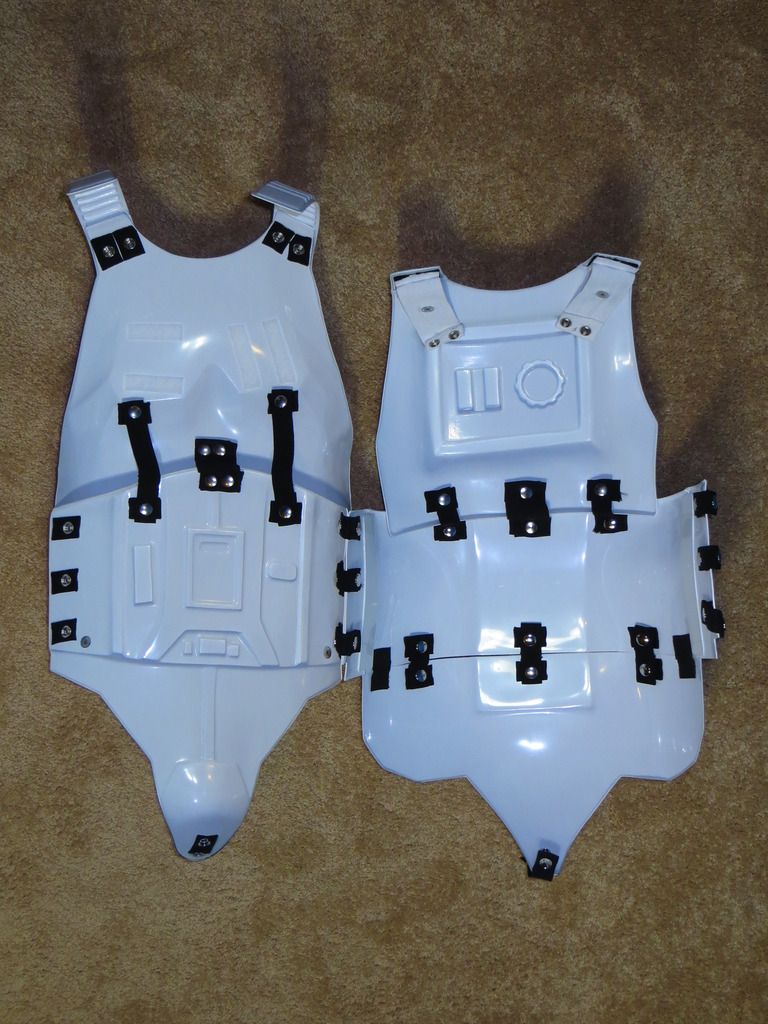
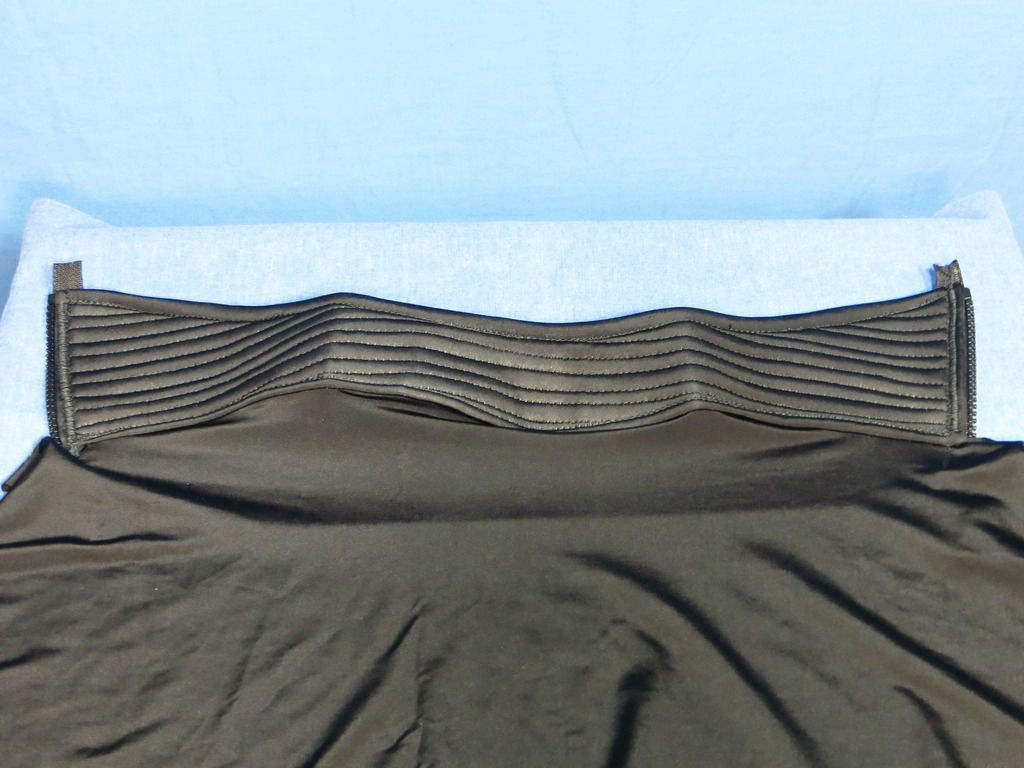
Interior Strapping
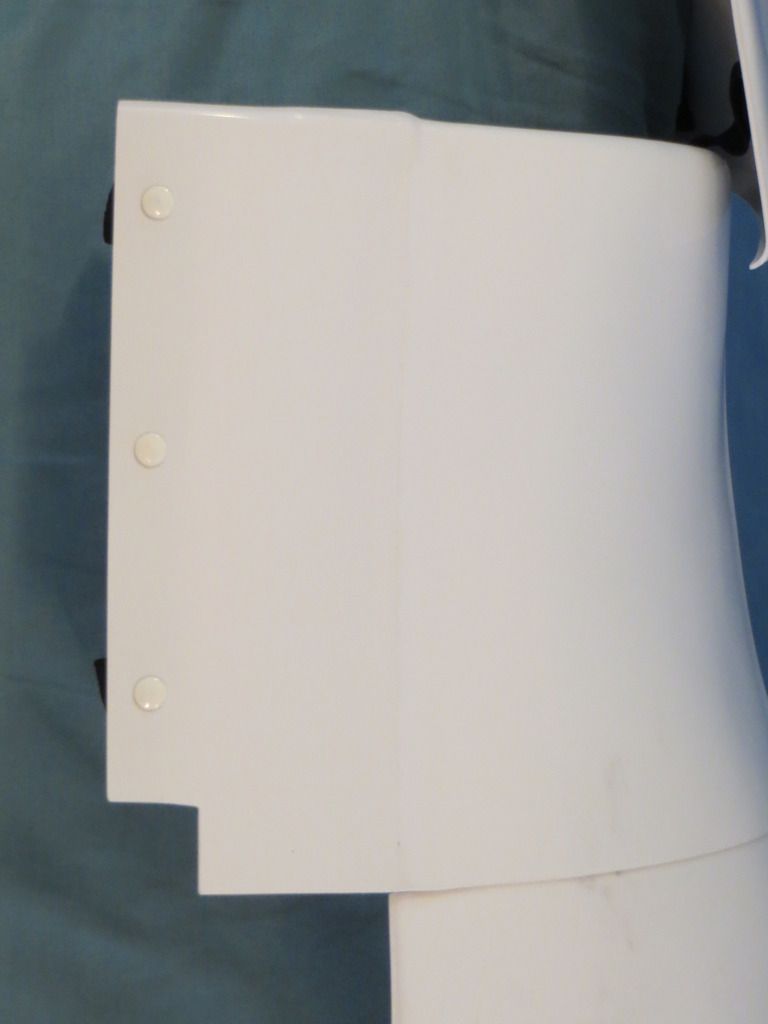
Kidney Plate Notch (& Side Shim Detail)

Wrist side of Forearms
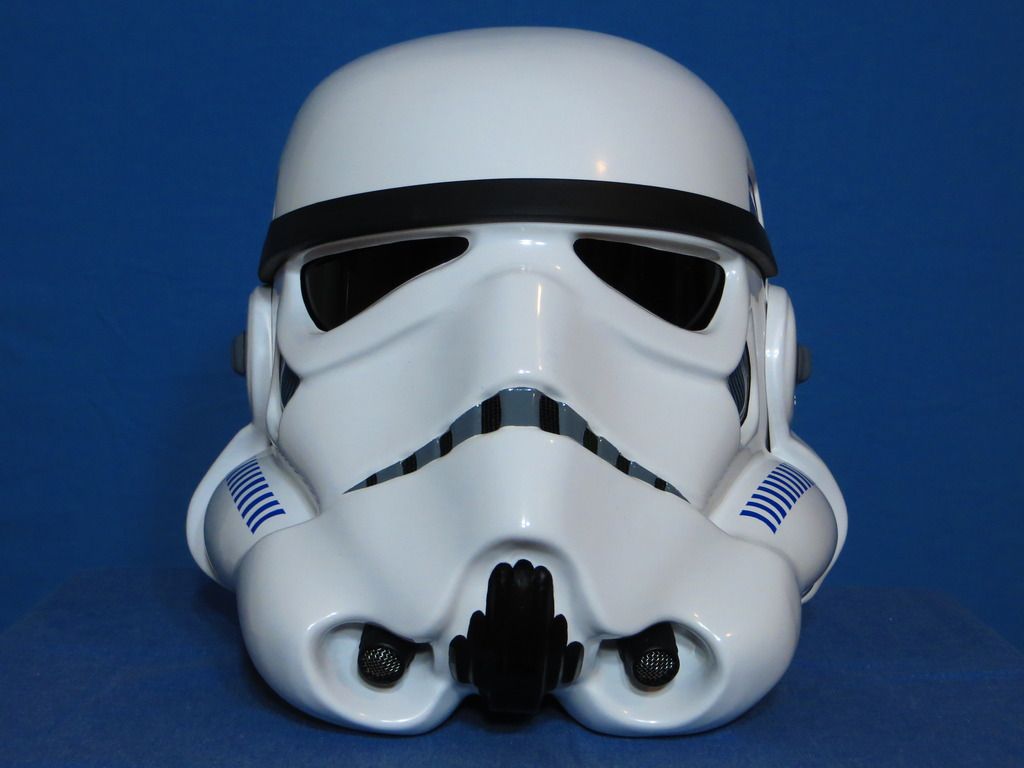
Helmet Details
Front
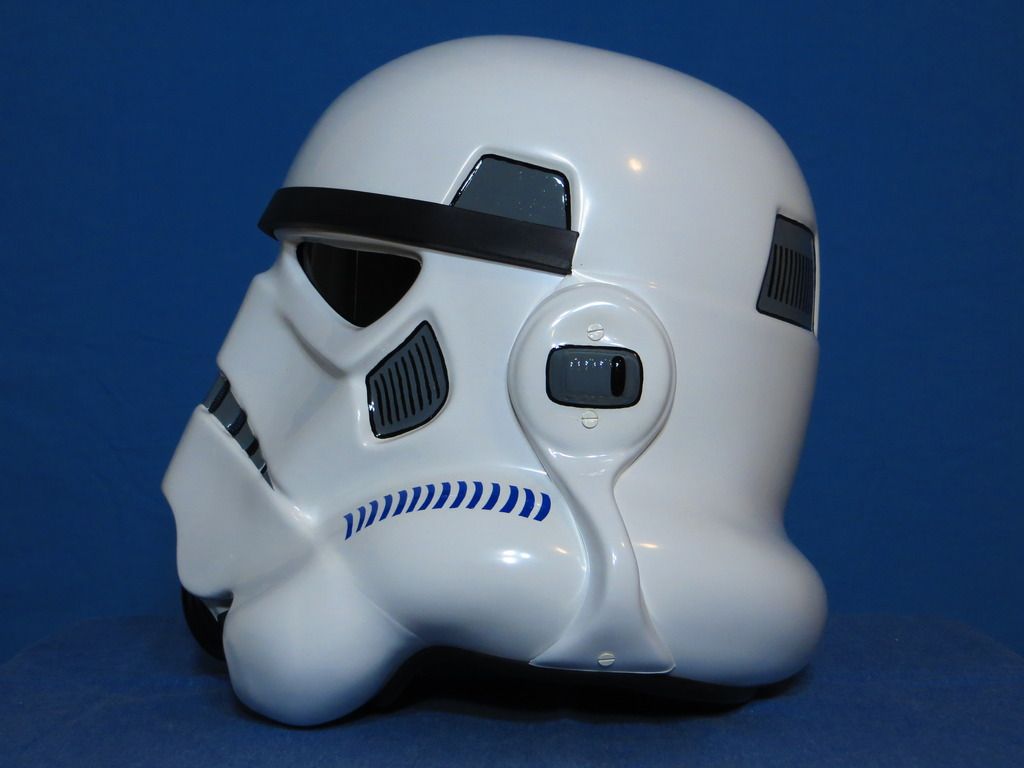
Side – Right
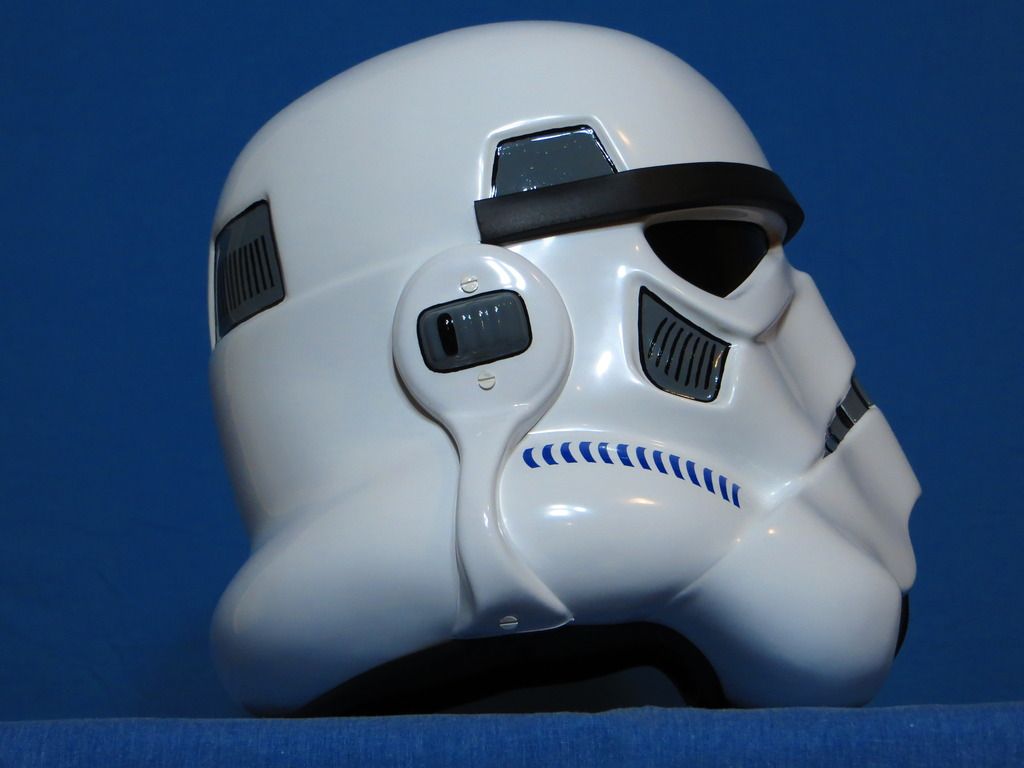
Side – Left
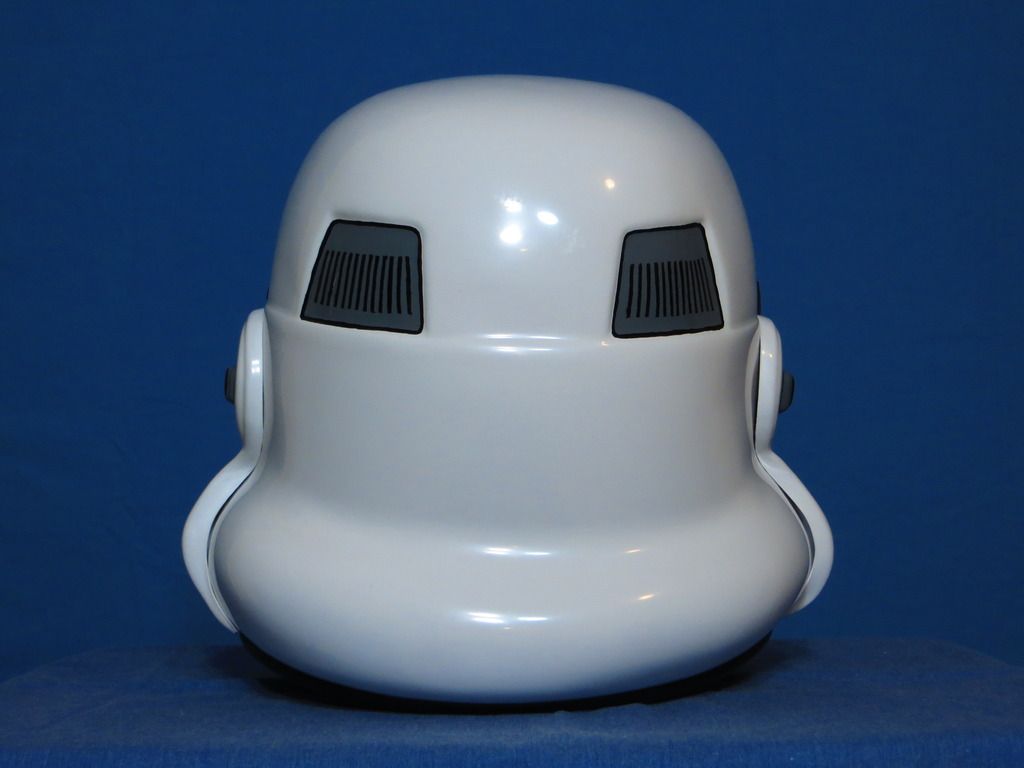
Back
Hovi Mic Tip Detail
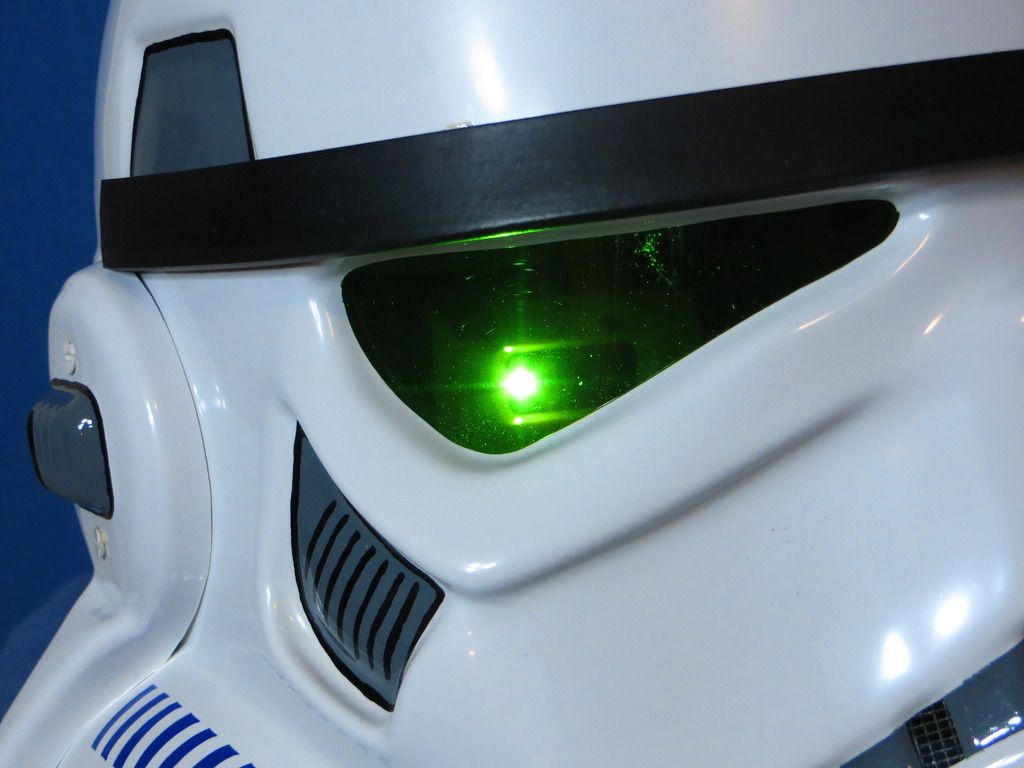
Lens Color (Backlit)
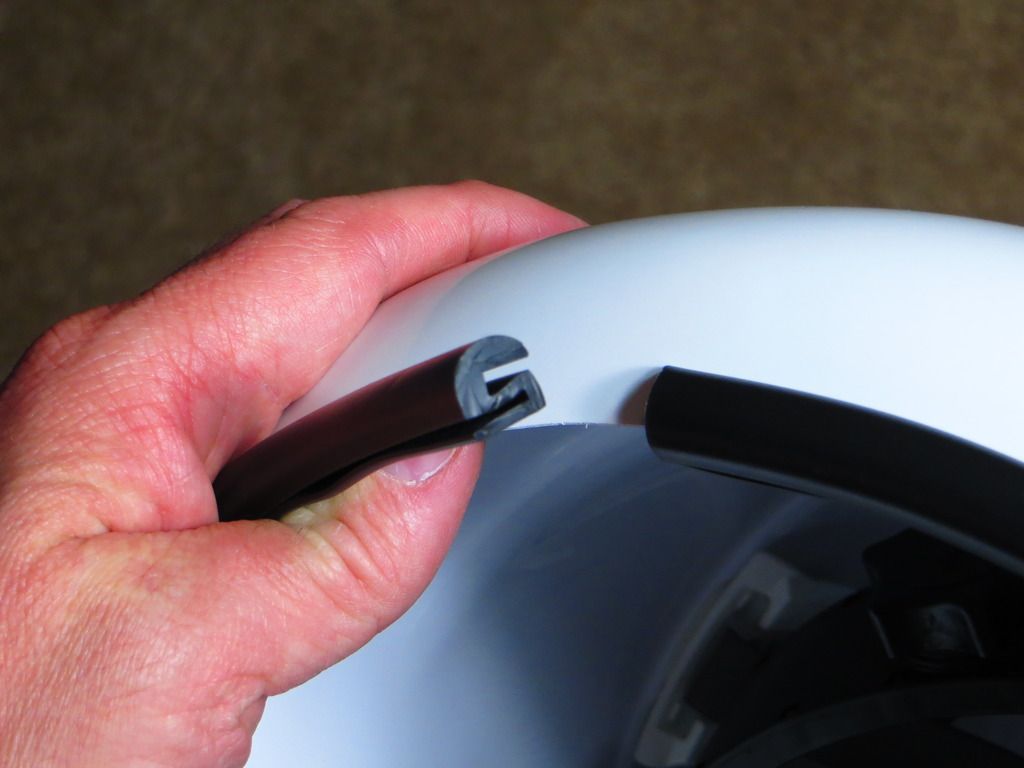
S-Trim
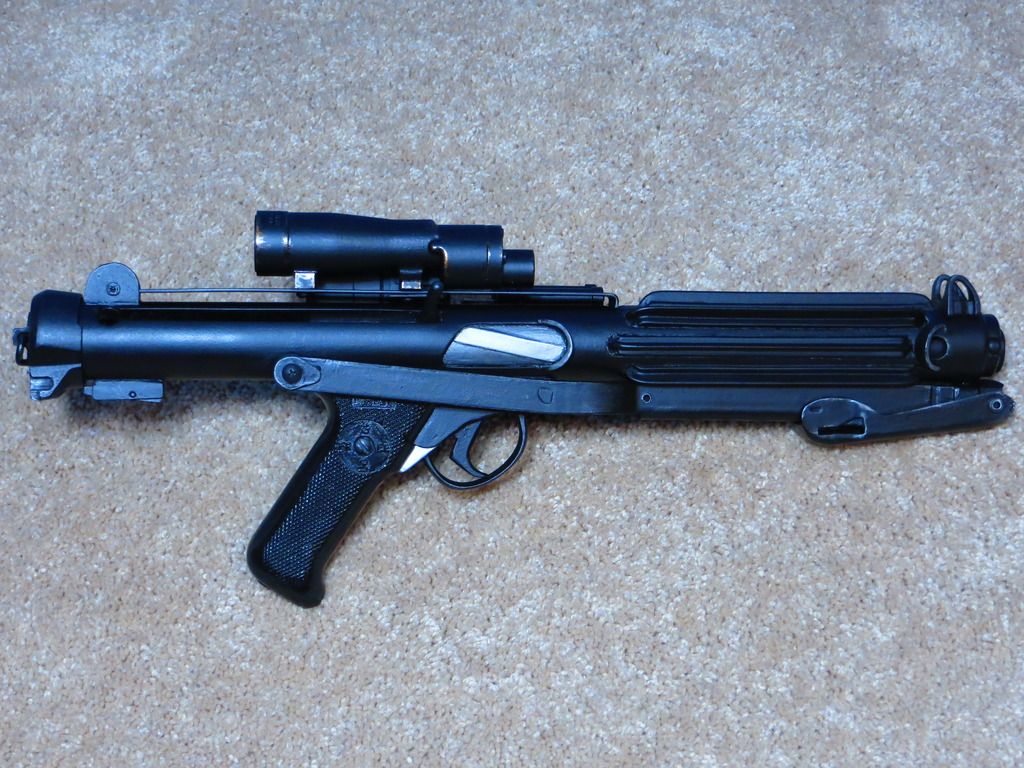
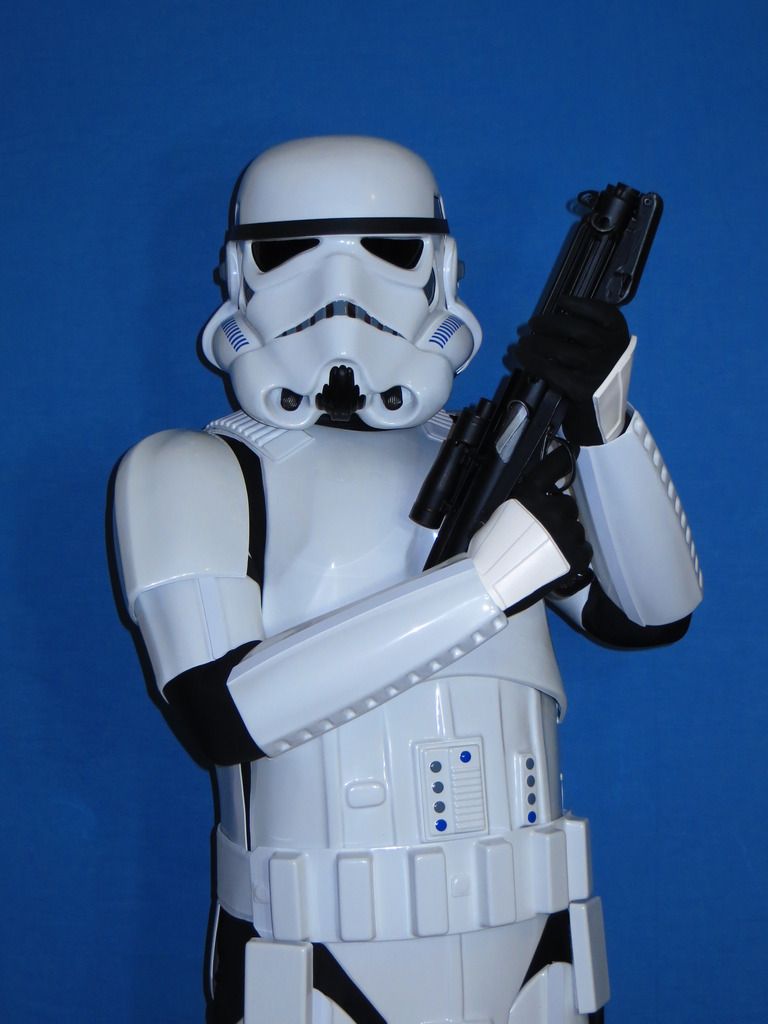
Blaster Details
Blaster – Left
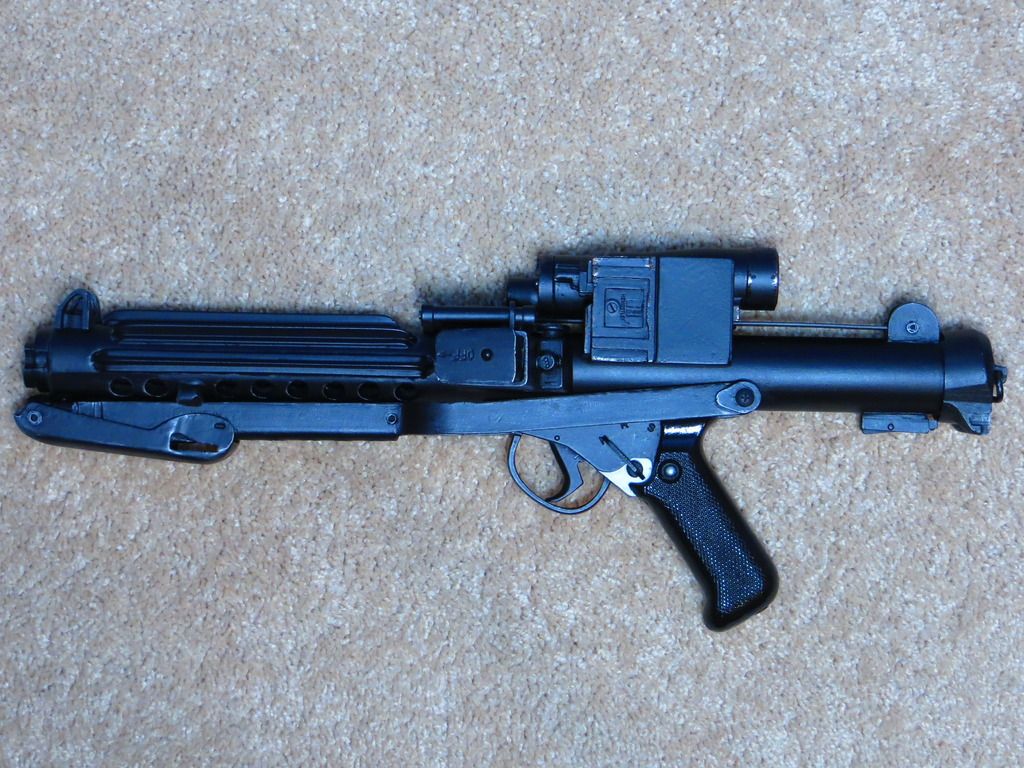
Blaster – Right
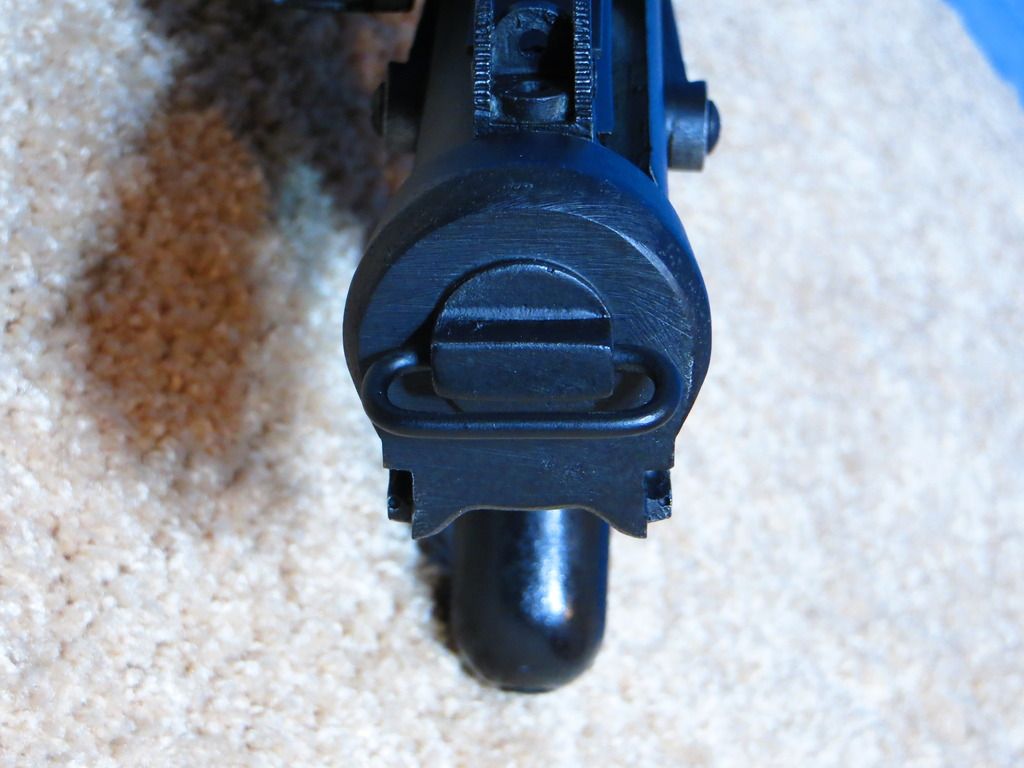
Blaster – D-Ring
Accessory Details
Neal Seal
Thermal Detonator – Back
Holster Attachment
As requested in my EIB approval, I have closed up my kidney plate side shim seams with ABS paste, and shortened my shoulder strap to shoulder bell connections.
Thank you for your time and consideration.
-
1
-
-
James Suerdieck 11075 EIB Letter
Thank you!
-
Wow, that's awesome! Thank you so much Andrew. Yes, I did hand paint my helmet. Some of it was free hand, while some of it was with the help of a template. I like the way it turned out, so I appreciate the compliment. You're also right that I am gunning for Centurion. I wanted to achieve my EIB first before I tackled those side shim seams. Now that I have my EIB, I'll start working on those shim seams. I going to use the ABS paste option, so I'll be sure to practice first. I will also take care of those shoulder bell straps. Hopefully you'll see a Centurion application from me in the near future. Thanks again!

-
2
-
-
I'm using Photobucket but it appears I used the wrong method to link the image. I have corrected the original post with new direct image links. Hopefully that will solve the problem with Tapatalk. Sorry for any confusion. Thank you.
-
Basic Information:
Name: James Suerdieck
Legion ID: 11075
Garrison: Garrison Carida
Mandatory Information:
Armor Maker = AuthenticProps (AP)
Helmet Maker = AuthenticProps (AP)
Blaster Type = DoopyDoo’s
Optional Information:
Height = 5’ 10”
Weight = 185 lbs
Boots Maker = Imperial Boots
Canvas Belt = TKittell
Hand Plates Type = Trooperbay
S-trim = Trooperbay
Electronics = TK Products
Neal Seal Type = Darman
Holster Maker = AP
TD Belt Clip = ukswrath
Rivets = Echo
Inner Drop Boxes = kwdesigns
Mic Tips = VaderPainterStudios
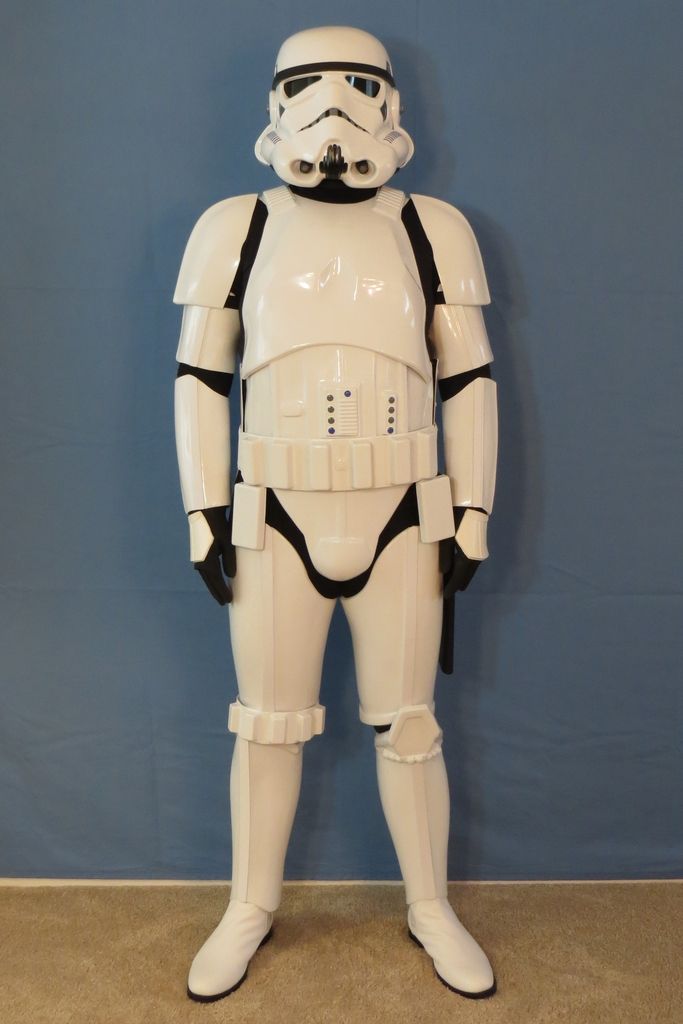
Full Body
Front – Arms at side

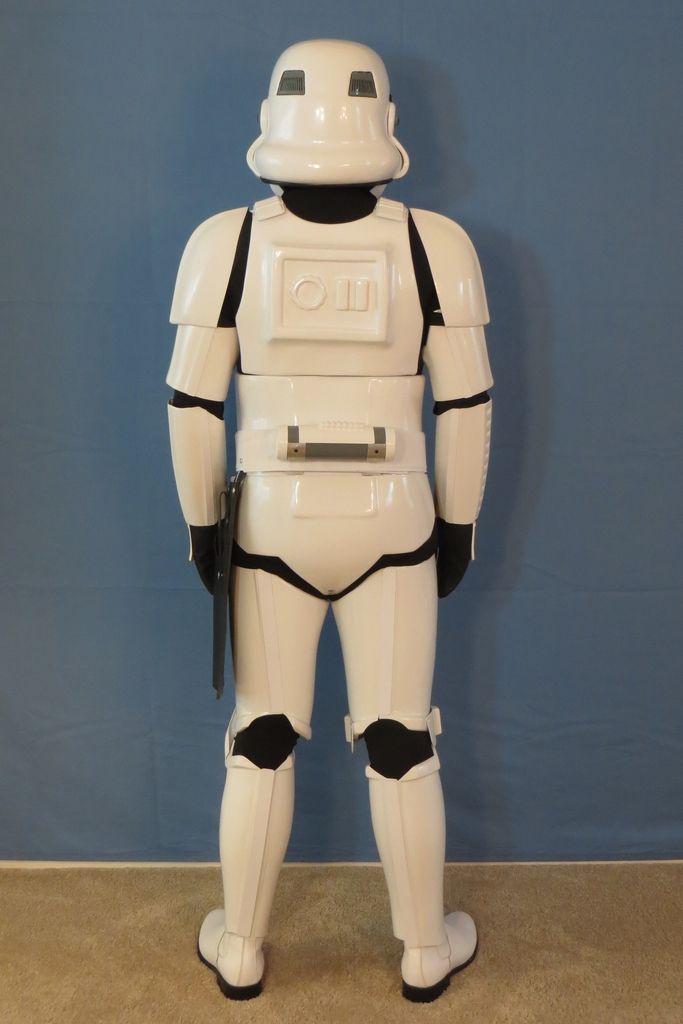
Back – Arms at side
Left – Arm raised
Right – Arm raised
Right Side Detail – Arm raised

Left Side Detail – Arm raised
Armor Details
Abdomen Details
Action Shot
Cod and Butt Plate Attachment
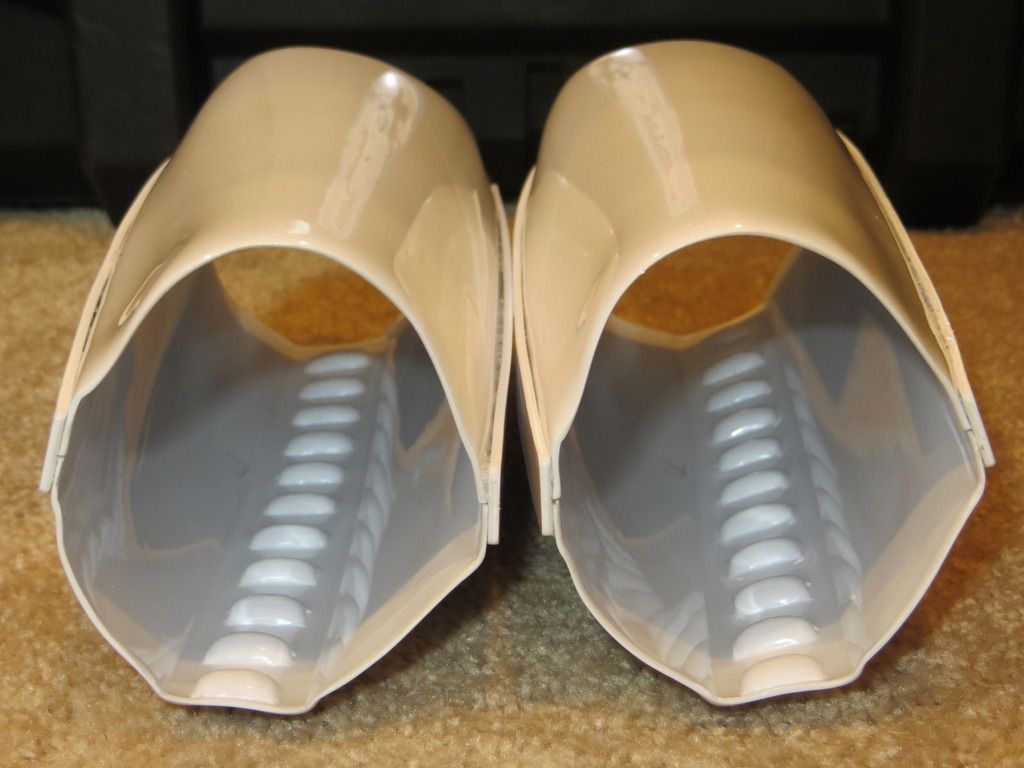
Interior Strapping
Helmet Details
Front
Side – Right
Side – Left
Back
Hovi Tip Detail
Lens Color (Backlit)
Blaster Details
Blaster – Left
Blaster – Right
Blaster – D-Ring
Accessory Details
Neal Seal
Thermal Detonator – Back
Holster Attachment
Thank you for your time and consideration.
-
I've been following you through your build, then EIB, and now Centurion. Great work. Congrats!
-
1
-
-
TK-11075, Requesting access.<br><br>
<a data-ipb='nomediaparse' href='http://www.501st.com/members/displaymemberdetails.php?userID=19909'>http://www.501st.com/members/displaymemberdetails.php?userID=19909</a>
-
I second that motion on JoAnn's, if you have one near you. I've looked at AC Moore, Hobby Lobby, and Michael's. None are any where near as good as JoAnn's for elastic selection. I'll admit I've also bought some elastic from some Rebel scum on eBay with mixed results. It's better to see, or better yet feel, the elastic in person. I never knew there could be so many differences in elastic before I began my TK build a couple months ago. As for snaps, I went with often recommended Tandy Line 24. They're harder to find, but most will agree they're worth the extra effort. I bought mine online, but Tandy does have stores around the country. My only minor complaint with the Tandy Line 24 snaps would be that the post is a bit long for the thickness of the elastic or nylon webbing it's being attached to. Tandy is actually meant for leather products so their post length is geared towards a thicker material. One trick I learned here was to give the post a couple light hits with a Phillips head screwdriver before using the setting tool. That helps prevent mushing the post to the side when setting the snap. There may be better ways of doing it, but that works for me. Dritz snap posts are shorter and therefor easier to set, but as mentioned above, the overall quality isn't as good.
Good luck with your build!
-
Oh I'm already on it and completely agree. I practically live by the EIB and Centurion applications. I started my build with Centurion in mind.Welcome James! It sounds like your in good hands. If you haven't already, be sure to head over to the advance tactics section of the FISD to check out the EIB and Centurion programs we have. Good luck with the rest of your build!
Thank you! Good to be here.Hello and welcome aboard
-
Hello, my name is James. I've been trolling here at FISD for a couple months, made some purchases from several members, and am already well into my TK build (from AP). In addition to fine folks and my Academy Advisor at Garrison Carida, I owe a debt of gratitude to those who've taken the time to share their knowledge and experience here at the FISD forum. I'd be lost without it. Thanks!
-
Amazing build, especially with such little reference material. Inspiring. Congrats!
-
I'm in the middle of my AP TK build too. You can never have too many snap plates. I started with 30. After doubling up at some connection points, I needed to make 15 more today. Despite the slight delay, your build is looking great so far. I'm going to borrow your ABS paste formula for my side shim seams.
Good luck on the rest of your build!
Request Centurion certificate
in Request Centurion Status
Posted
James Suerdieck 11075 Centurion Letter