


usajdm
-
Posts
26 -
Joined
-
Last visited
Content Type
Profiles
Forums
Gallery
Articles
Media Demo
Posts posted by usajdm
-
-
Just to share a method I used.<br>
I cut 1" strips of Eva foam mat the length of the cover strip.<br>
Clamped, magnets, then laid the foam over the strip and used wire ties(zip ties) to apply added pressure on the piece.<br>
Worked really good.<br>
Don't over tighten the ties or it'll concave the butt ends.<br>
Look inside the piece while you tighten to be sure the joint has stayed flat.<br>
Place all the ties on the piece, then start from one end tightening them.<br>
Sorry I didn't take any photos of it.<br>
A tip, use a strip of foam on the opposite side to keep the wire ties from shifting.<br>
It gives them something to bite into instead of the slick surface of the armor.<br>
Robert
-
You guys are Awsome!<br>
Thanks.<br><br>
But be ready.<br>
I'm at that point where all the questions are comin.
-
Another quik question...<br>
The backs of the shins.<br>
Is the cover strip side supposed to overlap the other side, or should the two sides butt up against each other?<br>
And I don't mean just the cover strip.<br>
I know that overlaps to cover the seam.<br>
I mean the whole thing overlapping to create a tight fit.<br>
Robert
-
-
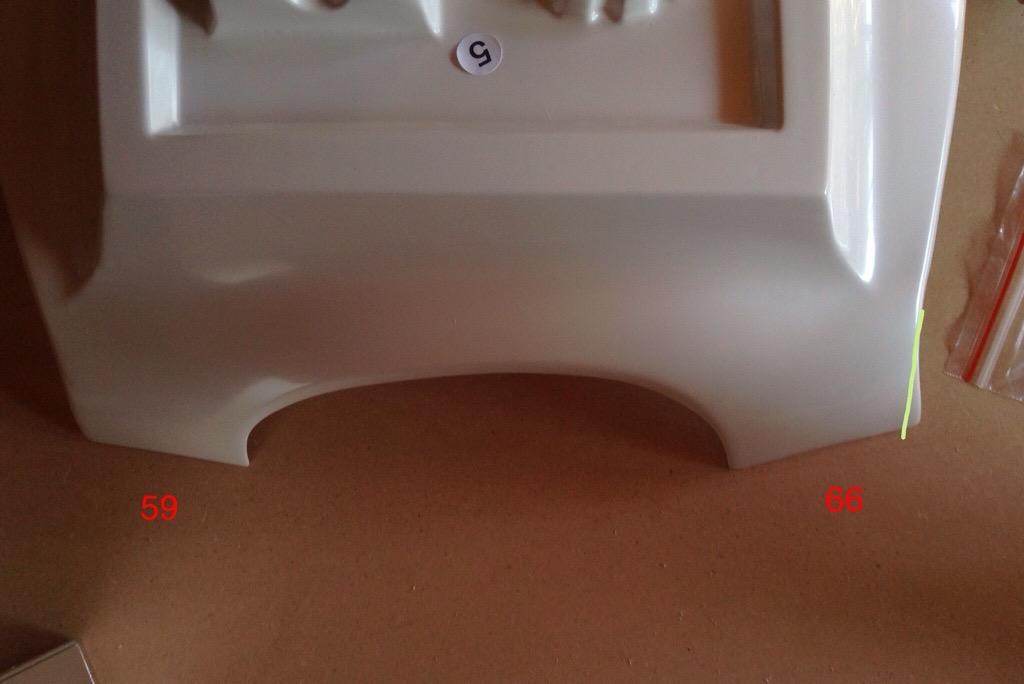
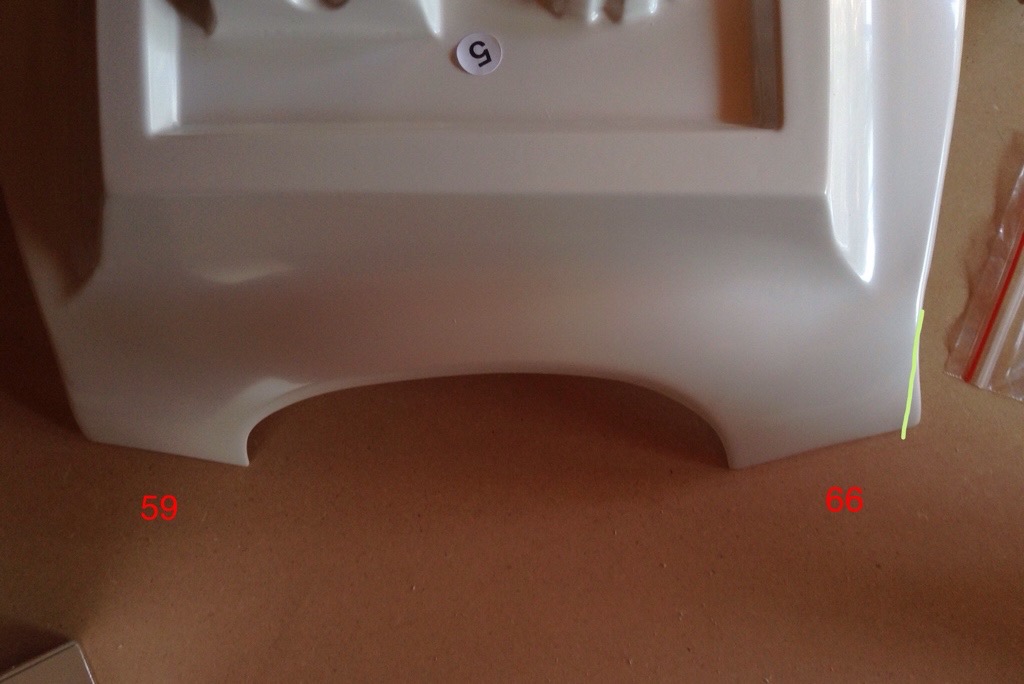
This is what I was talking about.<br>
I can trim on the green line to even them out.<br>
What do you think?
-
Is it recommended to trim the back shoulder extensions to match?<br>
I've got 59mm on one side and 66mm on the other.
-
Ha Ha!Wow, ok, this is a long list, so settle in. Ready?<br><br>
1. Wrist end of the forearms.<br><br>
That's it. Any other return edges you remove are completely optional, and for your comfort only.
You funny guy.
I knew I was askin for it, but I had to be sure.
Measure twice, cut once.
Thank you,
Robert
-
 1
1
-
-
I'm sorry everyone.<br>
I know this is a silly post, seeing how it's all been covered.<br>
I'm hoping someone could list out for me all the return edges that are supposed to be removed.<br>
Starting on my strapping and such real soon, but wanna make sure I haven't missed anything.<br>
Easy to have left something out, seeing how many pages this has stretched over.<br>
Thanks everyone and a big thanks to you Tony.<br>
Robert
-
1
-
-
Who do I report a recast of MY work too?
-
3
-
-
First off, hello.<br>
Now, your common AA puts out I believe approximately 1.2-1.5v at 4mah.<br>
So even in series your short on amps.<br>
Put that together with less volts then recommended, and the fact that the motor is seeing a "load", your just not giving it enough juice.<br>
You could always wire in 2 more AAs in series to increase amps, but your still short.<br>
With proper amperage it "should" turn the motor even at 2volts, but will be considerably weak.<br><br>
Now the bad news....<br>
With proper volts and amps I highly doubt you'll get the water output needed or desired.<br>
Even with a pressure producing nozzle, I just can't see it working.<br>
If you really want to push on with the project, you might want to look for a "high flow" pump.<br><br>
Do try hooking up 2 more AA in series and see what kind of an output you can get.<br>
Also you can try a single 18650 battery.<br>
They put out 3.7v and come in a variety of amp ratings.<br>
Keep in mind, 1000ma=1a.<br>
Good luck,<br>
Robert
-
Glad this is working out.
It was pretty clear it was crossed wires.
Let me add alittle more if you don't mind.
Be very careful if you decide to drill into the pcb.
It's very easy to damage the traces.
Also, some pcb's have internal traces that can also be damaged.
A properly soldered joint should not need to go through the pcb.
Also, it may just be the picture, but be sure the exposed copper of your +'s and - wire are not touching.
Heat shrink tubing should be covering those exposed wires.
Remember, you only need alittle wire exposed to get a good joint.
Cover the rest.
Again, that might just be how it looks in the picture.
As far as "sealing" the board, may I recommend silicone.
The stuff you buy by the tube at home depot is fine.
Be sure it says 100% silicone.
Great seal and if you ever need to remove it for pcb work, it'll peel right off.
Please keep us informed on your progress.
-
1
-
-
Do keep in mind that standard solder won't stick to aluminum, stainless steel or bronze wire/pads.
Your wires do look to be primarily cooper.
That soldering station looks like it should do it.
Alittle bit of flux and I'm sure it's gonna work out for you.
-
If I may...
First I would be concerned with your soldering irons power.
Some solders require upto 250 degrees to melt properly.
A quality soldering iron is a good investment.
After you've completed this project, I'm sure you will wish to try more.
Stick with solders made up of 60/40 tin/lead.
Also, stay away from dollar store solders.
Alittle wipe with sandpaper won't hurt, in case of any wire or pad contamination.
Also, be sure your "spongeing" your tip before, after and during usage.
-
Try the red as + and the stranded copper as -. Off visual, you've got it wired as left+ and right+ as your +&- leads without a proper ground.Well it didn't work. The mic speakers work when plugged into my phone, but a heck of a lot quieter than I had anticipated (seemed way louder in the videos)
I thought I had soldered it half-decently, but now I see the deplorable job I did. Hopefully, the wires just aren't actually touching the leads:
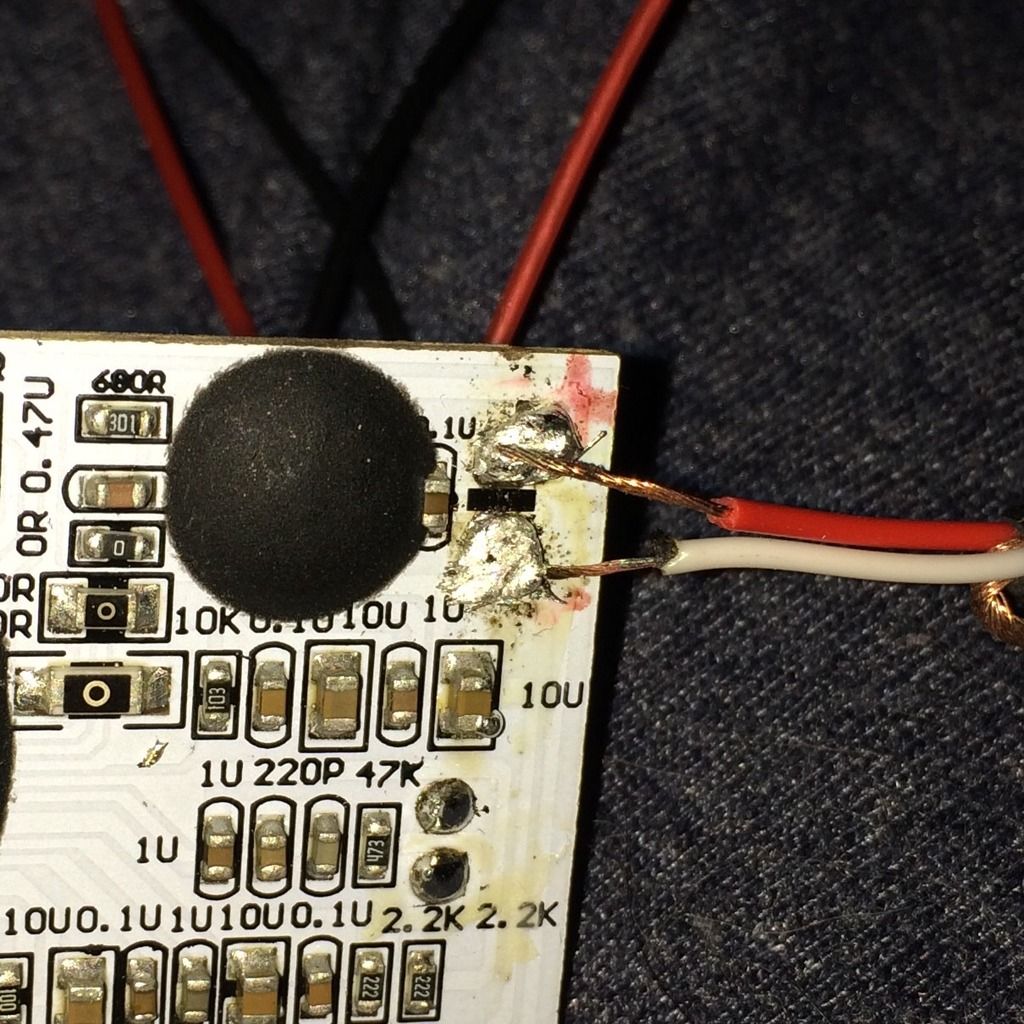
Ideal would be to join the two +'s together(red and white) then of course stranded to ground.
Also, your not heating up your wires enough for the solder to flow properly.
Try holding your soldering iron to the tip of the wire.
After its heated up, touch the wire to your solder supply, keeping the iron on the wire, but allowing the heat of the wire to melt the solder.
After you've "tinned" the wire, place the tip of your iron to the pad on the ic.
Allow it to heat up, then touch the tinned wire to the pad.
It should bond instantly.
Not to criticize, but that's way to much solder there and it obviously did not flow into the wire.
Heat is everything.
The part must be hot enough(not just the iron) to melt the solder.
The finest amount of solder applied right will make a solid connection.
Good luck.
Robert
-
1
-
-
So without being able to find any accurate templates for the rear butt cap, I could really use some good closeup pics from as many angles as possible, if anyone could help me out with that.
Would be real helpful if you could throw in a measurement or two as well.
Thank you,
Robert
-
Great, thank you.
I missed that PDFs download.
Any chance you have pics on your method for the rear butt cap?
The side view is captured in the PDFs, but not really an accurate front view.
-
Thanks, but have gone through that thread front to back.
The only post mentioning the rear butt cap templates doesn't show up for me and I see nothing on the rear sight.
Thank you though.
Robert
-
First, please forgive me if this is posted in the wrong place or has been covered.
I'm a newer member and still learning the ins and outs.
Been searching nonstop for templates/blueprints/plans for the rear sight and rear butt cap for the E-11, to no avail.
I'm attempting a full scratch built build.
Except for the grip.
I do have an actual grip.
Any help would be greatly appreciated.
Thank you,
Robert
-
Welcome Robert im from Livermore 925
Livermore, right down the road(freeway).
Maybe at some point we will be able to meet up.
And thank you everyone for the welcoming!
-
Hello everyone.
Names Robert.
I'm from Alameda, Ca in the San Fransisco Bay Area.
I work at the Oakland Airport, for Southwest Airlines.
Like many others, I've ordered my Anovos TK suit.
Been making Star Wars weapons since I was a kid, just like so many others.
I hope I can contribute to this site as much as I'm sure I will receive from it.
Thank you for having me.

Ukswrath's ANOVOS TK build (stunt)
in ANH Build Threads
Posted · Edited by usajdm
Here's an example of what I was trying to explain in my post above.<br>