

bluefunoodle311
-
Posts
58 -
Joined
-
Last visited
Content Type
Profiles
Forums
Gallery
Articles
Media Demo
Posts posted by bluefunoodle311
-
-
1. I disagree with having the weathering a requirement for basic level approvals (with the exception of the gray lines on the indents)
2. Should implement a minimum number of segments on the belt and forearms to accommodate different sized troopers but not dilute the costume to severe inaccuracies
3. Confused about the stickers/paint comment on the thermal detonator. If it looks correct, who cares if it’s a white tube with stickers or paint vice a grey tube painted white?
-
Is the overall consensus still that nomex gloves aren't acceptable at basic? I think they should be.
Sent from my iPhone using Tapatalk
-
I need to get in on this order, if at all possible!
-
 1
1
-
-
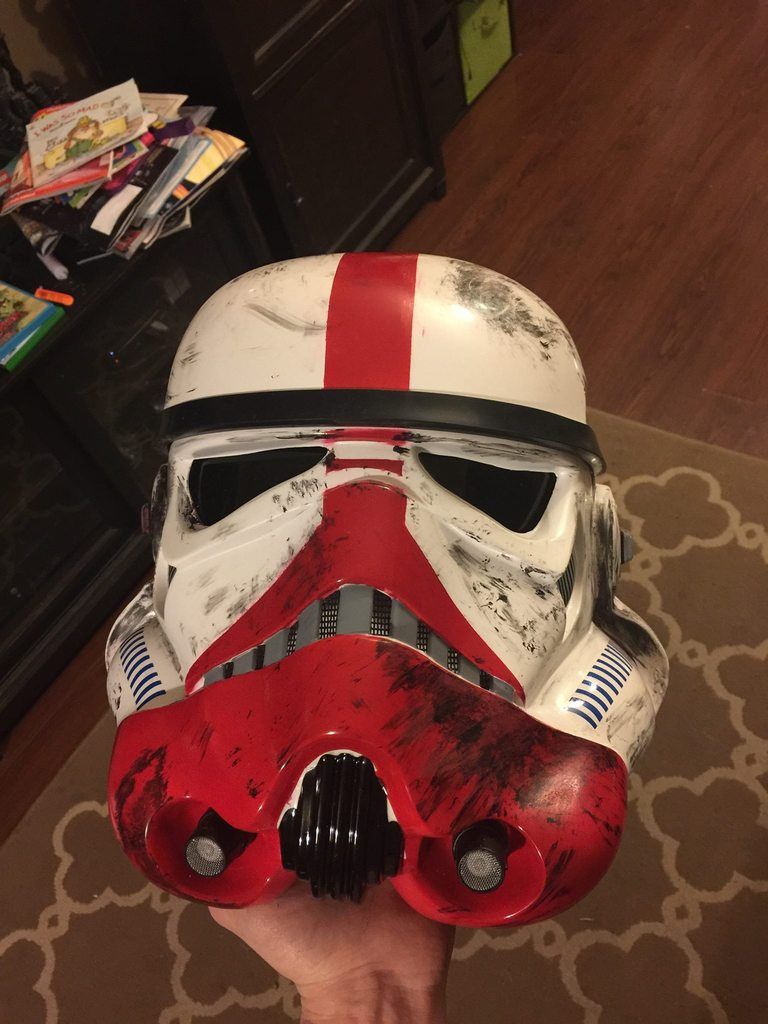
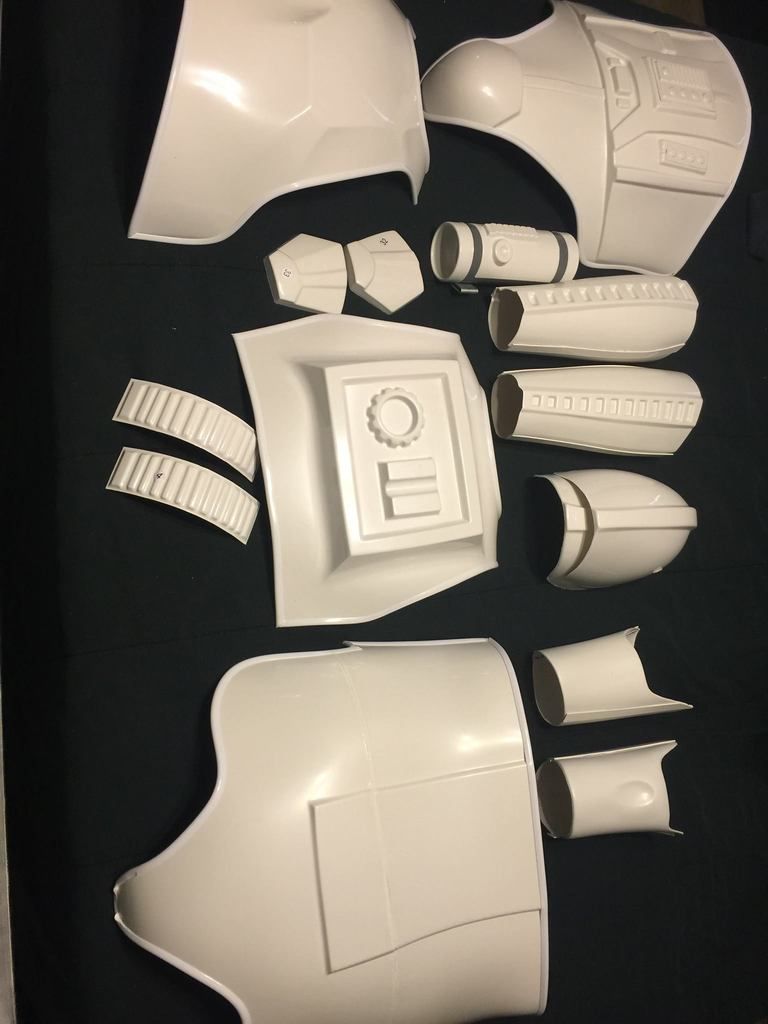
Wanted to weigh in here since I'm (very slowly) working on building one of these kits.
1. I disagree with the requirement of the grey weathering at basic level since it's very inconsistent across the different scenes in the show (textures used to imitate environmental lighting IMO) and kinda goes against the point of painting it gloss white and polishing to reflect light
2. Again, due to being inconsistent throughout, I don't think the gloss white and polished to reflect light should be a basic requirement and rather be reserved for a "hero" or level 2/3 variant. I personally think a satin white would emulate the on screen appearance. If anything, just list it as gloss white and leave the polished to reflect white out of it for basic.
3. I concur with the indents being painted a dark charcoal gray.
4. As much as I hate to put forth this idea, since the animated boots are very clearly different from standard OT TKs, I would think for the sake of the CRL at basic approval, it would be reasonable to accept standard OT TK boots if we're allowing ANH/ESB boots for FOTK and Funtasmas for basic OT TK approval (or at least modified to have the gray elastic).
That all being said, I have a few questions for the group:
A. Is anybody currently making/selling screen accurate animated TK boots or does anyone have a source for ones with flat soles that can be painted?
B. I agree that there is no black rubber trim like the OT TKs, but would white s-trim along the neck part of the helmet be acceptable to offer a finished edge, but not detract from the look, at least for basic approval?
C. Is the general consensus that there are no vertical ribs on the neck seal?
-
I would consider doing a closure like the animated Clones do. The KW kit is designed to have the seam on the inside of each leg, Velcro closed to mimic the seamless look. You certainly could split the rear calf, but I'm thinking you'll see more popping open on the rear with these being more form fitted than the ANH TK.
Do you have an example of how this is done? My mind is stumped on how it would look seamless. I mainly have build experience with classic TKs, so sorry for what may be a dumb question.
-
1
-
-
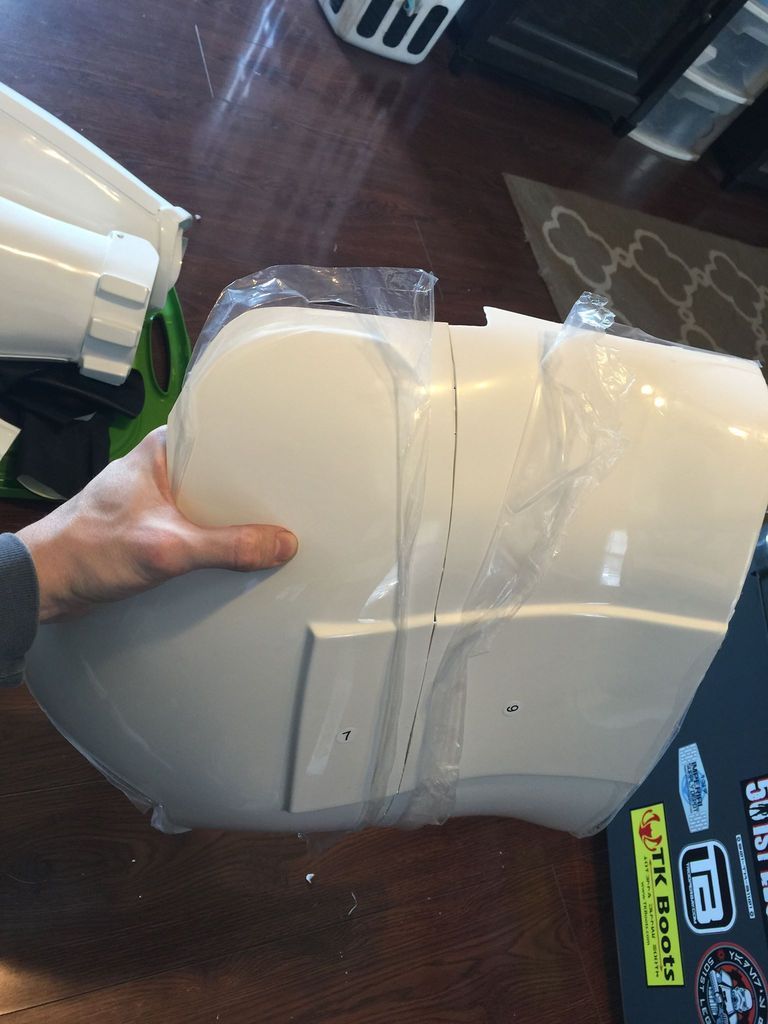
Sizing up the thighs and calves/shins. Both are seamless, I am looking at putting a strip of white plastic inside the side joins after trimming to size. The calf will require being able to open on the inside and a strip placed with Velcro attached so can be removed easily. I plan to fill the cracks with filler to make smooth joints. the thighs will probably need 1-2 inches off each side as quite large for my frame, and will need shortening around 1 - 1 1/2 inch to fit
Very interested to see how the shins turn out. With the sides being seamless on screen, maybe split the calf down the back to make it go on like a classic TK and allow for filler on both sides?
-
Wondering if you have the files available for this. Looking to print one for a garrison mate.
-
Following this with great interest.
-
Definitely interested to see more on this and how it looks finished up. I received one of the standard line helmets today and pretty happy with it but the mic tip is driving me nuts.
-
What make/model of airsoft rifle did you use as a base? I think once I get past this step, the rest of my build will be cake.
On 7/29/2015 at 7:59 PM, yoshix said:First off, let me shamelessly plug my Incinerator Build thread
http://www.whitearmor.net/forum/topic/32116-my-build-thread-0/
Its awesome, so check that out if you haven't already and leave a comment.
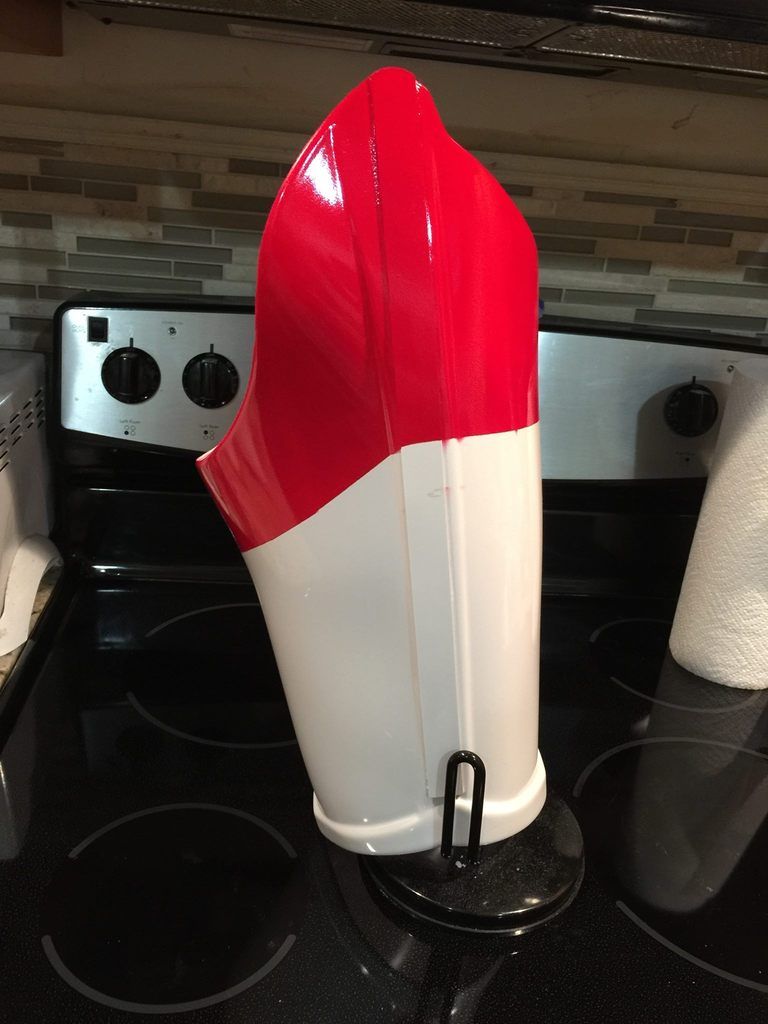
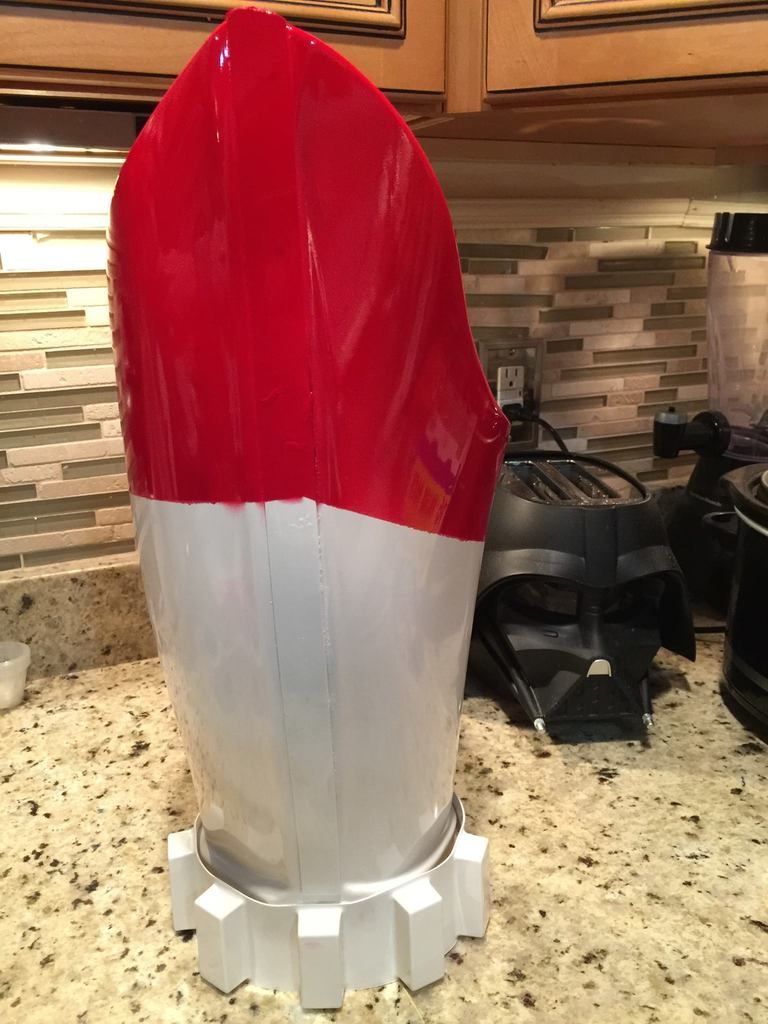
I originally wasn't going to do a flamethrower as I thought it would be too much work. But I played with the idea and slowly started assembling parts.
I love the T-21s that the sandtroopers have so I wanted somewhat of a crossbreed between the two. I figured as the source material is a video game we have a little bit of play room. So this will not be a build looking to replicate the game down to the T. -
He's right, I made mine as well and it wasn't as hard as I thought it would be, still a pain, but doable. I based mine off the T-21 because I liked how much thinner it is compared to the game. I used a lot of the parts I had lying around so in the end it cost me less than $50.
Your build's looking good by the way
Do you have pics of the results of your flamethrower build?
-
Just some quick progress pictures:
-
1
-
-
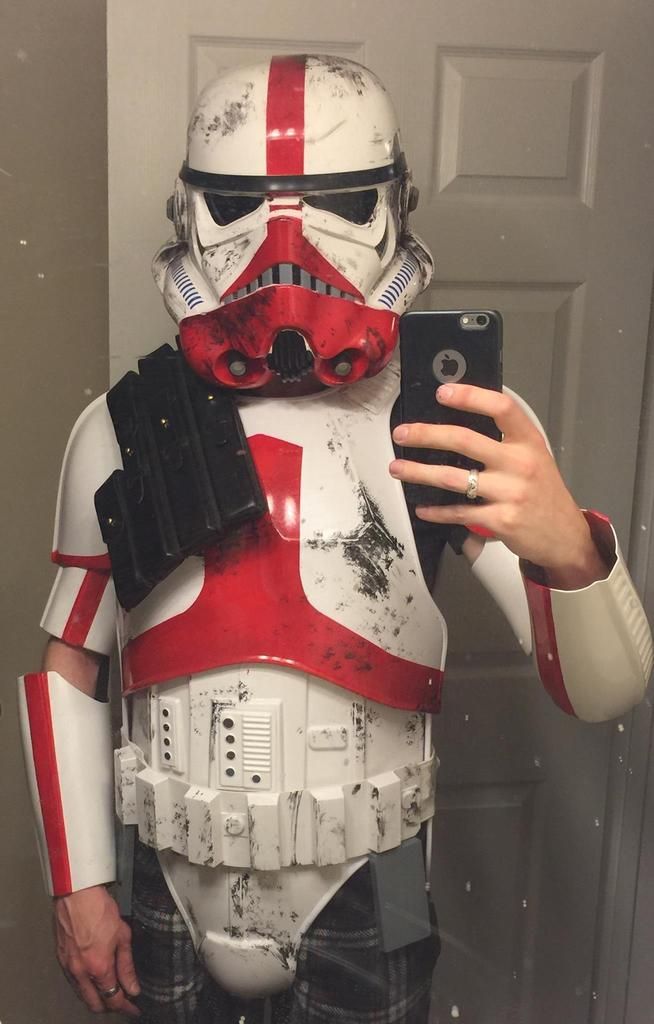
Just wanted to drop by and post a little progress on my build:
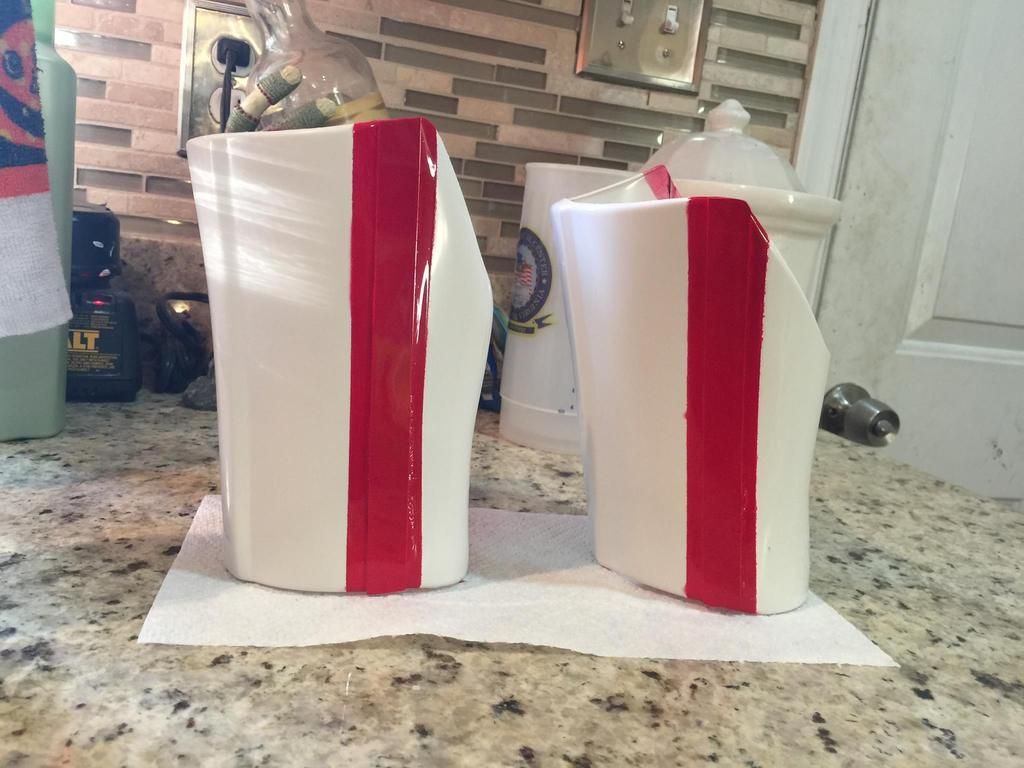

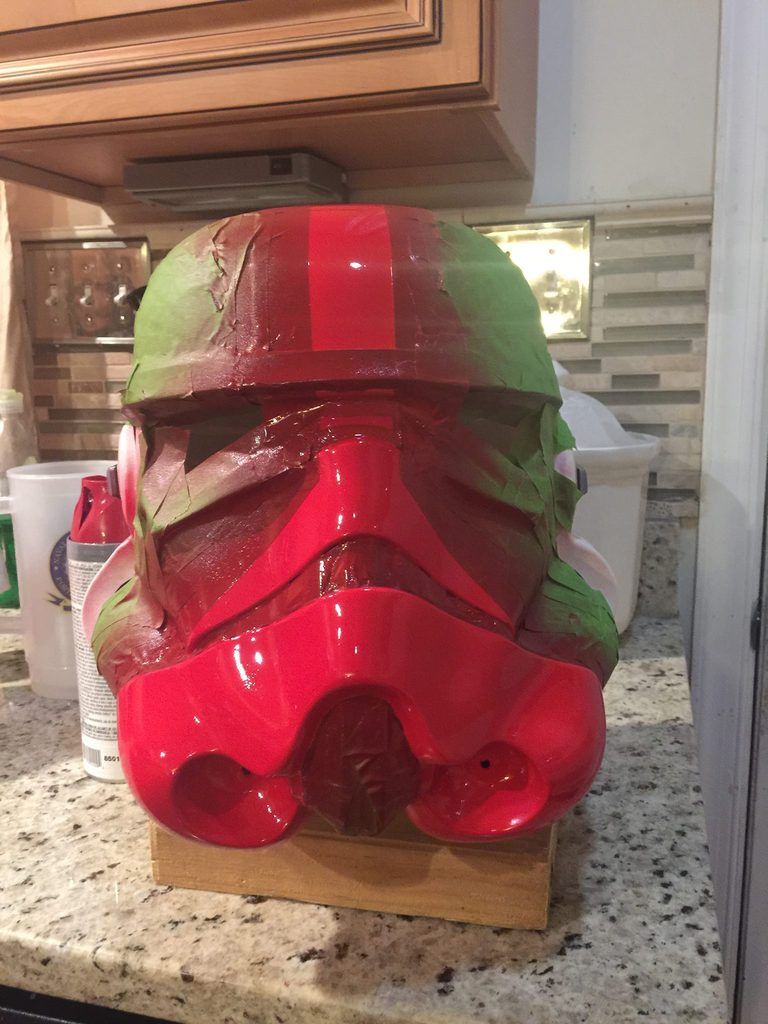
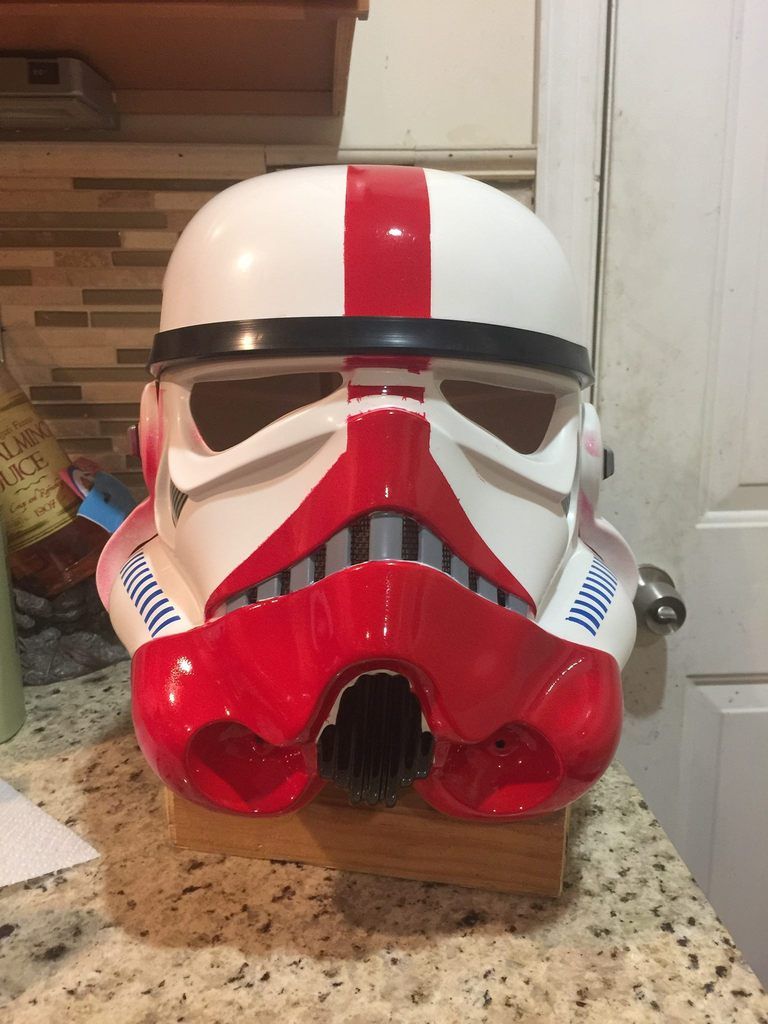
Gonna clean up the helmet a bit and add some "scorch marks" to mask my overspray incident.
-
I'm watching this thread, too. How are the biceps in the Anovos kit different from what is needed? Is it the indentation on the back of the right side?
The CRL doesn't show it, but from my understanding the ROTJ biceps are two different shapes and I think they have a different indent on the inside of both. Someone please jump in and correct me if I'm wrong.
-
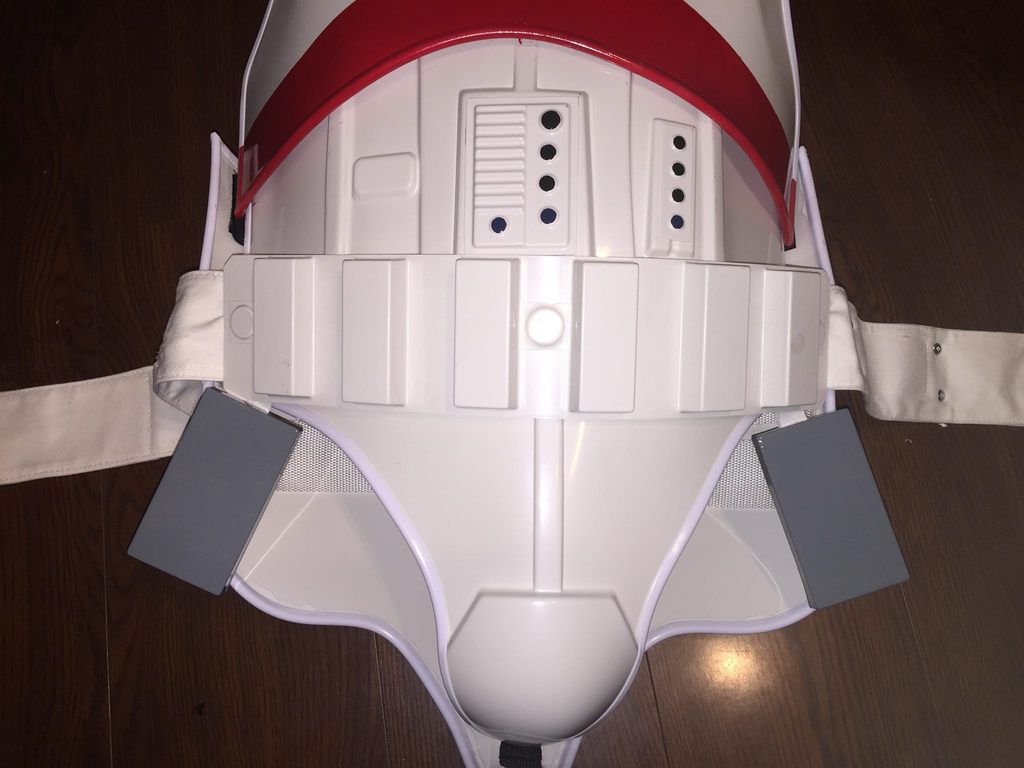
Yay! Another Incinerator.
I can't really comment on your points but would offer the following advice when joining the butt and kidney plate: rather than just glue them together, use some strips of ABS on the inside to bridge the two sections as they may be under a lot of stress. Also, as directed by my armourer - I filled the seam with some acrylic paste I made. I would be interested to see the Plasma Rifle you are planning too

Larry
I was planning to do exactly that on the inside, and considering using some plastic epoxy that fills gaps really well and dries super hard (which is good for structure, bad when you have to sand it down).
The plasma rifle is my major speed bump. Hoping for responses from some folks that I saw around the boards that have made some nice ones in the past since I think that project is way outside my skill level. I'm just terrified to see the price tag on commissioning something like that. lol
-
I got my PVC U-trim from GreatLakesSkipper.com.
Cover strips appear to be acceptable for EIB, so you're good there. Remember to glue your ab button panel upside down, like the ROTJ armor. I assembled ATA, CAP-W, and MonCal armor pieces with overlaps no problem, but I haven't seen an Anovos kit in person so I can't speak for that.
I ordered mine from here: http://www.customautotrim.com/body-side-moldings/door-edge-molding/mdgde-u/103/
Hopefully it's the right stuff. I ordered a surplus, but for curiosity's sake, how many feet am I going to end up needing?
-
Hey all,
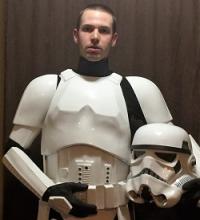
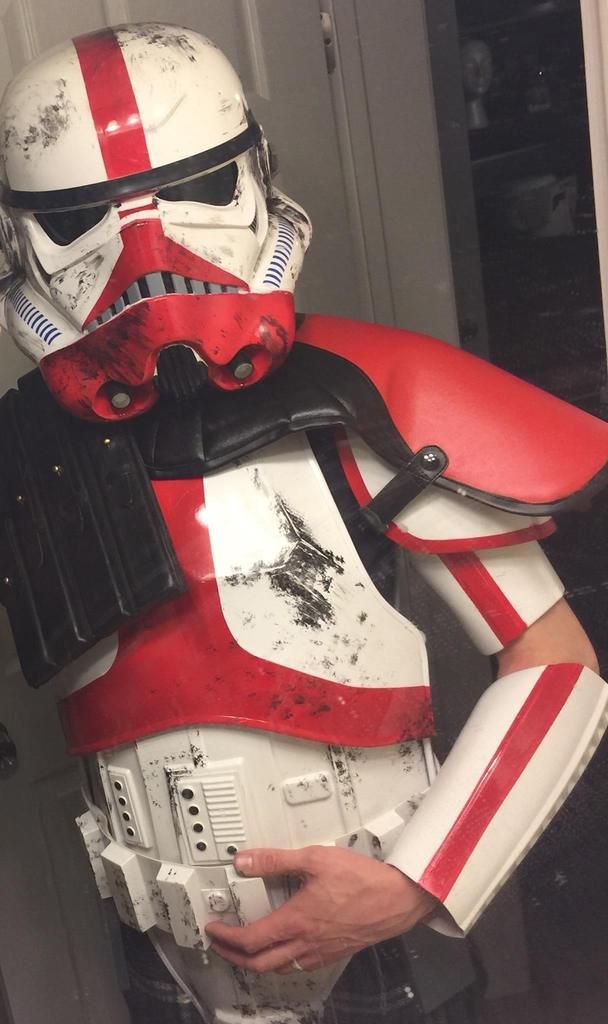
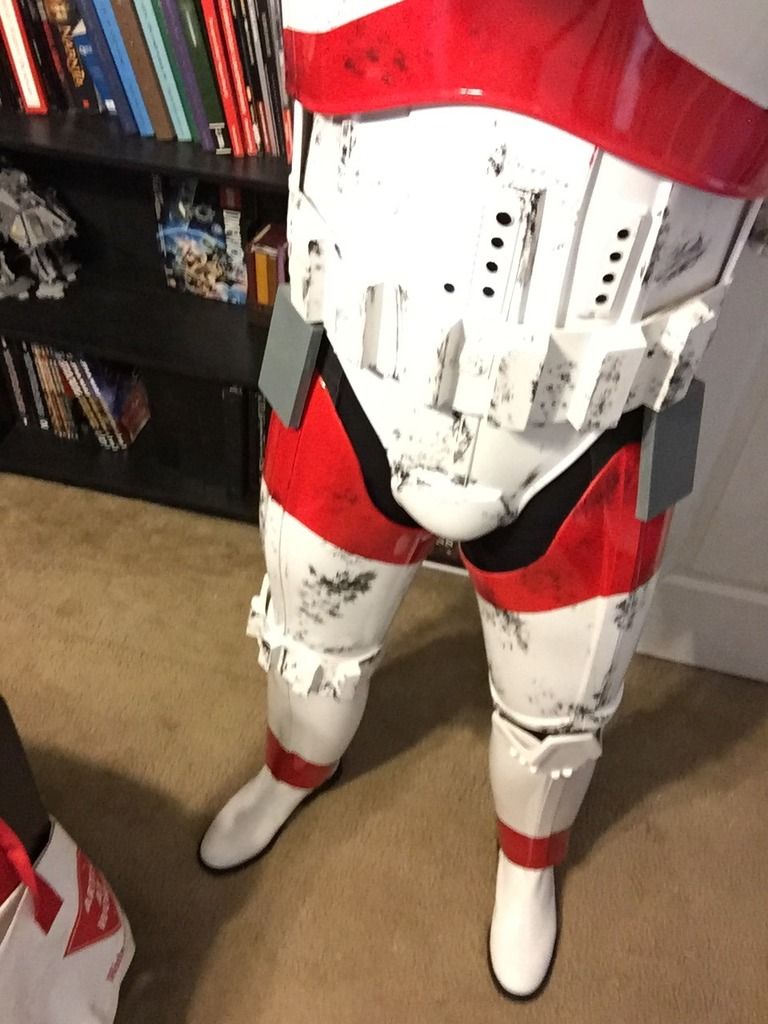
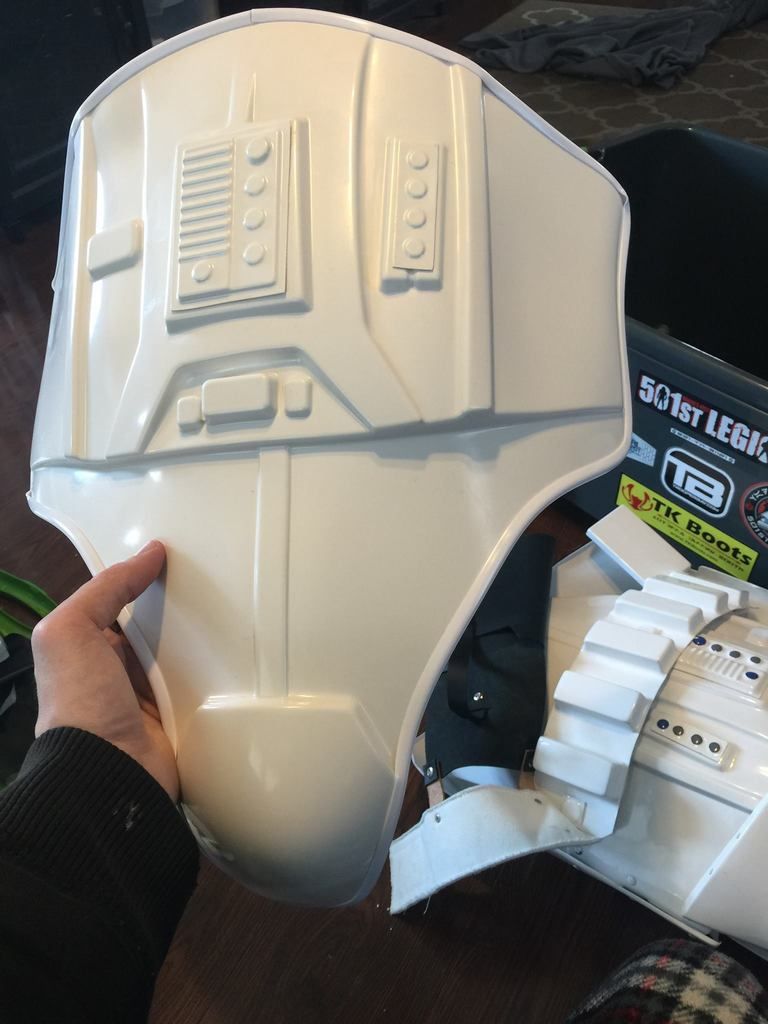
I have an Anovos kit en route and wanted to do something different with it since I already have an RS ANH Stunt that I am very happy with. I'm looking to do some minor modifications to build an Incinerator trooper, but wondering if I would be able to get basic approval because of a few little problems that I am going to face.
Here's the basic game plan:
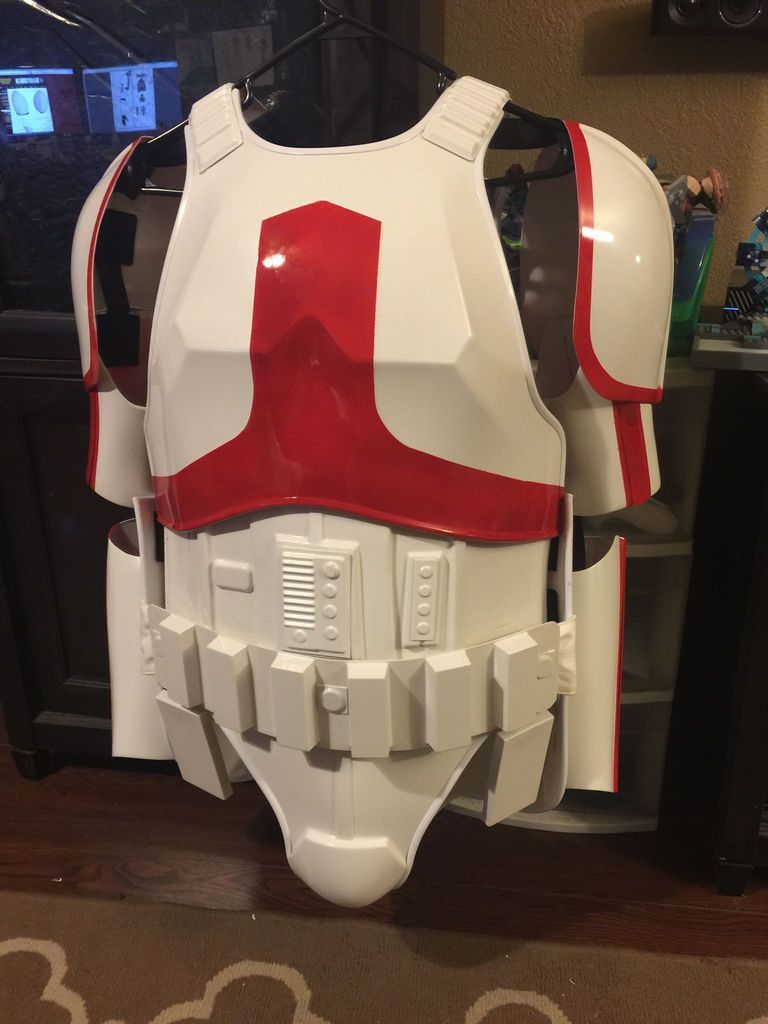
1. Leave the ANH style belt with three rivit caps, which isn't accurate but seems to be present in some approved Incinerators.
2. Remove holster and add the four rivits on each side of belt
3. Not sure how comfortable I am with the overlap construction and am just looking for basic approval so I'm considering sticking with cover strips, which I've also seen in some approved Incinerators
4. Adding door trim
5. Connecting butt and kidney plate, possibly with plasticweld epoxy
Major concerns:
1. Bicep armor of Anovos kit is not the same as ROTJ
Thoughts?
-
1
-
-
Are you still making/selling the flamethrower? About to start my own Incinerator build here shortly and that is the only component I am missing. Tried to PM with no joy.
Thanks in advance!
-
Is PFU553 the correct gasket to use from sealsdirect.co.uk for trim on ROTJ armor and how many meters would I need to complete one set of armor?
-
I was thinking of doing the same with an Anovos kit, but I have read that incinerator trooper is ANH helmet with ROTJ armor. Using Anovos armor as the base, which is ANH, is it possible to get an incinerator trooper approved?
-
I'm having trouble figuring out what snaps to use for the Ab plate and crotch portion. I understand that the Tandy snaps are for the inner strapping, but the ones on the Ab plate and crotch seem much smaller than the Tandy line 24 5/16 post snaps.
-
Using these from Amazon:
If I plug up two of these: http://www.amazon.com/gp/product/B0192TH6HY?psc=1&redirect=true&ref_=ox_sc_act_title_1&smid=A1HES6VZF527UJOne as TX for wired mic in helmet and one as RX hooked up to icomm and Aker, would that work?
I ran into this same problem:
TESTED: For this system to work, I think you might need to build your own arduino BT reciever so you can customize how you want it to connect.
now for BT to BT (tx dongle to rx dongle) I get them to pair and it transmits sound from devices just fine, mic's is a different story. I've gotten it to work by plugging in some simple earbuds into the transmitter and speaking into them
but w/ mic's it doesnt work. I think because it takes soo much less to drive the earbuds vs the mics, it might work if you had some kind of mini pre-amp or something or maybe just the magical mic of the right super low impedance.
I was looking at HyTechToyz Bluetooth Vader system and it does exactly what I'm trying to do so I emailed them and asked how they have the mic wired, waiting to hear back from them. If this doesnt work I'm just going to scrap the whole idea.
I even tried a mono to stereo 3.5mm plug adapter to see if that was part of the problem and no joy. It looked like they were synced up to each other, just no luck transmitting sound of any kind. Back to the drawing board...
-
If I plug up two of these: http://www.amazon.com/gp/product/B0192TH6HY?psc=1&redirect=true&ref_=ox_sc_act_title_1&smid=A1HES6VZF527UJOne as TX for wired mic in helmet and one as RX hooked up to icomm and Aker, would that work?
-
Me:
1. Under armor and neck seal
2. Thighs
3. Boots
4. Shins
5. Torso
6. Arms
7. Gloves
8. Helmet
9. Attitude
Same here. Works great and I've pretty much mastered doing it myself in my RS.


Official Rebels TK CRL Discussion thread
in Star Wars Rebels
Posted
I concur. This is the same point I have tried to make in the past.")