Vette11
-
Posts
152 -
Joined
-
Last visited
Content Type
Profiles
Forums
Gallery
Articles
Everything posted by Vette11
-
Germain, thanks for the info, I will check everything when I get home. the screws might be big and I am thinking of going to a smaller set.
-
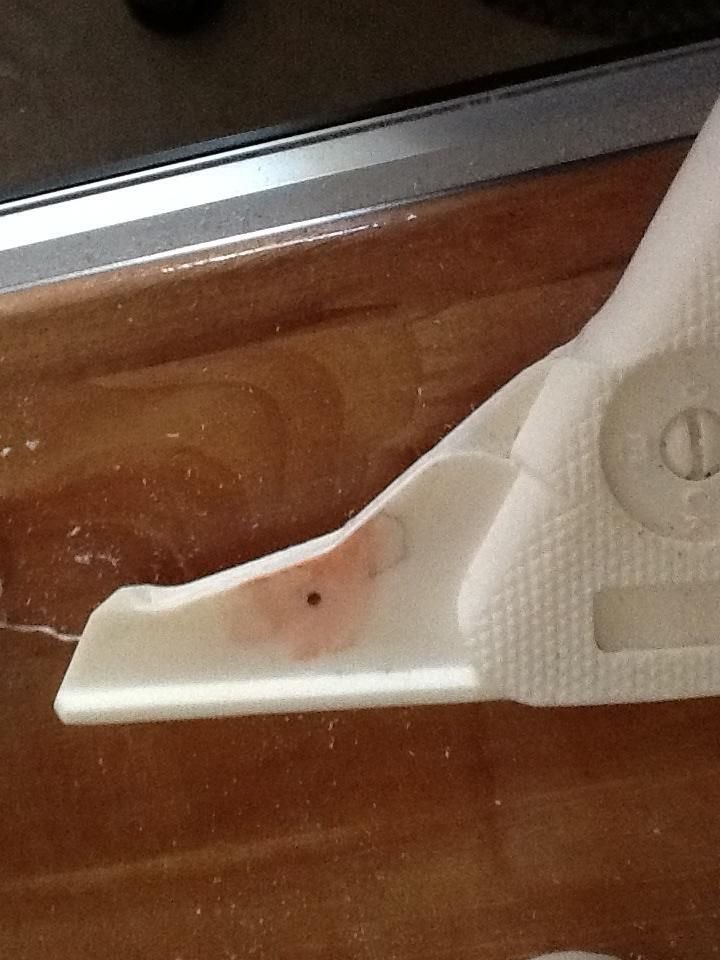
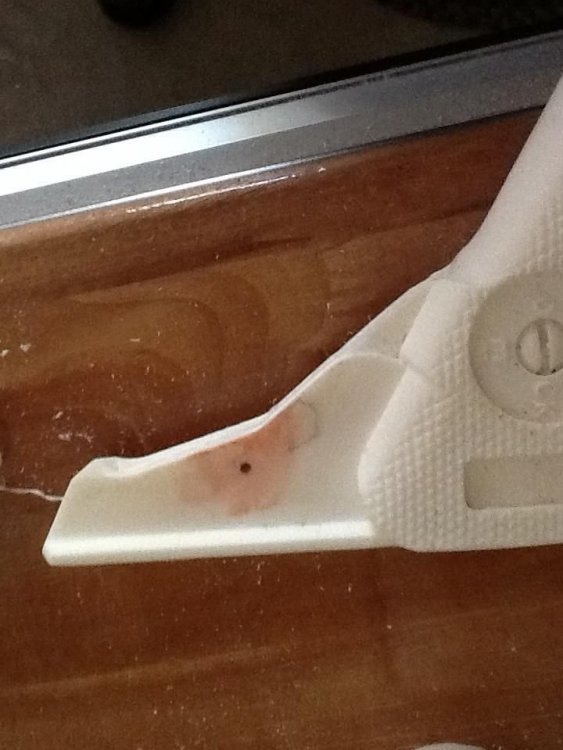
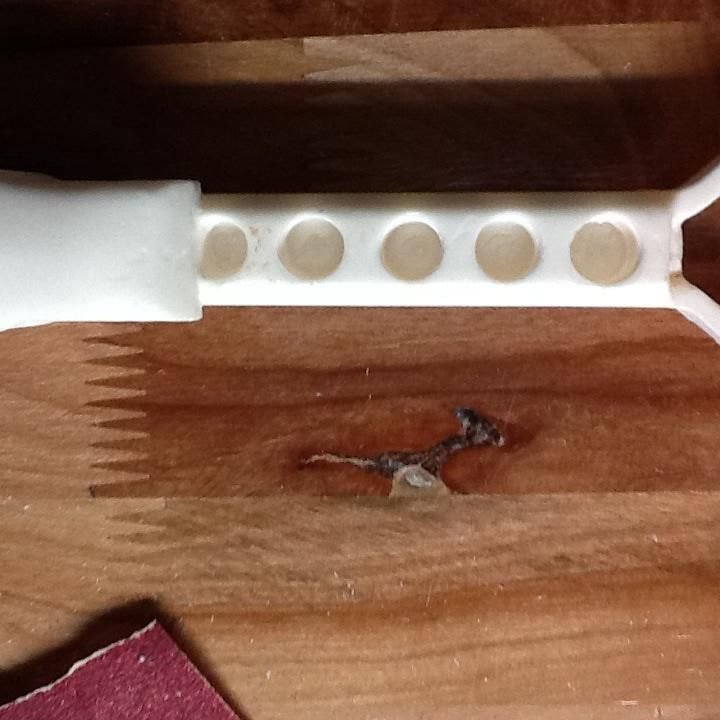
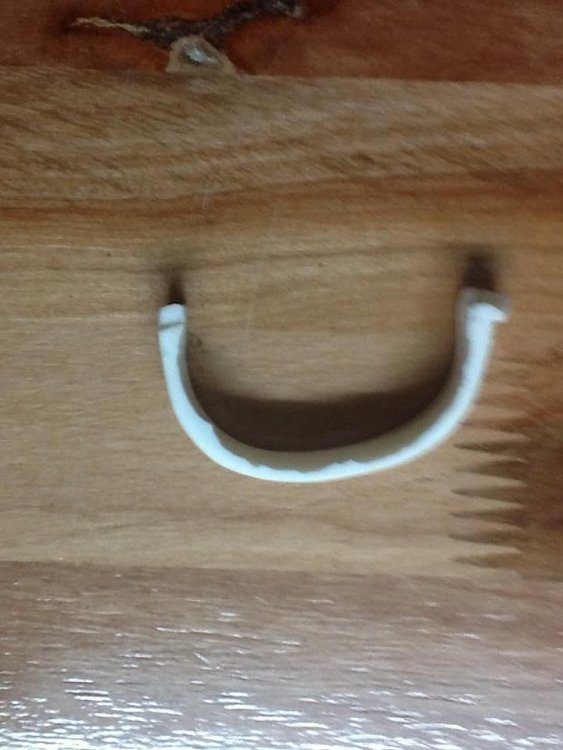
Now we come to the bane of this project. I mentioned earlier in my thread that my sight came with some damage on the sight post. it had an air bubble in it so it has a gaping hole in it. I first decided I would try to fill and sand it. I used bondo putty, let it sit for 24 hours and tried to sand it smooth the next day. Well, as soon as I started sanding the filler came flying right out of the hole. several curse words were heard by pretty much my hole neighborhood. I was truly dismayed and thought long and hard about what I wanted to do now. I thought about trying a different putty, one such as the one Tim used made by Testor. (if I have not mentioned to everyone before, patience is a virtue that I often lack. this project is a test for me, if I can complete this I should be able to put my armor together.) ultimately I decided that I would sand down the sight and just remove the air bubble, which is what I did. I did not realize just how deep the air pocket was and ended up removing half of the sight post. it is now too thin for me to insert a screw for a sight, a la Tim. I did drill a hole for a sight to be inserted but it ended up being to small for a nail and I could not drill it any bigger b/c it would have split the sides. I decided to just use a grinding disk and put a split in the sight. I then cut a piece of aluminum from a sheet I will be using to try to make my scope and counter brackets. I formed it and glued it into the split. it is passible and may not look all that bad. the jury is still out on that. the other issue I had with the sight was the bottom area b/w the post and the outer edges was very rough and uneven. I decided I would sand that area and try to smooth it out and took out too much and now the bottom is very thin. so thin in fact that I can't really sand it to fit the barrel and you can actually see light through the bottom. I will use bonodo filler to fill in the gaps once the sight is attached to the barrel and that will hopefully take care of any fit problems. I am very disappointed with this piece and if I could get another one and start over I would. if any fellow troopers out there have an extra sight or a real sight from a sterling they would like to part with send me a message. with all that said, here are the pics also, in one of the photos I realize the sight itself is backwards. I did catch that before the glue had dried and turned it around re-gluing the area for security.
-
-
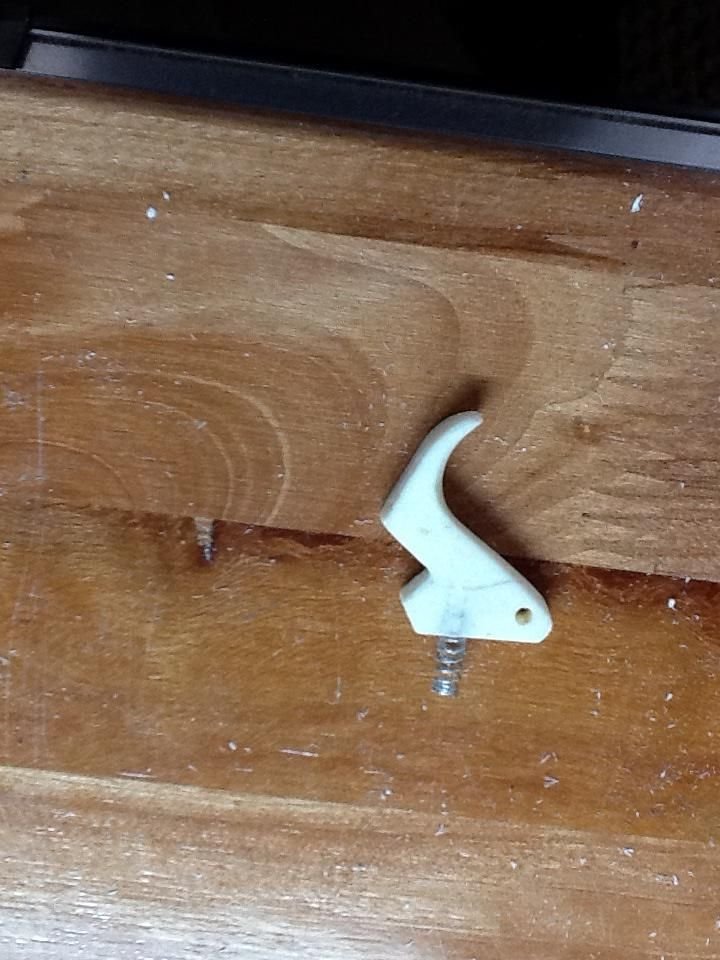
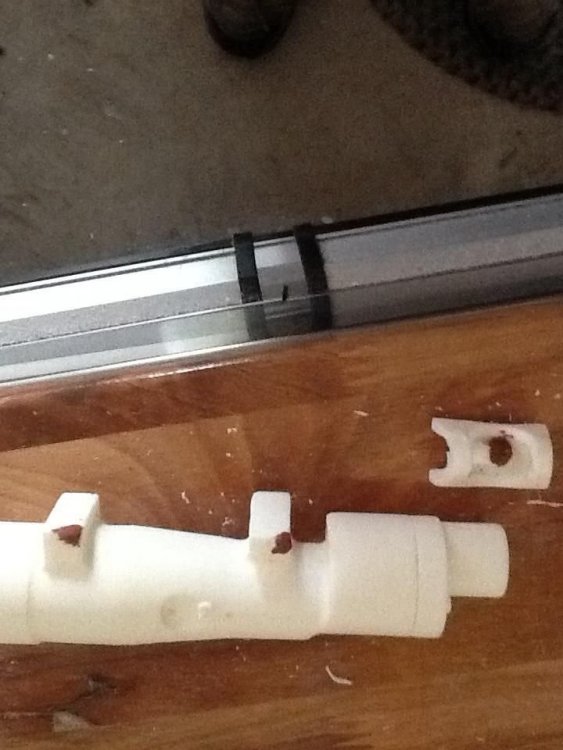
on one of the photos above you will see the selector switch on the grip. it is functional and those pictures are next. Instead of using a screw like Tim did, I decided to use a piece of coat hangar. it works well and I will glue the end that goes into the grip to keep it from falling out. the switch has been cleaned up and smoothed out with a dremmel bit and sandpaper. the switch was placed on the grip and markings made where it would sit. then i marked the center of the circle on the grip and the center point of the switch. I carefully drilled and you can see the result. I am very pleased with how it came out.
-


-
if you look at the first picture above you will see some bondo on the handle. i went a little too far with the drill bit while making the trigger functional. I tried to fill it with bondo but i pushed it right out with the hangar again as I am fiddling with the trigger. those pictures are next. I am having an issue with the trigger spring. I have used several of different sizes and lengths and no matter which one I use the trigger is still being pushed to far out. any suggestions from anyone would be greatly appreciated.
-

-
continuing with the stock, yesterday after looking more closely at Dark CMF's build I realized that the type of screws I used for the stock handle would not matter b/c I would have to fill the heads with bondo to make them look like rivets. something Tim confirmed for me later in the day. Thanks Tim. I went home and decided to go ahead and attach it to see how I would do. this became an area of great irritation as the drill bit slipped at the last possible second so the hole is not centered on the handle. I thought about filling them in and trying to drill again but due to the size of the screws the holes are fairly large and I know the drill will just go to them again so I have decided, reluctantly, that I can live with it.
-
With a special thanks to my friend Steve who is an IT guru my computer problems appear to be fixed so now I can continue updating everyone on my progress.
-
Question for Tim. On your folding stock I can't really see the head on the screws you used, is it a Phillips head or is it a straight line for a flat head screwdriver? Also do you remember the size of the head? Was it a #12 or #14?
-
and it will not happen...my work computer wont allow the pic to transfer over. hopefully more tonight
-
Thank you to Tim and Brian for your responses, I have about 30 minutes left on lunch so I will try to update more progress
-
-
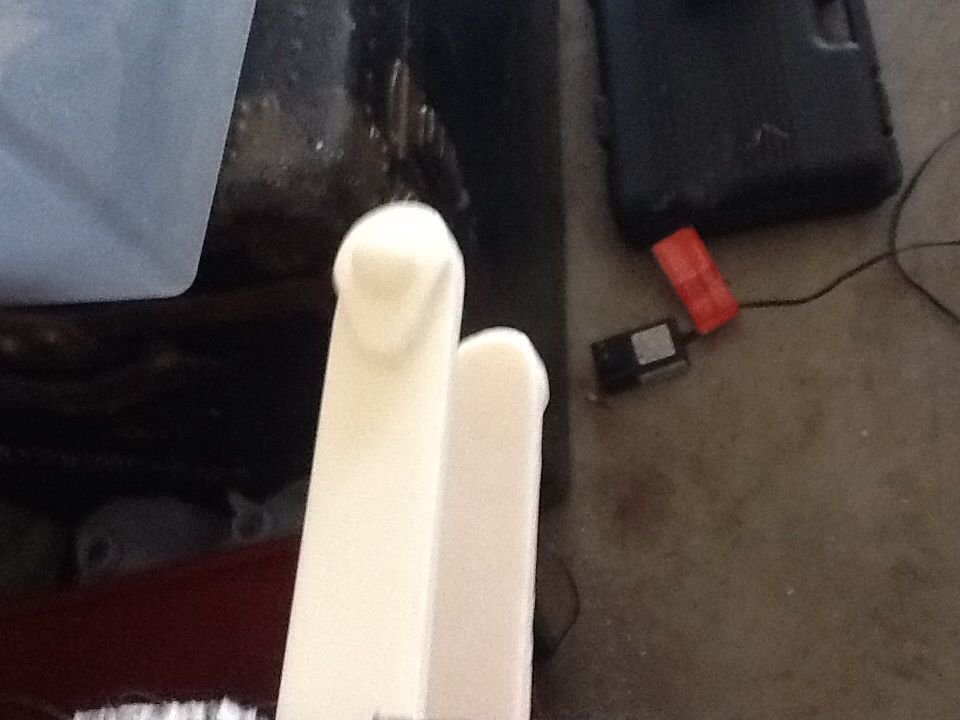
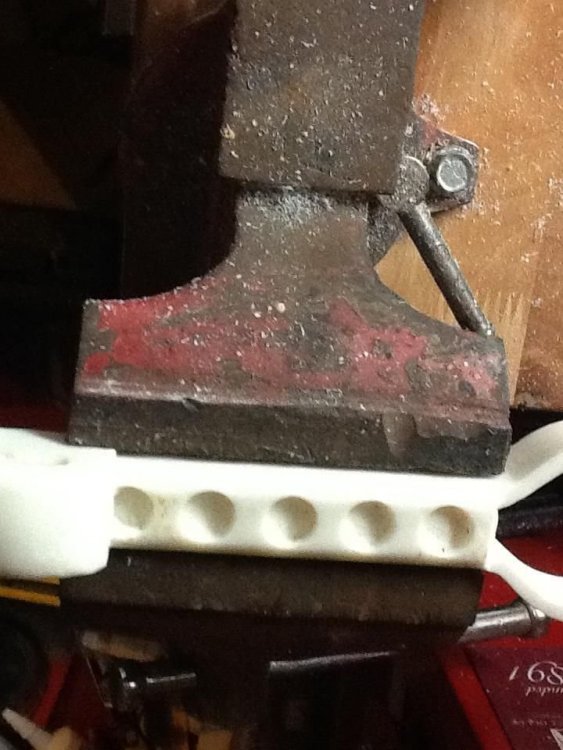
the next thing I decided to do with the folding stock was to make it semi-functional. I removed the epoxy bubbles on the hinge that attatches to the barrel. I will eventually drill holes and put screws in so that the stock will be able to move. in the pictures you will see the bubble and then 2 pictures of the bubbles having been removed and the area sanded and smoothed out.
-
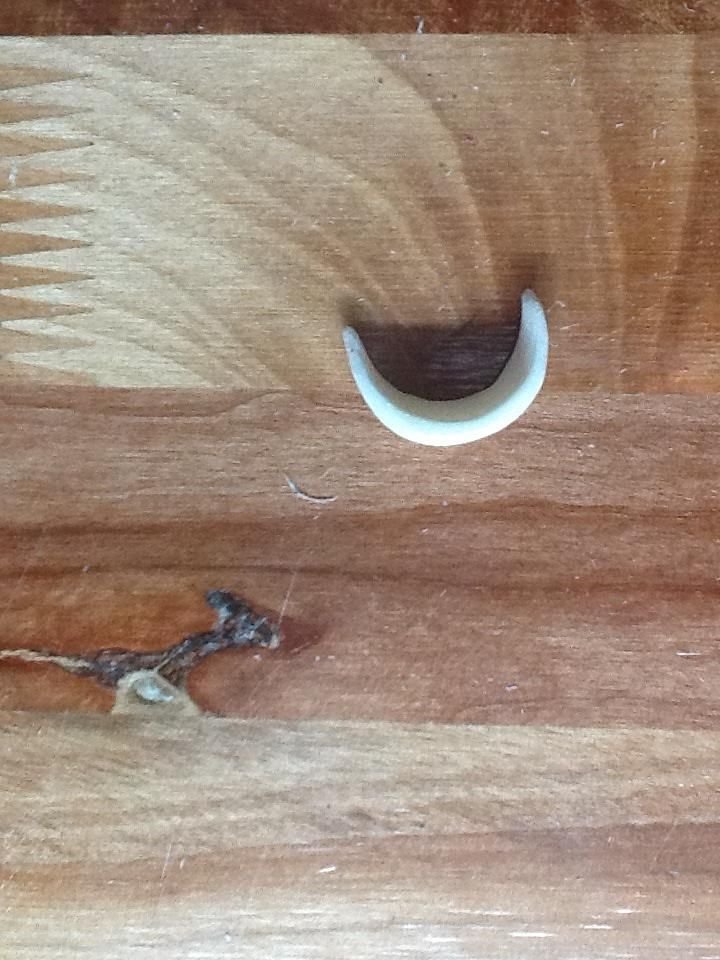
the line groove has since been sanded, leveled and smoothed out.
-

-
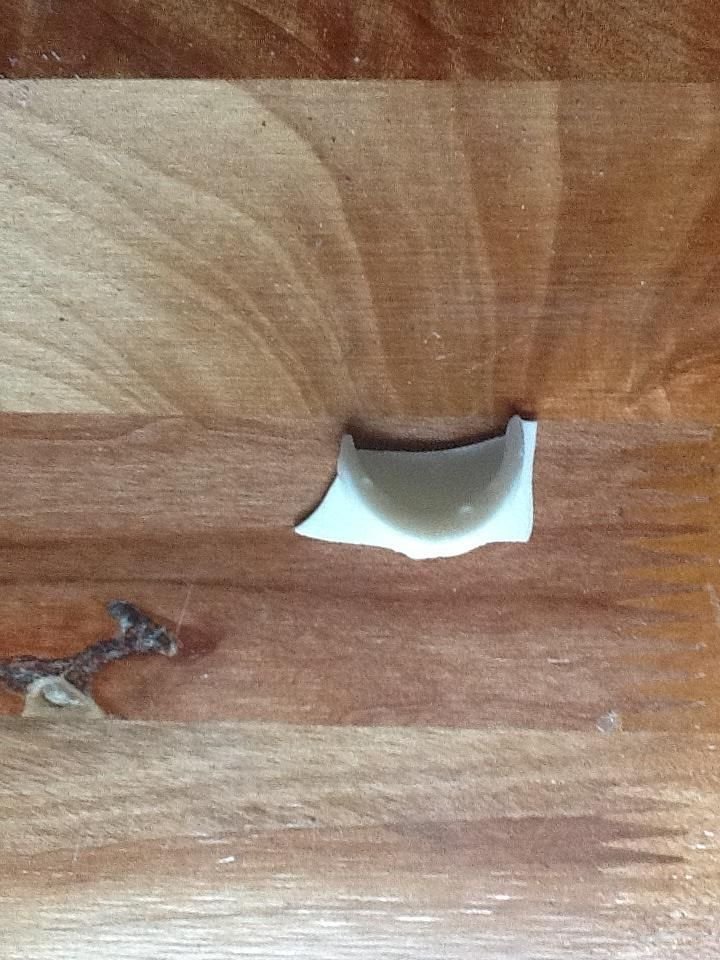
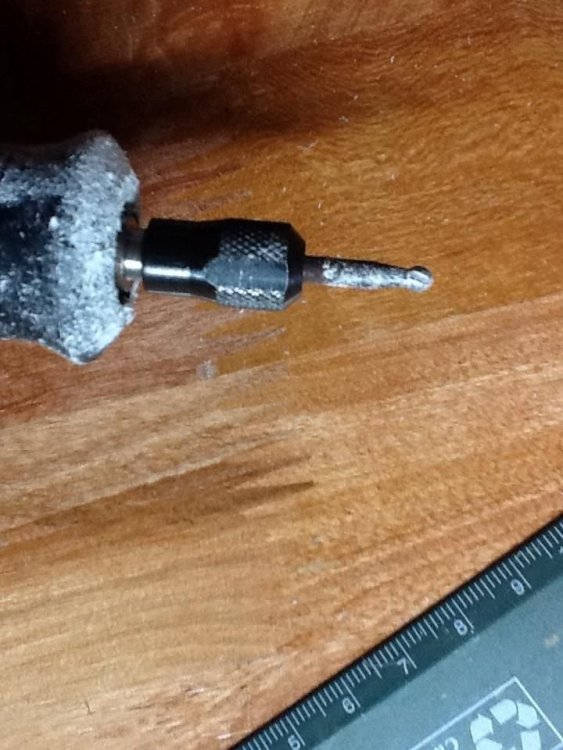
these next photos are of the folding stock handle. I have seen some builds where the holes were drilled through and I have seen some that were drilled deeper but not through. I decided not to go all the way through. I also drilled out the line in the handle. I found using the dremmell bit pictured was the easiest way to do it and it went through really quick. I started by drilling pilot holes in the slot and then used the dremmell bit to remove everything in between
-

-
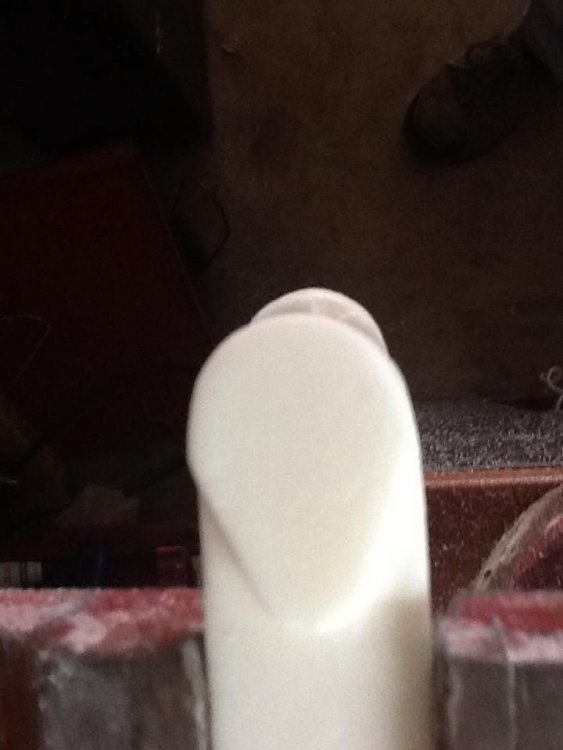
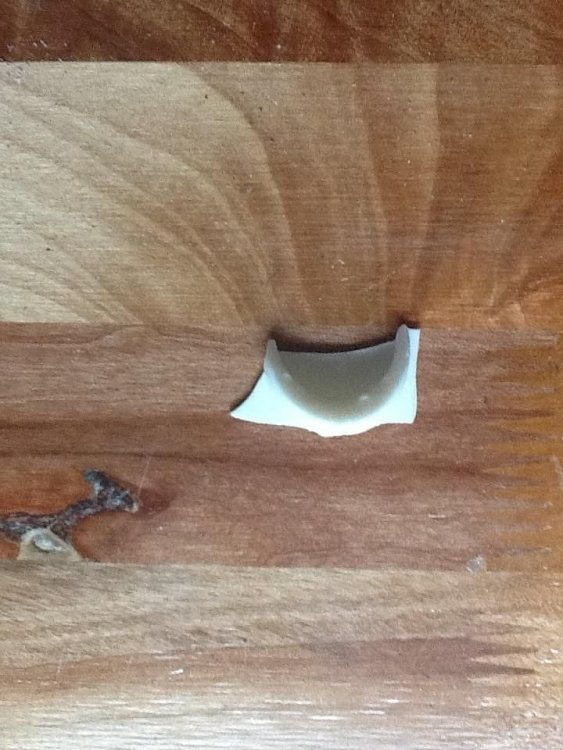
these pictures are of the air pockets that were in the base of the sight and the repairs that I made today. I used bondo putty to fill in the holes and as it started to cure I used my fingers to try to shape it to the corners. I will give it a day to set and then I will sand them smooth.
-
the above pictures are of the rough shape of the trigger guard before a good cleaning/sanding. the last 2 photos are all cleaned up
-
-
the above picture is a before and after of one of the guards.
-

-
Update. Lord Vader stopped by and let me know he was most displeased with my apparent lack of progress and threatened to find new ways to motivate me. More work was done today. I will try to post more pictures today or tomorrow at the lunch hour. I do have some questions for you all: I found a gray sprinkler riser pipe that will work as my inner barrel. Do I have to paint it black? If so, do I have to paint the whole pipe and then insert it? or can I just paint it when I paint the whole blaster, and only the parts that are visible would then be black? The pipe is 18 inches long and fits the barrel perfectly. However, do I have to cut the pipe to get the spring in the barrel or does the spring just go around the inner barrel? I don't see how, if you put the spring around the inner barrel, it will fit at all. If the inner barrel is cut, what is the length you cut it? I am thinking it would be in half or at the 9 inch mark. Comments or suggestions? Please, I am getting to the point of needing input so any help you all can provide would be great. Thanks in advance. More photos of progress coming soon.
-
that is all for tonight, more tomorrow