-
Posts
1,364 -
Joined
-
Last visited
Content Type
Profiles
Forums
Gallery
Articles
Media Demo
Posts posted by ZeroRoom
-
-
I have now applied this fix to all buttons. Please let me know after you empty your cache if it works. Screenshots appreciated!
-
OK - this is what the top navigation bar looks like for everyone but IE:

Clearly it's rendering transparent in IE.
I have added a safety that should at least get IE users a solid colour, which is not as nice as the shiny metal look but at least legible.
Can someone using IE 7 or above please let me know ASAP if this fix has worked?
-
There it is! IE 10 supports CSS gradients natively (or will do when it is officially released) 9 does not...
-
I believe this is the experience of most web developers

Your absolutely right Brent - Browser compatibility ain't the challenge that it used to be but that damn IE is the last hold out of the web designers nightmare!
Thanks for posting these. I have no access to Internet Explorer so it's good to see screenshots.
That issue with the menu bar was pointed out during testing by RogueTrooper who also uses IE, I thought I had fixed it (it's the IE margin bump thing) but evidently not - back on that then!
The overrun on the Also Tagged is a universal problem. I need to apply a different div tag to the header but due to the way IPB breaks up it's code packets I'm having the damnedest time finding the "Also Tagged With" template... Working on it.
From the buttons (and the nav bar) It's clear that IE can't recognise CSS gradients or rounded corners. (I was under the impression that had been fixed in 9). In a smart alec (and obviously misdirected) move I changed out all the buttons at the last minute to remove any image links and replace them all with pure CSS to speed load times. That will clearly have to be reverted at least for IE.
The horrific alignment issue is a tricky one for me - as I said I don't have any access to IE to check. I'm guessing it's either the margin thing again or a float property. Brent could you see if you can spot the CSS causing this and I'll fix it, That really is the worst of all the bugs.
Meanwhile I also have a look at that left active content ID/Class issue and see if that's what has happened.
Thanks again Brent - more screenshots for any issues are welcomed!
P.S I always forget how horrible fonts look in IE until I see it again. Urgh!
-
You must be using the white skin - you can select the new skin using the skin selector in the bottom left corner. If you're not using the whit skin a quick refresh should do the trick!
-
Thanks Brent - this is good info to have. 99.9% of the javascript is built right into the forum software so the software developers will need to be aware of this. There are currently no IE10 update scripts available but I'm sure it will come. Your solution definitely seems to make sense on paper - if it maintains workability in all other browsers I will implement it in readiness for IE10 full public uptake.
-
but even though font smoothing is active under Control Panel > System > Advanced > Performance, the fonts seem slightly too sharp.
That's definitely out of our control I'm afraid! Your computer is loading the fonts from it's own font library. When you say sharp do you mean aliased (jagged like in IE) or sharp as in super smooth (anti-aliased - which font smoothing should do but sort of cheats..)
Also it's odd that the first character of the titles of each section of the page (such as "Reply to this topic", "Also tagged with...") seem to be in bold. Was that intentional or is my browser playing tricks on me (FirefoxPortable 11.0)?
That probably is a CSS issue on our end but it's not set to do that. I just checked it out in Firefox but it's not happening for me... maybe that's also connected to font smoothing?
-
PS:
I should have mentioned before - we have a new "Also Tagged With" function. This a great addition that helps you find topics of the same vein using the topic tags to group them. If you're looking at a topic on, say "applying helmet decals" below the topic posts you will see a menu with any other posts that reference this subject.
It's a great way to get the maximum amount of information on a subject in the minimum amount of time

-
It's probably an issue IE9 has with CSS gradients (and those buttons are pure CSS) - I'll make an IE fix for it

-
Try refreshing - it should look like this:

Which browser are you using?
-
Many of you will already have noticed, but the FISD Forum has a brand new skin for 2012. Those of you who simply use the default skin or log on and off irregularly will notice as soon as you arrive, but for those of you who have chosen a skin from the skin changer menu in the bottom left hand corner of the page you will need to manually select FISD 2012 to see the changes. Anyone as crazy as me who leaves FISD open 24/7 on their desktop may need to refresh or empty your caches to see the changes and get the full new experience - but more on that later.
First, as I always do, let me start by saying that the upgrade path is always fraught with surprises and a learning curve, so while we have done our best to stay on top of any glitches or bugs as more and more people start using it who knows what new issues might be discovered buried deep in the bowels of the Death Star, so feel free to post any oddities you may experience here.
Secondly - if you are not seeing the new skin after refreshing (nicknamed Steel) you may need to empty your cache. This is easily done. Most browsers have an empty cache function either under program name drop down in the top left (as with Safari) or as part of the "Clear Browser Data" menu (as with Chrome or Firefox).
The changes in 2012 are mostly cosmetic and won't require the learning curve of last years update but it is worth mentioning that the Login window now supports autosave - no more time spent retyping your name and password every time you show up! Now you can let your browser autofill for you.
We are always endeavouring to make friendlier, better and easier to use and we count on our members feedback to keep improving. If you have any questions or issues with the update be sure to post them here or in the Tech Centre so we can be aware of them and keep FISD the best possible forum experience for all our users.
ONE LAST THING:
In order to protect ourselves against any potential issues we have left the '2011.2' and the '2011.White' skins as selectable options in the skin changer for the time being. However this is simply to grandfather them out and I suggest you switch to 2012 as soon as possible as in a week or so the 2011 skins will no longer be accessible.
Well that's about it from me - enjoy the new FISD and be sure to let us know what you think!
With Unquestioned Loyalty
ZeroRoom
Webmaster
-
Oh man - this is where we need the *drool* emoticon....
That looks so good - it's literally as screen accurate as you could get.
Plus I love your swappable scopes. I'm jealous in the best possible way!
-
Dude - that thing is looking awesome! Great work on the finishing touches

-
Leave as is!!!!
-
Never fear - I'm completely aware of exactly what's going on. The circles and Stars will be back soon!
Better yet a whole new skin will arrive in the next few days!
There have been a lot of site upgrades, version updates new hooks and so on getting busily added around here as we go into the new look 2012 FISD. We appreciate your feedback and patience as we make changes to make the FISD even better.
Stay tuned to announcements

-
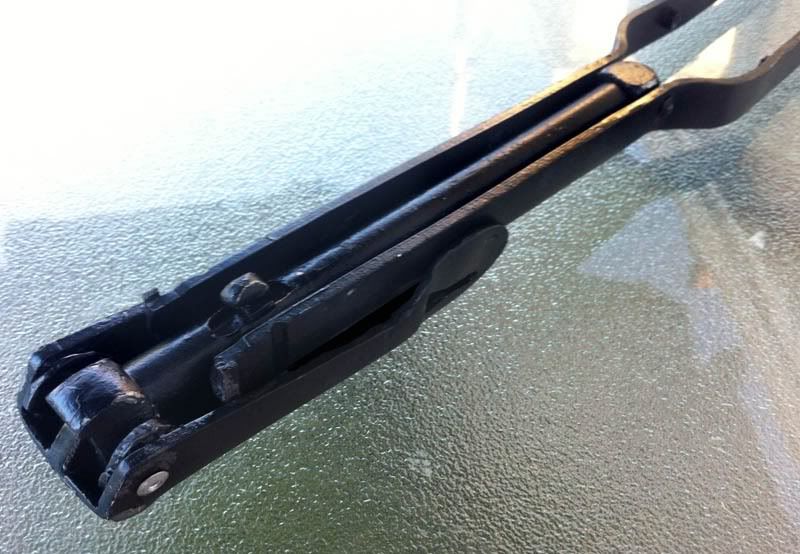
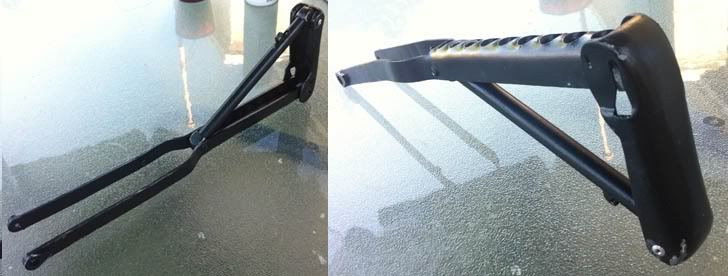
Well the morning sun is here and as promised it brings with some pics of the completed folding stock:
The front end:

The butt and fully open stock:
The catch retracts as the butt is opened:
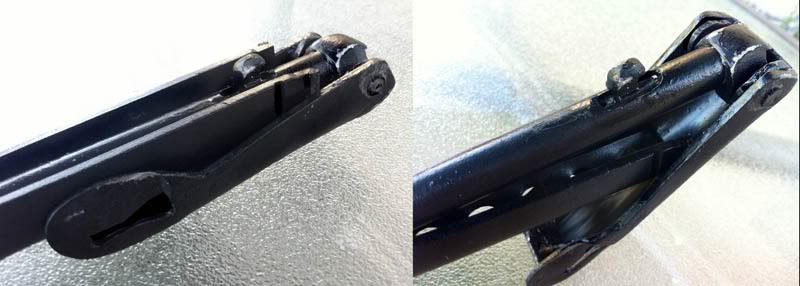
It's a little hard to see in this pic as it only retracts by about 4mm but that's enough to unhook it like so -
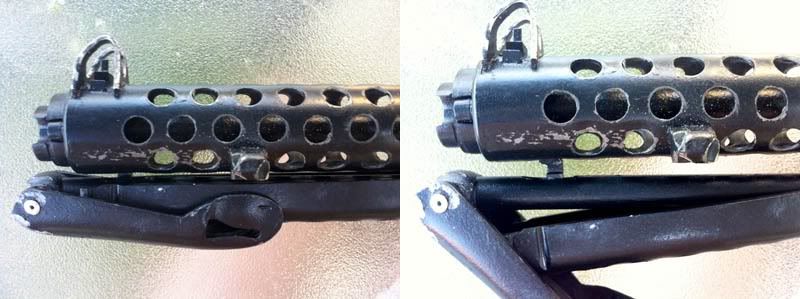
Once I have this set into the rear hinge there's so little left to do!
1. Rear clip
2. Andy PlayfulWolfCub's suggested chipping weathering
3. Slight paint touch ups
4. End Cap lugs
5. Selector Switch Screw
I think that's pretty much it and my base Sterling is done and ready for E-11 conversion!
-
Of course this whole contraption is for nought without the catch that holds the folded stock in place as seen in yet another pic from Andy here:

Alas - when I had all my parts laser cut I was ignorant of function and shape of this piece so did not have it made - a mistake I would definitely rectify next time. So out comes the apoxie sculpt again, over a spine of scrap plastic…
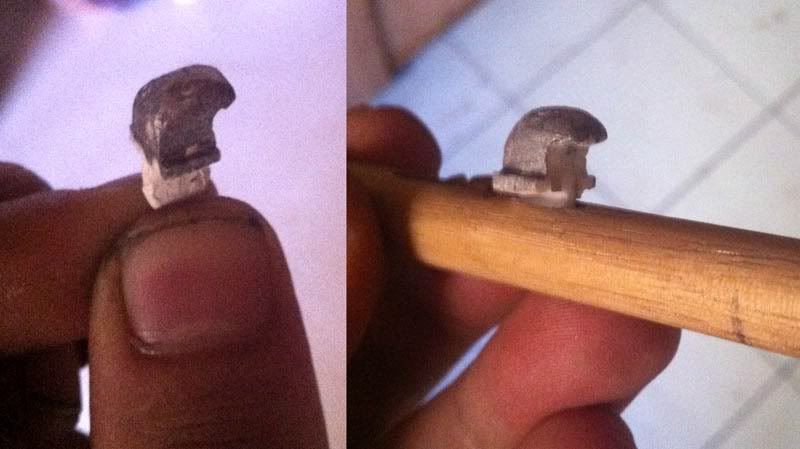
Although this next pic was taken after painting (and is therefor out of sequence) it does show the assembly premise:

Last - but soooooo not least - was the butt portion of the stock. Let's all get over the word butt right now because I'm about to use it a great deal…
Again it was a jig and oven job from cut template piece. Because of the wacky shape in all dimensions it took a few goes in the oven and some clamps to add three or four hands to my two…
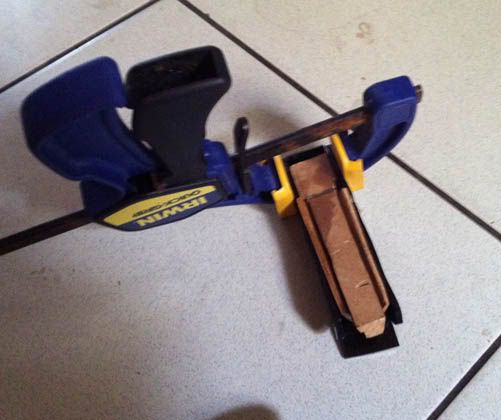
In addition - although the shape wrought by the template was satisfying - to truly get an accurate shape I needed to use some of the apoxie sculpt as filler for filling and shaping the edges and meeting points. At this point it's good to keep your reference pics handy.
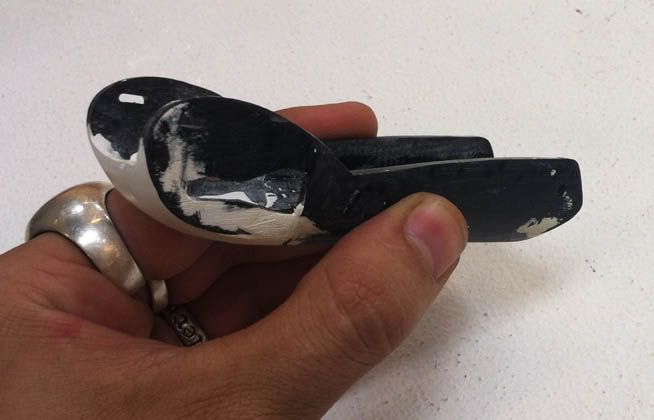
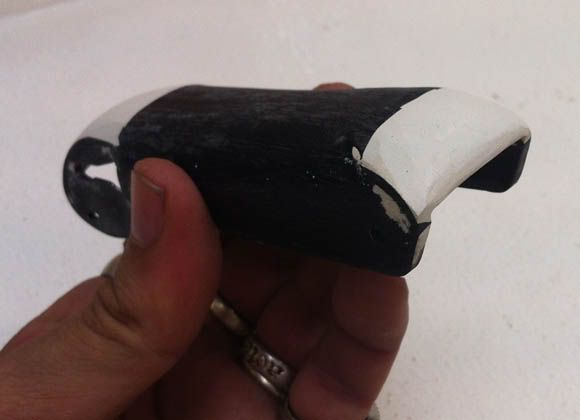
Once I was happy with the shape I gave it a good sanding to blend the joins and was left with a fairly god representation of the real Sterling butt.

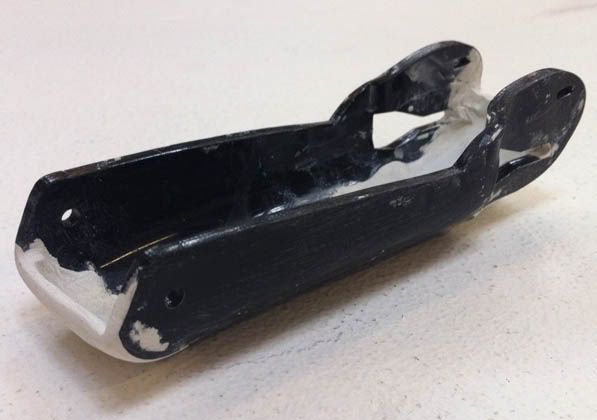
This seemed as good a time as any for a test fit:
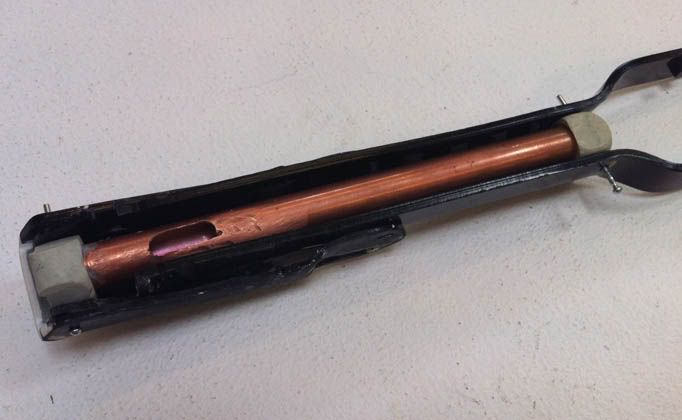
That was all good so I moved to the next part - the mystery component from this earlier pic:
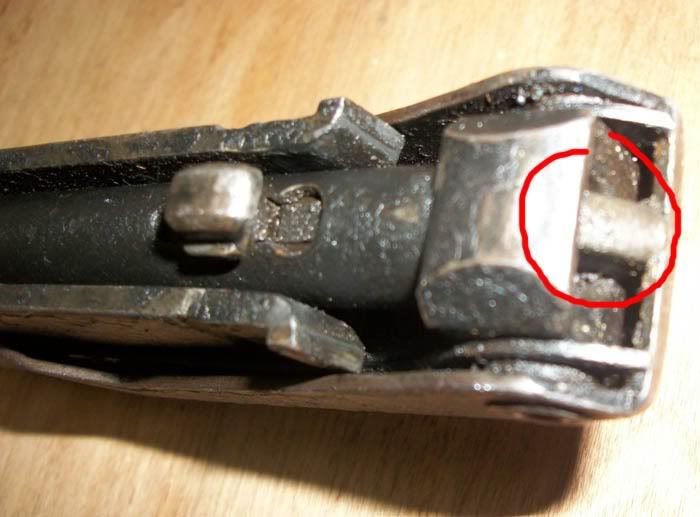
I won't bore you with the amount of mental nonsense it took to come to my solution (and let's face it if you've made it this far in a thread this long you're a soldier…) but here's what I did. I chose to replicate that circled part as that is the recognisable outside facing portion. My idea was to build a protuberance that would push the sprung catch backward when the butt was hinged open. That's certainly what it looks like is happening and - had I not been confused by the GofD diagram - I would have sincerely believed was how the folding stock works. Ultimately after all my head scratching this was the simplest solution that worked the best and looked the most accurate.
I just cut a small piece off of a lollipop stick from our candy jar and guess-timated the right angle by fiddling with it over and over. This would form the skeleton of my protuberance thing…
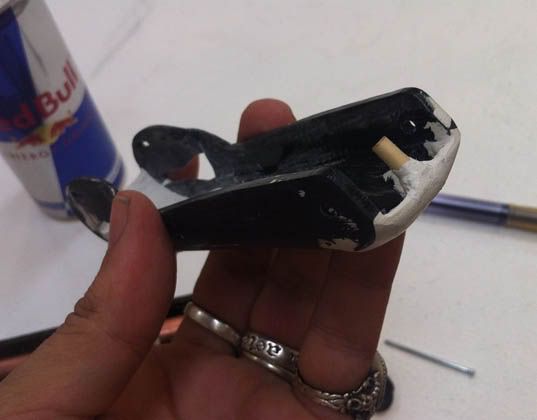
Once this was dry and solid I just sculpted over it til I had a decent replica of the shape seen in the pic above.
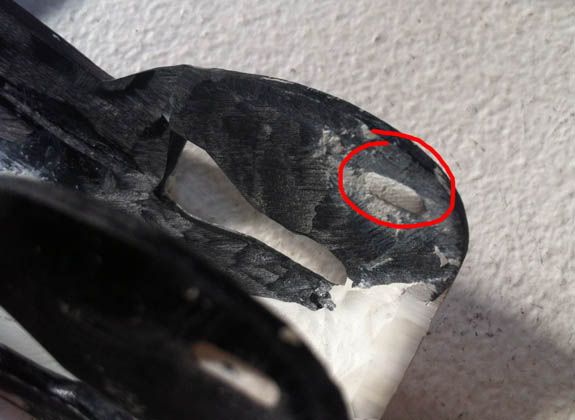
Meanwhile it was pointed out to me that the small "hole" in the butt above the shape that catches the arms was in fact a dimple and not a hole as I had cut it. I just refilled it with some apoxie sculpt.
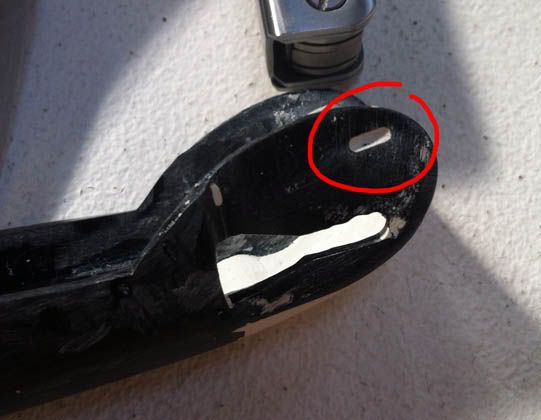
Pushing it in with my finger to create the dimple also conveniently created the "pimple"(??) on the other side that helps hold the stock closed:
Now I really did have enough for a proper test fit. I just held the joints together with the pins from some pop rivets and tested the opening and closing function -
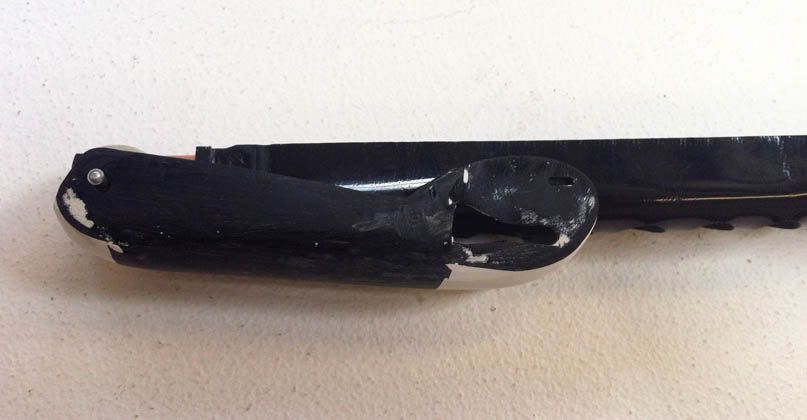
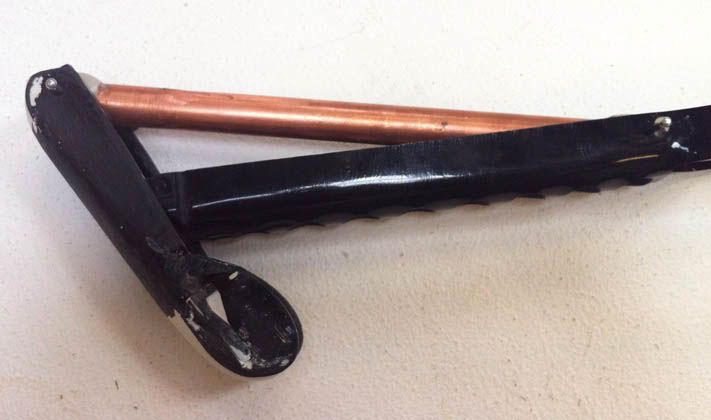

to my absolute shock it worked perfectly.
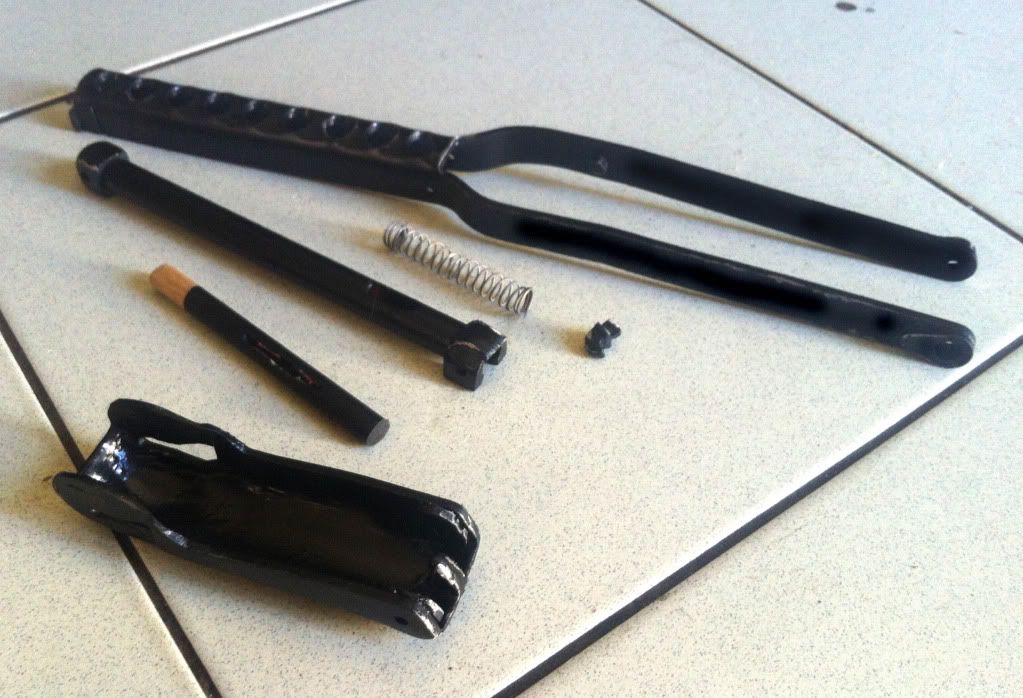
The only part not installed at this point was the catch hook. This is because the fact that it emerges from a stick that sits inside the strut pipe means that it has to measured and inserted after assembly - there is no way to get the stick inside the pipe once it's all hinged up. I also wanted to be sure to paint all components separately to prevent the paint sticking up the hinges and preventing the folding action. Paint first - hinge later...
Once again the whole paint, mask, paint cycle takes effect. These are the components of the folding stock ready to assemble.
THE HINGES
I needed something for a hinge that would stay fixed to the outside parts of the stock and sit loose inside the strut in order to allow the hingeing without applying wear and tear to the external painted components. I also wanted something that matched the circular look of the press fit bearings used on the real stock. I came up with the idea of taking some pop rivets like these:
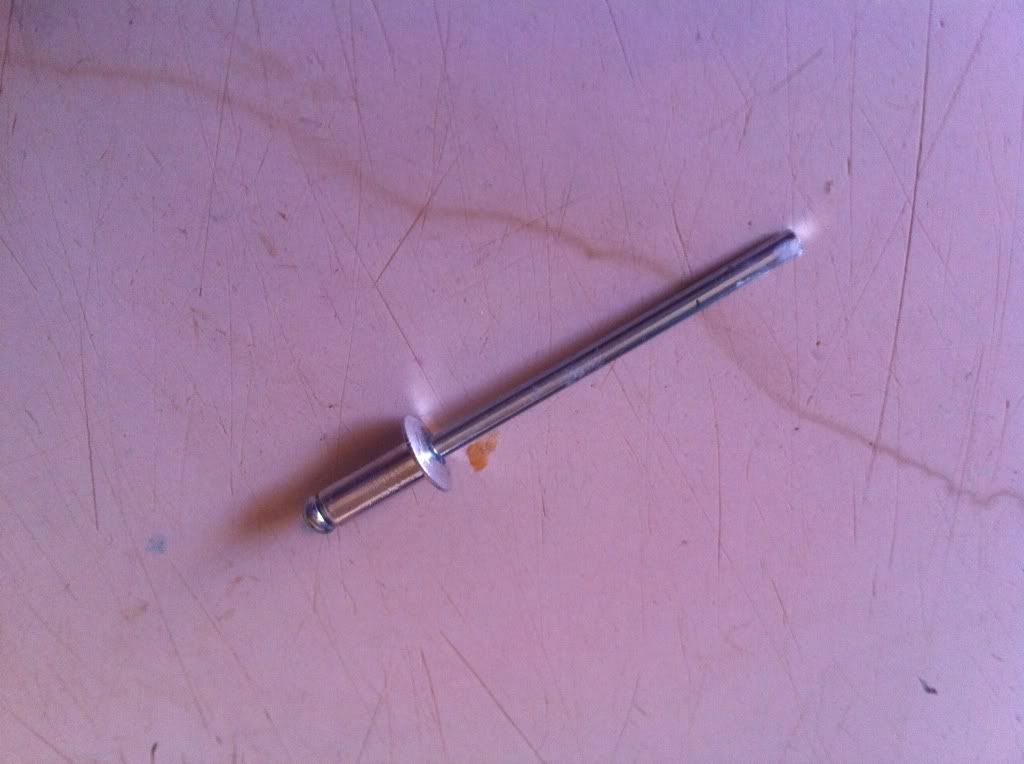
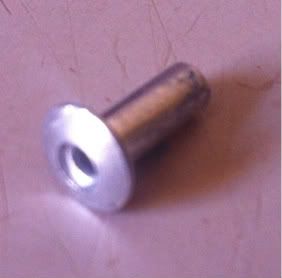
and using pliers pulled out the little stick that comes in them. I was left with a perfect hinge stick with just the right kind of circle to sit on the exterior of the arms and impersonate press fit bearing:
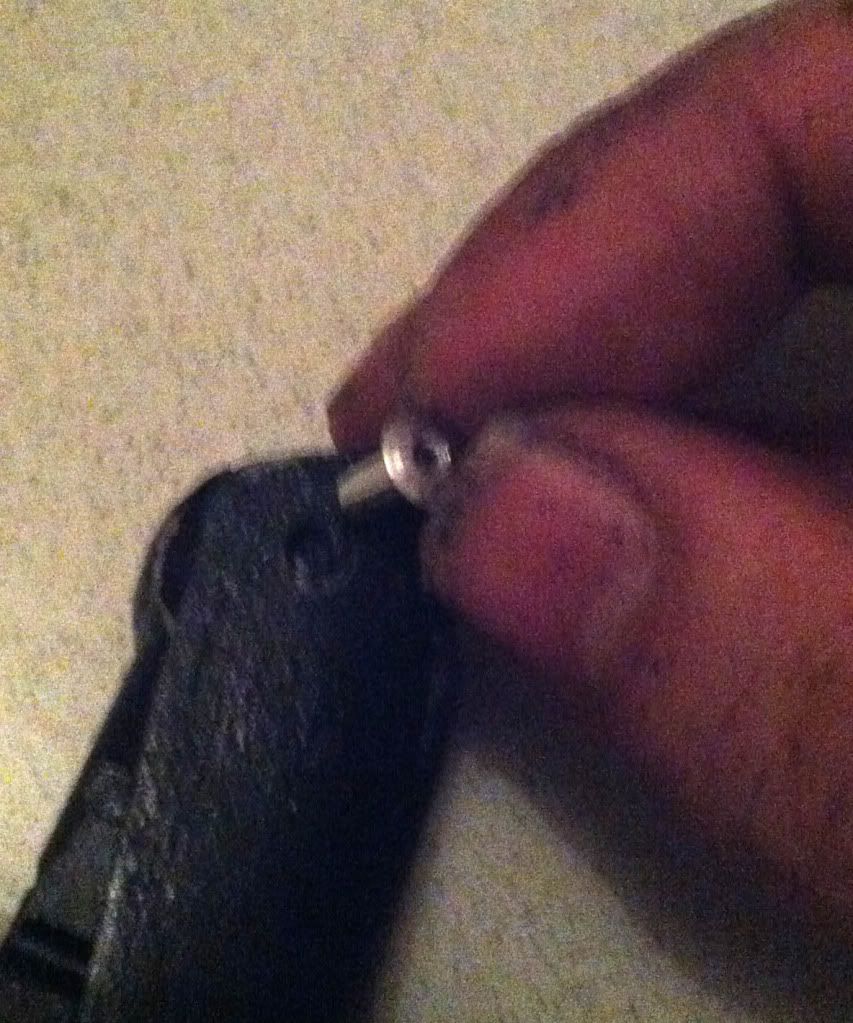
Being careful not to apply any glue to the end that would sit inside the strut caps I inserted and glued down my "hinges"
I inserted the catch hook (after testing the correct placement) using the apoxie sculpt as both a base and a fixative. I gave the hinges and the hook a touch of paint to blend them and finally I had a finished folding stock!
At this very moment it sits drying in the lounge. It's after midnight here so the light won't allow any decent pics so worst of all I haven't got any "finished product" pics for you all! If I can indulge your loyalty to this thread to come back tomorrow I will shoot some and post them. I'm pretty happy with the result.
All that remains now is to attach it to the rest of the gun…
-
AT LAST… THE FOLDING STOCK!
It was finally time to tackle the folding stock - this took a lot of thinking through to figure out exactly how I was going to make it work.
I had many great resources to work from though. Firstly Vern posted these great pics here and Andy PlayfulWolfCub sent me a huge batch of extra pics.
In addition I had these two diagrams in the book "The Guns Of Dagenham":
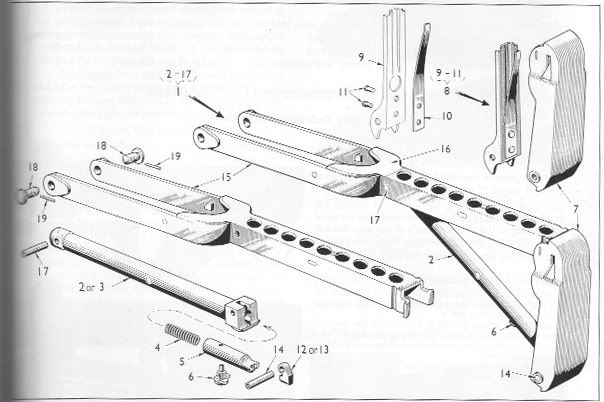
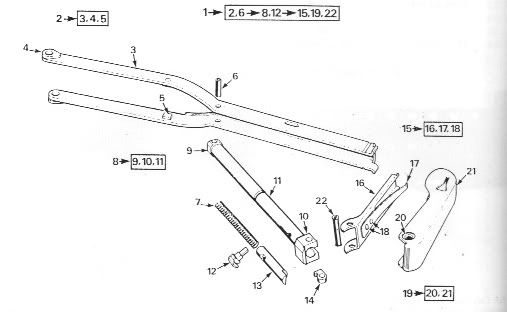
(by the way - I can't recommend this book enough - it's been invaluable in my build as well as being a fascinating read. A shout out to my wife for spoiling me with a copy)
Now you'd think that this would be all you could possible need to build the stock, but it's a little trickier than that. These diagrams don't show exactly how the action works with the spring and what I couldn't reconcile was this bit that looks like this in the diagram:
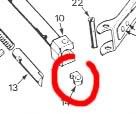
With the bit that looks like this in real life:

So, long story short, I had to come up with a "best of both worlds" method of making it all work. Without ripping a real folding stock apart I have no idea how accurate this is - but it works.
In fact it works so well I think I will draw up some diagrams and break this out as a separate tutorial soon, but meanwhile - back to the build…
The first thing I did was shape the arms. Some of you might have seen this in my strip heater How To here but basically the shape started out flat from the laster cutter like this:
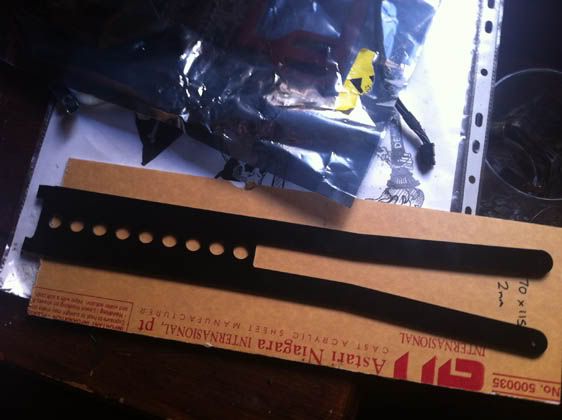
Bending the sharp turns at the front was easy enough with the strip heater but the softer, larger curves of the arms would need a wider heating area. It's probably better to use a heat gun here (as Brent discovered in his build) but I didn't have one. So it was back o the oven again!
The first thing I did was trace and cut another wooden forming jig using the templates:
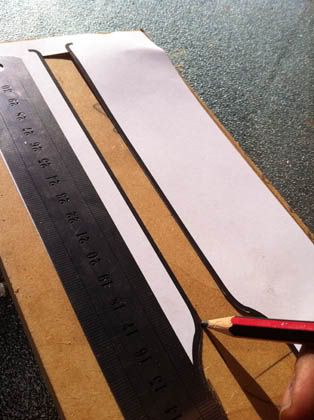
Then I cut the jig into two parts - the long skinny front and the curved back.
I tightly tied my stock arm part to the front jig using 100% cotton tape to make sure it kept it's shape in the oven - remember I only want the back half to bend now:
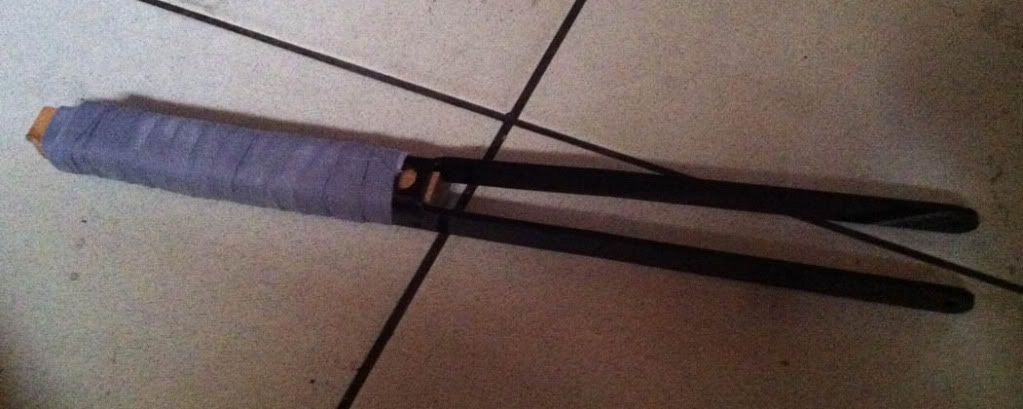
I used 100% cotton tape to do the tying so it wouldn't melt in the one and I wet it to prevent it burning any and leaving marks on the plastic. After about 10 minutes in the oven I took out the part and quickly locked the back half of the jig in place with the front half. I held the plastic around the jig tight for about 5 minutes (ouch):
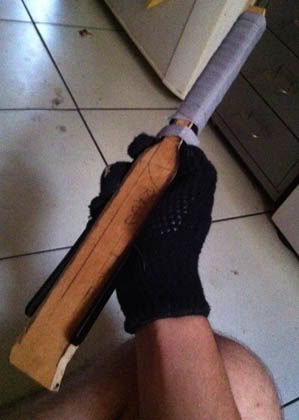
Once it had cooled I was left with a nice stock arm shape:
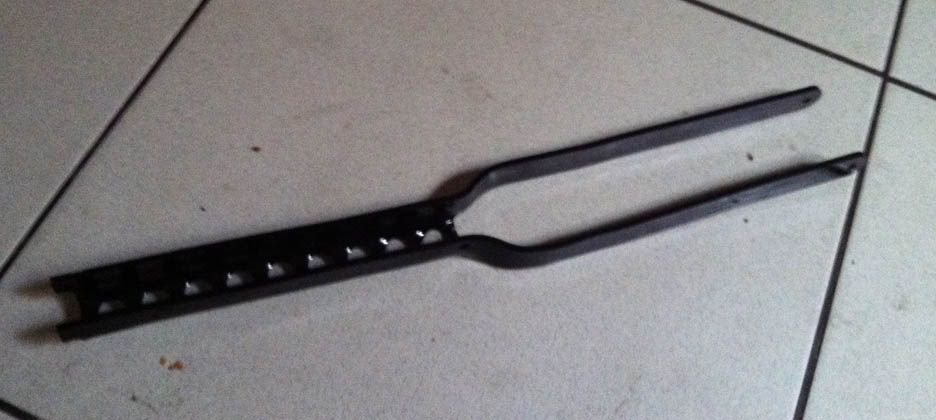
There are a few small but crucial details to add to the stock arms next. The first is this small groove channel toward the front:
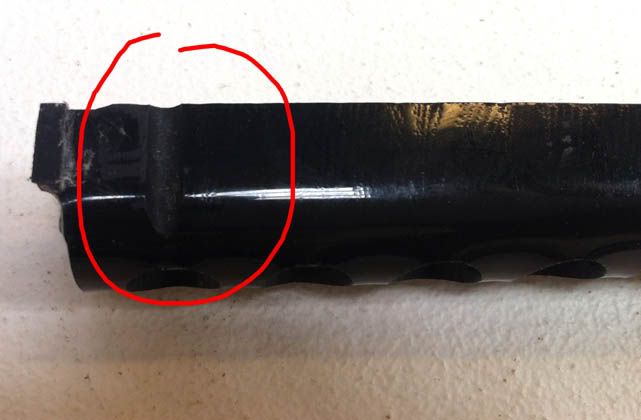
That was a simple carving job with a small dremel grinding cylinder.
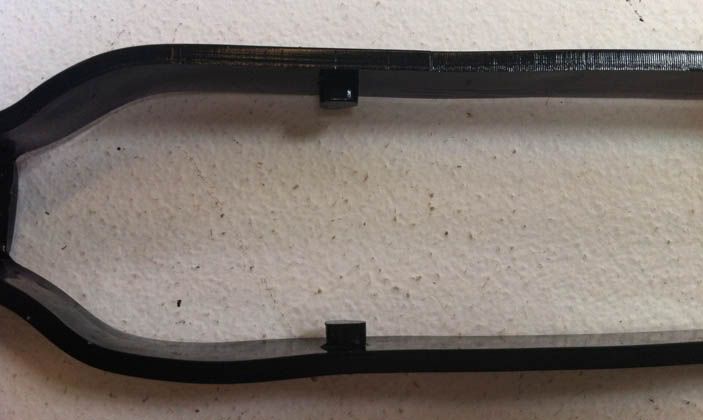
The other is the lugs which I had cut with the rest of the parts. After I measured for accurate placement (these need to lock into the channels on the end cap) I glued them in place:
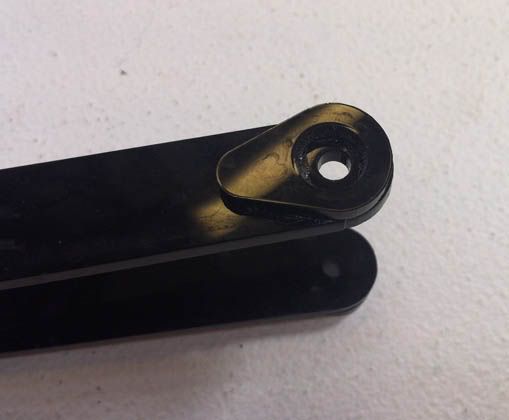
The last parts to glue over the base were the tear shaped parts at the stock hinging point:
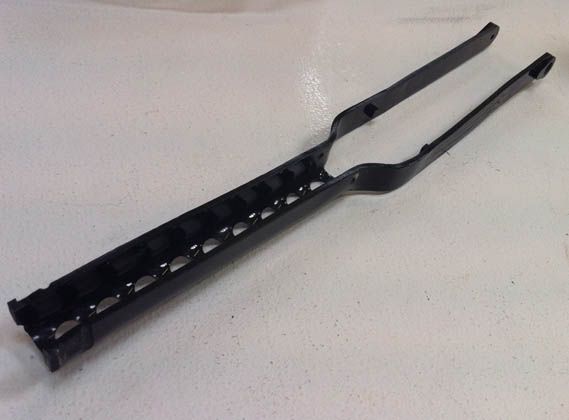
Over all the finished arms looked pretty good:
The next step was to cut a piece of pipe for the inside support strut:
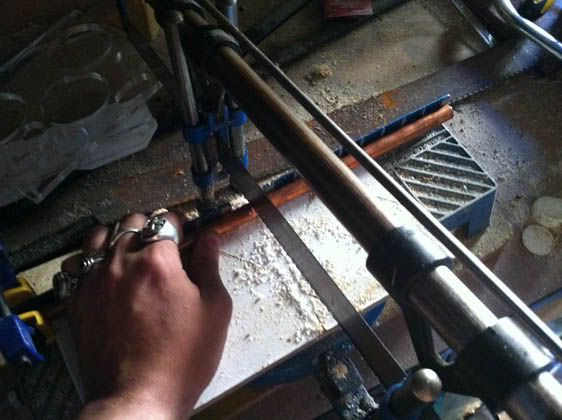
This pipe should be 12.75mm OD.
You can see in these pics from Andy that there are some odd shapes capping this pipe:

There was unlikely to be any found objects matching these so it was out with the apoxie sculpt again to form these bad boys:
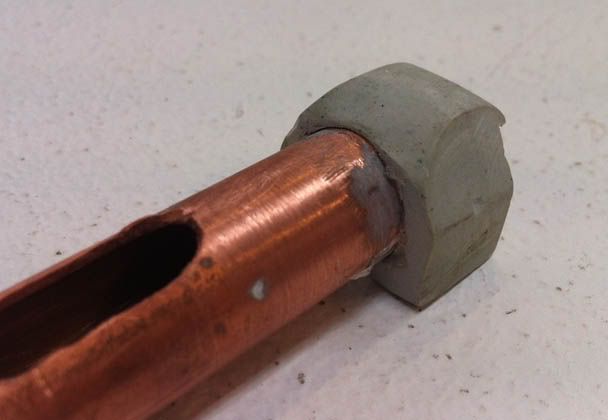

It took a bit of sanding to get the sharp edges right but the whole thing worked out pretty well.
I also needed to cut a hole for the sprung catch to stick out of. I just drilled two holes with my dremel drill press (seriously - I'm not sponsored by dremel) and cut between them with the cutting wheel:
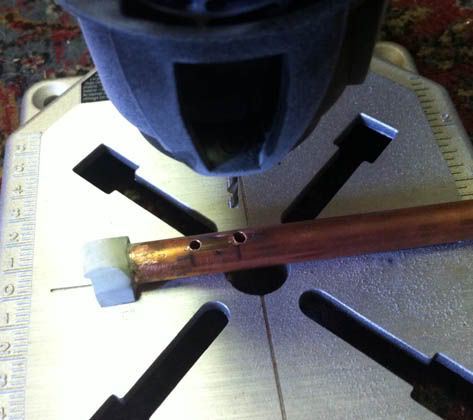
You can see here I did a pretty bogy job of it but it will do the trick.

Back on the drill press again I drilled the hole for the hinge right through the stock arms and strut at once:
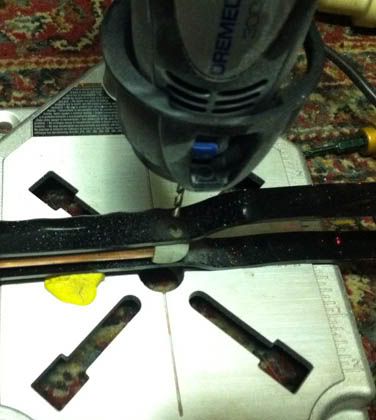
Now the key thing to the folding stock actually functioning as it would on a real Sterling is the aforementioned catch, spring, folding action contraption. So i needed to next construct the basis for this. As per the diagram the strut pipe needs an internal spring to hold the catch forward.
I made the spring out of some sturdy but thin wire using the same method I used to make the spring inside the barrel casing. Since I forgot to show you guys how I made that I thought I'd post the method this time.
It seems obvious to wrap your wire around a stick of some sort the same OD as you want the spring and space the coils the distance you wan them. However I find this often leads to very wonky springs and ones that don't really work as functioning springs.
It's better to coil your wire around a stick with a smaller OD the your intended finish product. Also you should wrap the coils as tight as you can - as if the spring is completely contracted.
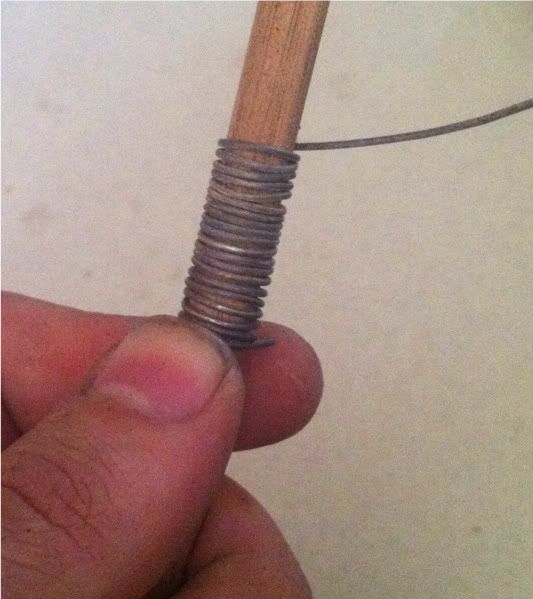
Then after you slide the spring off the pole you can stretch the coils to the required size and have the chance to adjust any wonky ones and ensure an even spring. Bending the wire this ways also provides better tension in the wire for spring function.
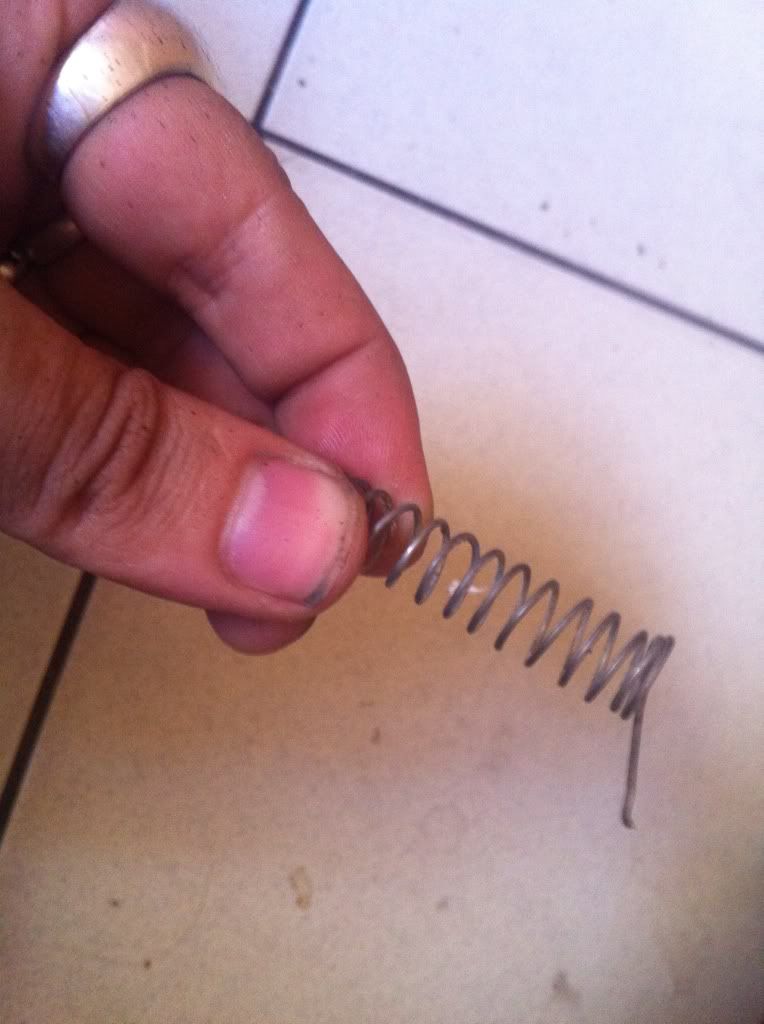
(And yes I do realise I just went on for two paragraphs about the evenness of spring coils… My anorak is in the mail…)
Then I cut a hole in a small piece of dowel that fit the inner diameter of the strut pipe perfectly. This will be the slot for the catch to sit in.
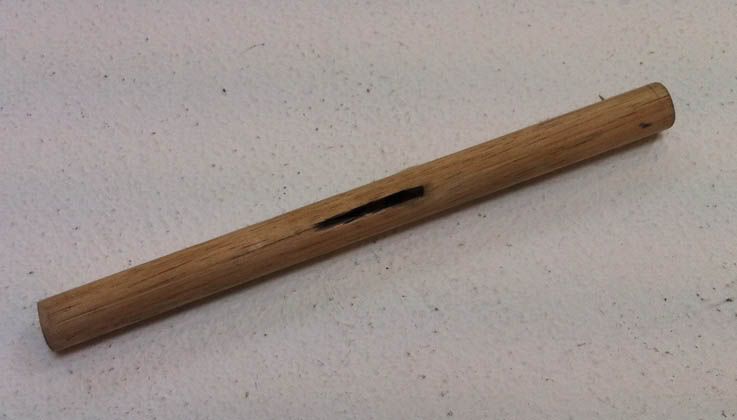
A quick test assembly proved that the stick sprung back and forth nicely inside the pipe:
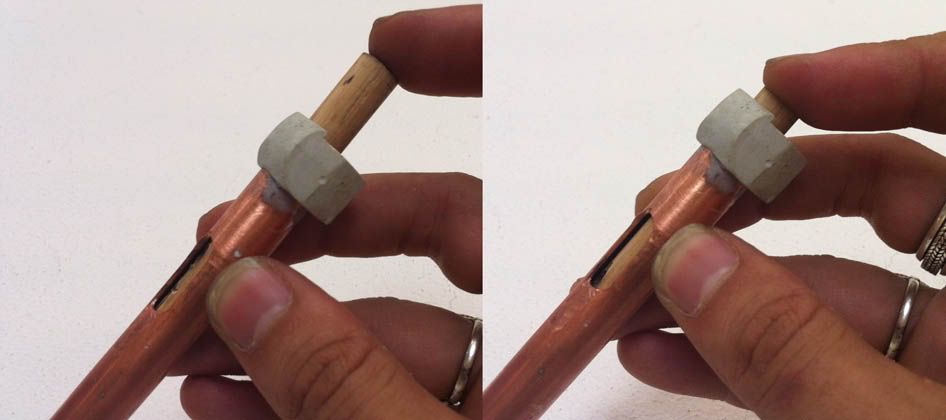
As a bonus it makes a satisfying "springy" noise when compressed

-
So - this update has been a looong time coming! Work has been progressing in the last month since I posted - I just haven't had the time to upload the pics, update the thread etc etc...
END CAP
The next thing I did after the main barrel casing was complete was complete my end cap.
Now most of you won't have to do what I did as you will probably have the common sense to use a hollow end cap. I, of course, did not.
Again, these were all spare parts I had lying around so in a perfect world I would have just ordered a hollow end cap casting but I was determined just to work with what I had - thus the first job was to hollow out the end cap. As I said most of you won't care about this bit, but I'm posting my method anyway as it can also come in handy for hollowing out resin scopes and the like, and provides a nice clean and fairly accurate shape.
The first thing I did was use an off cut of my 1.5" OD plastic pipe to centre up and trace the size of the area that would need removing:
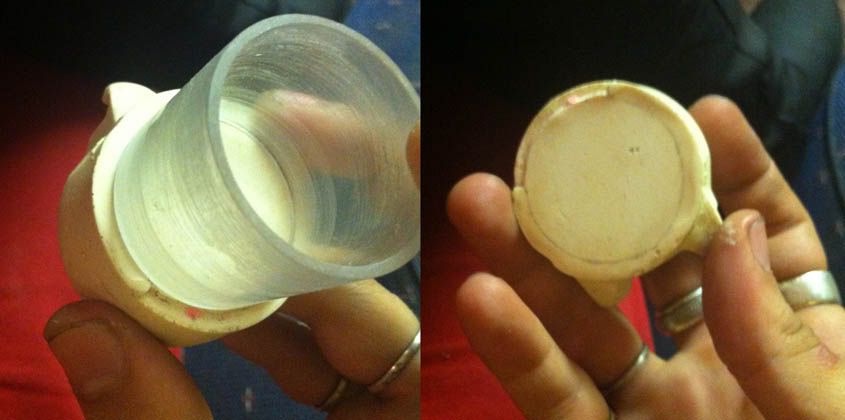
Then I drilled long, slim holes into the resin too the depth I would need:
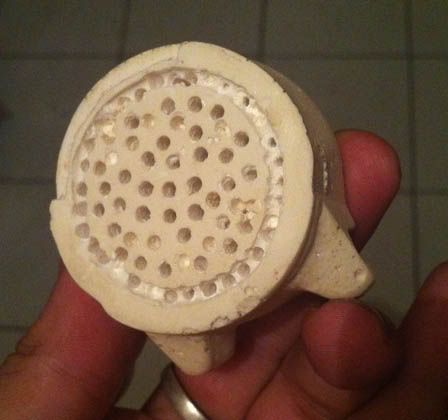
The next step was to use a larger drill bit to go over the holes. Using one of the first holes as a pilot hole, the bigger drill bit expands the circumference to about four surrounding holes (if that makes sense?). Progressively you get more and more resin removed...
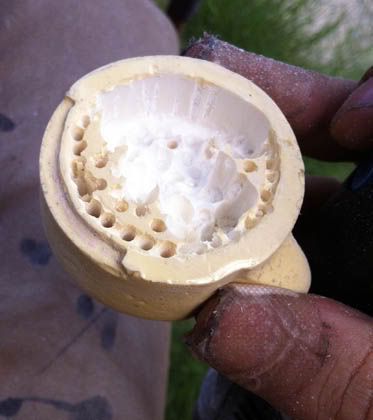
Then using the grinding bit on the dremel, followed by a sanding bit I cleaned up the last few bits of craggy resin and smoothed the edges of the circle. Thanks to the drill technique I already had a nice even 90 degree angle on the walls:
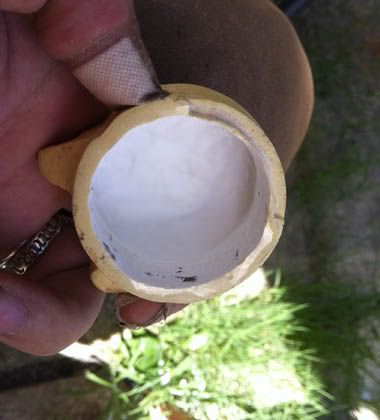
At this point I was about to attach the lugs to inside when a test fit proved that my tolerance was so spot on that the end cap held tight by itself:

I still have every intention of adding the lugs, just to be anal, but I can afford to leave it for later now

The next step was to remove the cast D-Ring from the end cap casting. This was a simple job with a sanding drum on the dremel and some careful edge work - there really is nothing you can't do with a dremel

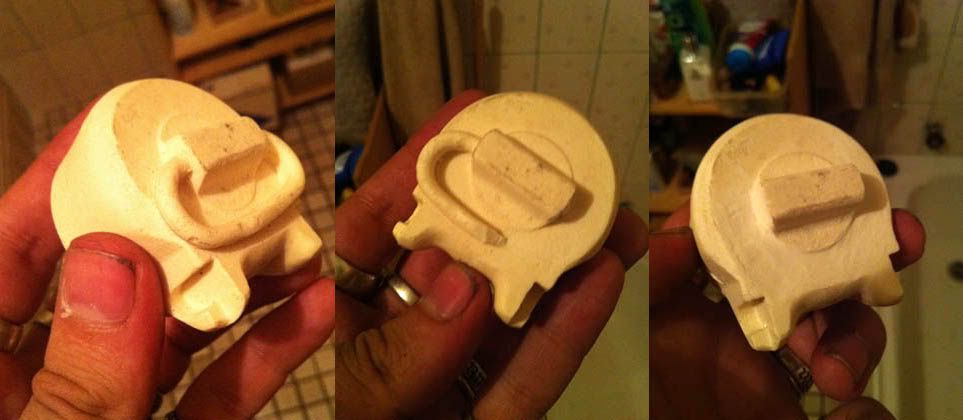
(excuse the light in this pic - I was working at night)
Switch over to a drill bit in the dremel and putting the D-Ring hole through is even easier:
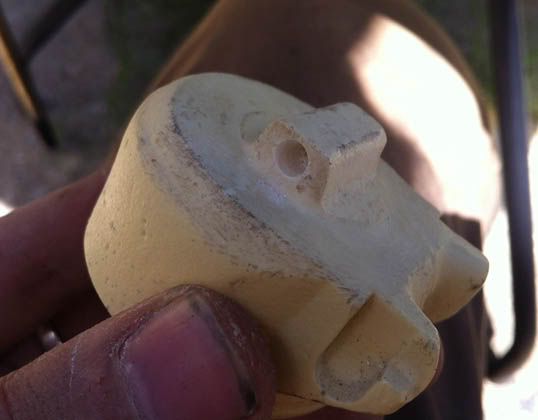
To make my D-Ring I just took some wire that was part of an old hanging basket and bent a loop in it. I wrapped it around a marker pen that just happened to be the correct diameter to get the curve size right.
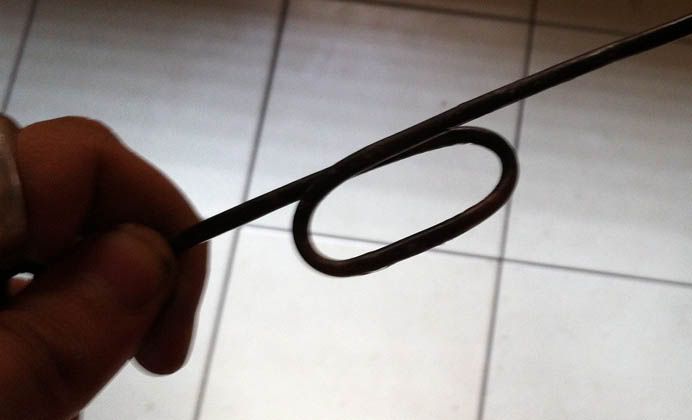
Then I simply cut the wire through to leave a useable D-Ring. Actually it's more a C-Ring but you catch my drift...
I used the exact same, prime, mask and paint technique from the barrel casing to paint the end cap - so no need to repeat myself - and inserted the D-Ring to finish the whole thing off.
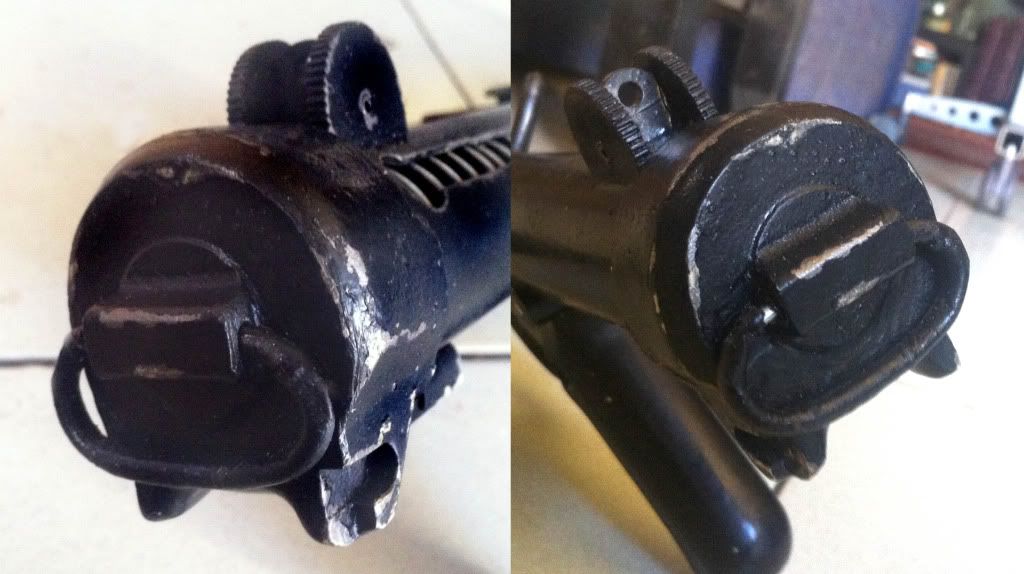
I have a bad feeling some of the keen eyed spotters out there might inform me that my D-Ring wire is a tiny bit too thin. If that happens I can easily remove and replace it though.
-
Howdy Tom! Welcome aboard - I love it that we Australian's keep growing in number

-
 :th_AnimatedBravoSmiley:
  :th_AnimatedBravoSmiley:
Now that is SERIOUS commitment. Well done sir!
-
OK guys - in the interim prior to the new skin's launch I have fixed the current board index to point to the right places!
It may require a refresh or even a cache empty but the side menu is now fully operational.

-
I would say use this stuff. It's really easy to work with, can be wet moulded like clay and dries like plastic. It's also super sand able and file-able.

-
Will do - stay tuned.



Layout issues with FISD 2012 theme
in Forum Help & Support
Posted
"Also Tagged With" overun issue also now fixed.