

jimmiroquai
-
Posts
209 -
Joined
-
Last visited
-
Days Won
3
Content Type
Profiles
Forums
Gallery
Articles
Media Demo
Posts posted by jimmiroquai
-
-
Only parts that are black on the armor are the shoulders and yoke.
BTW, finished this recently:
-
 2
2
-
-
I'll just let the pics do the talking (sorry, late night and i'm exhausted after finishing only step 16 of 600 of the Lego Ghostbusters Firehouse for my kids)
-
7
-
-
^ Send me a PM with your email address.
")
-
Oh, and we *will* need really good pictures for the CRL. Jim - would you be able to submit those on a neutral background? We need something high resolution, but that we can easily photoshop.
Or, if someone else has already built Jim's kit, that would work too...
I do have hi res photos. Let me edit the backgorunds out.
-
2
-
-
I'm mostly interested in the helmet. It looks very good.
The tube stripes don't look quite right to me. They look a little too long, not deep enough, and possibly too far down the tube. In the length and position, I am referring to the direction wrapping around the tube.
Sent from my SAMSUNG-SM-G930A using Tapatalk
The blue paint just got on the side walls of the vent. A better way would be to cut the vents out and place a blue strip of plastic underneath. However, with this being cast, the depth of the vents might not be as consistent as leaving them in.
-
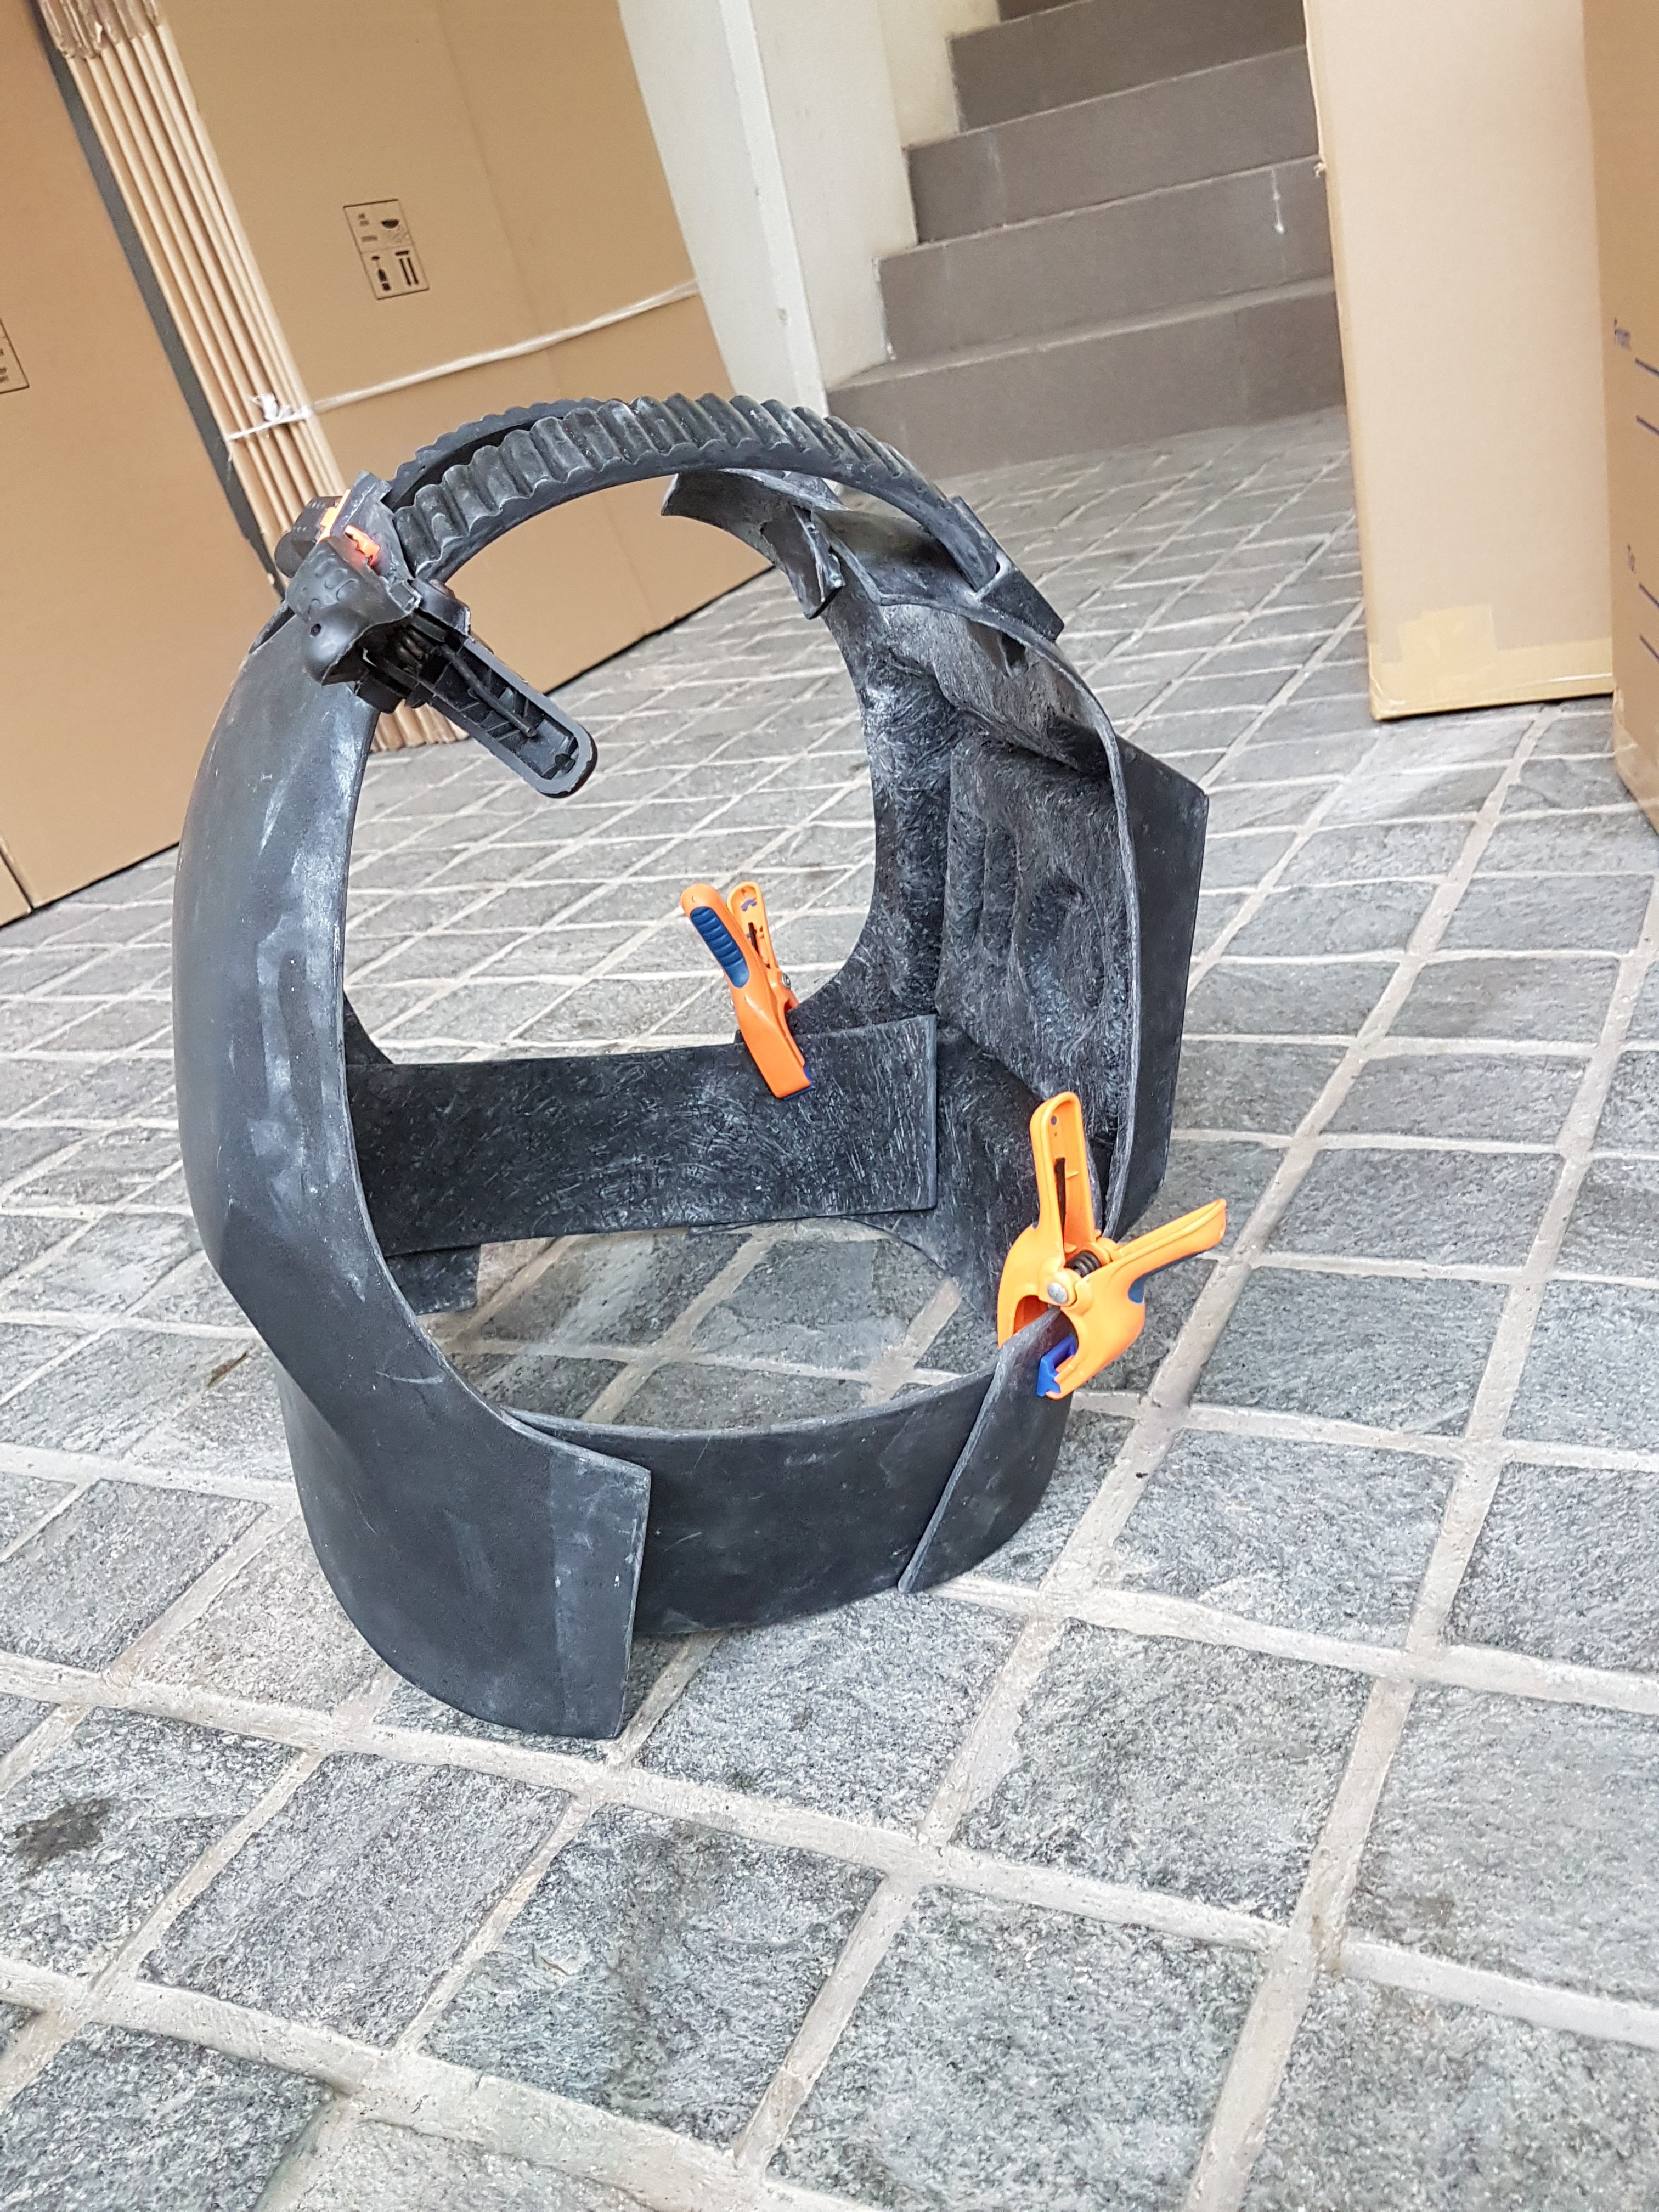
The belt is one of the most complex parts of the R1 TK armour. Not only does it have projections that key it to the ab plate - as per Jimmiroquai's posts - but it also has that difficult two-part construction, with the overlaps at the sides. In some pics from the SWCE display the back part of the belt even angles up slightly to the det pack attachment area. It is also probably worth looking at the shoretrooper belt and compare the way that the belt boxes (on the actual belt itself) are constructed. I also think that the hanging belt boxes attach to the belt in a similar way as the shoretrooper ones do. They attach 'into' the belt box detail above them.
I noticed that most of the time the back bvelt overlaps the front but on some examples the front overlaps the back
-
1
-
-
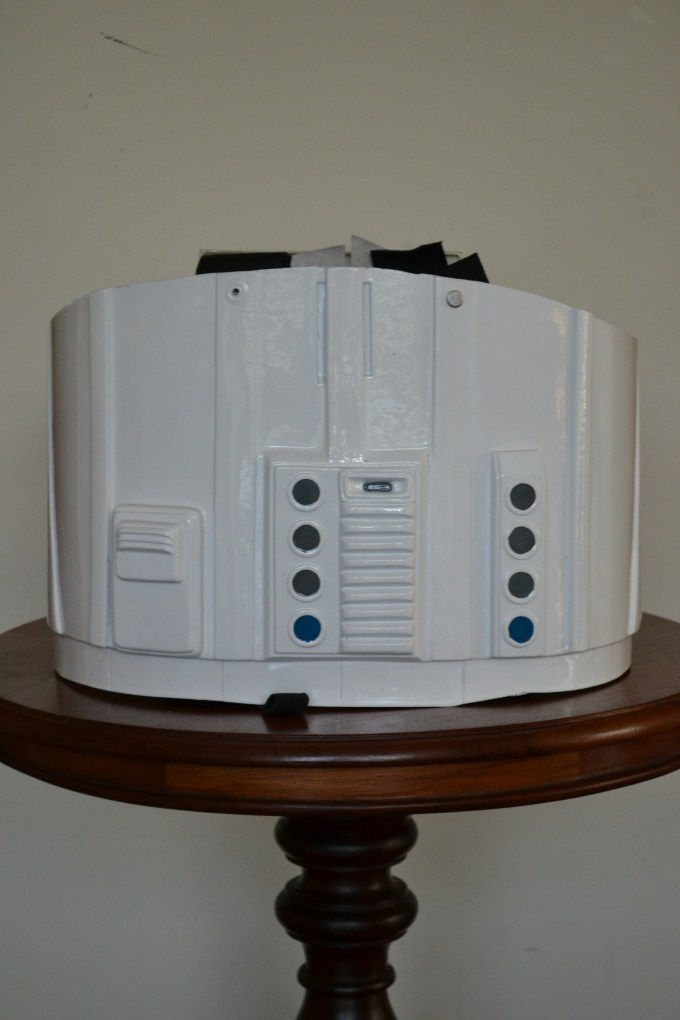
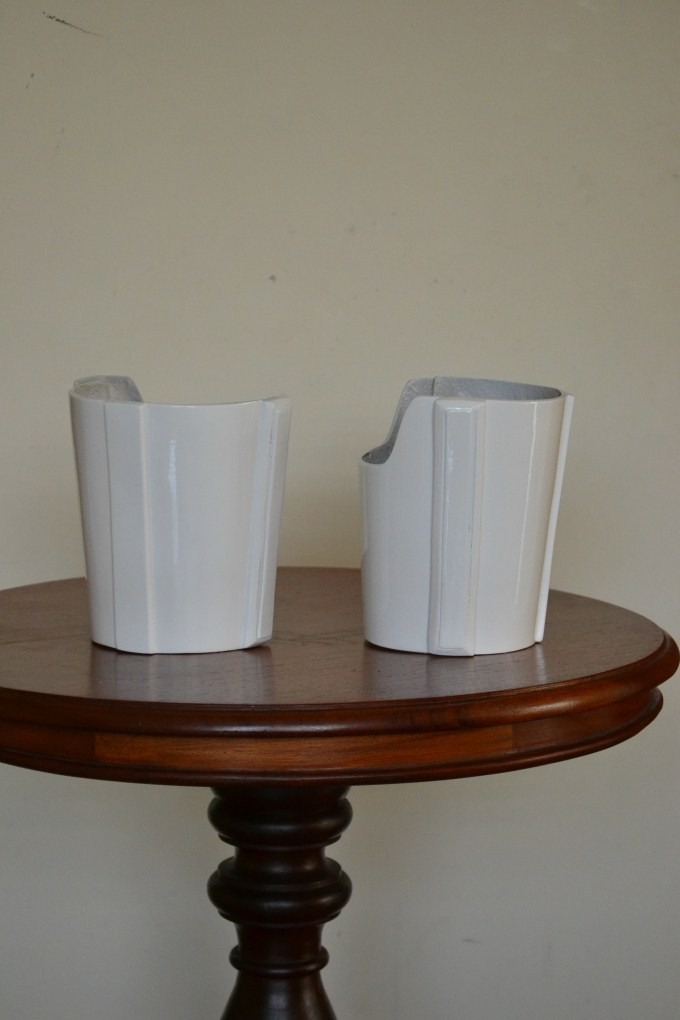
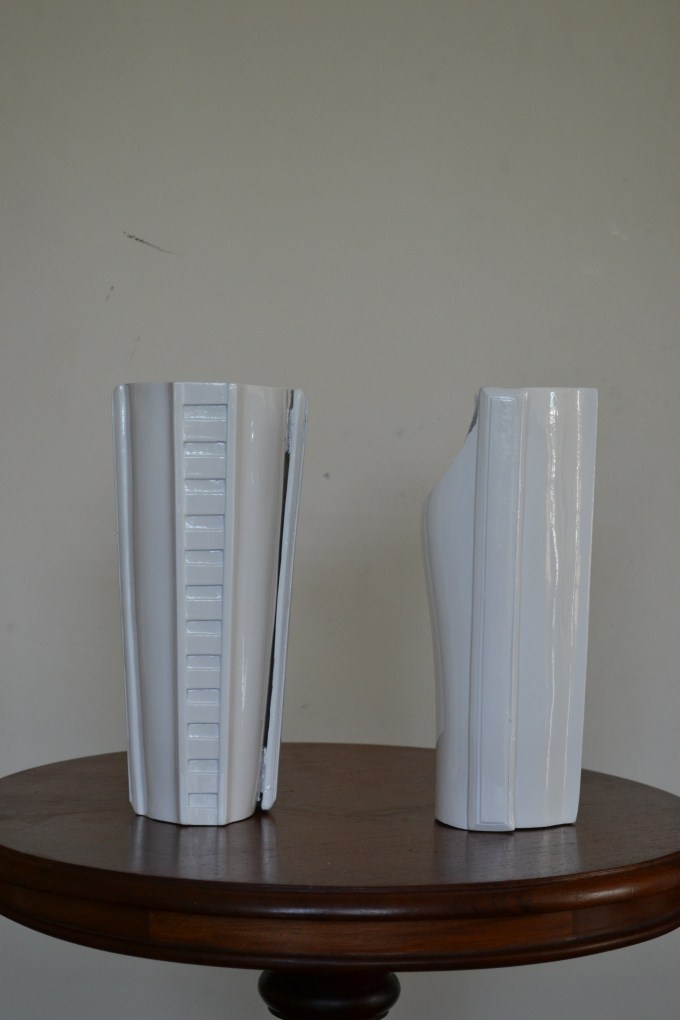
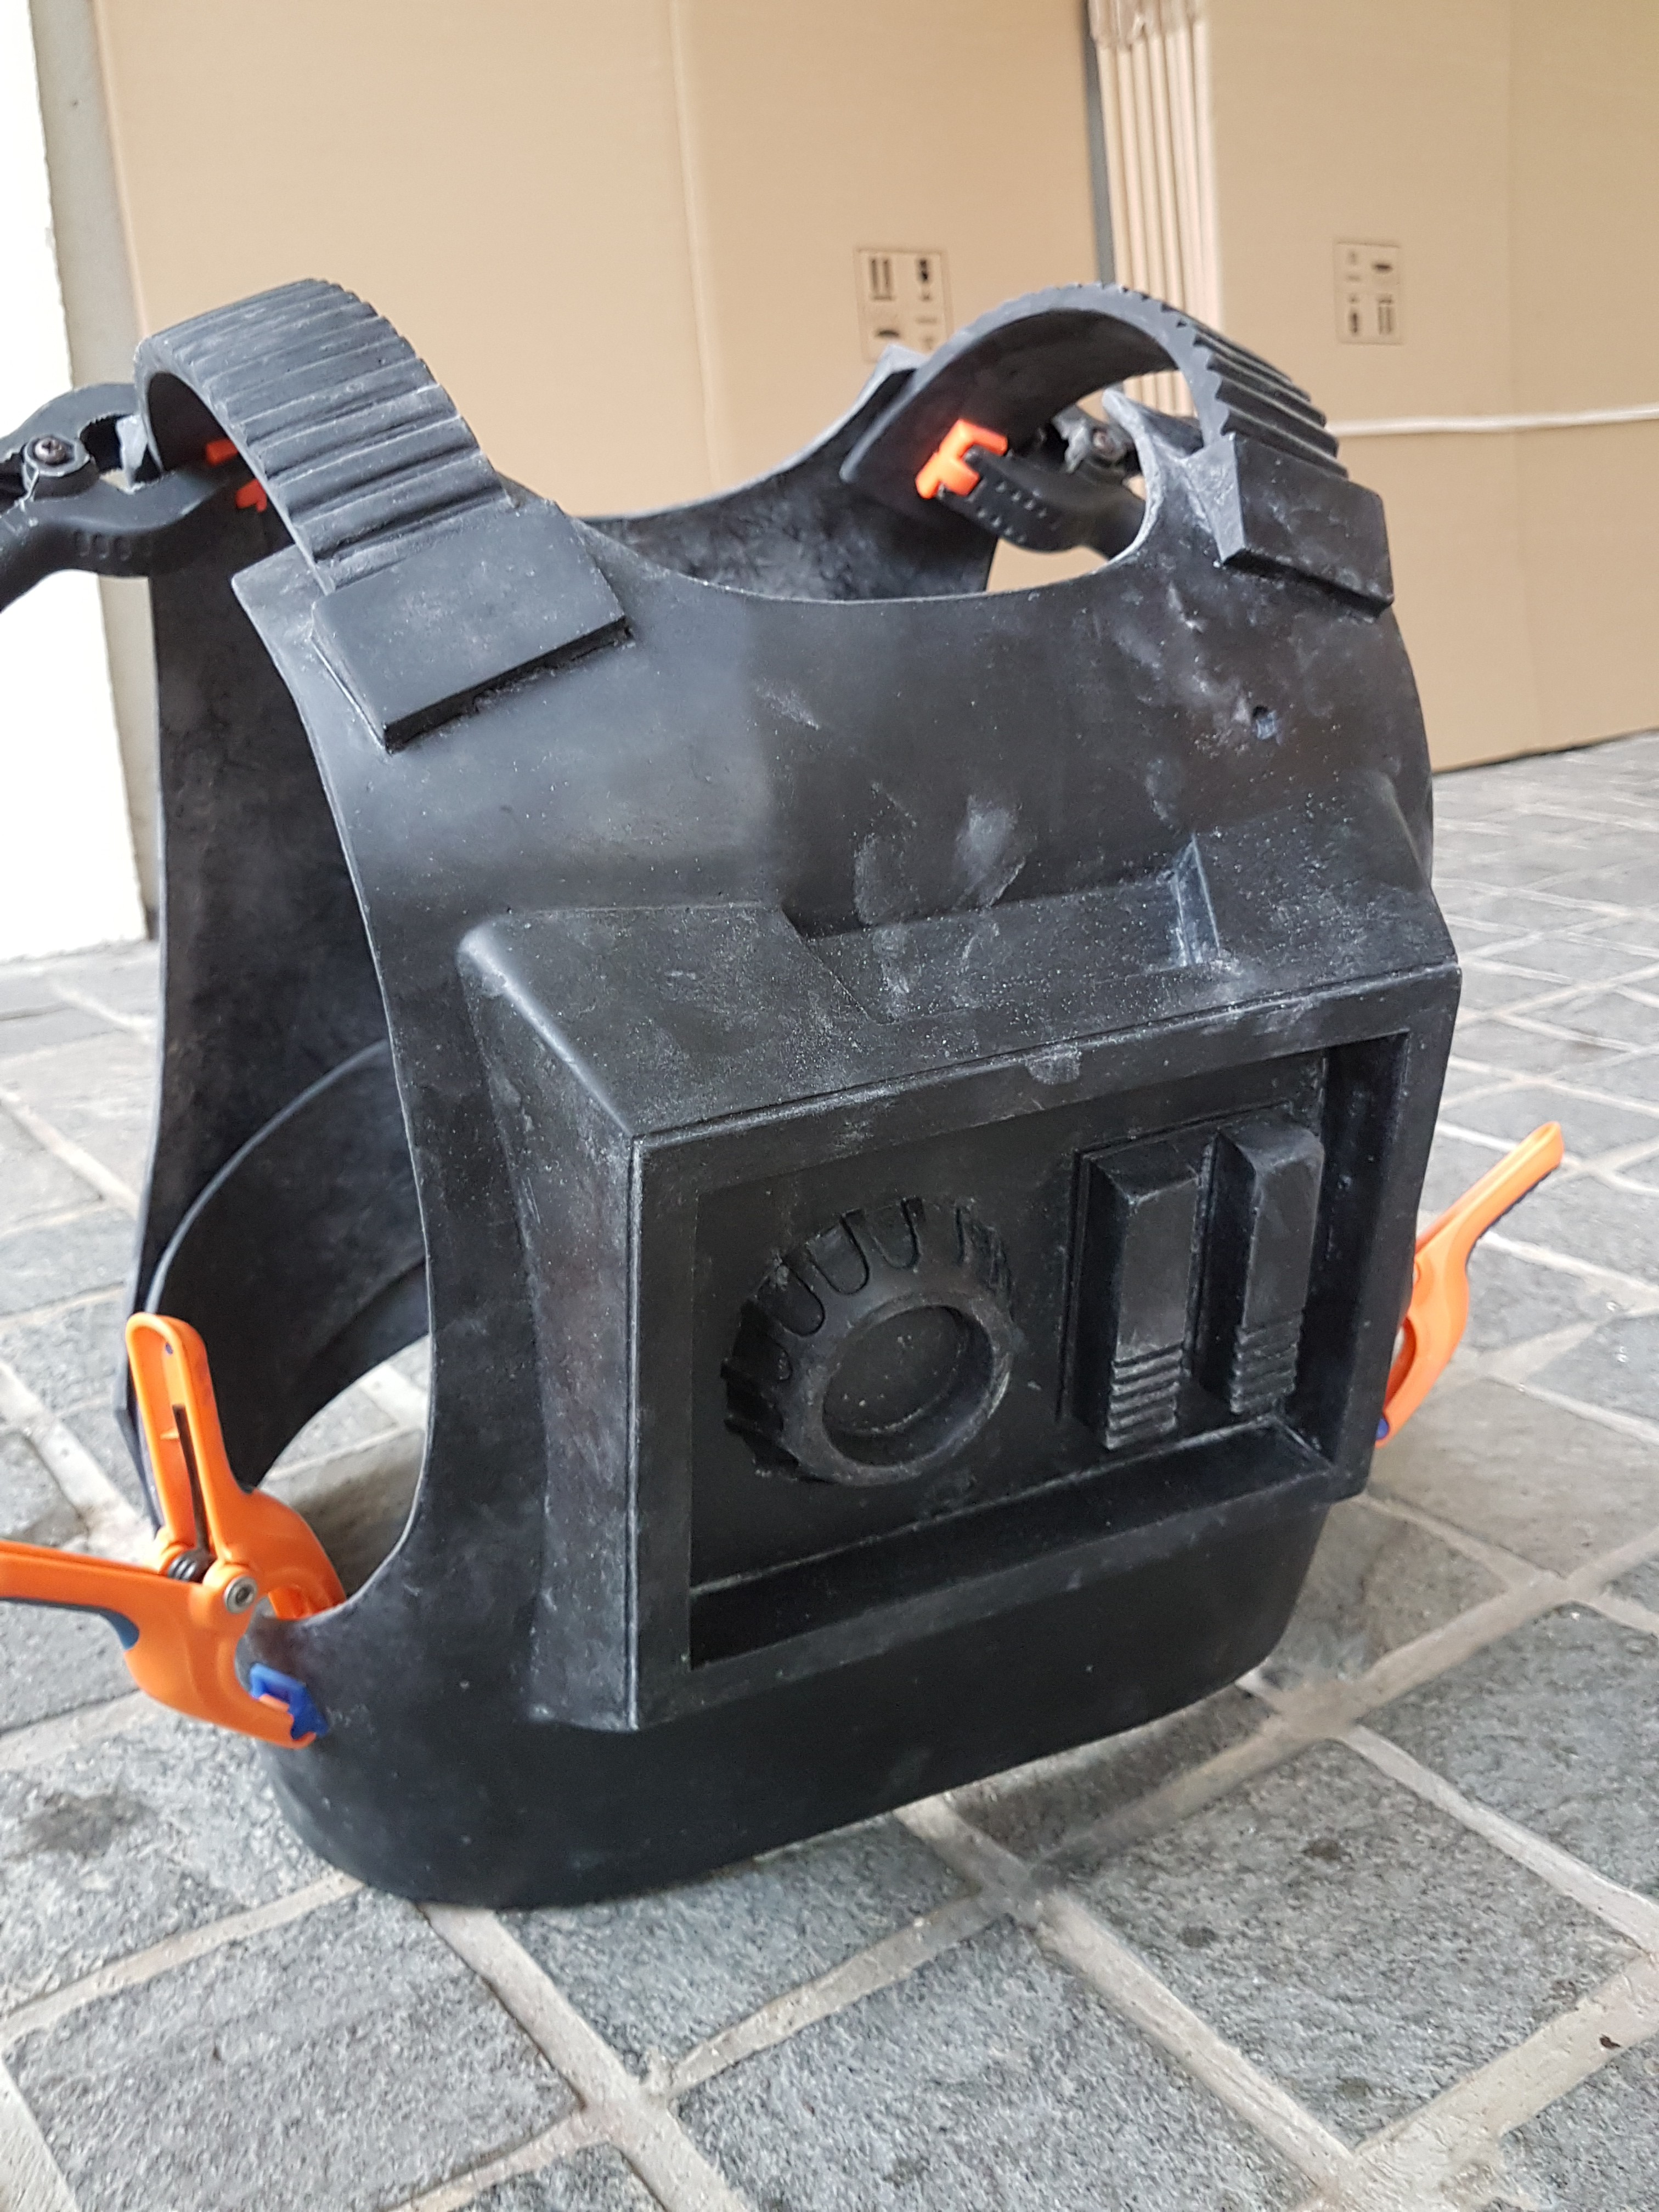
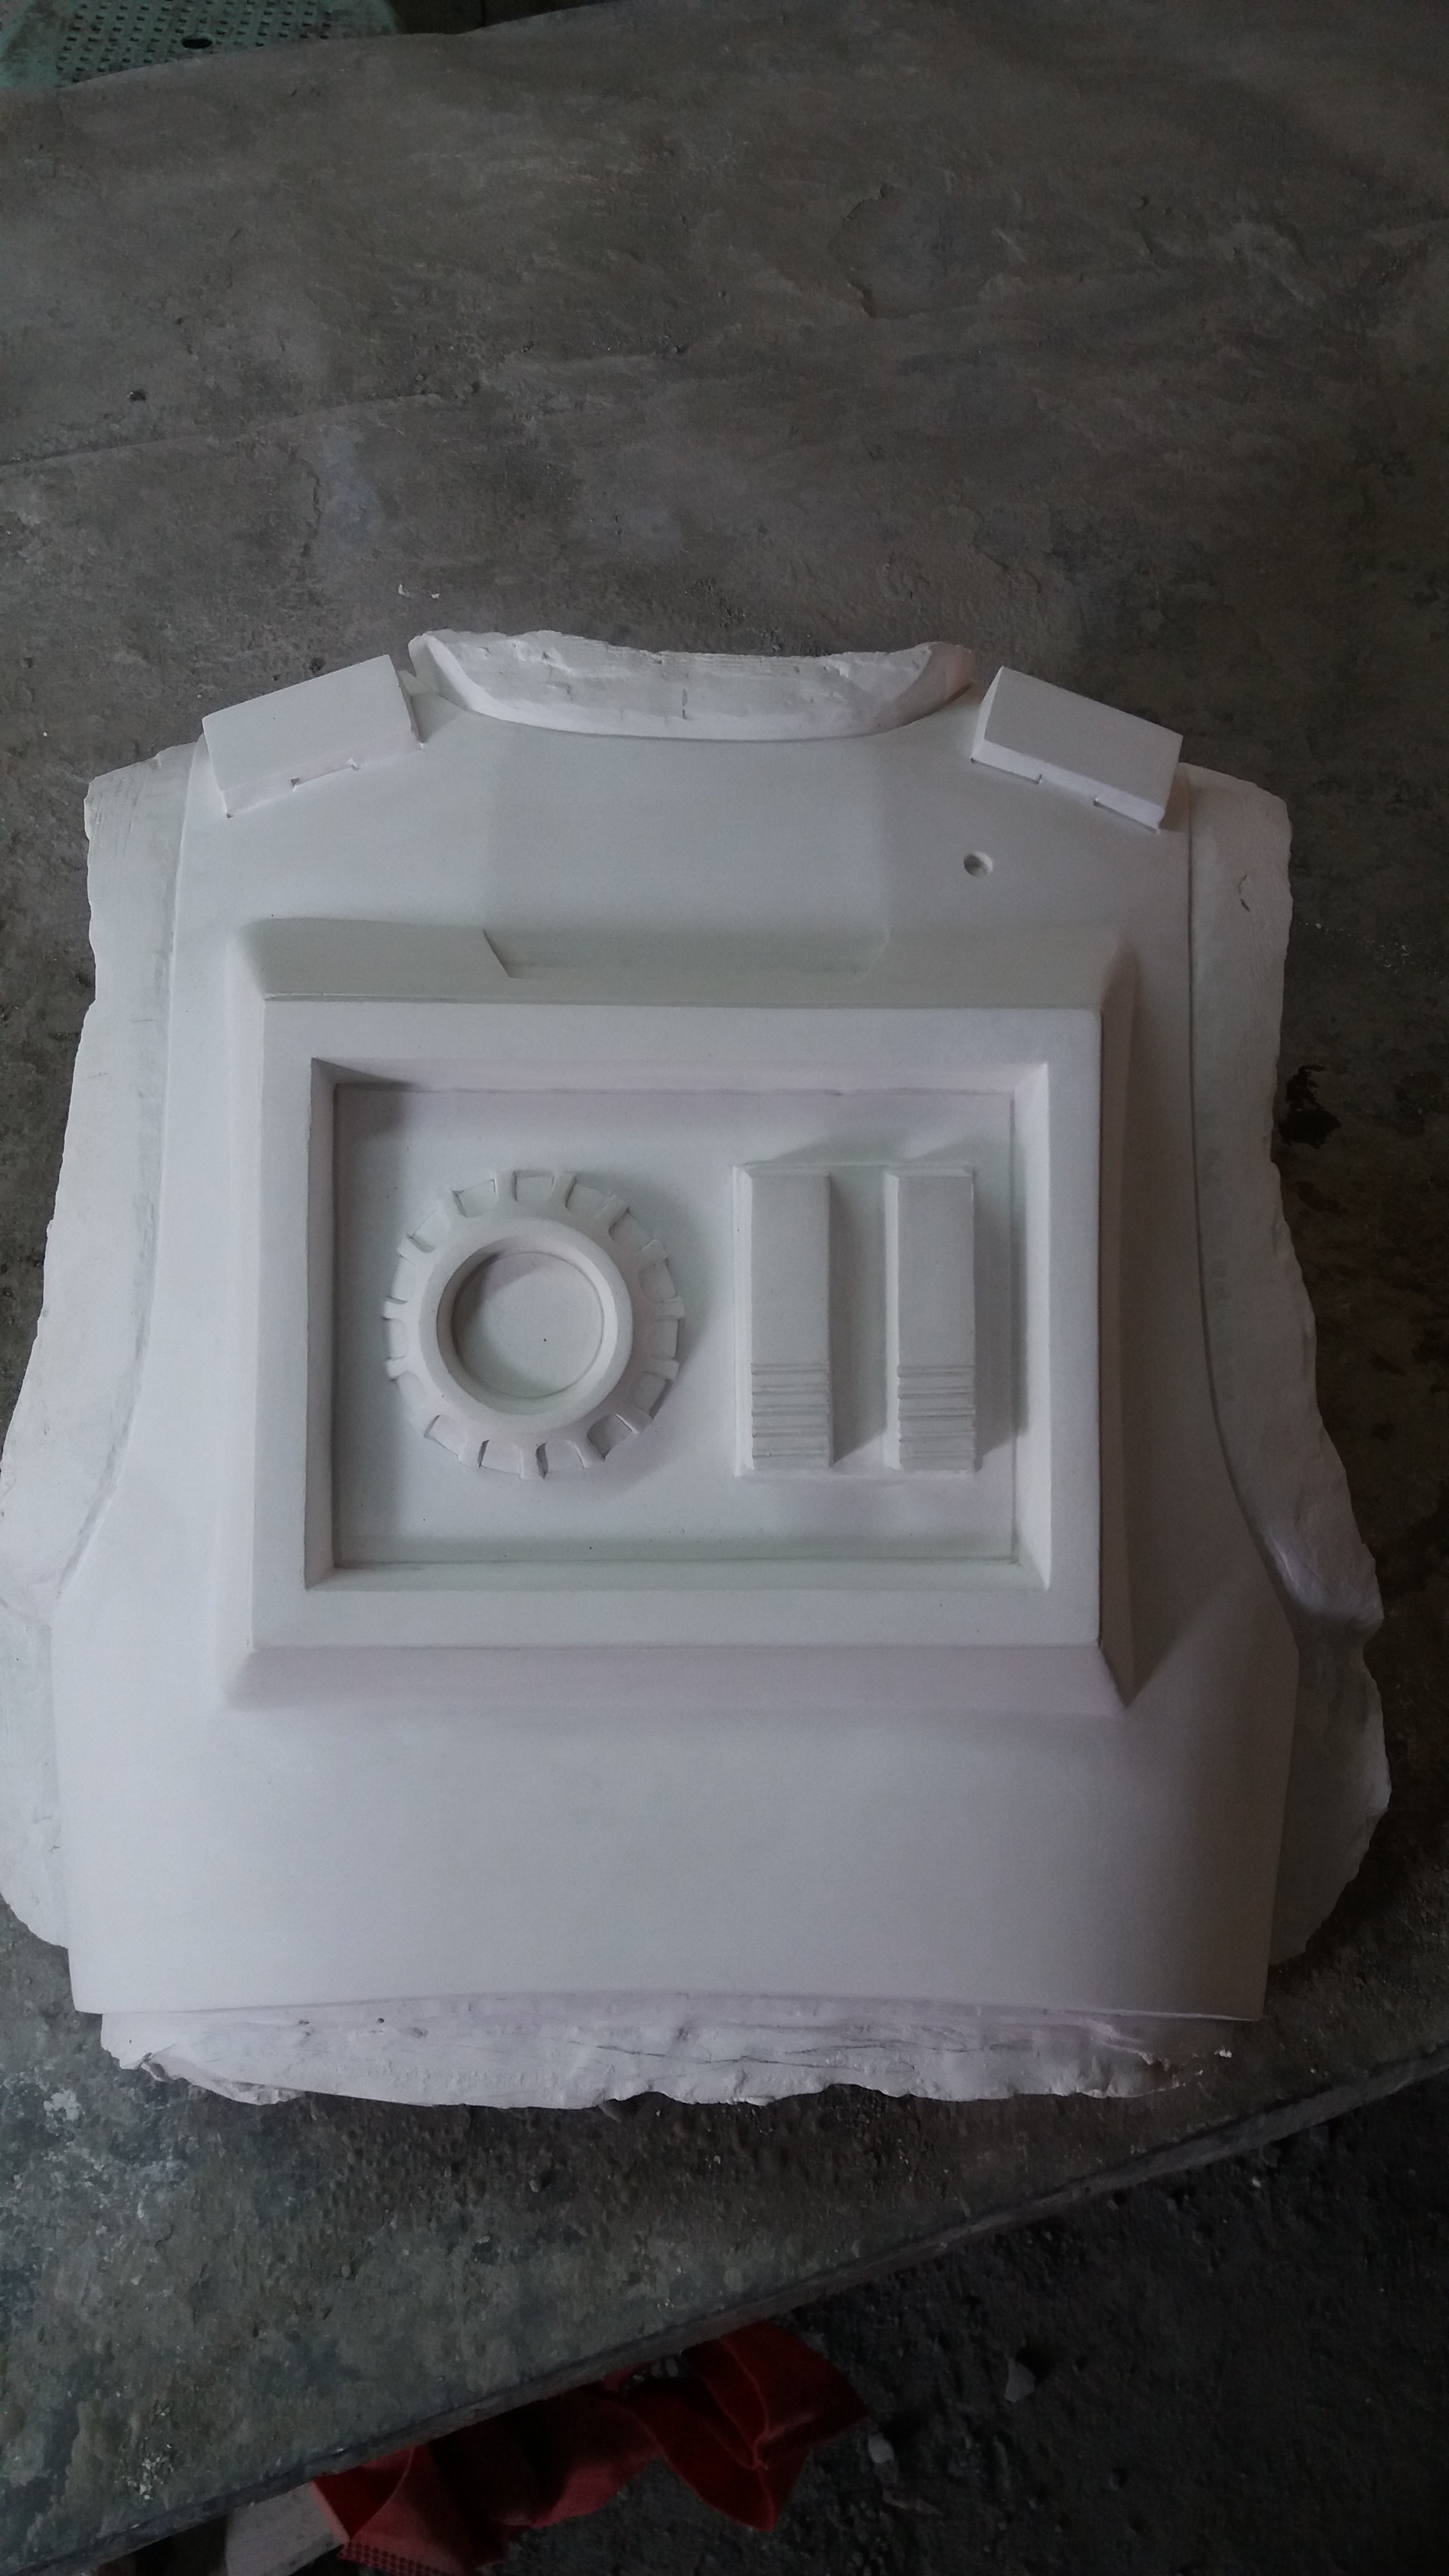
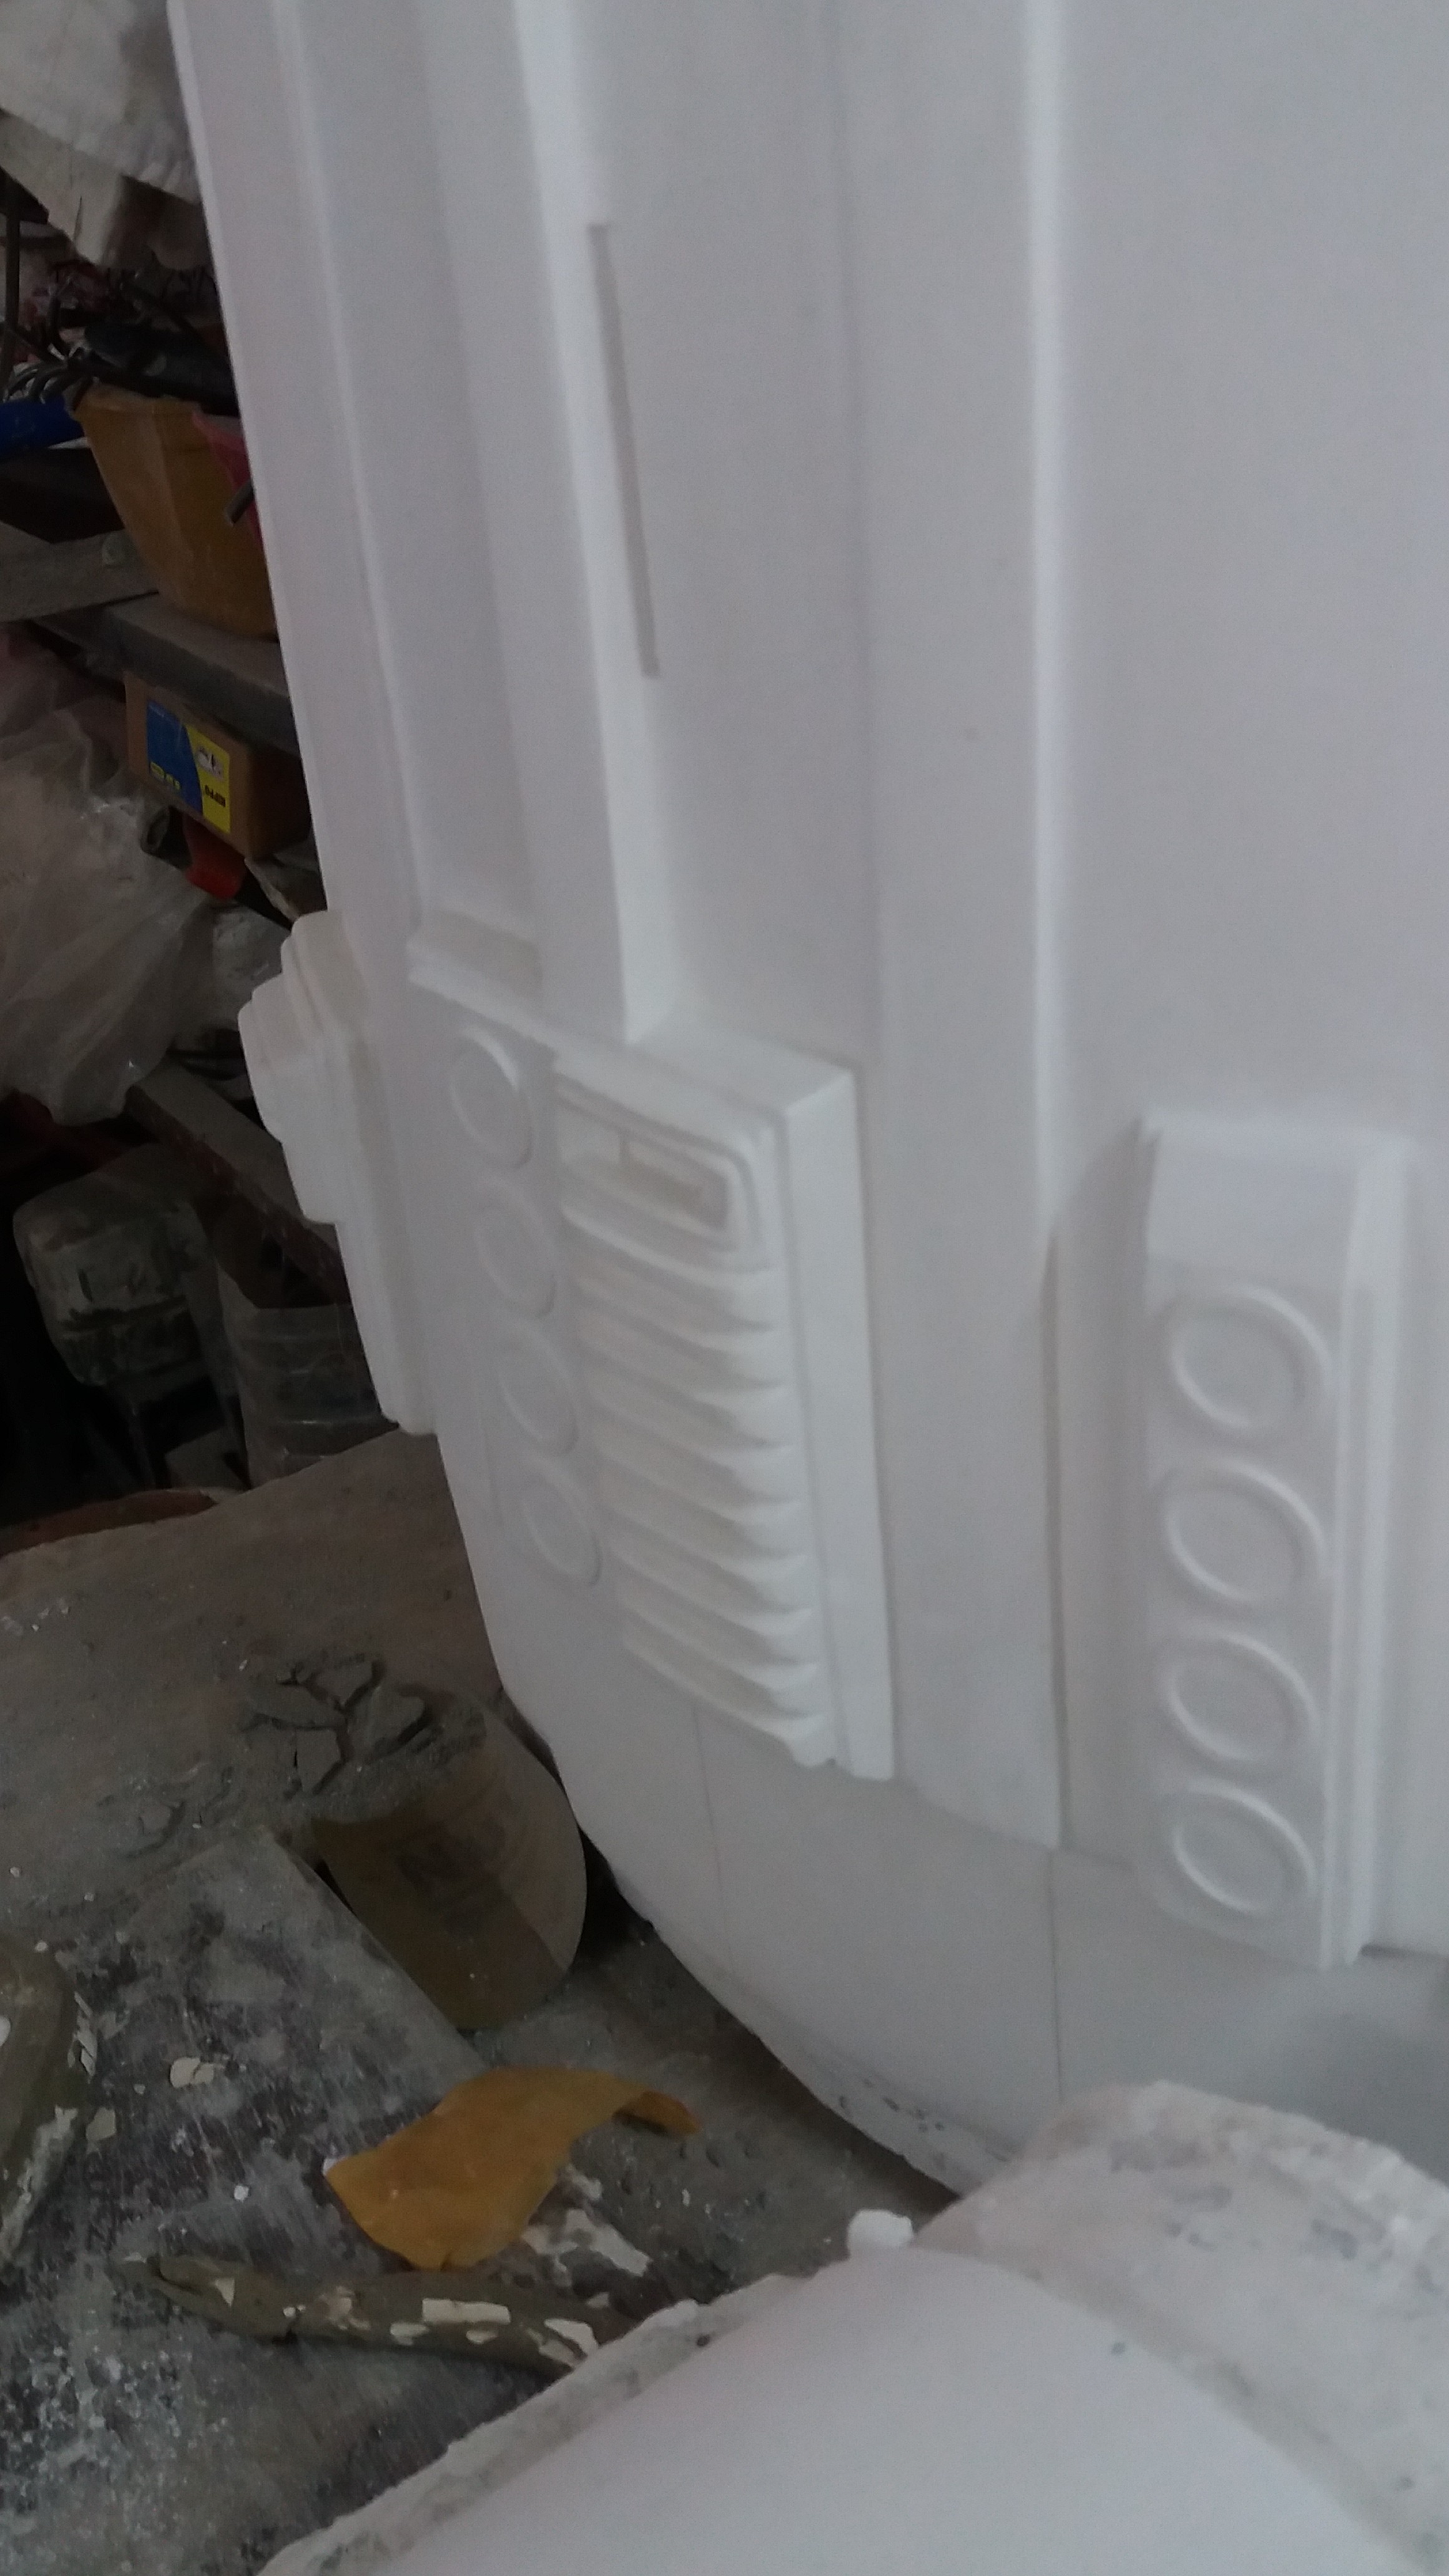
11) Abdomen + kidney armor
- See Shoretrooper ab armor for basic description
- no "kitkat bars" above the central panel
- Buttons have raised outlines and recessed centers
- diagonal raised area adjacent to a recessed black area
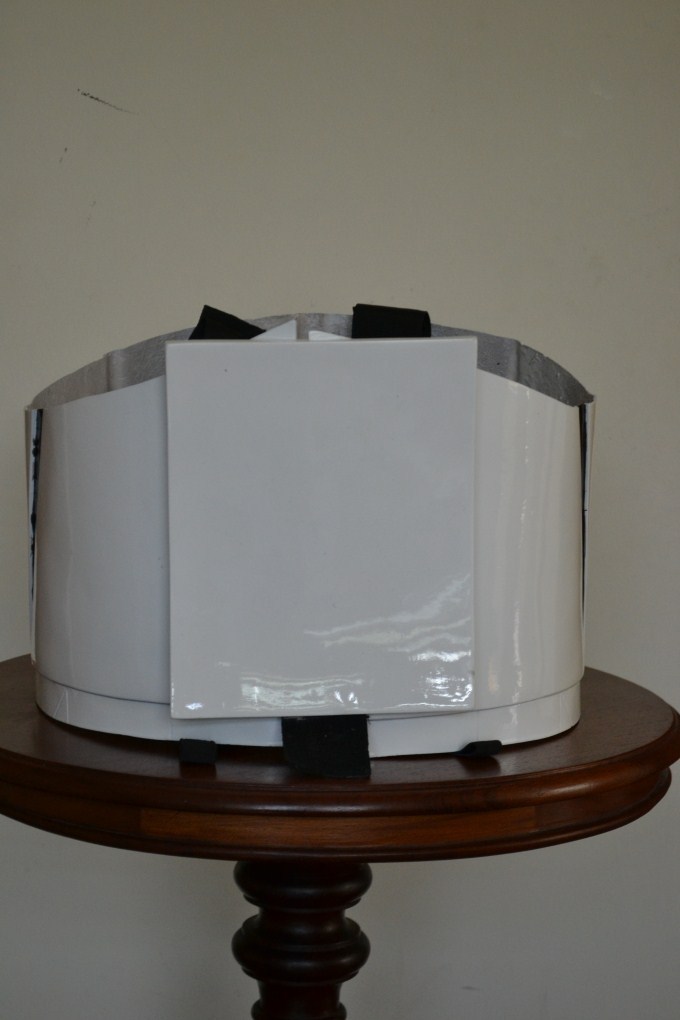
- closed in the back by a rectangular plate
12) see above
13) Posterior armor - Same as ANH (YEY! the only piece that can be used from OT sets)
14) Belt
- Rigid front belt, roughly 3.5" wide with notches which key into ridges on abdominal plate
- 2 thin boxes (roughly 2x3x8cm) , 2 medium boxes (roughly 2x4x8cm) with a raised ridge on top, 2 wide (roughly 2x7x8cm) boxes, 2 hip plates (7x15cm) suspended with black elastic/webbing
- Rigid rear belt, roughly 3.5" wide, overlaps with front belt
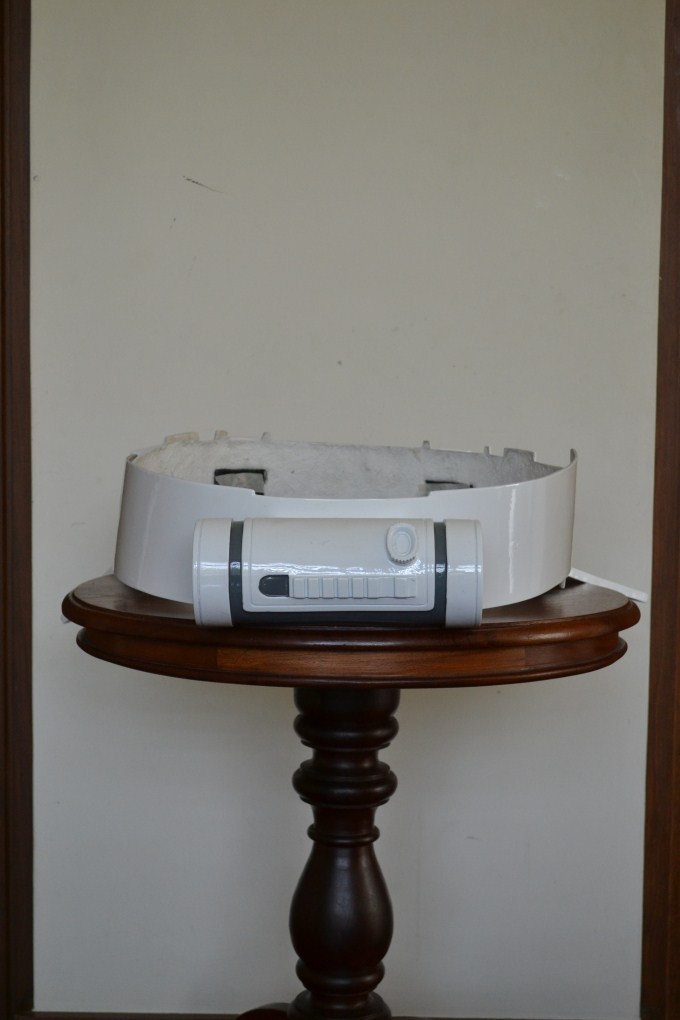
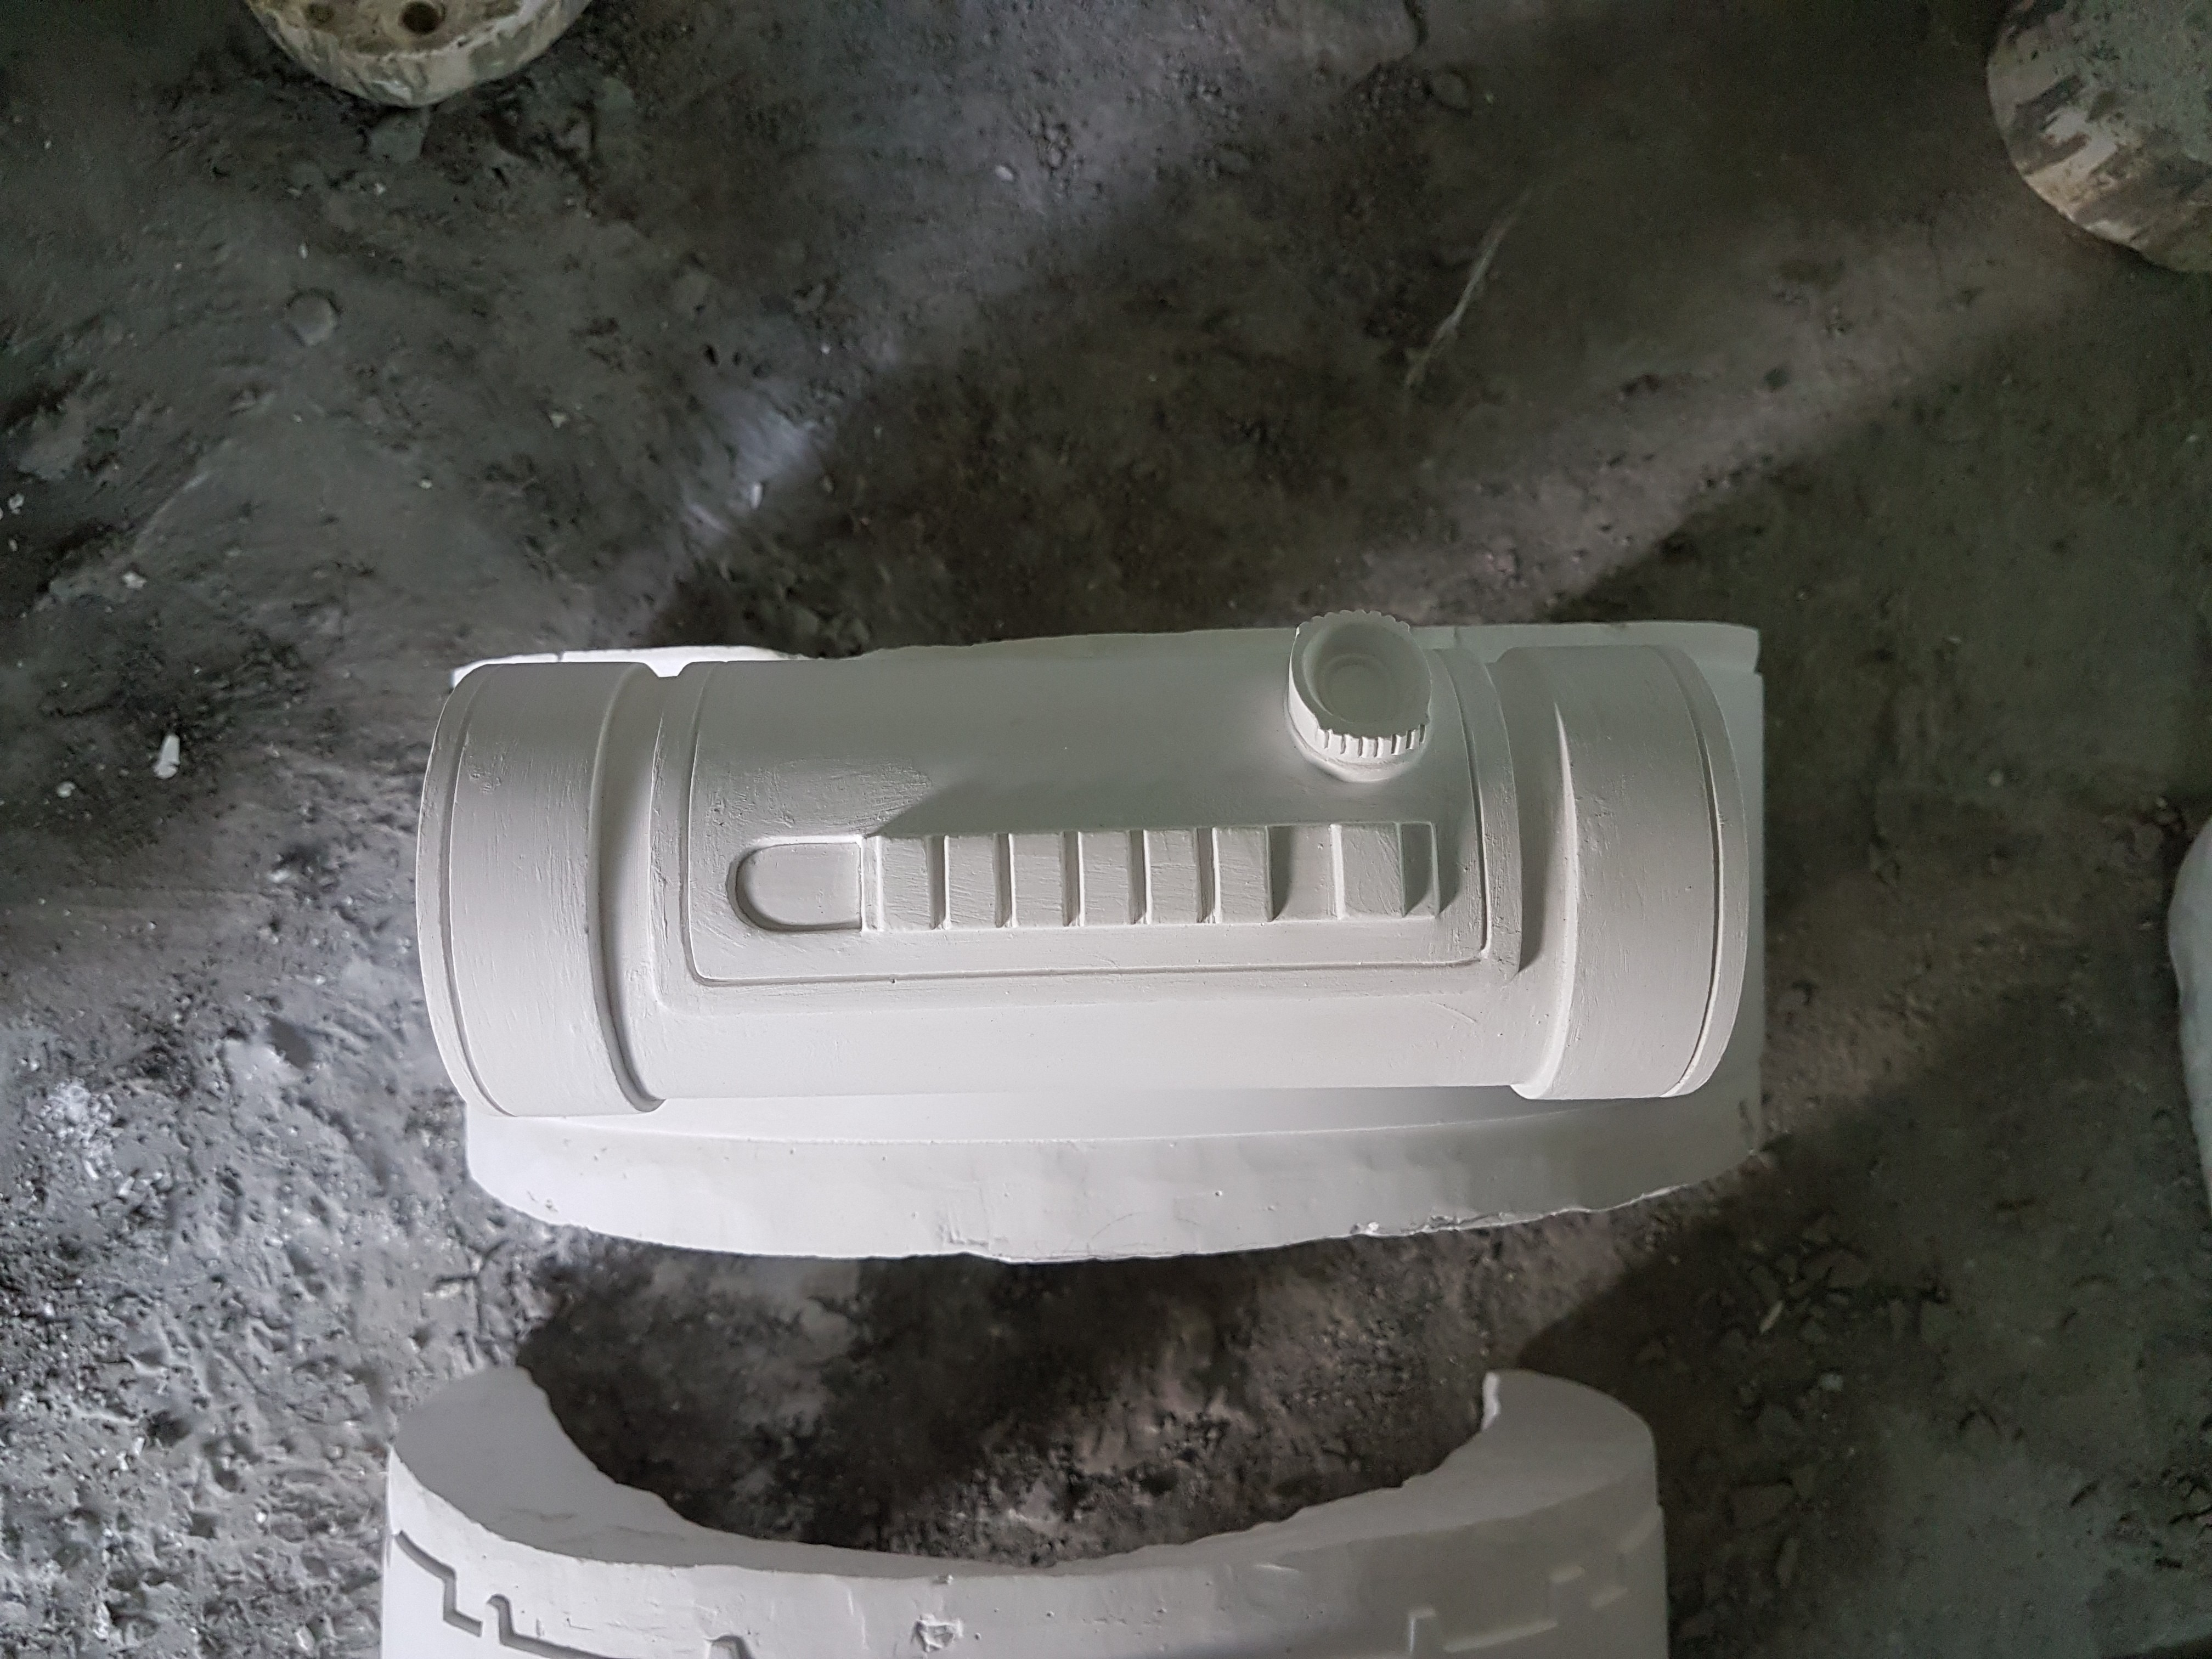
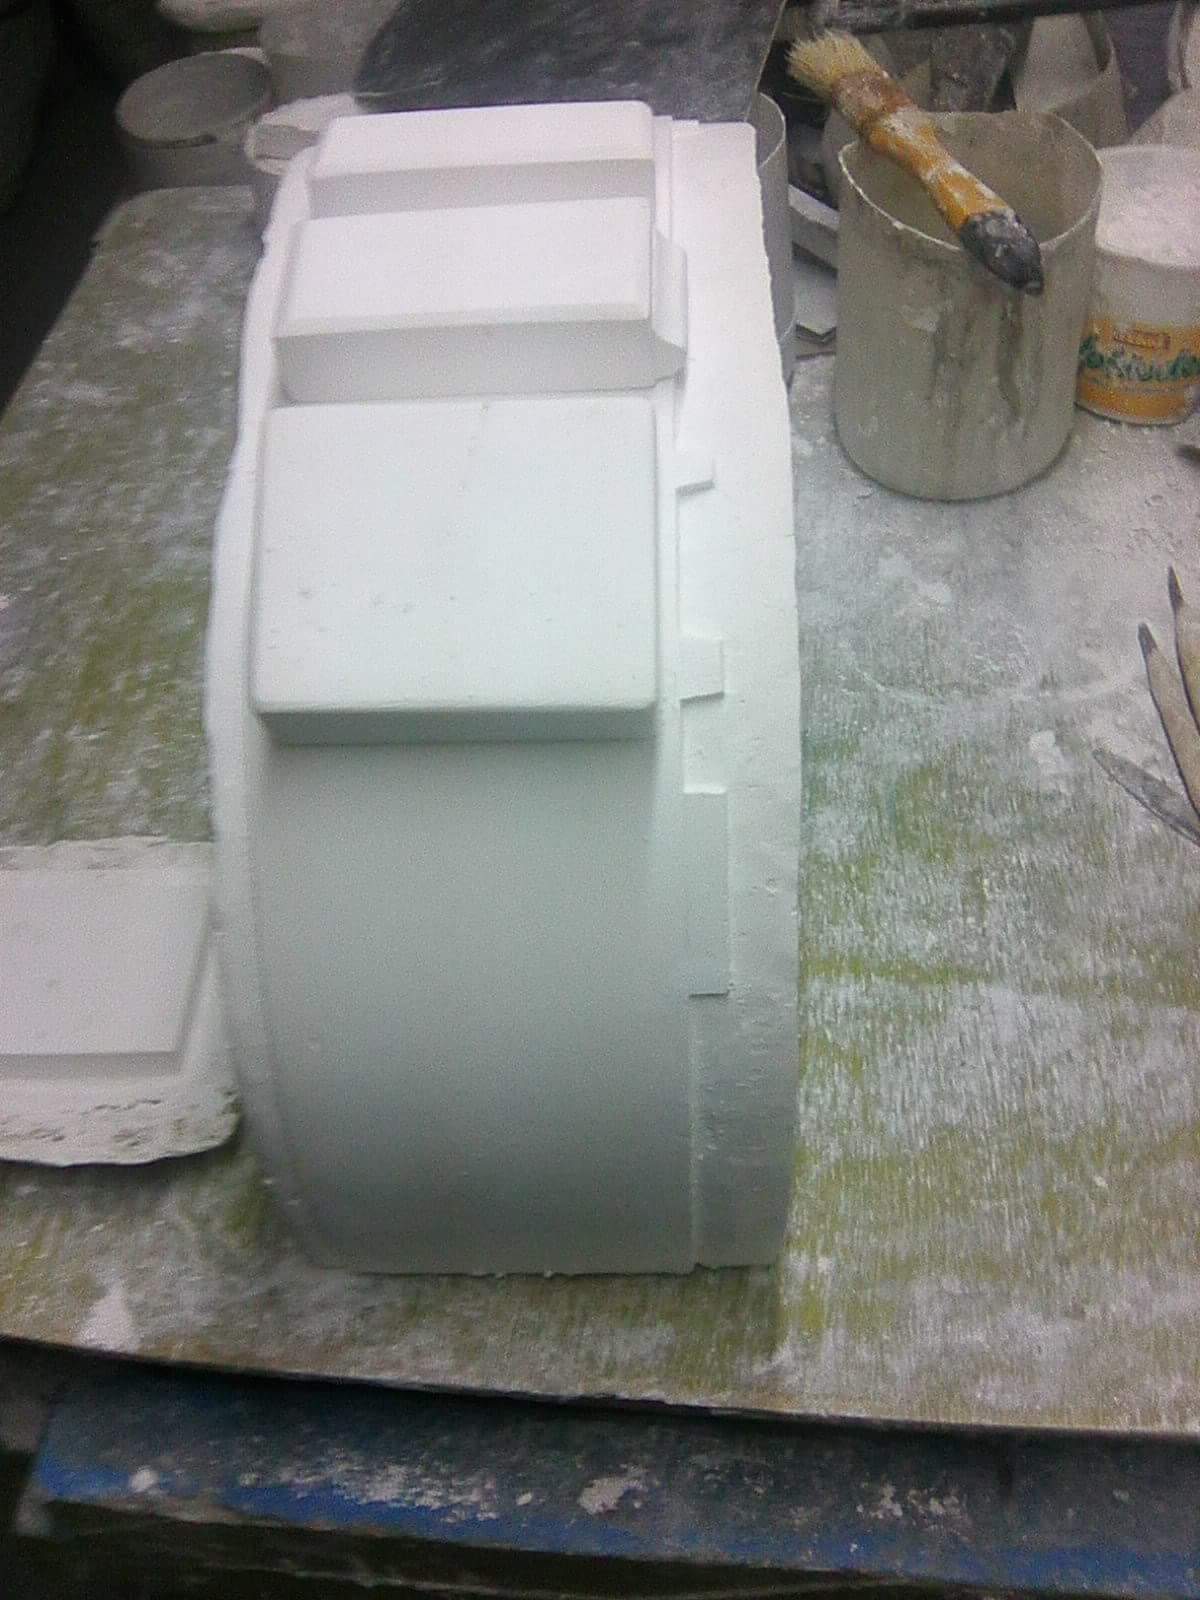
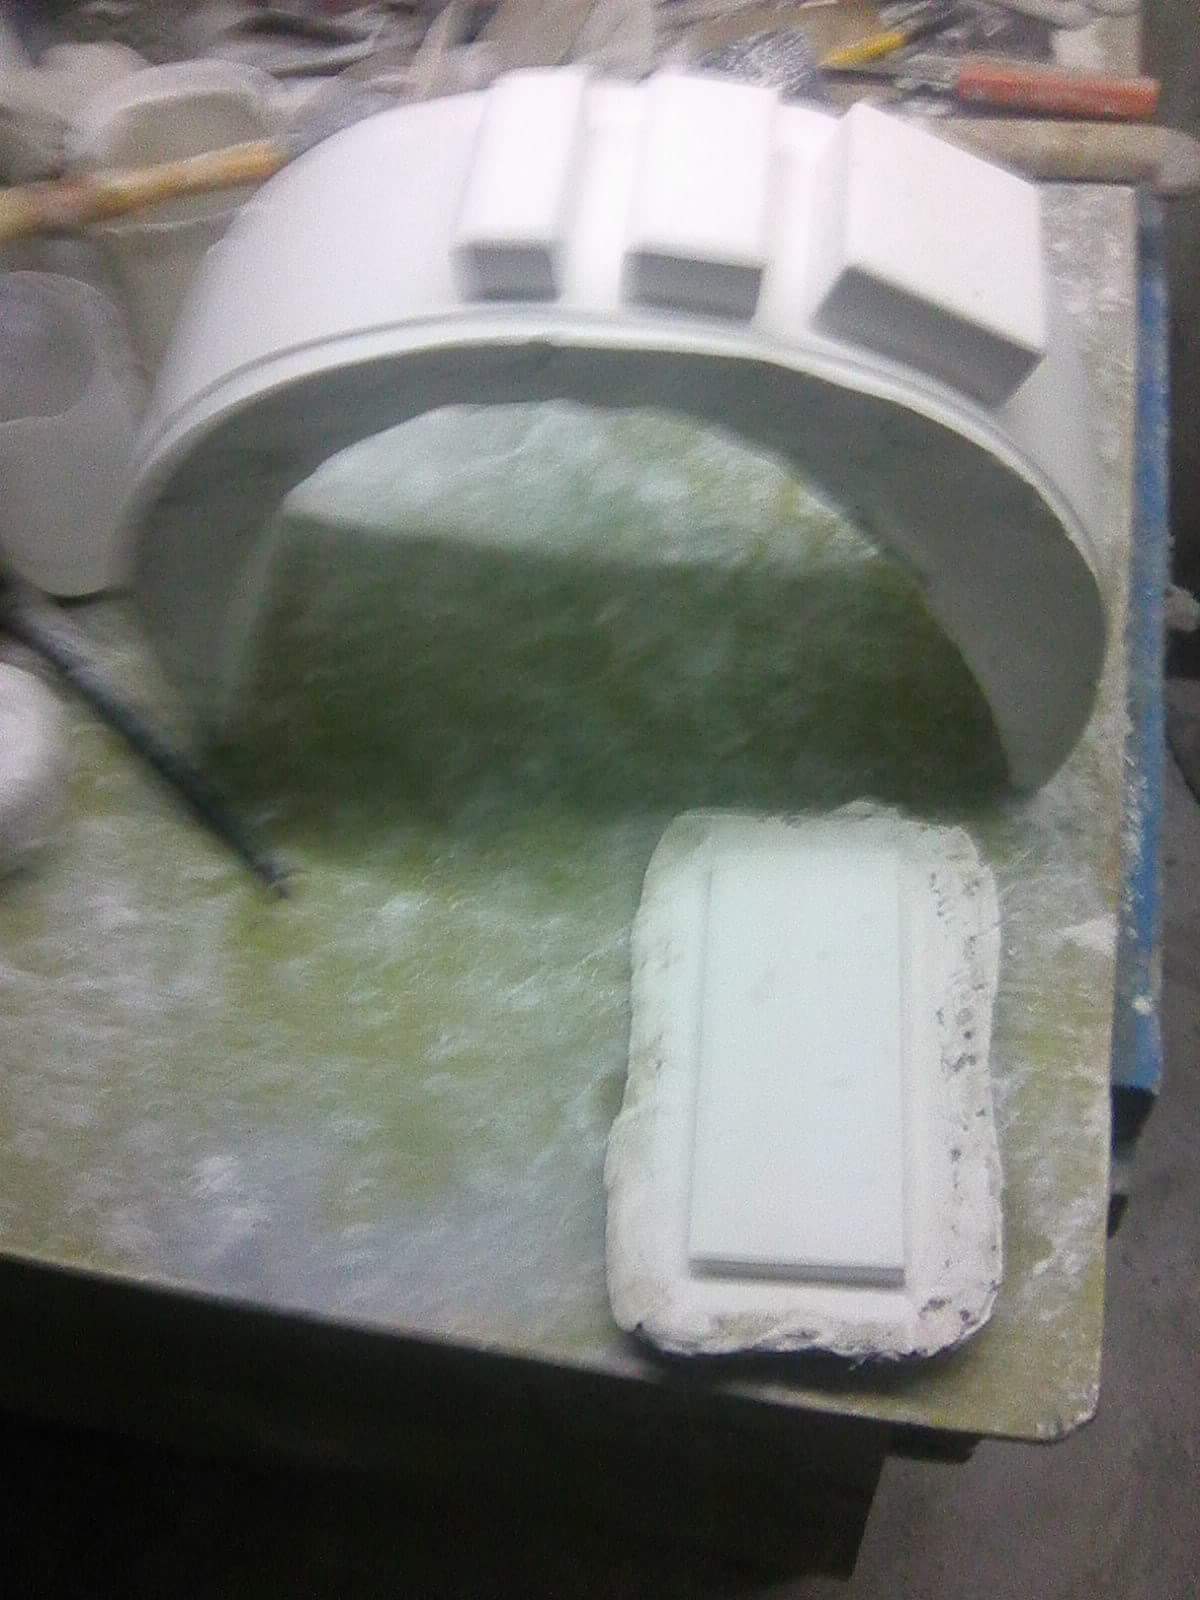
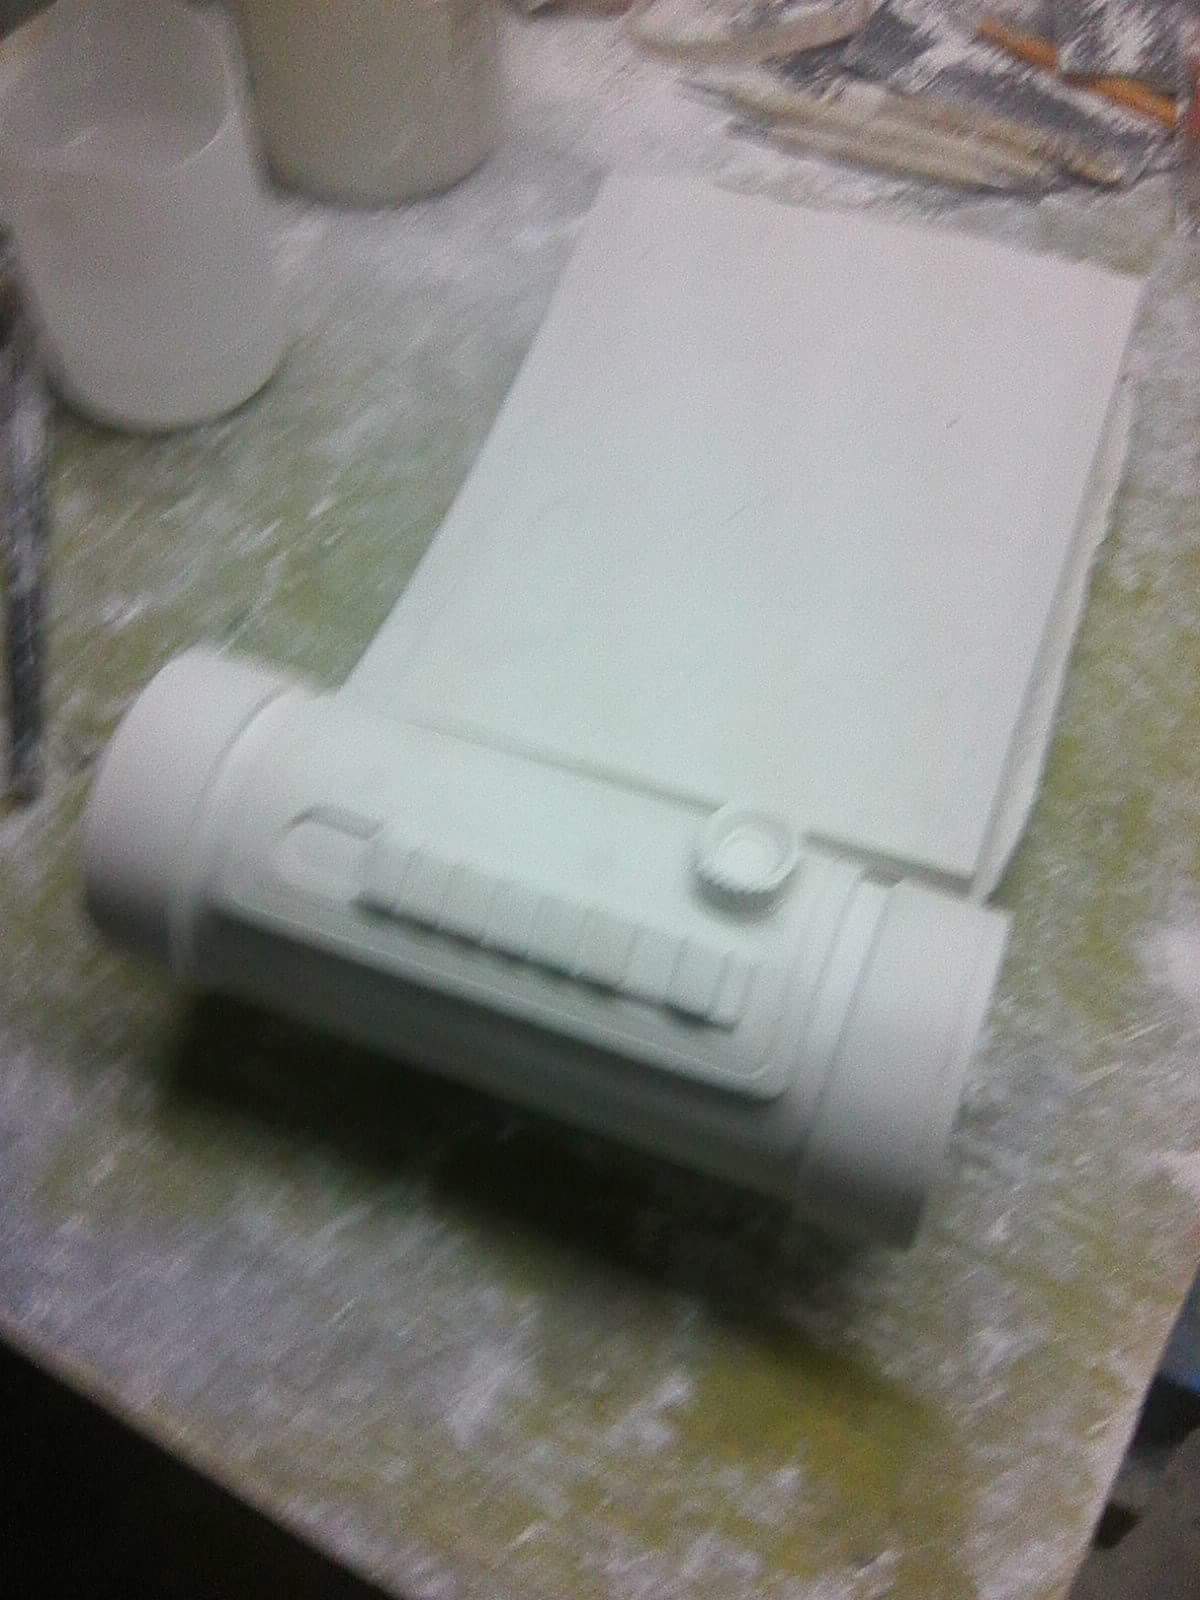
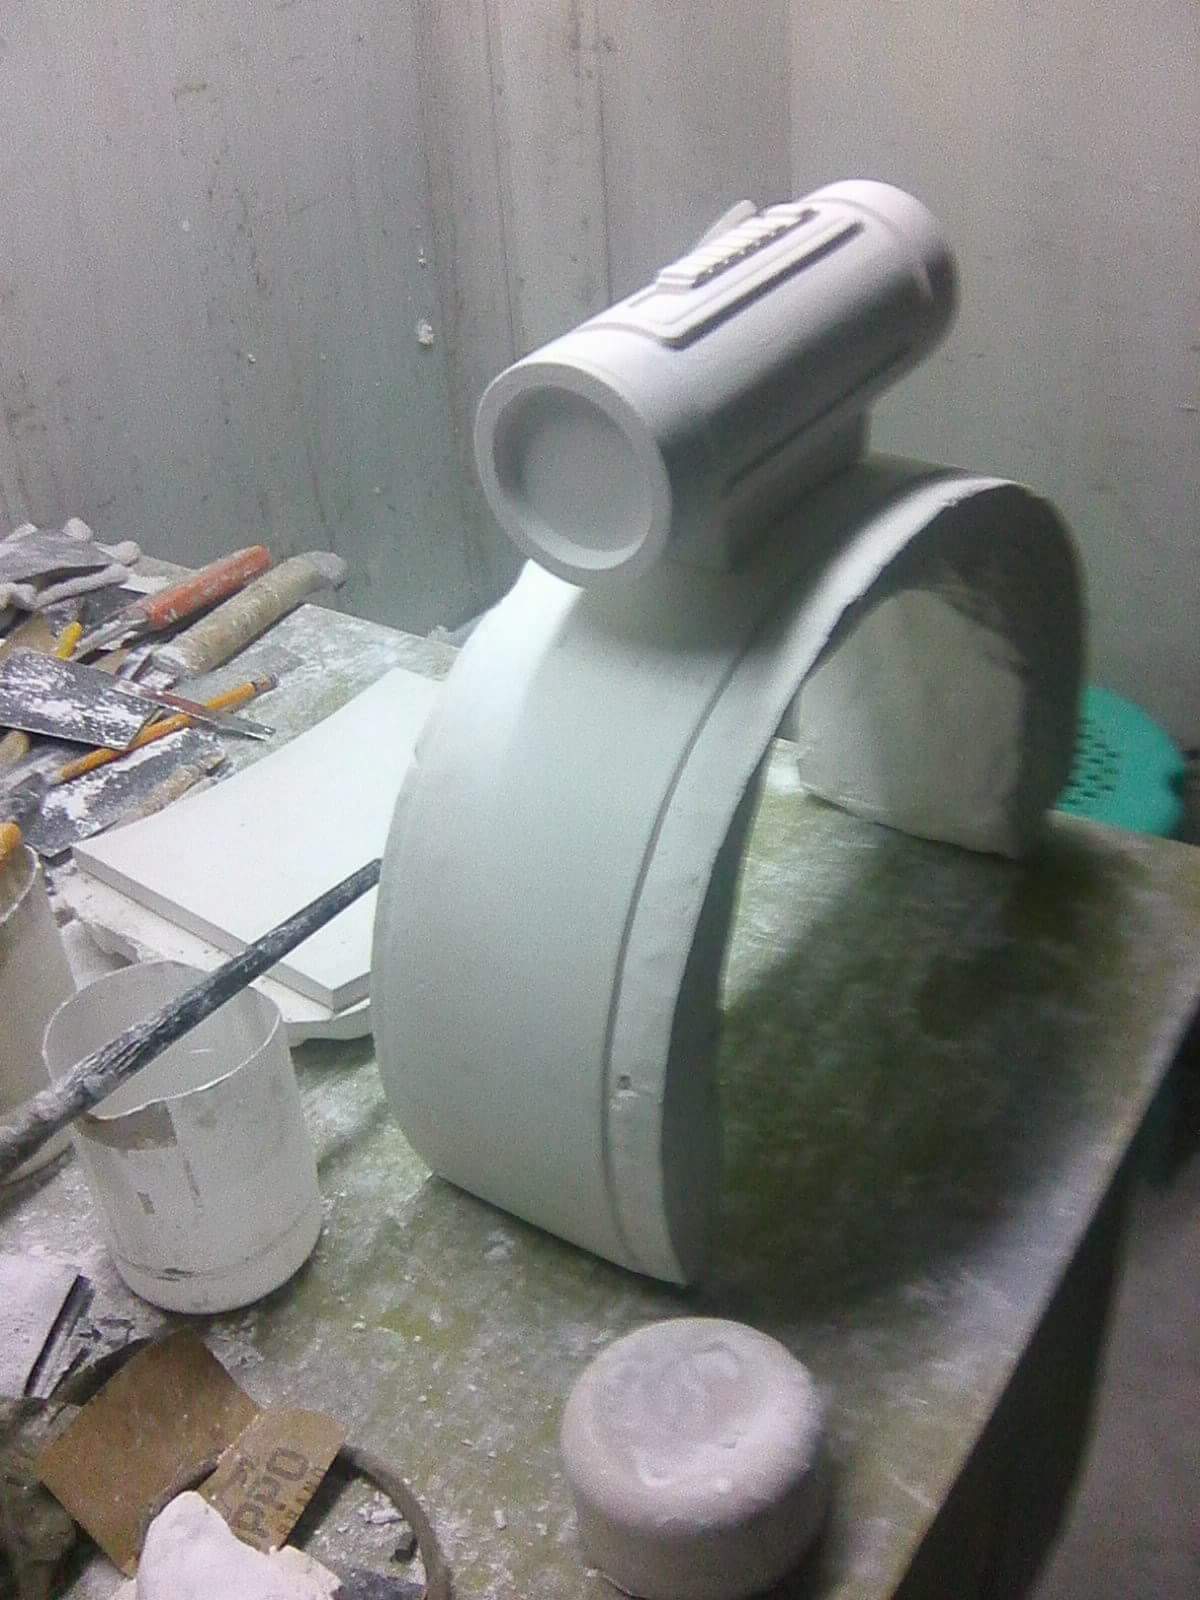
15) Thermal Detonator
- roughly 3" in diameter, 8" long
- grey base, white endcaps with recessed sections painted grey.
- control panel is white with a elongated semi circular section painted grey
- had a vertically oriented raised oval detail similar to but smaller in scale to a Deathtrooper chin greeblie
- attached to rigid rear belt
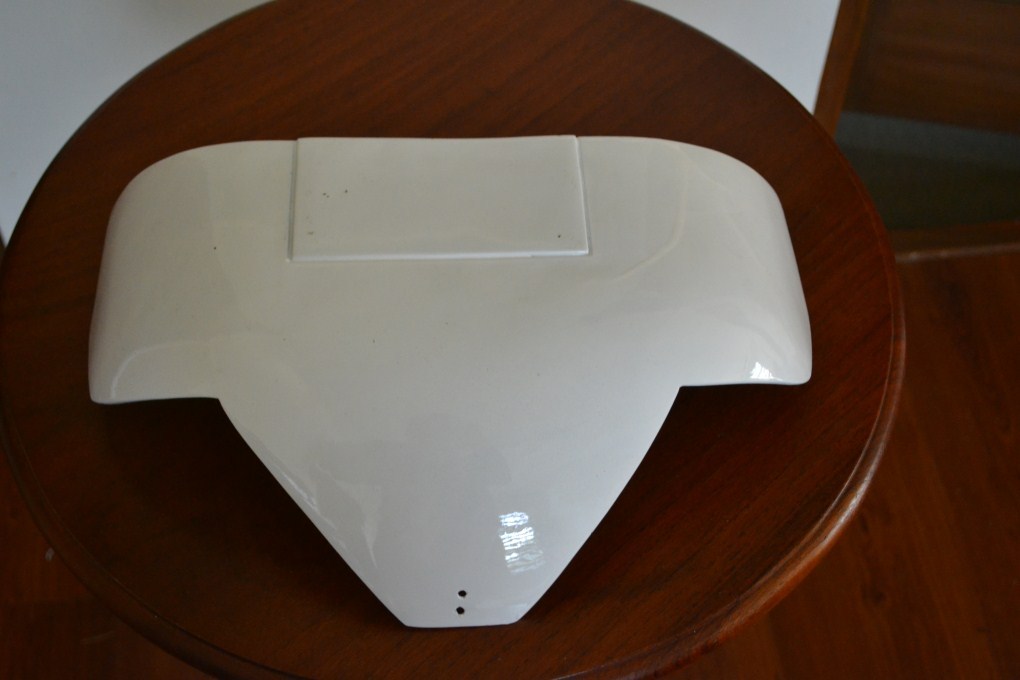
16) Cod armor
- higher cut than OT armor
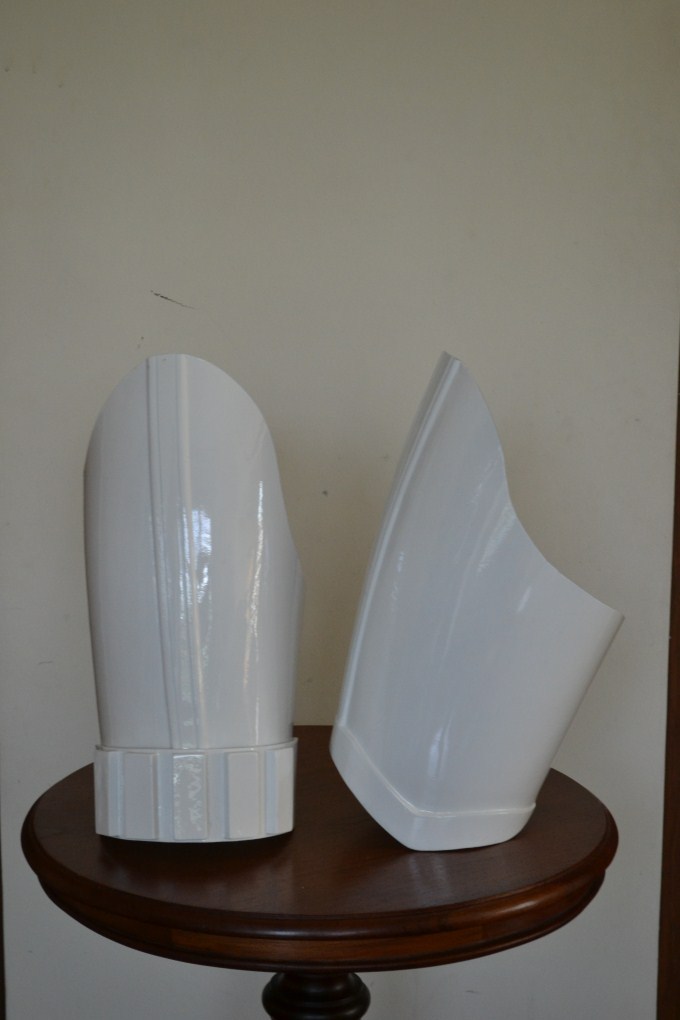
17) Thigh armor
- Front cover strip is chamfered with a recessed outline
- top of thighs are rounded
- Back cover strip is also chamfered, can overlap
- Right thigh ammo strip
18) Shin armor
- Front and back cover strips are chamfered with a recessed outline
- overlap at the back
- Front cover strip terminates before top of knee horizontal section
- Knee plate is glued to left knee

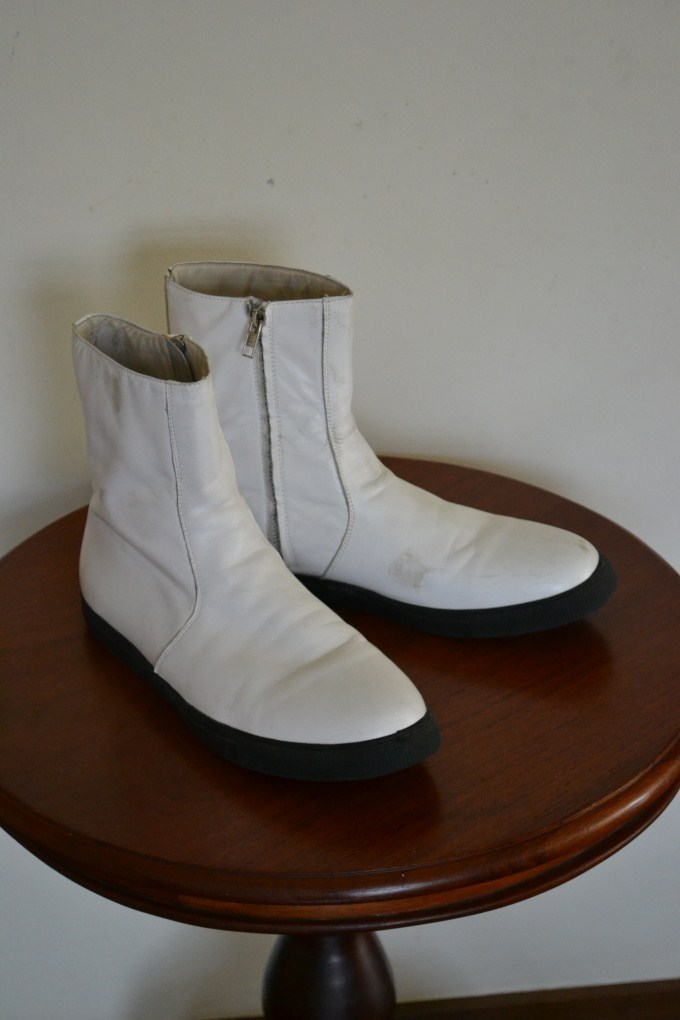
19) Boots
- FOTK boots
- flat sole
- zipper on the inside
-
1
-
-
Hi! I just finished my R1TK build and i thought i'd help out a bit with the CRL with some input not yet found in the draft:
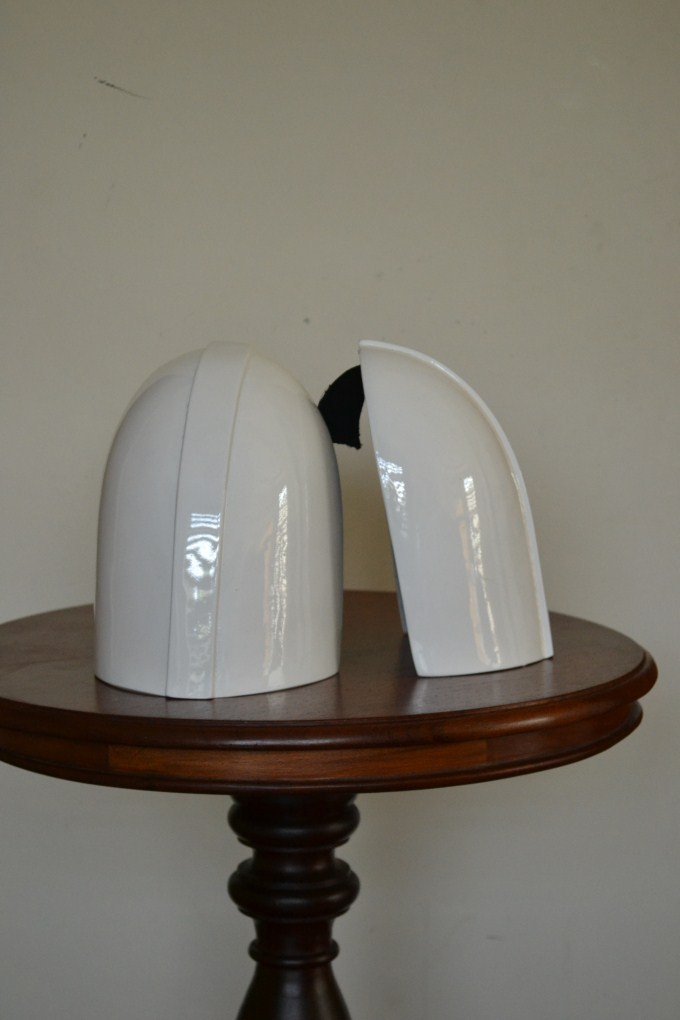
1) Helmet- Helmet is symmetrical
- Chin section has a well defined seam from the angles of the mouth
- Vocoder tubular in nature with a visible gap between the outermost section and the helmet
2) Neck seal
-ANH or integrated with undersuit
- if separate neckseal, skirt must be tucked underneath the ribbed undershirt
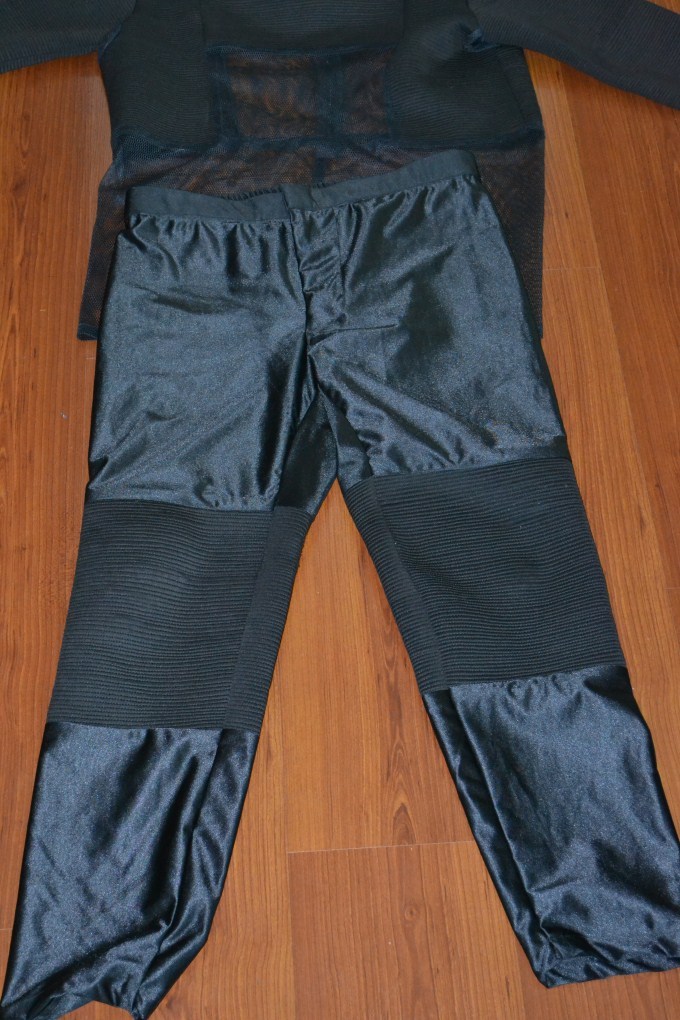
3) Undersuit
- horizontal ribs made of non-shiny fabric at the chest, arms, knees ; approx 4-5mm
- hexagonal mesh at the armpits
- ribbed neck seal made of shiny material can be integrated - approx 6-8mm
- hip section does not have ribs

4) Shoulder armor
- Tops are rounded (vs all the others which come to a point)
- See Shoretrooper CRL for basic shape
5) Shoulder straps
- made up of wekk defined half cylinders
- insert behind chest tabs and into slots of back plate
6) Biceps
- see Shoretrooper CRL for basic shape
7) Forearms
- see Shoretrooper CRL for basic shape (main difference with OT forearms is the straight profile of the ladder and the chamfered cover strips
8) Gloves/ Handplates
- Raised are is RO style (larger than OT)
- Gloves are similar to FOTK but in black
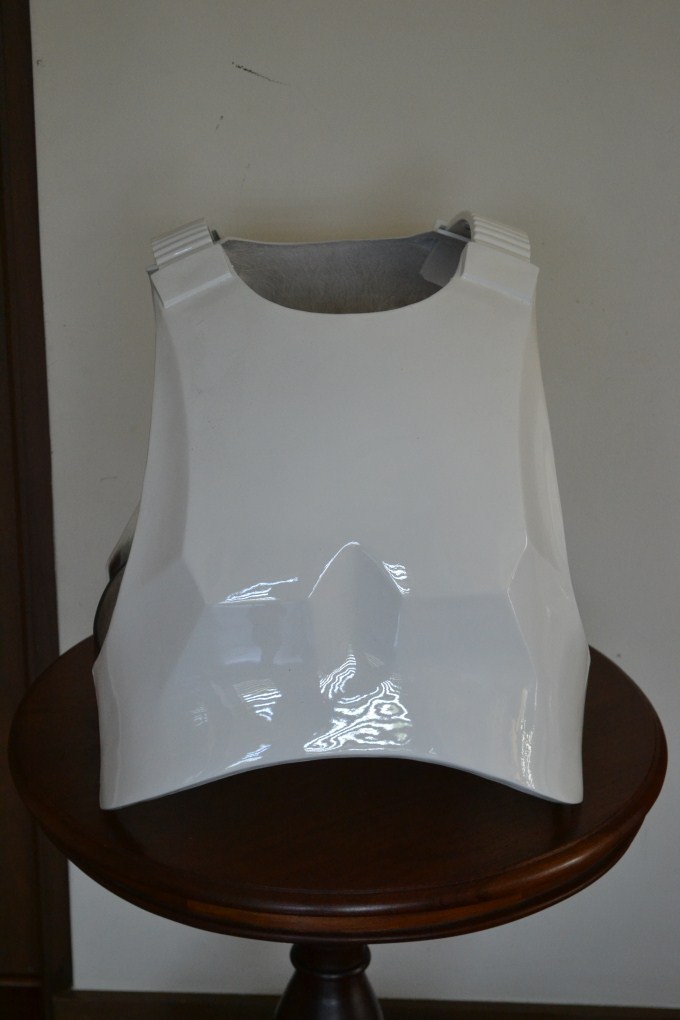
9) Chest armor
- raised trapezoids at the top of the shoulder section beneath which the straps insert
- pectoral outer "webs"/lines are more horizontally oriented than OT
- top pectoral out lines swoop outward
- bottom of ribcage flares outward
- Chest and back are connected by black extensions pieces
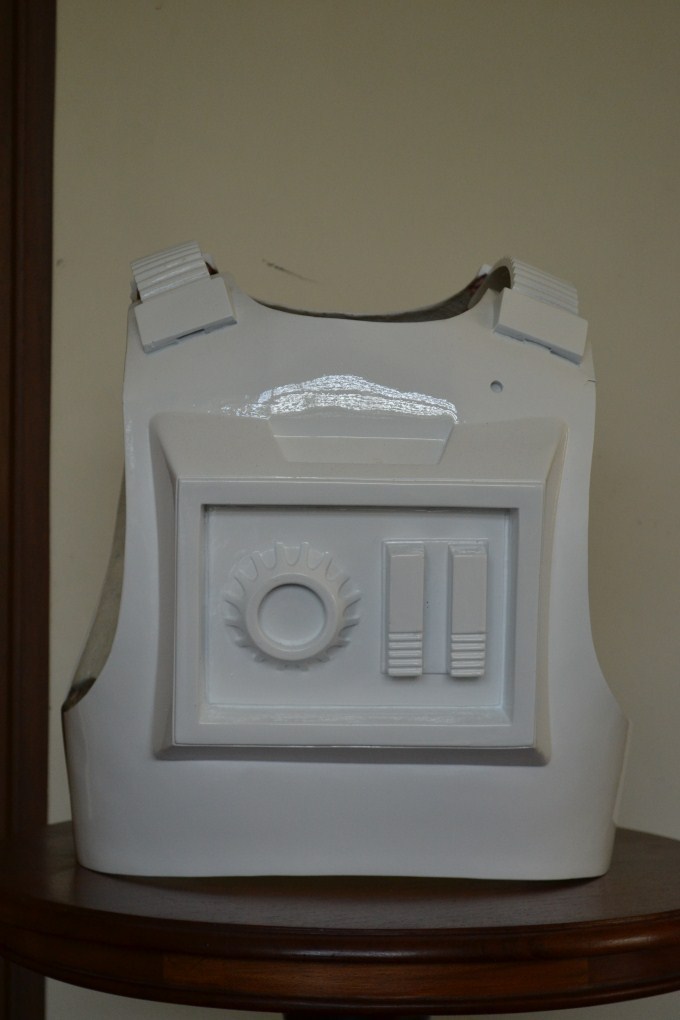
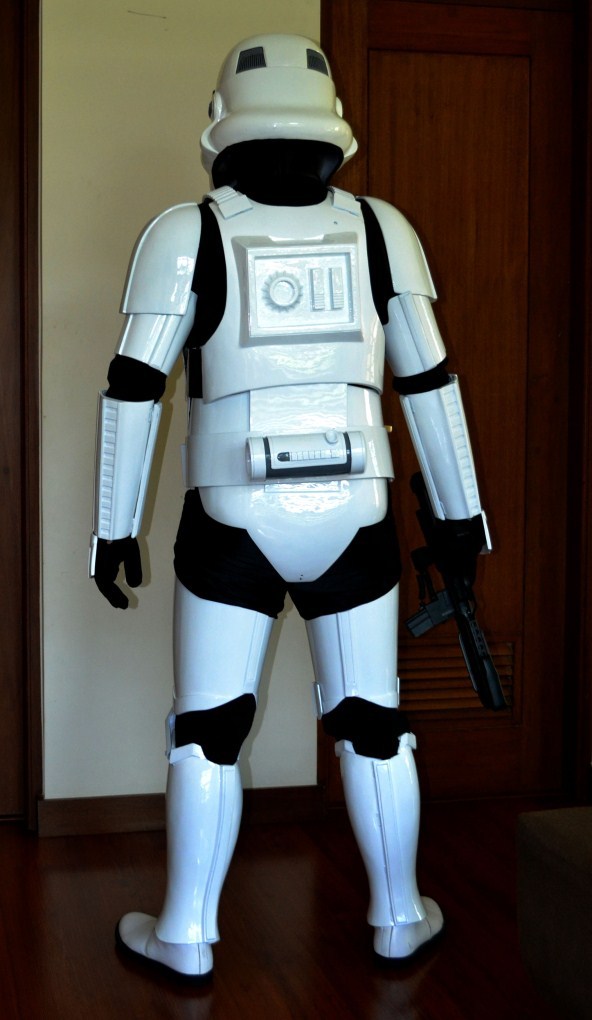
10) Back armor
- cog has 16 spines
- 11 has raised lines on one end
- Back pack has a trapzoidal indentation at the top
- Shoulder straps insert into raised trapezoidal sections
- There is a roughly 8mm circular indent near the right top corner of the backpack
- Bottom of back plate is curved and extends past the kidney plate
-
2
-
-
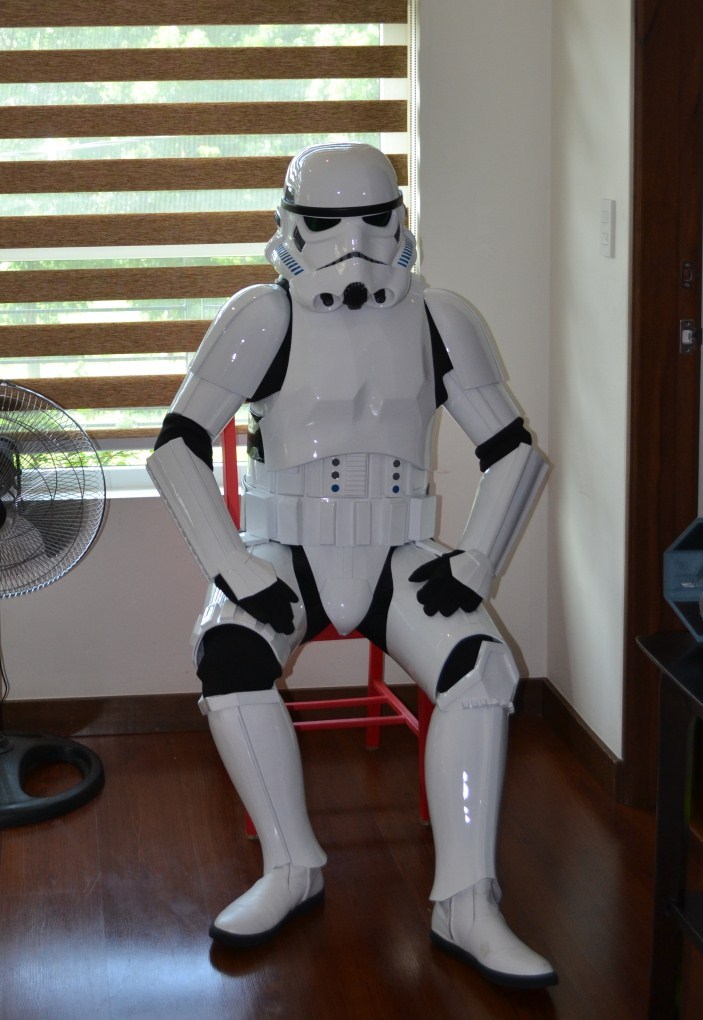
Done!
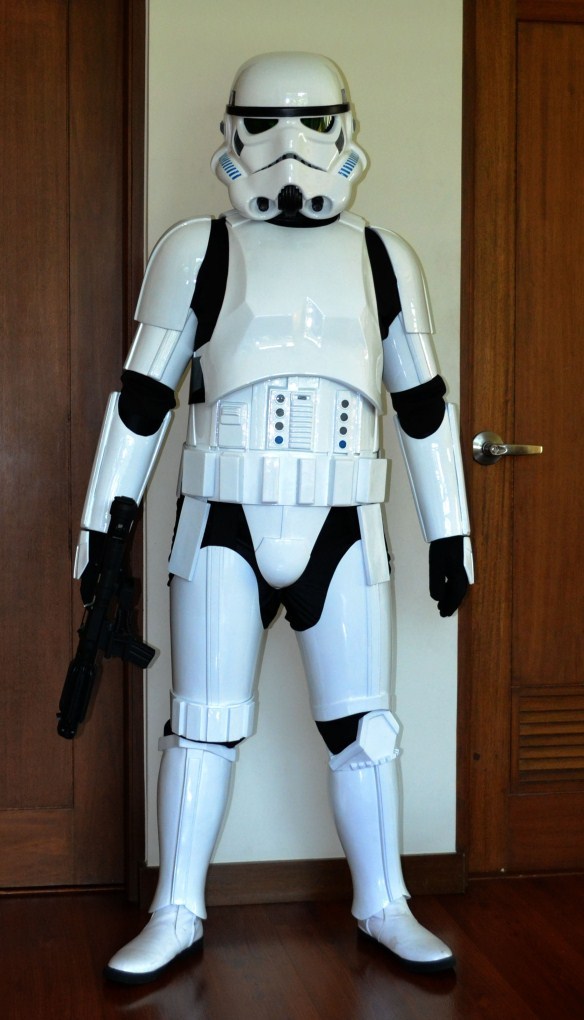
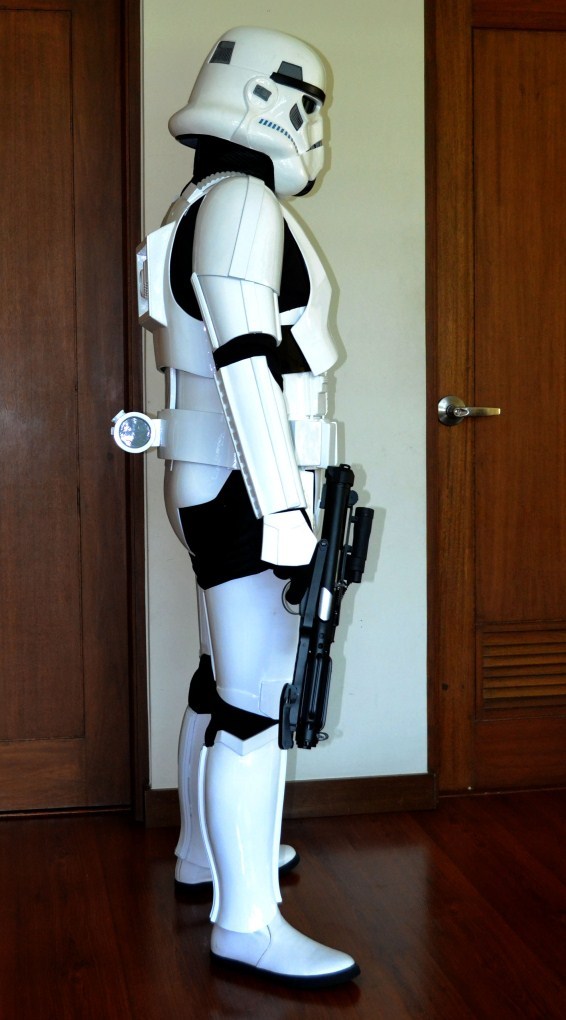

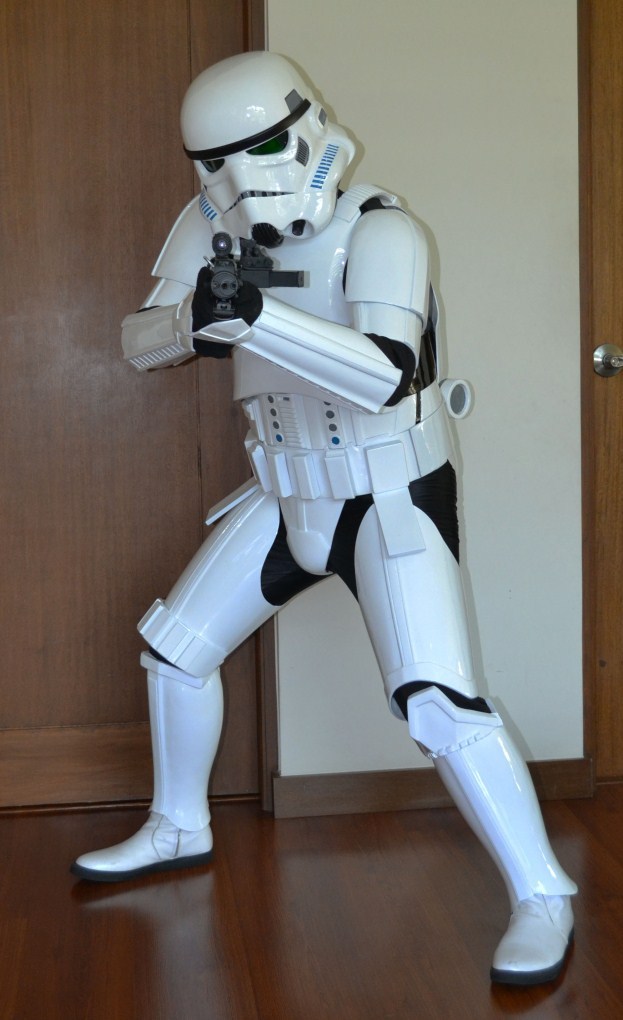
If i were taller i would probably pull off a kneeling shot and be a lot more mobile. I can sit down though:
-
13
-
-
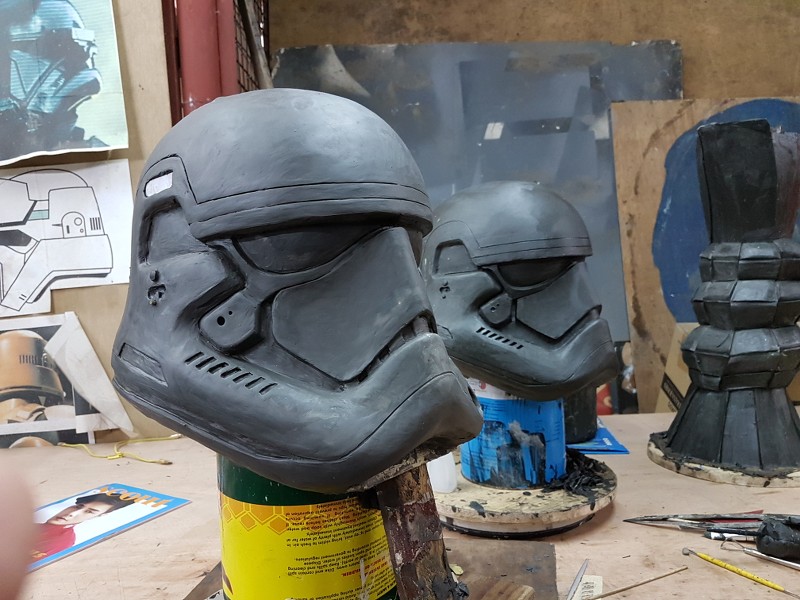
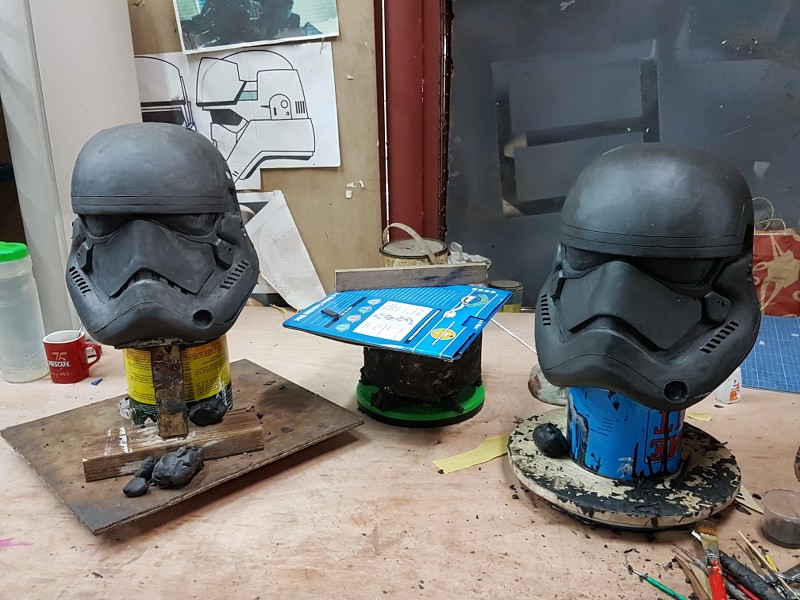
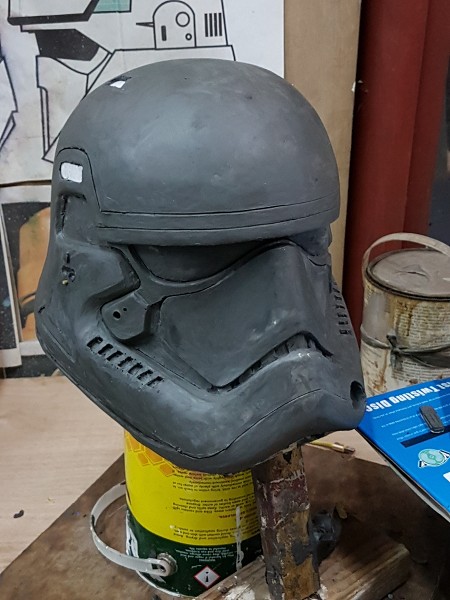
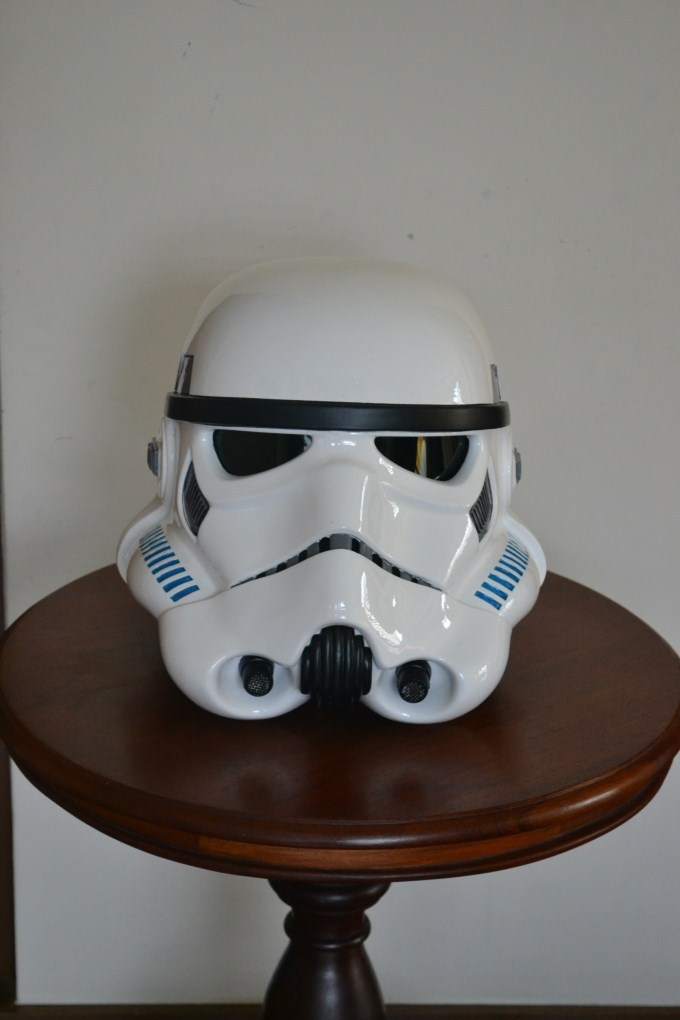
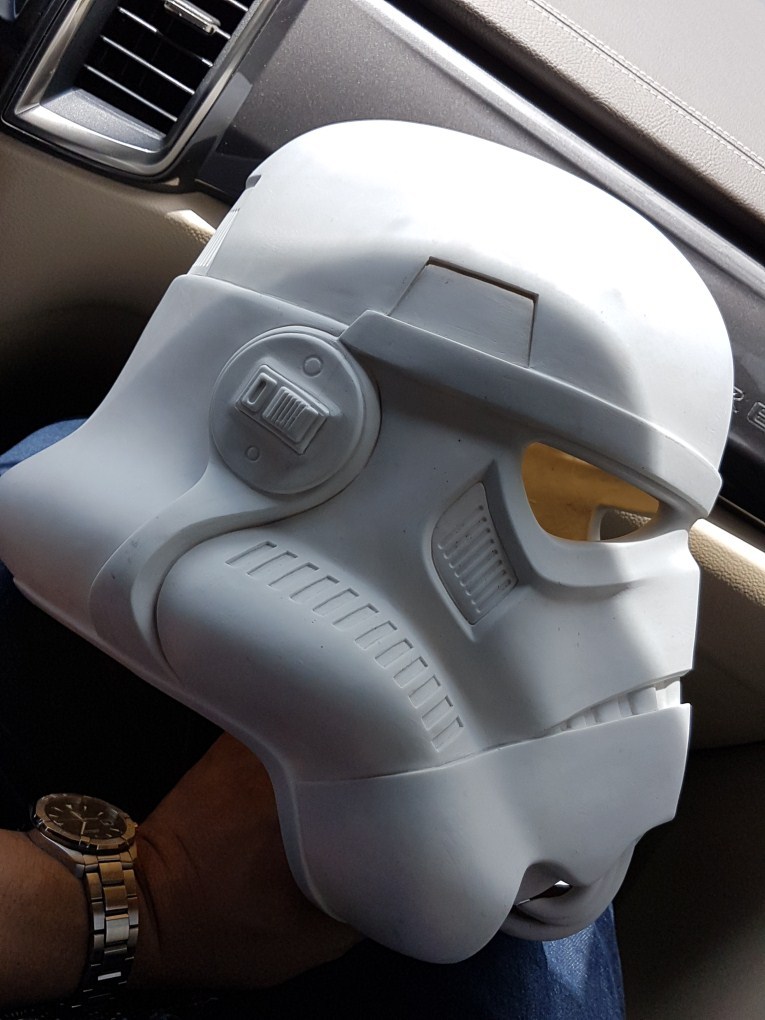
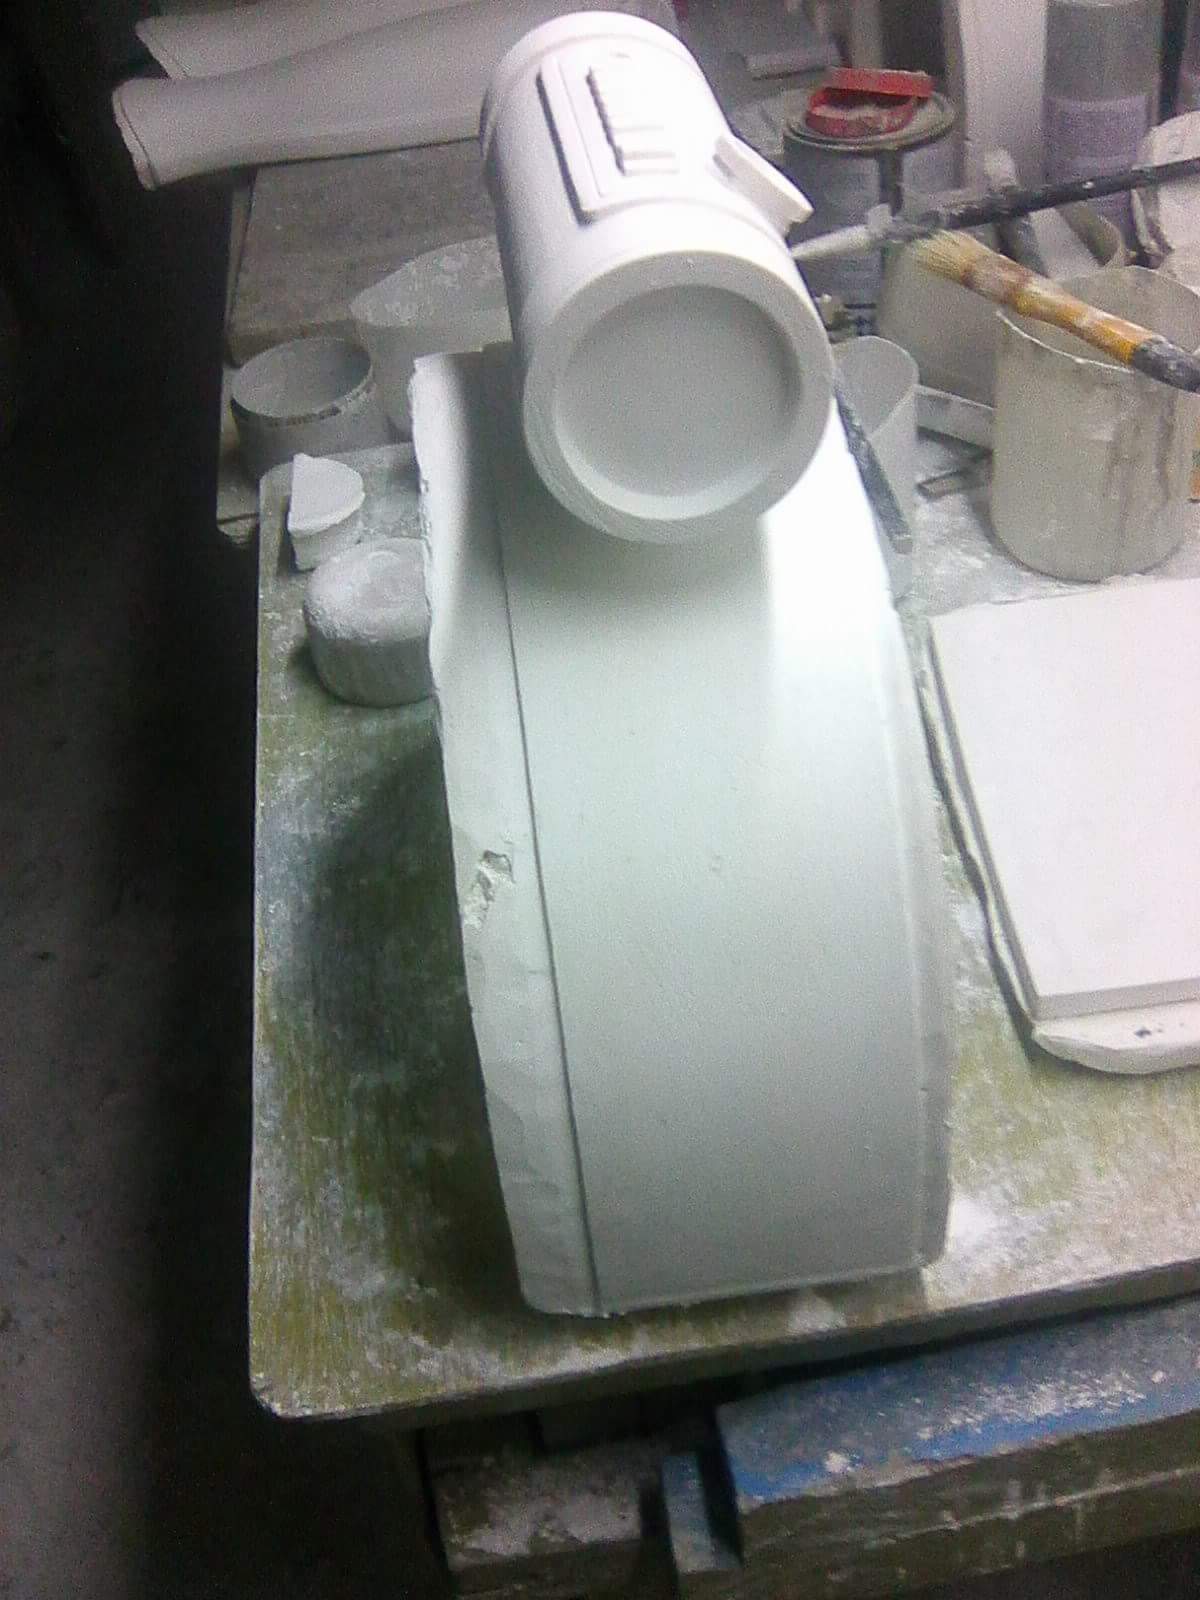
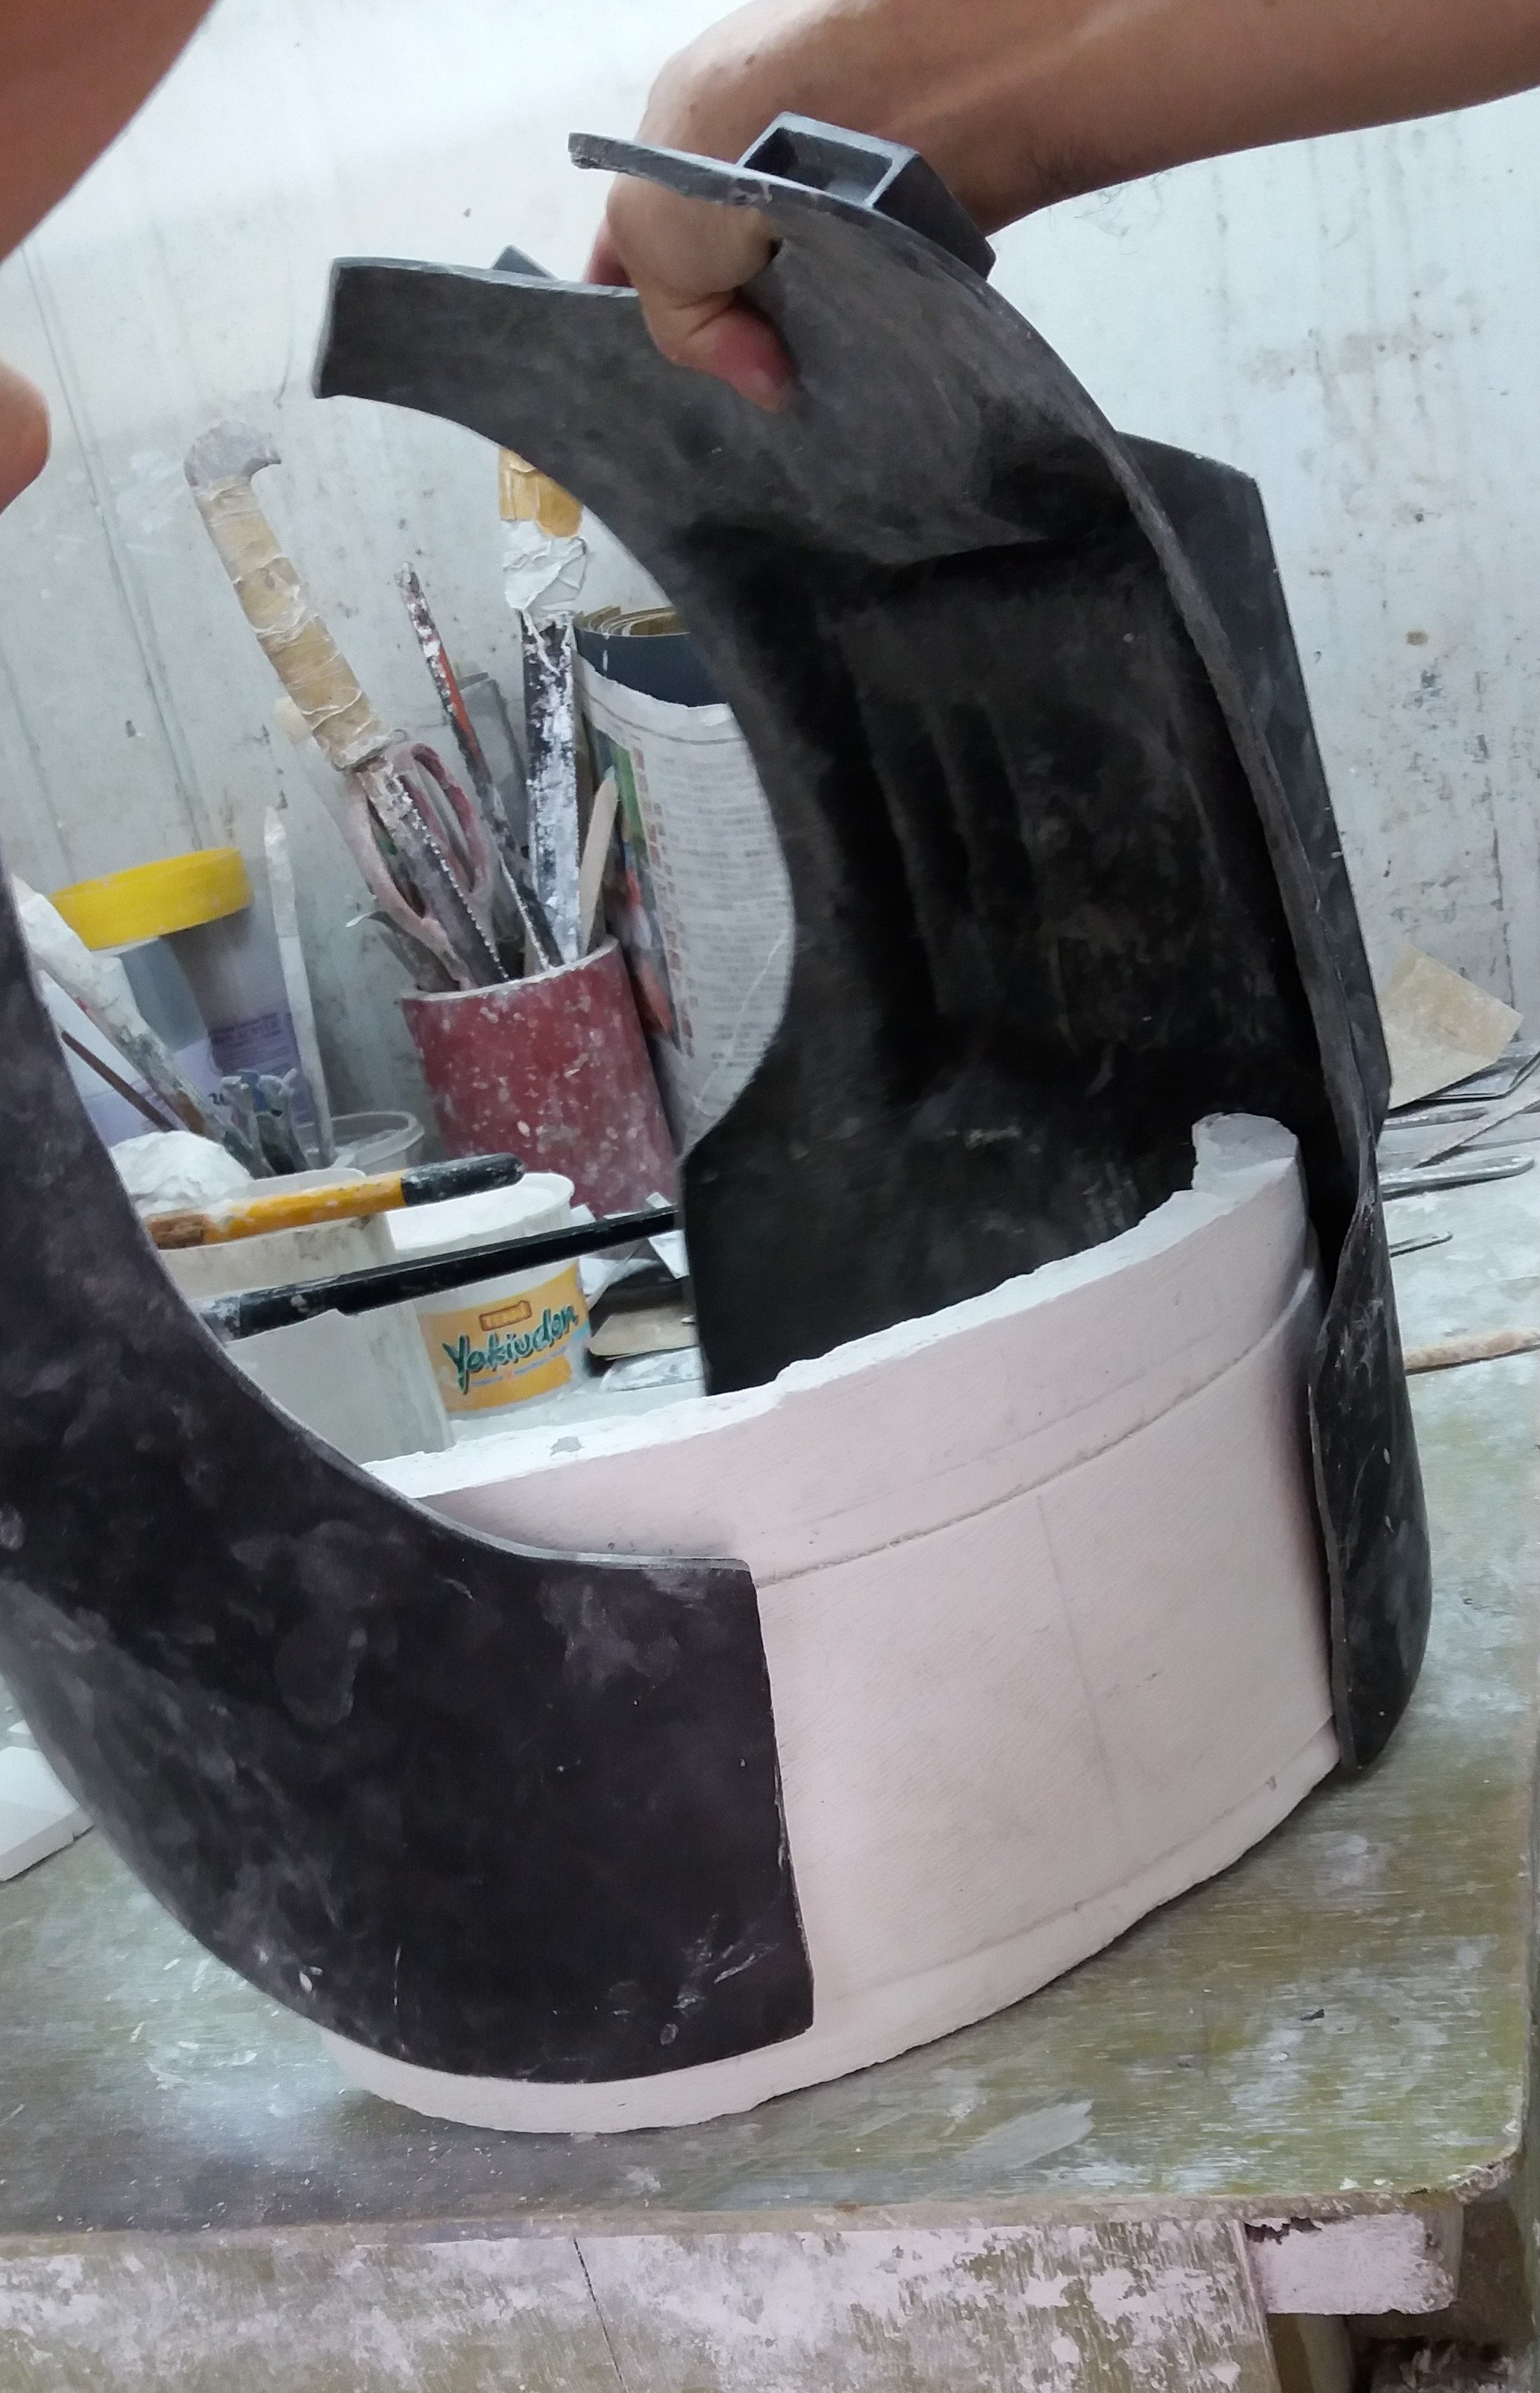
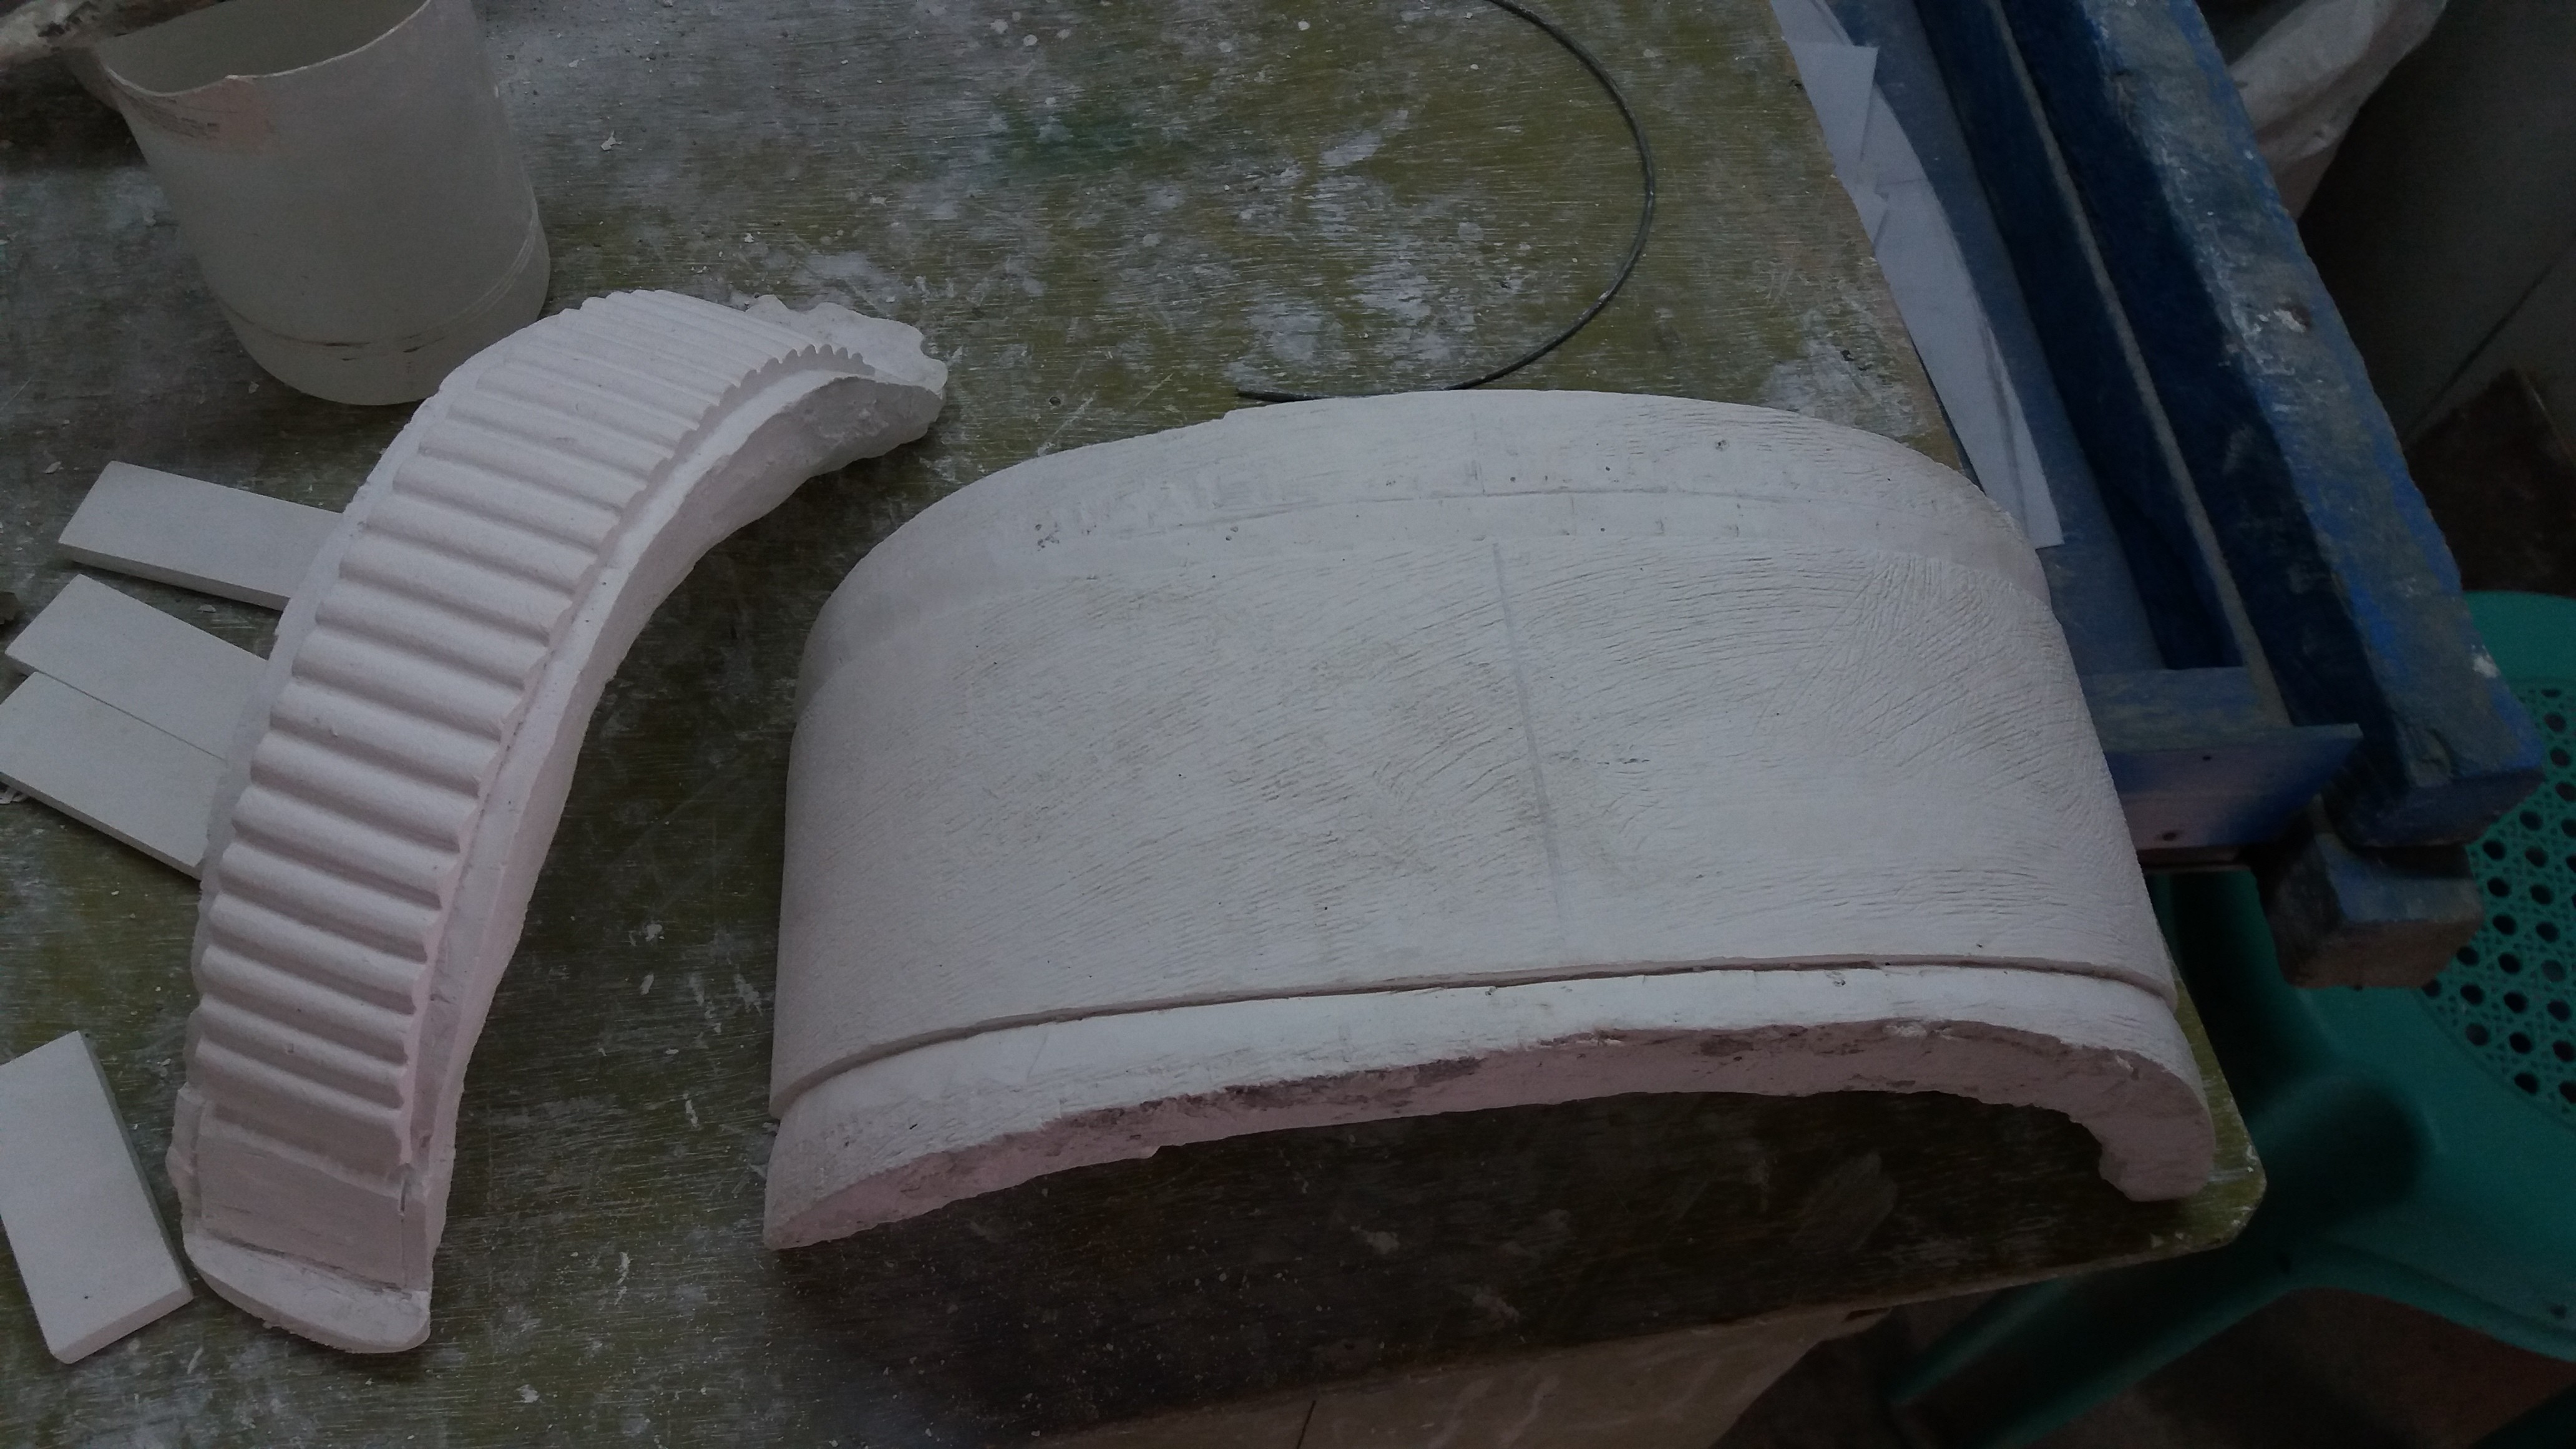
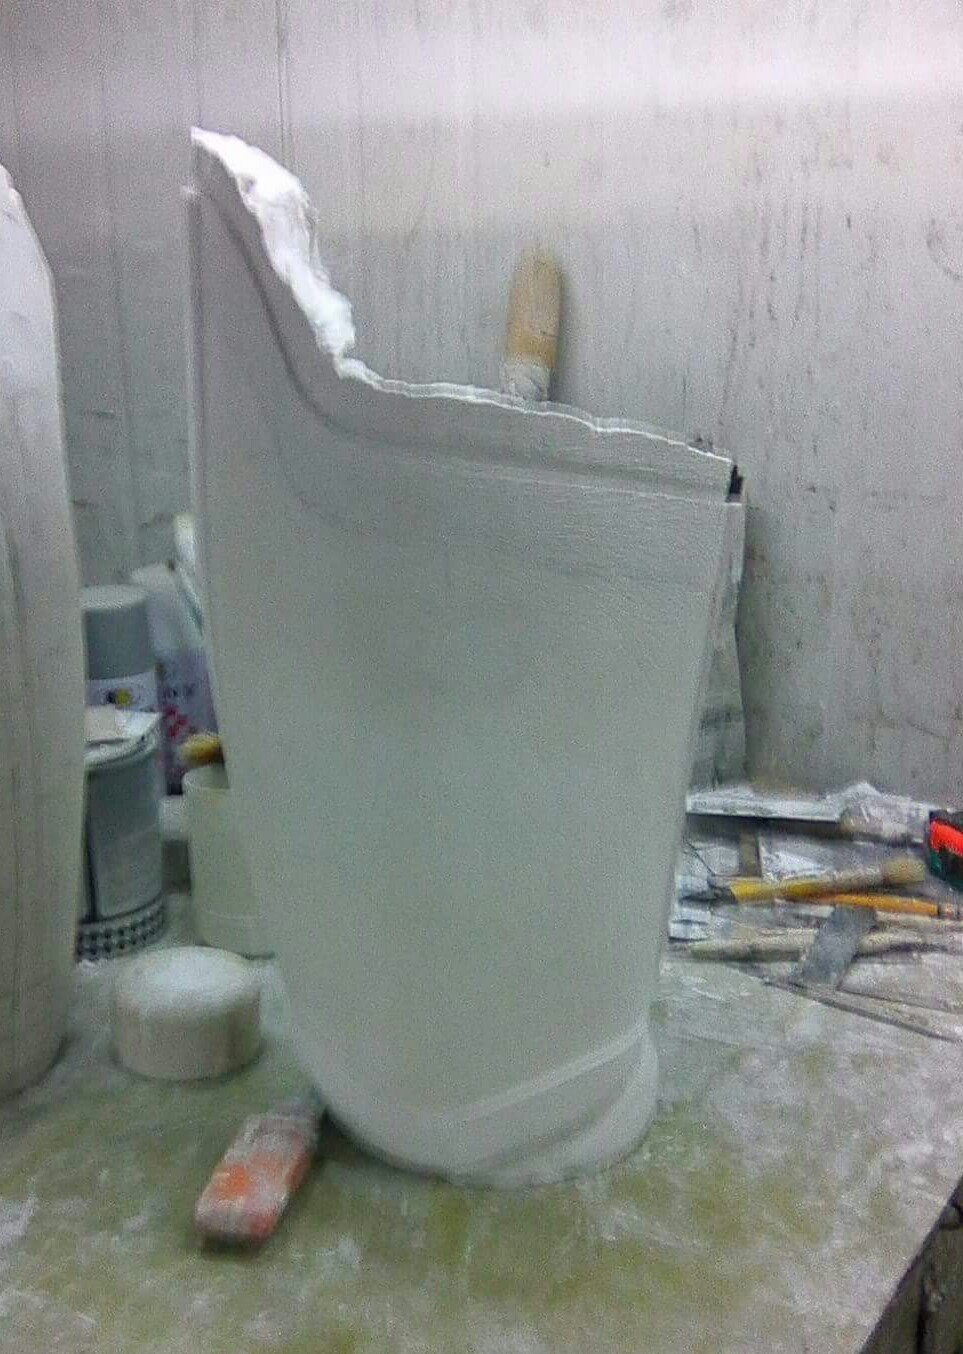
Like i mentioned before, i was a bit hesitant about making a helmet for this because the black series bucket is cheap and can be fixed with some mods. That being said, i now agree that wow, that was a heck of a lot of mods to do and the casual armor builder would probably have a hard time making it look nice afterwards. After my personal bucket was modified, it was so heavy and it was difficult to get everything to blend together seamlessly. In the end, we had to make a waste mold of the modifed bucket, cast in it plaster, and clean it and mod it some more. So here's the bucket, which was based on a BS, heavily modified. (To be honest, i'm still hesitant about releasing this because we usually sculpt stuff completely from scratch).
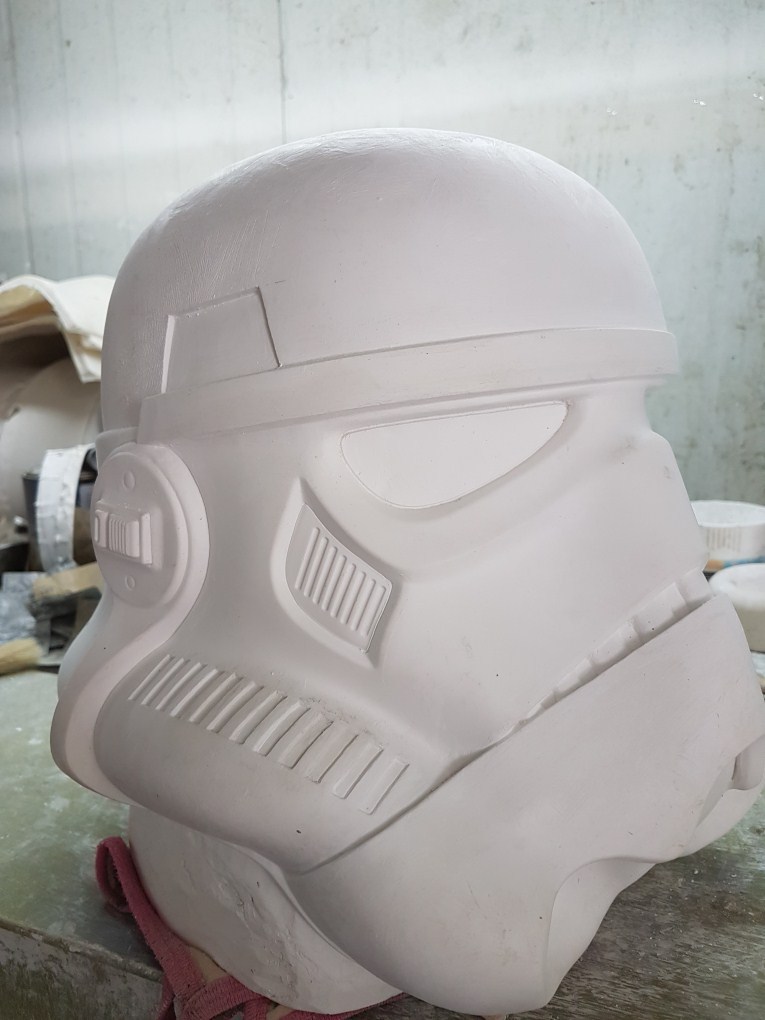
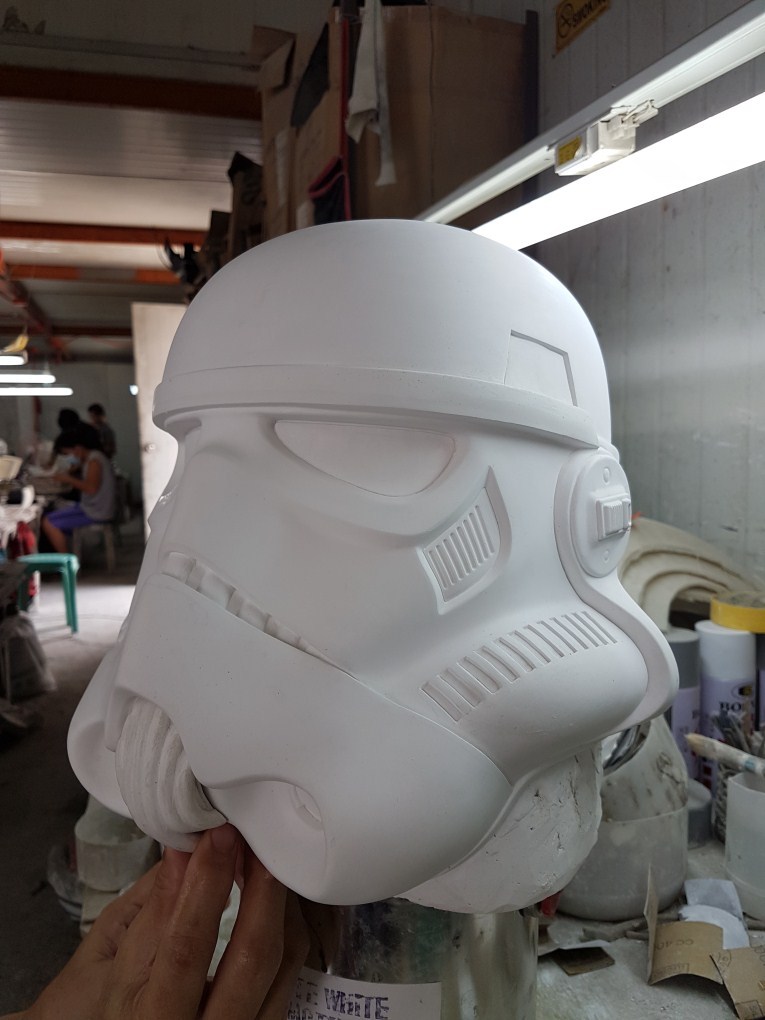
Changes include the ff:
1) Larger and lower brow
2) Closed seams while leaving them a bit well defined
3) Cleaned up and sharpened vents, traps, tears, etc
4) Slightly smaller mouth
5) Made the seams of the chin section more prominent and well defined
6) Got rid of the batt compartment and speaker seams
7) Extended the chin bulbs inward
8) got rid of the battery compartment protruding into the back of the helmet
9) made bottom trim continuous
10) sculpted a new, more tubular vocoder
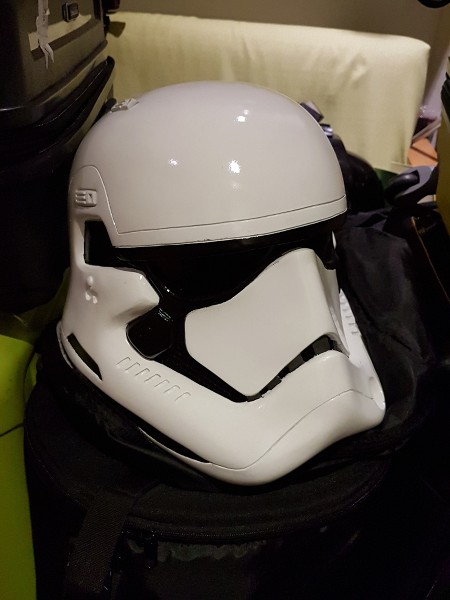
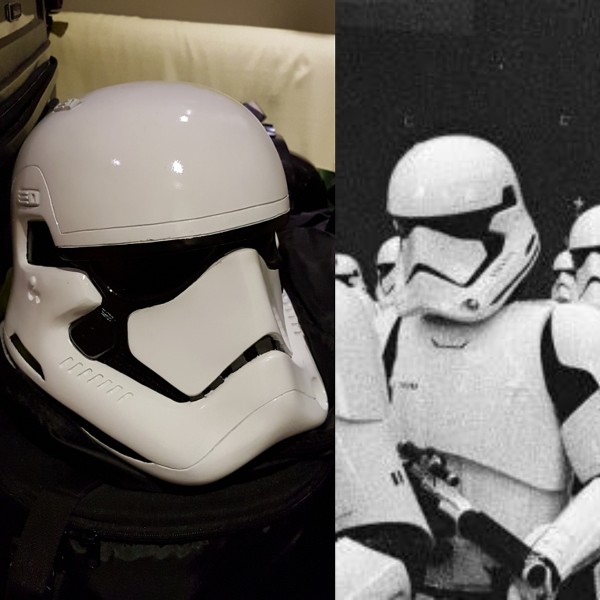
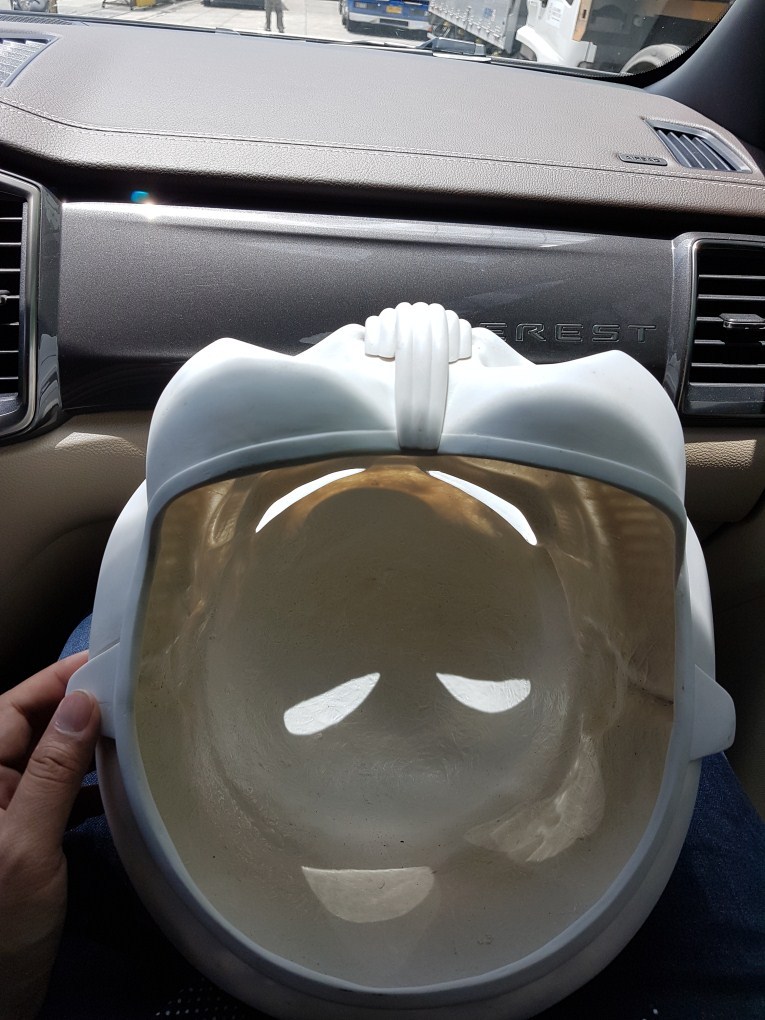
Here it is painted up:
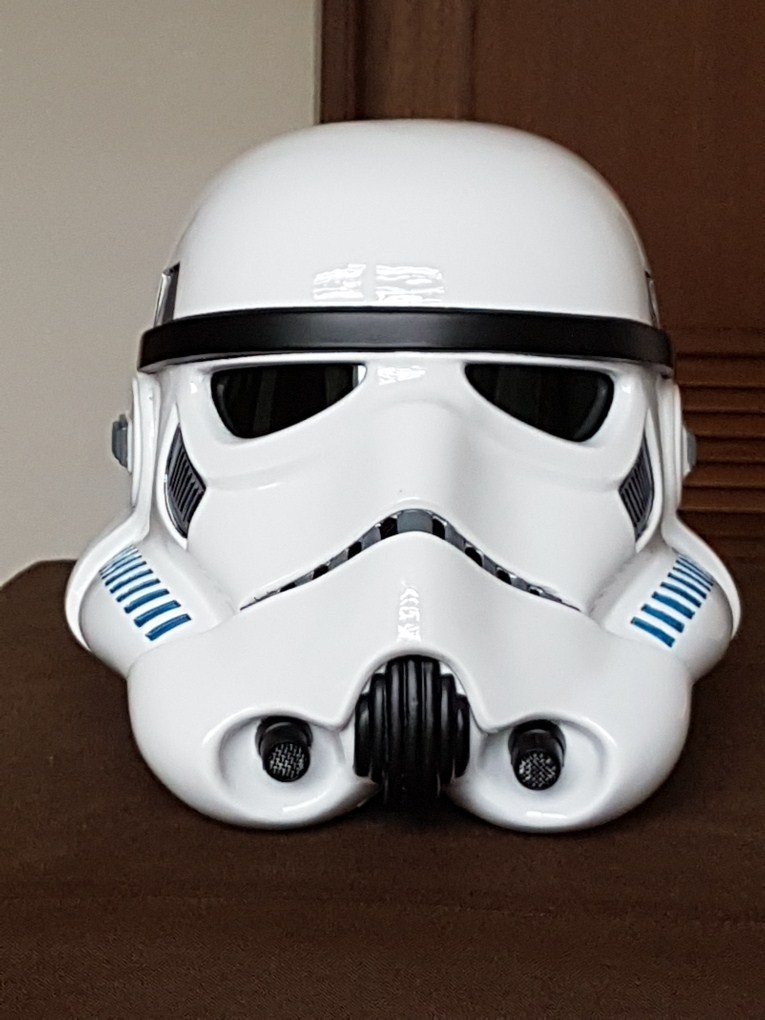

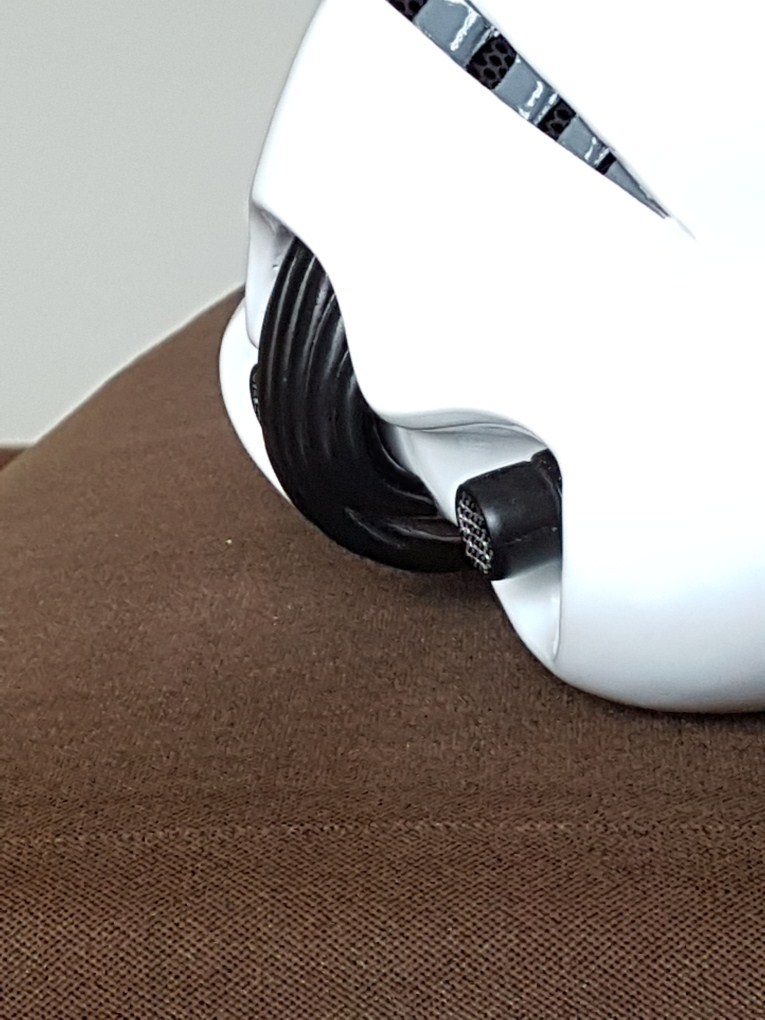
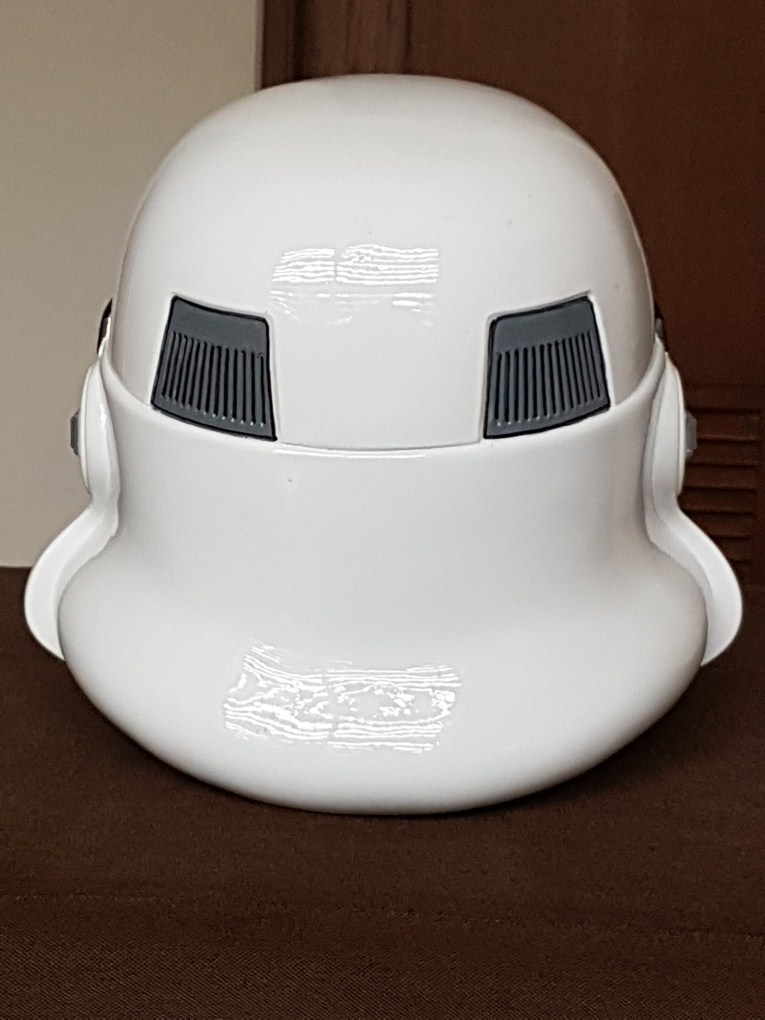
It actually came out a bit lighter than the BS.
Pics in armor, hopefully tomorrow.
-
9
-
-
Wow Jim, this looks absolutely incredible! You did an amazing job. This is officially the first ever Rogue One Stormtrooper armor available. I'm really glad you took the time to do it right, the end result is definitely worth the time and effort. It's accurate and it looks Awesome!
Thanks! I'm a completist i guess, and since i had most of the parts already from the Shoretrooper, I didn't have to do stuff from scratch.
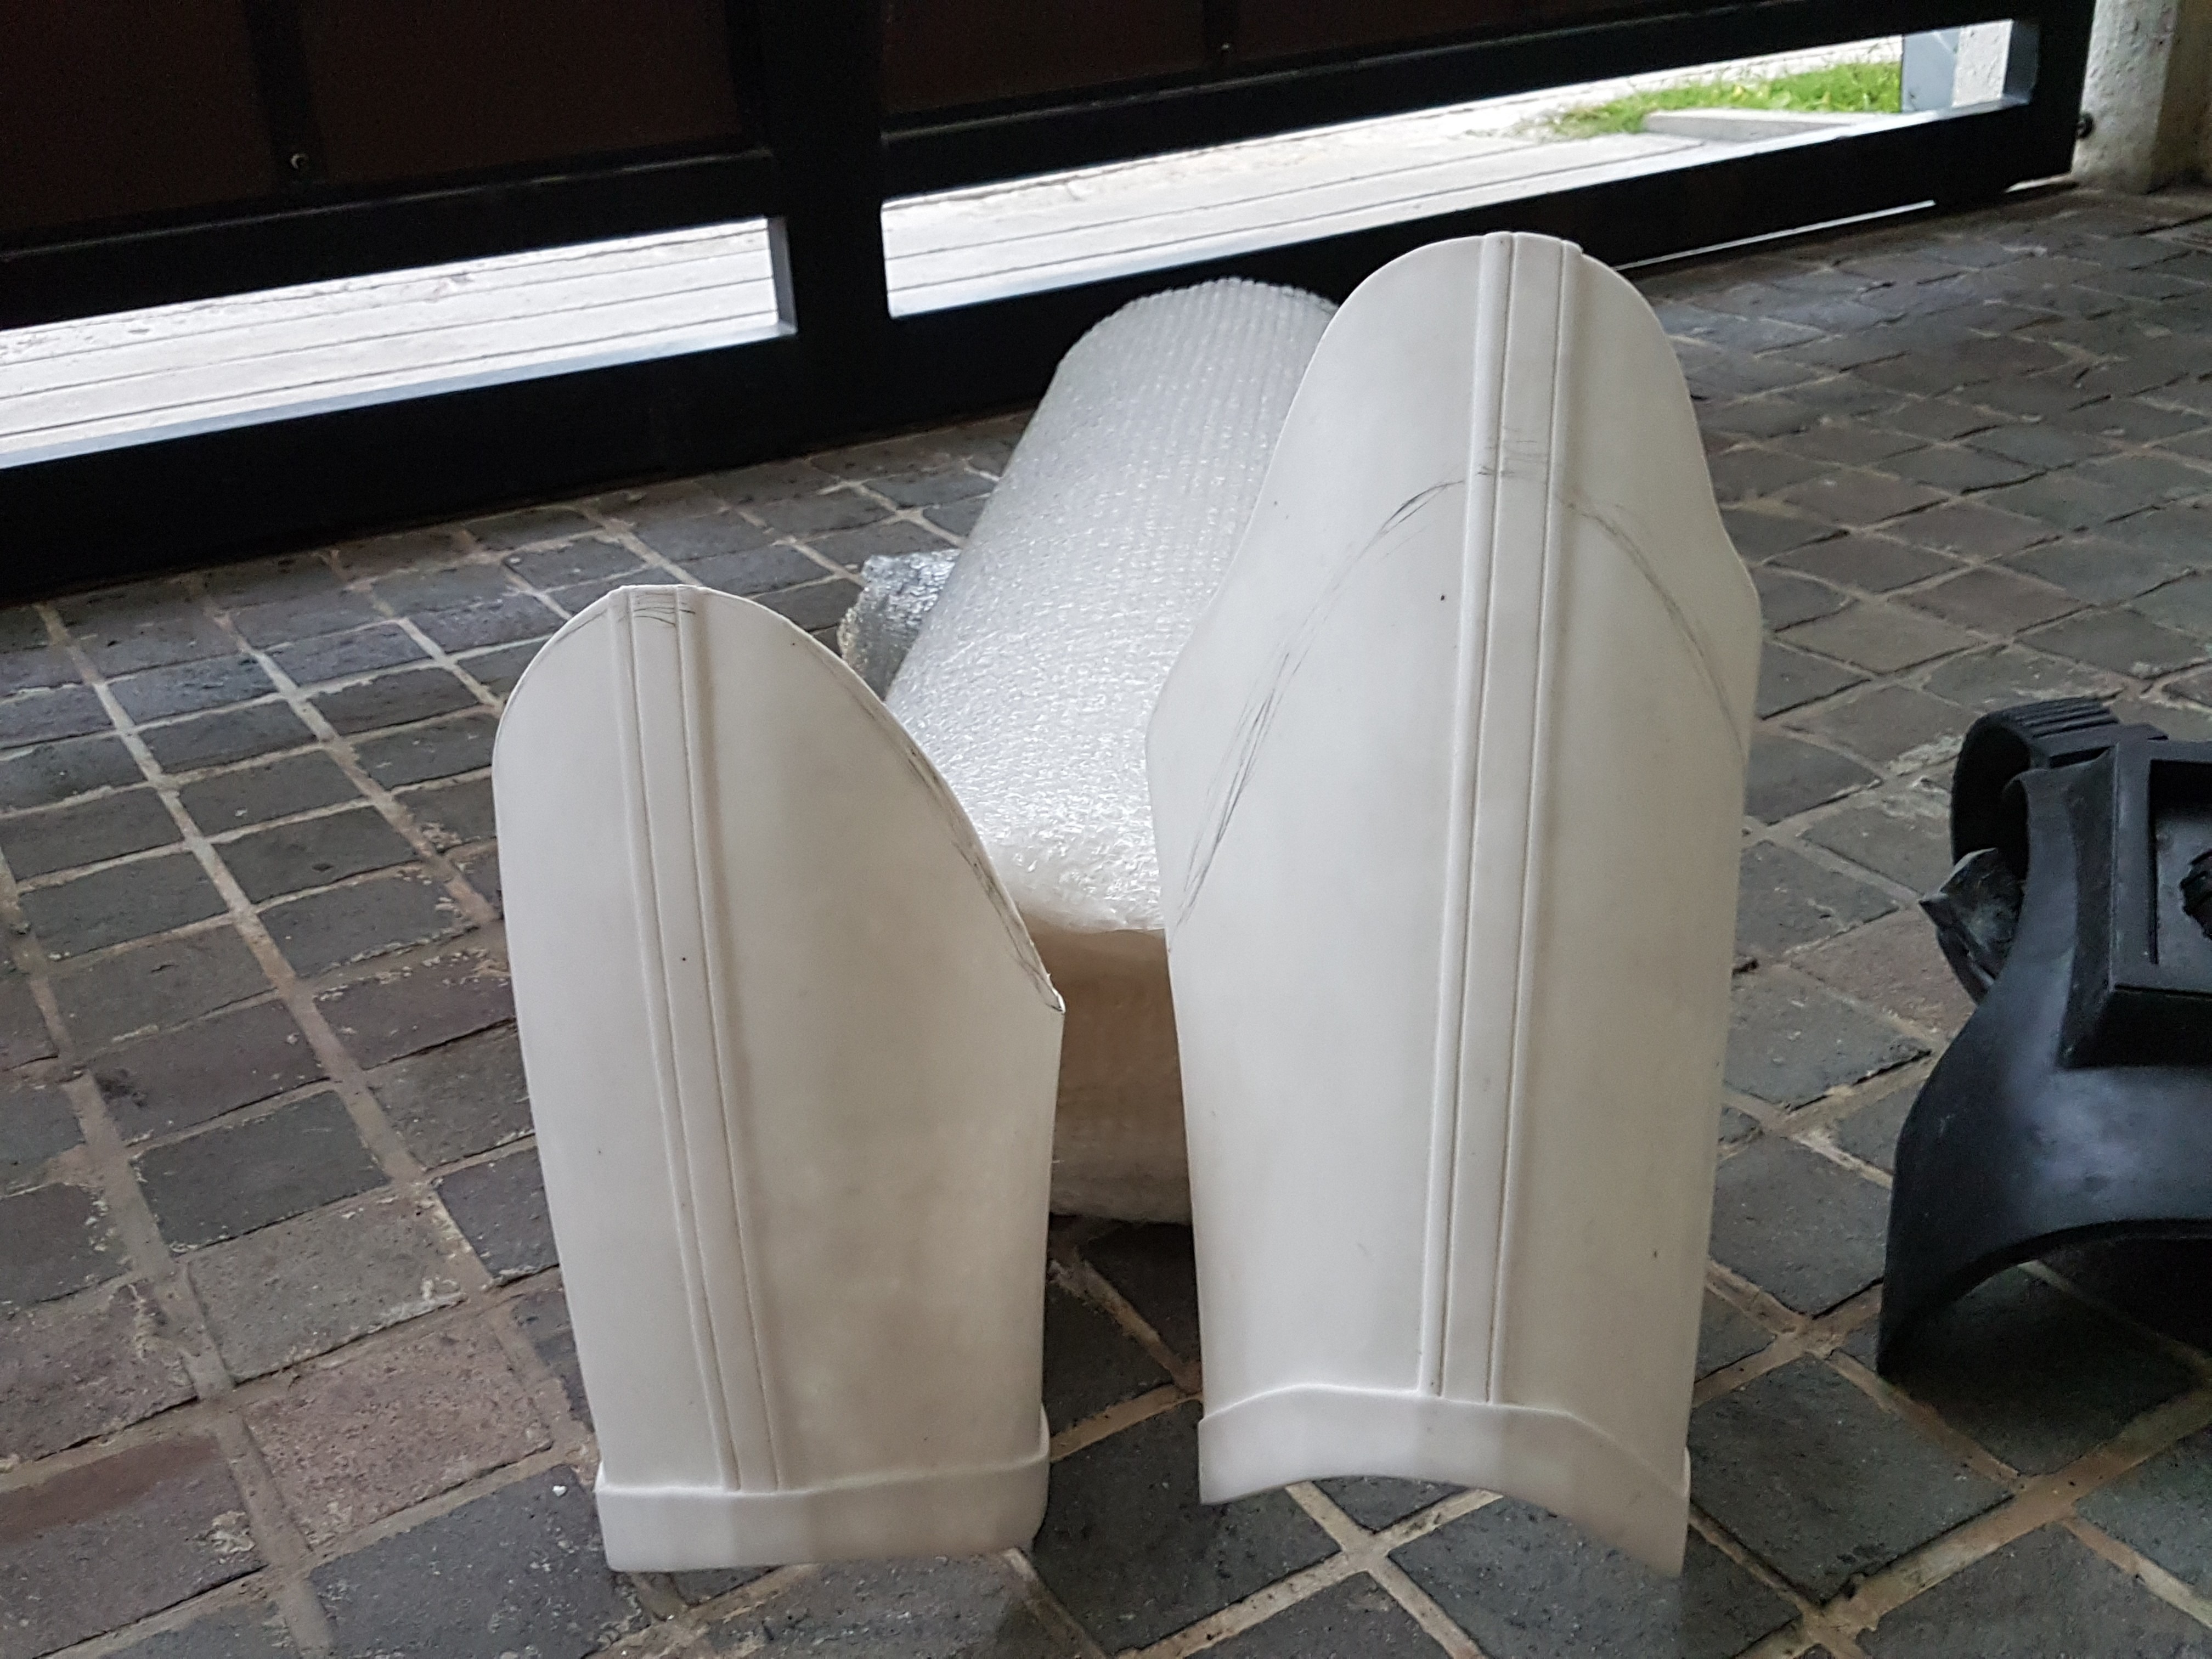
Looking good Jim
 . Question, are you considering making the legs adjustable in width as well? In the photos they're sitting kind of low and seem to be too small even for you. Nice work though
 Thanks, Tony! Yes, the thighs are actually cast much taller and wider. I had to trim about 2" off the top and cut it in the back to reduce girth. And yes, it looks like i over trimmed a bit. Haha.
Here's a pic after trimming the length but before reducing the girth.
-
4
-
-
That's awesome, then all it will need is a nice gloss clear coat. I wonder which kind will be best for protecting the armor and shine up nice if you want to buff out any surface scratches, similar to using Novus Plastic Polish on ABS.
Or do you think the armor will require primer and/or paint?
Hmmm. That's interesting. I guess just a clear coat would work, especially if you're going for a weathered version. This material yellows over time though so best option might still be primer, paint, and a clear coat
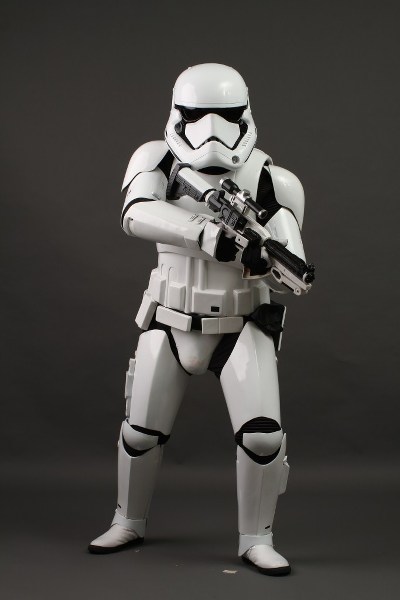
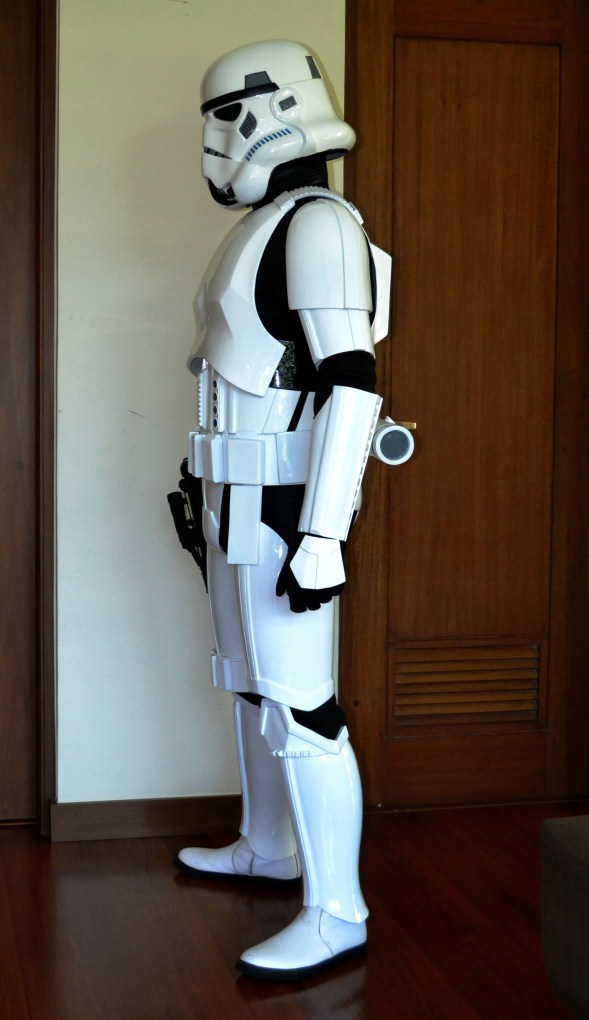
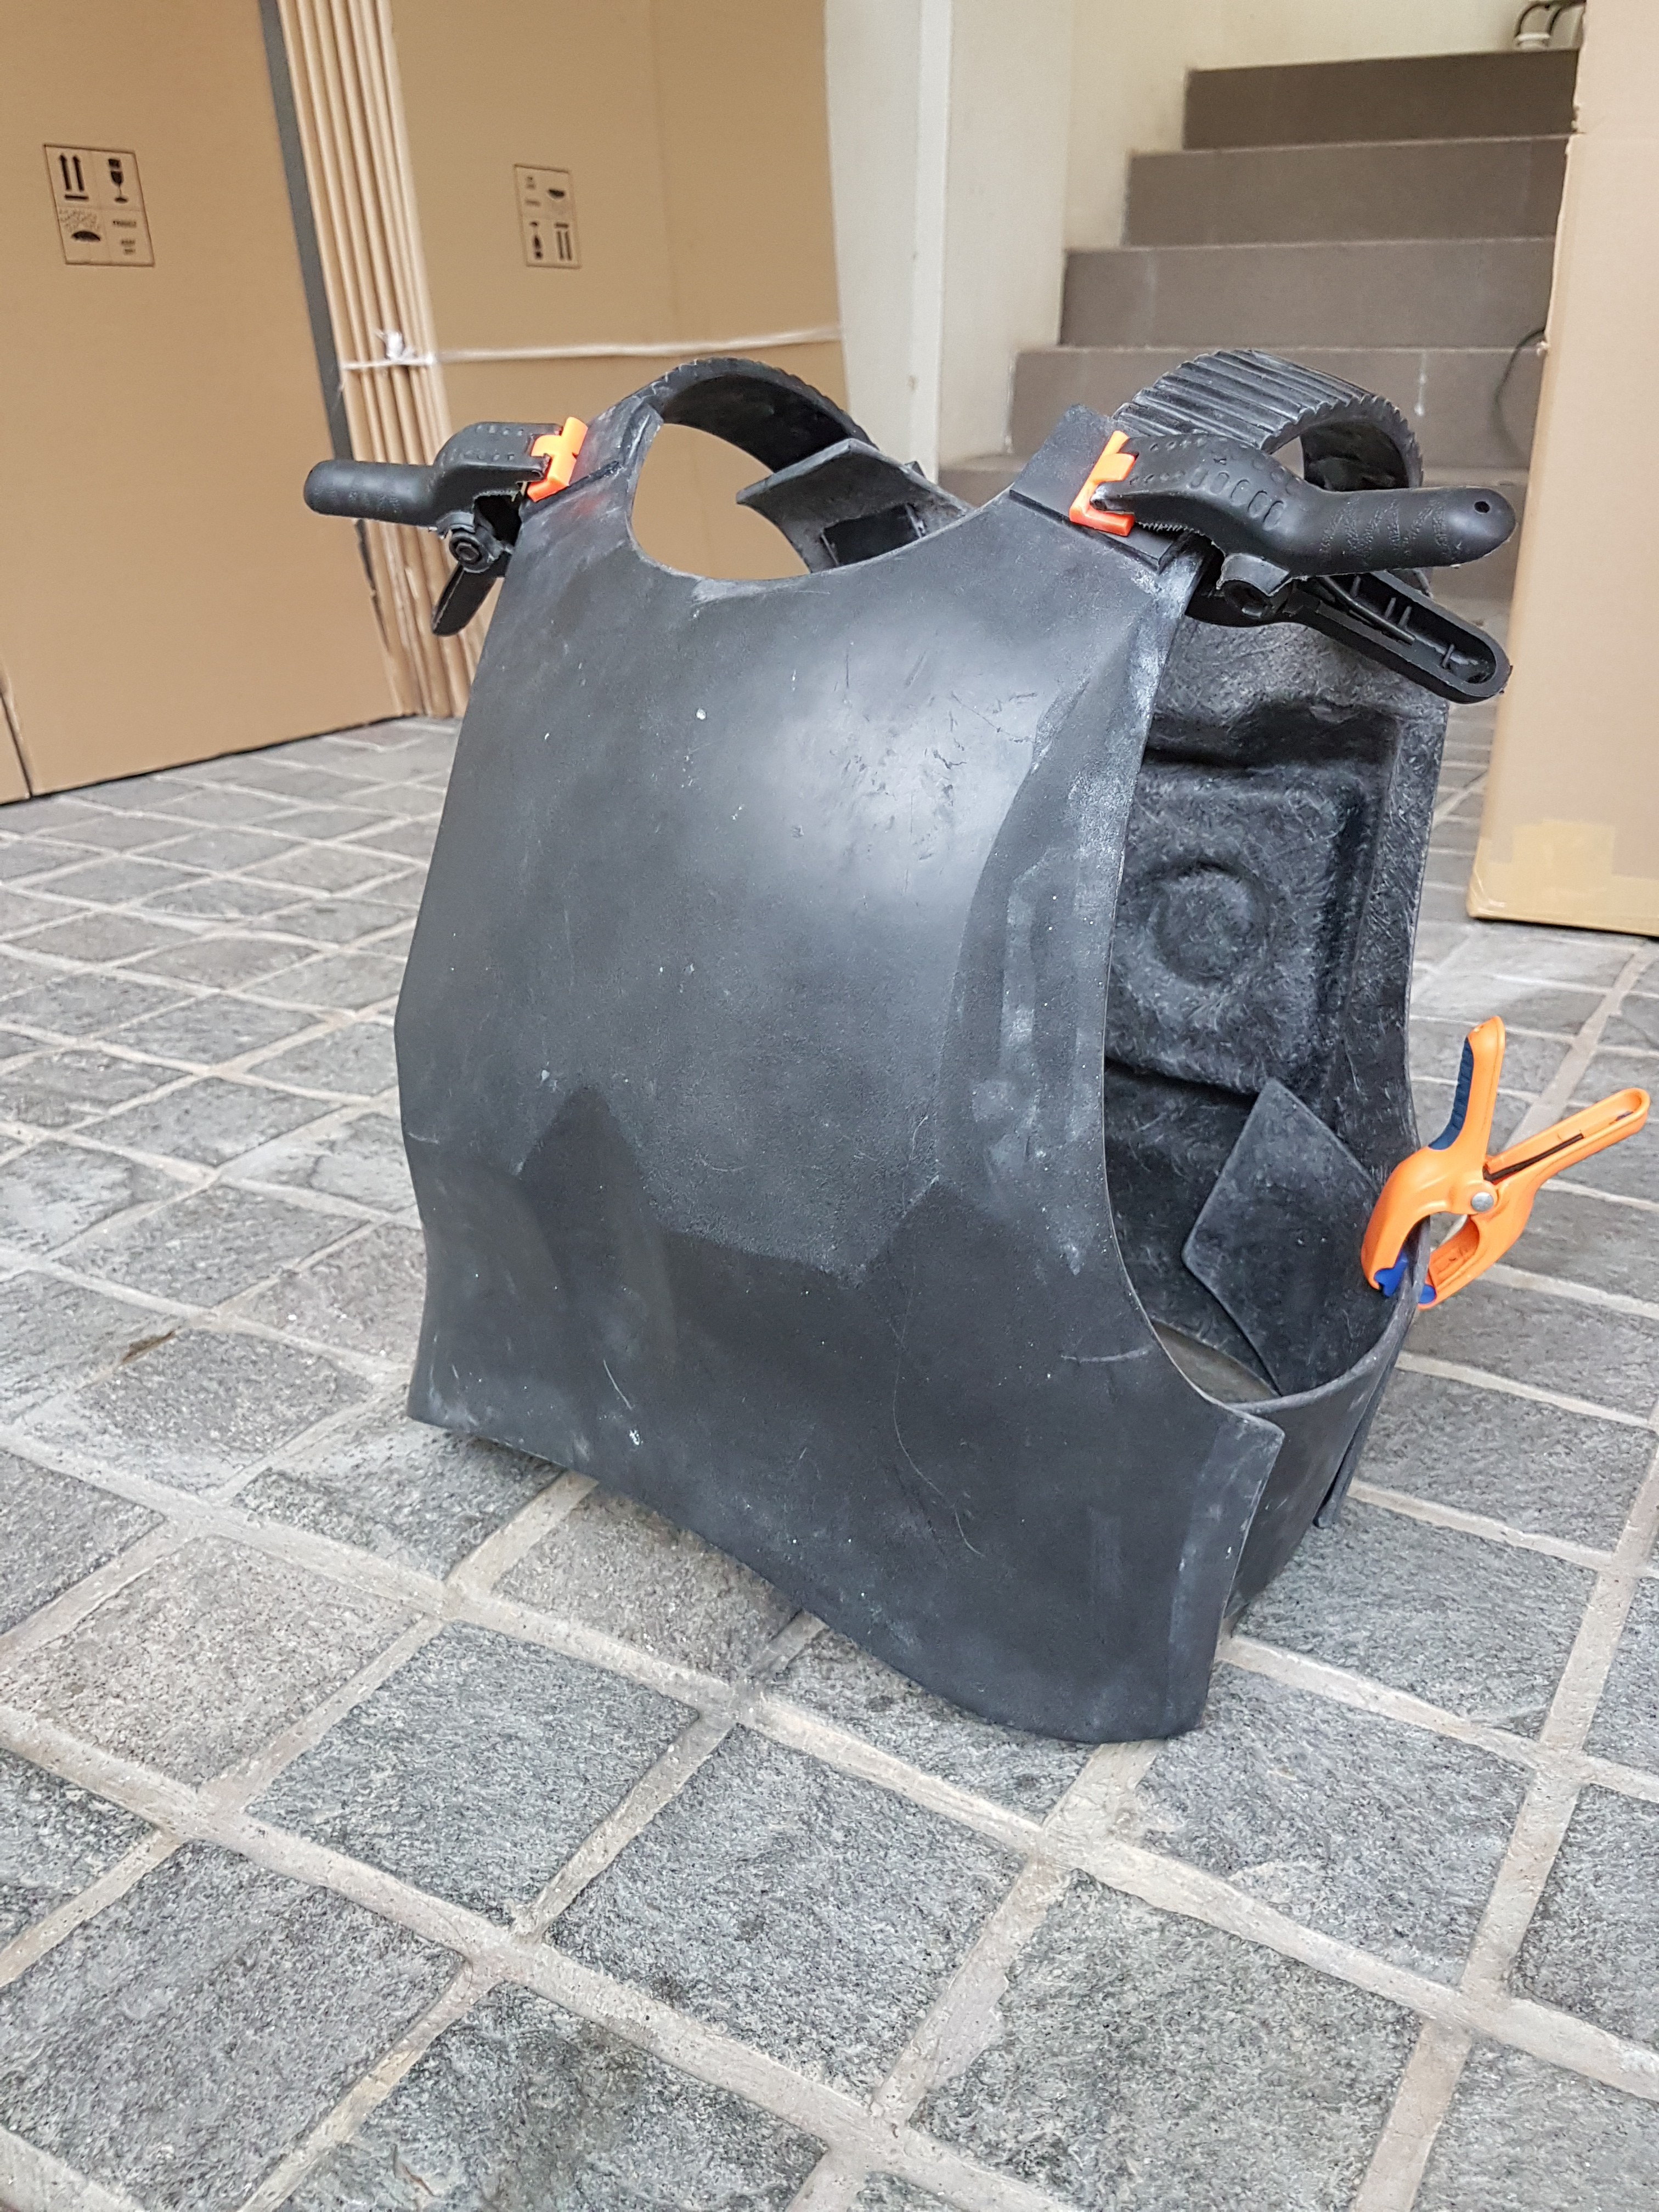
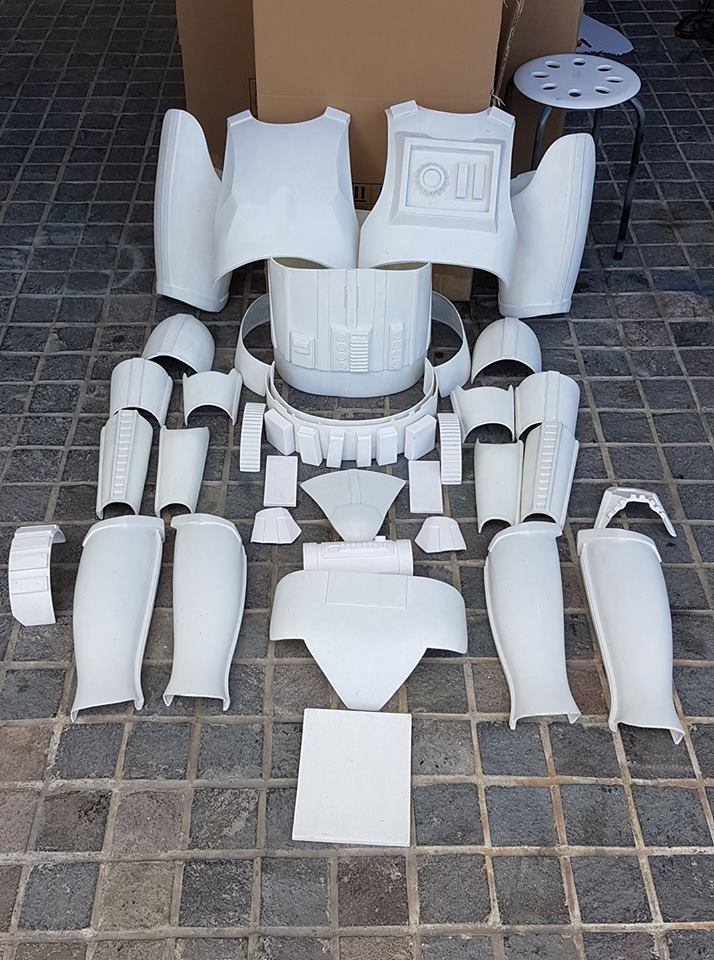
Here's the unpainted kit all rigged up!

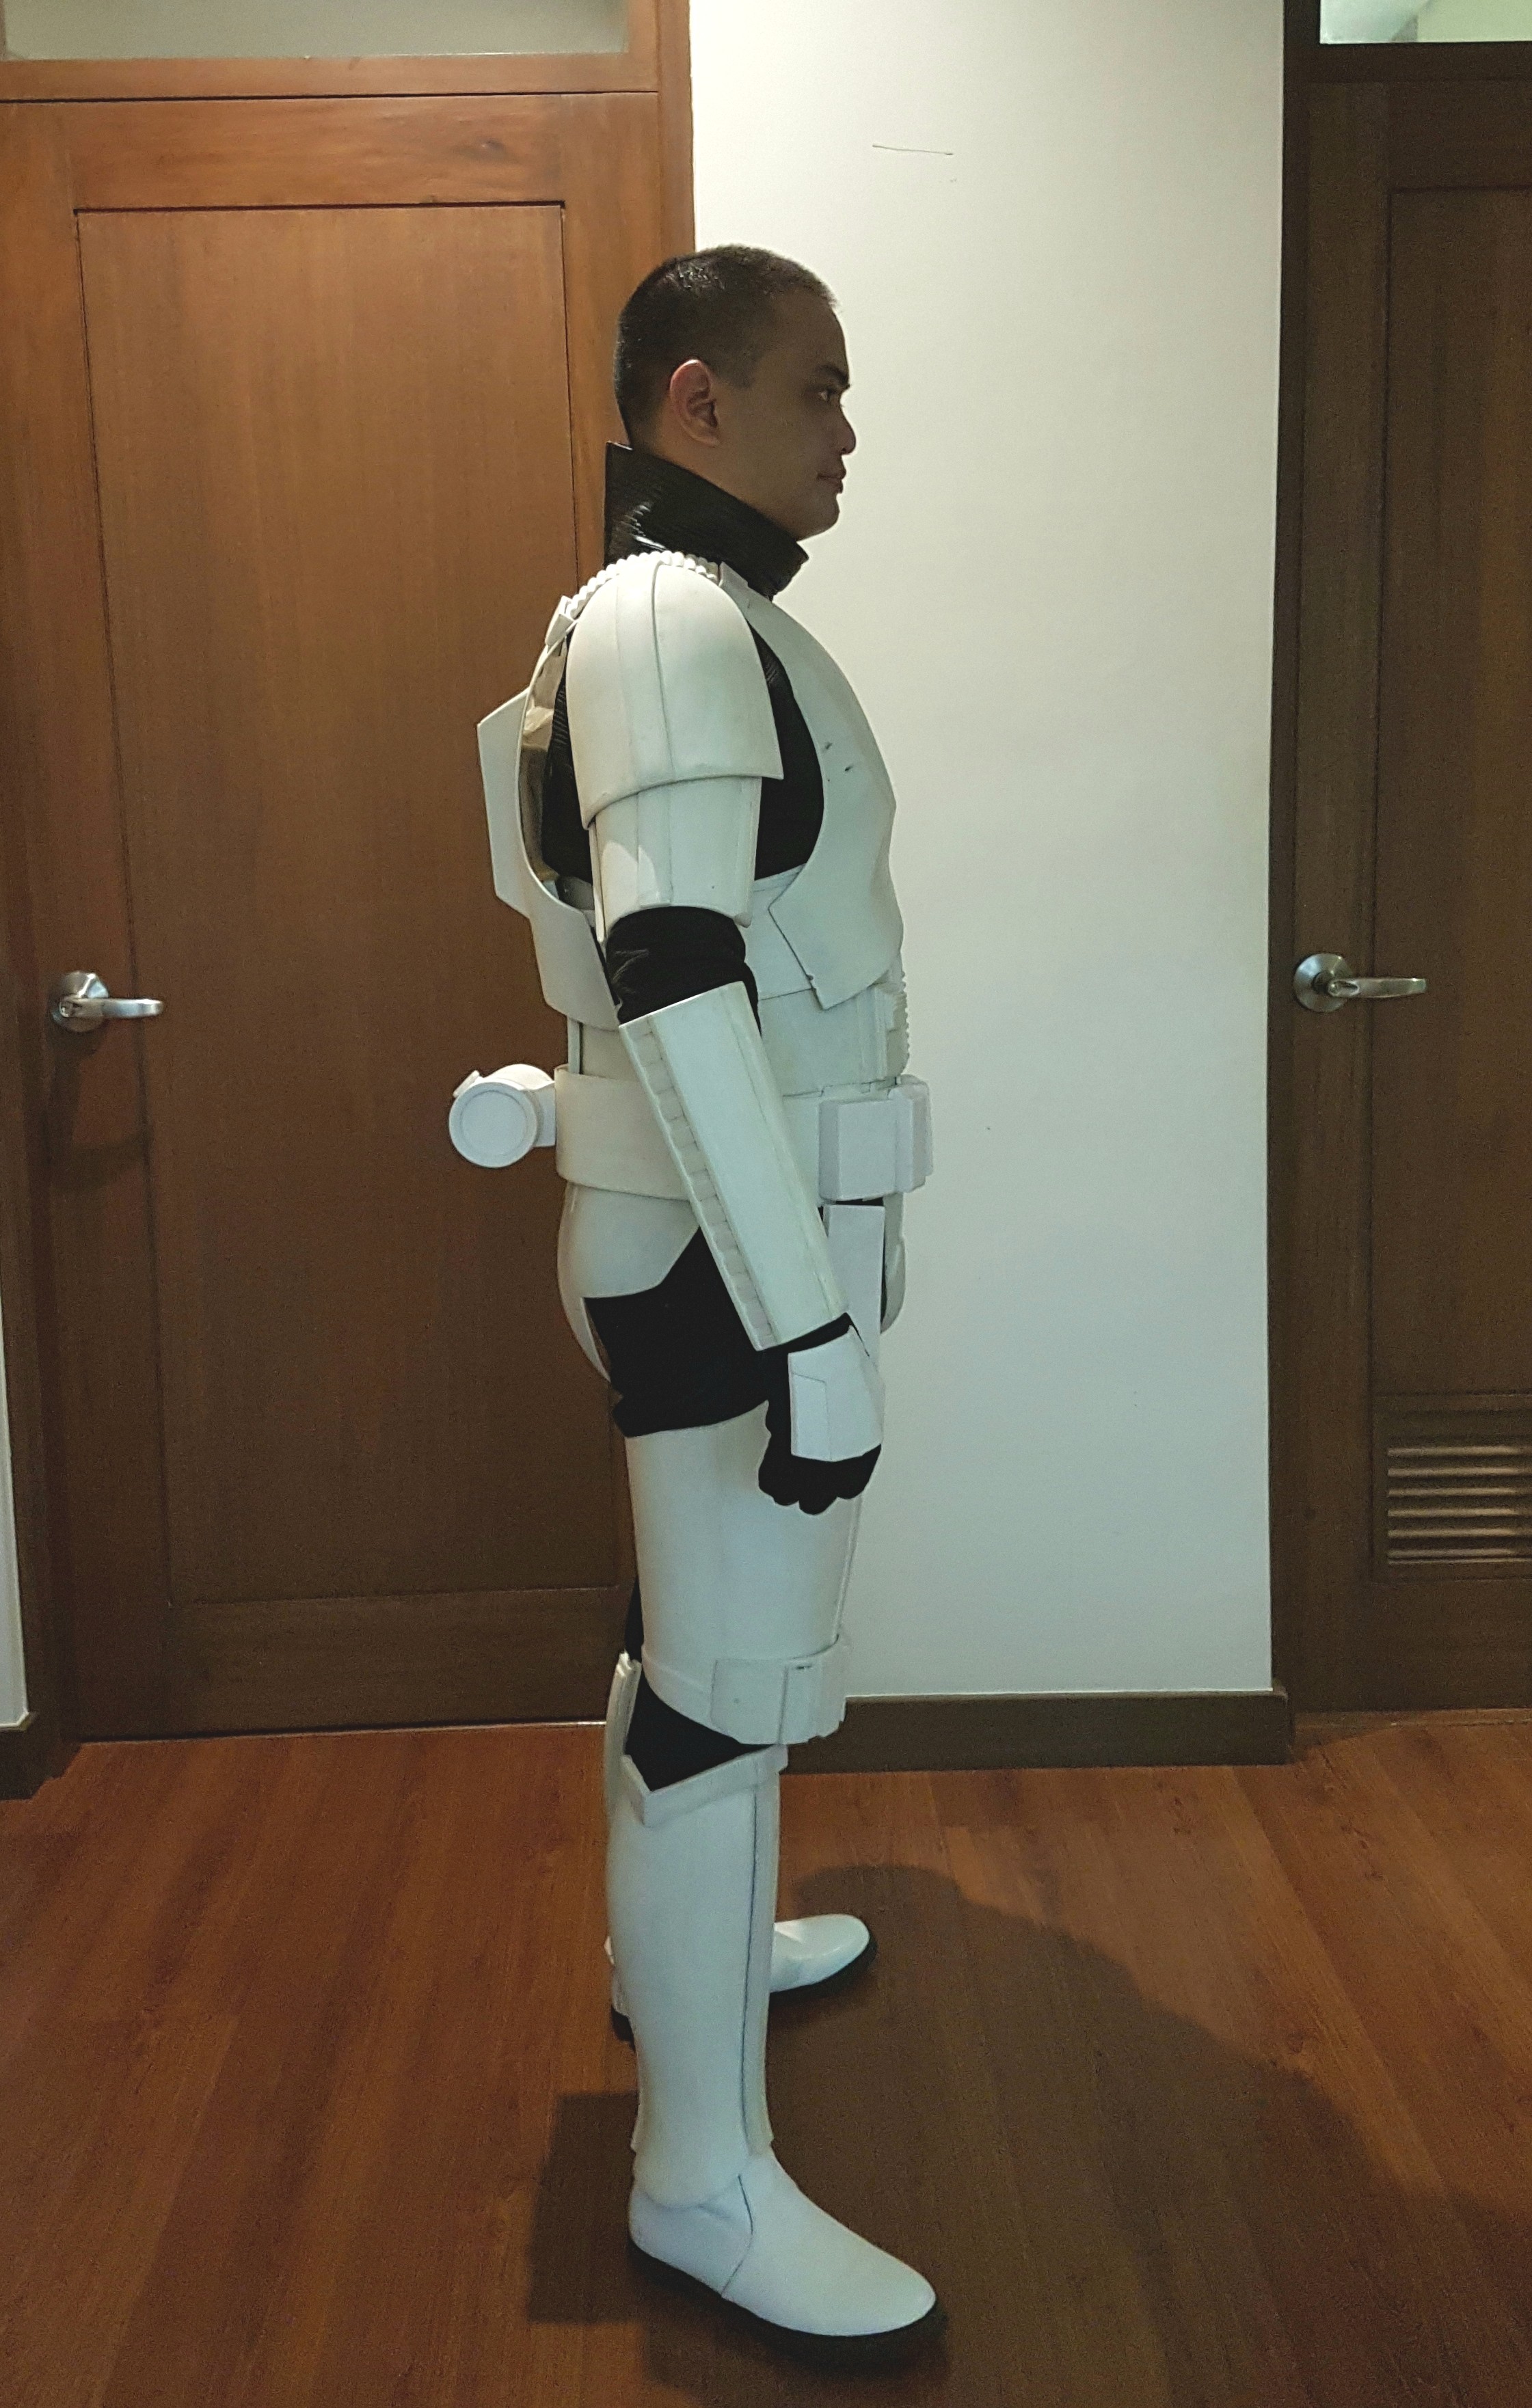
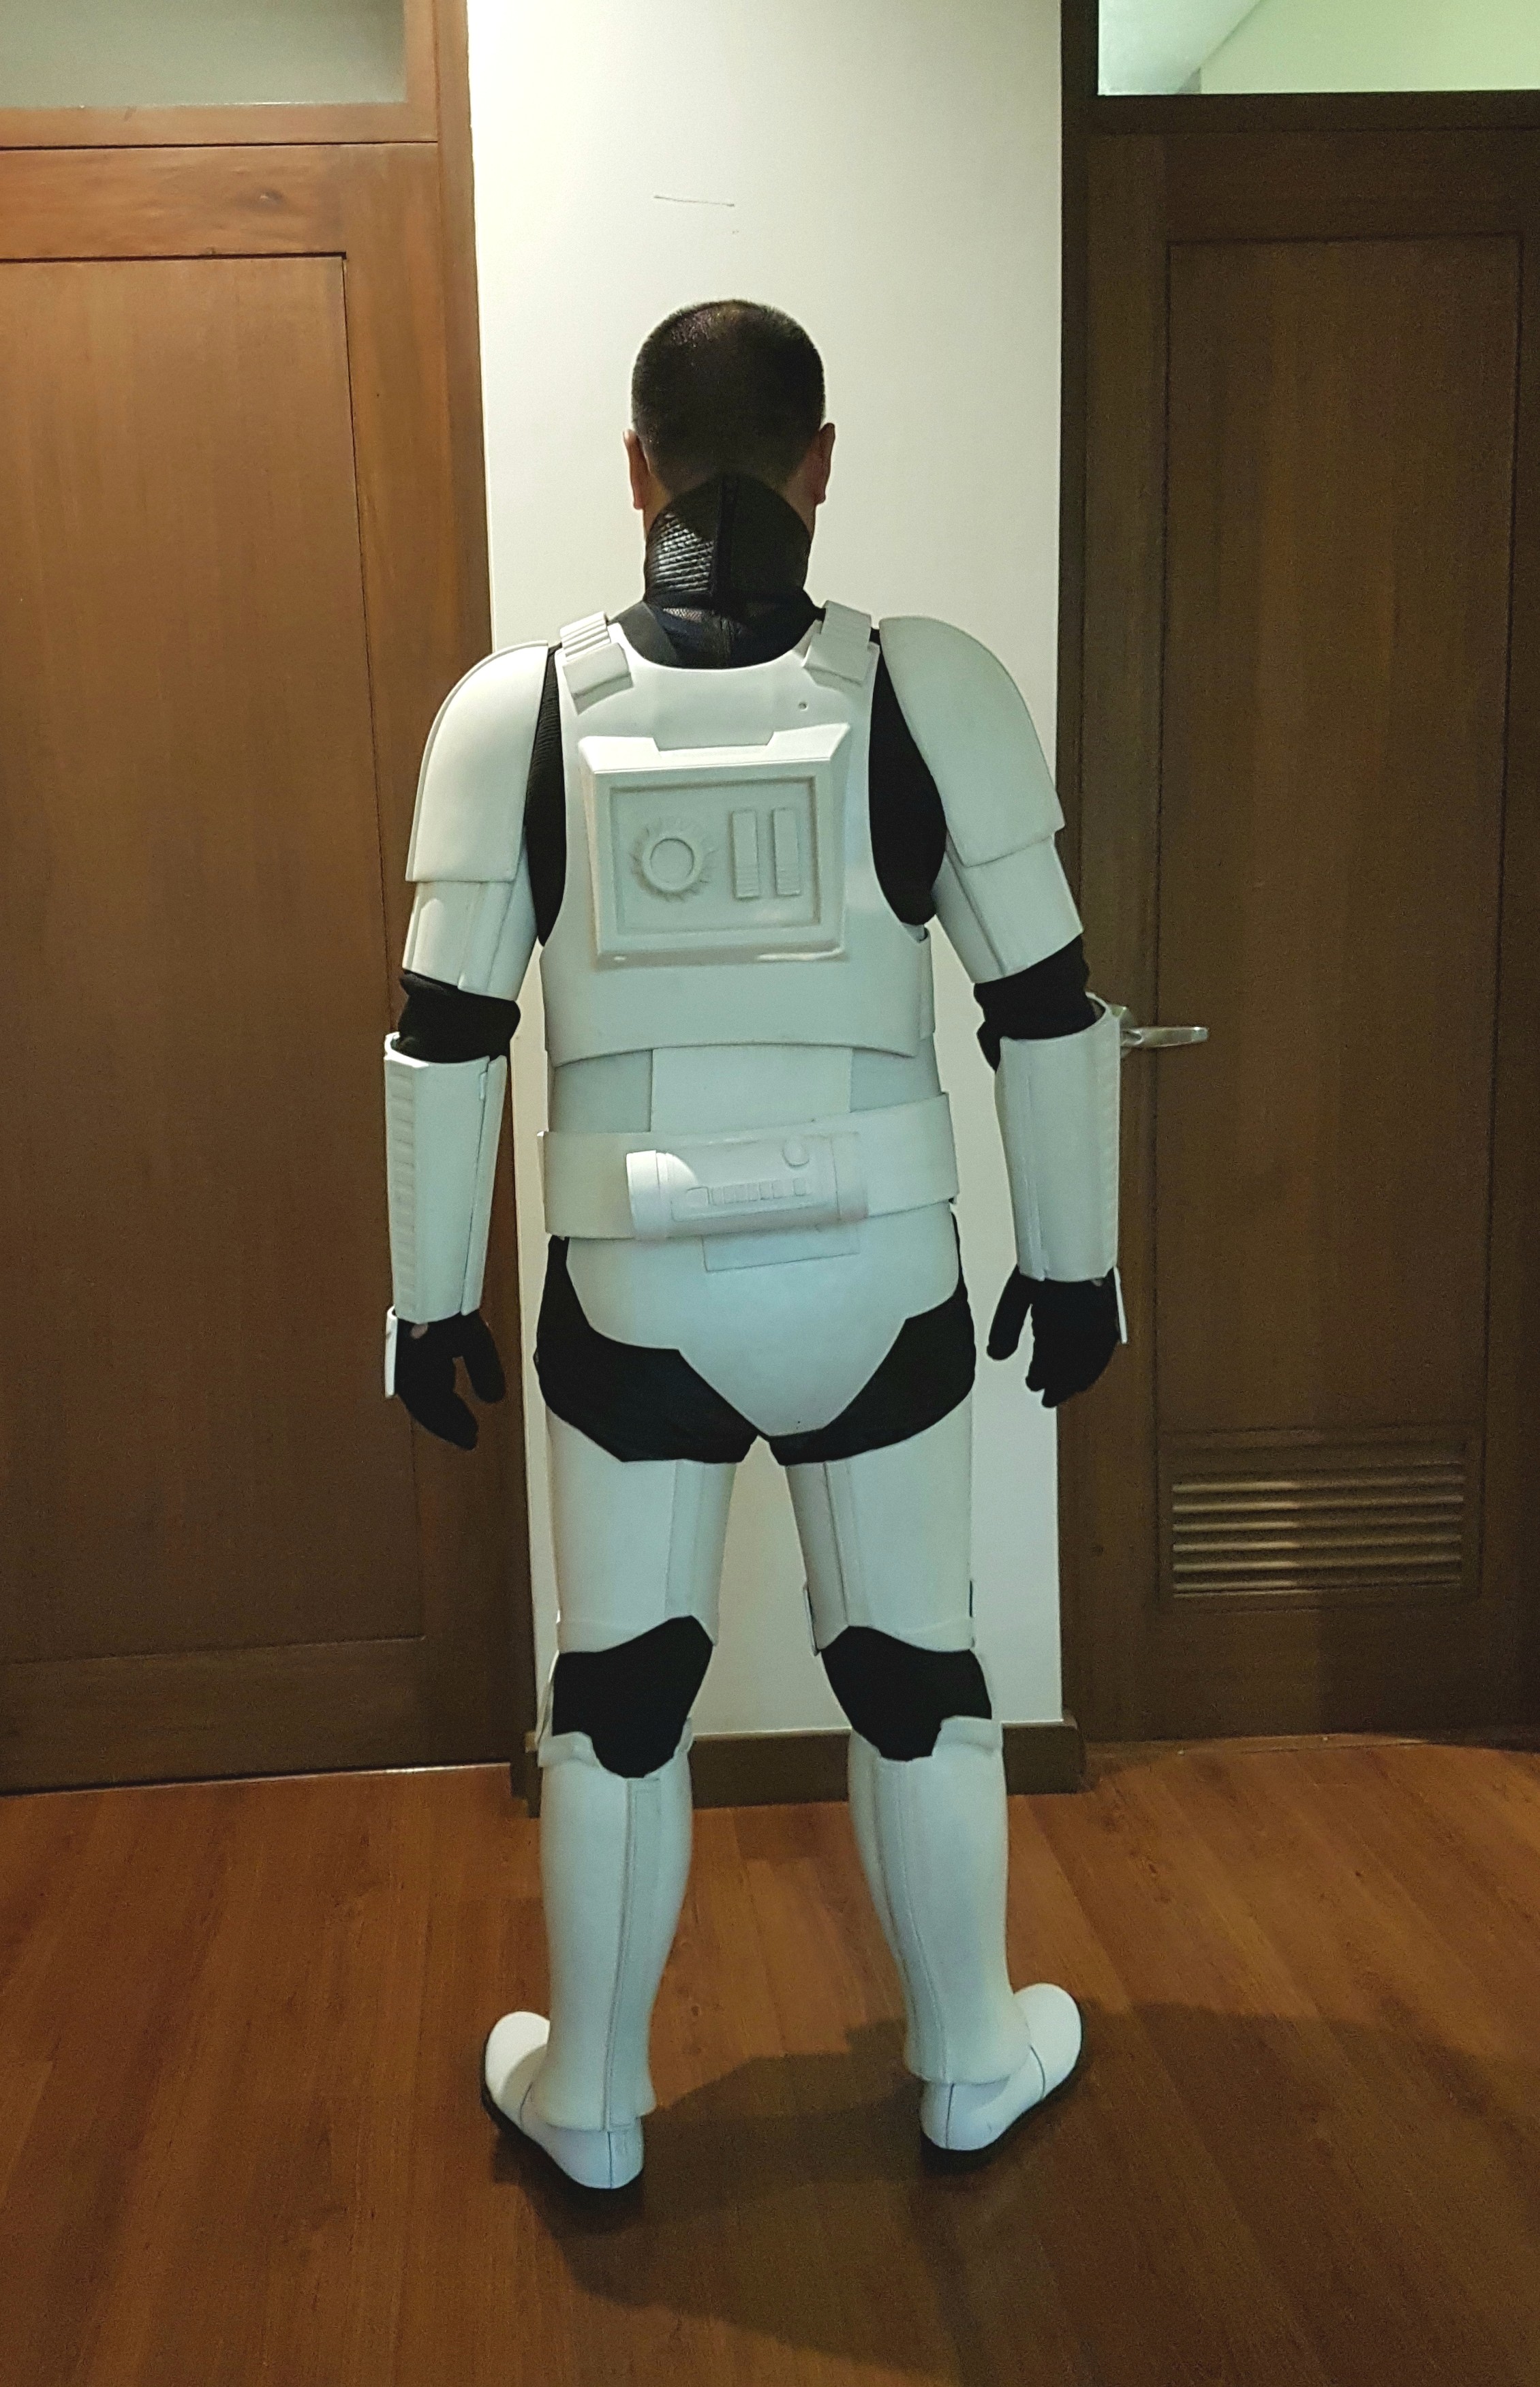
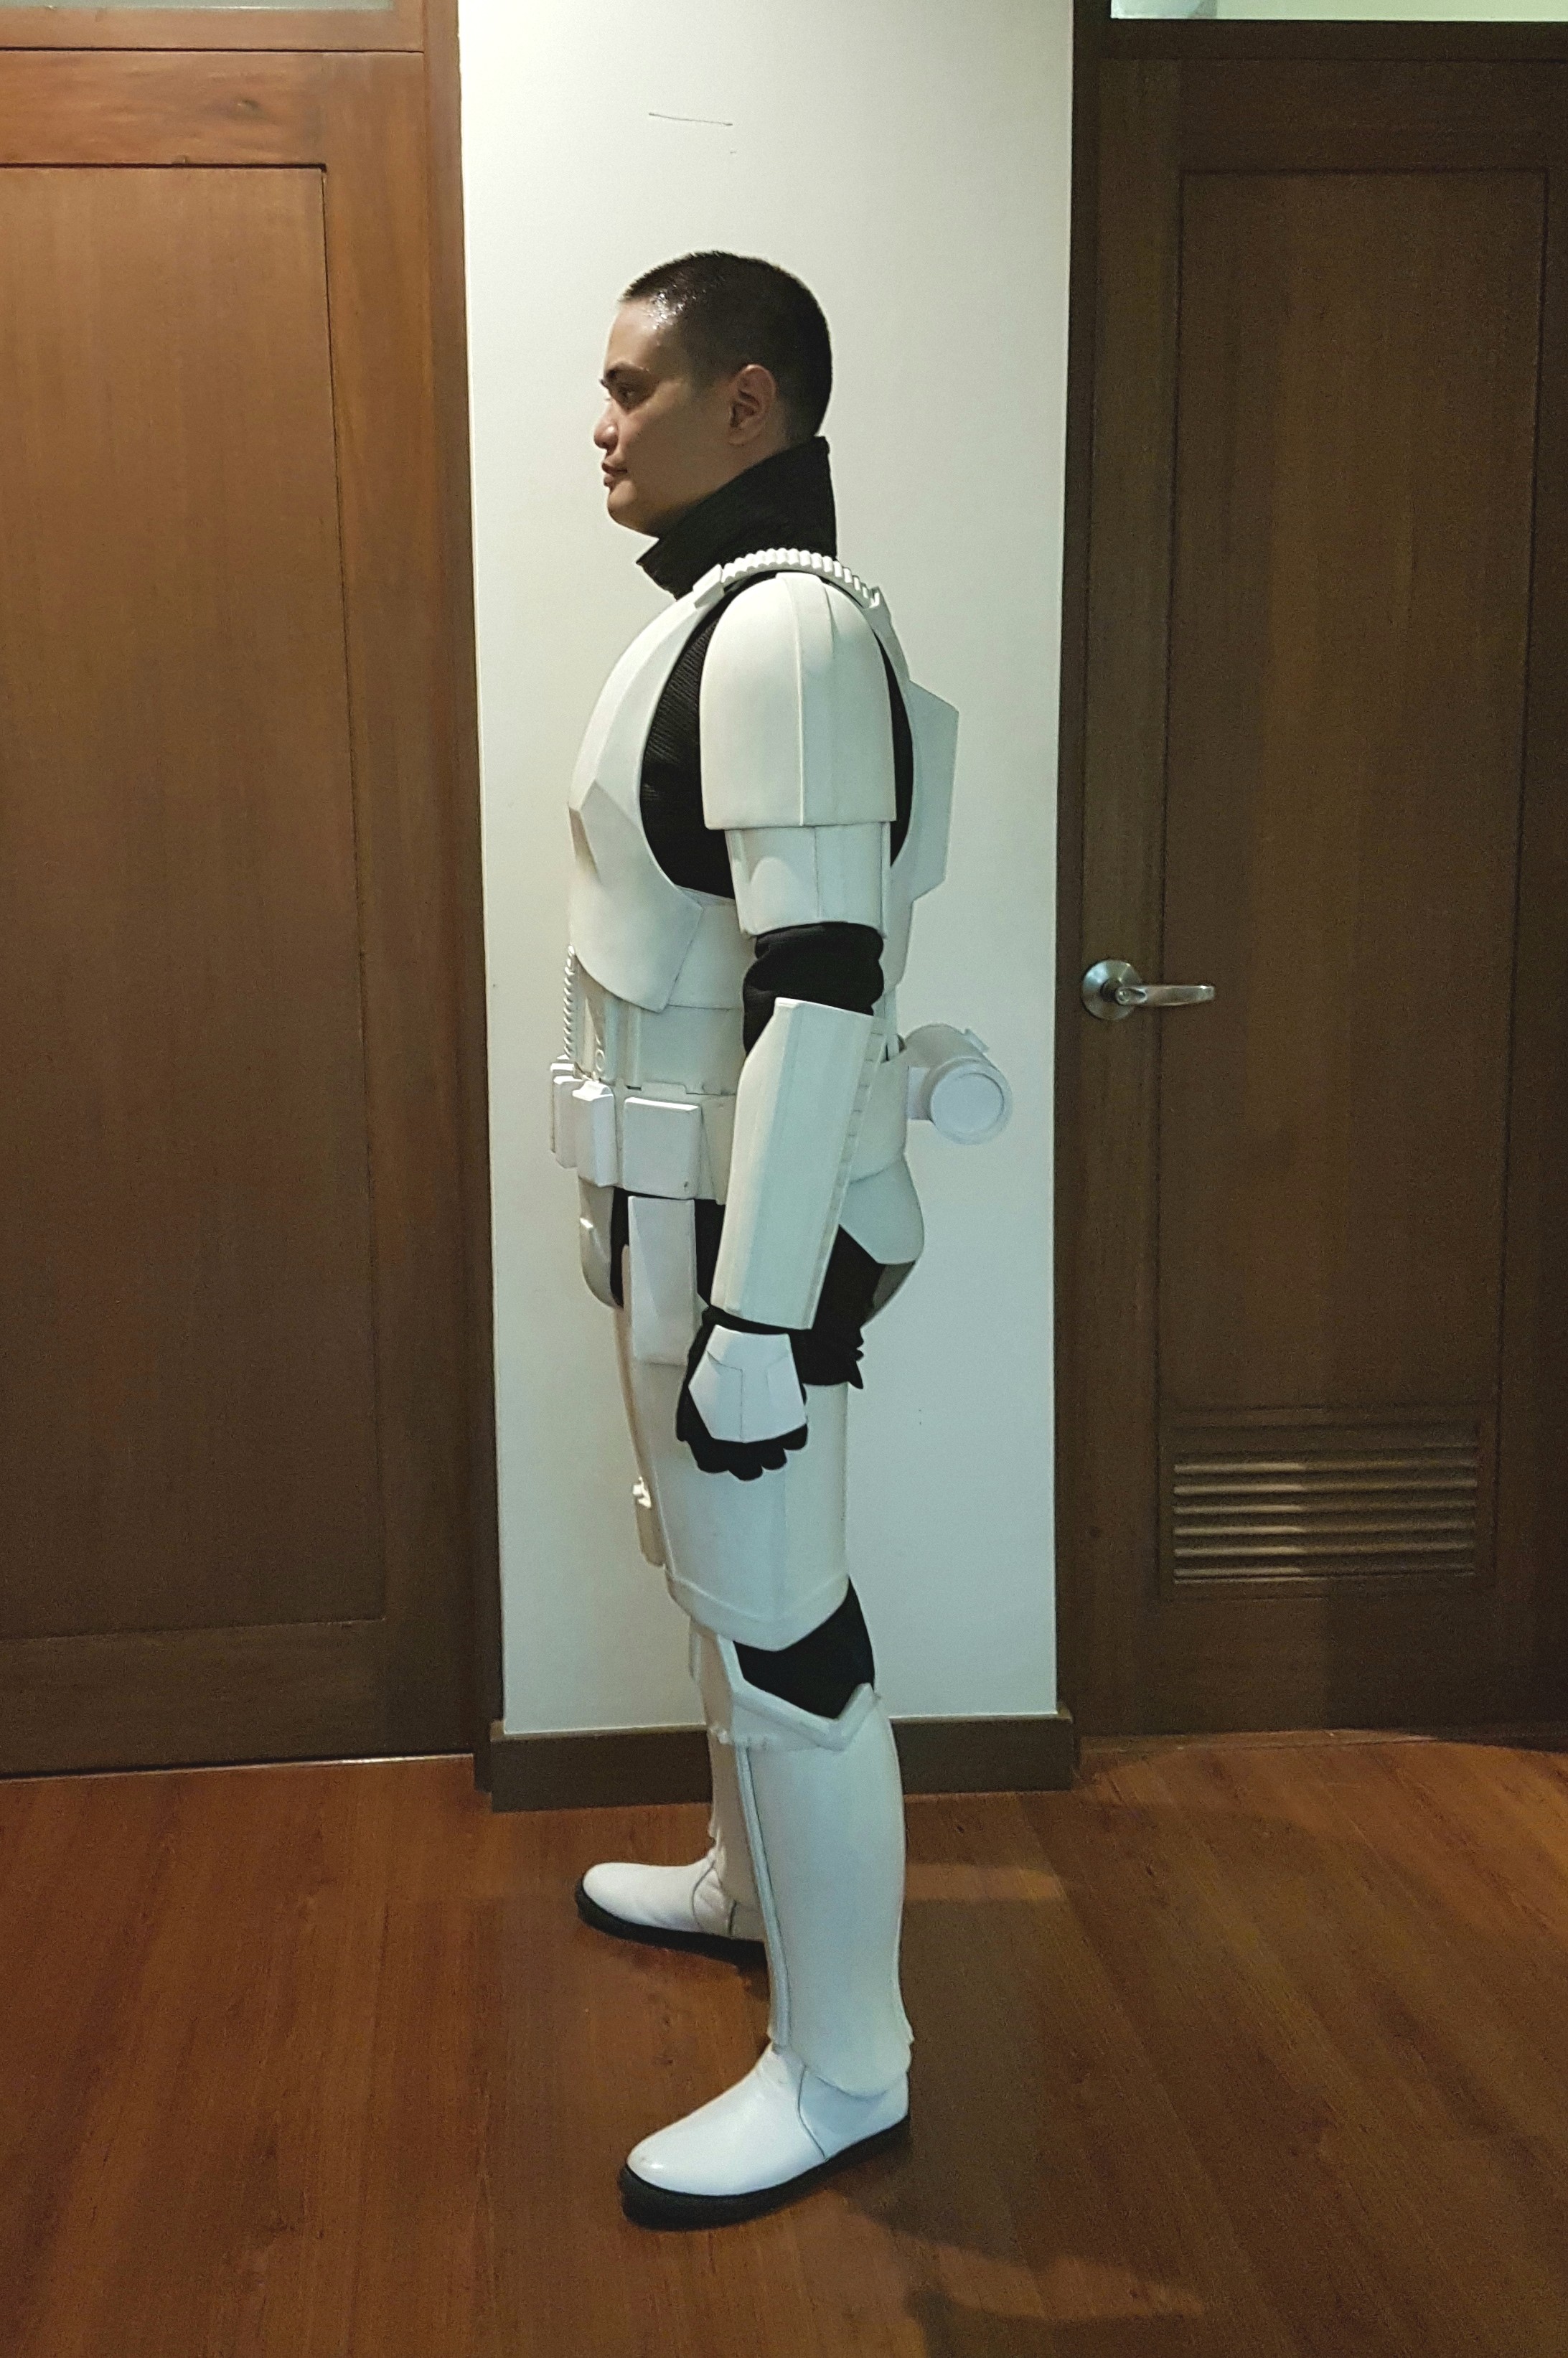
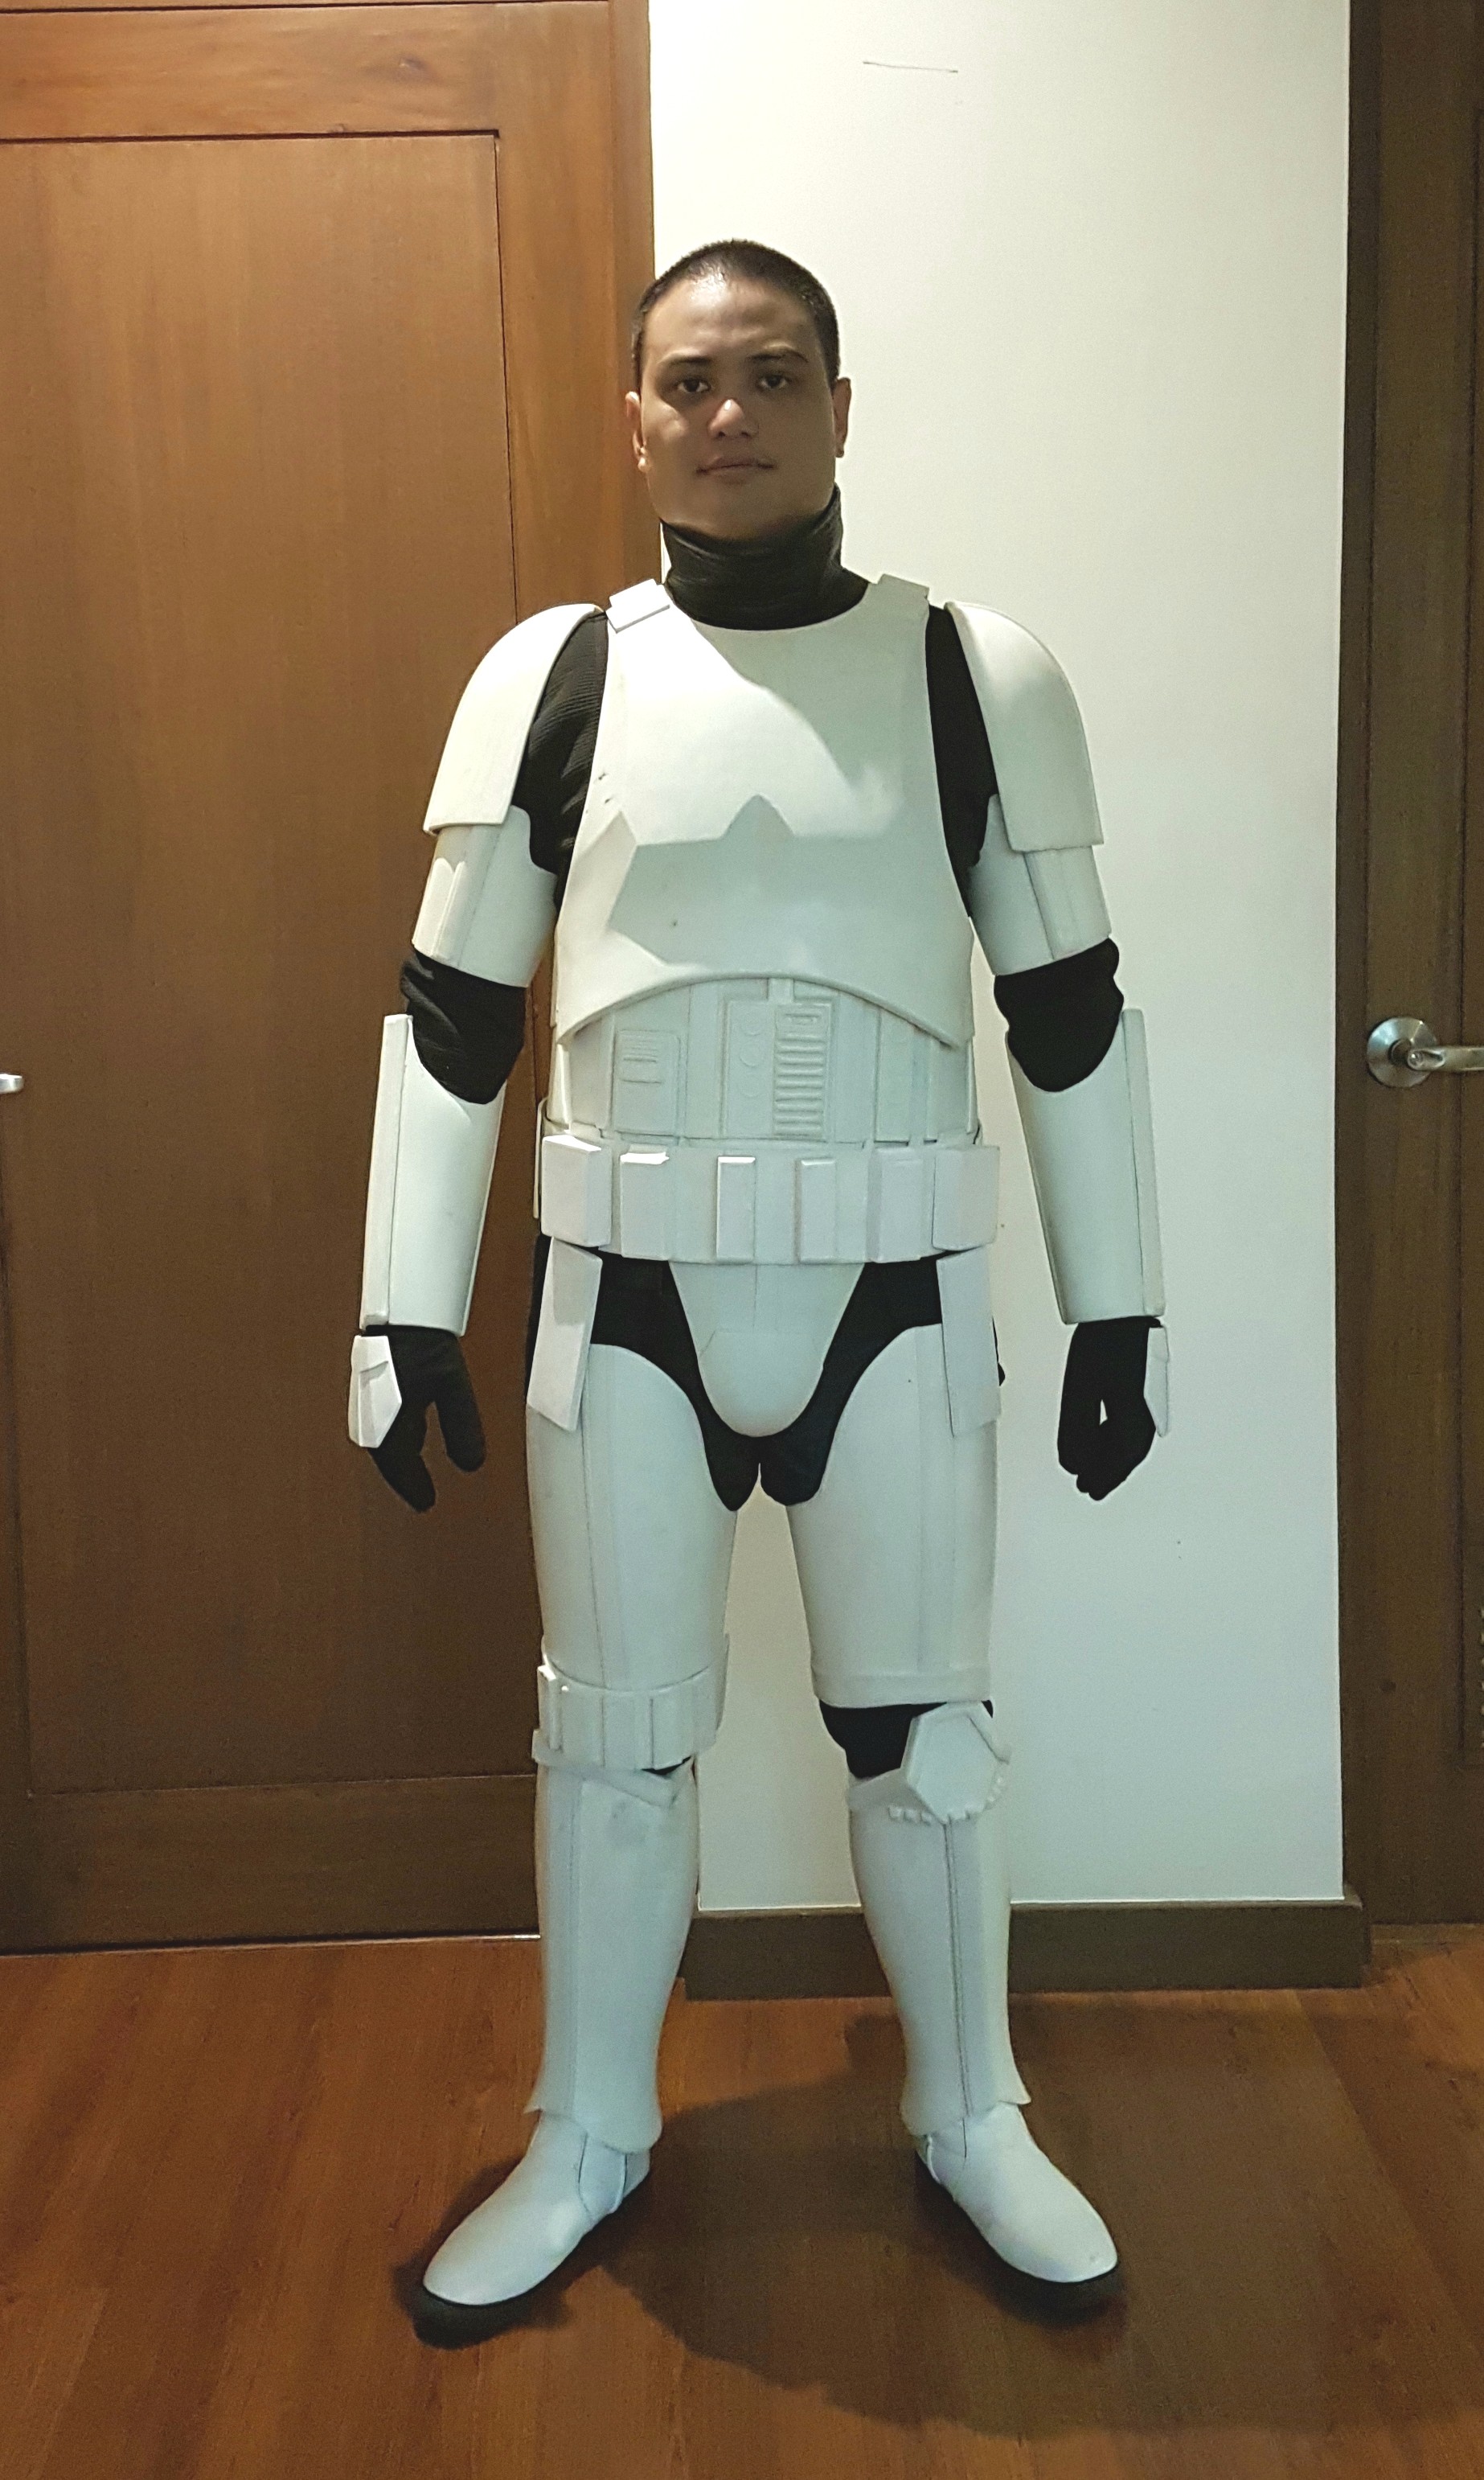
Some notes:
I'm 5'9 and a bit on the wider spectrum in the pics. So for taller folks, there will be more of the abs backplate cod and butt exposed. Lots of built in allowance for height and girth all over too.
Back plate and TD is on a bit crooked (dressed myself)
I can probably lower the cod and butt a bit more.
Movement is awesome. If i were a bit taller i would be able to sit, kneel, get kicked around by Chirrut Imwe.
Material is flexible fiberglass
Not sure if you can see it in the pics but i'm also wearing the correct undersuit.
-
10
-
-
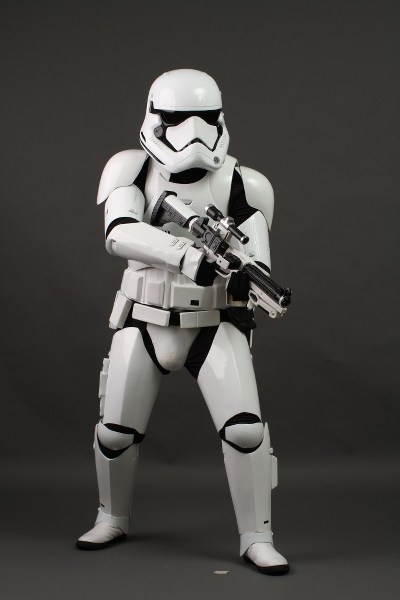
Wow Jim, The white parts look amazing! Are they painted white, or is it cast in white fiberglass? Glossy or Matte finish?
Thanks! We tried casting in a glossy finish with a gel coat..but it was not ideal. So this is cast in white dull flexible fiberglass.
I hope to have this all rigged up by tomorrow.
-
4
-
-
-
Hey Jim - can you clear your inbox here?
Done!
-
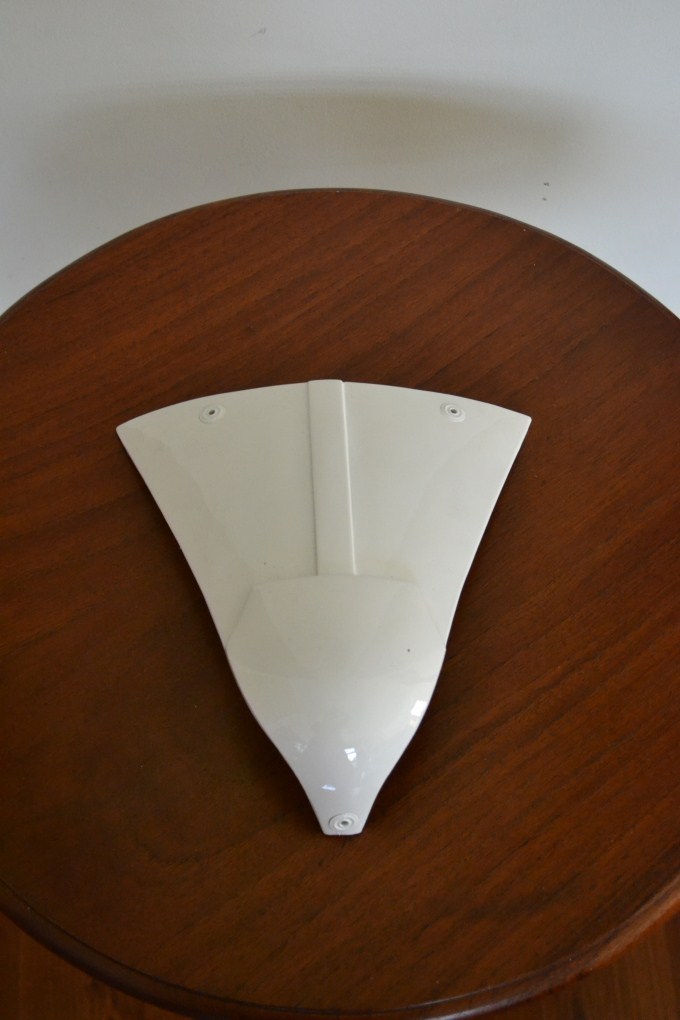
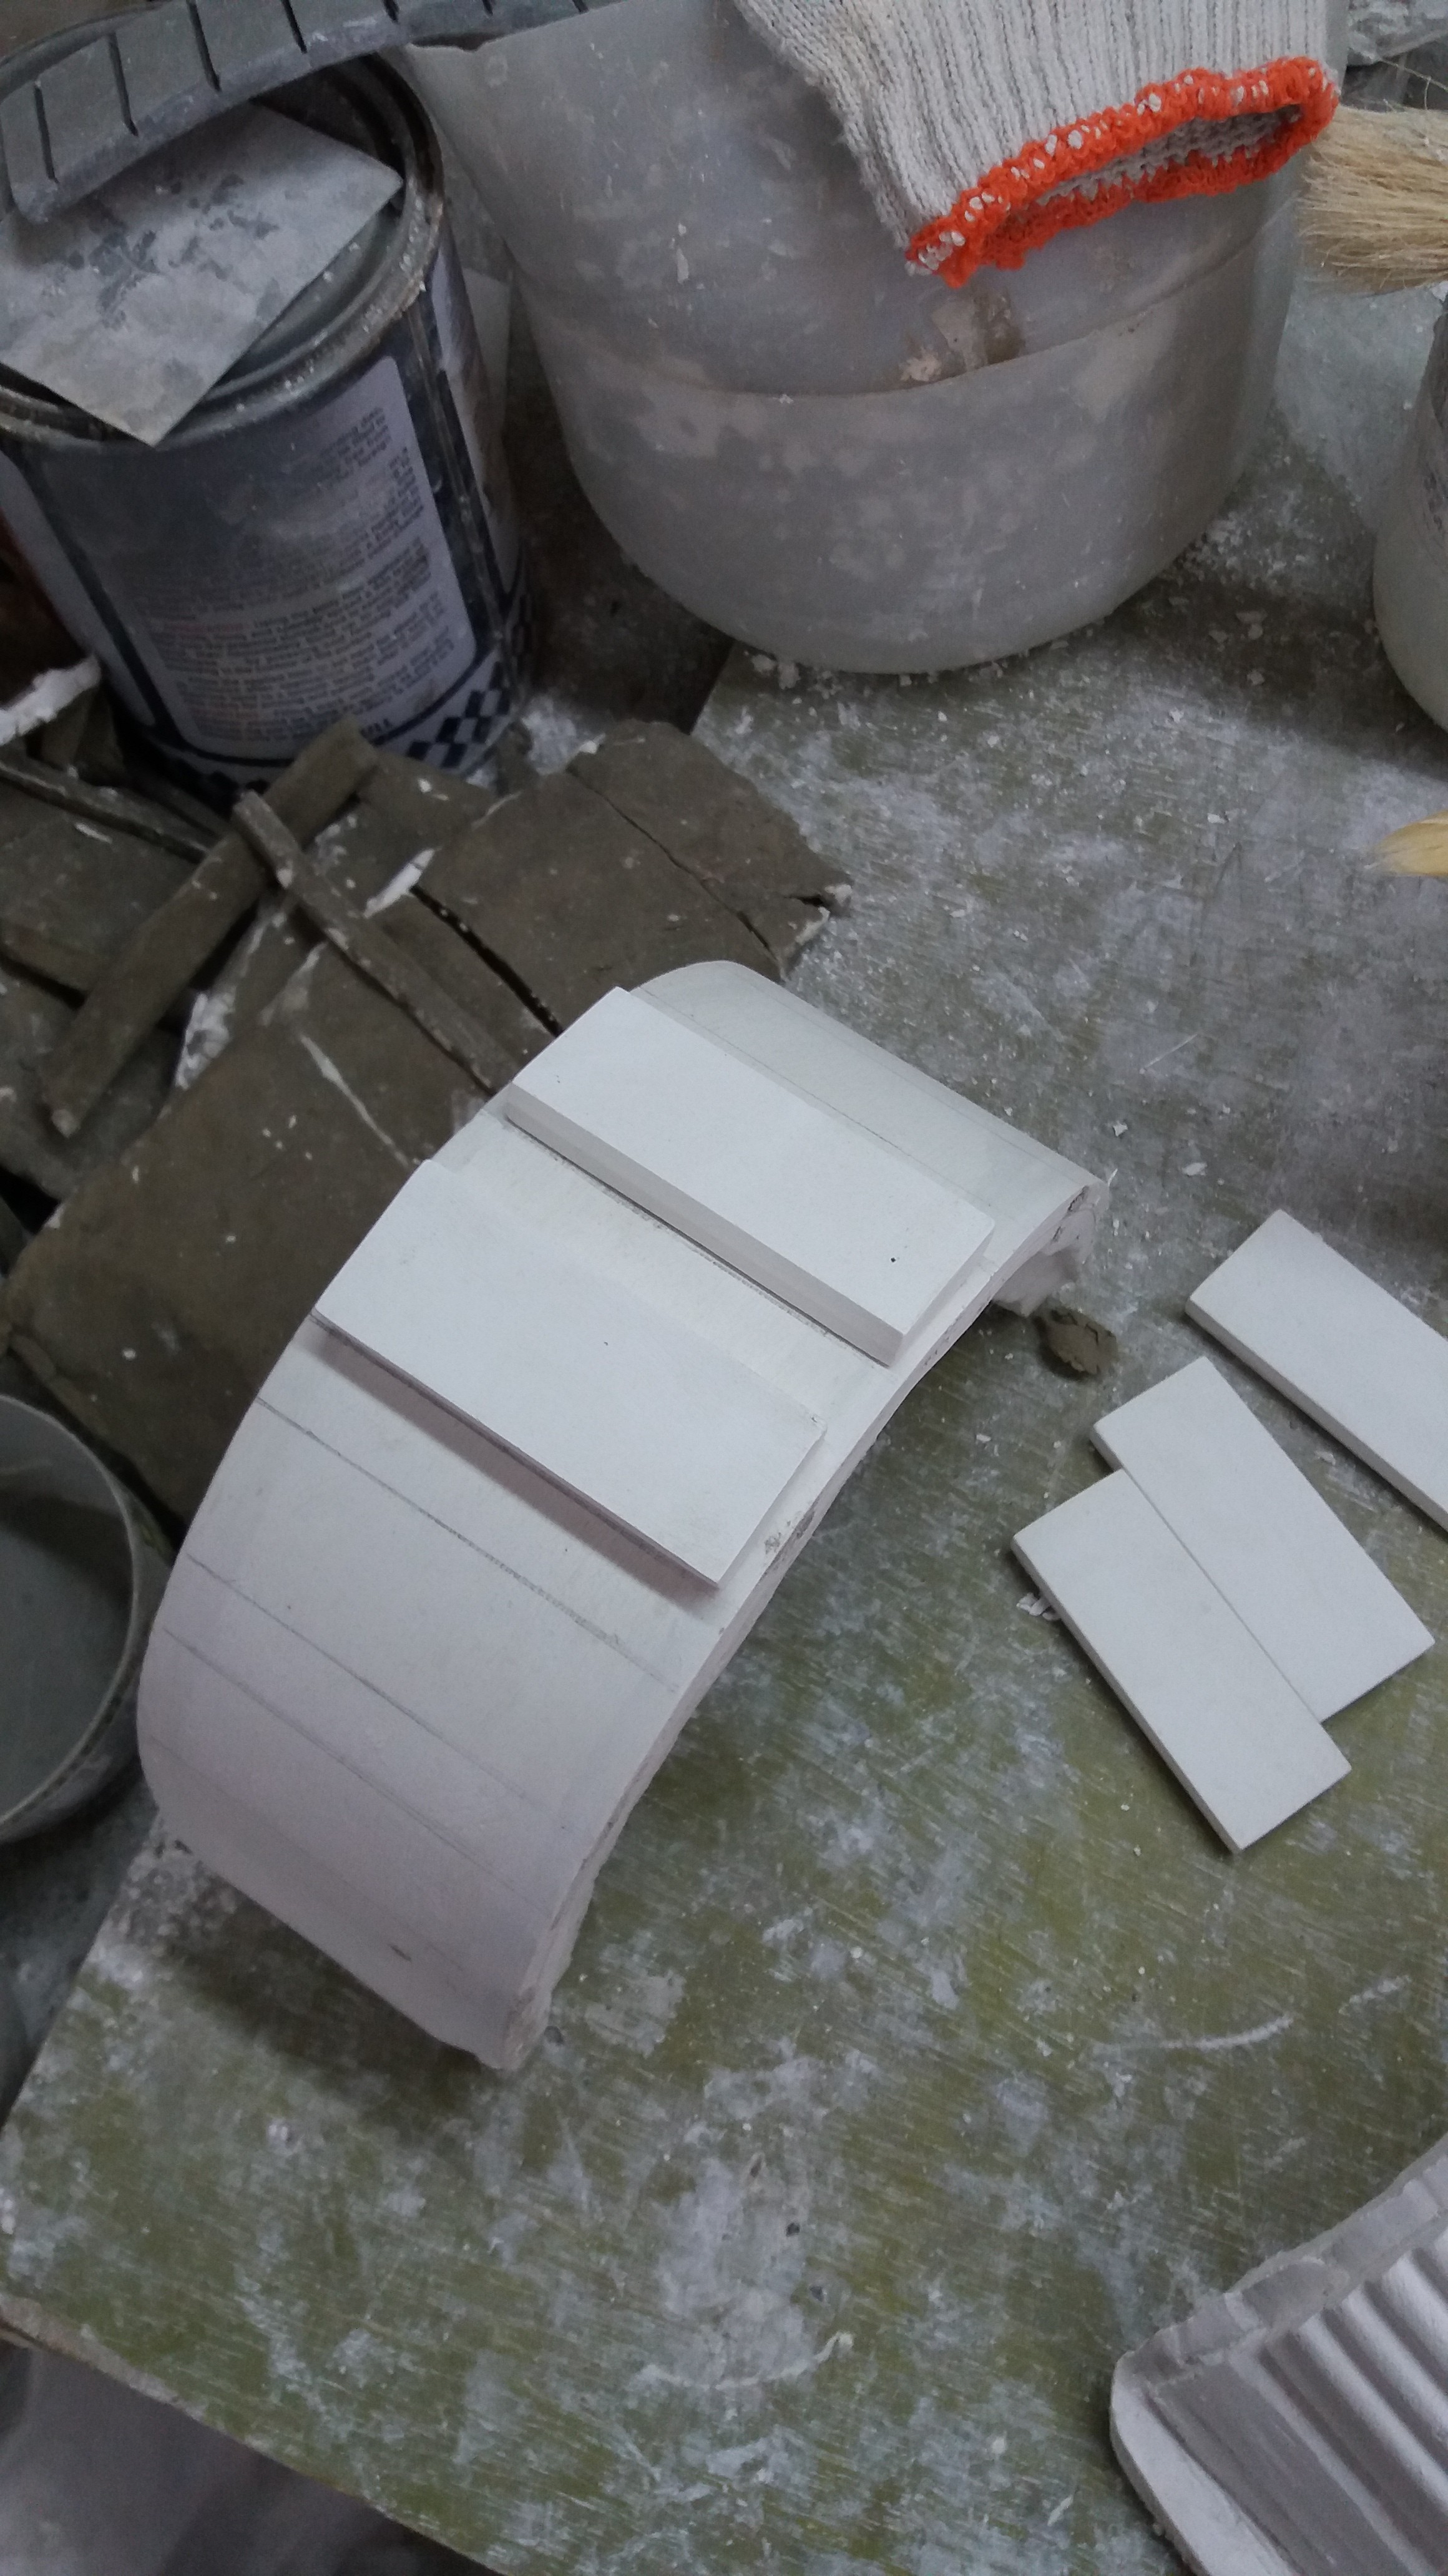
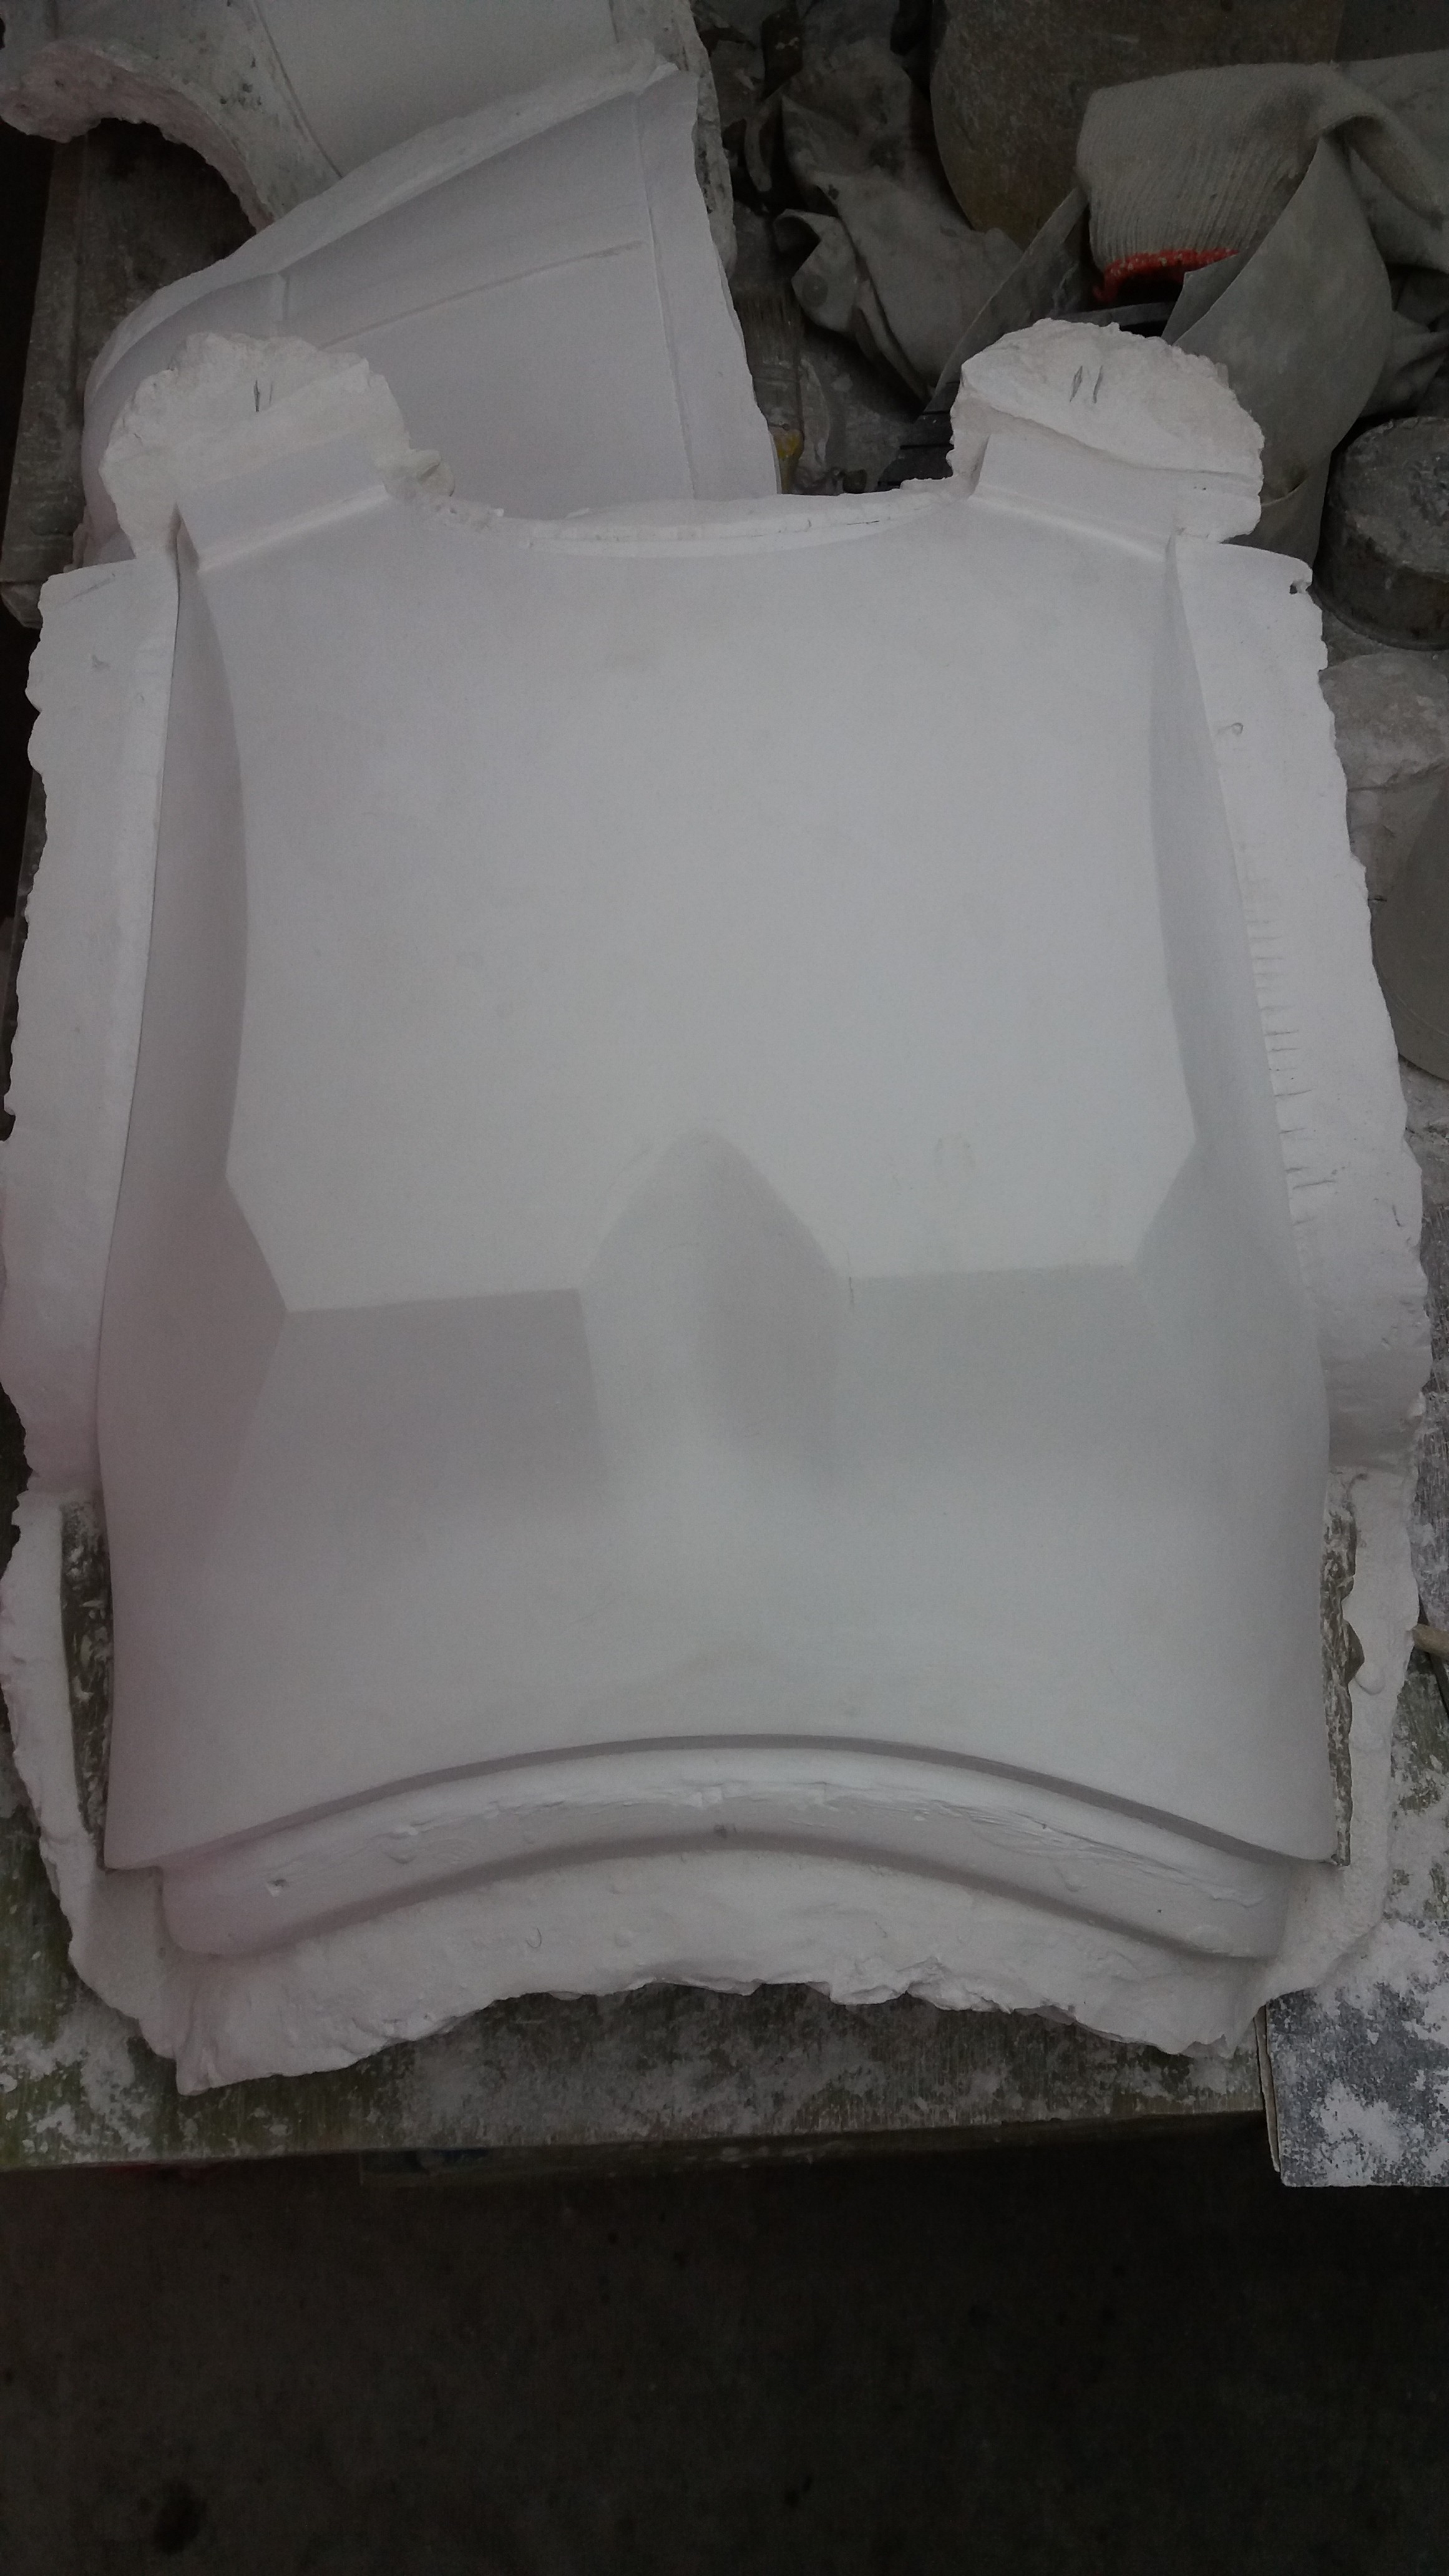
Aaaaand the last piece is done.
We also fixed the back plate cog after the 15/16 issue.
Molding everthing up. I hope to be able to show a prototype by next week.
-
5
-
-
Nice work Jim
What's the chance of making this in white? We'll be casting this in white.
Experimenting with some finishes out of the mold as well. Updates!
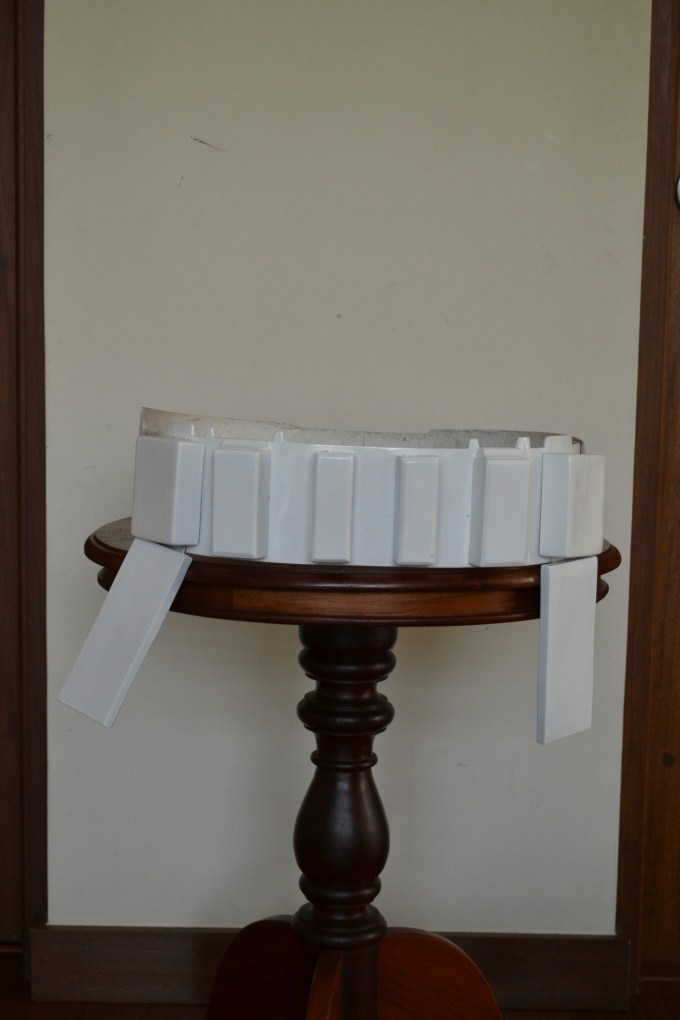
Working on the front belt and belt boxes:
Made the back plate a bit wider for more allowance. Also worked on the Thermal det. Sorry for the blurry pics.
Feedback very much welcome!
-
2
-
-
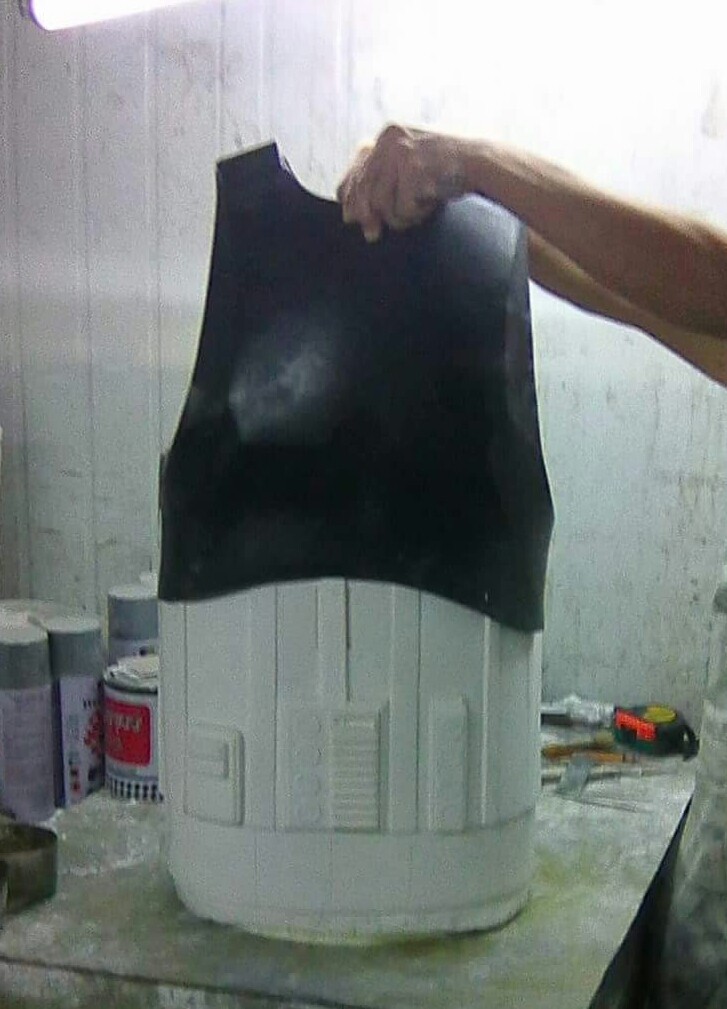
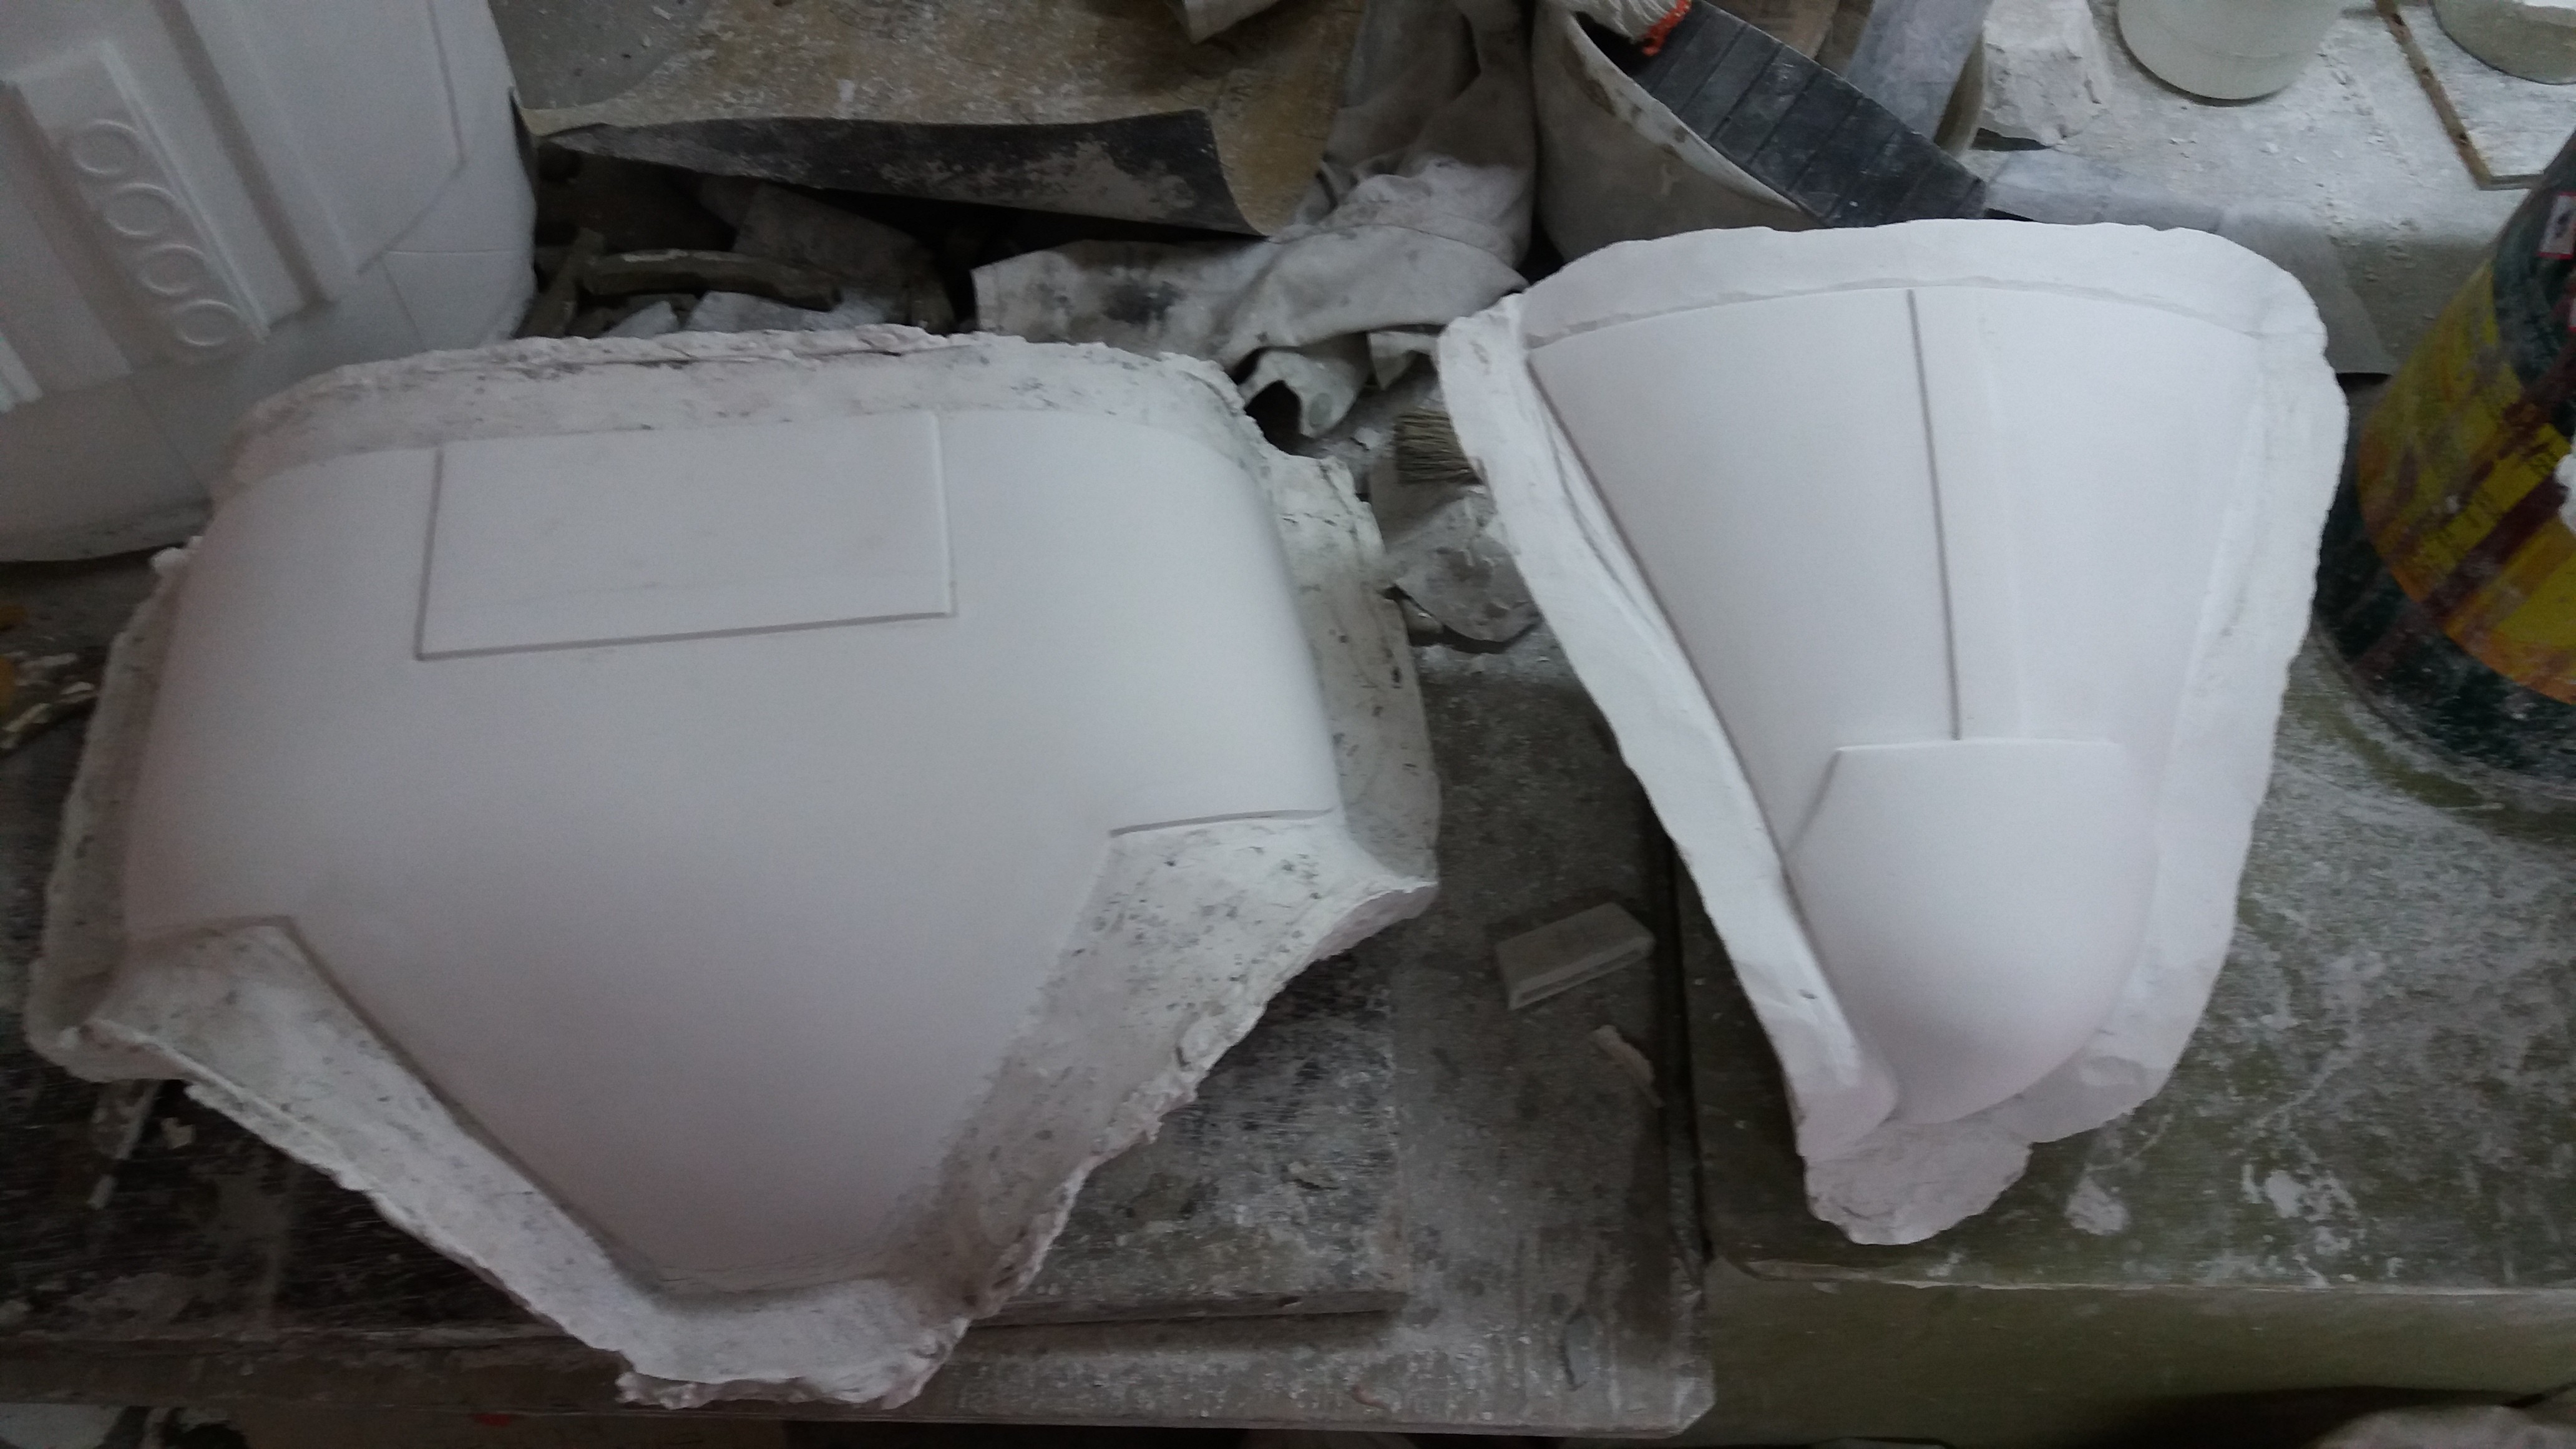
Done with the chest, back, straps, side extensions. Here are the first casts:
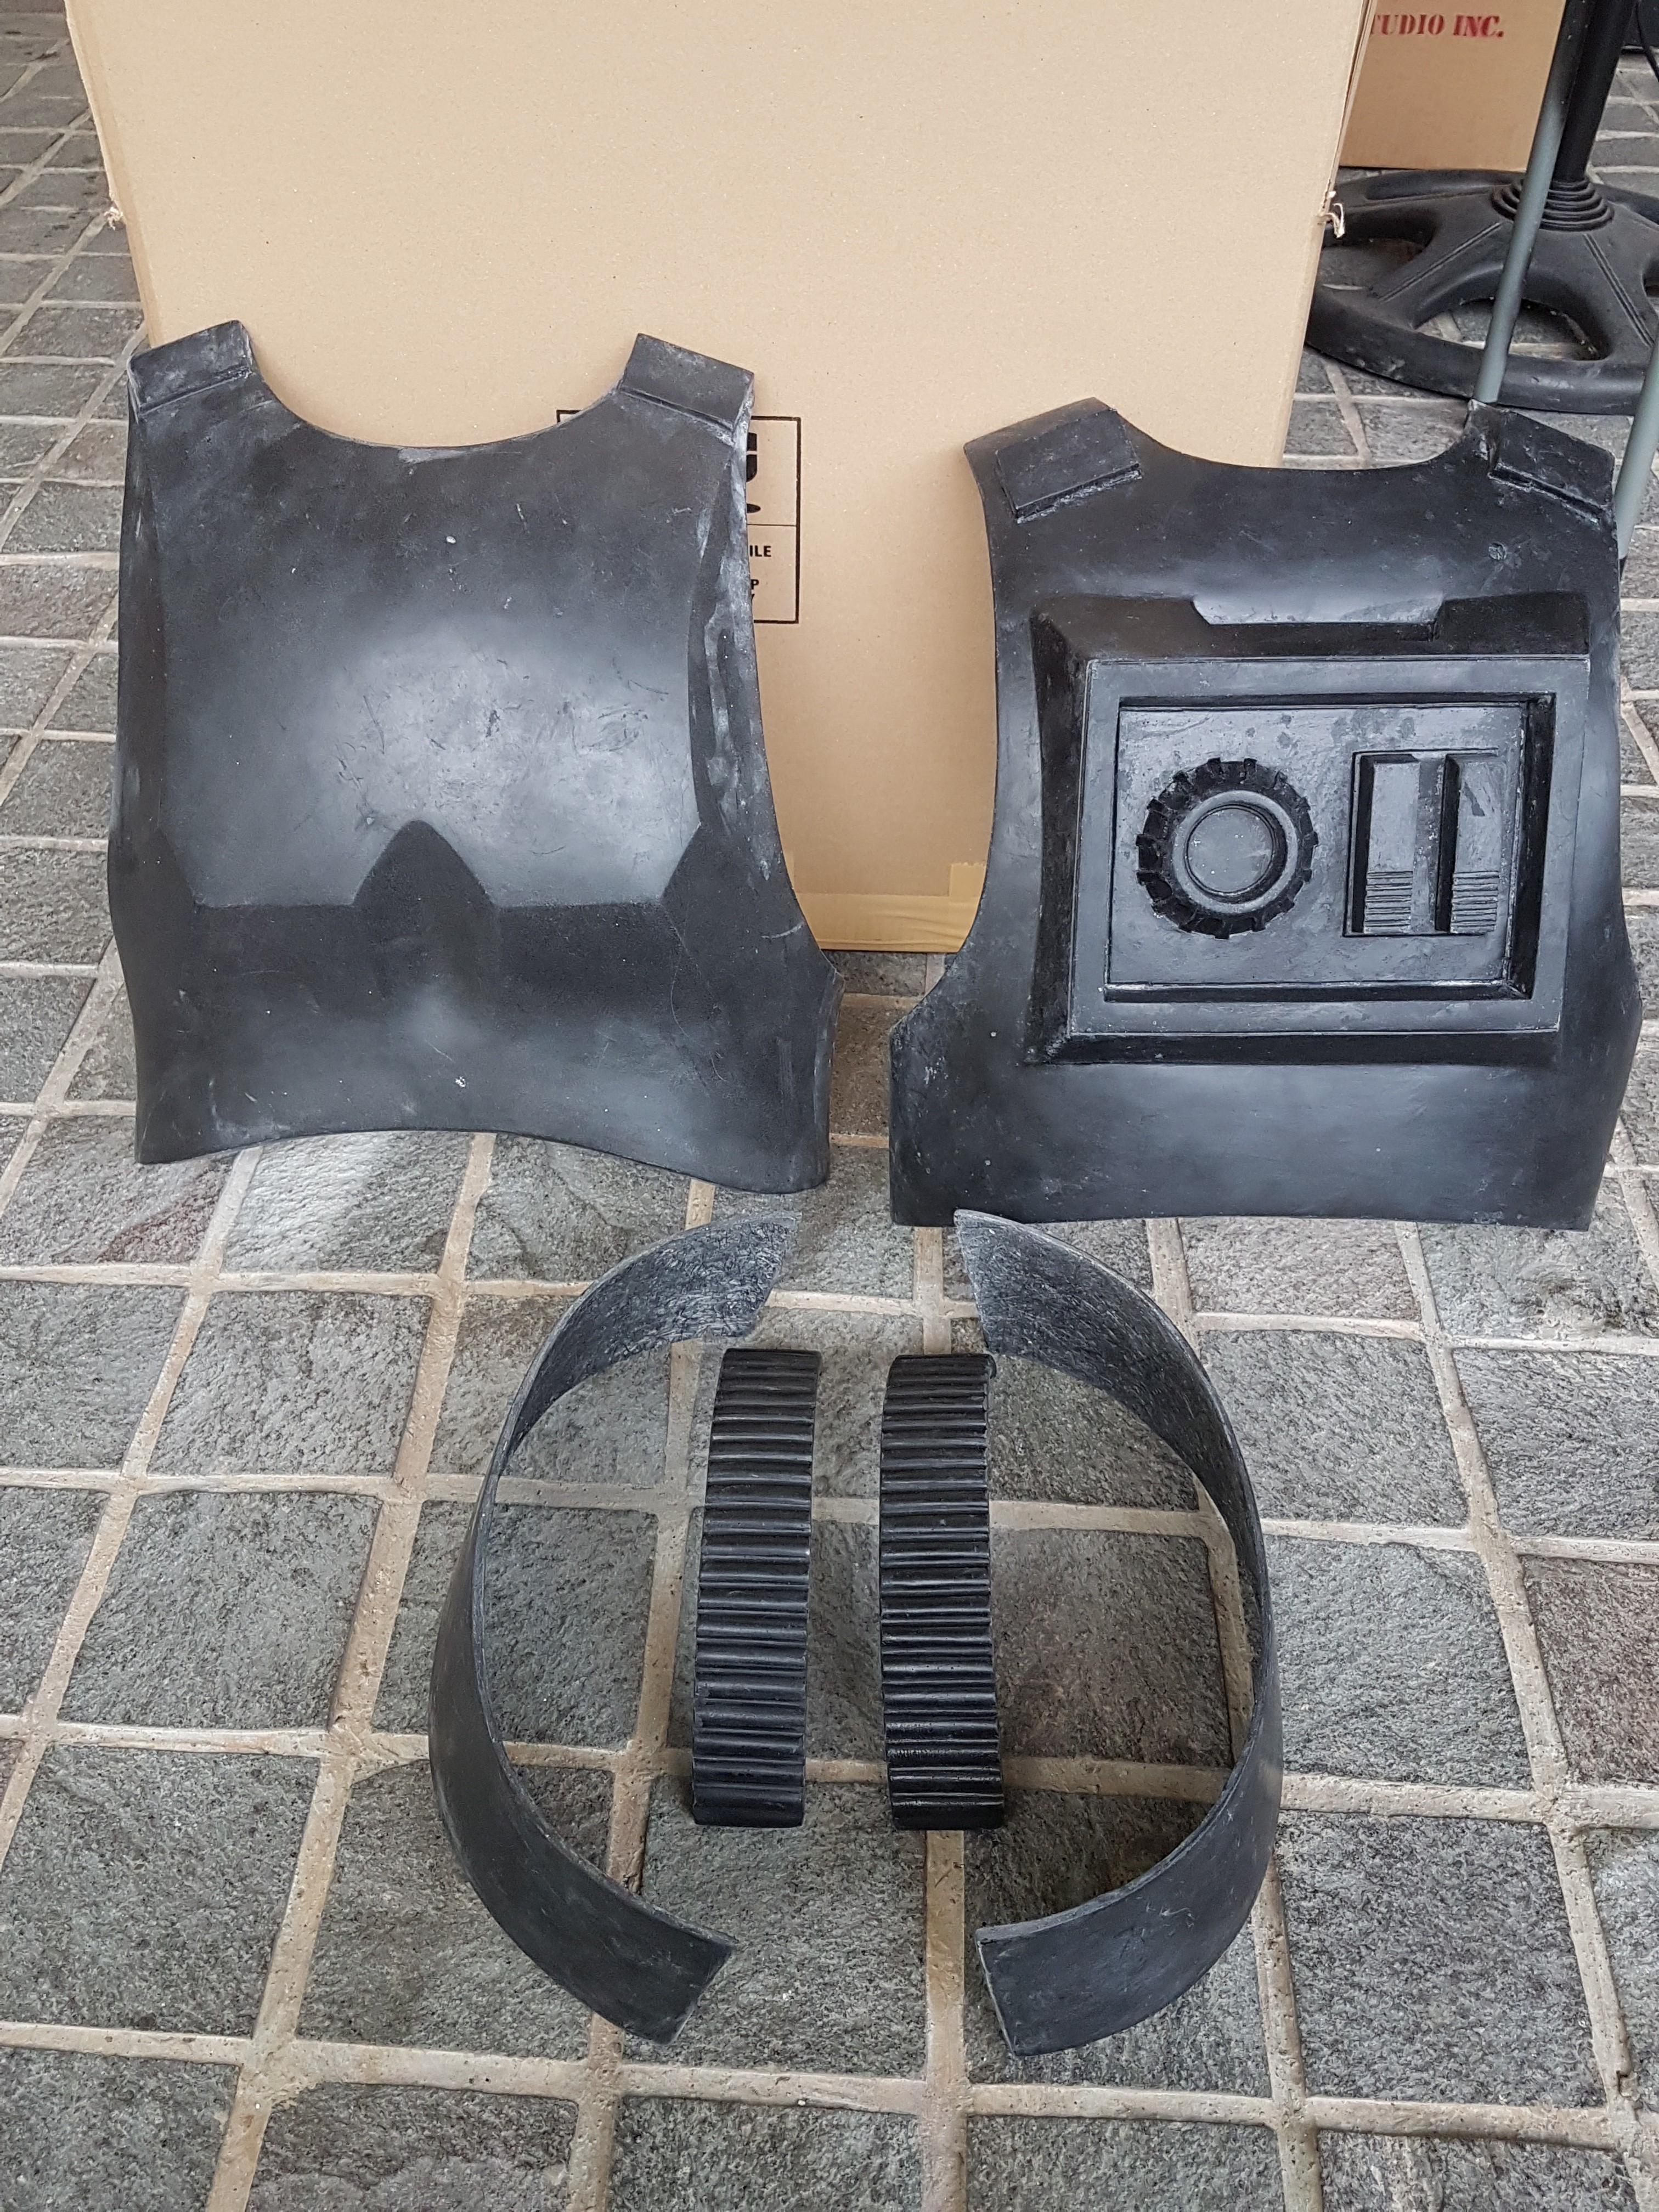
Thigh ammo belt, cod and butt are done as well.
Currently molding the ab section, thighs and shins.
-
4
-
-
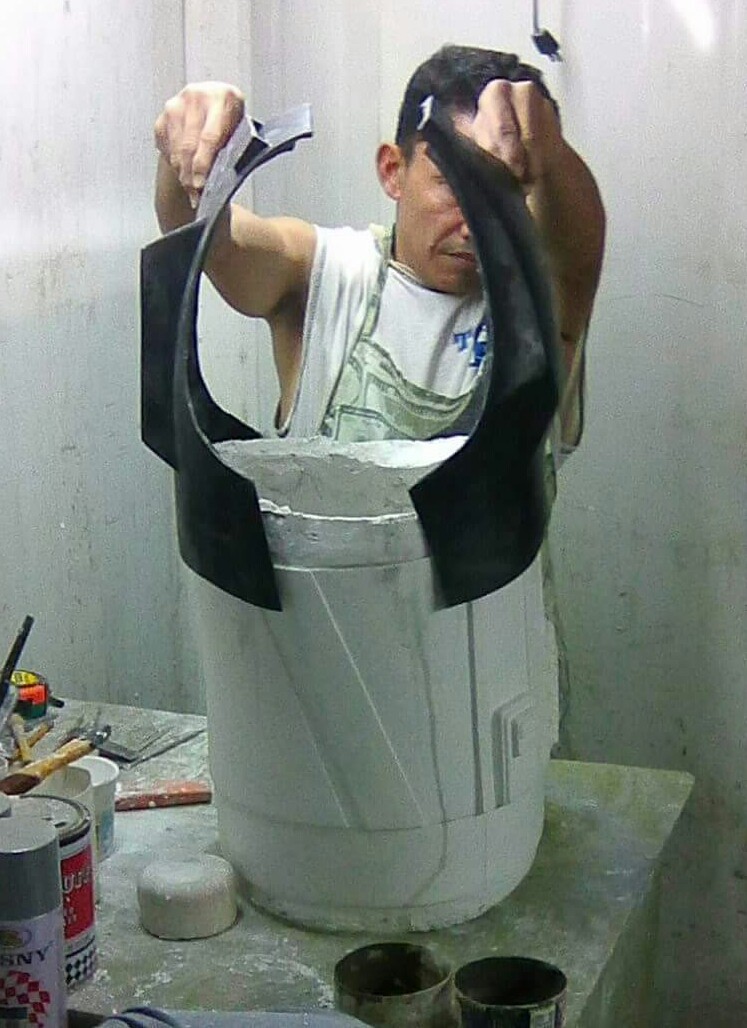
Updates!
Made the side extensions for the chest and back. Made sure to add allowance. Made the shoulder straps too.
Finished the thighs and now working on the shins: Like the DT, there will be an option for regular and tall. Started the knee ammo strip as well
-
4
-
-
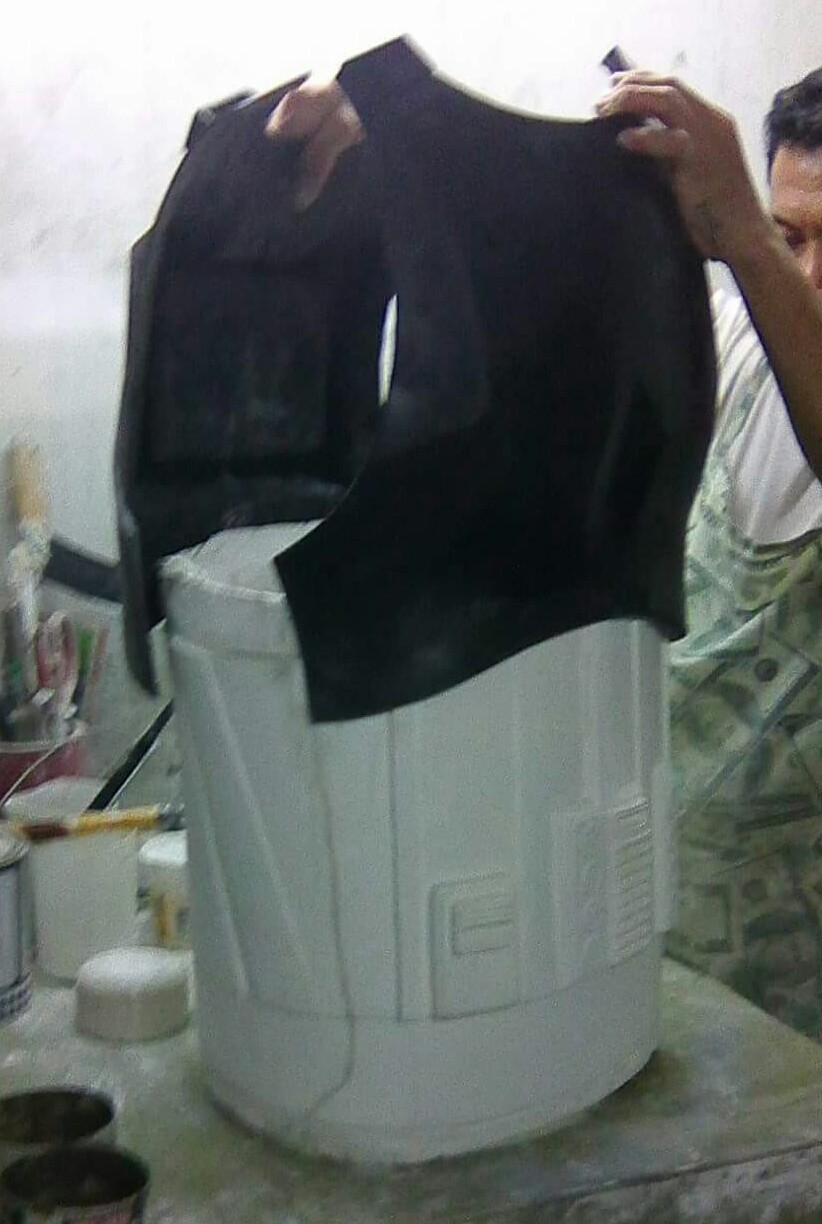
Updates!
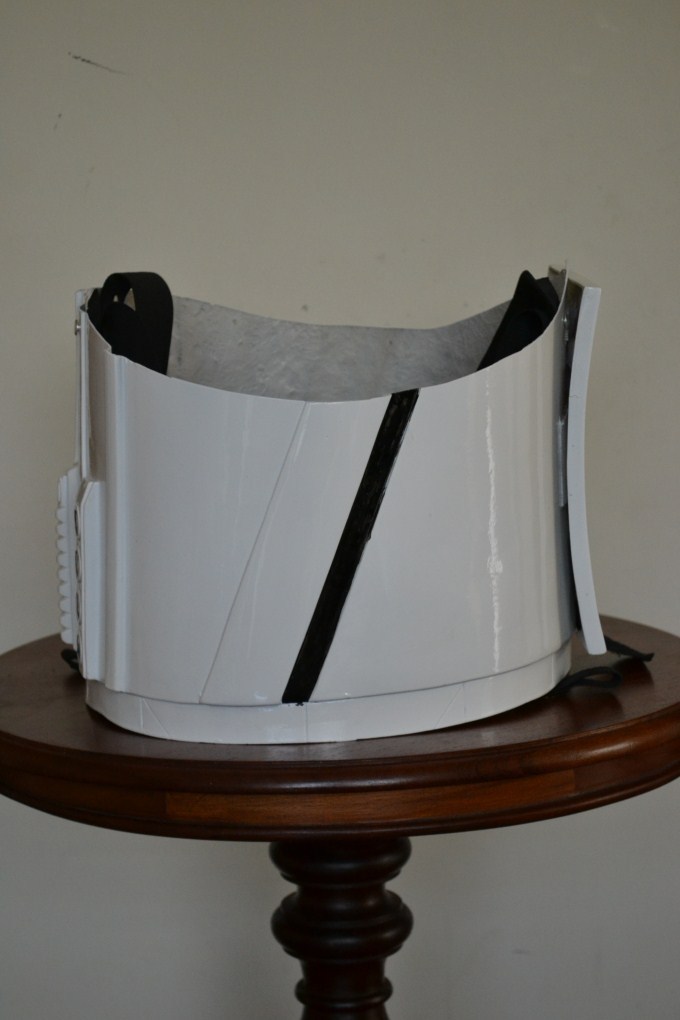
We've molded the chest and back to see how they fit with the Ab section and also so we can work on the rib/side pieces. These will have lots of allowance to accommodate a wide range of girths. The Ab section will be cast in one piece, just like our FOTK or Shoretrooper. Split in the back will be covered by the back plate. Do take note the the ab section is sized to a 39" waist by default and can still be brought in just by cutting the back. So it can be much slimmer than in the pics. The chest and back was also positioned a bit too high relative to the ab section. At least it gives an idea of the upper fit limit height wise.
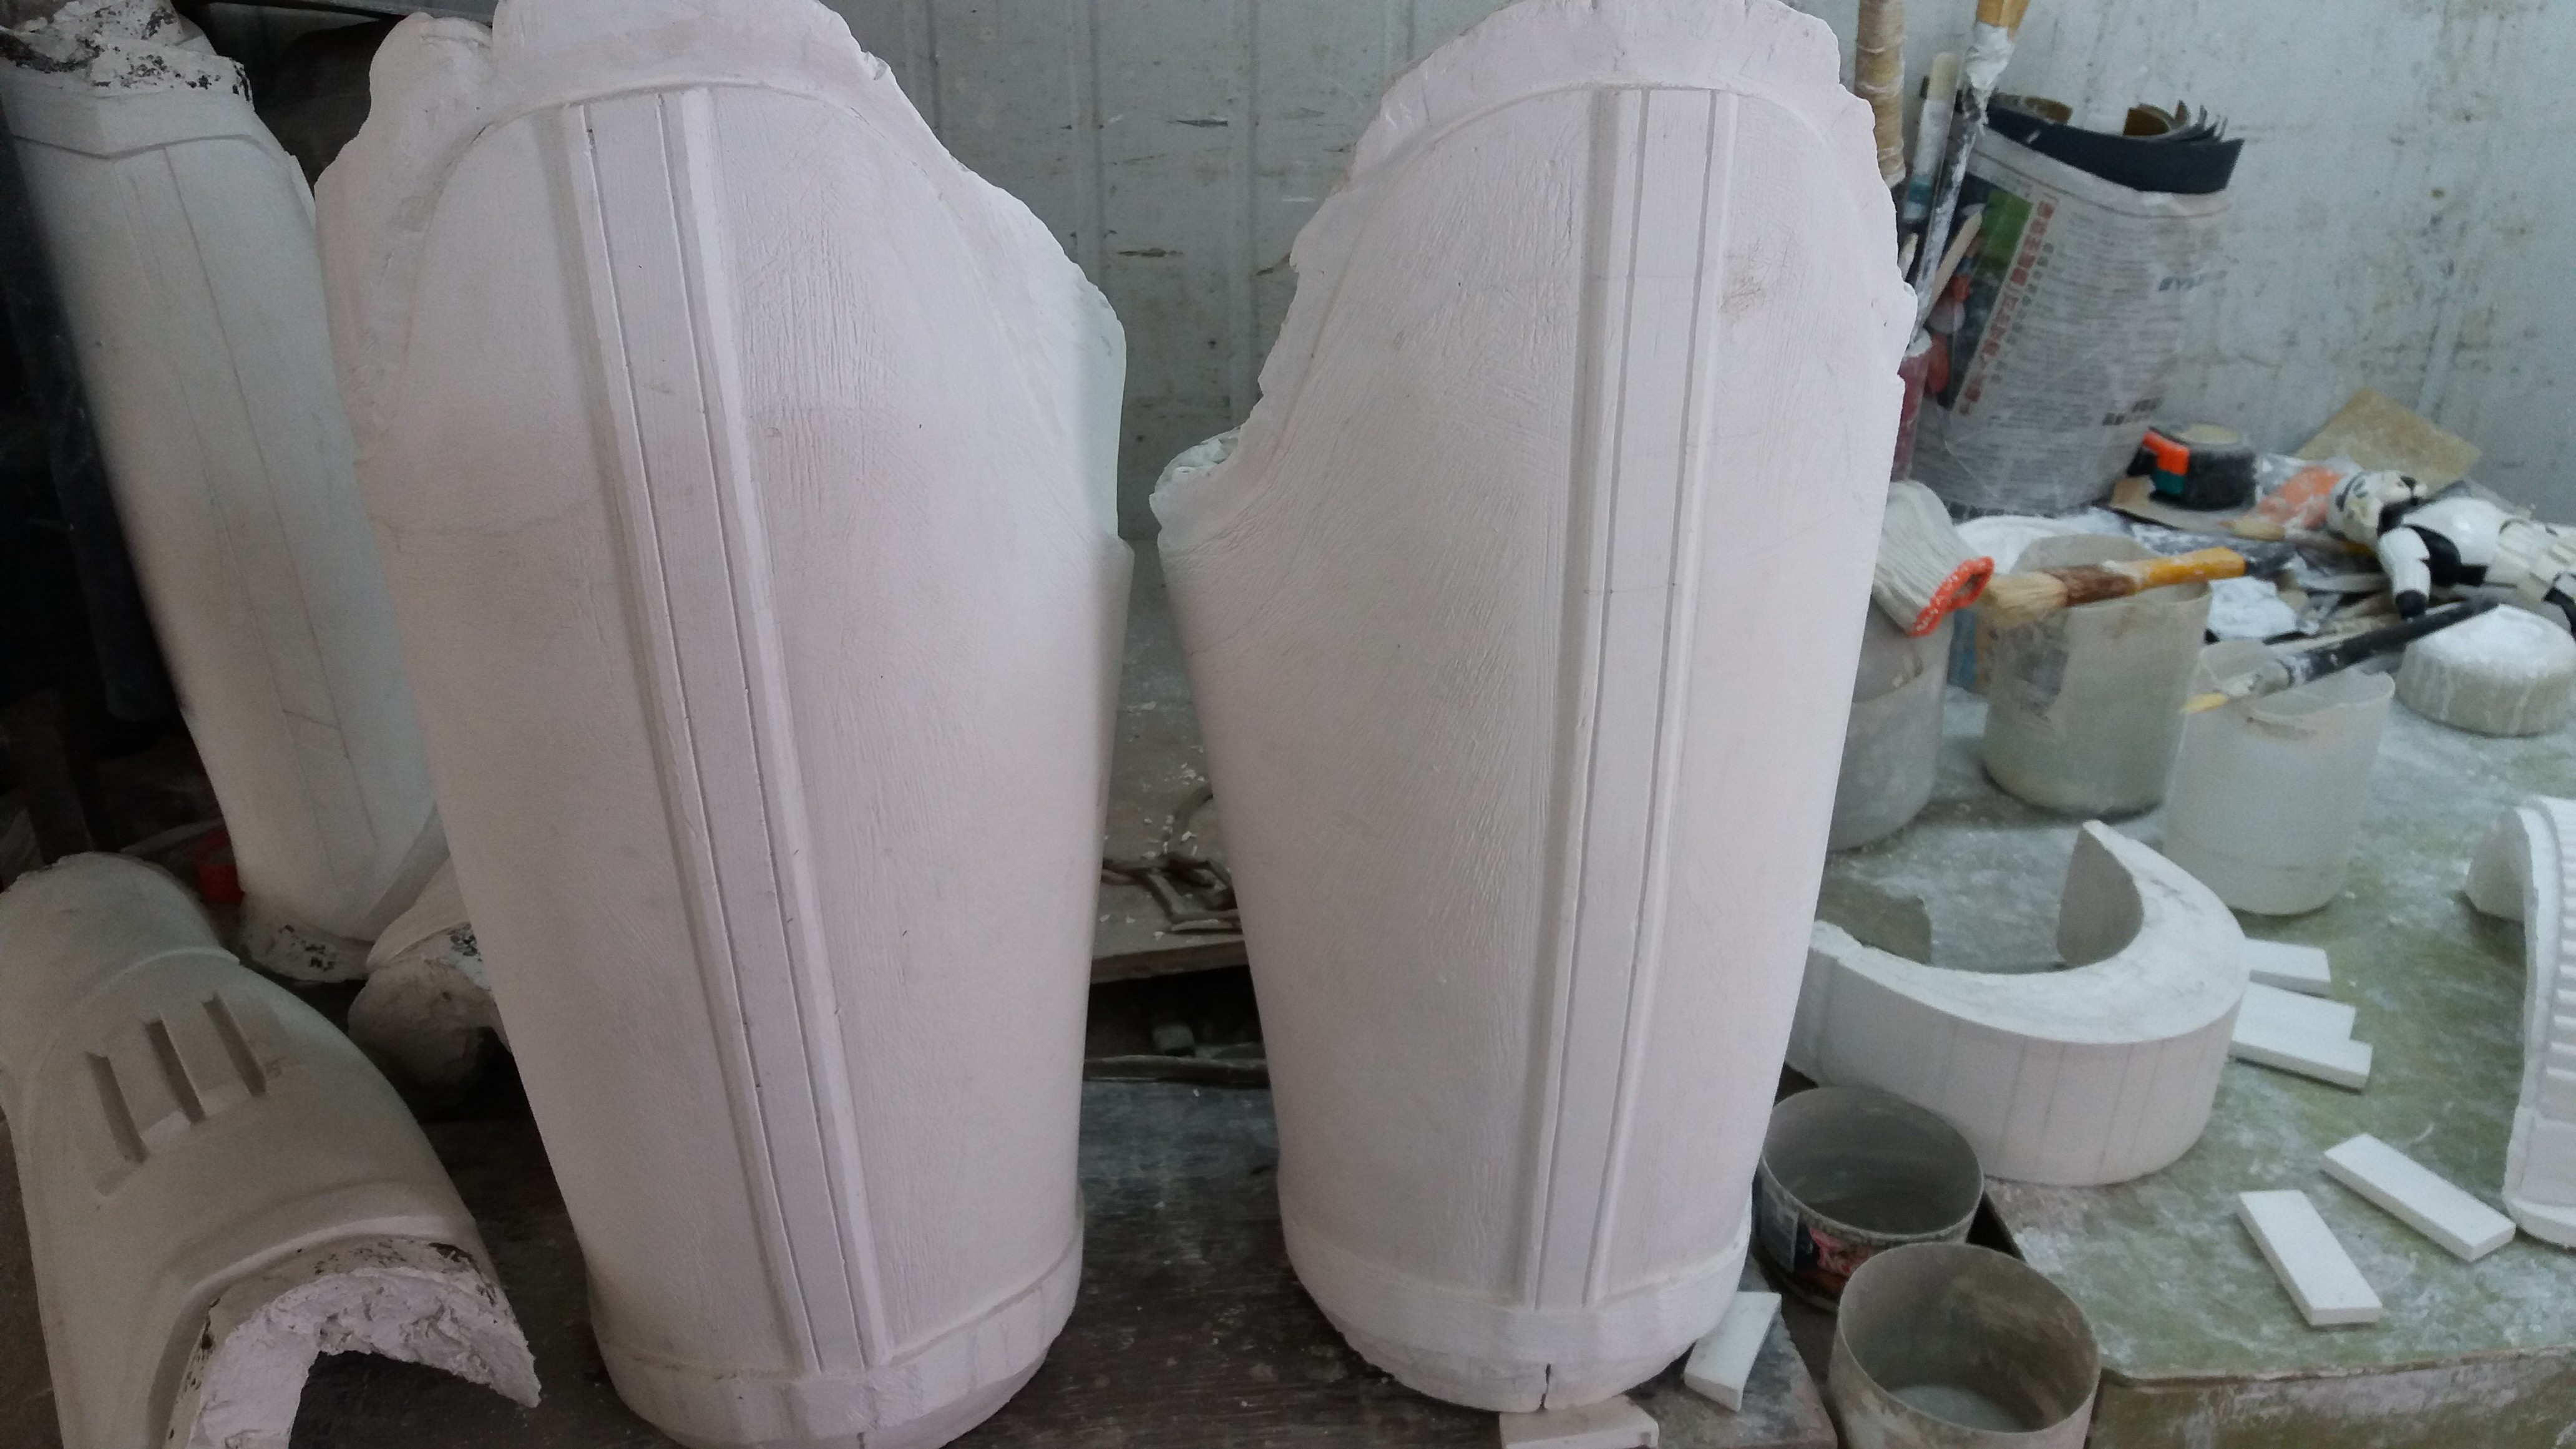
We've started on the Thighs as well. These will be cast in one piece. If one needs to shorten it, just trim from the top. If it needs to be slimmer, the idea is to cut along the coverstrip of one or both sides and the flexible fiberglass can be made to overlap. Similar to what we've done with the Death trooper and FOTK thighs:


And in case people are wondering about the flexible fiberglass material:
---------------
Input and feedback very much welcome!
-
8
-
-
Thanks for the input! Will make the revisions.
-
4
-
-
Revisions done! Going into the mastering phase prior to molding these up
Chest: flared out bottom a bit more. Outward curve on the pecs.
Back: Flared out the sides a bit. Taller backpack. Single platform for the 1 1. central ramp on the strap slots
Abs: Central ramp more flush to the ab box
Cod: higher "bikini" cut; Butt: minor revisions
-
4
-
-
Jim, did you see the post above that one about the back plate? http://www.whitearmor.net/forum/topic/41169-jimmiroquai-rogue-one-tk-builds/?p=552832
I believe he was referring to the horizontal lines I mentioned that are located on top of the "II." Are you referring to the step the II is on that me and you were talking about?
Yup, the single step/platform for both I Is
-
1
-
-
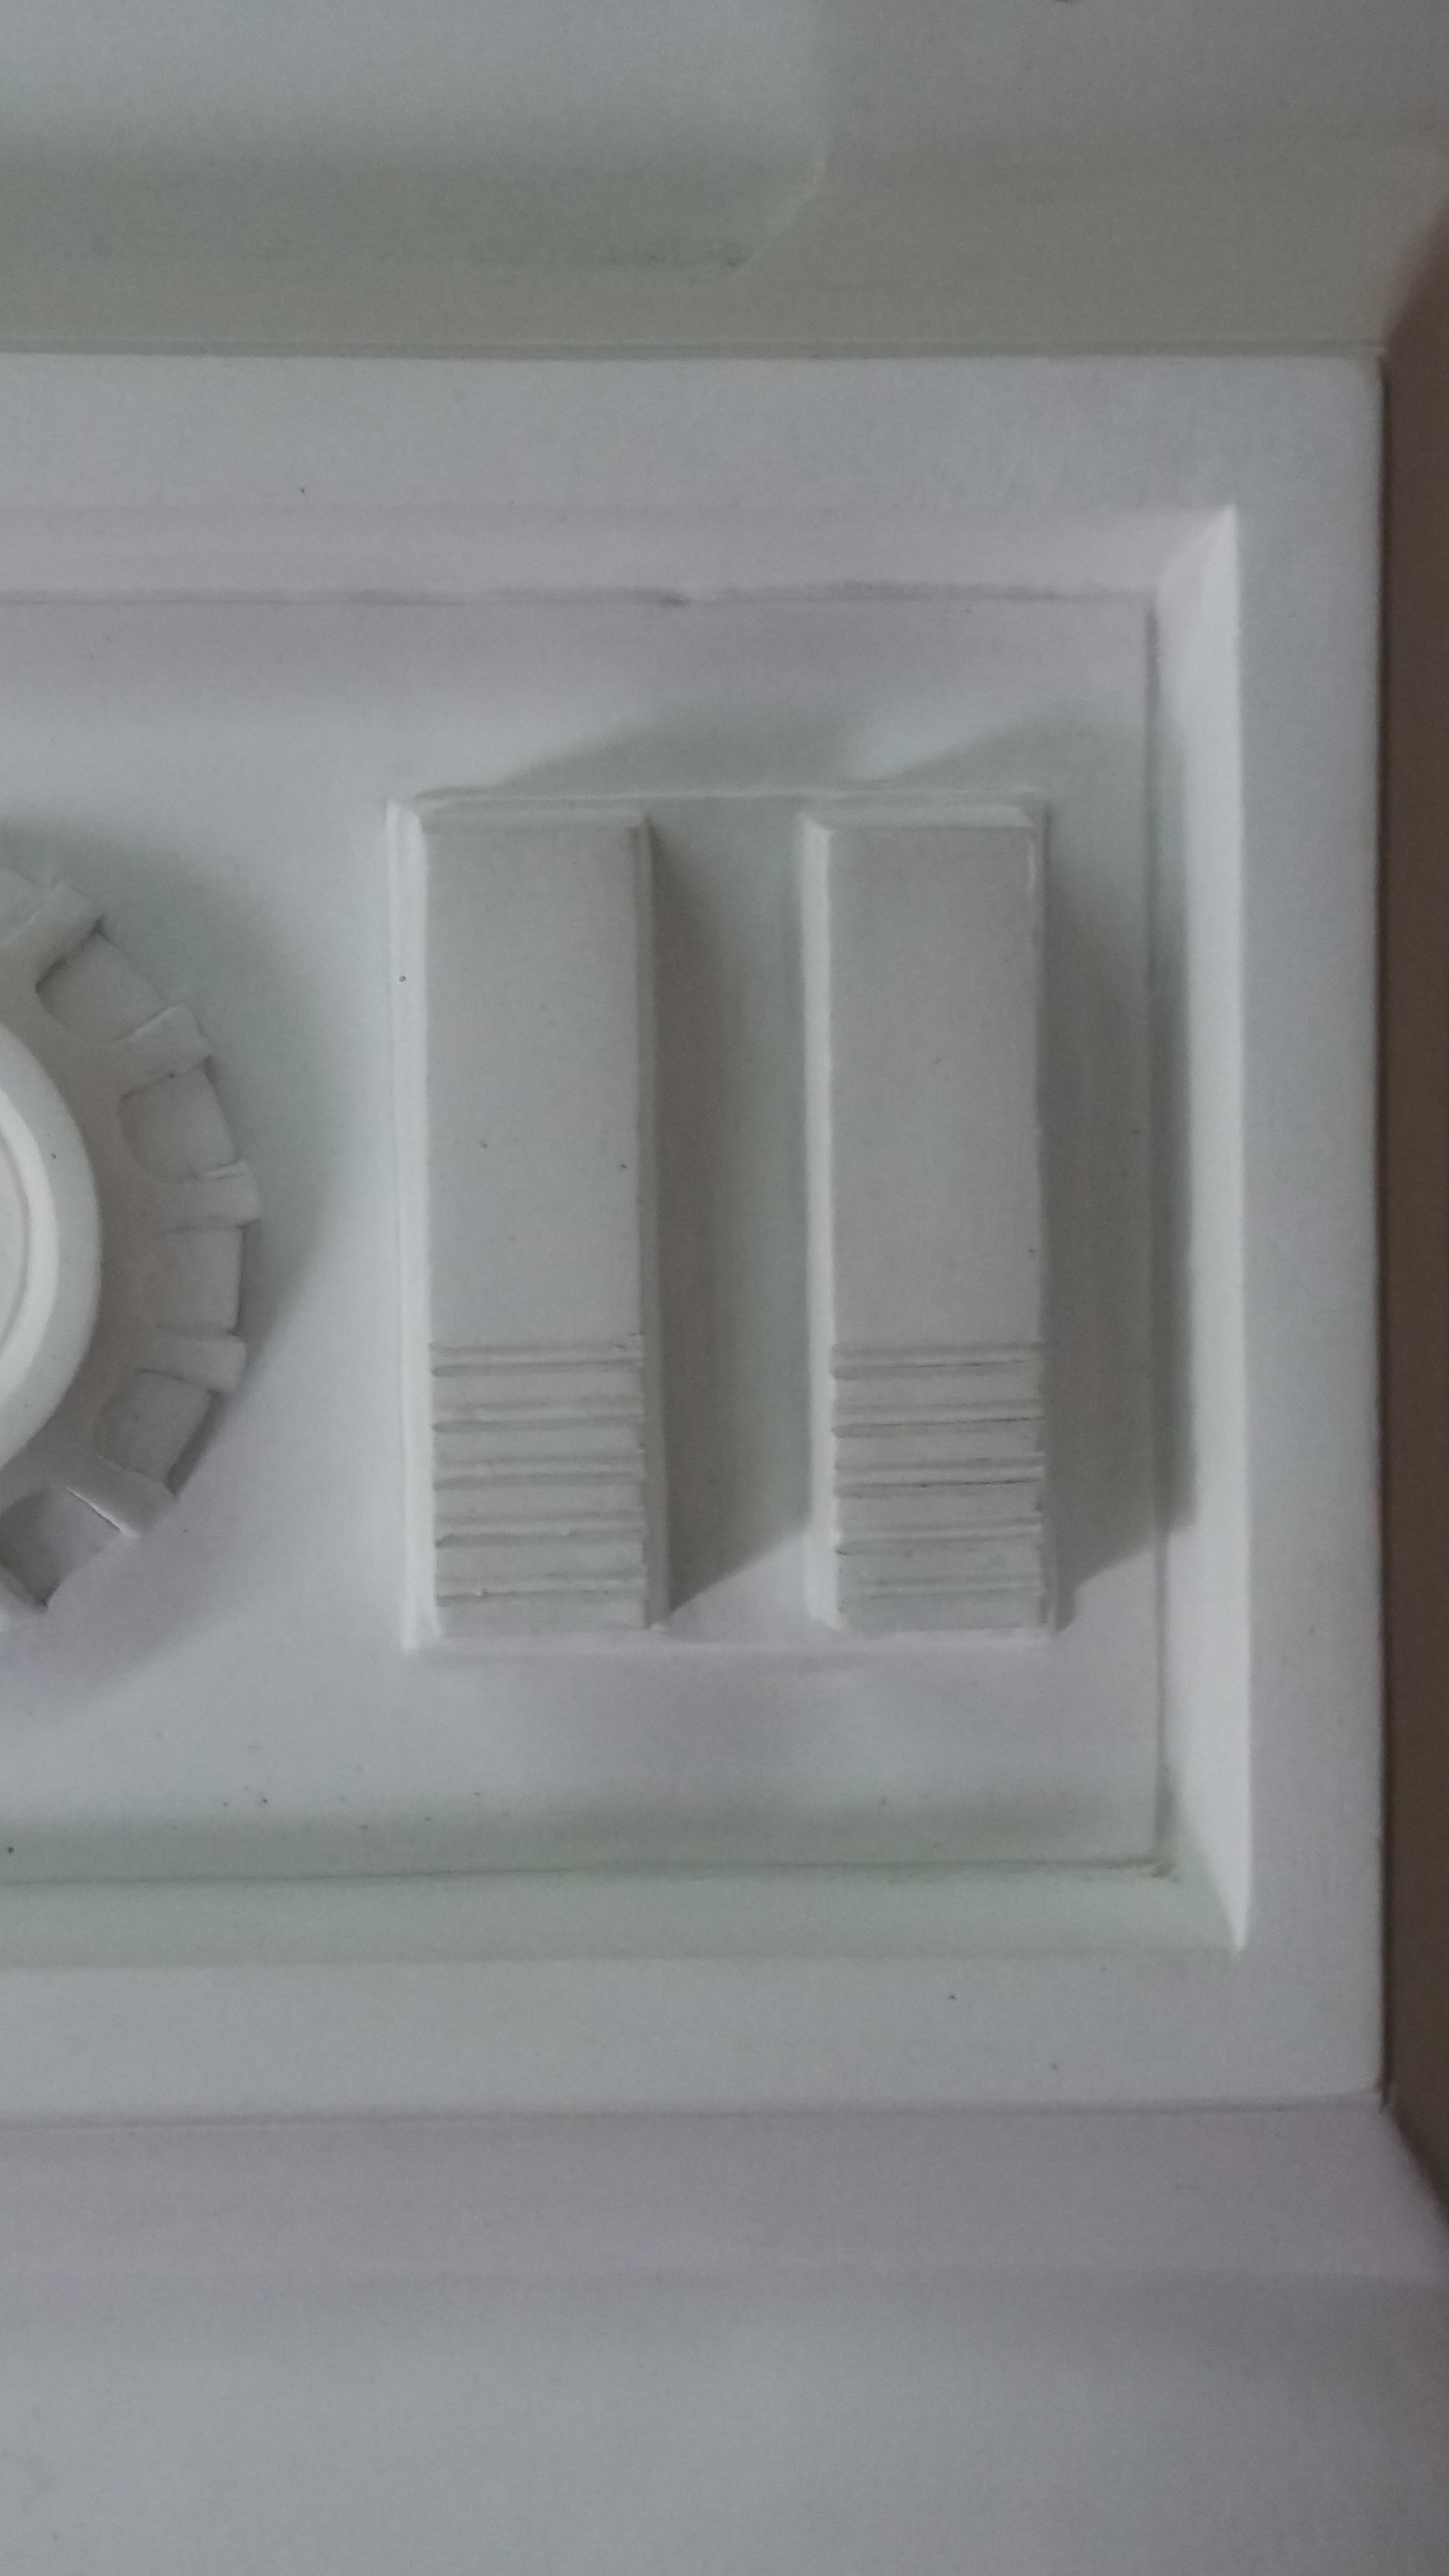
On 4/4/2017 at 8:33 AM, SlyFox740 said:
Jim, as always your sculpts are amazing! I just wanted to show you some comparison shots next to images from the Rogue One Visual Guide.
----------
As you can see from this side angle the horizontal ribs next to the ab buttons are actually quite deep and shaped like a heat sink.
-------
http://imagizer.imageshack.us/v2/xq90/922/HToBKh.jpg
Thanks! Yes, that's right. Due to the casting process though, it would be less prone to bubbling and mold damage if the fins were a bit shallower.
On 4/4/2017 at 10:18 AM, Par_ said:Also on the "II" in the screen used piece, I think the horizontal lines are actually raised lines versus engraved lines.
Yup! Ours are raised.
-
1
-
Recaster Alert: ! has recast my R1TK
in Hard Armor (General Discussion)
Posted · Edited by jimmiroquai
Recaster Alert:
Ebay seller Makerofthings! has recast my Rogue One TK armor
Mostly are direct vacuformed pulls from my kit.
Some were pulled from modified versions of my parts
My master sculpts are hand sculpted, not 3d printed, so the human made imperfections have been perfectly replicated in the vacuformed pulls as well.
Photos with comments below. Flexible fiberglass off-white parts are my kit. White vacuformed parts are his
Thing about recasters is this: for every kit they sell, they steal work from the people who's livelihood i support by selling my kits. The sculptors and casters I work with, this is their livelihood. They are actually very poor and each order can mean anything from food on the table to paying tuition fees for their kids.