


Shank_O_Potomus
-
Posts
68 -
Joined
-
Last visited
Content Type
Profiles
Forums
Gallery
Articles
Media Demo
Posts posted by Shank_O_Potomus
-
-
Did y'all find a difference between the outer biceps? Or are they the same?
-
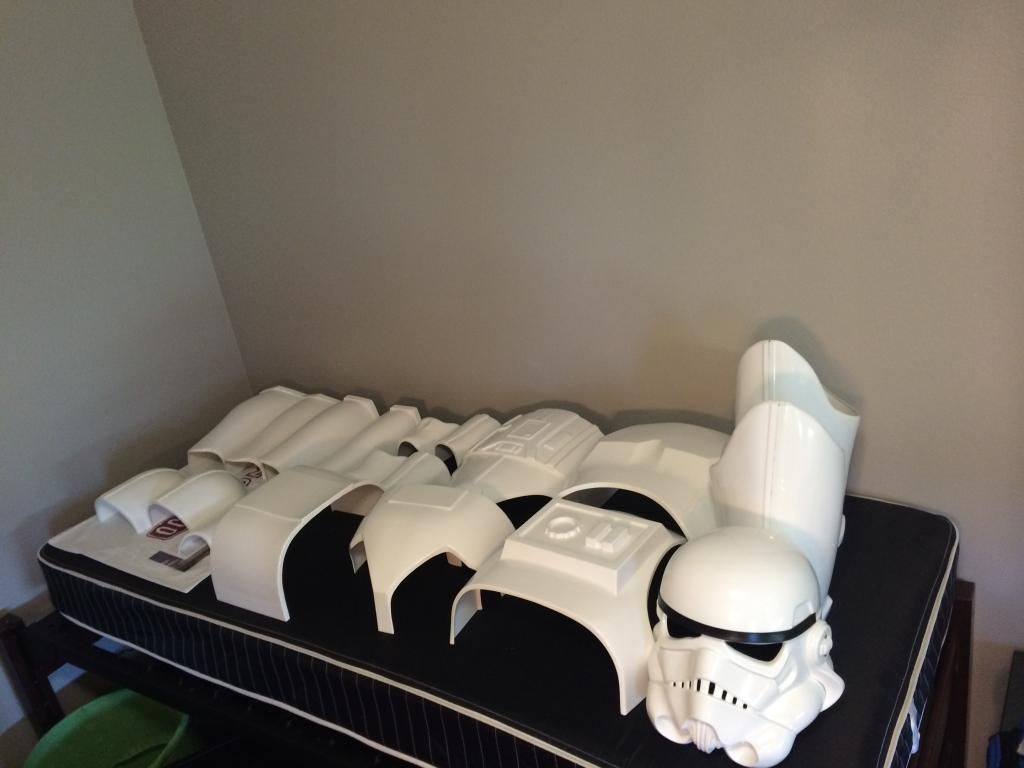
Well I'm (mostly) moved into my new dorm room now. not sure where I'm going to store things yet, but my absent roommate's bed seemed good as any for now!
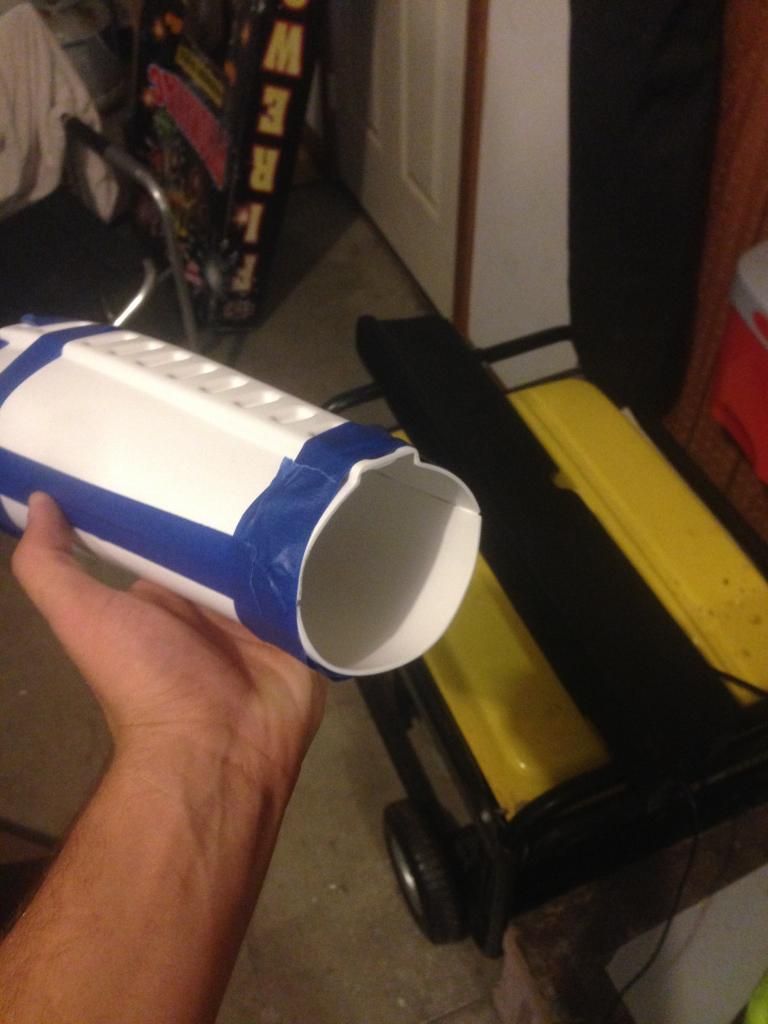
I have the final cover strip on my right forearm gluing now and hope to get back into the swing of things quickly!
-
Looking good Mike! Keep it up!
-
While I wait for my forarm to glue, I decided to work on the left shin. Working on the left shin turned in to the whole limb
 .
.Since the shin and the thigh had too much plastic for me to see roughly where I will need to be more or less, I cut out 1 inch.
Here are some picks of my leg pieces taped together.
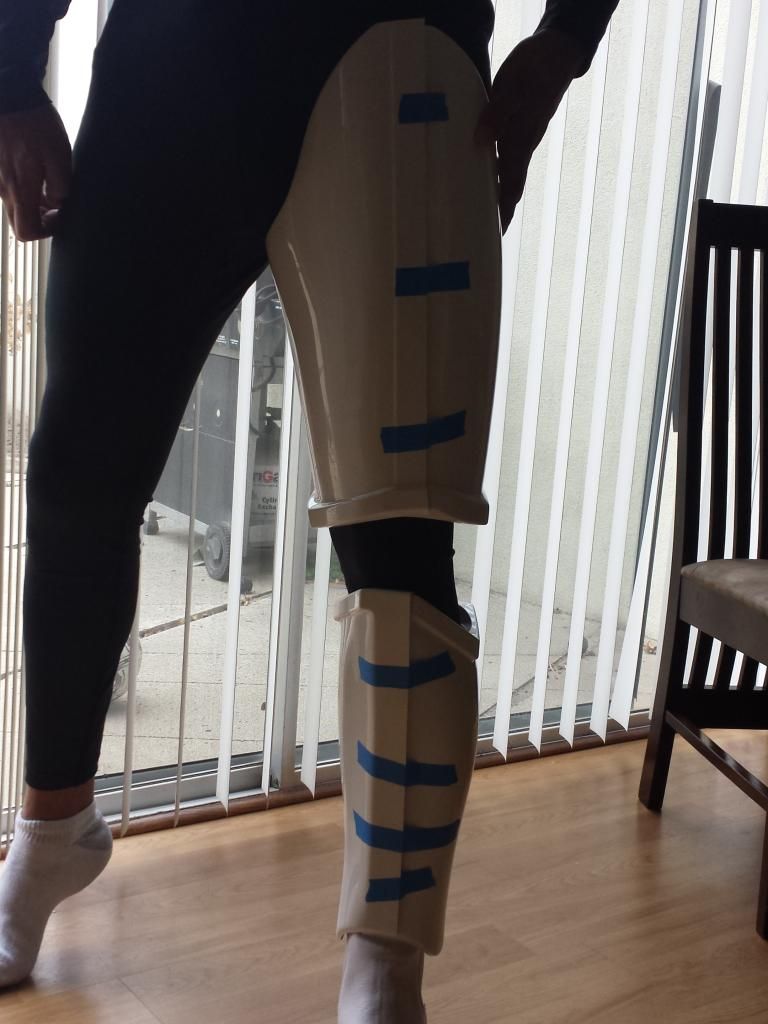
Looks like I will need to cut a good amount off the top, I can't bend my leg.
Yeah inorder to bend my leg, I had to cut off about 3/8" from the top
-
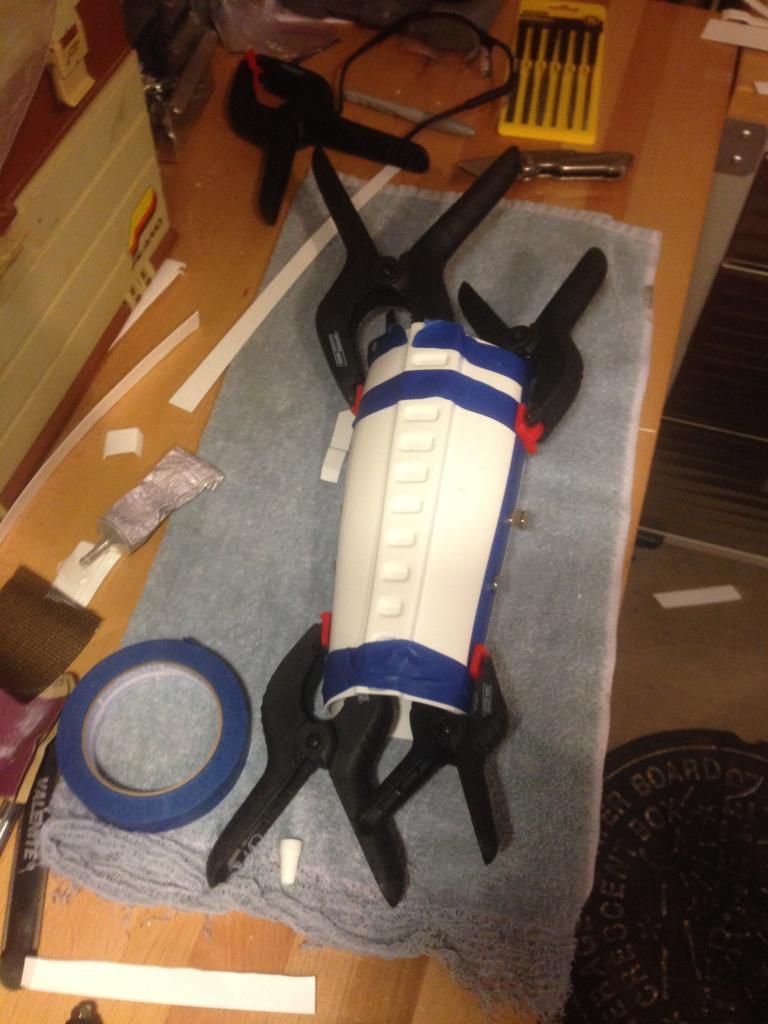
Sorry It has been a while all. I have put the return edge on my other thigh and just need to glue on front cover strips and put the battery packs on the knee. I went ahead and painted the inside of my helmet flat black. I waited until after it was assembled, so I sprayed flat black rustolium in a cup and then just hand painted the inside. Also, are the aerators flat black? Unfortunately we had family friends in town this weekend so I didn't get much done.
This will probably be the last update on the build for a week or so, as I prepare to move out to Oklahoma for college. If there is anyone in the Star Garrison or just the OKC area that would like to help with my build (Armor Party???), it would be greatly appreciated!
-
A heat sealing iron sounds like it might do the trick, and Pandatrooper, among others I'm sure, have done amazing things with one but I don't know yet whether I'm ready to spend the money on a tool I'll likely use once.
I've got access to a heat gun I just have to go pick it up. It's going to help with the bends in the belt ammo belt and shoulder straps.
I got mine for like $20 and I've used it on multiple occasions throughout the build. Just from experience with the heat gun, I'm more concerned about using it. I would fry the plastic

-
Wow! Looks great!!!

-
I think I'm going to make a 7mm line from the edge and use the heat sealing iron to make a flat edge going along the forearm which I can then glue upon
-
I wasn't planning to, unless I have to. My guess is that he had to for height reasons? At 6' 2", I shouldn't have that problem.
Okay I'm about 6'4" so I guess I wont either
-
Are you planning on splitting the abs into 2 pieces like panda trooper did in his AM build?
-
Yeah novus works for light scratches. This is just a faster way to get it done.
Okay great! I found some paste finishing wax here at the house and have been experimenting with it. It works really well!
-
Nice mod on the thighs. Looks close.
One way to get the new return edge smooth and shiny is steal wool. The hd by my house has several grades. I started with a semi rough, then super fine and it came out great.
Thank you! Steel wool will make it shiny? this has a wet sand at 1000 grit sandpaper. Is there an ABS polish you know of?
-
Nice paint job!
-
Pretty good. Got a bunch more done today since I could work outside and before 10 p.m. will have pics later.
How about with you?
Its going well! I'm not quite sure how to approach fitting the torso pieces... have any ideas?
-
The thumb/spoon print goes on the left, per: http://www.whitearmor.net/forum/topic/7263-bicep-question/
Great thanks! Hows the build going?
-
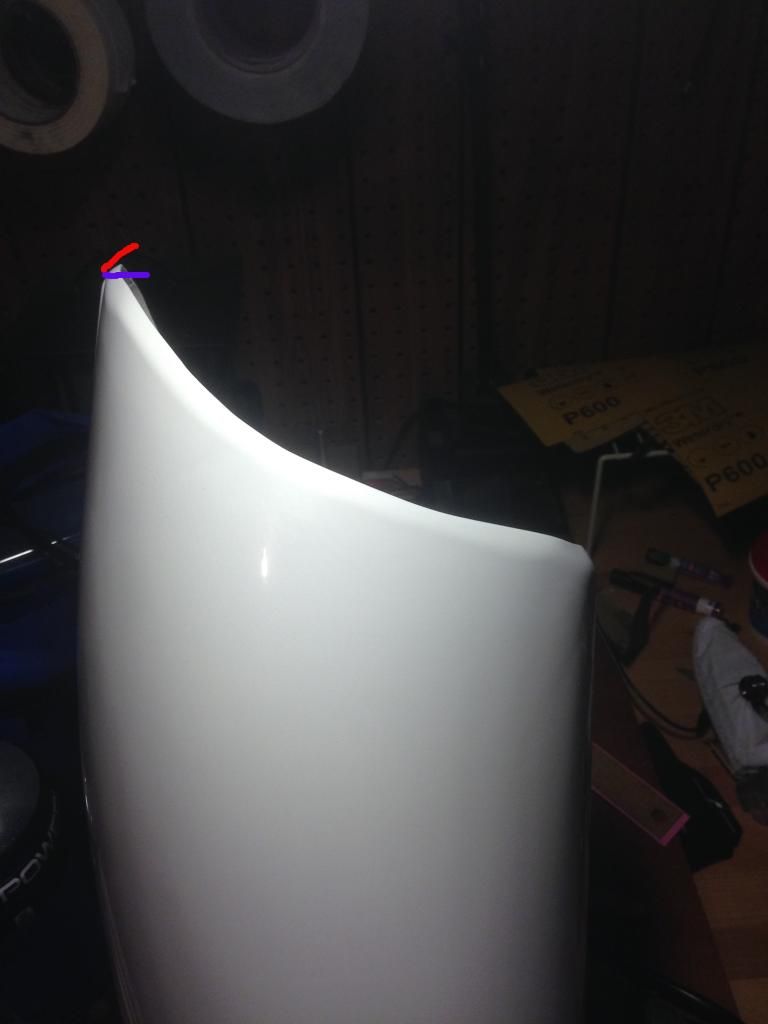
I have a question. On the top thigh return edge, should it be at the angle I have it (red) or at a 90 degree angle (blue)?
-
Hey Mike, how did you determine the left and right bicep. Which arm does the spoon go on?
-
Looking really good so far Ryan!
I'm asking all of the build threads these days, so I'm asking you, too: Are you building to EIB/Centurion standards already?
I was going to chime in on the cover strip cutting, but Ron and Steve already addressed the score and snap method, so I've got nothing to add.

Thank you! I am going to get as close as I can, but if not, its not the end of the world seeing as this is my first build. Can the upgraded AM 2.0 be centurion level with the chest and back it has? Just looking at control the old AM couldn't.
How did you end up doing the return edge? It looks like im going to have to trim down my thigh.
I only had to take about half an inch or less of the top. Then I followed panda trooper's method with a heat sealing iron.
http://www.whitearmor.net/forum/topic/10434-pandatroopers-am-build-threadam/
-
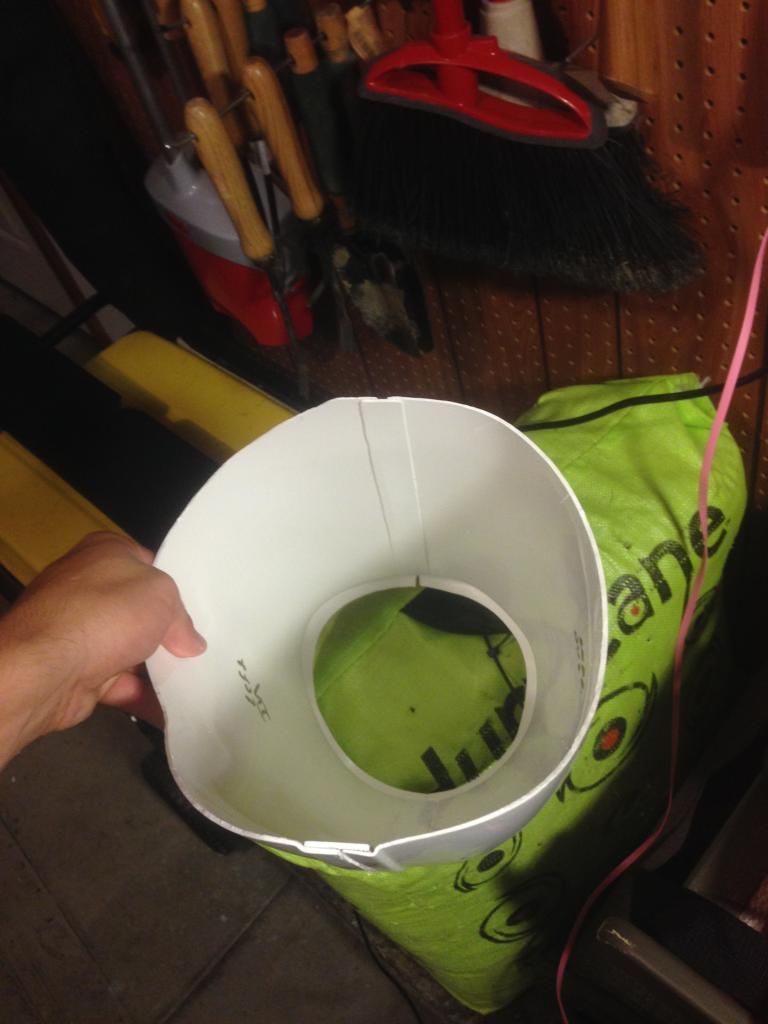
What time is it? Update time!
Alright so I've glued the inside cover strips on my forearms. They are pretty tight so I only did a partial strip.
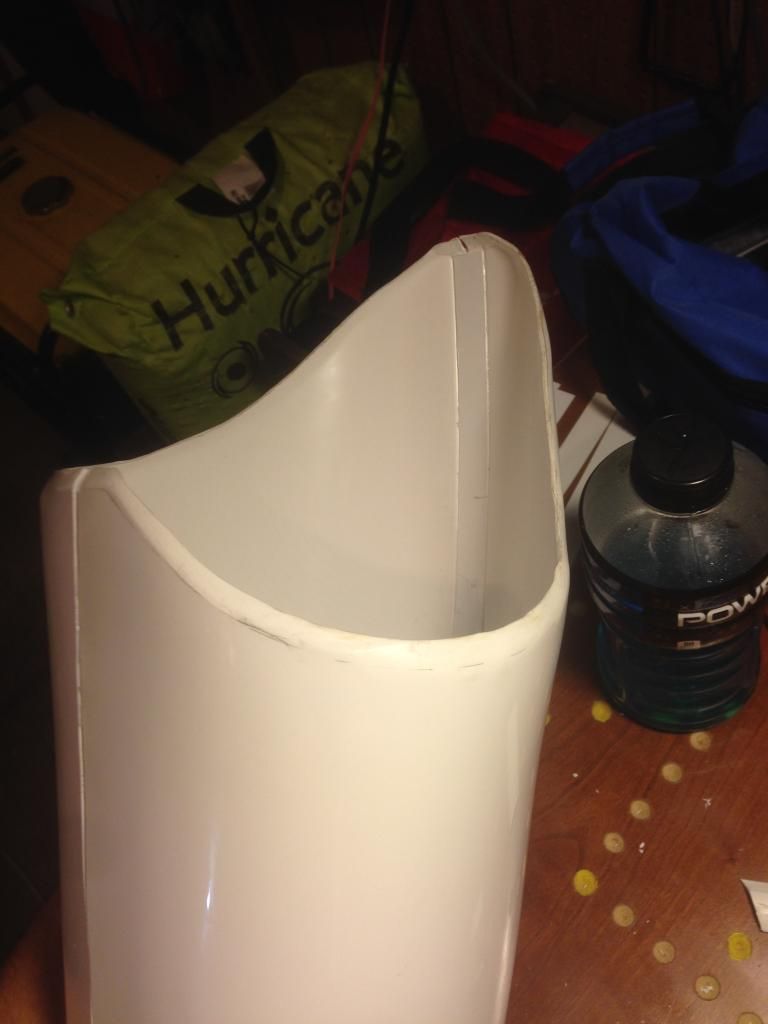
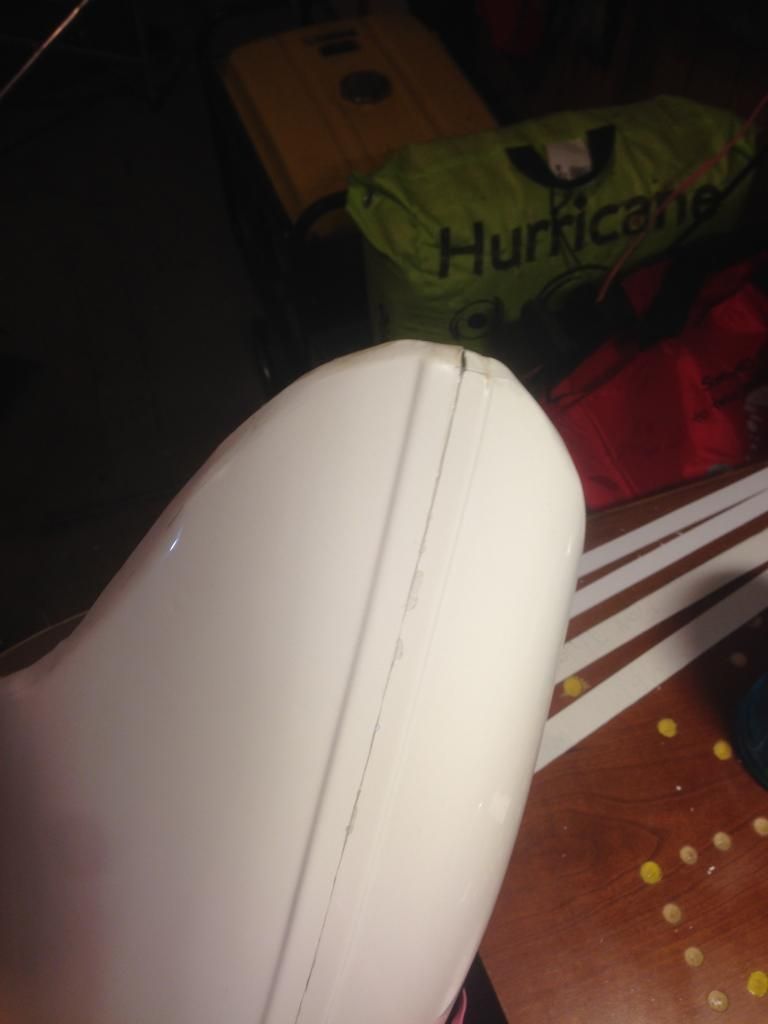
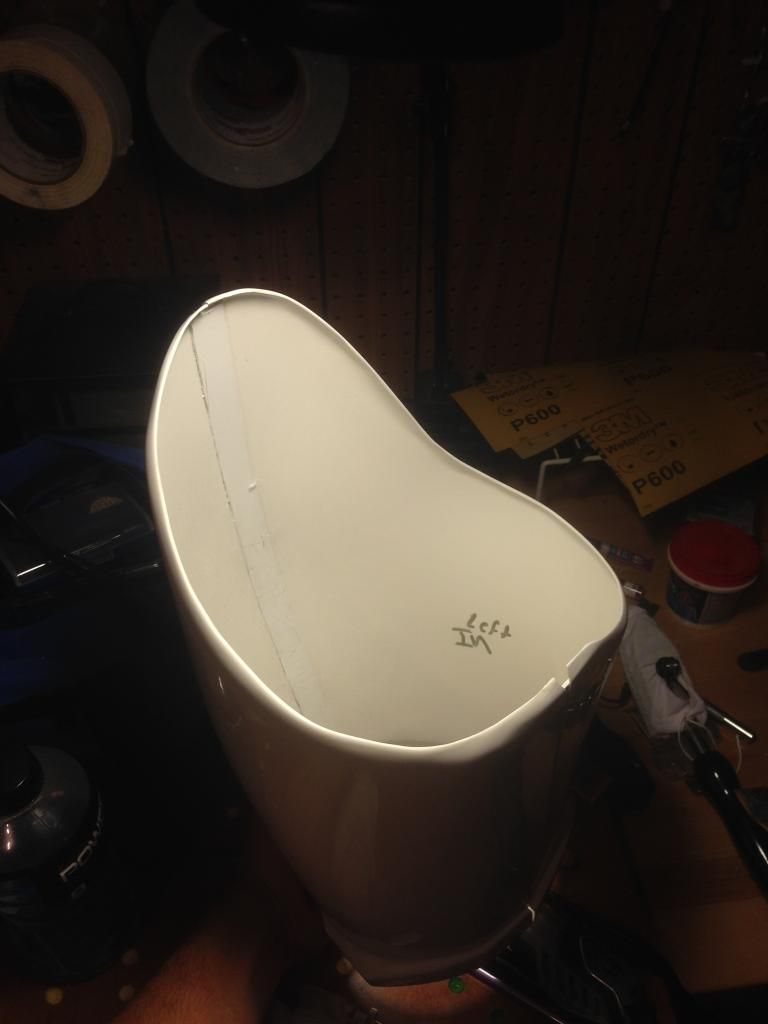
I also finished gluing the inside cover strips on one thigh. Then I got brave and decided to try making the return edge on the top of the thigh as well.
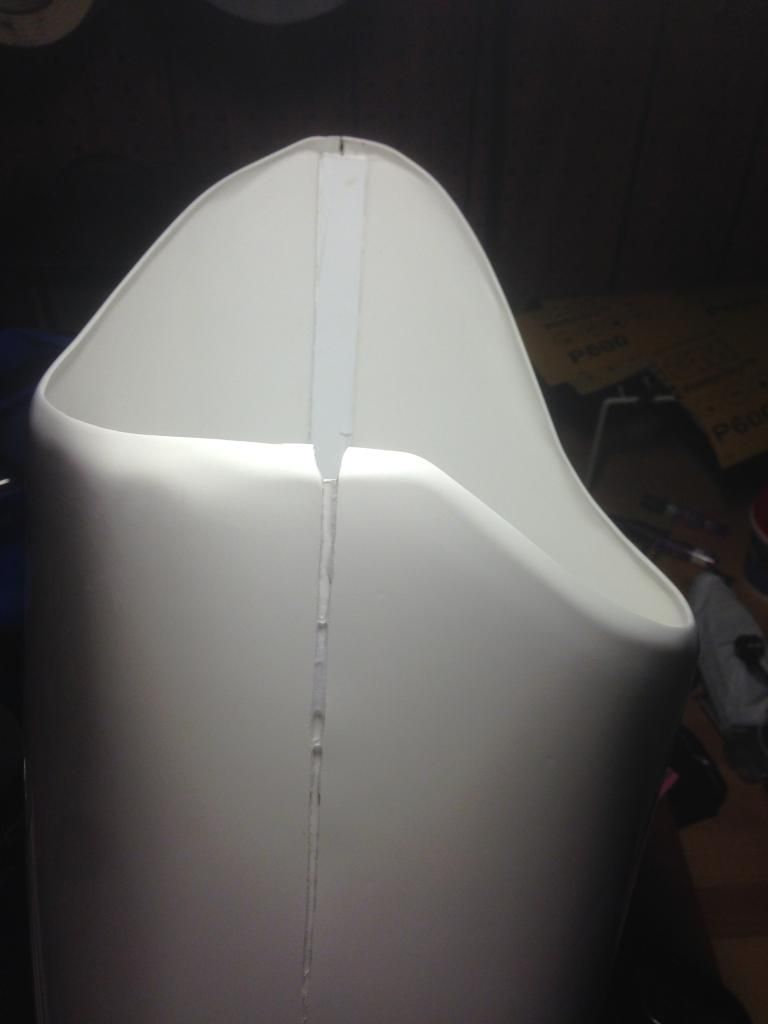
Here is the rough pass.
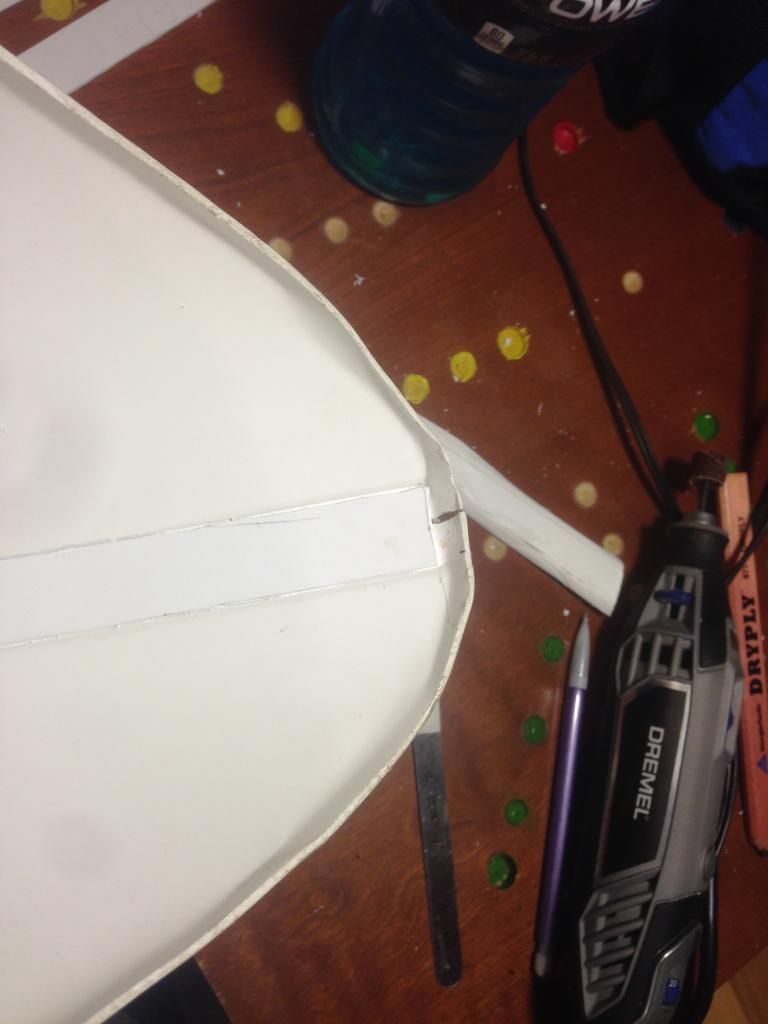
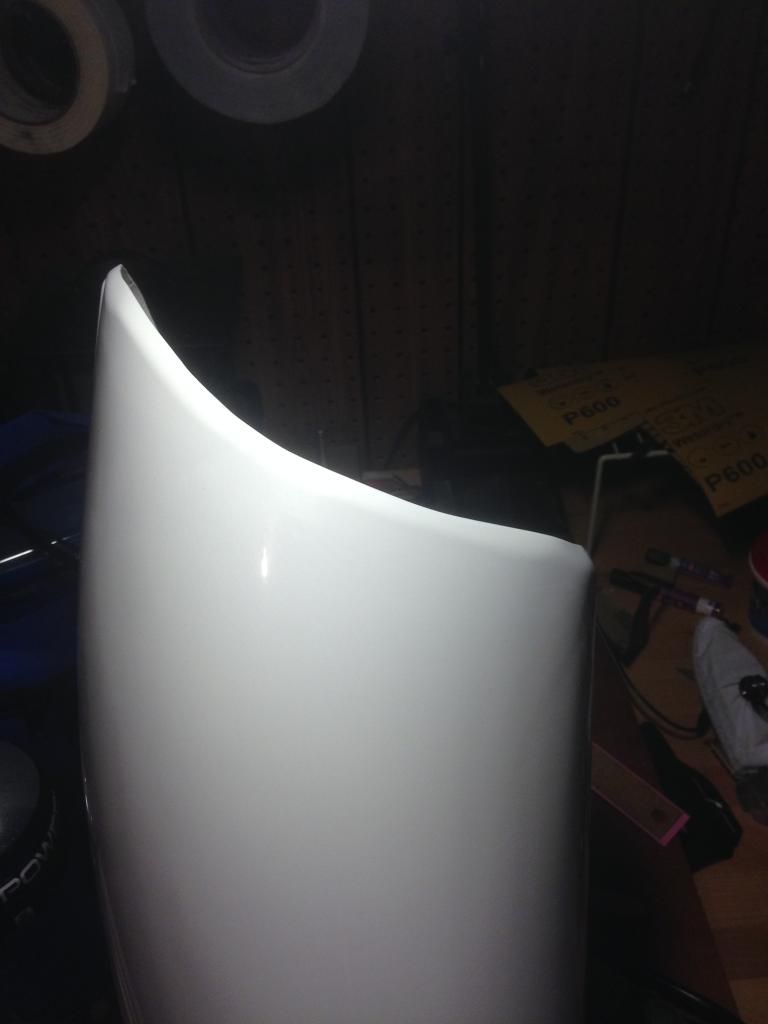
And the finishing passes with sandpaper

-
For straight cuts, I measured and drew my lines, then I taped down a metal ruler on the line I wanted to cut, and ran an xacto blade down against the ruler 4-5 times. Then I removed the ruler and snapped the plastic off at the score line. Nice clean lines. If there was any issue with that, I cleaned it up with some sandpaper.
That is what I've been doing except I've been using my magnets and my hand to hold down the ruler.
-
Unfortunately I don't have time to work on fine details such as painting etc right now. I go back to college in about 12 days so I'm trying to get all of the major components sized and assembled first while I have the tools and space. I can worry about the rest at school.
-
Yeah the paste works great!
-
-
I haven't assembled any straps yet, but here's how I plan to do it.
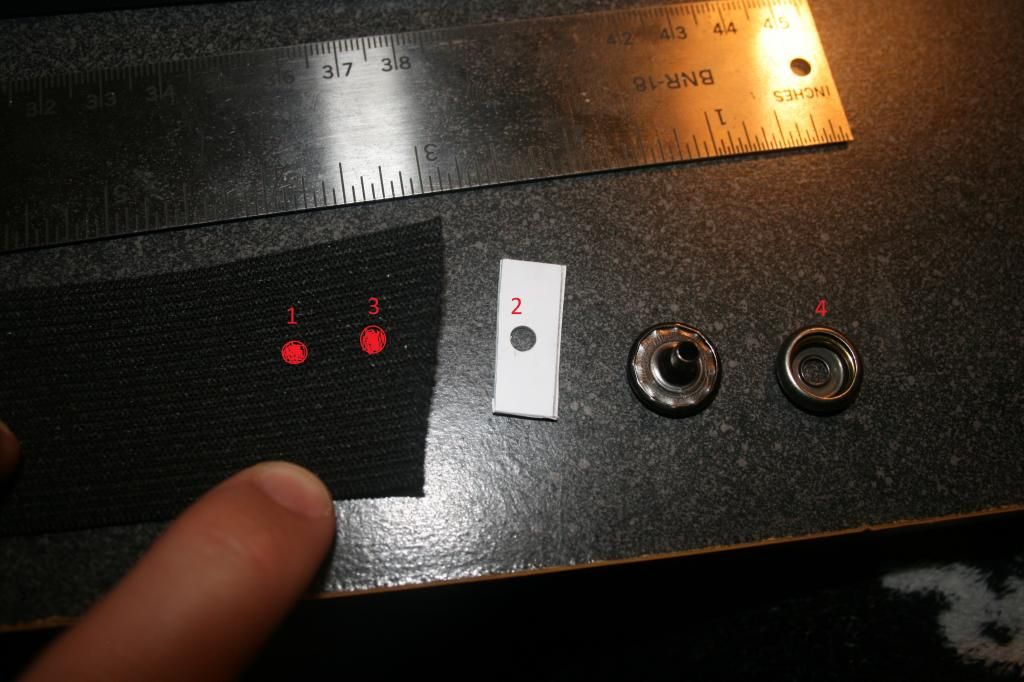
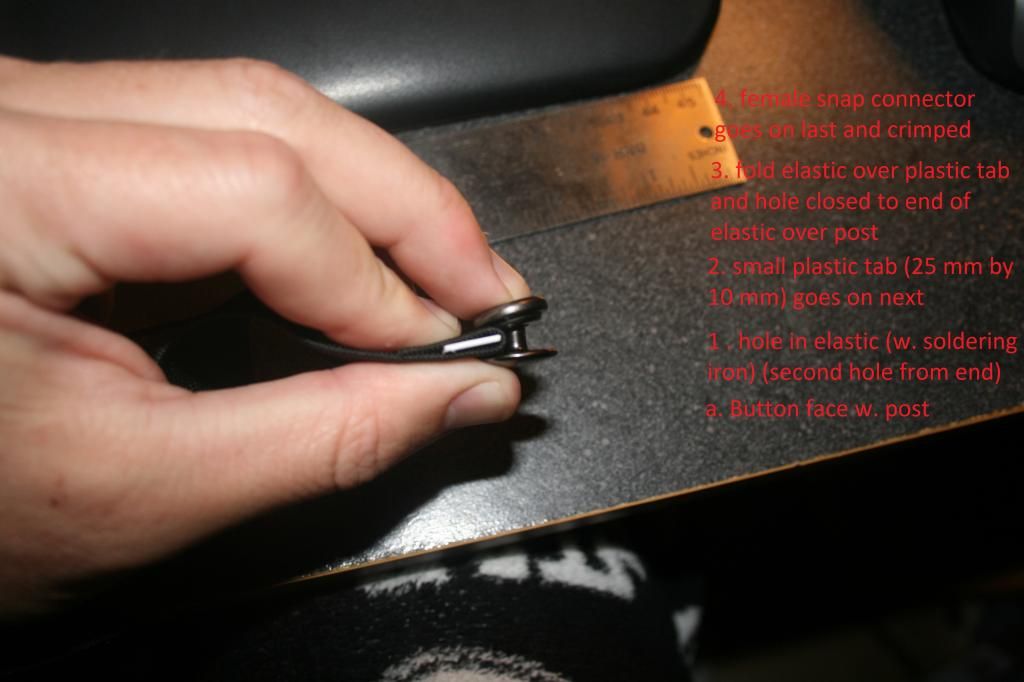
Does that answer your question?
And yes, these are Star Wars/stormtrooper pajamas.
Yes that does. I thought you were going to try to E6000 it or something!


AM 2.0 build (ANH Stunt) by Rystan
in Build Threads Requireing Maintenance
Posted
Hey Mike, what type of buttons did you buy?