Darth_Bethel
-
Posts
5 -
Joined
-
Last visited
About Darth_Bethel

-
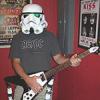
I'm a relatively new guy who will be applying for 501st membership soon. I've been working on my armor for about a month. I'm attaching a link to my build pics if anyone is interested. I want to thank "Stukatrooper" because most everything I did was based on his TM build guide. Your work is AWESOME. Also, thanks to Darth Nickel who has helped me figure this out since day one. Firebladejedi made me a great belt and of course TE2 for the armor and his kind, quick responses when I needed some extra plastic. I'm getting some professional pics tomorrow and will be posting them so check the link in the near future for finished pics of my armor. http://www.flickr.com/photos/30761804@N04/...7510456/detail/
-
I've been spending a lot of time on this lately. I have a LE Master Replicas "Hero" helmet that was kind of expensive. It comes with lining that I didn't want to mess up by attaching electronics. There isn't much room for headgear either. I got the radio shack mini amp and the powered tie clip microphone (item #33-3013) mentioned earlier. I wear a thin lyrica hood made by under armor over my head. Again this is an attempt to keep sweat off my helmet and keep it nicer. The mic wire just runs right under the neck seal and stays put on my bottom lip thanks to my stretchy hood. The mic is close so a light blow makes a great static burst. No cramped headgear, no big expense on an overseas sound board. The only drawback is that I have to breath through my nose or you'll hear me breathing. Hasn't been an issue though....
-
Although I made it confusing by mentioning a Vader helmet, I am actually trying to find out about the body armor. For example, the straps between the chest and back plate. Do you assemble (including straps) and then paint the whole thing? Or paint the body pieces individually and then assemble? I'm going to glue the straps so there are no rivets and it is screen accurate. I've seen some tutorials where rivets are used, but I think that is a 501st no-no. Anyway, I sort of figured I would paint the pieces first, then assemble. So I was surprised the order is assemble then paint. But I can see how it would be on a helmet... Same question for the trim pieces that top of the shins, arms, etc... So still asemble and paint?
-
A great paint job is a step away from a paint run. That was exactly my experience with the Vader helmet I was talking about. So, since flirting with disaster is the way to go... my next question is how to handle a paint run. Is there a product that is best suited to HIPS and rust-o-leum paint that will allow me to redo it if I mess up? A particular thinner / remover?
-
I'm a newbie and I'm awaiting a set of TE2 armor. I've come to the conclusion that Rust-o-leum paint is the standard and plan on using the white sandable primer and then gloss white. What I'm unsure of is how to prepare the armor and when to paint. I read a recommendation to use steel wool on TK409's website. Anyone have an opinion on this? Does the armor need to be "roughed up" a little first? I'm also wondering when to paint. Do you trim, sand, paint, assemble? Or do you trim, sand, assemble, and paint? I know you have to add shims to the legs and arms so I wasn't sure if they are painted ahead of time or what? Lastly, can anyone tell me the best method. Are several very light coats the best method? I recently painted one of those $100 plastic Vader helmets by Rubies gloss black and found that it didn't get "glossy" until I got the paint can close enough. It didn't come out that great because of the light coats that I had made prior. I don't want to mess the armor up once I get it. I have a lot more money into it than I did the vader helmet.