

Bloodwalker
-
Posts
26 -
Joined
-
Last visited
About Bloodwalker

-

TK 61138 Requesting ANH Stunt Centurion Status [296]
Bloodwalker replied to Bloodwalker's topic in Request Centurion Status
Thankssssssssssssssss!!!!!!! -
TK 61138 Requesting ANH Stunt Centurion Status [296]
Bloodwalker replied to Bloodwalker's topic in Request Centurion Status
I am truly happy. A thousand thanks to all of you for your incredible help. It's a honor to be a 501s member . Thanks again and very best imperial wishes. B. -
TK 61138 Requesting ANH Stunt Centurion Status [296]
Bloodwalker replied to Bloodwalker's topic in Request Centurion Status
Done. I have removed some of the return edges at the base. I think it works. This is a parcial frontal picture (I am redying my boots for the next mission and I can’t do a full frontal picture)… If it was necessary I’ll post it next year. Thanks a lot for your advices... and happy new year. -
TK 61138 Requesting ANH Stunt Centurion Status [296]
Bloodwalker replied to Bloodwalker's topic in Request Centurion Status
Thanks Andrew for your comments. Could you suggest me how can I do it? Maybe I could connect the biceps to the chest plate with snaps... would it be correct? Thanks again. -
TK 61138 Requesting ANH Stunt Centurion Status [296]
Bloodwalker replied to Bloodwalker's topic in Request Centurion Status
Done! Thanks. I think it looks much better. -
TK 61138 Requesting ANH Stunt Centurion Status [296]
Bloodwalker replied to Bloodwalker's topic in Request Centurion Status
Thank you very much for your nice commentaries. Do you mean these parts? I think it's a great idea and It makes the missions more comfortable. -
TK 61138 Requesting ANH Stunt Centurion Status [296]
Bloodwalker replied to Bloodwalker's topic in Request Centurion Status
Thanks for your words and for the AS advice (post edited). Merry Xmas. -
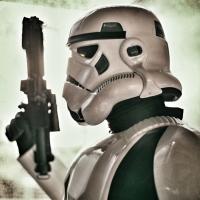
Name : Óscar González Legion ID : TK61138 Forum Name : Bloodwalker Garrison: Spanish Garrison URL EIB STATUS: http://www.whitearmor.net/forum/topic/39623-tk-61138-requesting-anh-stunt-eib-status-ata-660/ Armor = ATA Helmet= ATA Blaster= Painted Doopydoo's Kit Height = 182 cm Weight = 82 Kg Boots = Zaldi Canvas belt = Hand made Hand Plates = Hand Plate Type Neck Seal = Extreme Racing. Holster = Hand made Full Body 1. Front – Arms at side 2. Back – Arms at side 3. Left – Arm raised 4. Right – Arm raised Armor Details 1. Ab/Kidney Attachment – Button Orientation 2. Butt/Kidney – Fixed: No 3. Hand Plates 4. Shoulder Bridge Back 5. Shoulder Bridge Front 6. Back/Chest Connection 7. Thigh Pack Attachment 8. Knee Plate 9. Drop Box Back 10. Cod and Butt Plate Attachment Helmet Details 1. Front 2. Side 3. Back 4. Hovi Tip Detail 5. Lens Color (Backlit if required) 6. S-Trim Blaster Details 1. Blaster – Left 2. Blaster – Right Accessory Details 1. Neck Seal 2. Thermal Detonator – Back 3. Holster Attachment Action Shot New Interior
-
I have made new snaps for the armor, I have trimmed some parts and I have added Velcro in shoulder bells. I think it looks better...thanks...
-
Dear friends. It wasn't easy remove it so before I glue the biceps with the forearms I prefer ask you: Do you think this could be the correct lenght? How do you see?
-
Dear friends. Thanks a lot!!! I start with the modifications this weekend. I think the problem is my height... I must think how compensate all the parts. I hope next year it will be all ok to request centurion status. Thanks again. B. Enviado desde mi iPad utilizando Tapatalk
-
Sorry, here you are.
-
You're right: in the old pictures (outside with an ugly yellow wall) the thermal detonator doesn't have the control panel; I don't remember exactly why... I think I was waiting the correct screw. Now the thermal detonator has the control panel. .
-
Gracias compañero. Te he enviado un pm pidiendo consejo.
-
Thanks, Shawn and Brad, for your comments.<br><br> How do you think I could close the gap? Velcro maybe?<br> I am making new straps for chest and ab. Do you think I should put them at the left and right corner of the chest or/and someplace more centered?<br><br> Thanks again.