


sla73
-
Posts
151 -
Joined
-
Last visited
Content Type
Profiles
Forums
Gallery
Articles
Media Demo
Posts posted by sla73
-
-
Nerve racking work for sure.. Excellent outcome..Hi All,
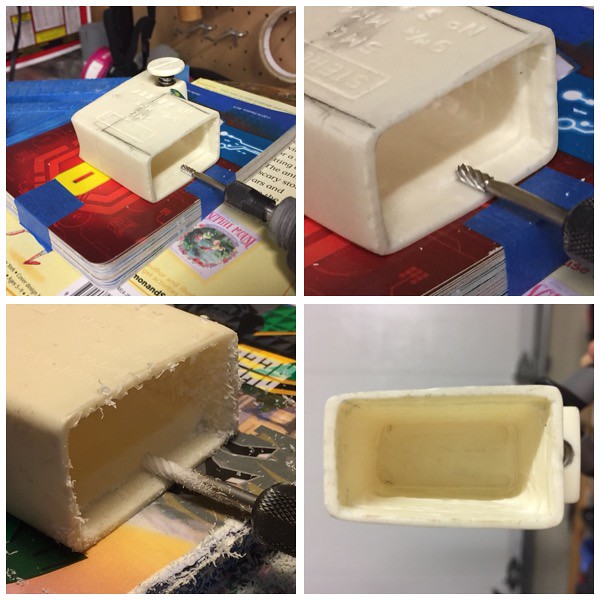
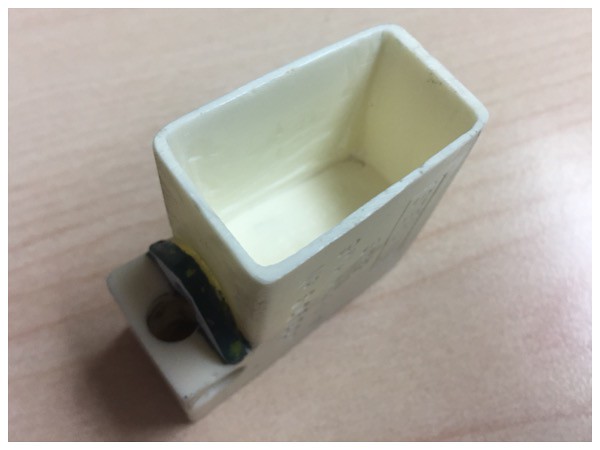
I set about to do some precision work here on fitting my custom magazine into my modified doopydoos magazine housing. I managed not to break the magazine well when dremeling to thin down the walls. Let's just say I slept well last night and had many sighs of relief. To fit the magazine, further nips and tucks were needed to get it to fit just right. The same goes with the thinning of the walls. After dremeling, used a square file to corner out the inside of the hollowed magazine well.
Spent 40 minutes on the dremel getting out the remaining resin inside my hollowed out magazine well. I borrowed this set-up from a genius TK who posted a while back which gave me the confidence to come at this task. With a low rotation setting on my dremel and the right dremel attachment (this little attachment has been very valuable: thanks Dan for the recommendation), I was able to keep control and dremel away at the 1 to 2mm of resin that remained, and so widening the well to desired.
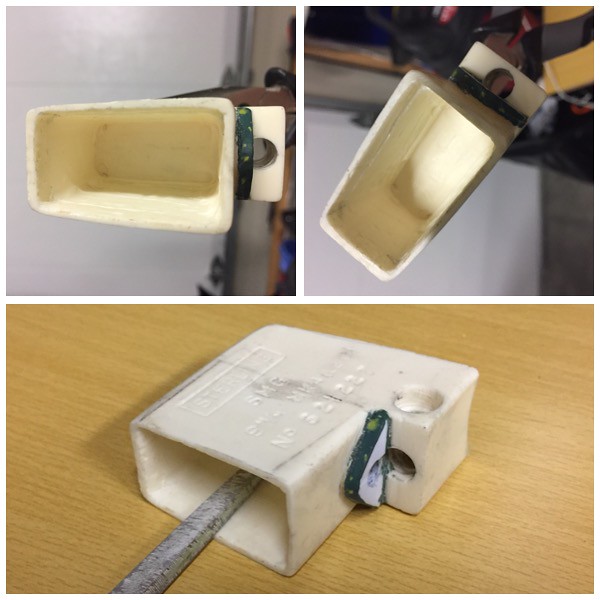
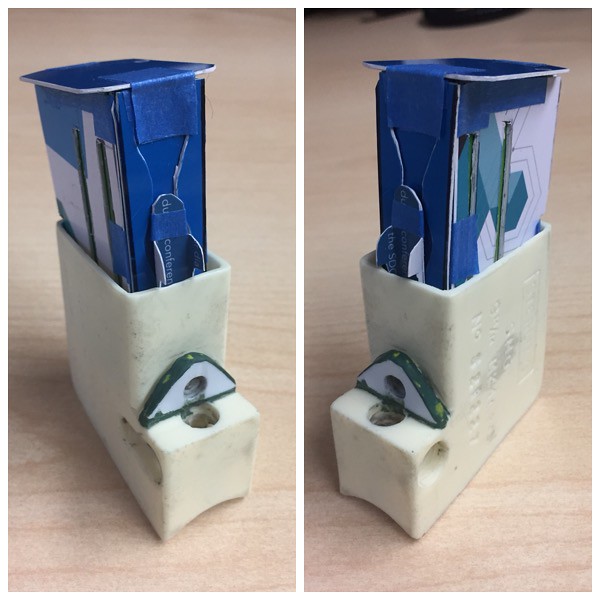
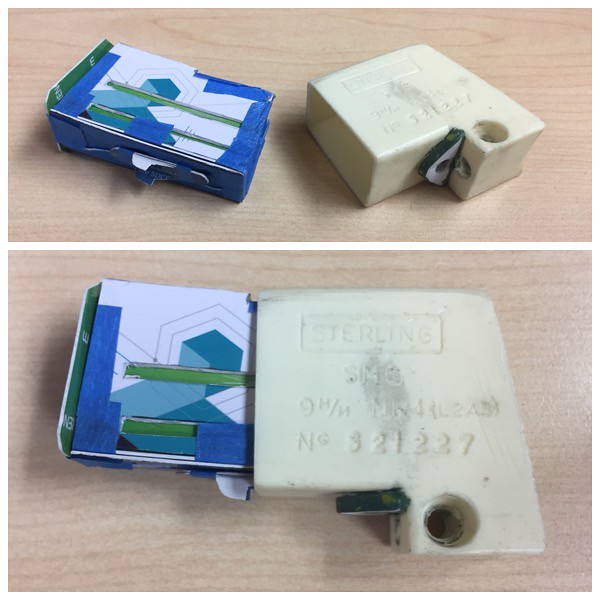
Further revisions to custom styrene plastic magazine for fitting into modified doopydoos magazine housing - magazine now fully inserted inside magazine well
Magazine well further thinned and corners on the inside made sharp to take in custom magazine
Micro revisions to custom styrene magazine and magazine well completed - two pieces fit well together with the precision I want - more plastic was cut away from the magazine and more resin was filed away from the magazine well. I also managed to scale down the magazine latch, I'll call it, and have it's corners come close to the magazine well opening. I also managed to do this with the corners on the back end of the magazine as well. Some curvature to the magazine was also captured too, which further lends to a realistic interpretation of the piece. thoroughly happy with these details as I had contemplated on how to capture them for quite some time.


Well, that's all I wrote - until next time and have a terrific weekend!
Sent from my F8331 using Tapatalk
-
 1
1
-
-
I can see some nice detail coming out in this build :).. Watching..
-
wow..............................!!!
-
1
-
-
On 11/22/2017 at 11:52 PM, CableGuy said:
Many thanks, Bryn. I've just refreshed my memory of your build - it really looks superb. I'll try to get my ejection port/bolt colouring as good as yours. :-)
Cheers,
Dan

Thanks Mate, that build seems such a long time ago... Am loving all the great new tweaks and build techniques in all the latest builds!
-
1
-
-
Well done Dan, a great looking blaster! And done in record time too! - I love blaster builds!
-
1
-
-
Excellent build so far Jesse, can't believe I missed this one.. following now!
-
I have a replica one that I bought from Blue Snagletooth about a year or so ago.. I have since upgraded. PM if you aer interested.
-
Hey Chris,
I just got my replacement cheese-head scope screws for my M38. Fantastic work mate, I have been looking for replacements for a few years now!
They look perfect!

Cheers Bryn
-
3
-
-
Great build so far Jesse! And I also love the digging out the tiny spaces where the t-tracks go in!
Following
")
-
wow, those power cylinders look great!
-
Looking good there Chris!
-
following for sure..
-
On 02/08/2017 at 1:41 PM, tennantlim said:
I just started on my build and your thread provides a wealth of useful information and tips. Your blaster looks great!
Thanks Tennant,
It has been a while since i completed this, glad that my build is still getting a few views..
-
1
-
-
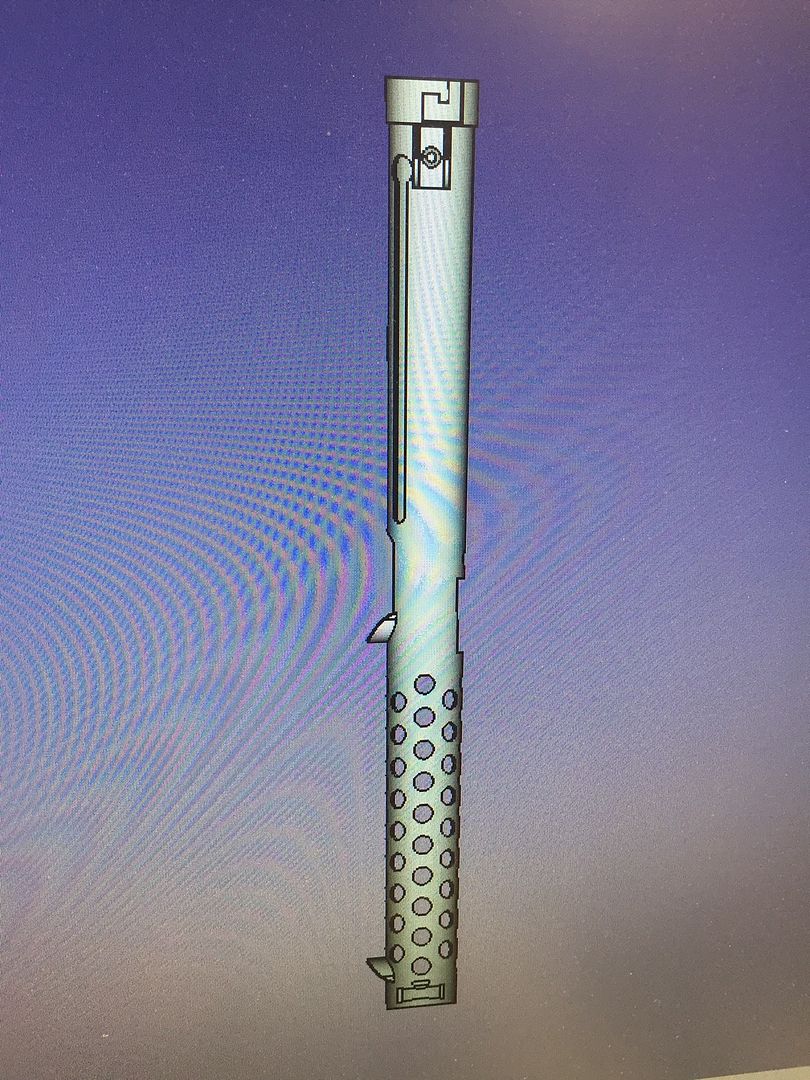
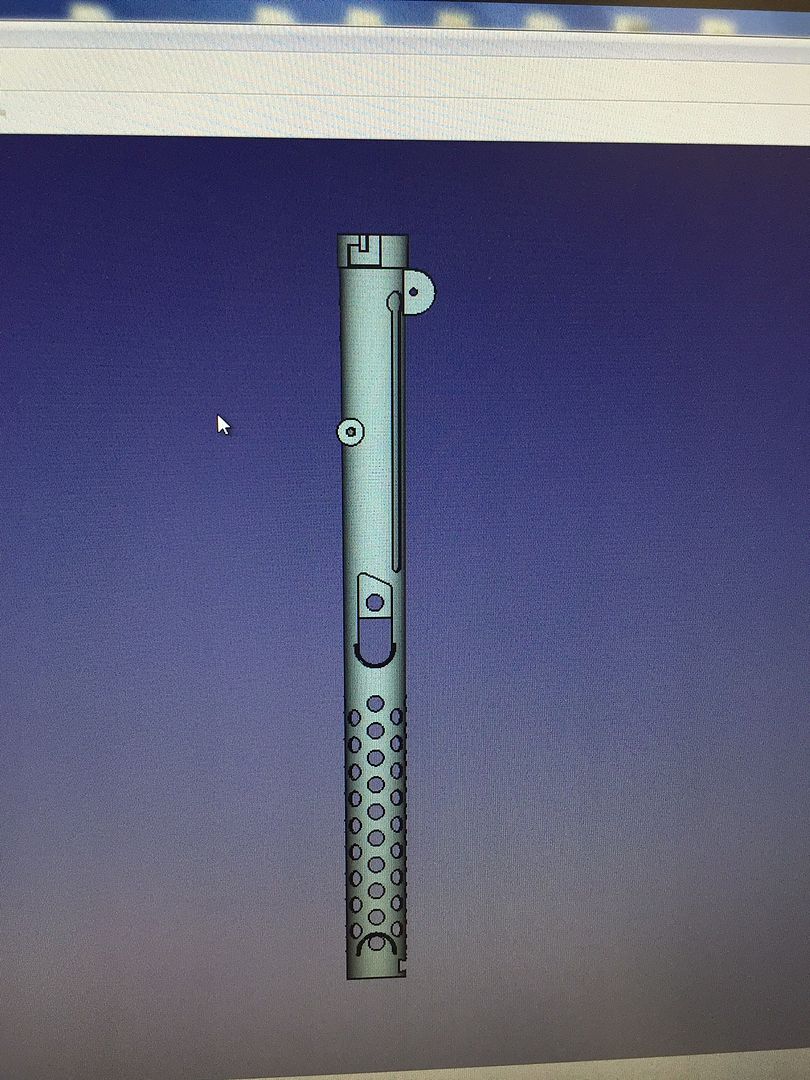
On 31/07/2017 at 9:59 PM, CableGuy said:
Hi Bryn,
Great thread, and a wonderful result! I may have missed it but, do you have any pics or details of the part you made to go inside the barrel please (with the spring and cocking handle attached)? Did you make this using a PVC pipe? I've got my DoopyDoos kit on order and want to be as prepared as possible.
Many thanks,
Dan
Hey there Dan, I will have a look for you..
Have a look at the pic's on my gallery for how i did the bolt etc.. Really it was cosmetic on the outside (ejector port) and I used a marker shoved into a PVC pipe that came with TJ's completion set.. I finished both the outside and the bolt with a flat piece of plastic shaped and glued on..
Here is a pic before I painted the barrel/ PVC pipe..
http://i.imgur.com/OQiABnG.jpg
Cheers Bryn
-
1
-
-
-
16 hours ago, fieldmarshall said:
My Tshirtguns at celebration,,,, captured by REBEL forces .................................................................
https://www.youtube.com/watch?v=8odorUOSLv4
https://www.youtube.com/watch?v=szQpBockwlQ&feature=share
ha ha ha so cool..
-
2
-
-
Garden sprinkler?

Sent from my iPhone using Tapatalk
lol
-
e11 sterling cad file ready for machine ops
I'll never get that through Australian customs

-
2
-
-
P.S. did anyone find any prisms for these scopes?
-
1
-
-
Bloody hell Brian, I just got my M38 scope in the mail from you and it is AMAZING!!!
I have a feeling that I may need to get another one from you just to keep one in the box as it is.. (def a collectors item as it is in the box)
Extremely impressed on this whole package - the casting quality, packaging, instructions (WOW) - Unbelievable stuff mate!
Cheers Bryn
-
3
-
-
wow, what a very cool fun build artimorty!
-
1
-
-
Yeah, I was hoping to submit Centurion application with my own blaster. Well, have to move on.
Sent from my M631Y using Tapatalk
I have the same problem here in Australia, luckily for my first build my doopy kit got through customs. But for my second build I have been ordering the parts separately from a few diffident sources and all bits have got through so far.. I think all I still need is the pipe..
Good luck Syahrin!
-
Hi Brian,
Got the invoice, all paid.. Lots of effort gone into this project!
Really looking forward to including this scope in my next build... when I get around to it!
Cheers Bryn
-
2
-
-
Bummer dude..
-
1
-


Fieldmarshall build
in ANH BlasTech E11
Posted
wow, amazing.. how the hell can I get this into Australia!?