

TxtbookNinja
-
Posts
17 -
Joined
-
Last visited
About TxtbookNinja

-
Jordan's AM Build - Noobie (ANH Stunt)
TxtbookNinja replied to TxtbookNinja's topic in Build Threads Requireing Maintenance
Wanted to drop by and give an update. I just received my acceptance into the 501st! TK13375 - Mountain Garrison reporting for duty! Thanks so much to everyone at the FISD that helped and for all the information provided, I owe it to you all. -
Jordan's AM Build - Noobie (ANH Stunt)
TxtbookNinja replied to TxtbookNinja's topic in Build Threads Requireing Maintenance
Aha yeah the plate got knocked off the Halloween night and i made a quick fix with some tape., I've fixed it since then. Ill look into some new hand plates asap and currently looking for a new helmet. The fx helm Wont hinder 501st application tho will it? Thanks! -
Jordan's AM Build - Noobie (ANH Stunt)
TxtbookNinja replied to TxtbookNinja's topic in Build Threads Requireing Maintenance
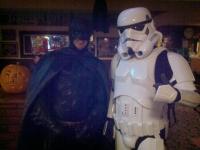
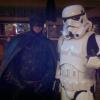
And Im back! Apologies for the long break, got put on a crazy schedule for work after being assigned to a nightmarish project. But Im finished and Ive made adjustments to my armor in hopes that I may be near completion. I fixed the situation with the helmet getting pushed up by the chest. I ended up putting in two straps that go from near the top shoulder portion of the chest down to the ab plate, after I did this it pulled the chest down a bit more snug and stopped clipping my helmet. Adjusted the sniper plate and added padding to the back of my thigh pieces so that the sniper plate now sits in front of the thigh as I walk around. Ive worn it out about 3 times since I last updated, each for about 3-4 hours. Its pretty comfortable to wear aside from the back of the knee - its pretty painful to use stairs or kneel, I think I read that might be normal though. Not sure what else I can do about it aside from trim a bit more from the back/bottom of the thigh plates. Anyway, I wanted to check with you all again to see what you thought or what else I could adjust before I go for my 501st application. Here are some more recent photos with the full armor on, and one very recent one of me running into the dark knight in the pub on halloween that gave me a chuckle. -
Jordan's AM Build - Noobie (ANH Stunt)
TxtbookNinja replied to TxtbookNinja's topic in Build Threads Requireing Maintenance
Hmmm, running into a weird issue, perhaps someone could help me out with this or point me in the right direction. I was able to correct the thighs so the sniper plate is visible, but now running into an issue with the bottom of my thigh armor hitting the top of the sniper plate while walking around. I'm really sorry I don't have pictures at the moment as I'm still waiting for a new phone. I've thought about getting rid of the return edge on the sniper plate, but that might make it look odd. Second issue Im having is the helmet bumping the top of my chest and decreasing mobility as far as turning my head is concerned. -
Jordan's AM Build - Noobie (ANH Stunt)
TxtbookNinja replied to TxtbookNinja's topic in Build Threads Requireing Maintenance
Thanks Derrek and Steffen, Ill start working on those adjustments this week, hopefully have another update this upcoming weekend. -
Jordan's AM Build - Noobie (ANH Stunt)
TxtbookNinja replied to TxtbookNinja's topic in Build Threads Requireing Maintenance
Excuse my lack of updates, trashed my phone which I was using for update pics. Been working on the suit regardless while I have found time. Ive gotten to a near complete point I think. Again, I am not going for EIB at this time, just 501st approval. Please let me know what I can improve! Thanks so much, everyone has been a great help on FISD. -
Jordan's AM Build - Noobie (ANH Stunt)
TxtbookNinja replied to TxtbookNinja's topic in Build Threads Requireing Maintenance
So I decided to get started on the thighs. I'm not sure if I did this correct or not as I couldn't find any threads or instructions for them so I continued to work on them the same way I did the shins. I put a strip on the inside and outside already, used e6000 so if I did it incorrect I think I can still take them apart. I'm planning to trim from the back to fit if that works. Can someone confirm if this looks correct or if I should be doing these a different way? -
Congrats Isaac!
-
Jordan's AM Build - Noobie (ANH Stunt)
TxtbookNinja replied to TxtbookNinja's topic in Build Threads Requireing Maintenance
Just a quick update. Waiting for glue to set, tried on everything multiple times before I glued. Im feeling pretty good about the forearms and biceps. Finishing up the second shin - left side. I think the first one came out well, but Im not too sure, I think I may need to trim up the back a bit more because it overlaps a LOT - maybe thats ok when using velcro to close them up? Not sure... Also - I got my boots in! Yay! Once the second shin is finished and I can free up my clamps Im going to start on the thighs. I will probably hit you all up again for more information. -
Jordan's AM Build - Noobie (ANH Stunt)
TxtbookNinja replied to TxtbookNinja's topic in Build Threads Requireing Maintenance
Thanks a bunch Brian. Great help as always. Ive glued the forearms and took them off and on a few times and made sure they fit, all seems well so far. Moving on to the shins this morning following this guide: http://www.whitearmor.net/forum/index.php?showtopic=16608&hl=am%20shins&st=0 Hope Im following it correctly, I was a bit confused at first, but read it over a few times, and I THINK I got it. I started trimming and joining the front of what I believe is the left shin. Three questions: This would be my left shin correct? Looking at the middle photo, this is where I would apply the cover strip? Looking at the photo on the right, Im supposed to overlap the opposing side onto this integrated cover if I need more room and remove it if not? I apologize for all the questions as well, but I really do appreciate all the help. -
Jordan's AM Build - Noobie (ANH Stunt)
TxtbookNinja replied to TxtbookNinja's topic in Build Threads Requireing Maintenance
Cool, much appreciated guys. Yeah I do have all the supplies. Just nervous about starting to use them which is why I haven't glued or trimmed anything besides the biceps. Ill set the large pieces aside like you suggested. The biceps I think I'm happy with when I tried them on they fit snug around the lower part but give enough room to move and flex without moving around. I did use the overlapping method with biceps and the forearm though, when I was testing out the butt joint on the forearms they seemed to fit awkwardly. I will however do the butt joint on the thighs and shins as suggested, I've bought the supplies for making a canvas belt so I think I have enough extra ABS to make the strips for the butt joints when I get there. When I do the butt joint method, how large should the strip be that covers the seem? Just enough to cover the gap, or enough to cover the entire flat portion? Started work on the forearm this morning also, I did some slight trimming to fit about 2 inches (angled) from each side of the inner portions . I think Im ready to glue them, wanted to check with you all first though, here are some pics: -
Hi everyone, got my AM armor about a week ago. Been working on it off and on while researching here and there on the forums. Ive got a few pieces semi assembled but hardly any trimming or gluing yet aside from the biceps. I mustered up some confidence to finally glue and trim some of the return edges off. In any case, wanted some help and pointers on what to focus on right now before I start working on the forearms, shins, and thighs. Im not really sure if the mid back should be touching the ab plate or not, and if it is, how should I solve this issue? Maybe its because I just dont have the belt applied yet? Also I have an FX helmet and it ever so slightly rubs against the chest armor and bumps the helmet every now and then and I lose sight. And lastly, most builds I see trim the back piece so it just lays flat on the back, is there a thread I can refer to for the correct place to trim the sides off? Other than that Im just really looking for any advice and help available. Dreading moving onto the thighs and shins. Especially the shins since I read that AM shins are screwy.
-
Isaac, your build looks great! I'm actually looking to yours as a reference since I'm a fairly big guy as well and just started my AM 3 days ago, and your build thread pretty much asked all the questions I had. Congrats, as Im sure you will soon be getting your 501st/TK#!
-
I did not swap ears. I ended up just measuring the gap then I taped it in place. I removed the left ear and drilled new holes below the originals the same distance that I measured earlier with the gap. I didn't do any trimming, not sure if I needed to, but it seemed to fit well enough after I moved it.
-
Thanks for the help! Im going to continue on then, might even get better after I finish gluing and tightening the screws a bit. Update: Finished the helmet completely. I took Leper's advice and moved the screws down an 1/6" on the left earpiece and it fits pretty well now. Jutted up a bit on the bottom, but fixed that with a bit of hot glue. Now I just need to fix the frown decal D: Thanks again for the help!