


Dutchtrooper
-
Posts
50 -
Joined
-
Last visited
Content Type
Profiles
Forums
Gallery
Articles
Media Demo
Posts posted by Dutchtrooper
-
-
-
looks like I'm stuck, can't upload more photos. will need to see how others are posting photos for this.
-
-
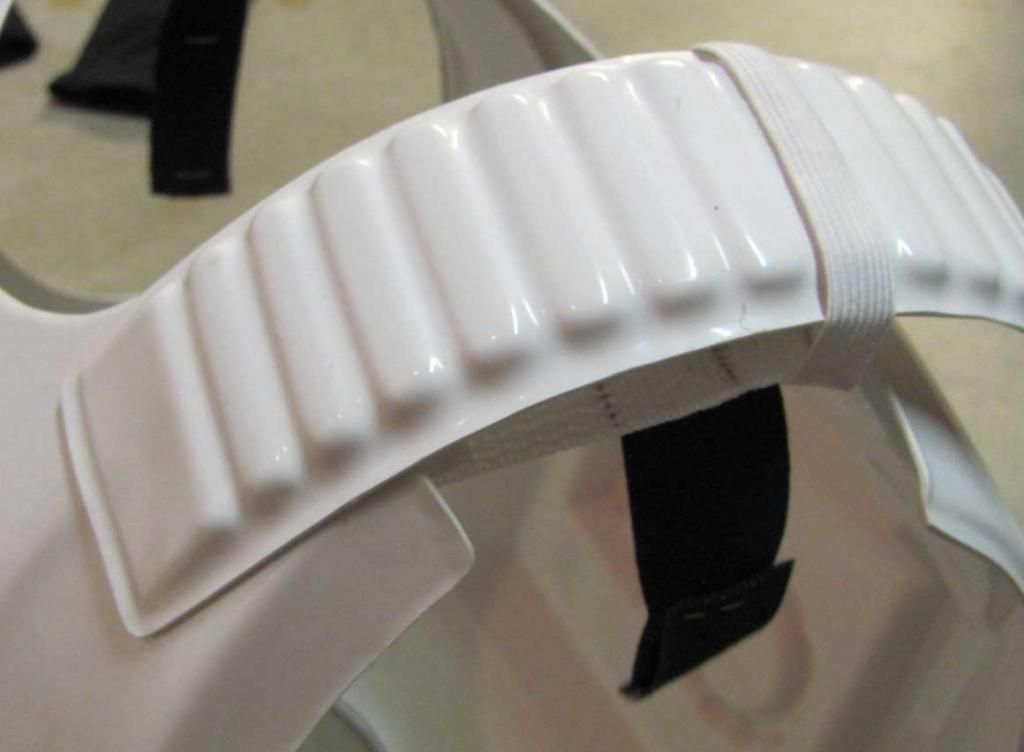
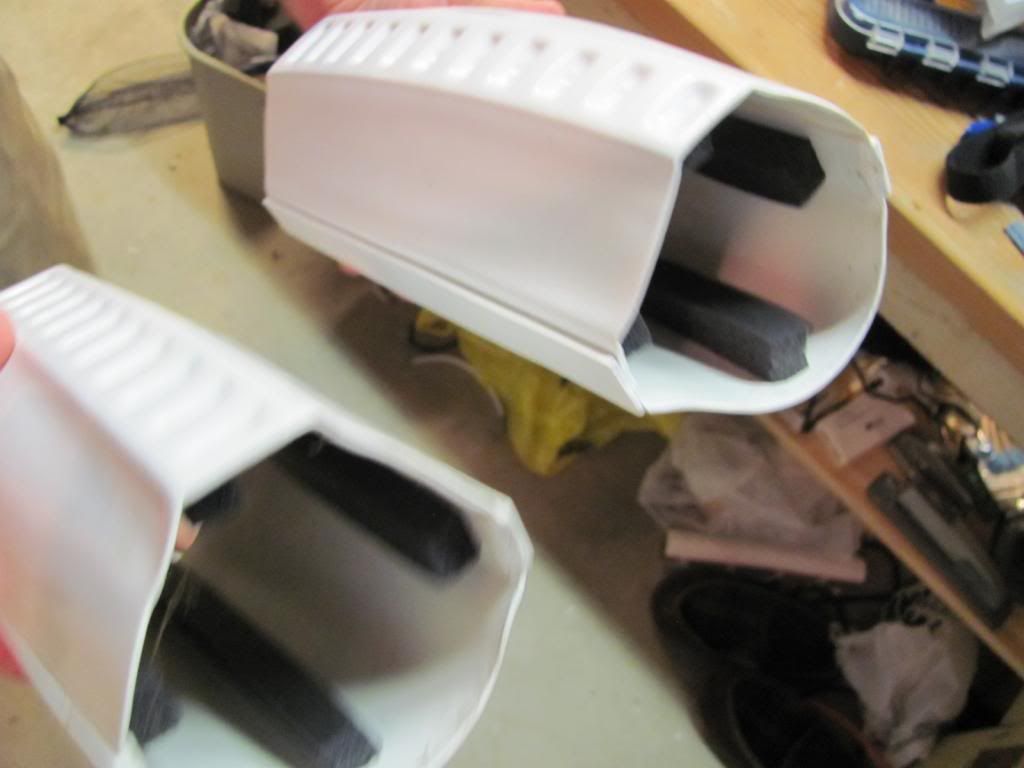
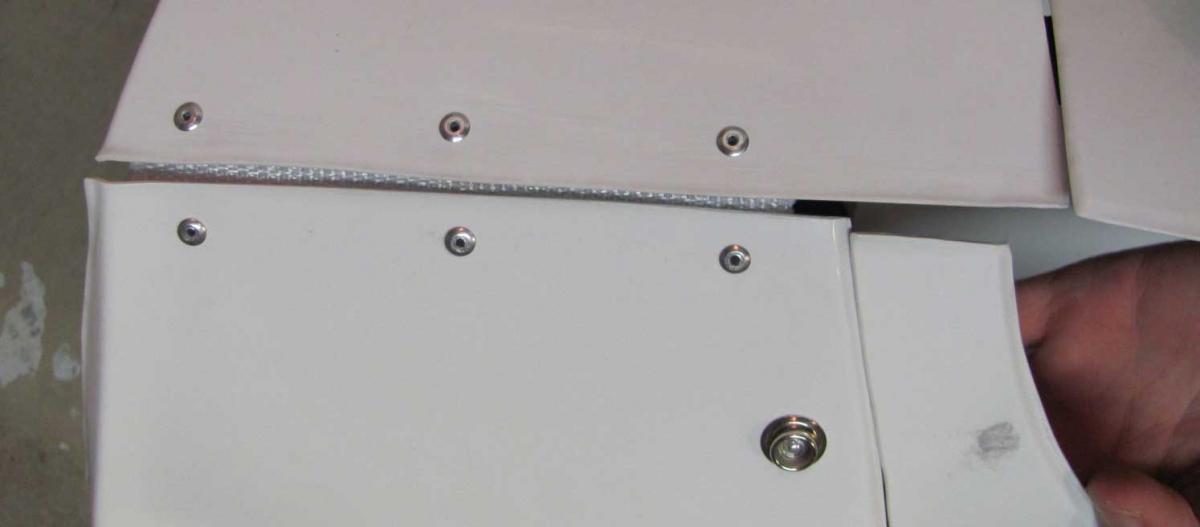
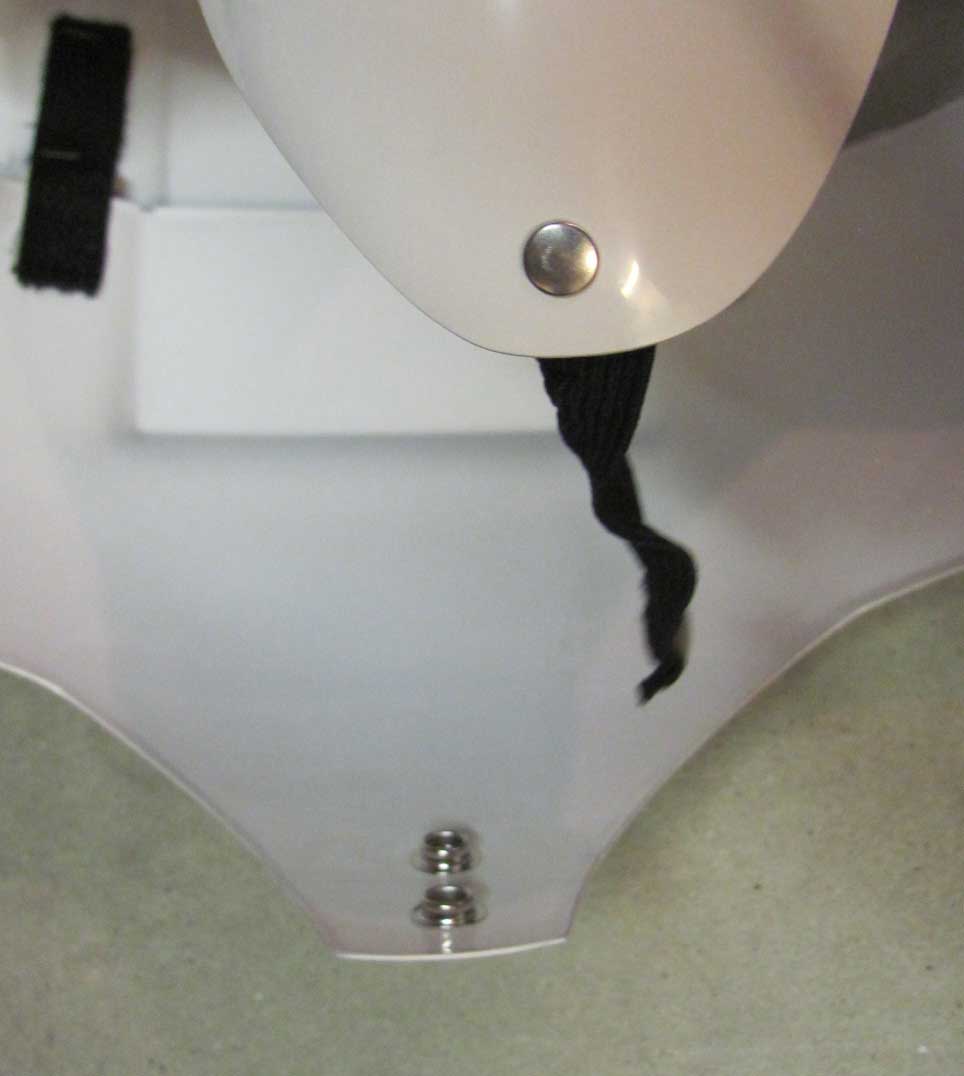
Just FYI when you get to the buttons that get glued onto the stomach plate. don't cut them down to fit inside the indentation. Leave enough lip around the outside so that it lines up "flush" around the framed outer edge of the indentation. The kits are made for sandtroopers too and leaving those stomach buttons off is what the sandtroopers do.
I made the mistake of cutting those buttons down too much to fit inside of the sandtrooper indentation on the stomach piece. I had to reorder the buttons and glue the new piece over the top!
I hope this makes sense, but it was a minor detail in keeping me from getting EIB or Centurion, yet this detail is not mentioned ANYWHERE. You just had to notice it.
-
Is there a link somewhere to get the conversion up to EIB approval status?
-
My kenner e-11 conversion w/doopy doos resin doesn't have the lower things shaved or the extra holes across the bottom. Can someone point me to a thread that has these details???
I might just splurge and get a sci-fire, but if the updates aren't too crazy, it's not a lot of extra work!
-
No news. Looking for a chance to retake photos. Looking to update in the next couple weeks. At least I got my paper done! Lol. Thanks for being patient and looking forward to sending updated pics.
-
My bad!
Yeah I should know this as a graphic designer. I'll edit the original post once I'm done typing this 10 page paper I have for a PhD class. Instead of doing this to procrastinate, it will be my reward for getting homework done!
-
Hello,
PICS POSTED IN REPLY POST BELOW.....
1: Your Name : Nic Bongers
2: Your 501st TK ID # 6459
3: Your FISD forum name: Dutchtrooper
4: Your Garrison: Great Lakes Garrison
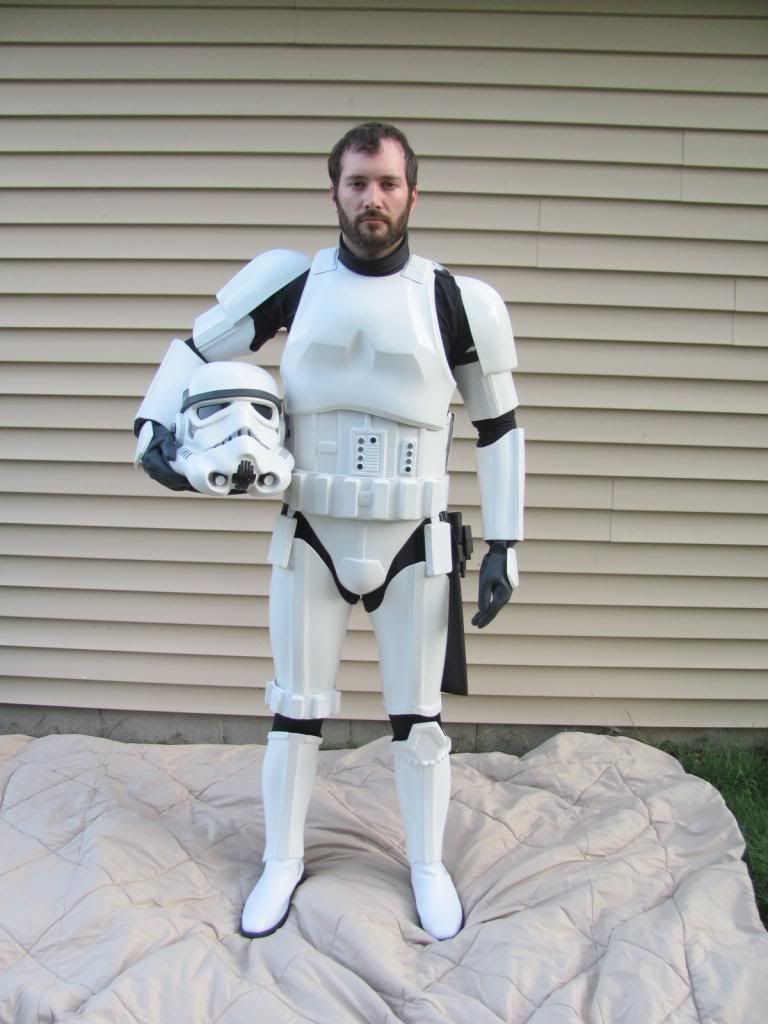
Armor = ATA Works
Helmet= ATA Works
Blaster= Hasbro DoopyDoos Coverted
Optional
Height = 6'1"
Weight = 182 lbs
Boots = TK Boots
Canvas belt = Home made
Hand Plates = ATA Works
Neck Seal = TK409.com
Holster = Handmade
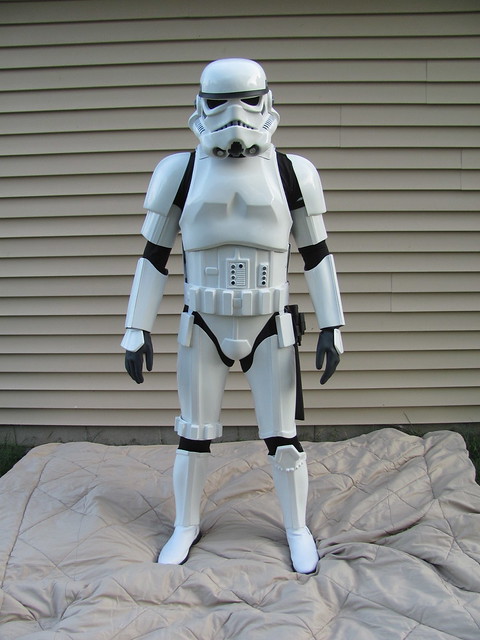
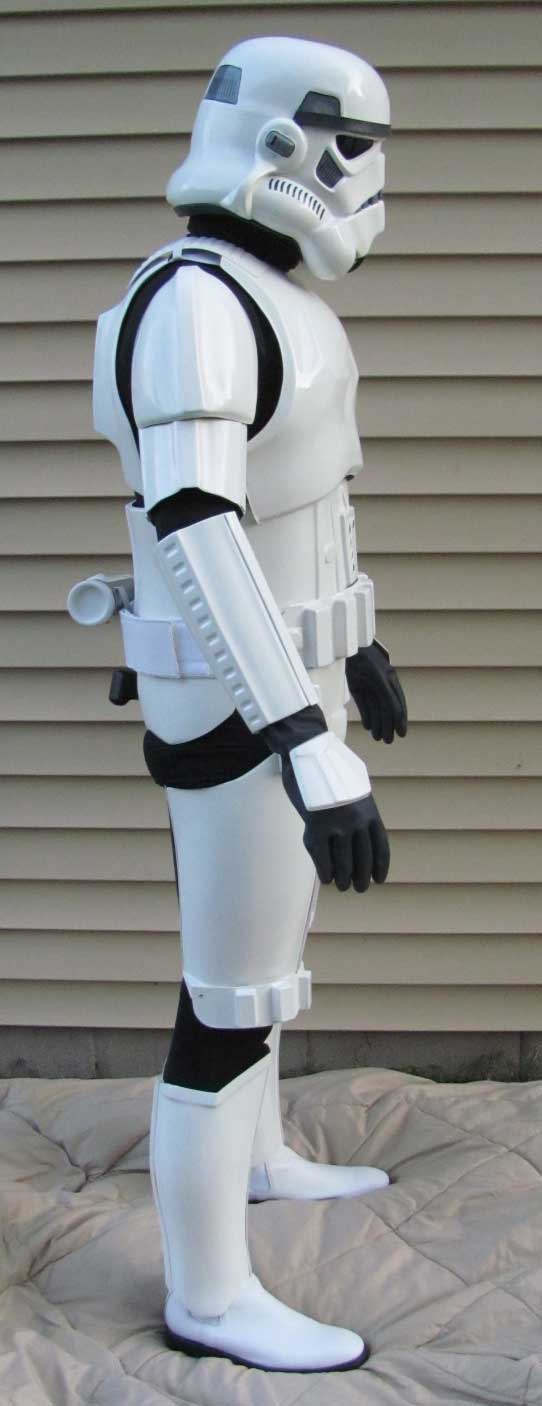
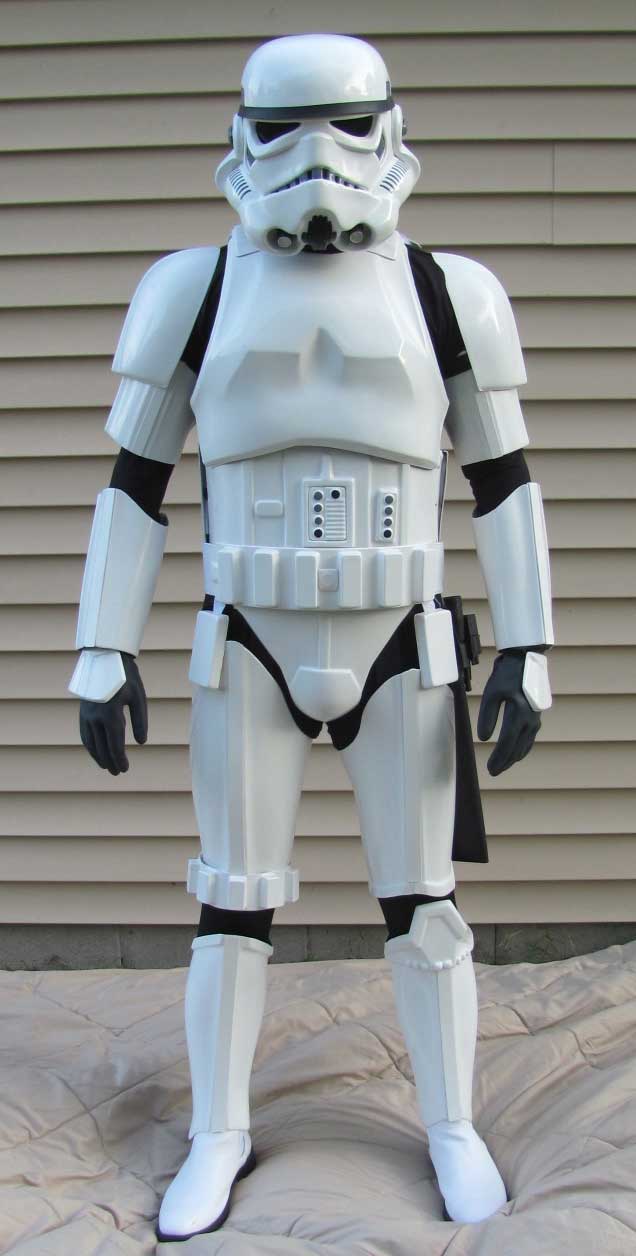
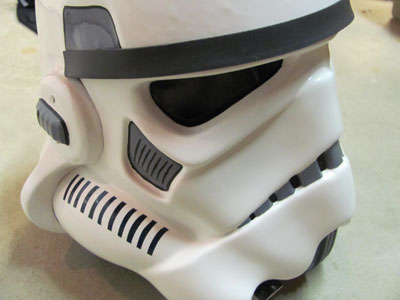
I got my ATA Works TK armor (ANH Stunt) approved by 501st Great Lakes Garrison back in July 2012.
Attention to detail went as far as n00bily possible.Humbrol blue paint, etc... handpainted helmet.
Photo should cover the details. I tried to cross off all the criteria on the EIB list with success.
I've been told by others in my garrison it should pass EIB. I sure hope so! On the details, since I have the hard hand plates, a hasbro converted E-11, and is missing a hero popper on stomach plate... it is not quite up to Centurion status. Hopefully the photos in the link are acceptable. I already learned that photos are better taken with biceps pushed down more, etc. That's an easy adjustment if these photos aren't acceptable. My shoulder bells are velcro'd on and can be adjusted to appear tighter as well. These photos were taken back in July when I first tried on the suit. Since I've been trooping I've learned how to adjust to make it look better.
Dutchtrooper
TK6459 -
Please enable me for TK6459 for 501st status.
http://www.501st.com/members/displaymemberdetails.php?userID=14738
thanks,
Nic
Great Lakes Garrison
-
edited (double post). see below

-
Links to patches and beret brings up an error... HELP!

-
OK I have gotten absolutely frustrated to the max extreme!!!!!!!! I can't push any further, I don't have enough magnets and they're expensive as heck. I don't have any power tools or access to them. I have almost reached the point of throwing this hyper expensive box of plastic out the window. I am just stuck. Any local dudes out there in the Portland, OR area? I have reached my wits end and you , the 501st, are my only hope!!
Plz message me on here or on the cloud city garrison forum. PLZ!! Thanks you guys!!
- Go to 501st.com and find your local Garisson... there should be a member willing to meet up with you and show you their armor/how they did some things. I found a guy 10 minutes away form my house, and he was very open to me stopping by to see his armor and take reference photos.
- You don't need power tools. For gluing this together, a lexan scissors, carpet knife, long ruler, sandpaper, and clamps should get you far. It took from November-July to finish mine, and I thought I'd have it done in a couple of weeks. Boy was I wrong.
- For what it's worth, I didn't use magnets at all for my build - but I did use strips of wood and heavy duty (not the plastic) clamps from the hardware store. Since I didn't have a lot, I had to do them on glued side at a time while the other side was masking taped (for placement.)
- Go to 501st.com and find your local Garisson... there should be a member willing to meet up with you and show you their armor/how they did some things. I found a guy 10 minutes away form my house, and he was very open to me stopping by to see his armor and take reference photos.
-
Could you modify the drop boxes?
I wanted to do this initially, but the dropboxes don't fit cards width-wise.
-
Most everyone in the Great Lakes Garrison has the Stanley ones from the Home Depot. I got one myself and I love it. It's a little hard to fit into the trunk of my Imperial Hybrid though!
-
... So my ab buttons are "inside" the Sandtrooper box on the ab armor, and they should be protruding out from that box. So I need to re order the ab buttons and not cut so much off, and re-glue for EIB or Centurion....
But I got approved!
I am now TK 6459

-
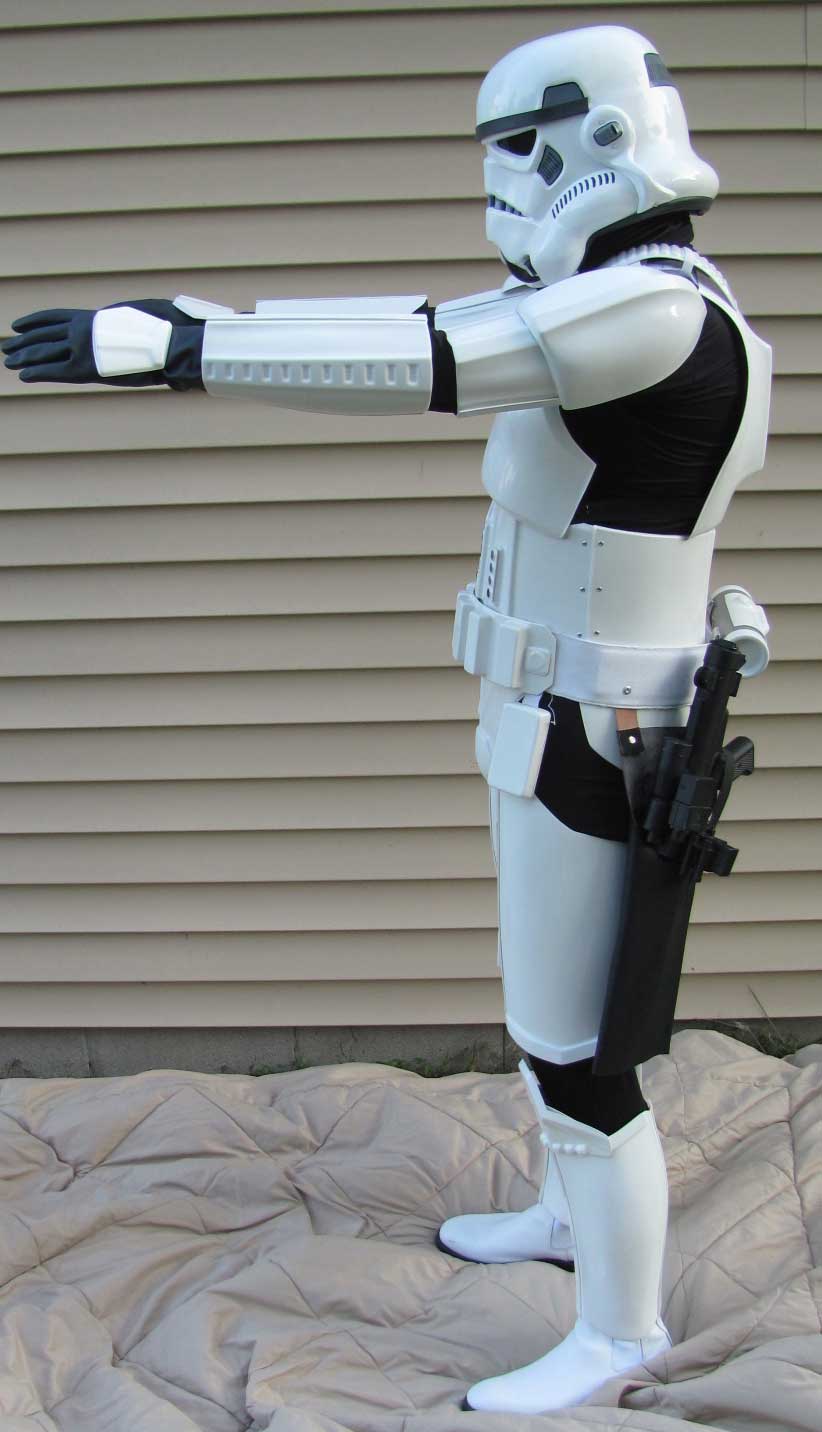
Another good looking ATA
One or Twoe things I would recomment.
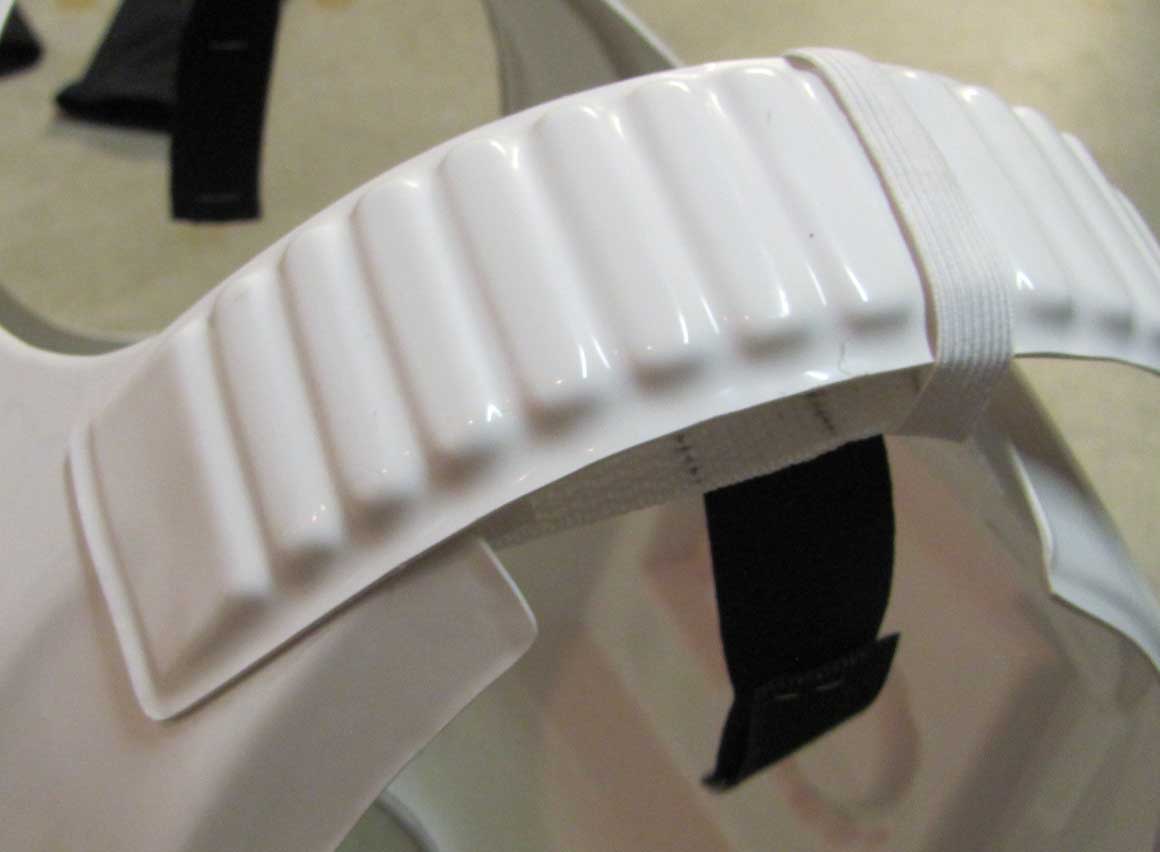
Bring your Shoulder Bells closer to the Shoulder Straps, and try to close the Cap between Forearms and Biceps a little bit more.
Many thanks!
The shoulder bell distance from the shoulders vary in millimeters because I have an elastic strap that velcros to the top of the shoulder bell. I'll simply "choke up" on the velcro next time I attach them. I found the velcro works better than a button because adjustments like this are much easier. Carrying around extra velcro in my case won't be a big deal.
I put the forearms on in haste, since they're the 2nd last thing I put on. They fit nice and tight, I should have pulled them up a little bit more for the photos.
-
Pending approval!
Height = 6'0"
Weight = 180
-
Helmet, Armor, and Thermal Detonator = ATA Works
-
Boots = TK510 Hollywood F/X TK Boots
-
Canvas belt = homemade per whitearmor.net specs
-
Gloves = black rubber chemical gloves
-
Electronics = None so far
-
Neck Seal = TK409 neckseal
-
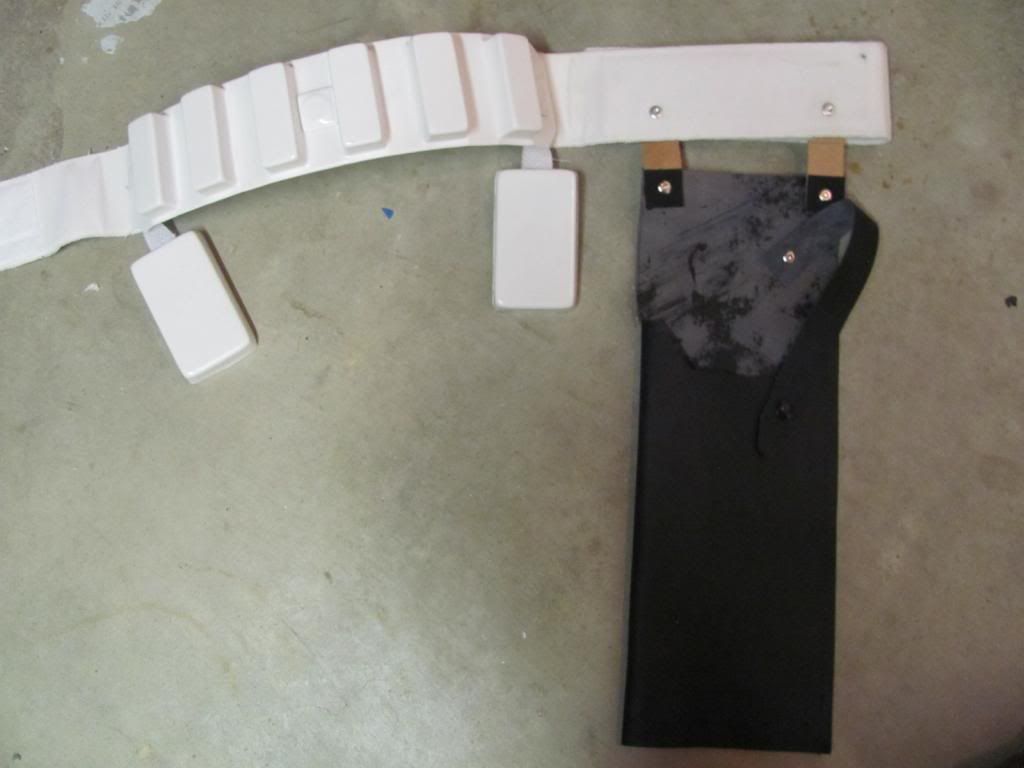
Holster = Bob Stout, real leather holster (Jacksonville, FL)
-
Inner Drop Boxes = homemade
-
Thermal Detonator Clips = TK 4702 Jesse McClear (home modified to fit ATA Works 2" pipe)
-
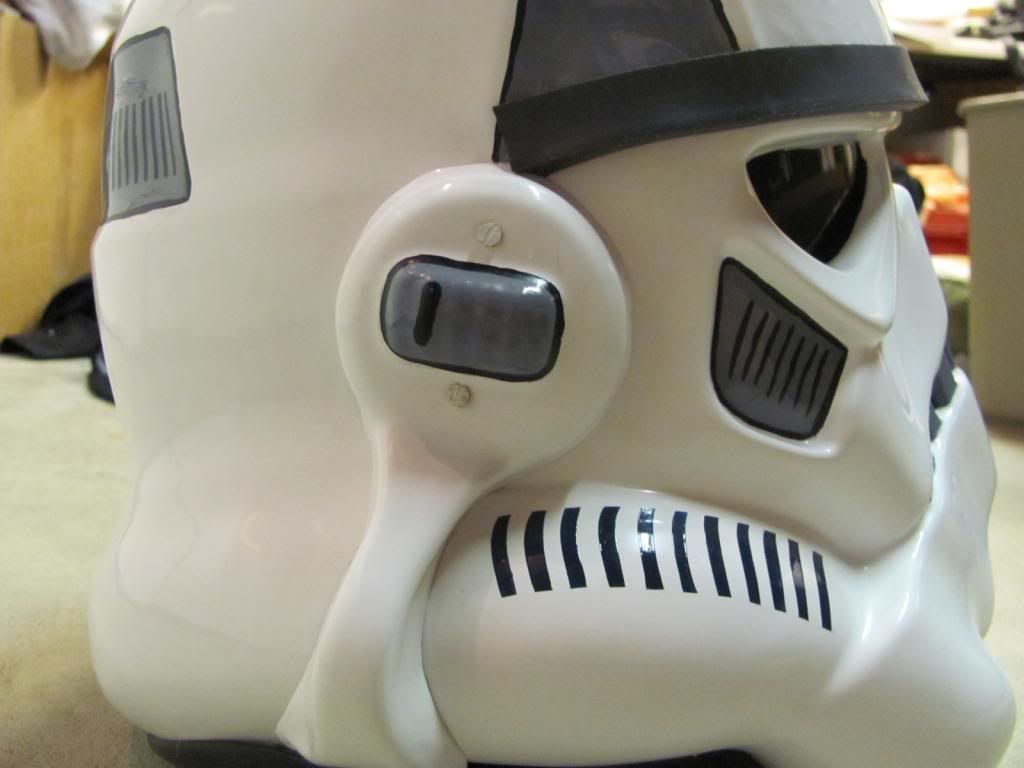
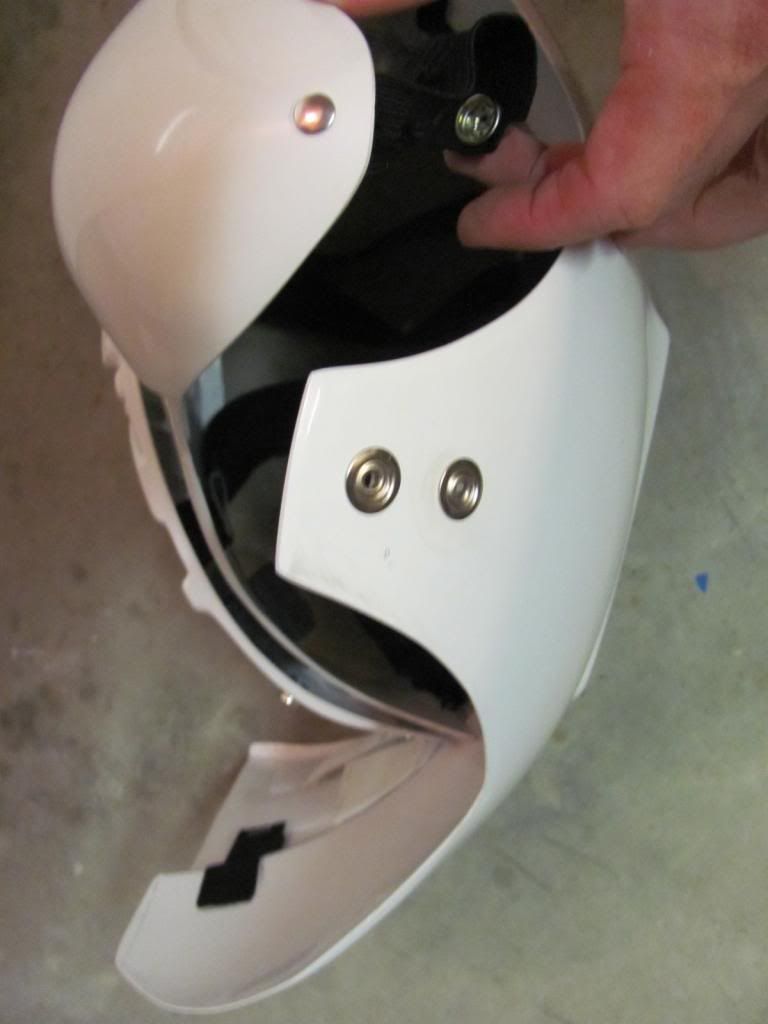
Paint on helmet & Buttons: Testors black and gray, Humbrol Blue
-
Helmet, Armor, and Thermal Detonator = ATA Works
-
Ha. yeah! You'll find that having a test piece for armor and even the belt is going to be to your advantage. Always test first on something else. I had to get creative with a mistake we did on our armor, and after that I learned my lesson!
-
I drilled one just large enough so the screw could easily go though it. Try the drill on a test piece of plastic before going "live" on the helmet.
-
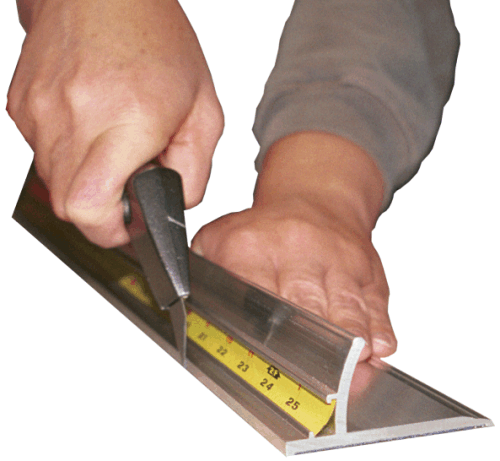
I would reccomend some neodynium magnets to hold the helmet and armourparts toghether when adjusting and glueing parts together. Do check out the concept of "score and snap" as this will make your life easier. The lexan scissors are a greeat tool also.
Take yout time, and maybe ask some nearby troopers for some insights?
As a graphic designer, I'm awesome with an xacto blade, or a carpet knife. A safety ruler is a good investment too. I didn't realize I could score and snap until after cutting half my stuff out with a small lexan scissors and a pretty raw edge too I had to smooth up with sandpaper. Score and snap really speeds up the process too. Cutting with a scissors could take much longer with not as nice of an edge.
Don't order magnets from TrooperBay. The ones I got were small in diameter, maybe 10mm and were not that strong. Get magnets that are at least the diameter of a coin like a US penny or nickel. In spots where the seem is too thin to fit it, you can put a block in between and the strong magnets will still hold. The magnets I had barely held the armor to the cover strips. Blue painters tape did an ok job holding things together as I tried things on, and also while I'm gluing things into place.
For starting, I did the biceps first.
Good luck!
-
I was emailing him today. Seem like his operation was fully functional.
I took a C clamp (UK calls them G clamps) and tightened the clip all around the pipe so the clip lines up with the top horizontal edge of the pipe. The pipe no longer hangs so low.
I plan to cut the clips just after the inside hole and drill another hole closer to the clip itself. A metal saw wasn't working that well, but a tin snips works awesome.
Bending and cutting the clips will give me
• the tight appearance of the clip onto the belt,
• right clip sizing for 2" diameter,
• and the TD control piece facing outwards instead of upwards
-
I recently had a similar problem with my ATA detonator and metal clips. The white button plate on the detonator would have been pointing too far up. I ended up trimming a bit off the end of the metal clips so that the white button plate would be able to face more outwards.
I'm thinking I might have to go this route or cough up another fifty some dollars for new plastic and tube.
What did you use to trim them? hand saw? nickel snips, tin snips, Dremmel?
-
Is the placement of the gluing standard, required, or preferred?
I'm attaching the chest and back with webbing straps, and covering it with the plastic shoulder straps that float in the back for Centurion (hopefully) status. The research i'm doing shows the glued area in the front four or five "squares" (as shown above) on the shoulder straps.
Is there a common method for this measurement and where the floaters in the back relate in distance to the OII back? I would hate to glue it too far down or too far up. If not, let me know and I'll glue for "best appearance." Sorry to ask about this, this site has a lot of resources and I like to think I've exhausted them before asking. This thread is the closest reference I can find, and just need reassurance.

Hand Made First Order TK
in Build Threads Requireing Maintenance
Posted
Please PM me about a kit